
Full Bust Adjustment Guide | Gathered Bodice FBA
If you’ve followed me for a while, you probably know I LOVE a good jumpsuit. I know a lot of people are anti-jumpsuit because they have to get naked to go to the bathroom or whatever, but, to be completely honest, IDGAF. I love them. They’re ultimate comfort.
So, when I found out I was pregnant, I immediately knew I needed to make myself a maternity jumpsuit. Onto a pattern search!
I checked all my normal busty-friendly designers: Designer Stitch, Itch to Stitch, Cashmerette. None of them had a maternity jumpsuit (or really many maternity patterns at all! Cashmerette has a few, but they don’t yet come in her smaller size band, which is where my upper bust falls). I went through the Busty Pattern Database hoping for a good option, and, alas, didn’t find one.
So I got desperate and I went to etsy: “maternity jumpsuit pattern.” And I found this:

Butterick 6226. Maternity jumpsuit of my dreams.
I immediately ordered the pattern. The only problem? I’d have to do an FBA. And, not just a simple, darted FBA. A gathered bodice FBA.
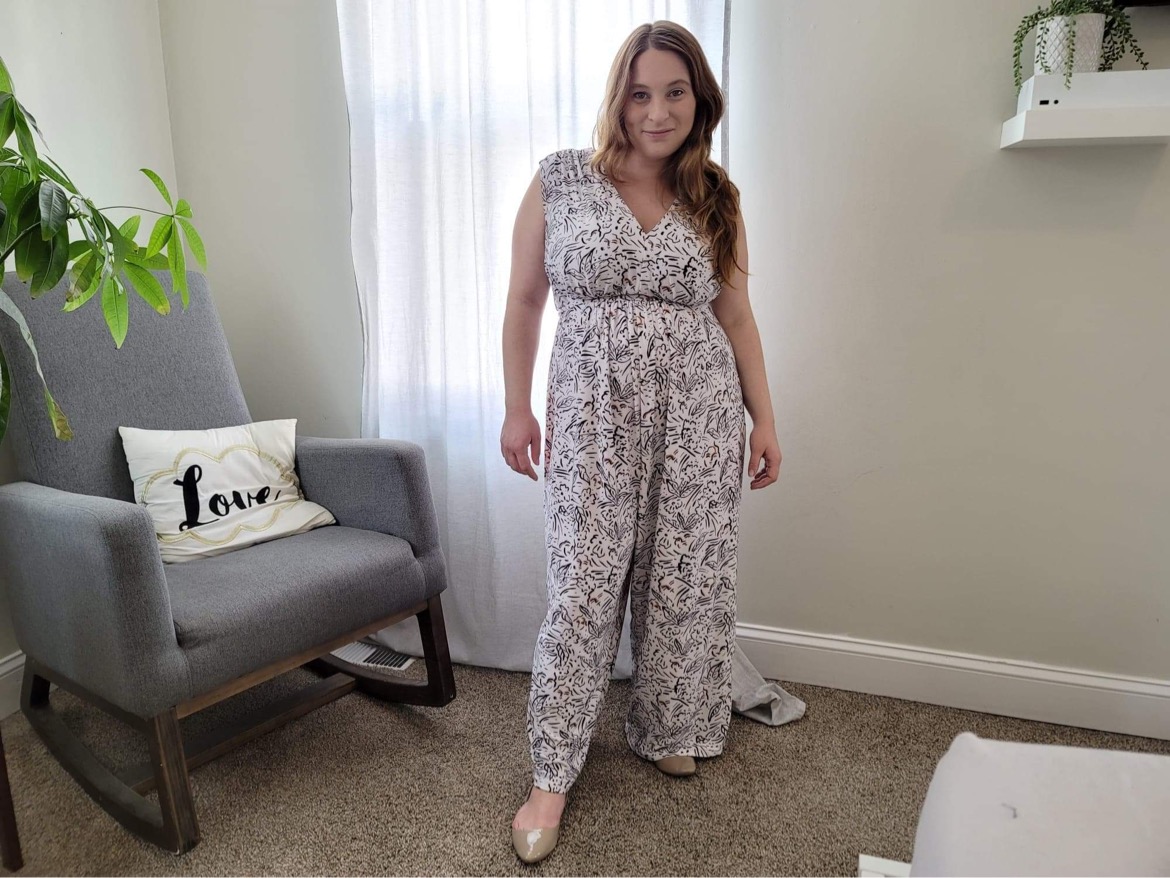
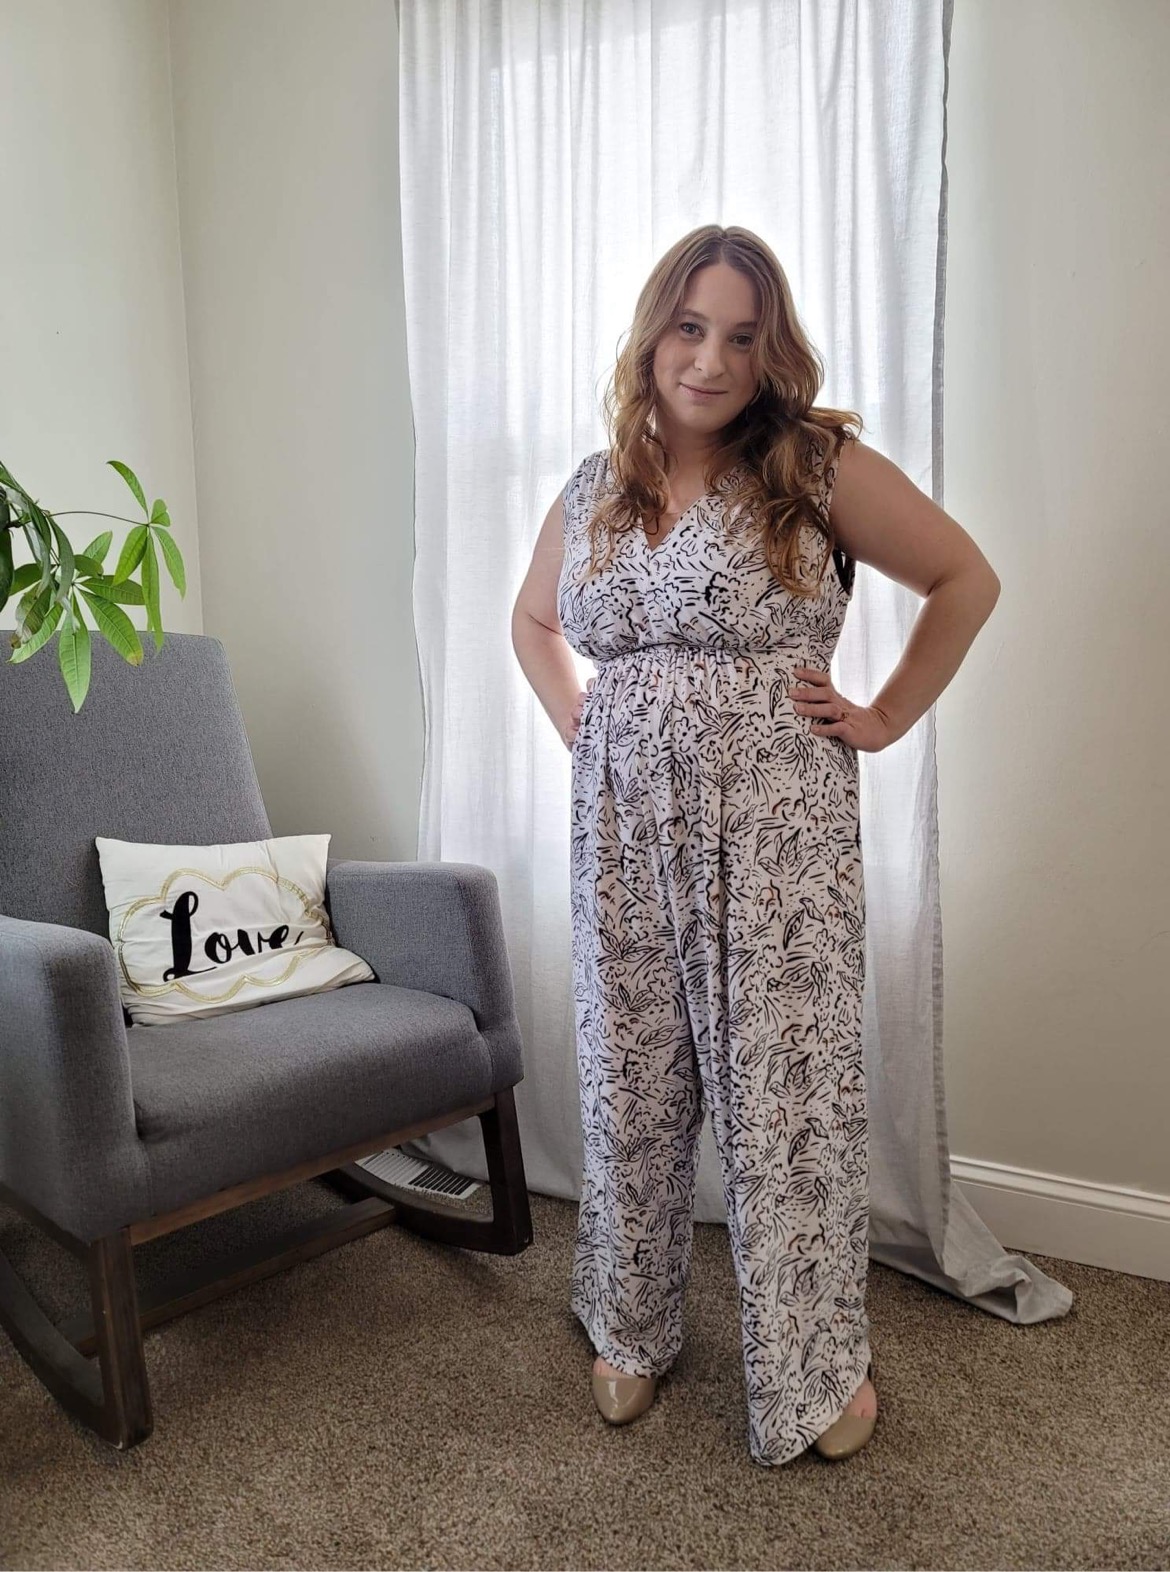
Thank goodness I had done this before, because the results were amazing! I love this jumpsuit.
Gathered Bodice FBA Tutorial
Let’s get started, shall we?
choosing a base size
Just like with other full bust adjustments, the first step is to figure out what base size you’ll be making. Choose based on your high bust + 2″ as the “bust” measurement on the chart. I’ve talked about this before, but most FBA tutorials will have you choose based on your high bust substituted for the size chart’s “bust” measurement. I’m honestly not sure why tutorials teach this way, as this instruction fails to consider that almost all patterns are drafted such that the high bust is 2″ smaller than the full bust.
Thus, if the high bust measurement is not offered on a pattern, you must add 2″ to your high bust measurement, and choose the size with a bust measurement that most closely corresponds to this HB+2. My high bust measurement is about 35″, so I need a size with a bust measurement that is around 37″. According to the size chart on the Butterick 6226, that put me at a size 16.
Now, let’s take a quick moment to talk about Big 4 pattern sizing and why I ultimately chose a 14 even though the boob math put me in a 16: After reading reviews of this pattern and chatting with some folks on Instagram who had made this pattern before, the feedback was unanimous: This pattern runs big. That wasn’t a surprise; almost all Big 4 (Butterick, McCalls, Simplicity, and Vogue) run big. Most people I talked to said they got the best fit by choosing two sizes down from what they measured. Since 14 was the smallest size I had, though, I decided to go for it. (After making, I can confirm I probably could have made a 12, had I had the pattern for it.)
Okay, back to the FBA.
Doing some full bust adjustment math
Now, to start our FBA, we must do a little math. Butterick, like most pattern companies, drafts its patterns for a 2″ full bust to upper bust difference. My full bust is currently 45.5″, and my high bust is 35″ — meaning I have a 10.5″ difference. I need to subtract 2 from 10.5, for a total of 8.5. This means, in theory, I should have done a 8.5″ full bust adjustment, adding 4.25″ on each side. If you are working with a woven pattern, this is absolutely what you should do.
But this jumpsuit is a knit garment with a lot of ease, so I decided to do a few more steps.
First, I looked at the finished garment measurements. At a size 14, the finished bust measurement of 43.5″, so it’s drafted with an intended 7″ of positive ease (since the 14 is intended for busts of 36″). My chosen fabric also has 30% comfortable stretch (meaning not stretching it to it’s absolute limits), so—if I made the pattern as-is—I would have ended up with a possible 56.5″, after stretch.
As those of you who follow me on instagram know, I thought about being lazy and just making the pattern as-is. I asked you all. And you all very wisely told me to do the damn FBA.
But I didn’t necessarily want the full 7″ of positive ease, so I decided to do a smaller FBA than the basic [my full bust minus high bust] – 2″ equation was telling me. So I settled on doing a 5″ FBA—adding 2.5″ on each side. This would result in a finished, unstretched bust measurement of 48.5″—so 2″ of positive ease. This also meant that, if my boobs keep growing (please NO!), the garment could comfortably stretch to 63″.
Alright. Let’s do the thing. Add 2.5″ on each side.
Marking the pivot points
The apex was conveniently marked on the Butterick 6226!
(If, on your pattern, the apex is not marked, you’ll need to find its approximate location. The pattern may indicate bust-to-bust measurement, which can be divided in two and measured from the center front to find the horizontal alignment of the apex. Similarly, some patterns will list a shoulder point to bust measurement, which can then be measured from the shoulder point on the pattern to find where the apex lands vertically. Find where these points intersect, and you have your apex! If your pattern doesn’t list any of this, just make your best guess as to the apex location.)
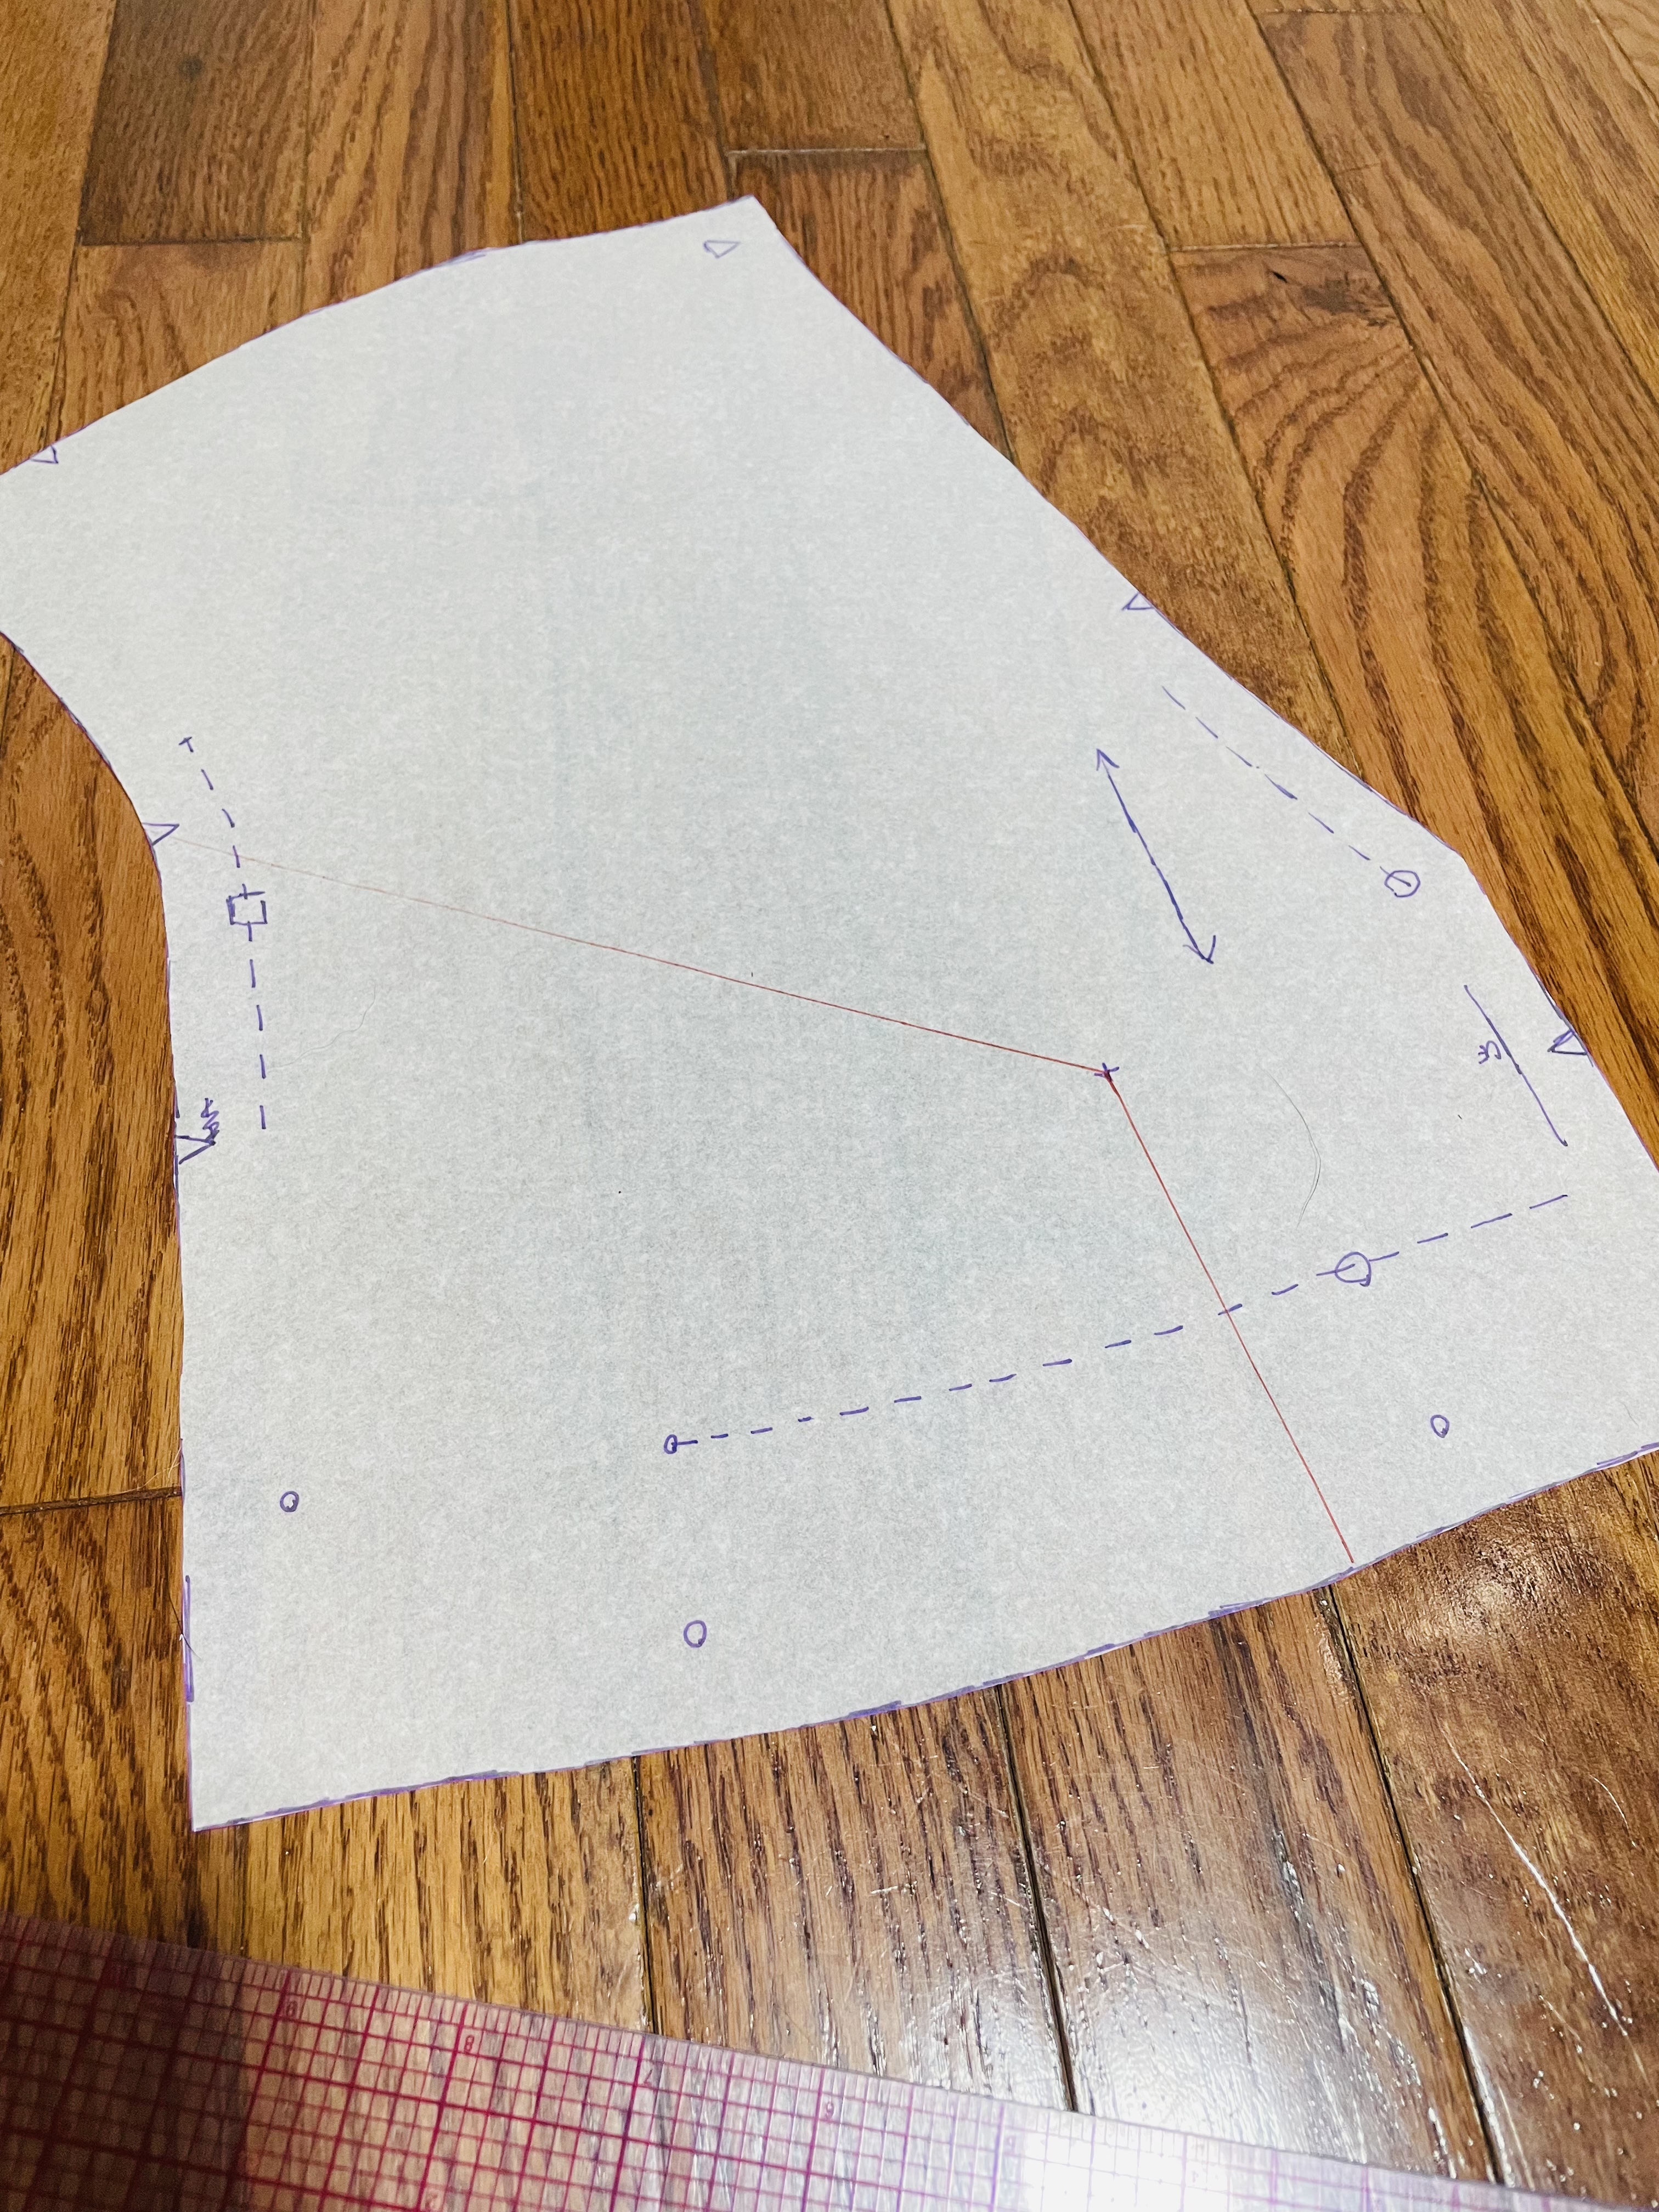
You’re then going to draw two lines, seen in my photo in red: one vertically down from the apex to the waist, and one diagonally from the apex to the armpit, about 1/3 of the way up. We will call the vertical line “line A” and the diagonal line “line B.”
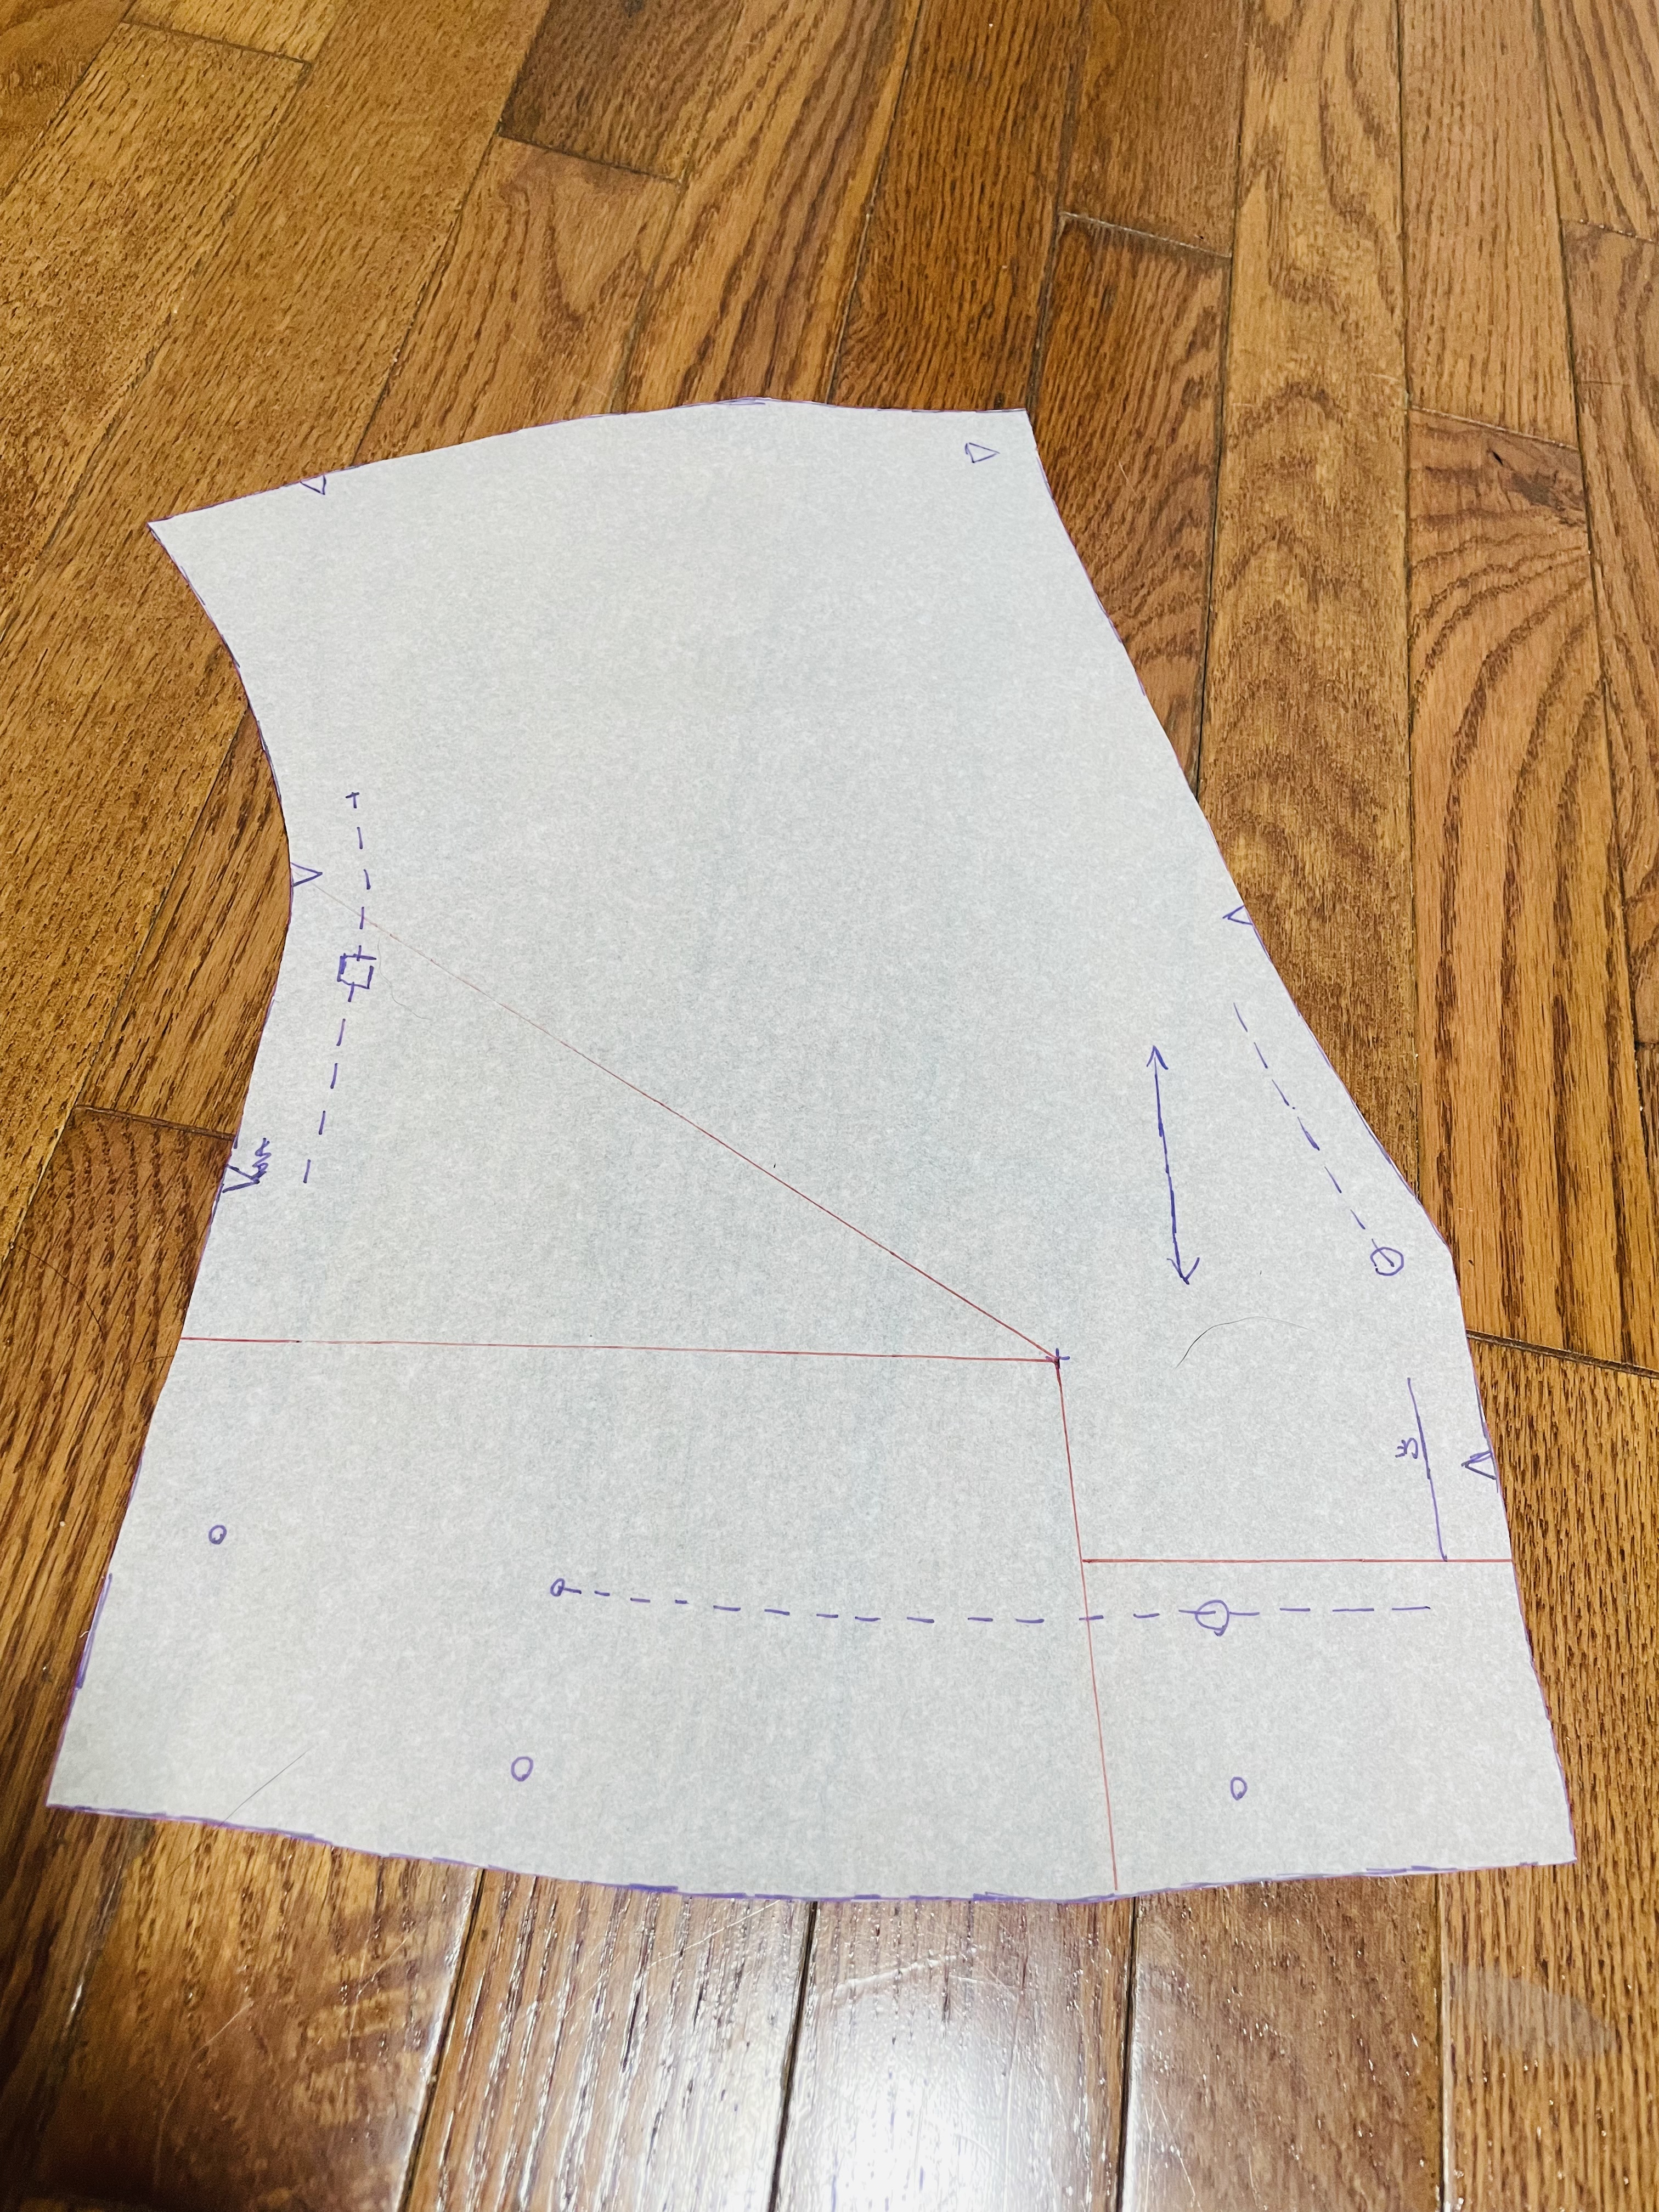
The next step is to draw two horizontal lines: What we’ll call “Line C” will go from the apex horizontally to the side seam. What we will call “Line D” will go horizontally from Line A to the center front. Don’t worry too much about exact placement of Line D — it’s really not important. Just needs to be somewhere from Line A to center front.
Cutting your pivot lines
Now, we’re going to begin snipping. Cut along Line A and Line B to the seam allowance. Snip carefully on Line B at the seam allowance to allow it to hinge—cutting to, but not through the seam allowance line.
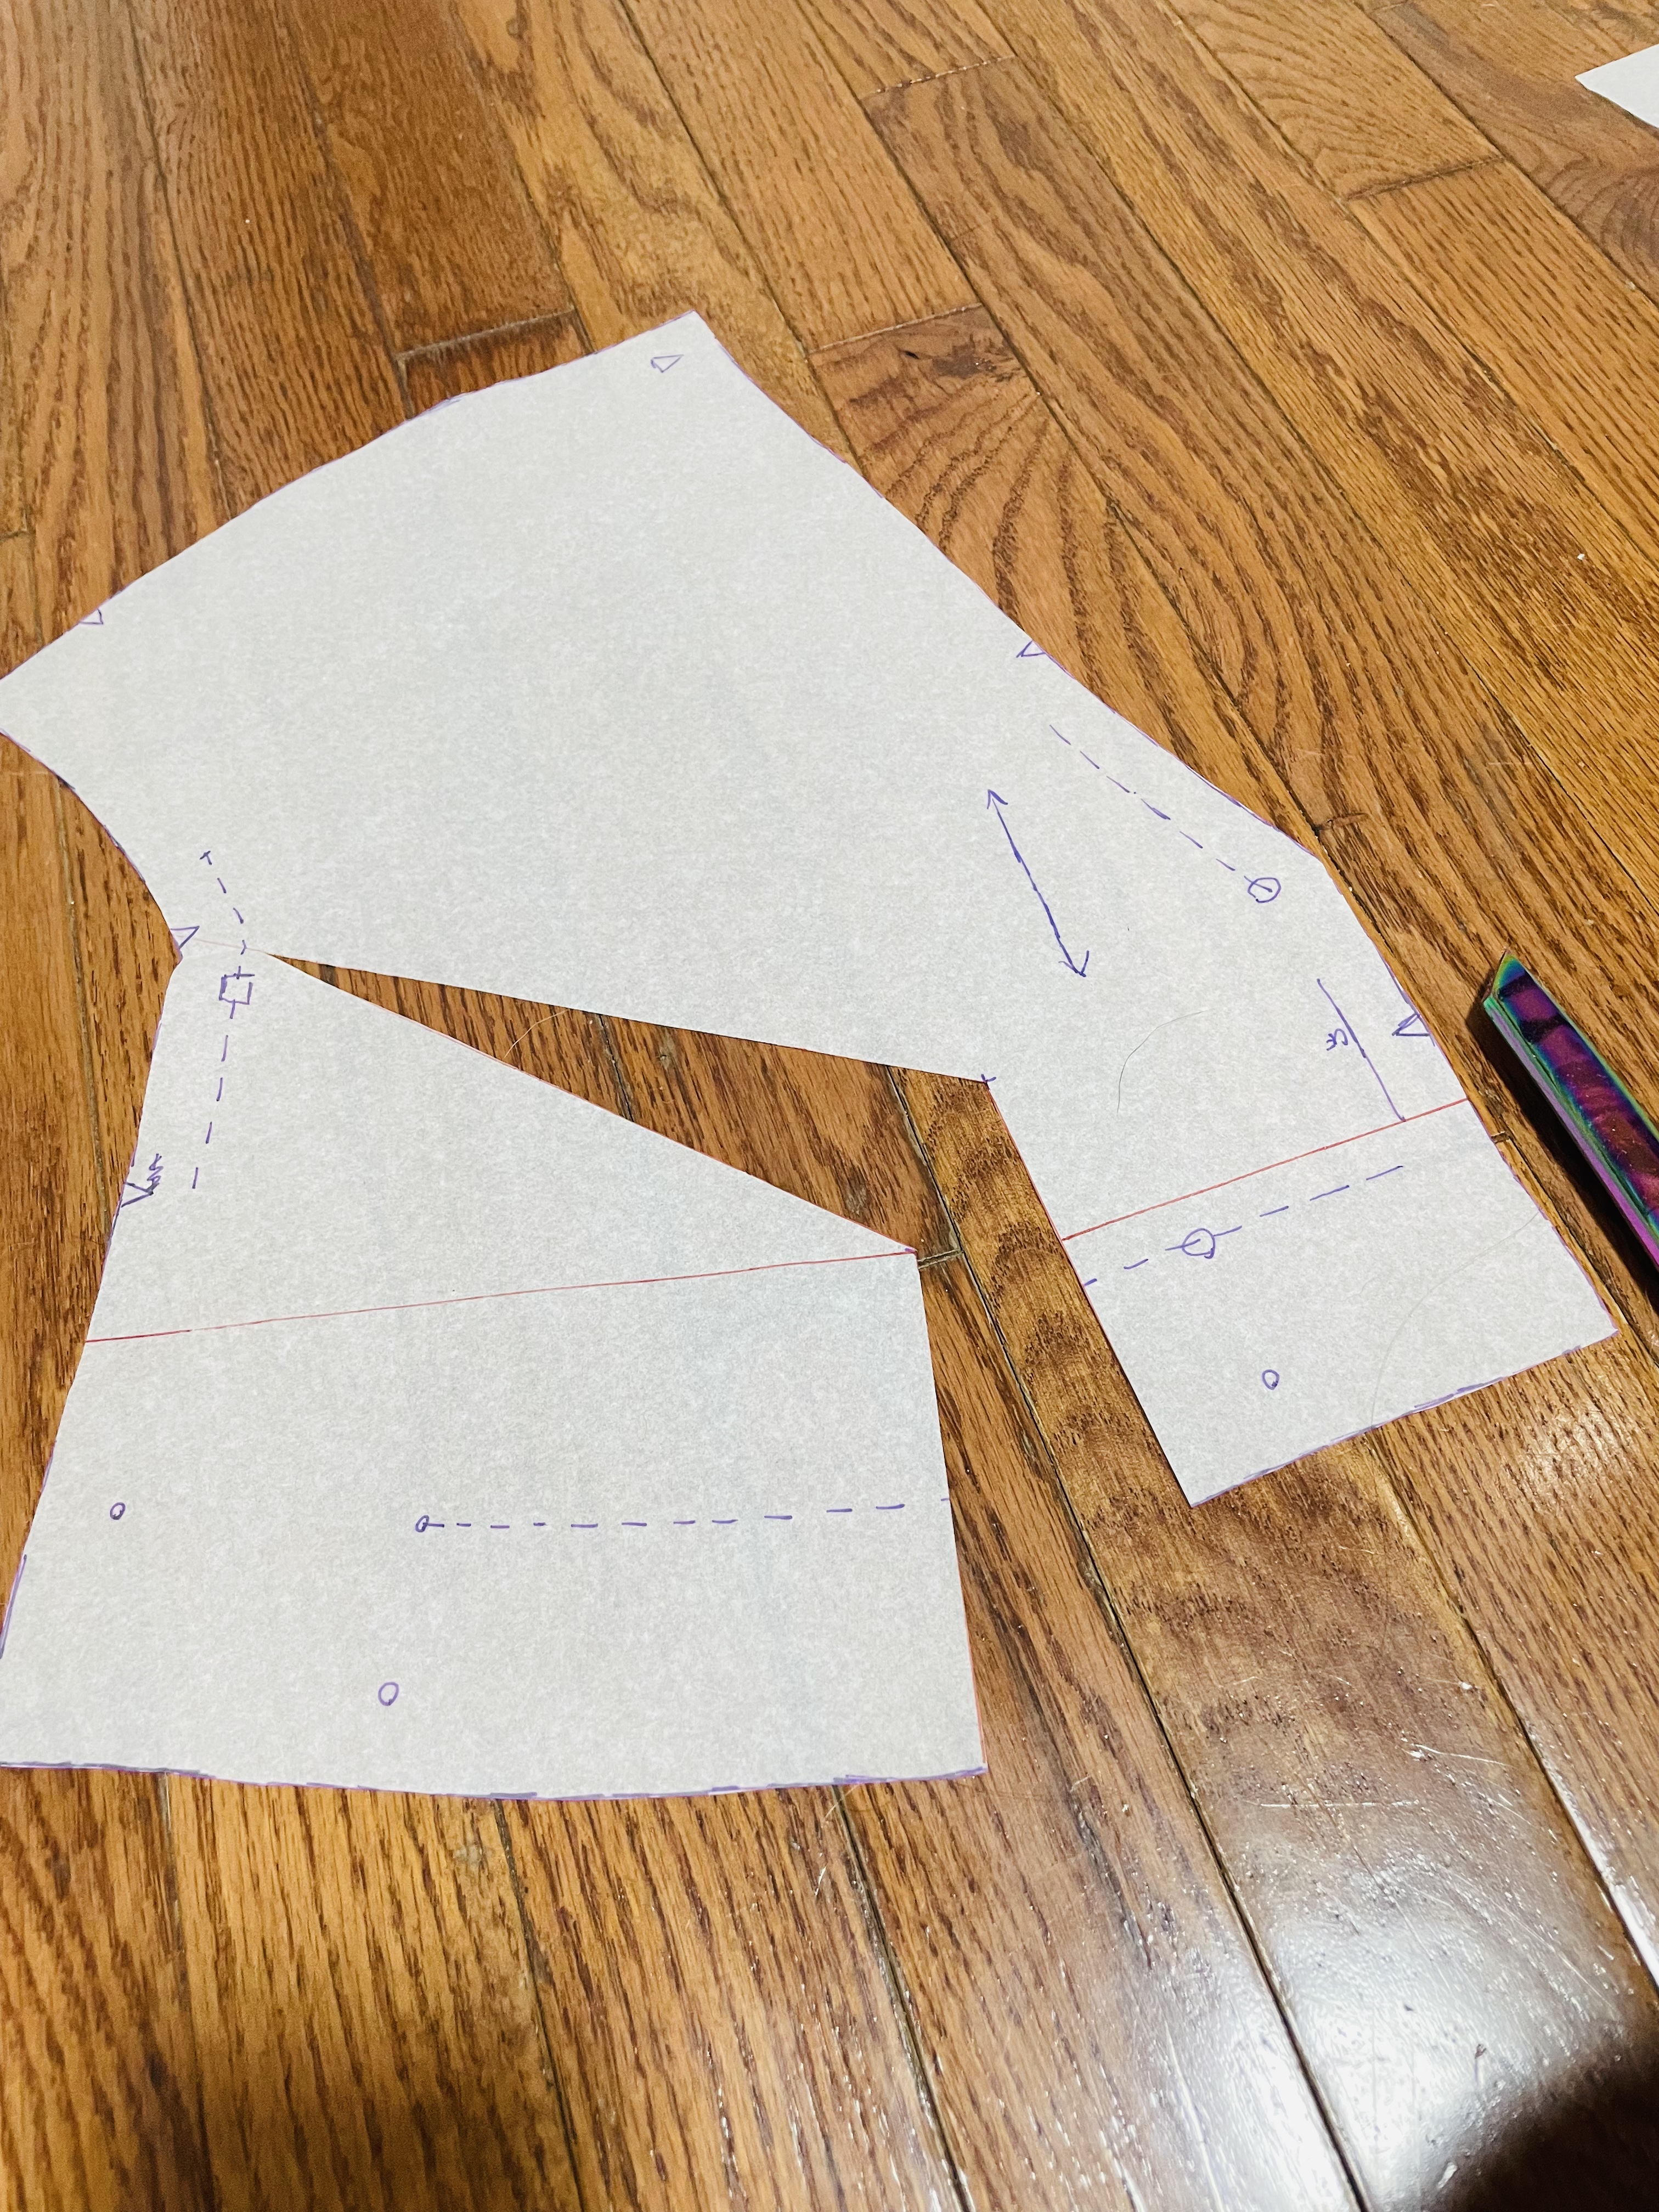
adding Room for large breasts
Place your pattern on another sheet of paper, and tape down the right side of your hinge. Now, measure from the right side of Line A to however many inches you need to add — in my case, 2.5″. Draw a line on the scrap paper to mark this measurement. We’ll call this “Line E.”
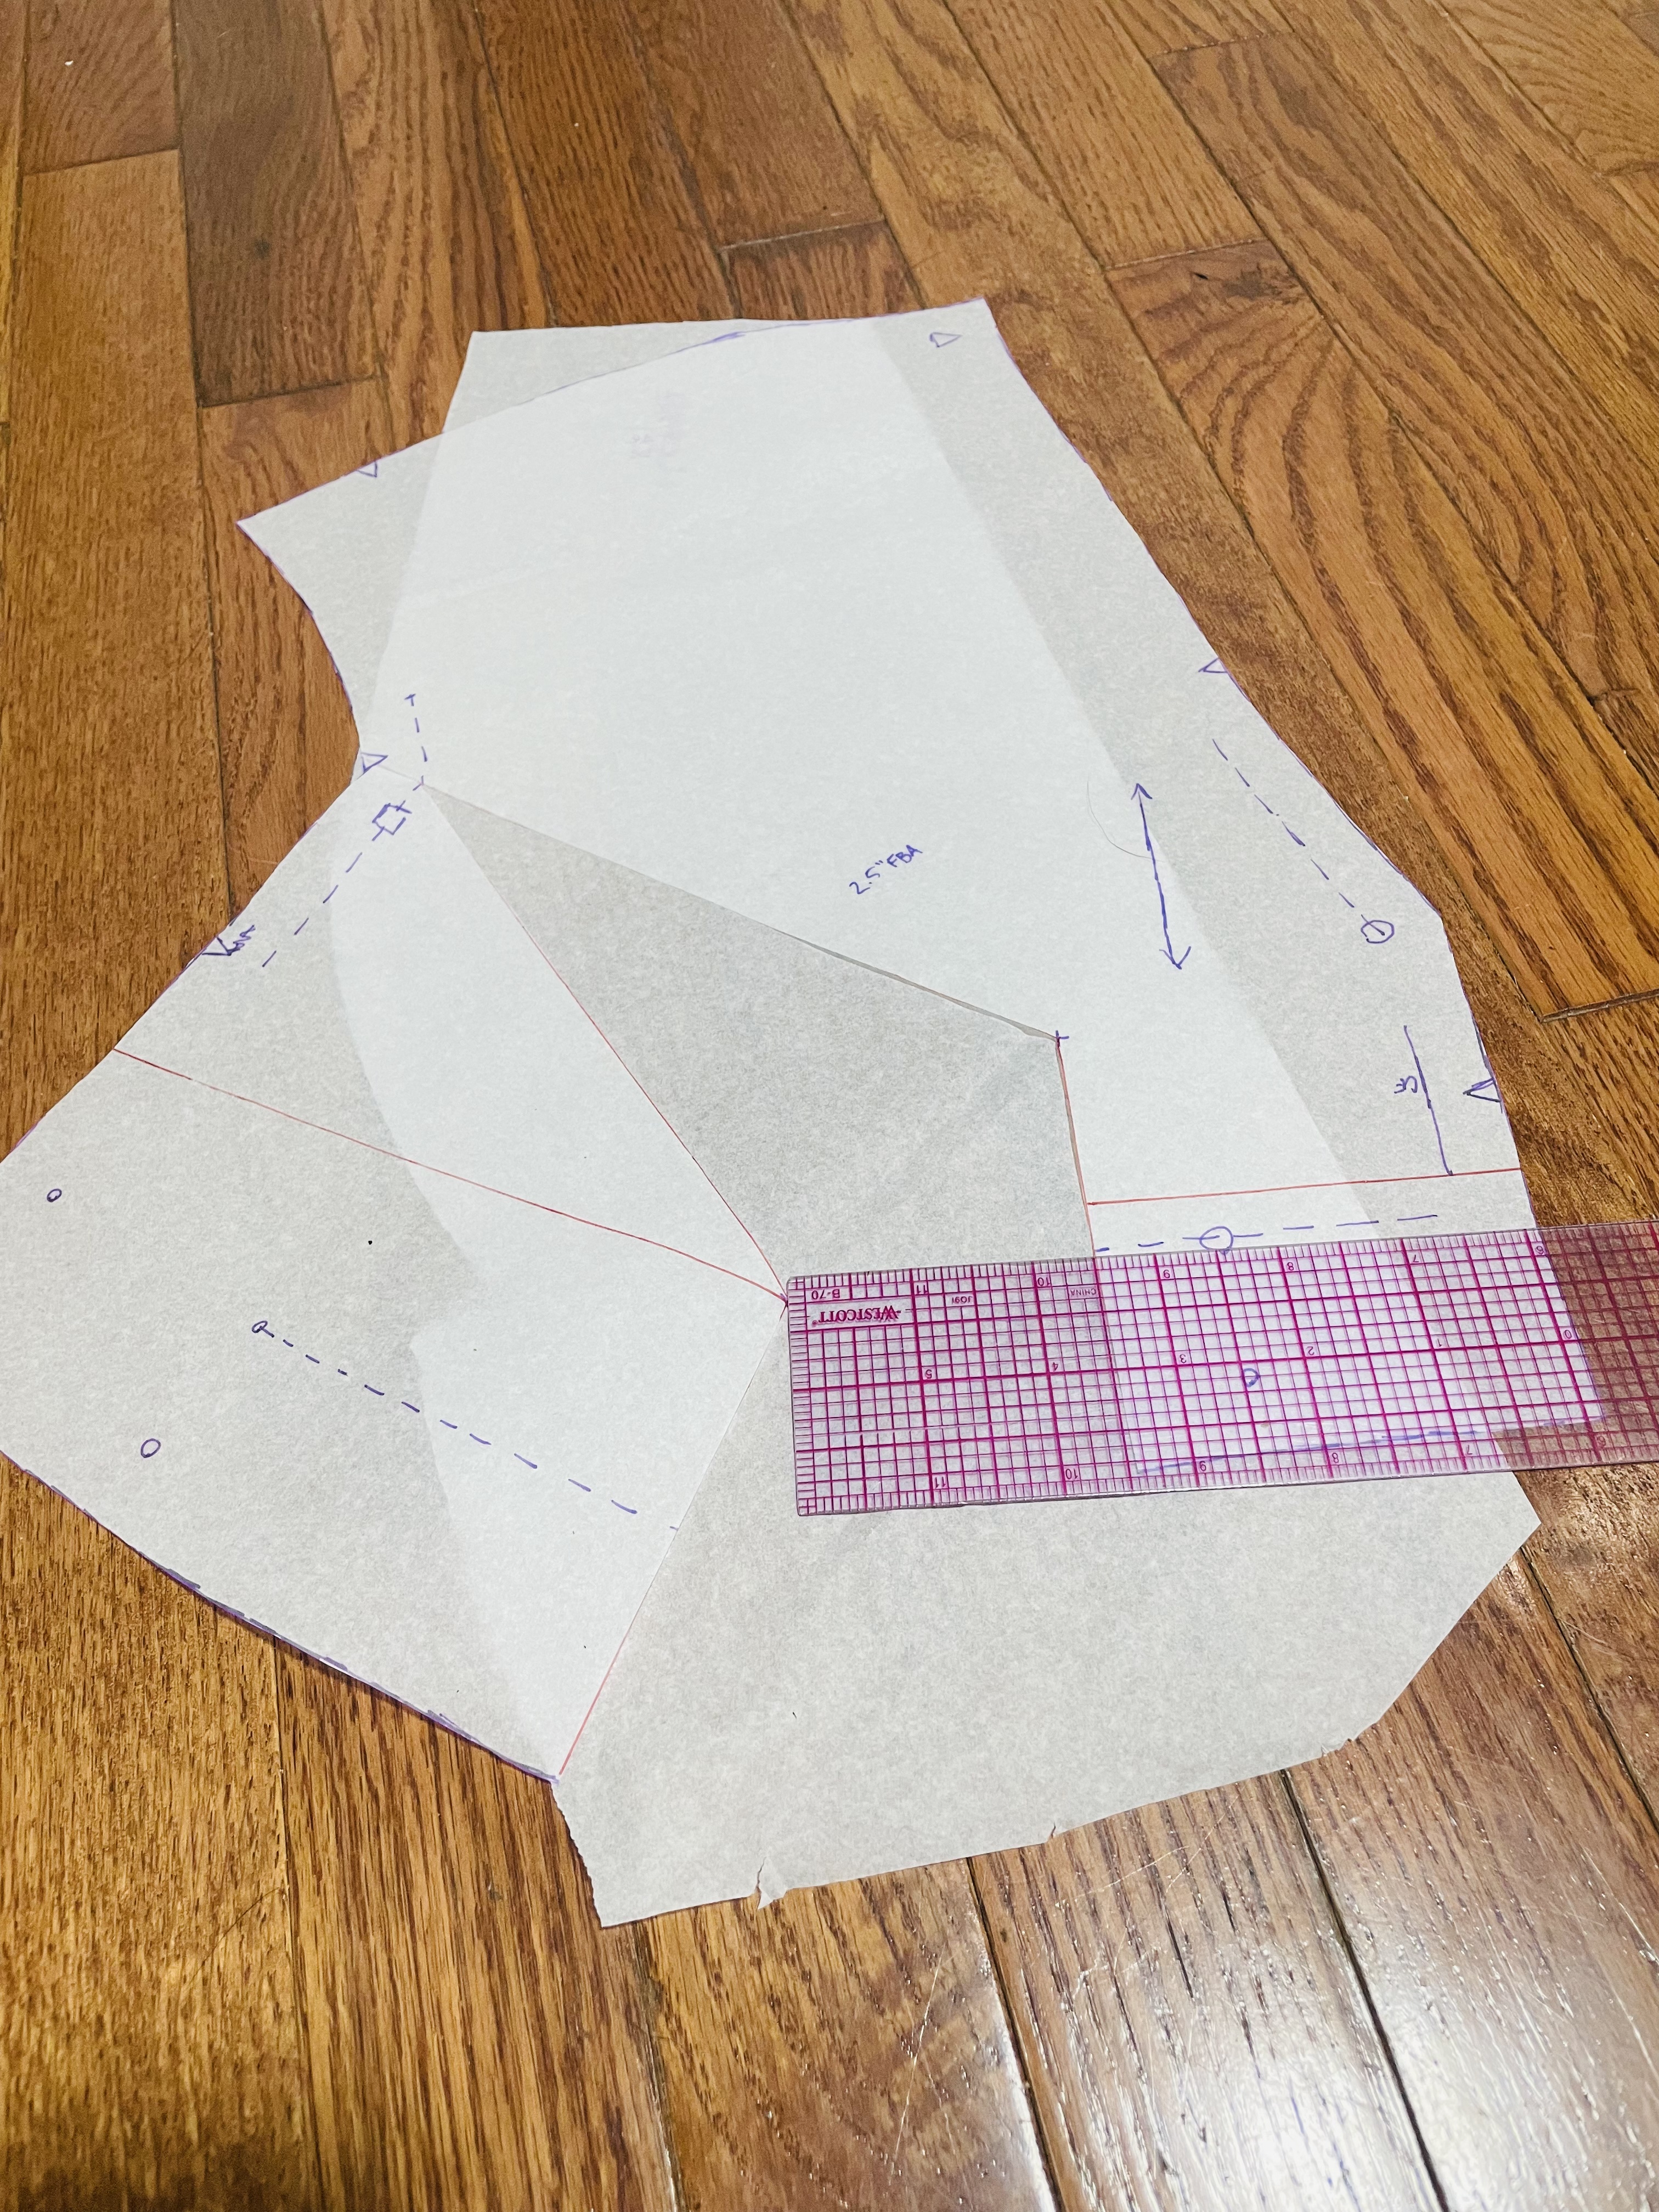
Now you’re going to cut through Line C. Hinge the left side of Line A to meet Line E. Tape this down for now, but with the recognition that you’re going to have to close Line C in a few steps.
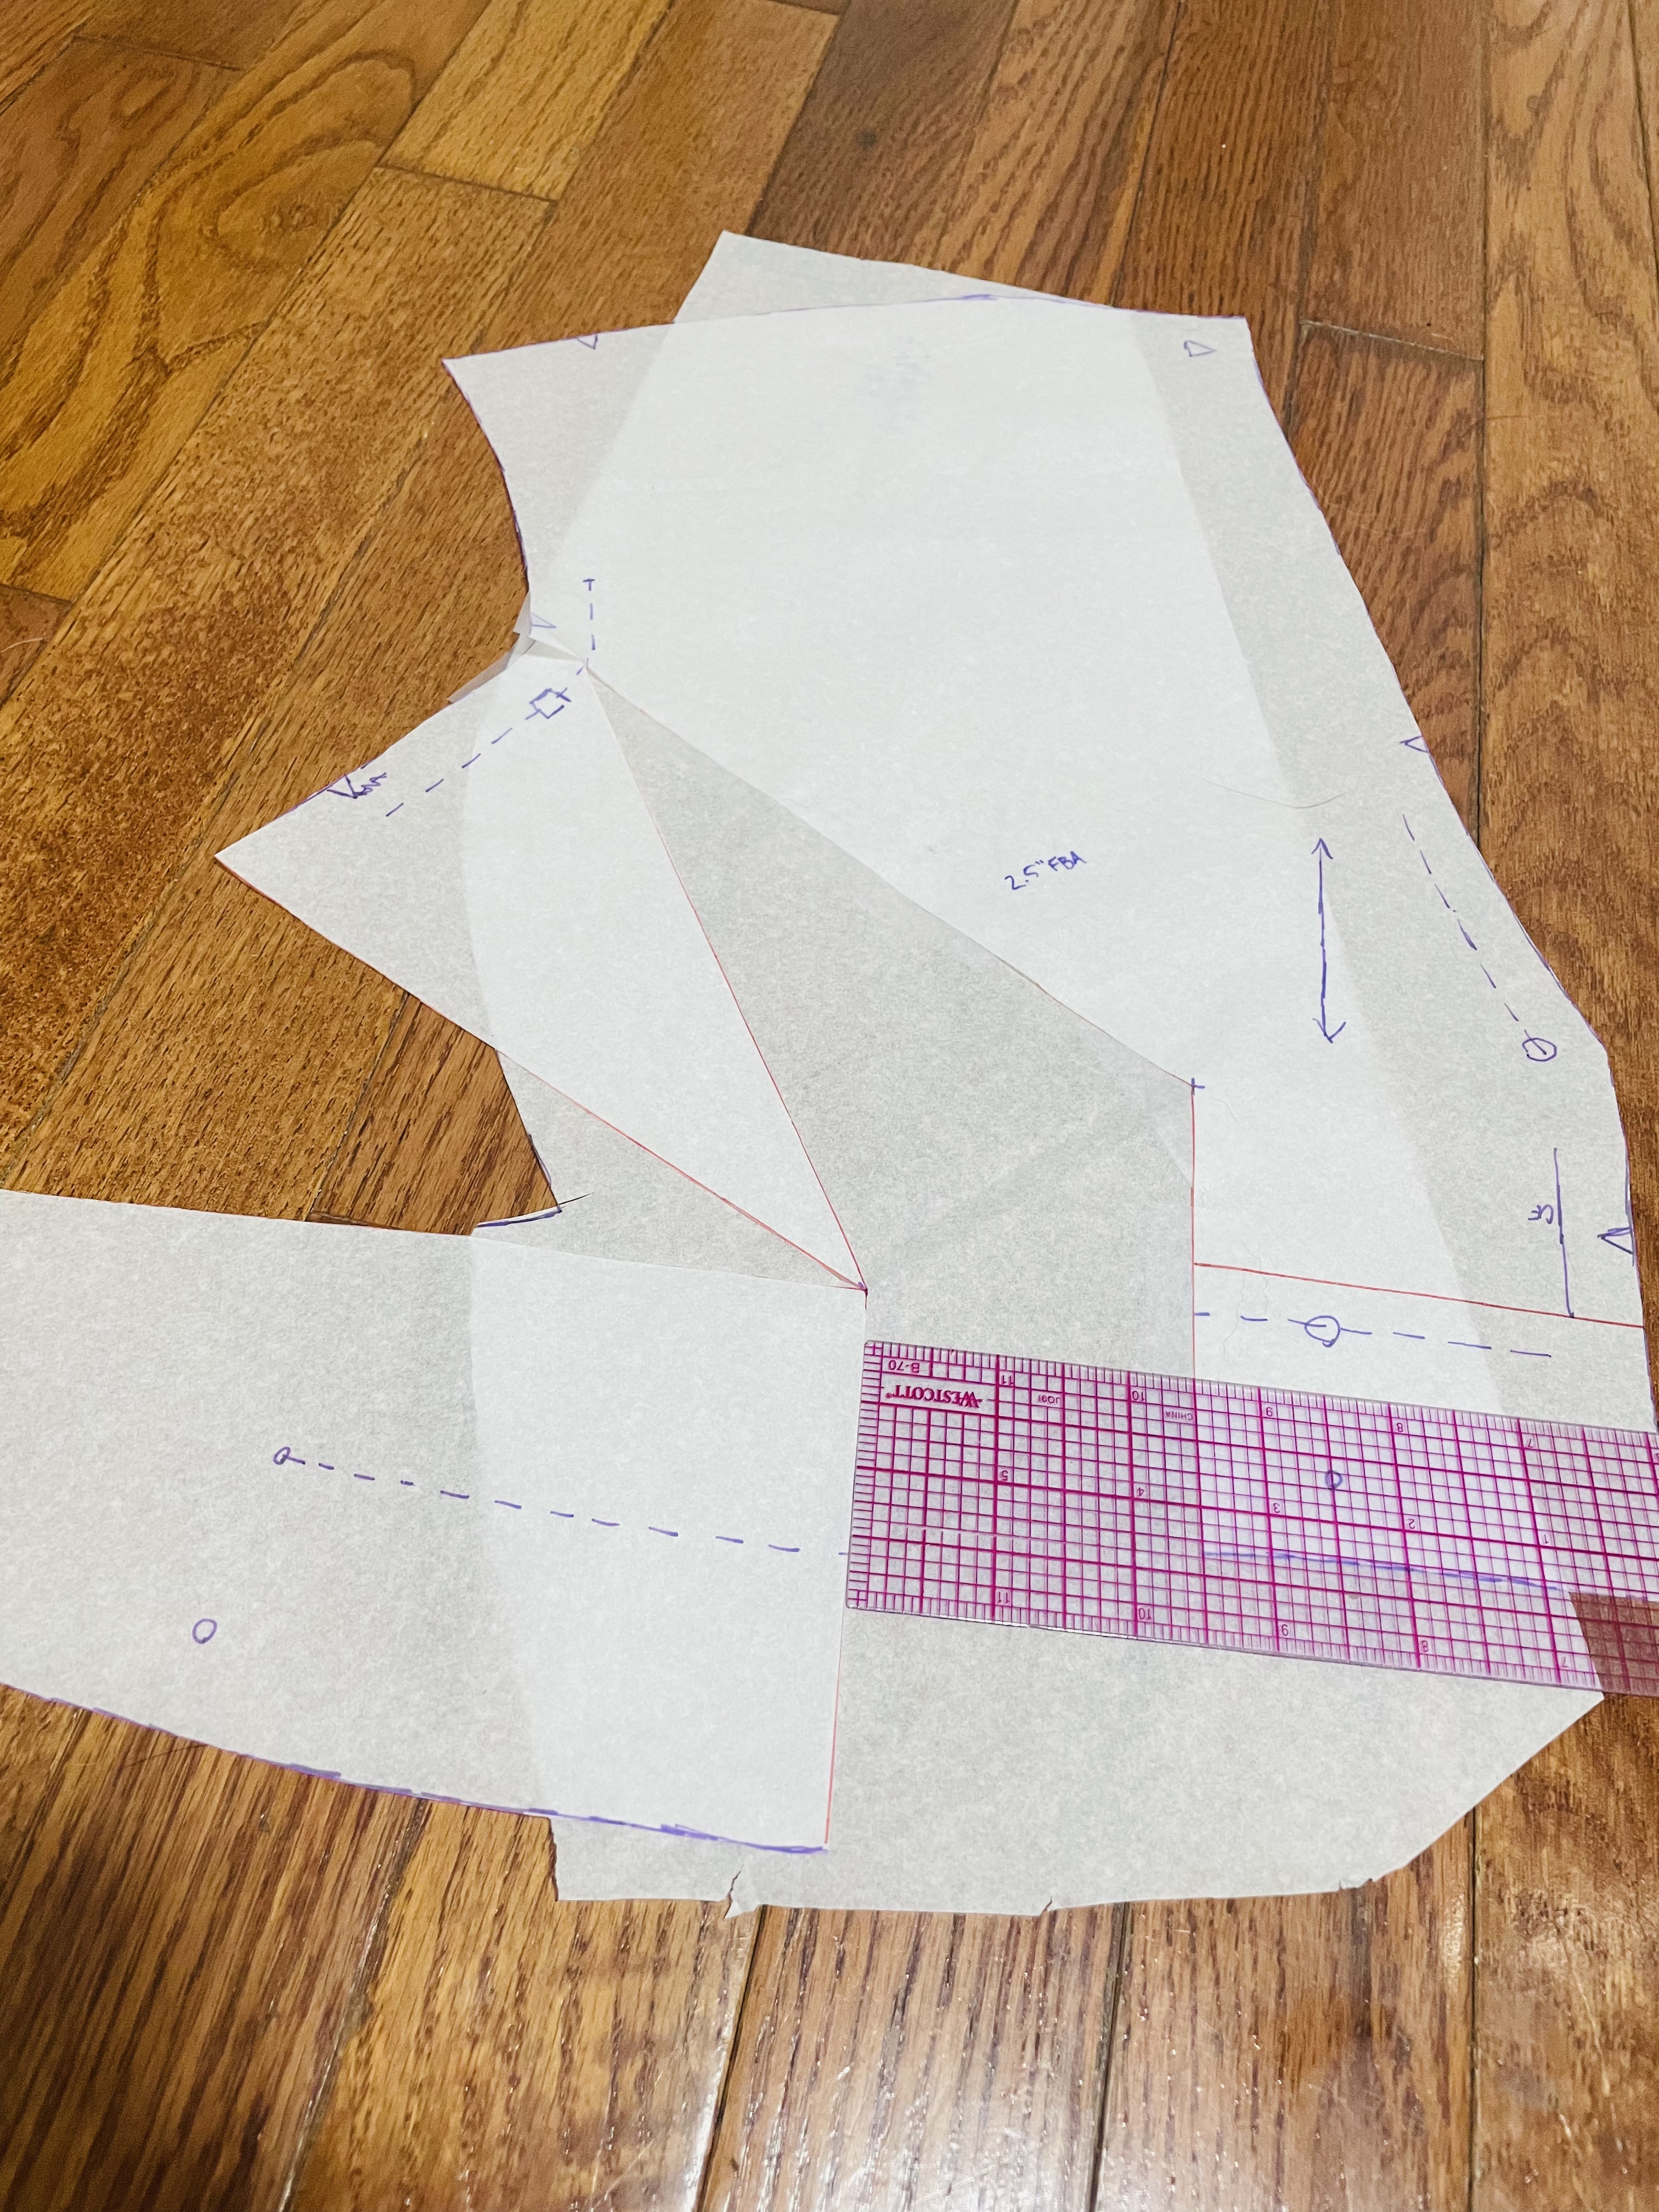
Truing the length
Next, you’re going to cut along Line D. I like to draw a straight line down from the right side of Line A so I know where I’m going to reconnect this cut off piece in the next step.
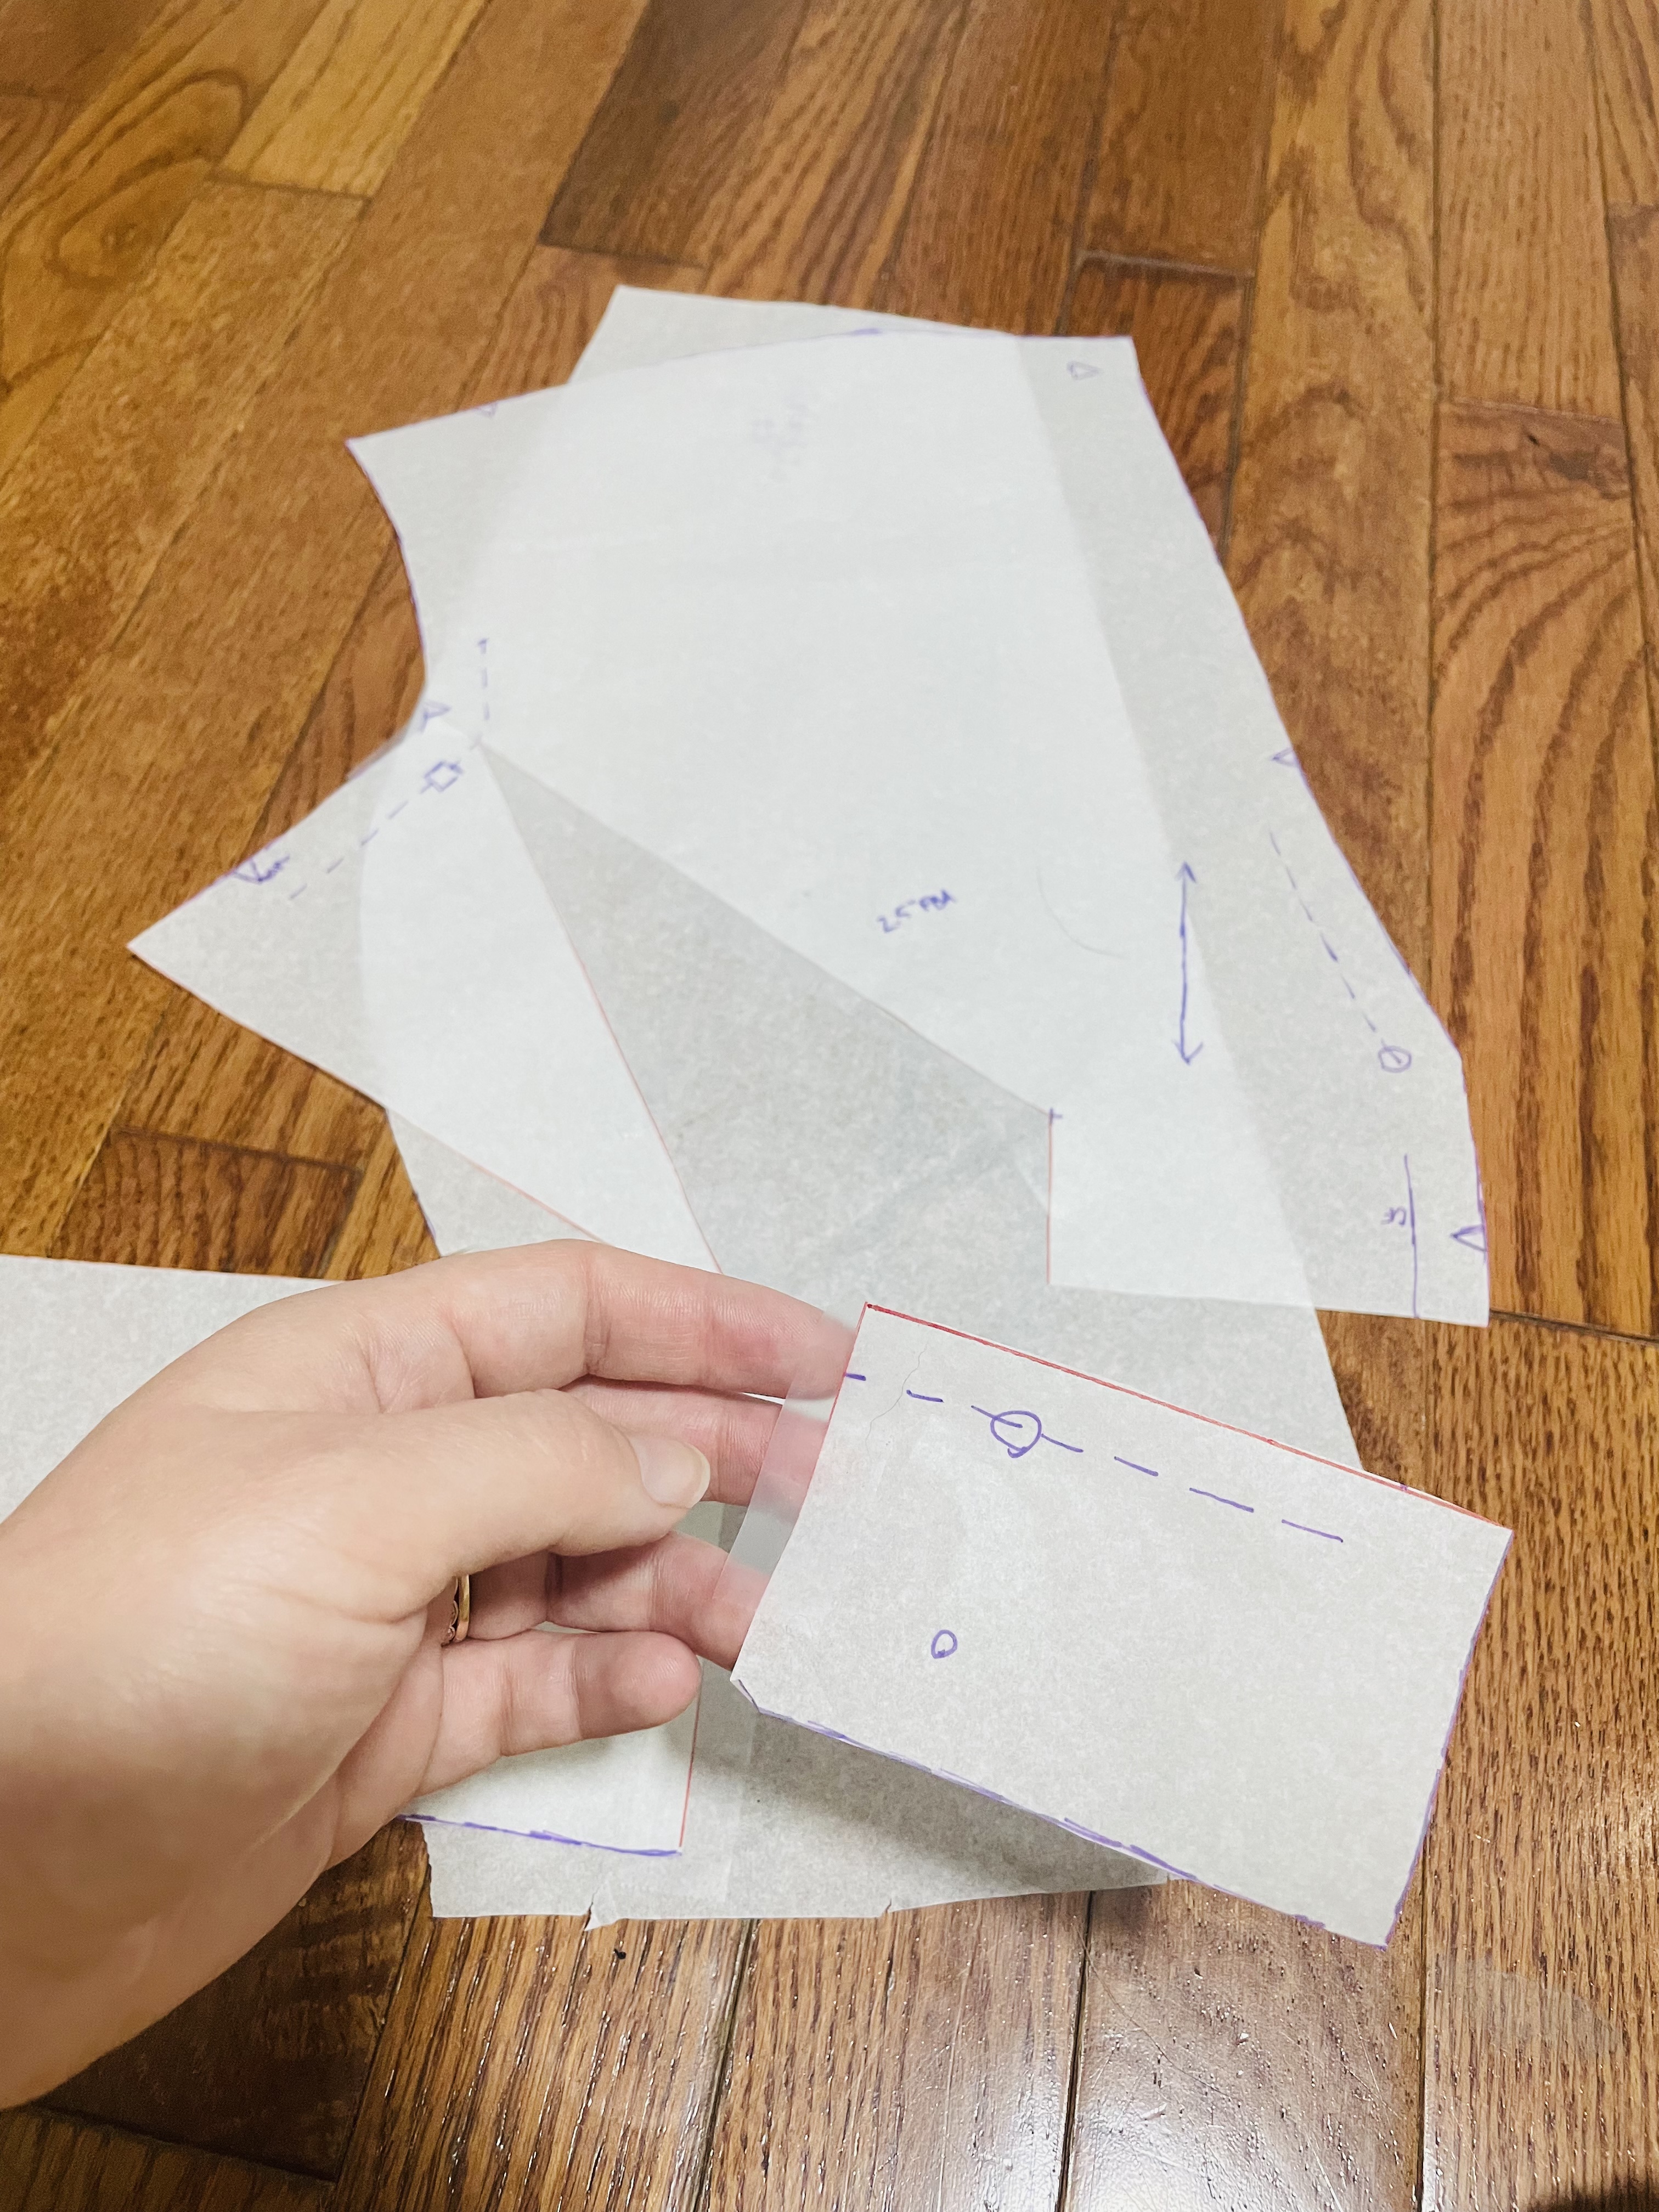
Tape down the piece you just cut off below Line D to your pattern, keeping it in line with the right side of Line A:
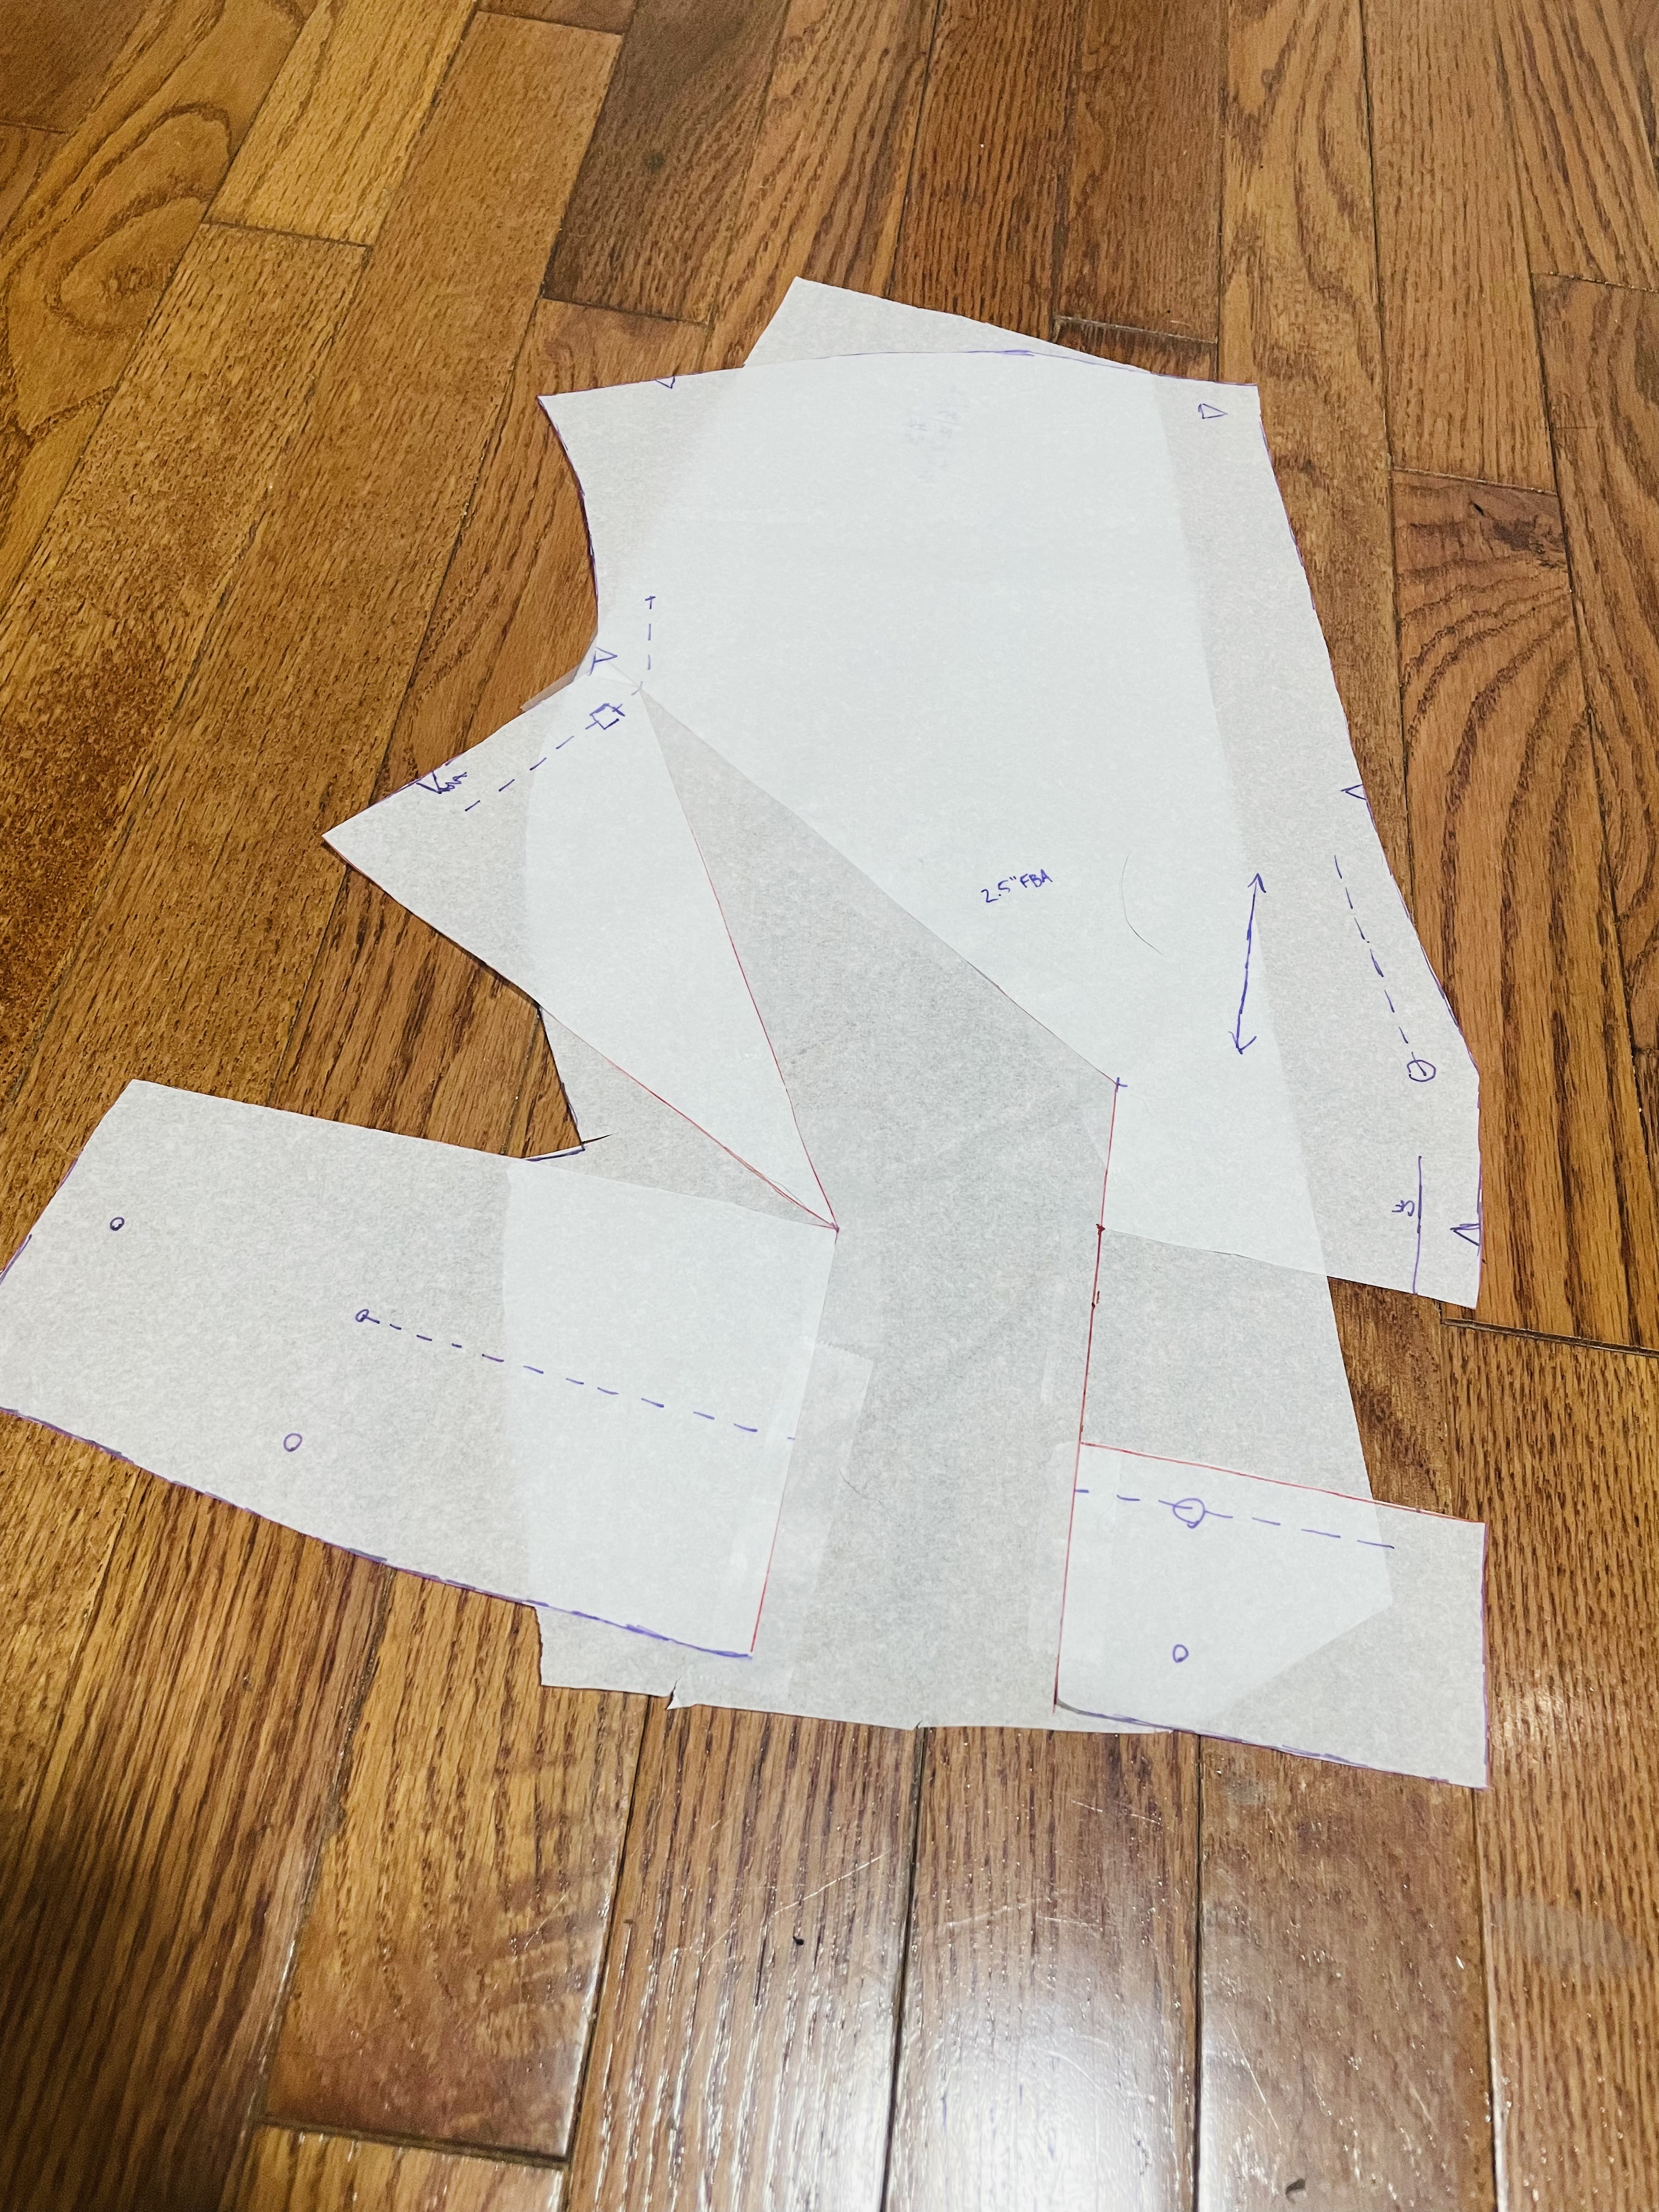
Then, we’re going to untape Line C. I know, taking tape off is a bitch, but I find it less fiddly than not taping down Line C in the earlier step. Up to you, I suppose.
You’re going to close Line C, creating a weird, contorted looking pattern piece. It’s all okay. I promise.
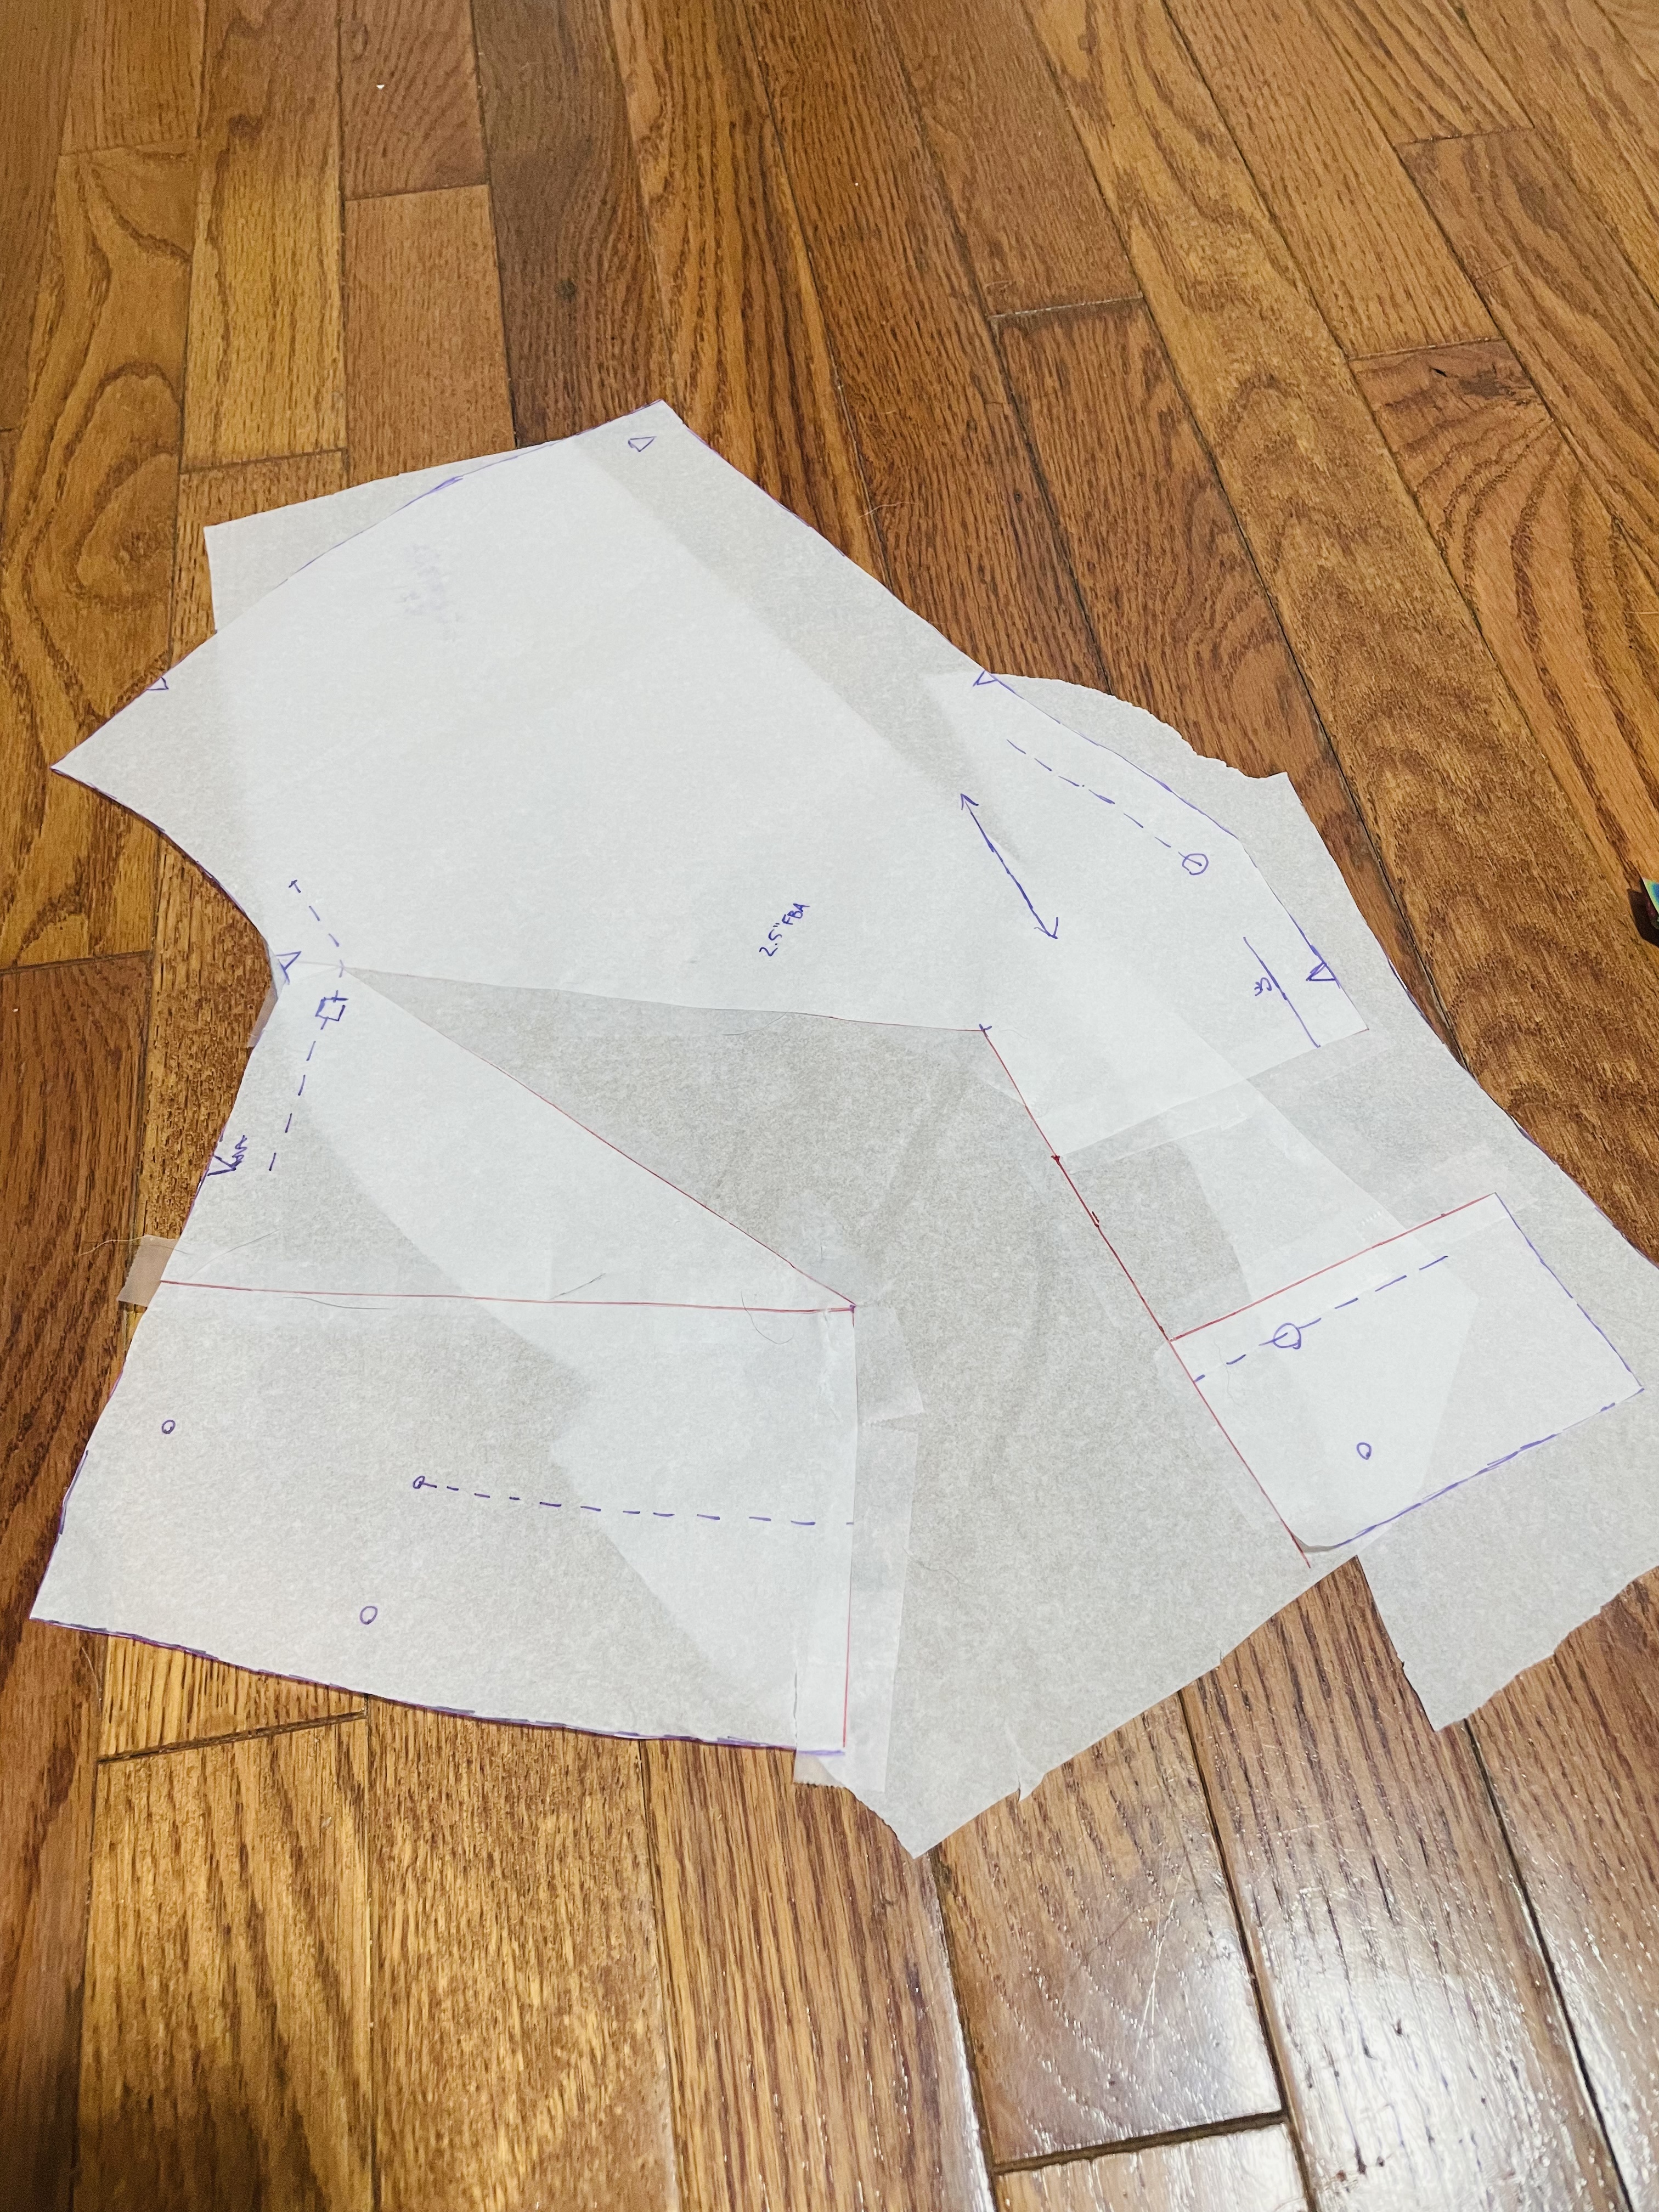
We’re nearly done! Your next step is to draw a curve to close off the bottom of your pattern piece. You can see my curved line in red, below. You can use a French curve to do this, but I honestly just freehanded.
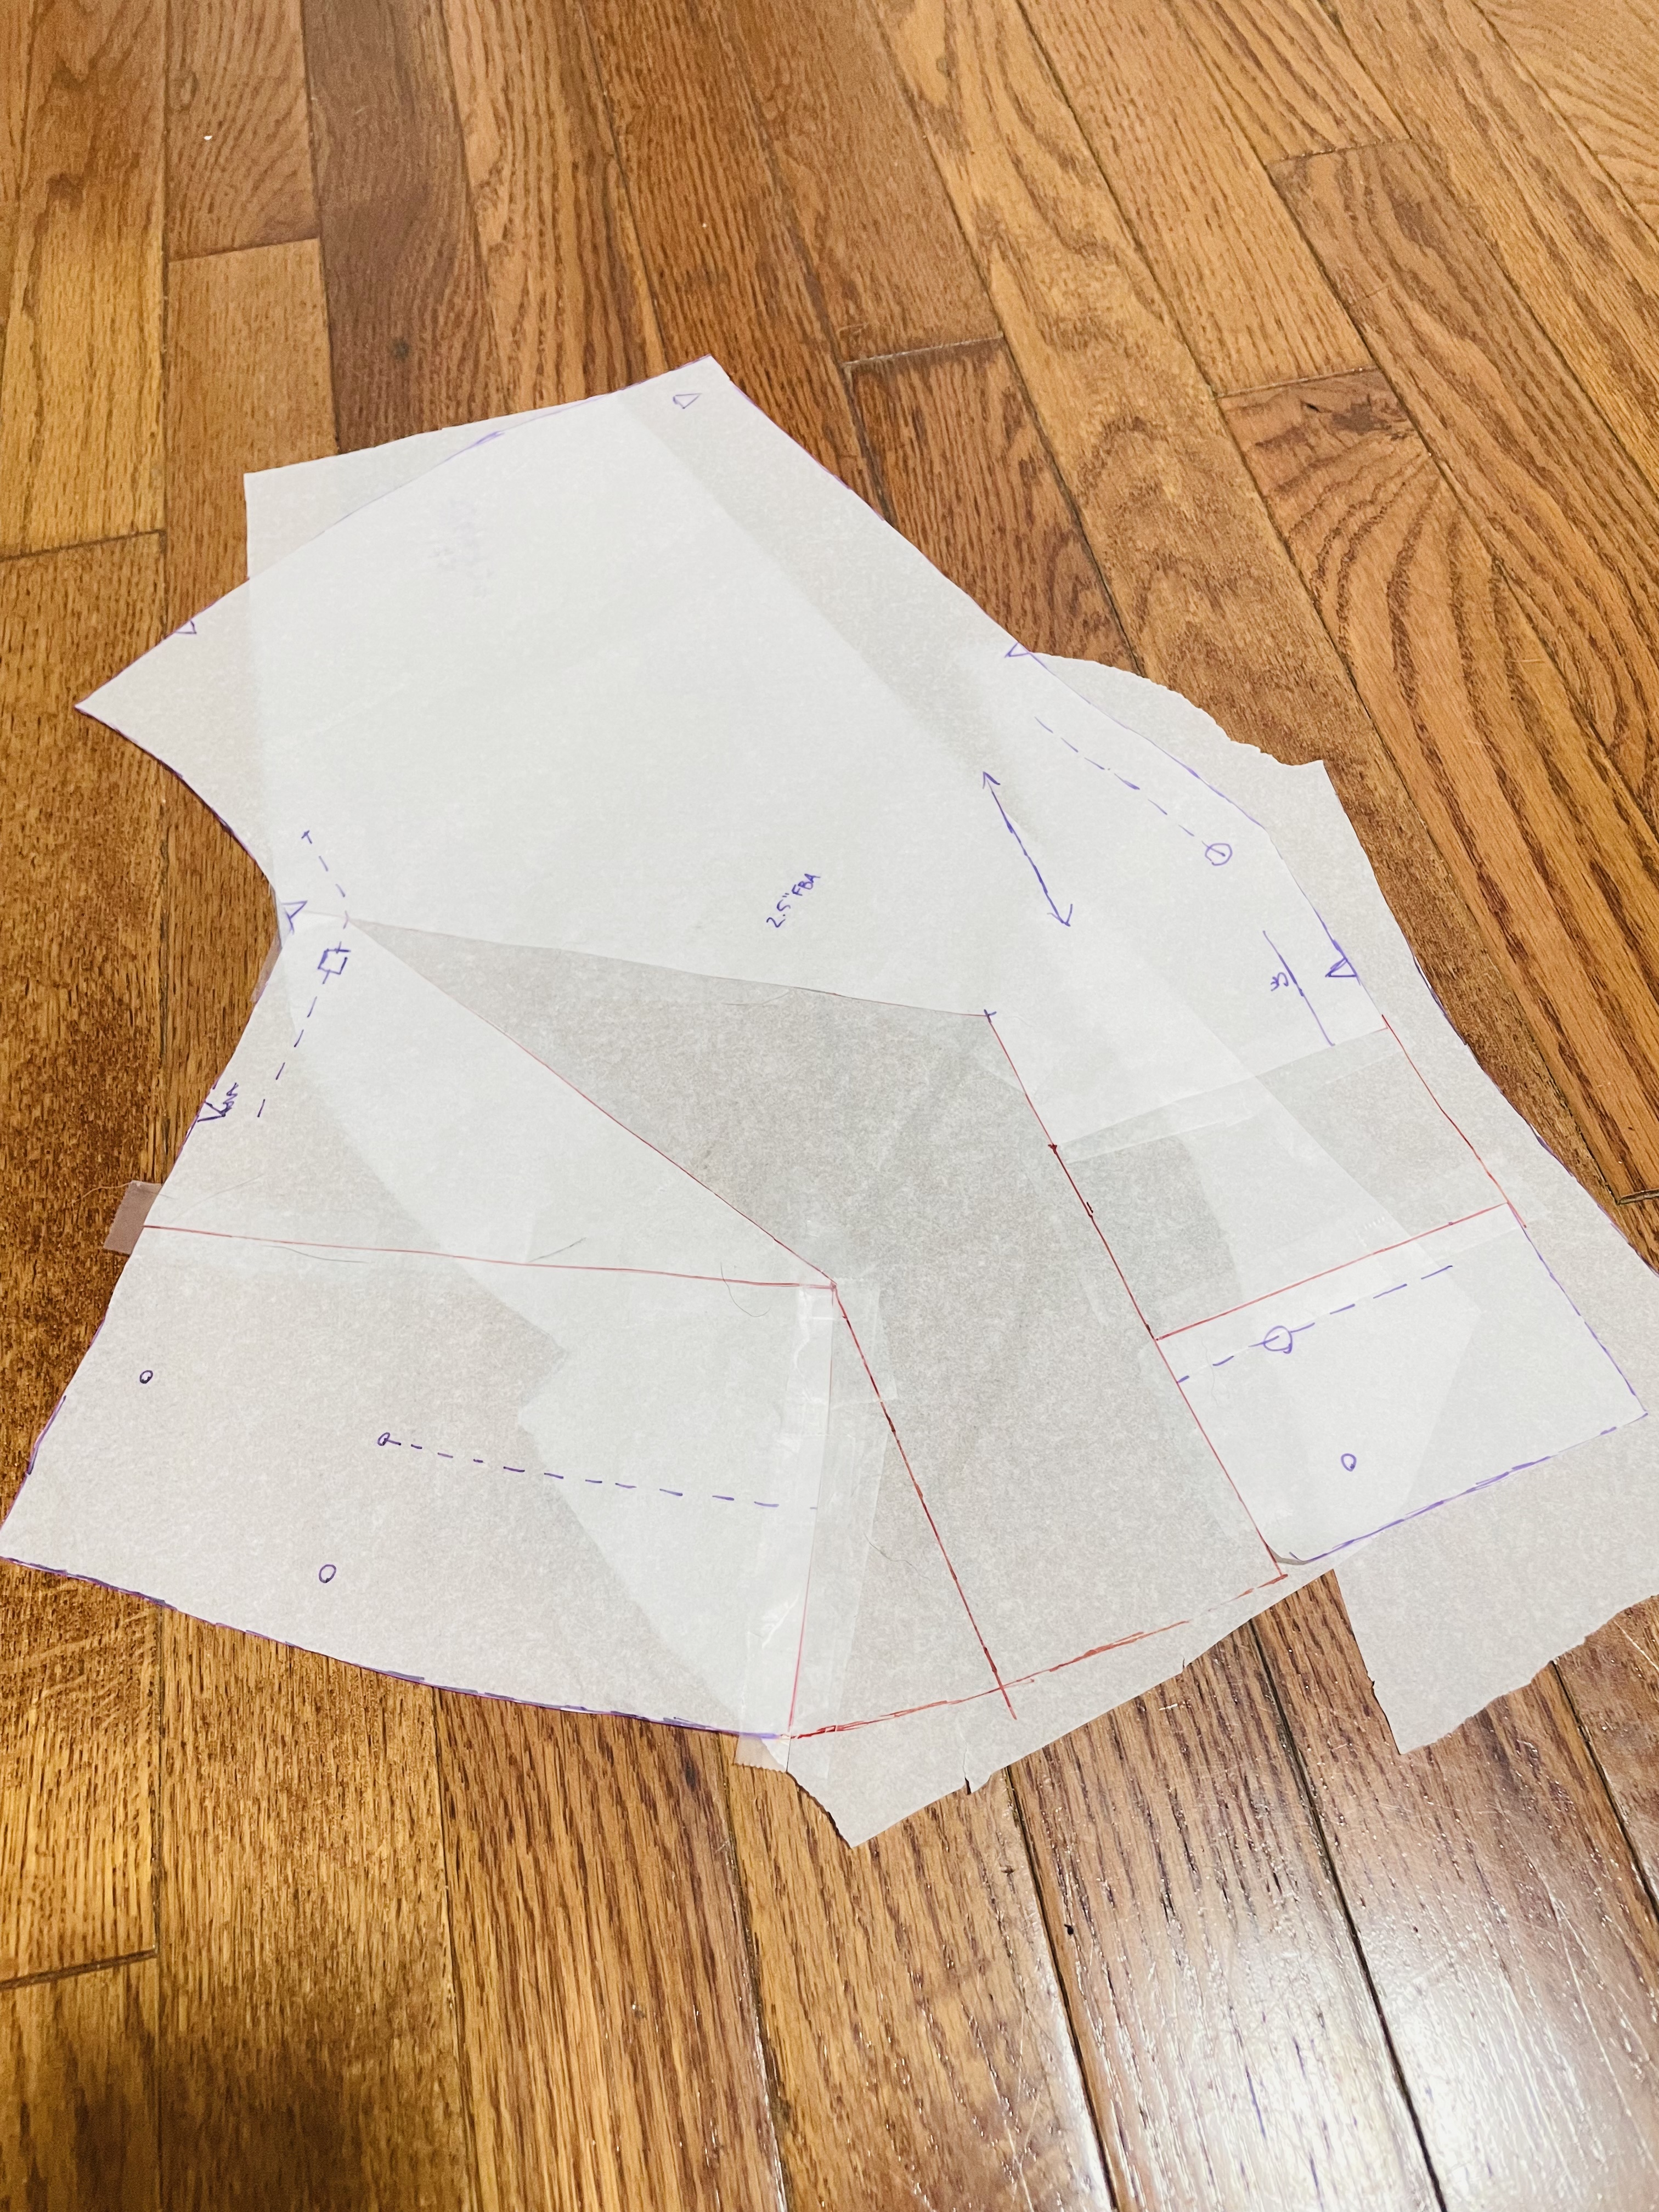
Cut out your pattern, and voila! You have a newly-FBA’d pattern.
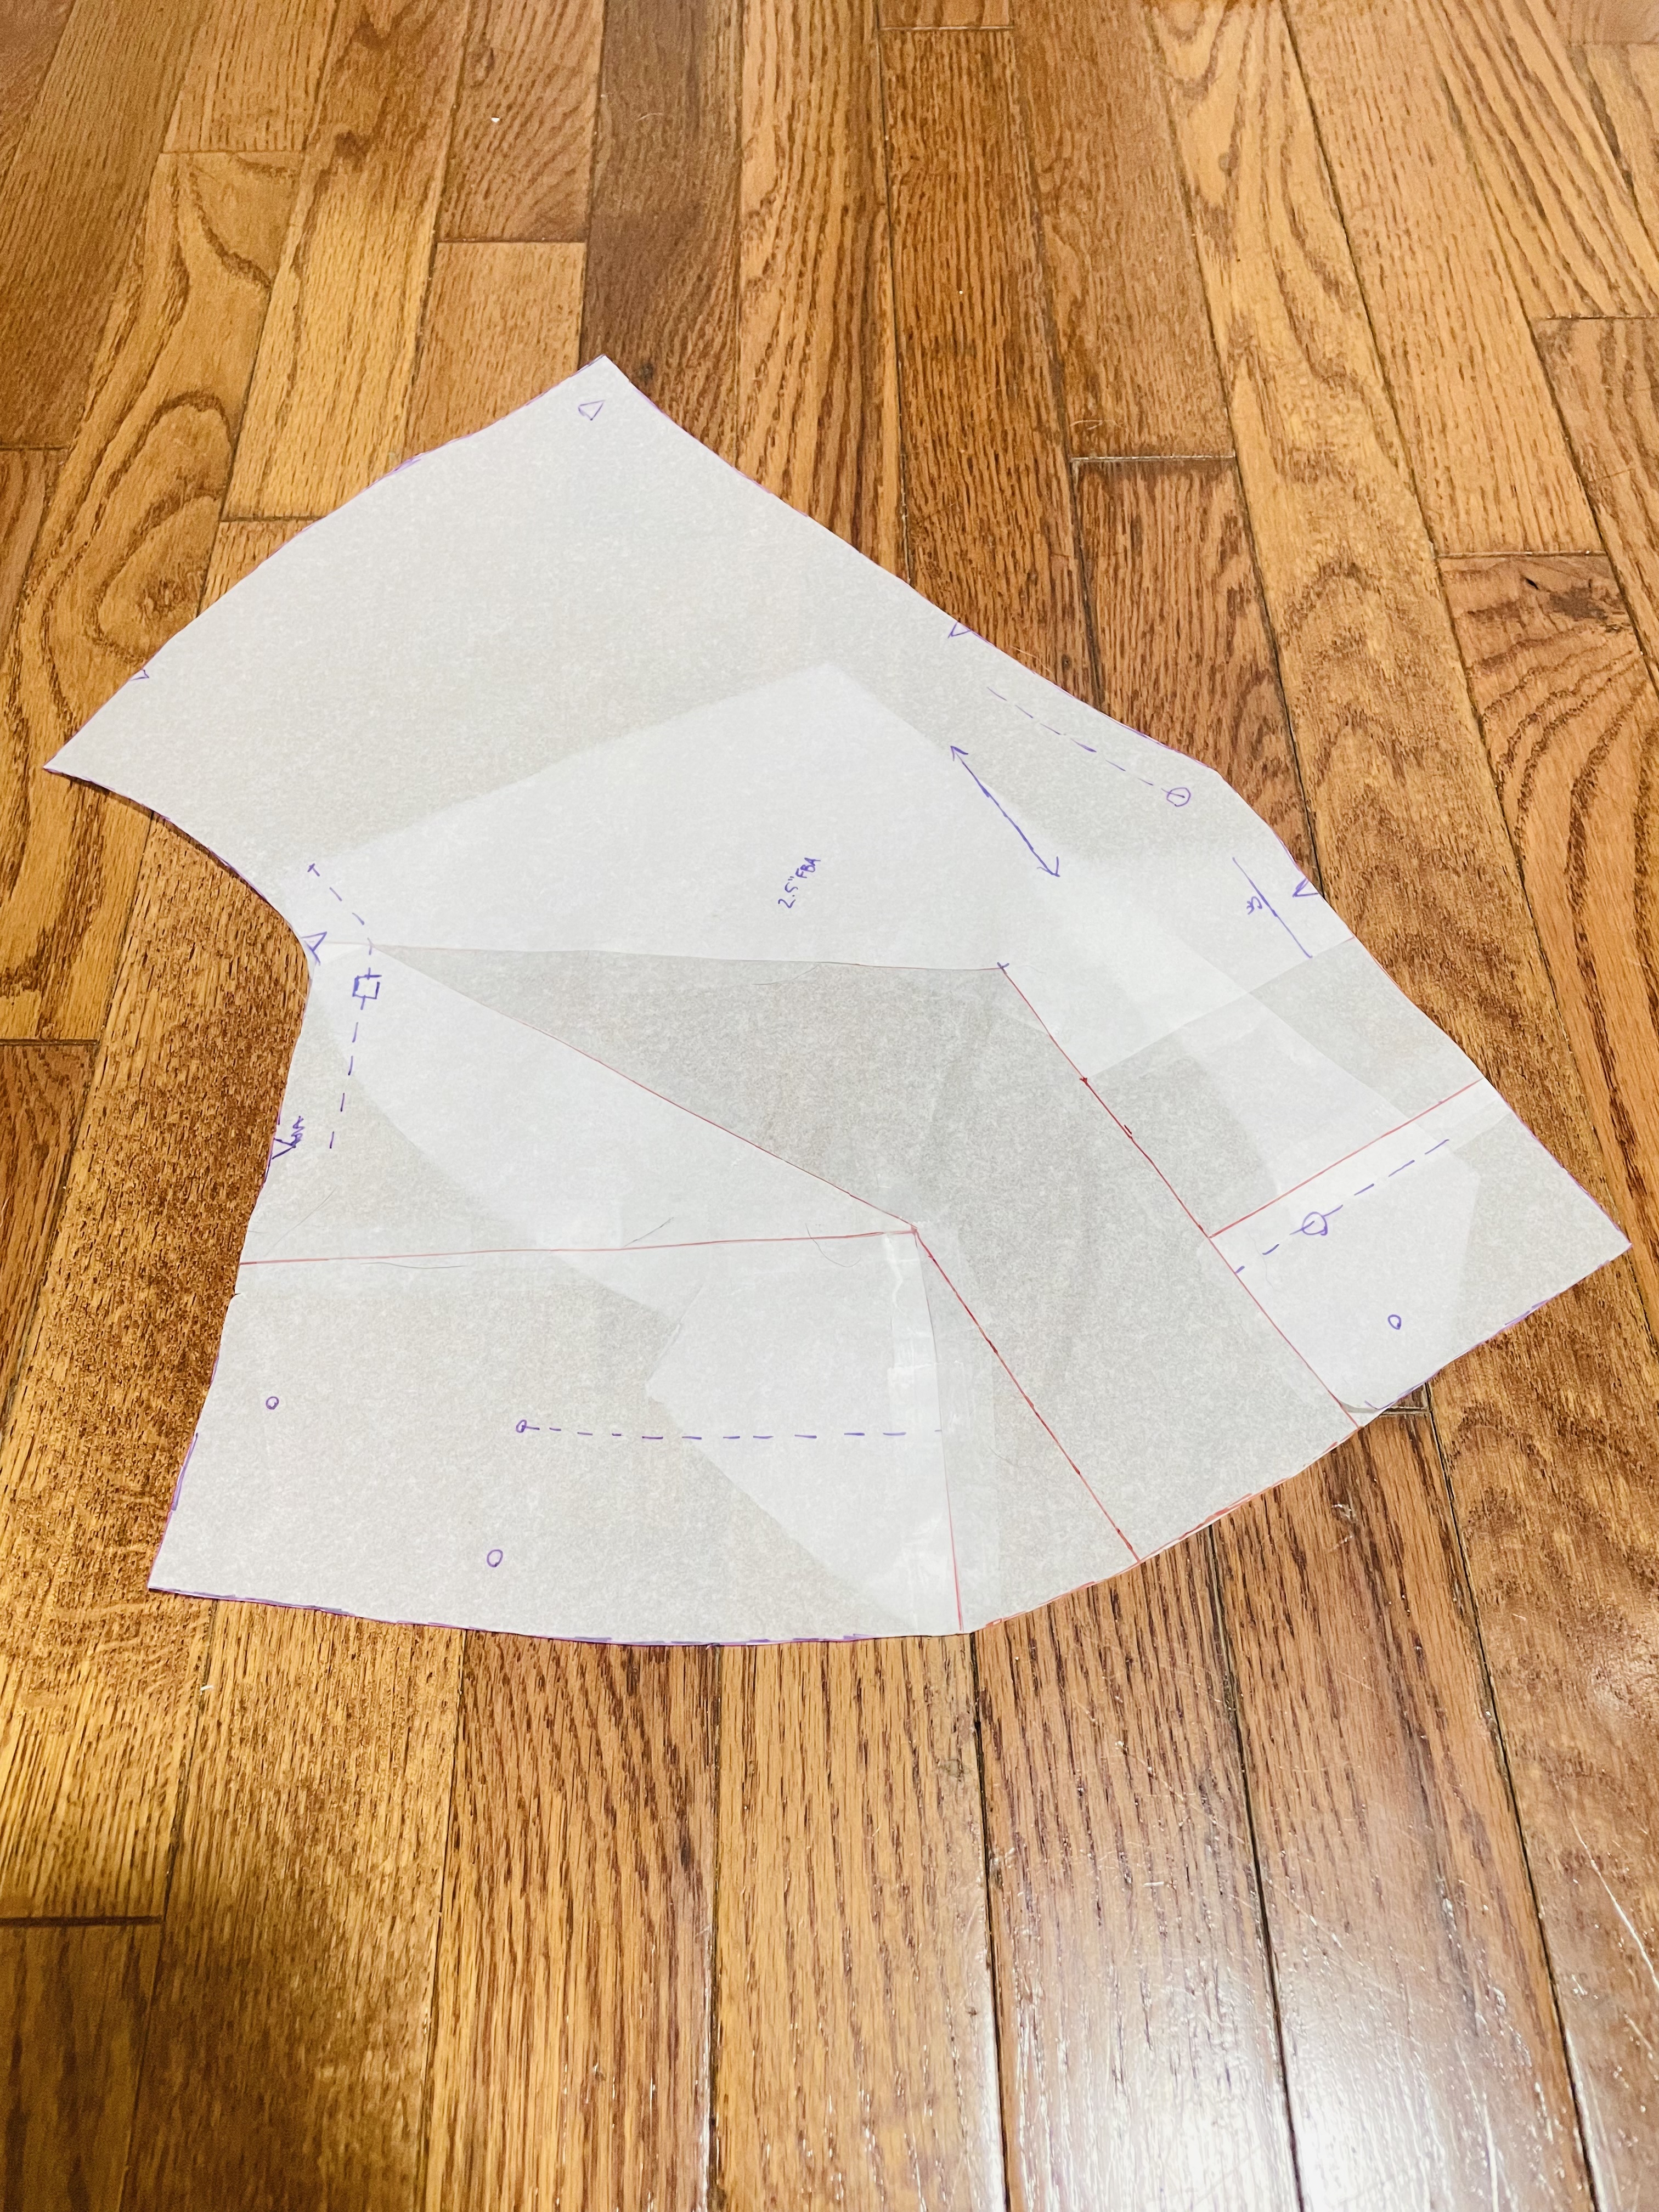
The only further change you’re going to have to make is that the gathering line — marked on my pattern piece as a purple dashed line — will need to follow the line of the bottom of your pattern piece, curve and all.
Dealing with the Waist
Usually, when we do large FBAs, we have to redraw the side seam or add a waist dart to prevent from adding room at the waist. But, with a gathered bodice, the extra room you added at the waist is going to be dealt with when you gather the waistline. You’re just going to have more gathers than someone with a smaller bust would.

Sewing the B6226 — General Thoughts
I’m glad y’all talked me out of being lazy and into doing a full bust adjustment! The jumpsuit feels like it fits well, with a bit of room to grow in the bust when my milk starts coming in.
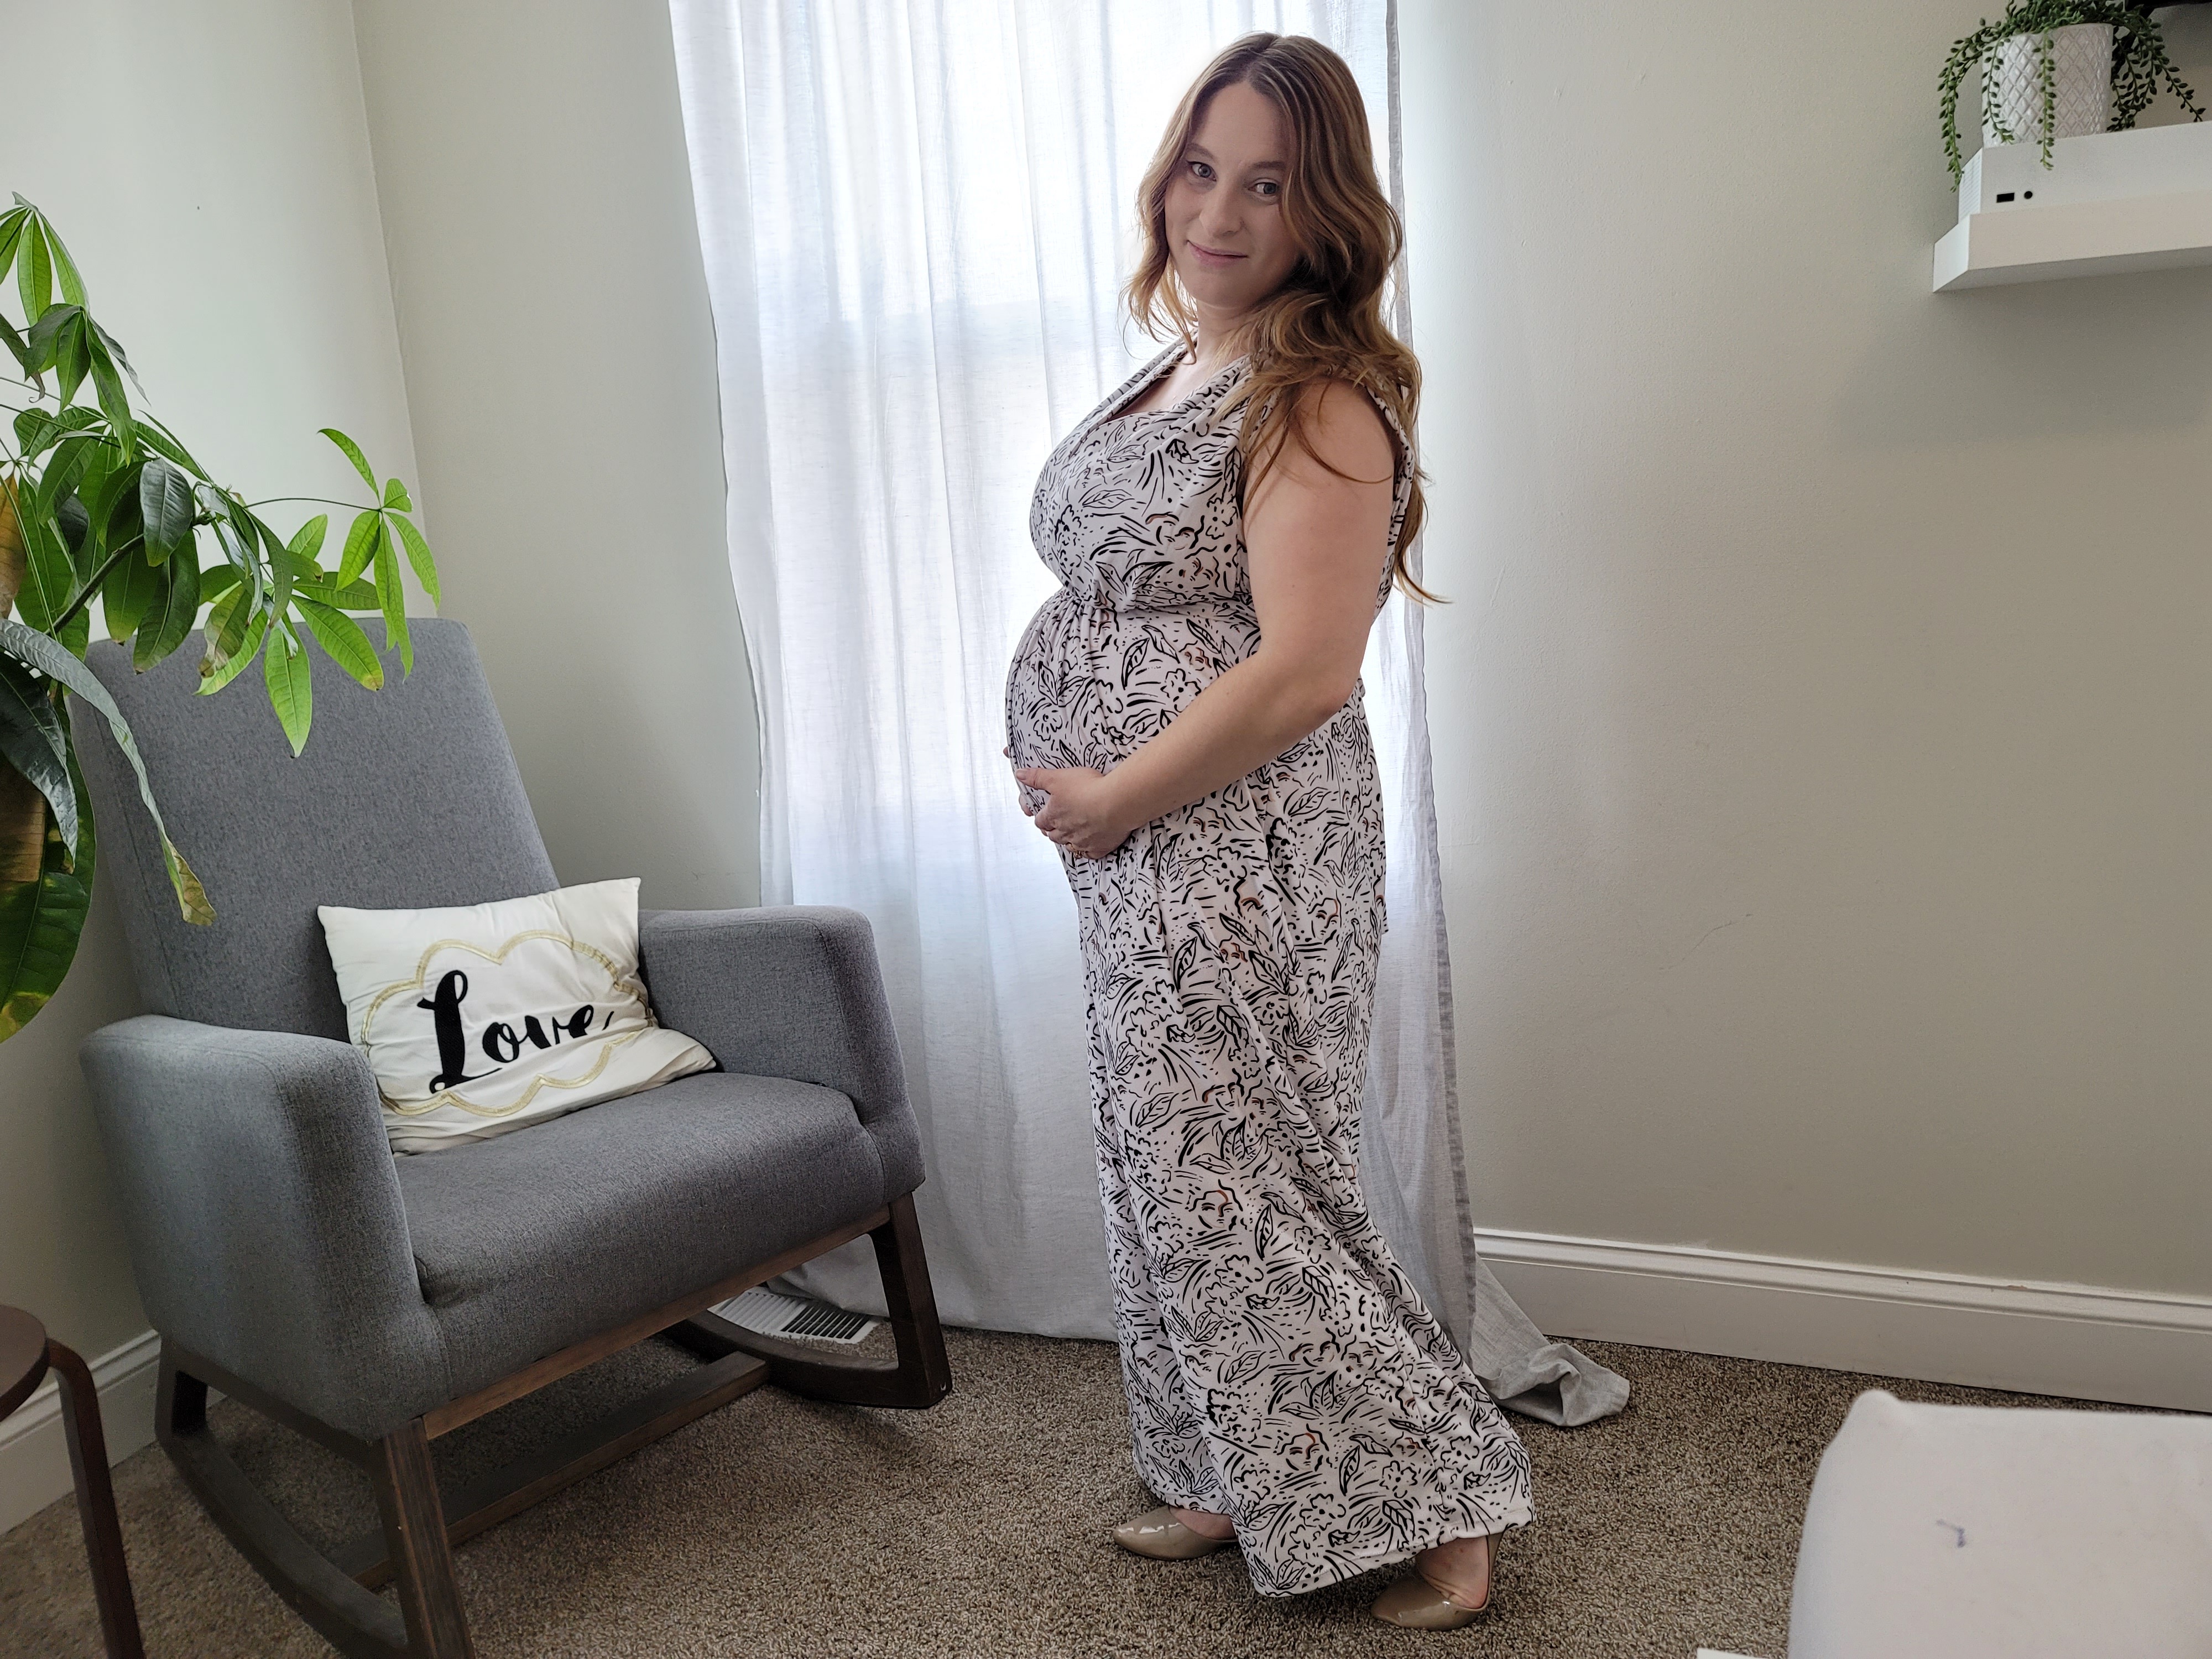
The jumpsuit definitely feels a bit roomy through the shoulders, waist and hips, and I certainly could have sized down to a 12 if I had owned that size in the pattern. But it’s comfy even in the 14, so I’m not too worried about it.
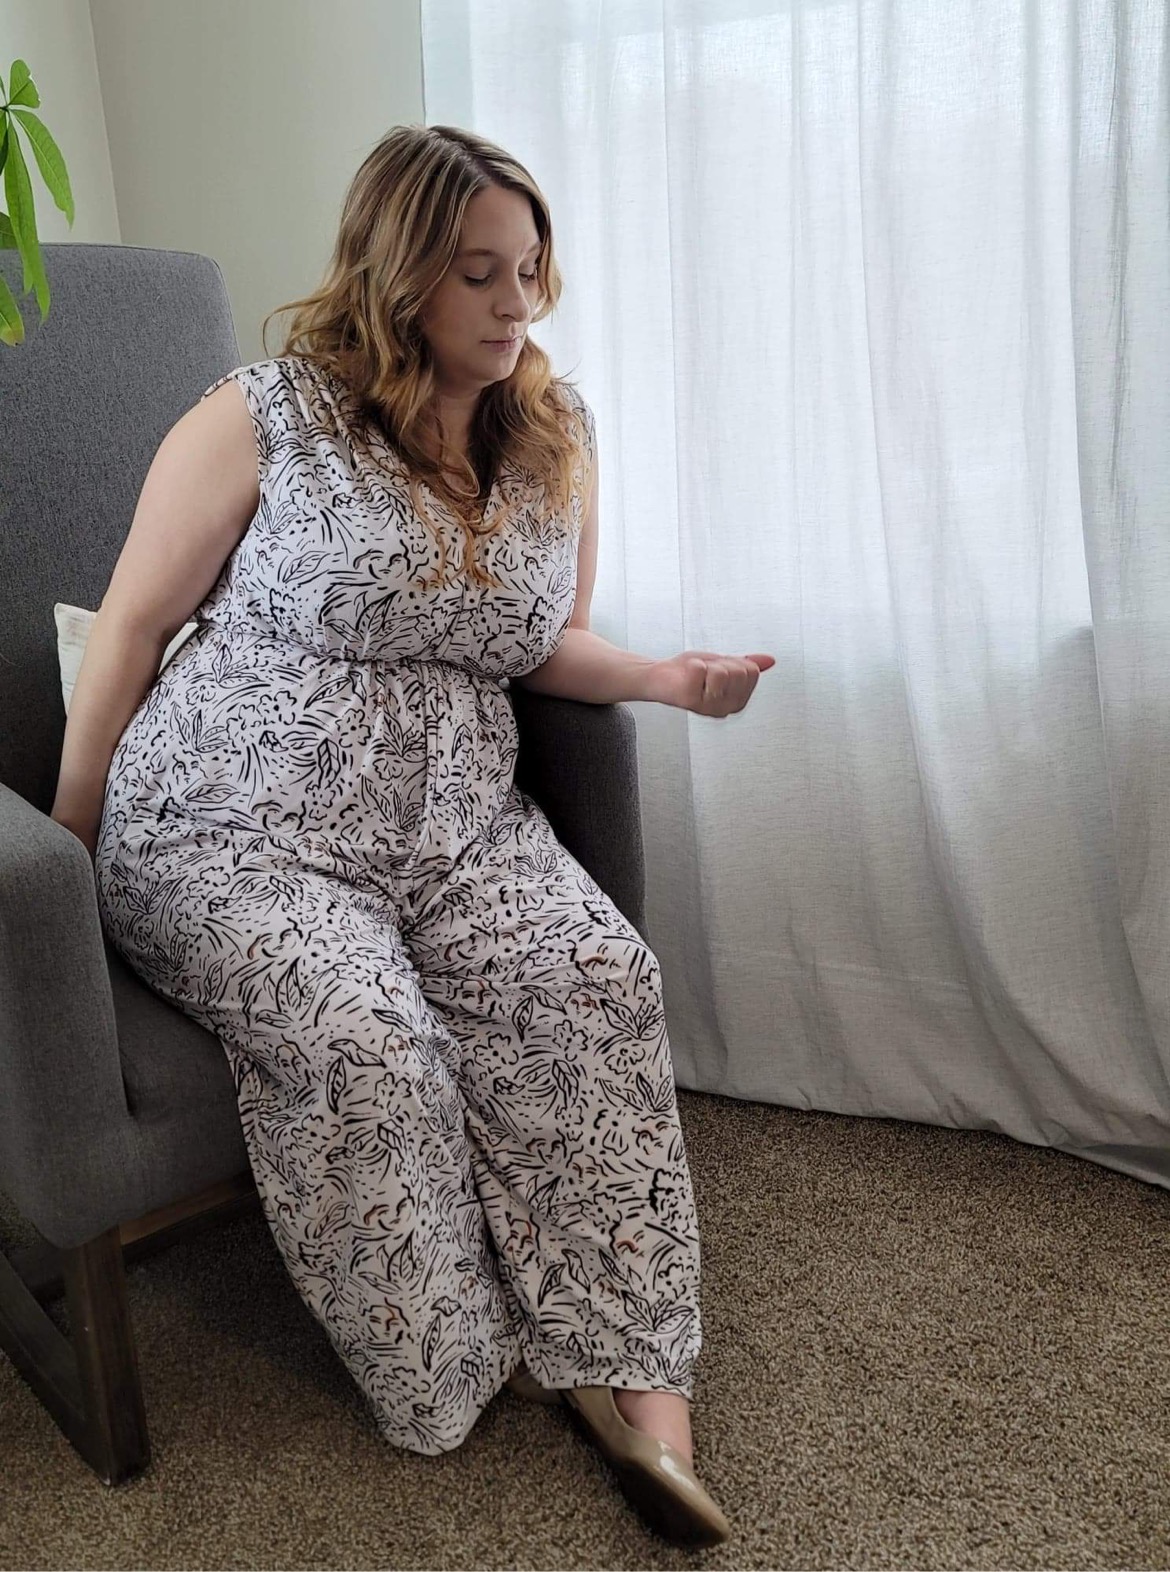
There’s definitely plenty of room for my belly to grow. In fact, there’s so much room at the front crotch that things look a bit strange seated. This is really common in maternity wear, even store bought, so I’m not concerned. It just means my belly has plenty of room as it expands.

Have questions about this full bust adjustment tutorial for large busts? Drop a comment below or or ask on the Sew Busty Facebook group or subreddit.


Rachael
March 31, 2022This might be EXACTLY what I need! Holy cow! Great timing for my Easter dress that I have been trying to figure out how to do an FBA by adding more gathers instead of a dart. A dart would totally ruin the look.
Thank you, thank you!
sewbustycommunity
April 1, 2022Yay! I’m so so so glad that this is helpful! Please share a pic of your Easter dress when it’s ready! Can’t wait to see!
Serena
September 26, 2024This is the only gathered bodice FBA I have found, so thank you for posting this! Very clear and with lots of photos, too, I feel confident I could tackle this type of adjustment as an advanced beginner 🙂
Lindsie
October 3, 2024yay! I love to hear that!