
Bra Month | Jet Set Natural Bra Sew Along Week A: Common Bra Measurements, Choosing a Size & Materials
At Sew Busty, June 2021 is bra month! Catch up on all the bra month posts here!
As part of bra month, we’ll be doing a sew along of the Firebrand Jet Set Natural bra. This bra, and all Firebrand patterns, are 20% off throughout June 2021 with code SEWBUSTY. See the full sew along here.
On June 9 at 5 pm Eastern, I’ll be hosting a LIVE chat to answer all your questions! Click here to pre-register on Facebook. (The event will be view-able whether or not you have a Facebook account, but, since this is new, the event will be cancelled if pre-registration is super low.)
I’m so excited to show y’all the Jet Set Natural Bra! This bra not only makes me feel like a vintage QWEEN, it also is a pretty easy sew. For that reason, this sew along is appropriate for an adventurous beginner. So, yeah, even if this is among your first garments, I really think you can do it if you take your time.
Taking Measurements for Bra Making
I want to walk you through not just the measurements you need for this bra, but the measurements you’d need for pretty much any bra pattern out there. So break out our NEW bra project planner and measurements printable and let’s get started!
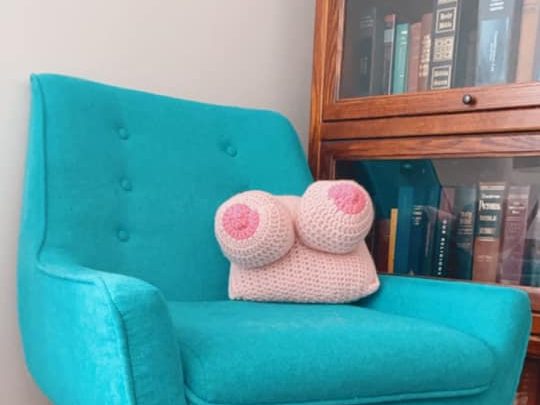
To help me with this, enter Tatiana the Tatas. She and her friend Bea, my dress form, will be modeling the measurements.
Underbust Measurement
The underbust measurement is important no matter what bra pattern you’re working with, since it determines your band size.
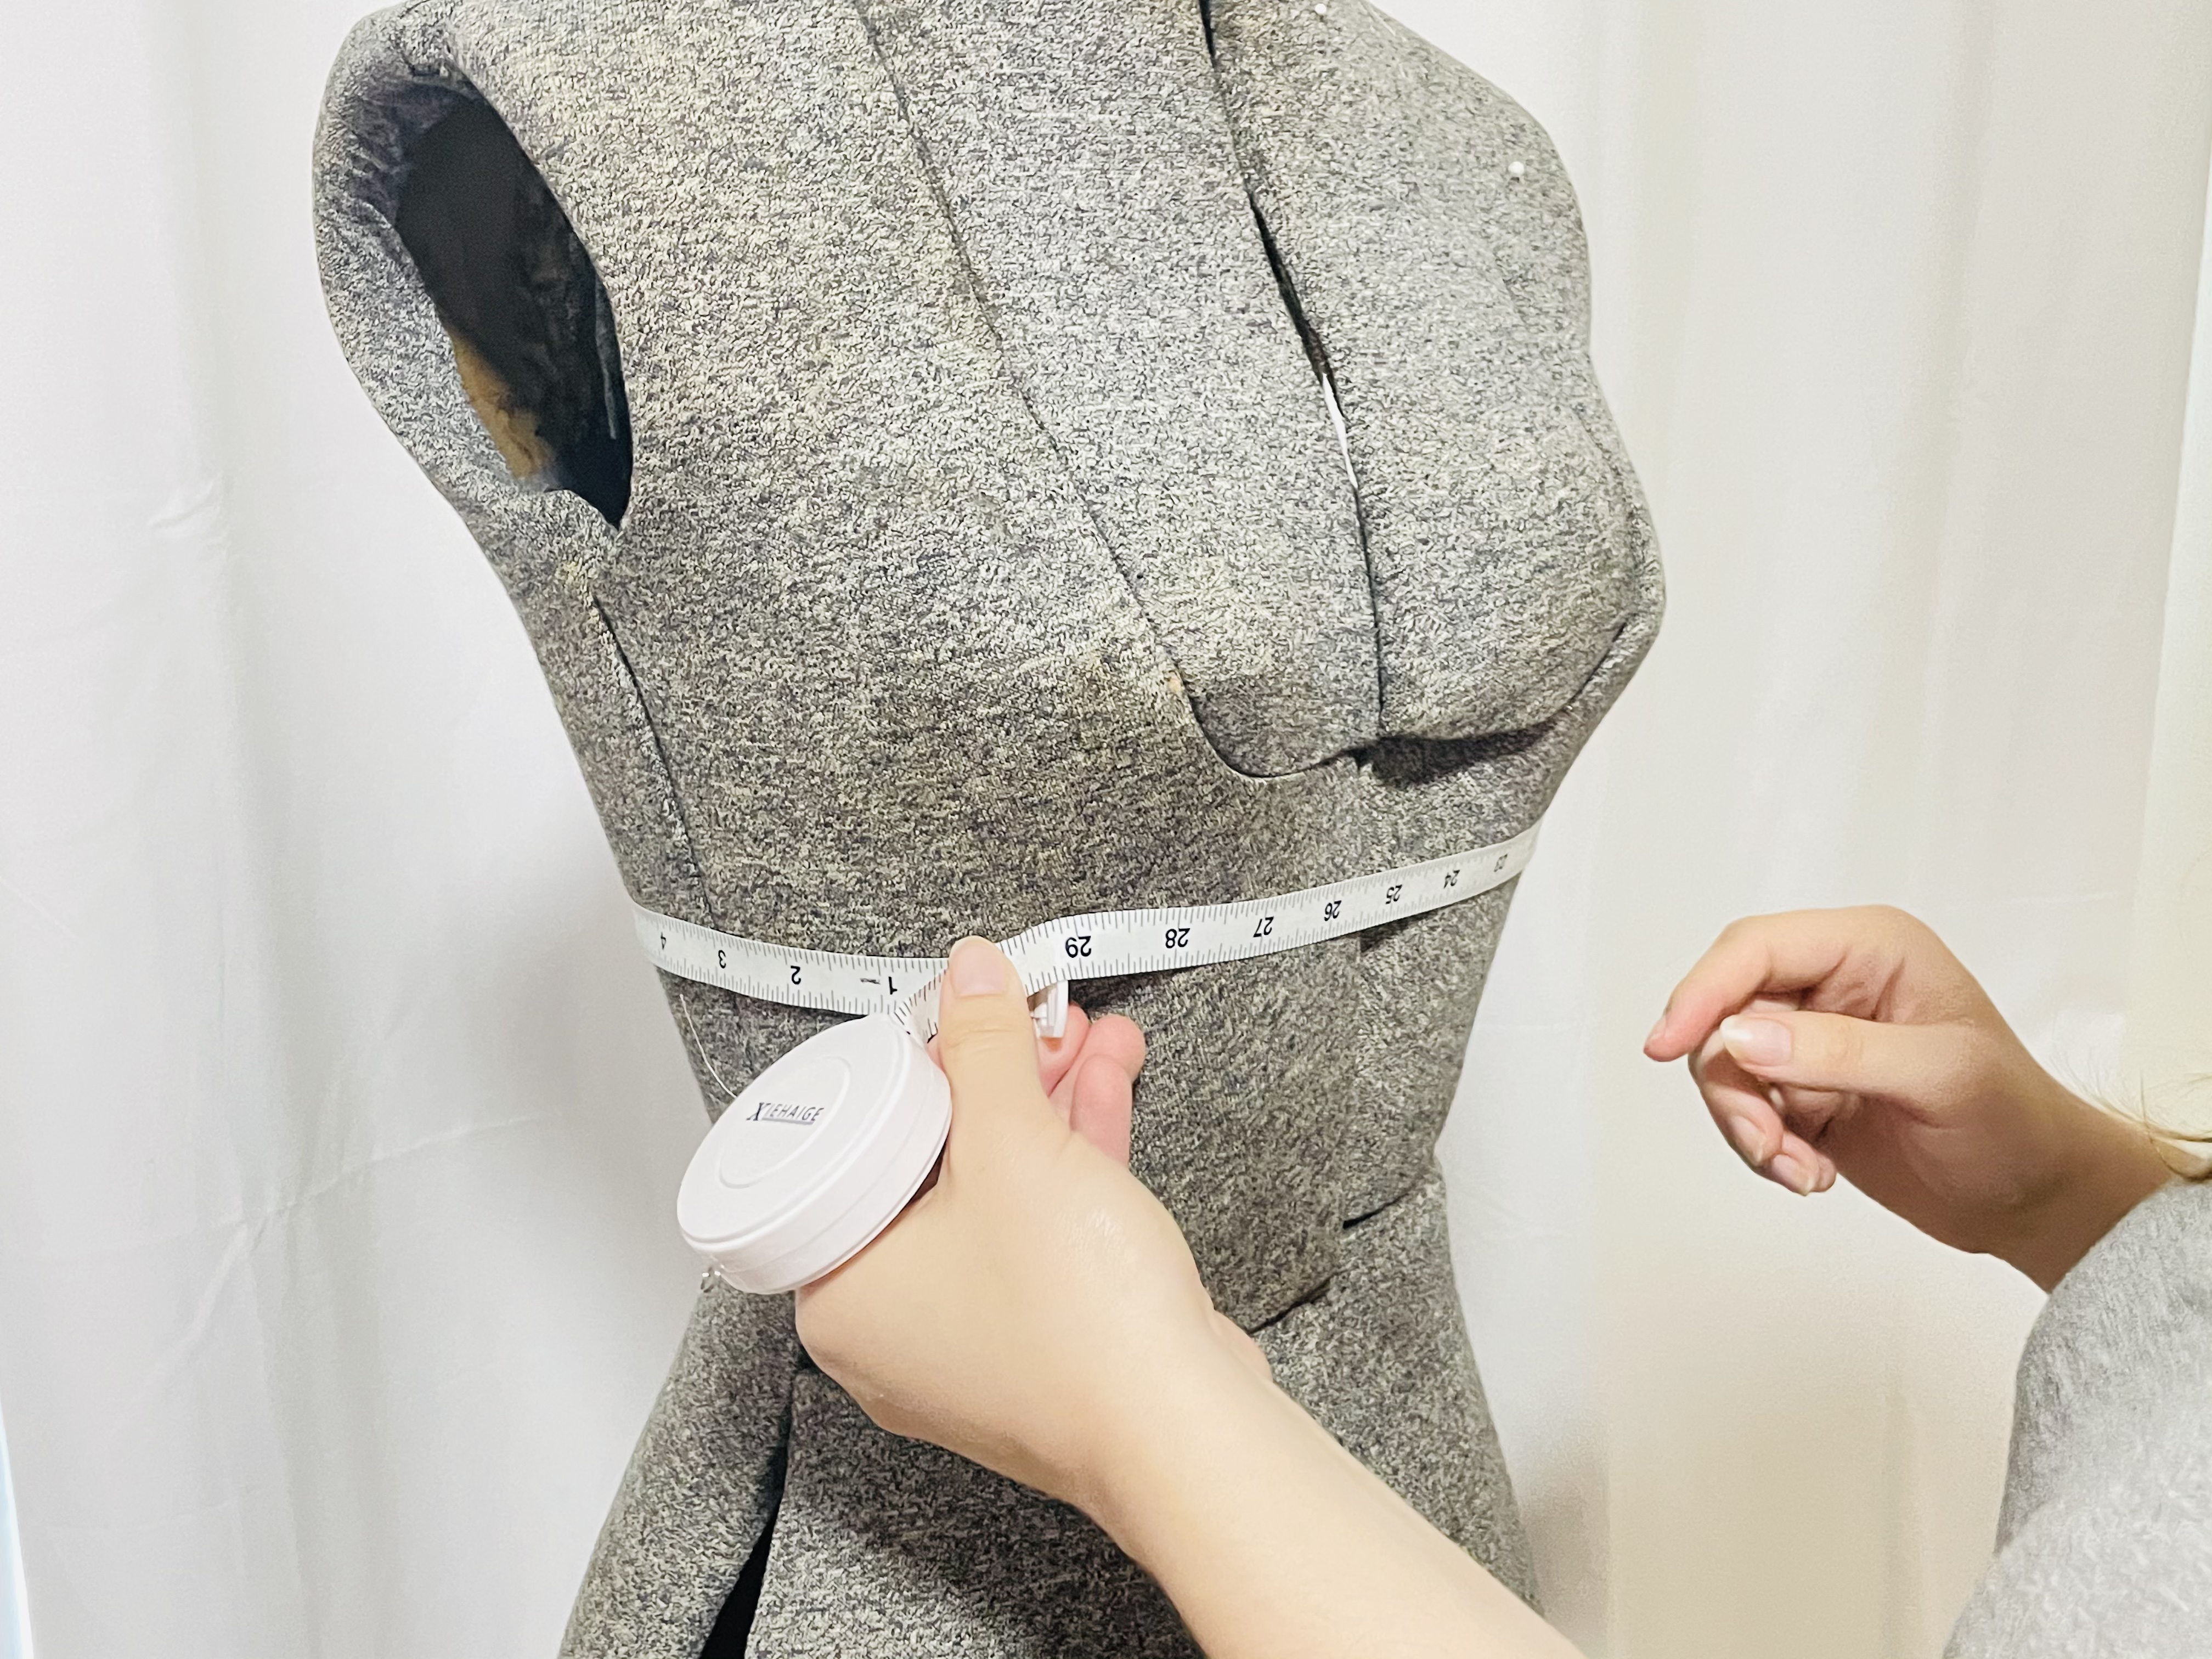
For this measurement, you are going to wrap your measuring tape around your ribcage, just under your breasts. It doesn’t much matter if you wear a bra or not for this one. You should hold the measuring tape snugly, but not too tight.
Now, a word of caution to the bra aficionados out there: You know that advice that you should buy a bra with a band that matches your underbust measurement, no matter what the size chart says? Well, while I generally agree with that advice for storebought bras, it doesn’t apply for patterns. Instead, you should follow the size chart.
For example, I’m also a 29.5″ underbust and wear a 30 band on all of my storebought bras. But on my favorite bra pattern, the Porcelynne Eve, I wear a 32 band? Why? Because this is where the size chart placed me. And it’s right.
the old fashioned bra measurement: full bust
So the first set of measurements is probably super familiar to you: full bust measurement. This is the measurement that, in addition to the underbust, the nice lady at Macy’s or another department store probably took on you when you shopped for your first bra.
Personally, I find this to be the most inaccurate way to measure for a bra or a bra pattern, but some patterns use this method, so I’ll show you it anyway.
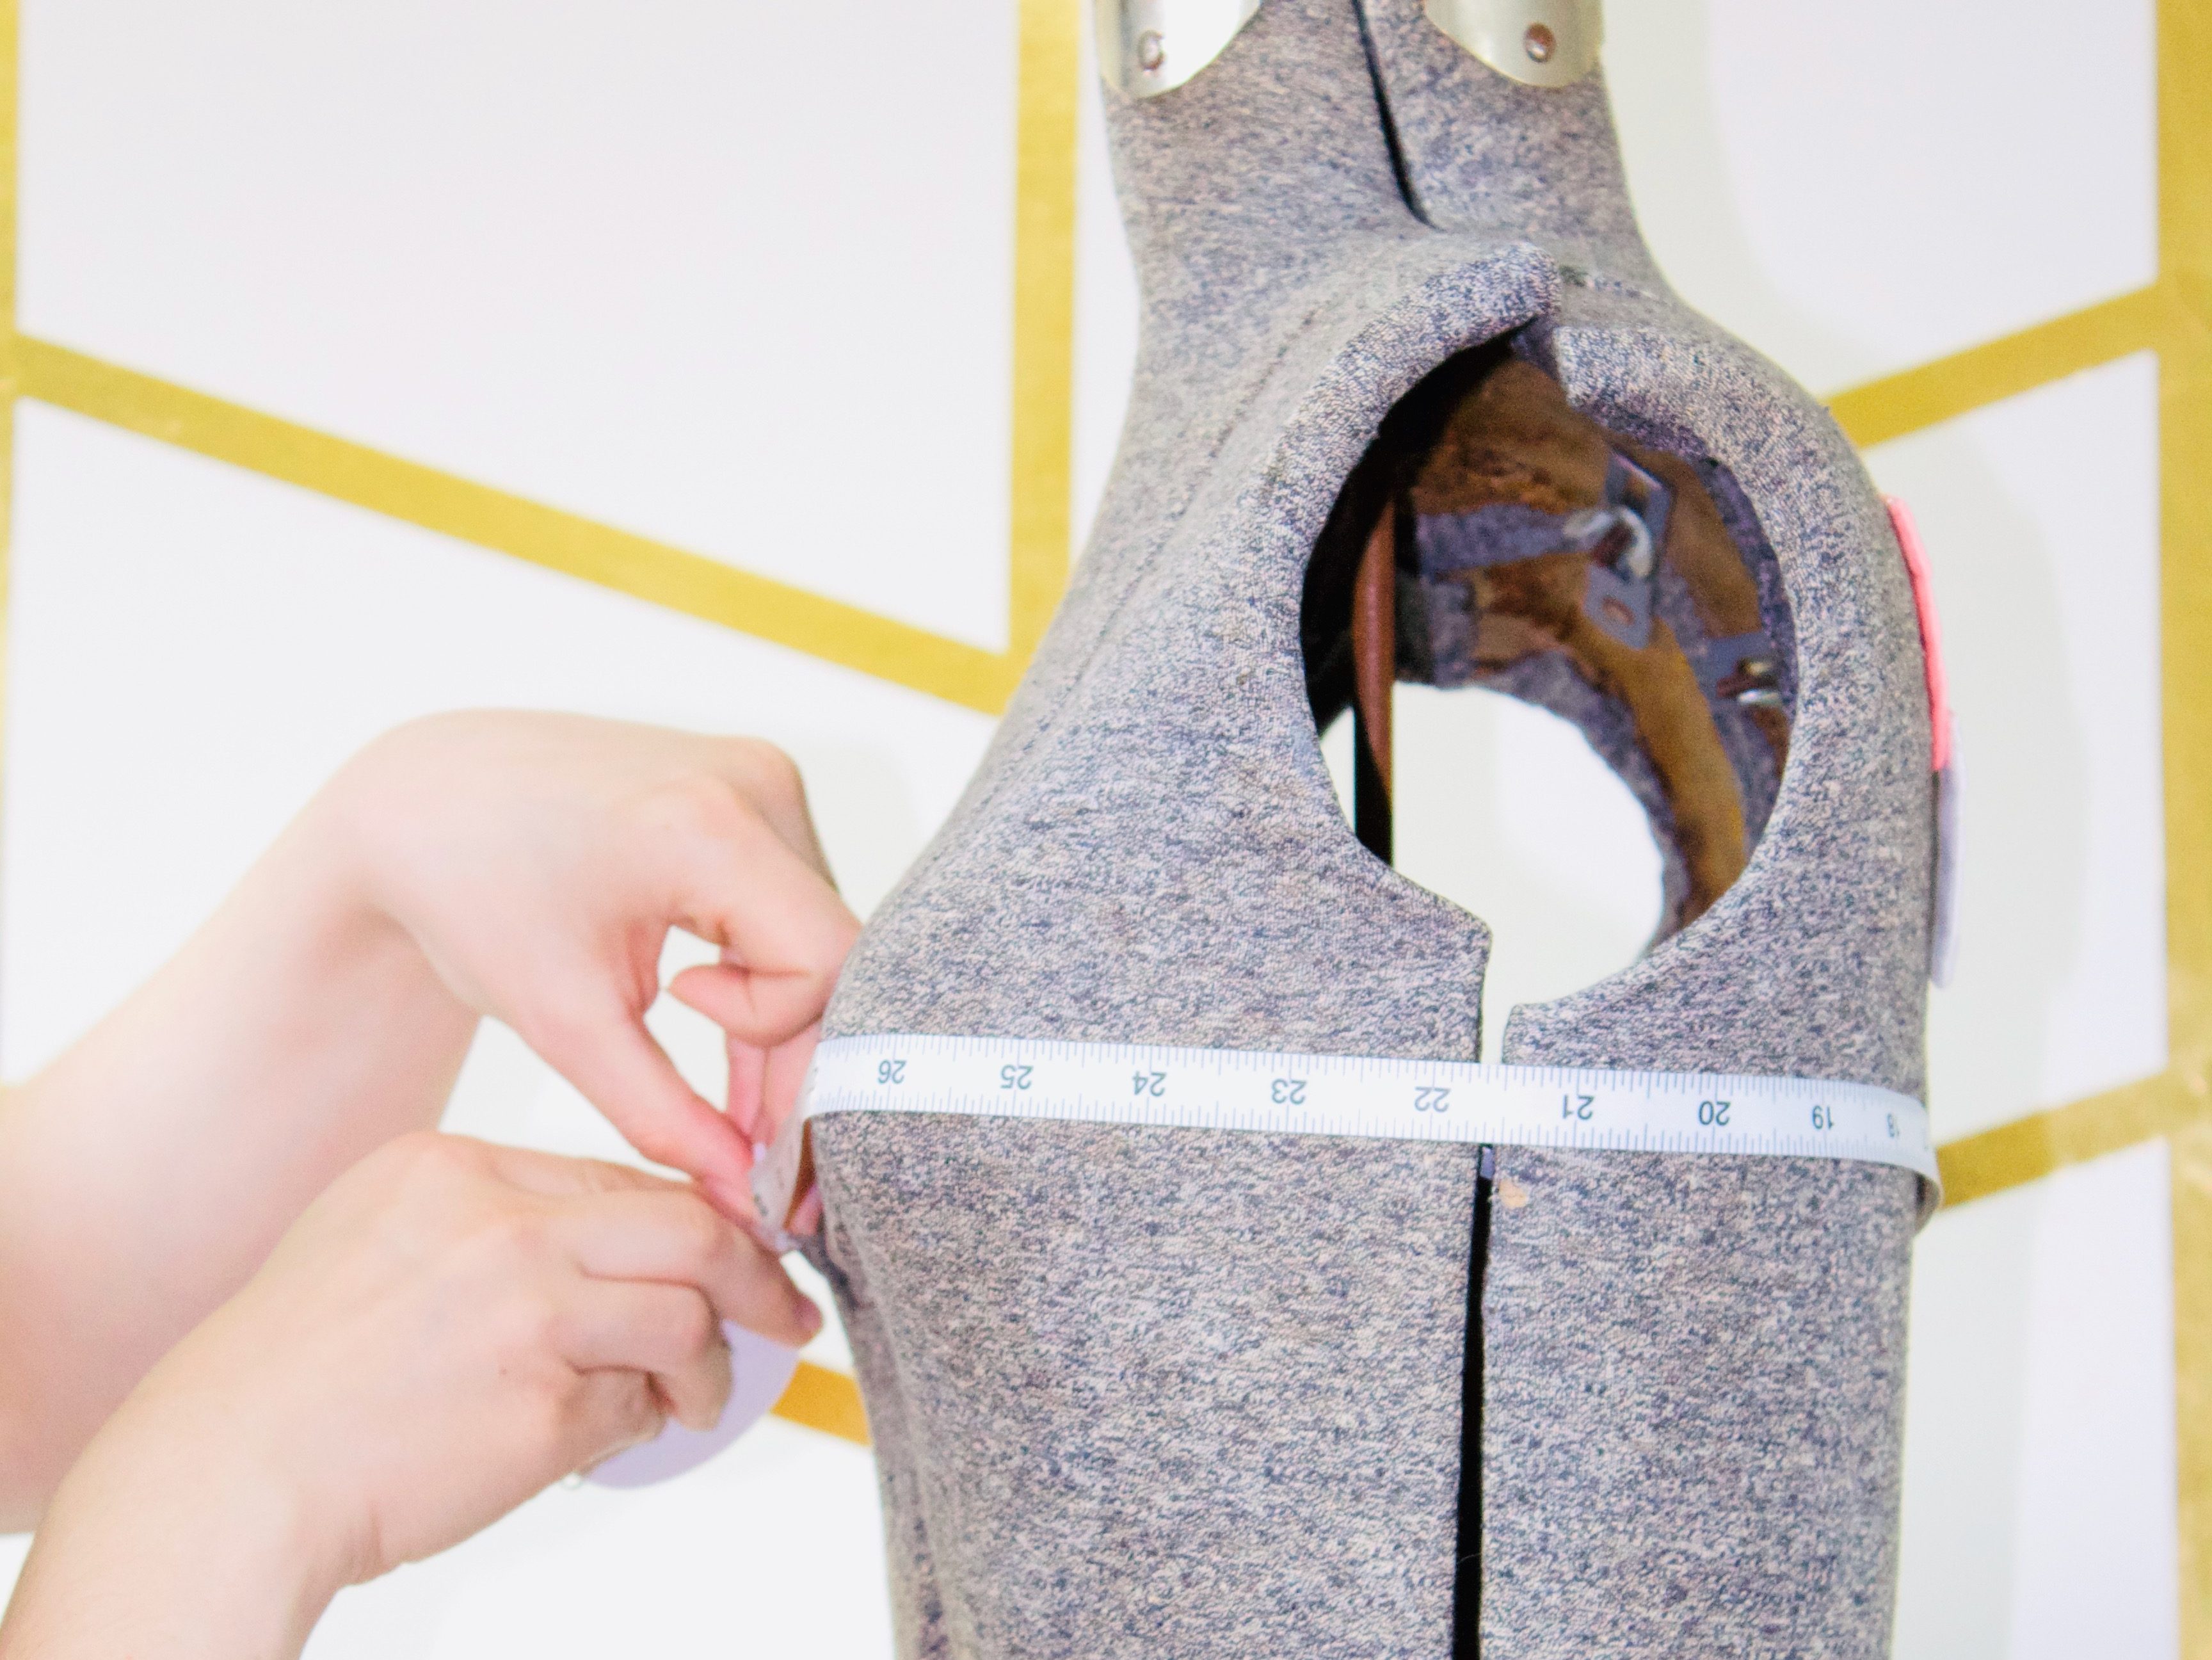
As I explained in the Sew Busty measurements guide, you should measure your full bust with your best fitting bra on. Position the measuring tape parallel to the floor, around the fullest part of the breasts/chest.
On most people, the fullest part of your bust will be your nipples, but this isn’t always true. The measuring tape should go around the part of the bust that protrudes the most, like the peak of a mountain.
Hold the measuring tape firmly and snugly around your bust, but not too tightly. Nothing should be smooshed.
If you don’t have a well fitting bra, one option can be to take this measurement leaning forward, like #5 in this diagram from A Bra That Fits. Take the full bust measurement leaning, then take it with your best fitting bra (even if the bra isn’t great). Average the two – this average will get you close, and should be used as your full bust measurement.
Bottom Cup Depth (bcd)
This is a very common bra pattern measurement, and is the one we’ll use for the Jet Set Natural!
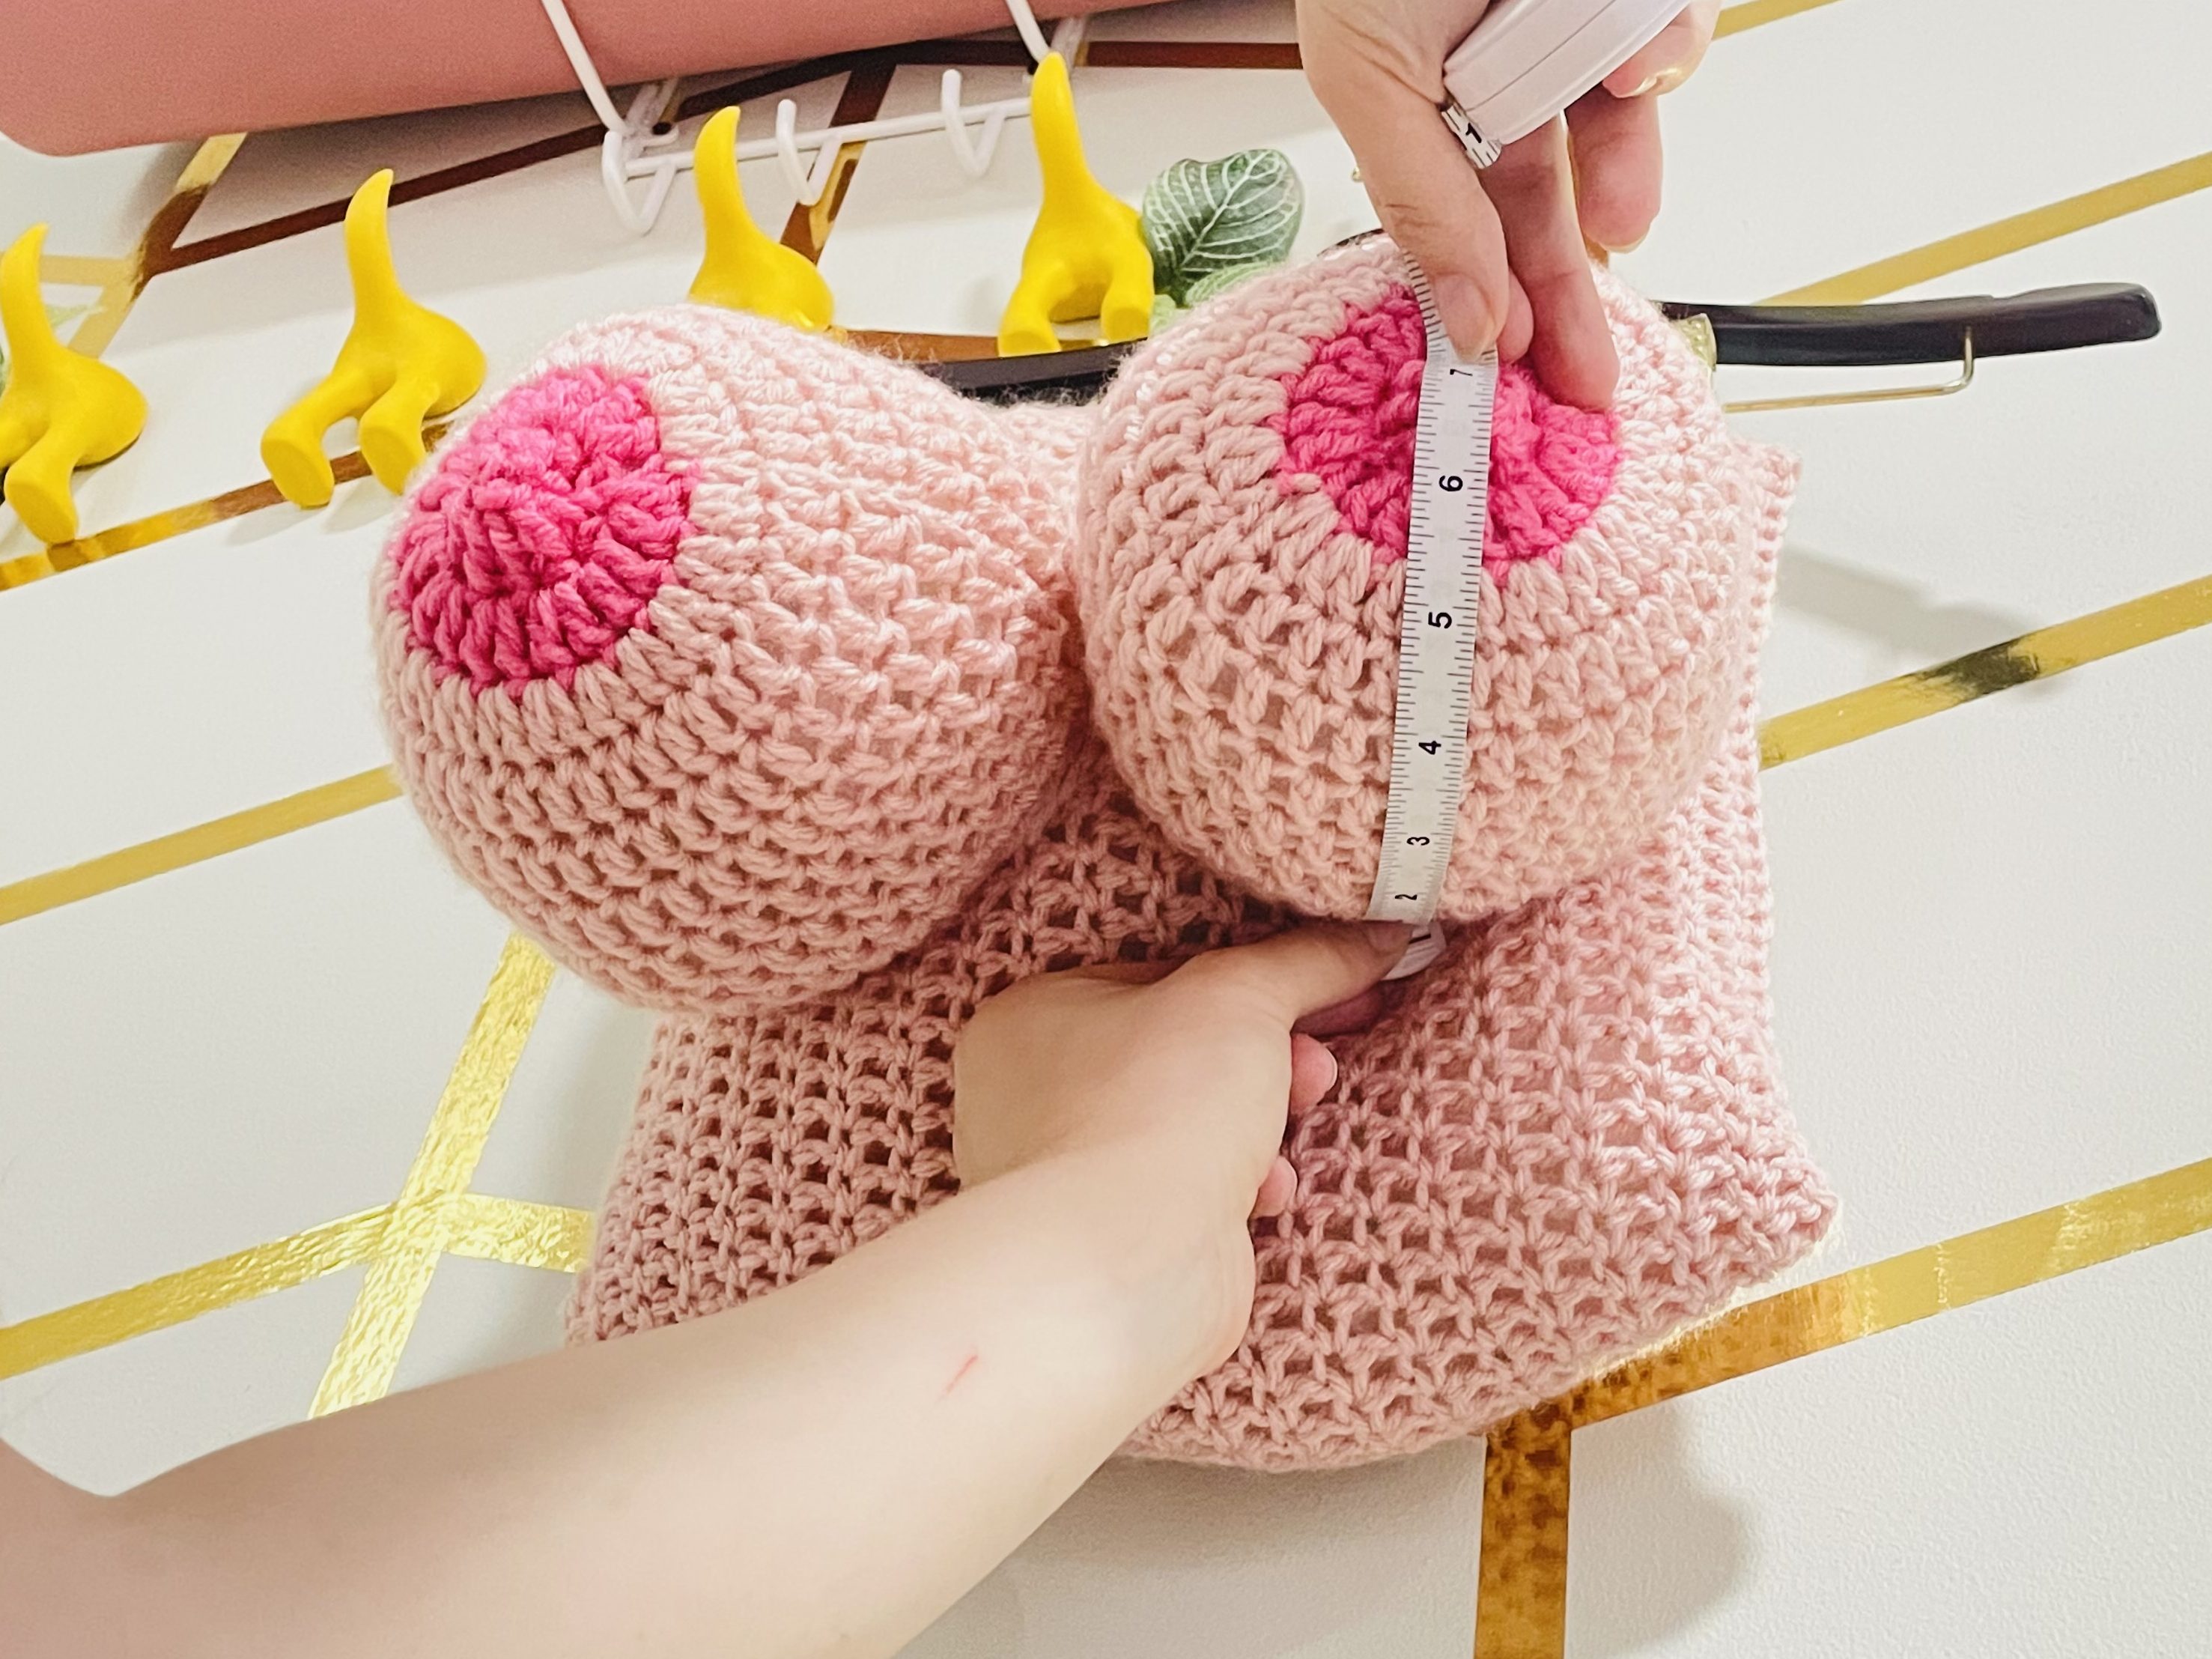
For the bottom cup depth, you’re going to measure this while wearing a well-fitting, non-foam bra. Measure vertically, from the root of your breast to your apex (again, usually, but not always, the nipple). This should follow the breast closely, but should not be so snug that something is getting smooshed.
If you do not have a well-fitting bra, do the same thing I had you do for the full bust measurement: Measure braless, leaning forward, then measure again wearing the best non-foam bra you have. Average these two measurements, and use this average as your BCD.
A note about The breast root
What is your breast root?
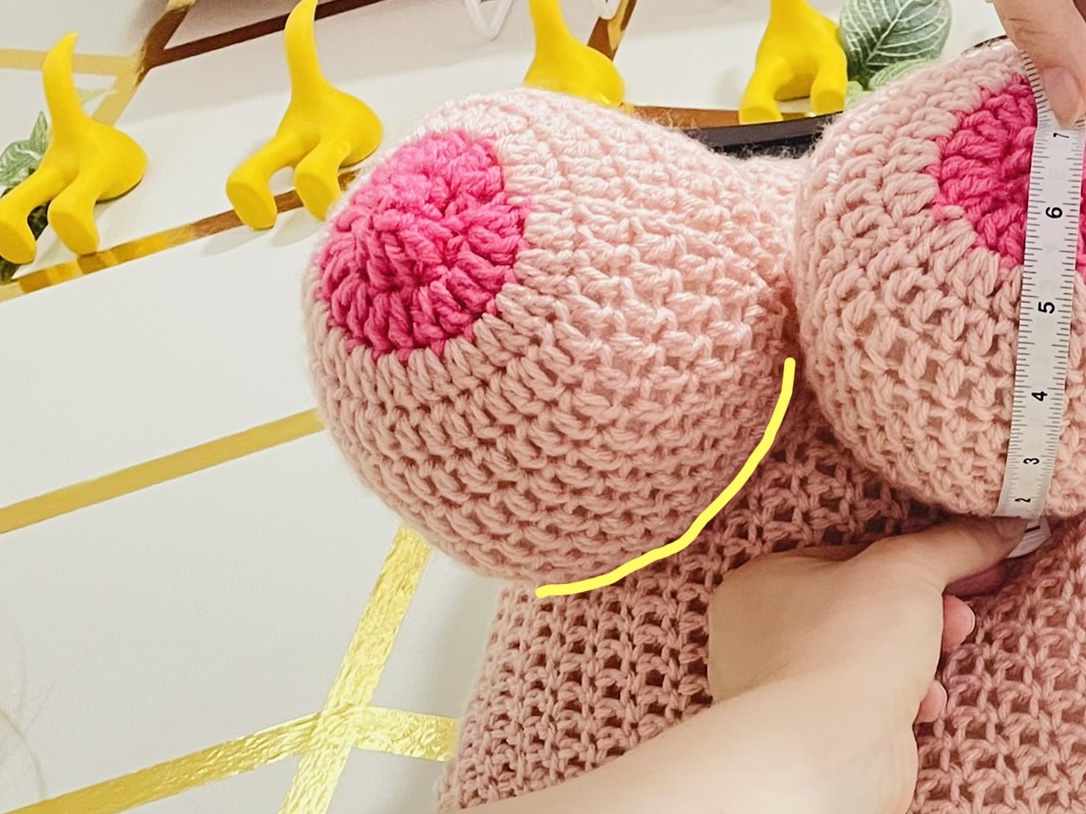
The breast root, otherwise known as the inframammary fold or IMF, is the place where your breast meets your chest. I’ve marked Tatiana’s IMF/breast root here in yellow. I’ve only marked the part that you can see, but it’s important to note that this measurement goes all the way around, from the front to the side, just like an underwire would sit.
This will become super important when we start talking about underwires, but that isn’t today 🙂
Horizontal Hemisphere
The horizontal hemisphere, or HH, is a slightly less common bra pattern measurement, but it’s important to getting a good fit on the Jet Set Natural and is also used in other bra patterns. Personally, I find this to be the most accurate measurement for my own body.
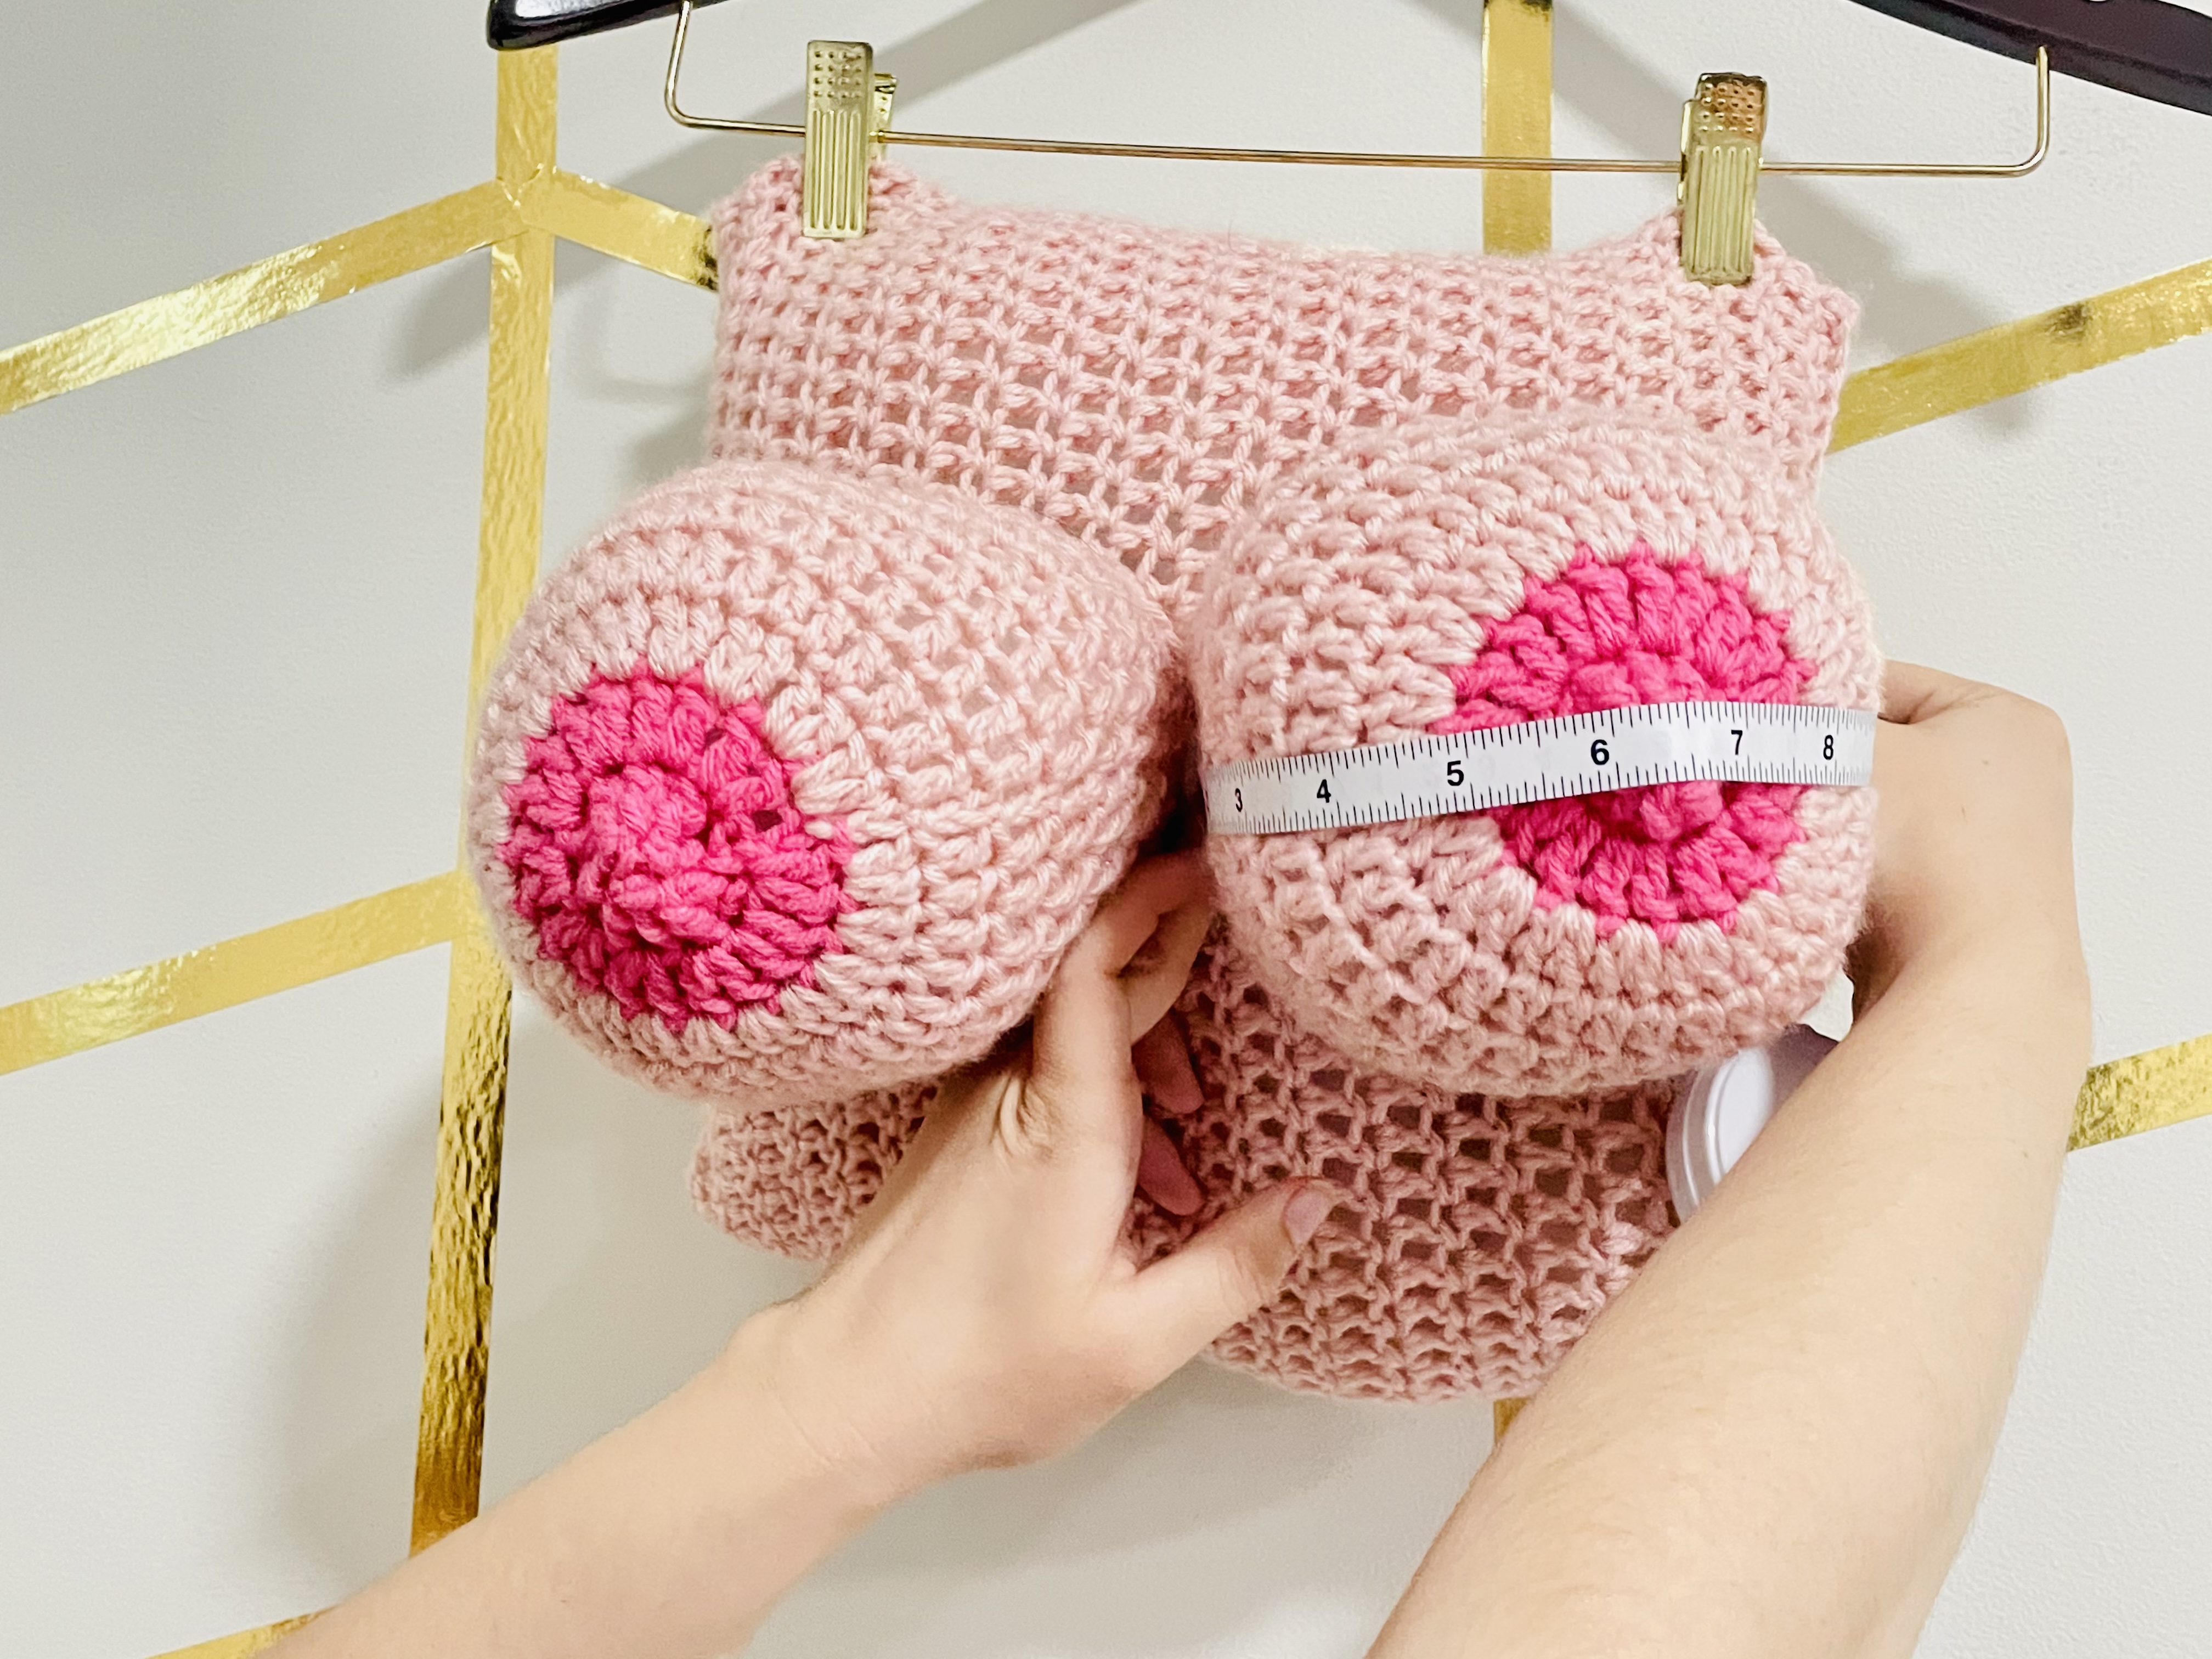
For this measurement, you’re again going to measure while wearing your best fitting, non-foam bra. Measure from the breast root on one side of your breast to the breast root on the other side of your breast, passing over the apex (again, usually the nipple, but not always).
If you do not have a well-fitting bra, we’re going to do the same combo we’ve been doing: Measure braless, leaning forward, then measure again wearing the best non-foam bra you have. Average these two measurements, and use this average as your HH.
Choosing a Size for the Firebrand Jet Set Bra
For the Jet Set Natural, we’re going to focus on three measurements:
- Underbust
- HH
- BCD
Firebrand refers to these as measurements X, Y, and Z:
- Underbust = X
- HH = Y
- BCD = Z
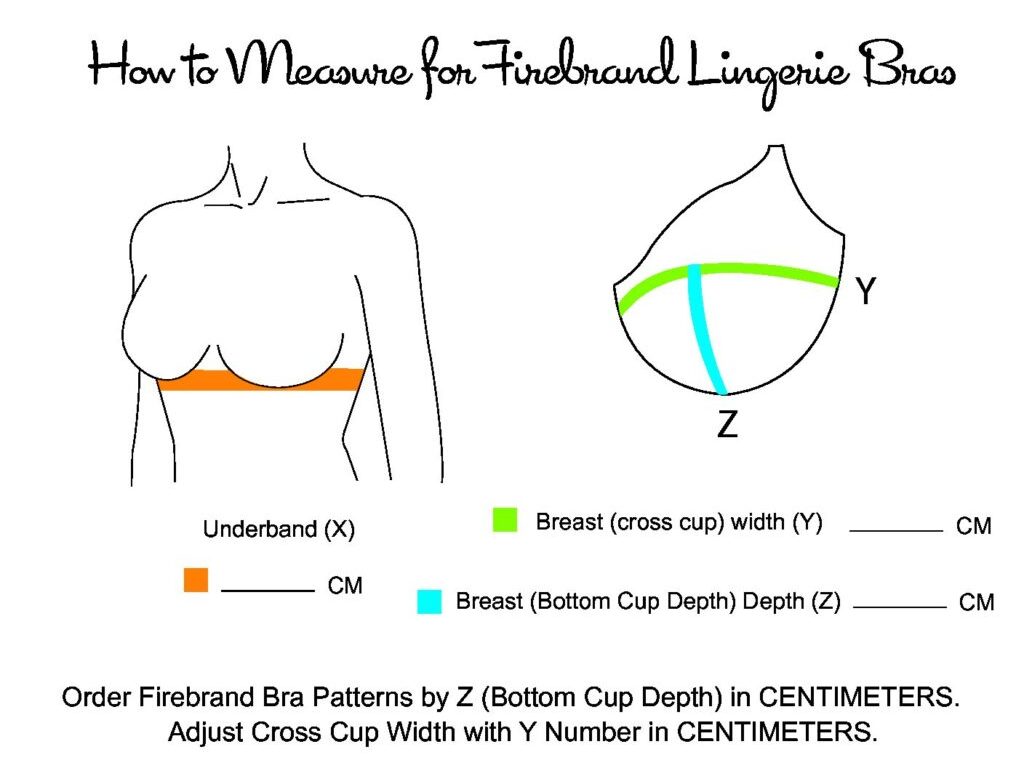
For choosing your base size, the important one is your BCD (bottom cup depth). Firebrand uses centimeters for these measurements, so all us imperial folx will have to convert!
For me, my BCD measures somewhere between 5″ (with my best fitting bra on) and 5.5″ (braless and leaning forward), so somewhere between 13-14 cm. I went with the 13 cm BCD size to start, and this was perfect on me.
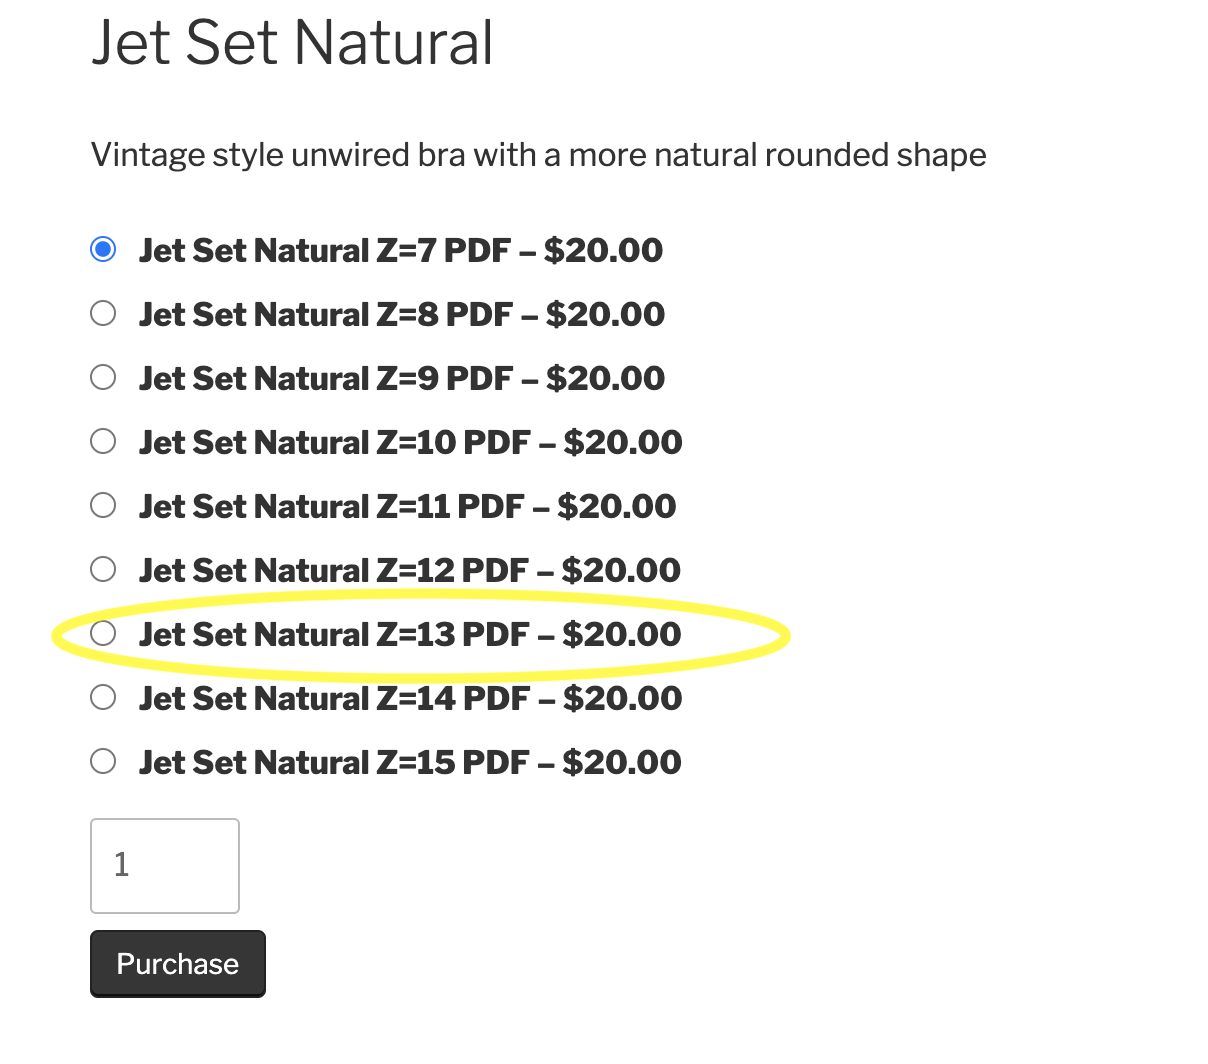
When you go to purchase your Jet Set Bra pattern using the sewbusty 20% off coupon code, you’ll see a list of options with Z measurements. Choose the one that corresponds to your BCD in centimeters. Here, I’ve circled in yellow the size I would buy:
If your BCD is bigger than 15 centimeters, DO NOT FEAR. Simply drop Kerry a line at hello@firebrandlingerie.com letting her know your BCD measurement, and she will draft it for you.
Kerry is fantastic and doesn’t want anyone to be left out of her patterns, so, as she works to expand the size range that one can buy on her site, she’s offering this custom draft option. Thanks, Kerry!
Printing Your Pattern
The Jet Set is a bit unique in how it’s printed. It comes in a single page, which is perfect for all of you who use a projector or have your patterns printed on large-format pages. But, if you’re printing at home on letter or A4 paper, you’ll want to choose the “poster” setting in Adobe Acrobat:

You need to set your tile scale to 100%, and you can set your overlap to whatever size you prefer – this is the rough amount your pages will overlap. I like to set mine at 1/4″.
Once you print this way, you can tape the pattern together just as you would with other PDF patterns.
Pattern Adjustments
Figuring out your underbust measurement
So the band on the Jet Set bra is a little unique! If your underbust measures 40″ or smaller, I’m going to recommend that you cut the largest band. This is because the largest band measures 40″. (Please ignore the numbers on the band; they are confusing and we’re going to get around that.) We will then trim some off in a later step, but this makes things easier for now.
underbust greater than 40″
If your underbust measurement is greater than 40″ underbust, cut the largest wing pattern piece, then follow these nifty instructions from Kerry on how to make the band a bit larger. Again, the reason we’re doing this is because the largest band measures 40″. The numbers on the pattern are confusing, so we’re circumventing that by cutting the largest band and adding to it.
You need to find this number: ([your underbust in inches] – 40)/2. In other words, however many inches your underbust is over 40, divided by two. This is how much you’re going to add. So, if you have a 52″ underbust, you’ll add 6″ (52-40=12; 12/2=6). If you have a 42″ underbust, you’ll add 1″ (42-40=2; 2/2=1).
When Kerry says “add however much length you want to add,” go ahead and add the amount we just determined.
Dealing with HH in the Jet Set Bra
When you look at your pattern piece, you’ll see that they have a “Y” measurement listed. This is the horizontal hemisphere or HH. For example, on this 14 cm BCD pattern piece, the Y measurement/HH is 33 centimeters, or about 13″.

Smaller HH than listed y measurement
If your horizontal hemisphere/HH in centimeters is smaller than the Y measurement listed, Kerry has you covered with this video on how to alter your pattern:
Larger HH than listed y measurement
If your horizontal hemisphere/HH in centimeters is larger than the Y measurement listed, Kerry has you covered with this video on how to alter your pattern:
Choosing Materials
One of the things I love about the Jet Set Natural bra is that the materials can mostly be purchased at local sewing shops, though a few of the materials I’ll recommend you grab from a bra supply source:
- 1 yard of woven/non-stretch fabric: I used a cotton poplin for my first bra, but you could use quilting cotton, satin, rayon, or even classic bramaking fabrics like duoplex or sheer cup lining. If you are newer to sewing, I highly recommend you choose cotton poplin or quilting cotton. You could, for example, use this brocade from Porcelynne, which is what I think I’m going to use this time …
- 1/2 yard of 1″ elastic: I used 1″ strap elastic from Porcelynne, which I love because it’s shiny on the outside. You can buy it here in white, or here in black. But you can also use any 1″ elastic. B’Wear (which is in Europe) has a lot of lovely options in fun prints!
- 1 yard of strap elastic: I used 3/4″ white strap elastic from Porcelynne (which is also available in black here, and other colors are also available). I personally feel like 3/4″ straps are perfect for larger busts!
- 4 bra strap rings and 2 bra strap slides: I used white 3/4″ slides and white 3/4″ rings from Porcelynne (black rings here and black slides here; other colors also available). The size of your rings and slides should match the size of your strap elastic.
- 2 – 1″ G hooks: I bought these G hooks from Amazon. Of course, this is a way larger set than you need, but I forgot to buy them until I was almost done with my first Jet Set bra, and this had one-day shipping 😂 Porcelynne has them in smaller quantities in white, black, and even silver and gold!
Where to Buy Bramaking Materials
Here are a few of my favorite sources for the non-standard bra materials:
USA:
- Porcelynne – has everything you need for this project, including fabric
- Gigi’s Bra Supply
- Bra Builders
Canada
Europe
United Kingdom
Australia & New Zealand
Your Homework
- Take your measurements and record them using Sew Busty’s FREE bra project planner printable
- Purchase the Jet Set Natural bra pattern from Firebrand lingerie using the code sewbusty at checkout for 20% off
- If your BCD is greater than 6″, contact Kerry at hello@firebrandlingerie.com to ask her to grade the pattern for you before purchase
- Print and make any adjustments you need to your band and cup pattern pieces to suit your HH and underbust measurements, as described above
- Purchase all the supplies listed above – fabric, elastic, strapping, slides and rings, and a G hook
The next installment of the Jet Set Natural bra sew along will take place June 14! We’ll be talking about cutting the fabric and sewing the lining and main fabric layers!
Questions about these last steps on the Jet Set Natural bra? Drop a comment below, or ask on the Sew Busty Facebook group or subreddit. Also join our LIVE CHAT about this week’s sew along installment on June 9 at 5 pm Eastern time. Click here to RSVP so I know you’re coming <3
Some of the links in this post are affiliate links. Using the affiliate links in Sew Busty posts is a great way to support the costs of running Sew Busty, as when you click on the link and purchase the item, I will receive an affiliate commission at no extra cost to you. This helps me pay for the hosting, domain, design, and other costs associated with administering this site. All opinions remain my own.


Ali Weaver
June 7, 2021I was looking at this pattern yesterday and freaking out about how to figure out my BCD and HH, thank you so so much for giving me super simple instructions on how to do it! I’m now excited to continue working through this bra pattern!
sewbustycommunity
June 7, 2021Yay! I know it can be a bit confusing, especially if this is your first time figuring out these measurements! So glad to be of help. Hope you’ll enjoy the rest of the sew along!
Desta
June 11, 2021Judging from the videos, this pattern does not include the seam allowance. Is that correct?
sewbustycommunity
June 11, 2021This pattern *does* include seam allowance! You can remove seam allowances to do the adjustments, but it’s not strictly necessary.
Desta
June 11, 2021Thank you!