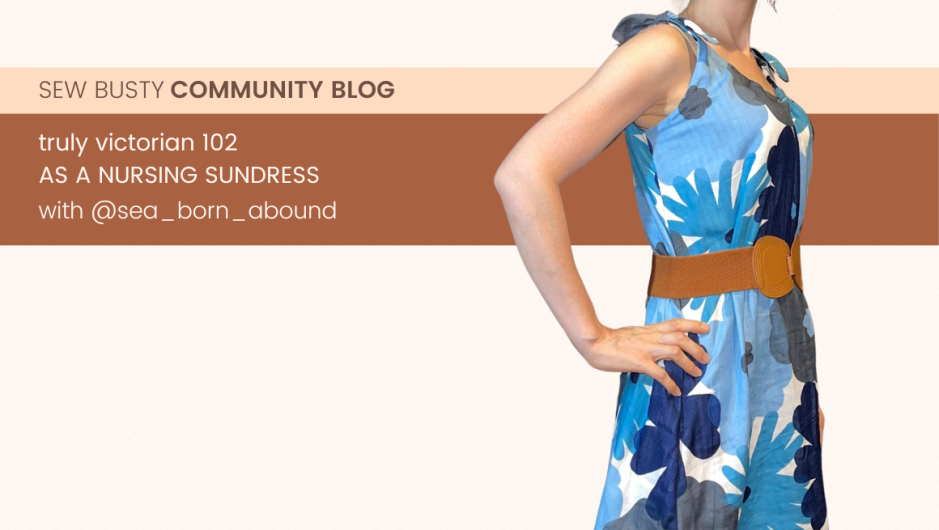
Community Blog | Truly Victorian 102 as a Nursing Sundress with Sea Born Abound

Planning:

I have been searching for the perfect nursing sundress, as I live in a tropical country that is hot and humid (the feels like temperature was recently 46C). I’m also picky as I wanted it to be a woven dress with straps that will cover a bra and not too tightly fitted but also not a sack. Nursing clothes are often lumped in with maternity and frequently patterns are made for knit fabric so the pickings were slim.

After another fruitless session of browsing through patterns and Instagram posts, I remembered that I already own the something that might be an option with some modifications — the Truly Victorian (TV) Chemise and Drawers (TV102). 

Now, I’ve owned this pattern for so long, that what I have is still the hand-drawn drafting on paper (and it uses a different sizing system than the current version) but I did confirm with the designer that although it’s gone through a few redrafts (and is now available as a PDF) that it is substantially the same and I didn’t need to get the new version.

A few things to know about TV patterns — as they are based on historical garments, they are usually drafted for a higher and smaller armhole than modern patterns and the chemise is made to be tightened with a drawstring so you can wear it both on and off the shoulder underneath a corset. This is important for how I’m altering it.

Sizing wise, I used my high bust (HB) measurement as my starting point. My HB is ~29” (73.5 cm) and the M (as the sizing on my copy goes) is 30” for full bust (FB). My full bust (FB) is almost 35” (88.5 cm) with a very significant asymmetry due to nursing; this leaves me with an almost 6” difference between high and full bust.

I am someone who needs to use their straight HB measurement to decide on a size to ensure it matches my frame. Many people find that HB+2” works better (see previous Sew Busty posts). 

Both Front and Back Pattern Pieces

Before I even get to the full bust alterations (FBA) needed, I need to take some of the width out of the back because I don’t want the dress falling off while nursing and I have a very narrow back width. (This comes up on nearly every pattern and also up the last time I made the chemise and other TV patterns). After measuring myself and the pattern, I reduced the width at center back by 1”; although I thought I might need another 1/2” taken out; I can just add a seam to center back if needed.

I also traced off the pattern and graded it from M under the arms to L from the notch to the hem so it’s not form fitting at my hips, as I am slightly pear-shaped. I wanted to keep it slightly A-line rather than clingy.

The front is where we get to the tricky part of alterations as I have a very high set bust and apex; the bottom of my bust is almost in-line with the top of my armpit.

Traditional FBAs don’t give need the extra room where I need it as they assume the extra space is needed lower, so I often need what another Busty Sewing community member calls a “high FBA” — which involves drawing a line through my apex point horizontally, cutting off the pattern and hinging to the armscythe and then spreading. This gives the room where I need it.

High FBA demonstrated on a Cashmerette pattern

In this case I made a 2 1/4” FBA for a total of 4.5” which is less than the ~6” difference between my FB and HB but this pattern already has a lot of extra ease.

I then trued and redrew the armhole and center front. The straps are also now set in further so I don’t have to do a separate narrow shoulder adjustment. The center front is now wider and “too big” but this is where the ease I will need to pull down to nurse will come from. 

Finishing the chemise is also another place I needed to make small changes. The pattern originally calls for you to overlock and then apply lace with ribbon over the top. I have decided to do a partial self lining to finish (down to the notch) which means I need to add the 1/2” seam allowance for the lining to the neckline. In order to snug up the front neckline, I will run ribbon through the a topstitched channel at the neckline and out eyelet holes at CF. I am not adding to the armholes as they are good as is. I am also adding pockets to the side seams and marked the pattern for that and am using a pocket piece from a different pattern. I plan to use this method of bag lining the facing to avoid stitch lines from running over each other.

Actuality:

All of my preplanning paid off with very minor changes. I ended up having to take out 1” of each side of the back with a pleat as it was too wide still when I moved my arms. The front is slightly too low which is perfect as that will eventually be gathered to allow for nursing.

I did have issues with the bag lining. Even though I stay-stitched my fabric, it must have stretched as the facing and fashion fabric weren’t lining up perfectly and I ended up having to fudge the results. The straps were also really too narrow to bag line properly and some of the fashion fabric layer is distorted — but this dress has a gathered neckline which hides the distortion unless you are very close.

I also ended up adding in faux tie straps (from this free pattern and tutorial) which serve two purposes: to hold bra straps and to add detail at the shoulders.

Faux tie, which is sewn on one side

The gathering of the neckline is done by way of a drawstring that is secured to the strap at the shoulder and comes out of an eyelet on the facing.

A trick I came across recently for hemming a dress or shirt that has a curve is to run along the edge with a serger with the differential feed turned all the way up. This slightly gathers the edge and lets you turn and hem easily without it getting wonky. I tried it out and it worked very well! I didn’t get any puckers or weird spots in the hem.

Finally, everything was serged to finish as this was a very shred-y fabric. 

Final Dress Thoughts:

This was a successful experiment and I already have ideas for making more dresses. Finding woven nursing dresses that don’t require zippers or other hardware to nurse in is difficult. It’s even more difficult when you need to have bra coverage and are busty. Altering the Truly Victorian pattern also meant that I started out with a base that already has a smaller armhole – key to preventing gapping when I have a high-set bust and narrow shoulders. I tried some things that were less than successful (the bag lining for the narrow straps) but was able to work around that to have a wearable dress.

Sea_born_abound has been sewing for over 30 year, originally learning when she was a child from her mother and grandmother. She started taking it up seriously as a hobby and relaxation tool as a young adult when nothing fit properly.

Community Blog | Making a “Me Size” Wardrobe with Carly

If you told me when I was 17 that in 13 years I would weigh 50 pounds more but post pictures of myself in a bathing suit that I made on Instagram, you would first have to explain what Instagram is, but after that conversation was over, I would be shocked.  Like many 17 year olds in the past twenty years, I had distorted eating habits and body dysmorphia.  None of this is uncommon.  But sewing has given me a new perspective on myself and of my body that has changed drastically since I was 17.  

I posted this in my stories, something I wouldn’t even dream of years ago.

One of the biggest changes I’ve noticed is how taking my measurements doesn’t mean anything to me.  It is a completely neutral act.  Is my under bust measurement 1” bigger than it was the last time I measured?  Yes, but all it means is I need to size up.  So what?  Sometimes it doesn’t even mean that I need to size up!  I’m not sure if I am only speaking for myself here, but I feel like sewing has desensitized how I feel about women’s clothing sizes.  

I measured a size 16 for the bust of this dress and a 12/14 for the rest of it.  It’s cute, and it doesn’t even matter what size it was.

We always talk about how your ready-made size does not reflect your sewing pattern size, and while that is fine, we need to recognize that sewing sizes in general are very arbitrary.  This is even more apparent when we start using different pattern designers outside the Big 4.  I am a size 12 for the True Bias Lander shorts, but I am also an 8 for one of Gertie’s Patreon patterns. 

The numbers don’t mean anything, and sewing allows us to understand that these numbers really are almost random, and just tell us which lines to cut out. 

I think my husband said it best when I told him I was a size 12 for a pattern and he said, “12 what?  There’s no units, that size means nothing.”  Leave it to the scientists to put things into perspective.

My final takeaway is that clothes should fit ME, I don’t need to fit into my clothes.  Once I realized this, my world changed. 

Sewing gives us the power to make something fit exactly how we want it to.  We are free to make any adjustments we want to a pattern so it fits us perfectly.  That power made me feel amazing, and to this day I am the most confident when I wear clothes that I made that fit me, not wearing something I “fit into”.  

Size XL Mighty Sports Bra pattern, that fits me perfectly!

Sewing my own clothes (and therapy, as well, can’t forget that) has freed me from this idea that I had to measure to a certain number, or I had to fit into a certain size to be happy.  What makes me happy now is creating something that is just for me, no one else, and knowing that I put time and effort into it to make it fit me exactly how I am.  

Carly (she/her) can be found on Instagram (@sewingyourwildoats) or at her blog with the same name, sewingyourwildoats.com, where she mostly shows tutorials on how to add pockets to patterns!

Community Blog | Body Image with Lauren

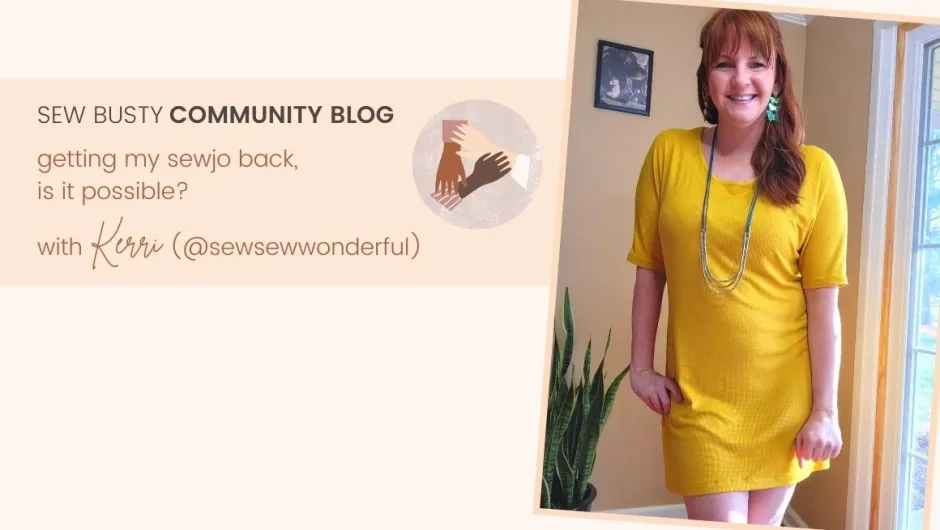
How many of us got into sewing because we didn’t fit in “off the rack” clothing? I know I did. 

It started with a middle school trip to the opera, we had to wear really nice clothing to attend. I don’t know if we were truly poor but money was always tight and clothing in the department stores either didn’t fit me in the kids section or was more money than we could spend in the adult’s. The tween/junior’s section was no help either, I was a B cup sometimes C cup chest with matching booty, baby teen of the late 80’s.

Fast forward to my 40’s, sewing has always been there for me when I didn’t find things I wanted in store or just wanted to express my truest self. I have skirts made of thrifted curtains, a wedding gown of store bought tencel linen with thrifted vintage lace bustle, bras out of old peignoirs. 

Fabric and fibers are in lots of places, once you start to understand the construction, source materials are everywhere.

It hasn’t always been sewing successes. Early on, as a high schooler, I submitted garments for our local county fair. I made a self drafted Romeo and Juliet costume. I didn’t know anything about wearing ease back then but I remember cutting the bodice out on the floor of our living room with a paper bag as my pattern. Thankfully my best friend was the right size to fit it for the fashion show. Mistakes still happen, just recently a pair of jeans that my sewing retreat group and I worked on didn’t fit me right but fit my husband quite well.

As my sewing skills continue to grow and be tested, I can’t help but notice how intertwined self esteem and body image are. I still have a hard time with my mistakes, or when the fit isn’t just right. Now, instead of thinking I need to change my body, I know I can change a seam. So much easier.

I can now only imagine how hard that must have been to navigate for my mom, having always been a straight size but also sewed clothing she wanted. I am frequently infuriated by the clothing industry on behalf of my teen and elementary schooler. I want better for them, so body image bs will not continue with me. It made me do some digging, so here’s some of the science of it. Just like sizes are just data points, our brains are doing brain’y things.

Body image is both a mental picture of your own body and how you see yourself in the mirror.

Body image is a four part concept in our gray matter:

  • Perception
  • Affective
  • Cognitive
  • Behavioral

Perception is how you think you look but might not match reality. Affective is how you feel about your body in relation to how it looks. Cognitive is the beliefs and thoughts you hold about your body. Behavioral is what actions you take in relation to body image. All of these can have positives and negatives, and the way to counter the negative is mindfulness. 

Mindfulness can look like walks to enjoy the scents and visuals of a place, self acceptance talk, the way we talk to ourselves in our heads (“my glutes are so strong, they help hold me up or help me sit down”) and being in the moment. 

Children as young as 3 can have body image issues.

Body image is both a mental picture of your own body and how you see yourself in the mirror, self esteem is how you value and respect yourself as a person and can affect how you take care of yourself. This is why I feel it’s important to recognize and get rid of our inherent biases, children as young as 3 can have body image issues.

I continue to sew these days because I love garments made out of natural fibers. Silk, denim, cotton lawn, lightweight knit merino wool all these fibers not only wear well in the climate where I live but they keep me from overheating. I don’t avoid all man-made fabrics but through sewing I have found fibers that help me feel good in my body when sometimes it’s hard.

Sewing is for everyone, every body, every gender (I don’t think sewing has a gender but historically it has been marketed to those who do underpaid and unpaid domestic labor, mostly minorities and women) but body image has been used as a selling point in so many ways that it’s always going to be something to examine with garment making.

Just like with making a seam, when we know better we can do better. I choose to keep stitching and improving, won’t you join me?

Lauren Durr (she/her) is a Los Angeles based creative educator and entrepreneur. She helps students young and vintage, cut through body image BS by making, altering or editing garments for the body they have right now. You can find her on instagram @laurenmakesitwork.

Community Blog | Bra Making | Petite Stitchery Colby Bralette with LC Courtney

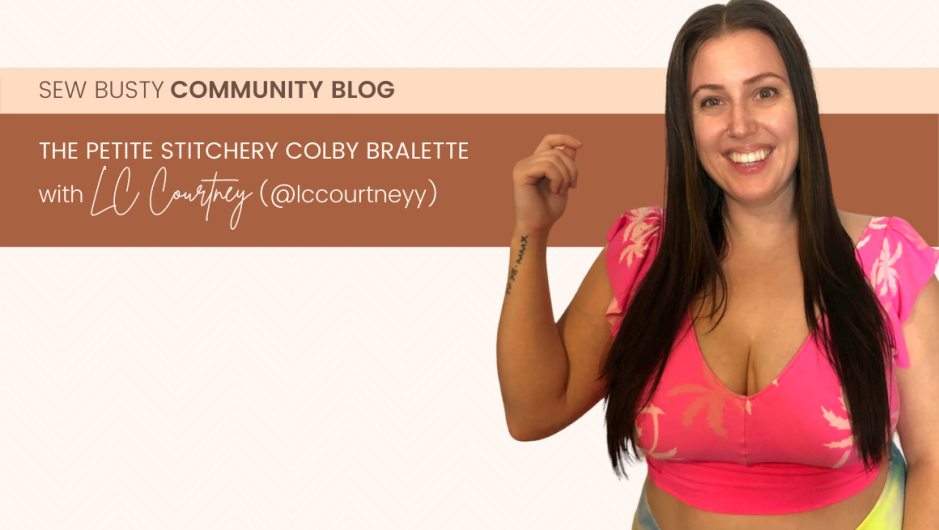
Hello Sew Busty! I am LC Courtney and I’m here to guest post and chronicle my modifications on the Petite Stitchery Colby bralette. I am outside the size range for the largest cup — a 5 inch difference — as I have a 6.5 inch difference between my upper and full bust. My best fitting RTW bra is the Elomi Matilda in 38 H. My chest tissue is full on bottom, shallow on top, and gravitates into my armpit area if left unsupported.

Hopefully I can share something that you can find useful in your own bra making adventure! 

Before we get too far, I am by no means a bra sewing extraordinaire. I have plenty of education in trial and error though. I’ve dabbled in sewing for a little over a decade and have dyscalculia. If you are searching for a post with super technical math formulas I am not your person. 

Onto the good stuff. My first version of the Colby turned out beautifully but after wearing it for some amount of time, the band tended to migrate up under my bust and the top of the band sat near the bottom of my chest tissue. The strap seam was pulling too far forward as well.

The fix seamed (ha!) easy enough. It was fairly evident that I needed more material at the bottom of the bra. Using a soft tape, I determined that the seam migrated up about 2 inches up from where it needed to actually sit. Because we know in sewing that you can always cut off more but not really add it back, I added the entire 2 inches to the bottom of the Colby pattern pieces, knowing I might need to cut a little off later.

A little paper, some tracing skills, and a Sharpie gave way for a more generous pattern. 

Like my original version, I chose double brushed poly for both my main and lining fabric.

On this one, I added a layer of mesh in the side cup portion to encourage my breasts to stay closer to the front of my chest and not migrate toward my armpit. I’m happy with the extra support this choice provided. When I make another, Colby I will add the mesh to the back pieces as well.

*Quick tip- a glue stick can be your friend here. Glue your mesh to your desired pattern pieces and treat it as one. 

If there is one takeaway I can give you for this pattern it is- DO NOT SKIP THE CLEAR ELASTIC, I repeat … DO NOT SKIP THE CLEAR ELASTIC (silicone elastin if you want to Google search and purchase some for your sewing stash).

I prefer the elastin over the thicker swimsuit elastic you can buy. I put clear elastic into every single seam with the exception of the neckline & where I joined the bottom band prior to folding it over.

You won’t stretch the elastic while you are sewing, but are using it to really reinforce the seams. I have a Brother serger and there is a little hole in the presser foot you can feed the elastic into and it really makes adding it a breeze. If you don’t have a Brother, I believe there are similar feet you can order for the same purpose. You’ll get a much sturdier finished garment using the clear elastic.

I missed taking a fit photo here, but when I sewed up the bralette layers, it was pretty clear I should have considered the vertical stretch a little more and only added about 1.5 inches to the pattern pieces. I cut off .5 all the way across the bottom. This ended up changing the depth of the V on the back but I’ll chalk this up to a happy accident because I’m really pleased with the back. 

A couple of other design/construction details ahead: I opted to add a small flutter sleeve in lieu of burrito rolling and having un-frilly armsyces. I also used my sewing machine instead of serger for the neckline only. It was easier to keep the V detail crisp(ish) on my sewing machine. I love my serger but crisp points isn’t something it excels at. 

Without any more of my chatter, here is the finished product:

I’m looking forward to making a few more Colbys over the summer in various materials and possibly one in swim. If you have a go at your own Colby, I’d love to see! Please tag me on socials. LC Courtney on Facebook & @lccourtneyy on Instagram. 

Thank you to Lindsie and the Sew Busty Community for having me here. Happy sewing!

LC Courtney (she/her) is a desert dwelling sewist. She enjoys sewing knits and listening to podcasts. You can find her on Instagram @lccourtneyy.

Community Blog | Getting My Sewjo Back, Is It Possible? with Kerri

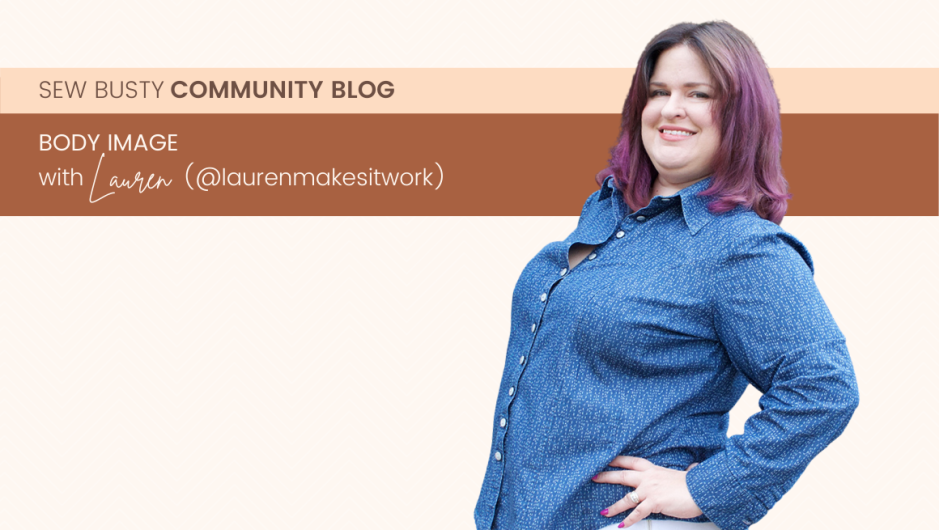
Well, here I am on the up turn of a long and dreadful lack of inspiration. Have you ever just felt,…. blah?

Lacking motivation, deprioritizing the things that make you happy?

That is the head space I have been living in for months, and it simply felt like it had no end in sight.
So, how do you get out of this perpetual state? I find most of the time I must fake it. Find even the
smallest sliver of joy and run with it. The way I most often do this is to start small. Find a very simple but beautiful pattern and just make something. It’s a start.

Kerri wears a periwinkle blue dress

Often when I force myself to start with a small project it can reinvigorate me and create that spark. We all just need a little spark sometimes, right?

To see if I could bring my joy back, I decided I would make one dress. Seemed simple enough, baby steps. Let me tell you it worked!

I chose the Arum Dress Pattern from Deer and Doe. This dress has called to me for some time. There is something to be said for a classic piece with a flattering silhouette. The Arum Dress is a woven pattern that features a dolman sleeve, back princess seams and two different length options. I find that dolman style patterns flatter those that are larger up top. After reviewing the measurement chart, I was surprised to find that I measured a straight size 44. No adjustments needed. I find this to be a rare occurrence for me as a 32 G.

To hone in on what I was trying to accomplish I made it exactly the way it was intended.

For my first Arum I used the Wine Paths print rayon that I picked up from Phee Fabrics. It has a nice stripe pattern that I knew would flatter my figure. I chose to position the stripes so they would run vertical on my finished piece. I knew this would also alleviate some frustration in the stripe matching process. My choices paid off, it was perfect!

After making the first dress I thought, could this be made in bases outside of the recommendations?

This thought led me down a positive path and it made me want to test my theory.

This time I made the dress in a wonderful Art Gallery Lemon print cotton spandex blend. I knew
choosing this fabric would pose some challenges, particularly because this pattern has a neck facing instead of bands. It made me wonder, should I convert the neck facing to a more traditional knit band?

After some thought I knew it was not the look that I wanted, I really wanted the same clean look as my previous dress. I figured it couldn’t hurt to do the facing exactly as I had done before, what’s there to lose? For this I needed patience and oh, so many pins. To my disbelief it came together like butter.

My confidence now restored and gears turning I pondered, can I make it work in rayon spandex too? My third dress was a rayon spandex rib knit, in a bright sunny yellow. I knew this fabric choice was risky as it has an abundance of movement but again, I pushed through. Sticking to a very similar process as the dress prior. Pinning and pinning some more. I really had no faith this would work, but it worked again.

With my sewjo now fully intact, I decided to make just one more.

For the last dress I went with a more muted but classic choice, using a lovely lightweight denim, a fabric closer to the original recommendations. Knowing I had previously put myself to the test with more finicky fabrics this one came together smoother than I imagined. From beginning to end, it only took 1 hour! It was exactly what I needed to come full circle.

Now fully invigorated, I can’t help but feel inspiration all around me.

Taking a small step approach works! It can work for something as complex as depression, all the way down to simpler day to day frustrations. You can take something simple and turn it into a wealth of inspiration. I know starting something at all can seem too big a task at times, but it is these simple actions that create momentum. Baby steps start us down the path to finding ourselves. Simply knowing that hobbies can be the outlet you need to find your joy and bring back that spark is sometimes all it takes!

Happy sewing and may your sewjo be forever in your favor!

Kerri is a sewist with about 5 years of experience. She is a mom of 3, a lover of fashion and all things vintage. She puts her heart and soul into everything she does and that is why she is so in love sewing: She can make things that are uniquely her! Find all of Kerri’s makes on Instagram @sewsewwonderful

Community Blog | How to: Seated Measurements for All Types of Bottoms (i.e., for wheelchair users) with Lolie

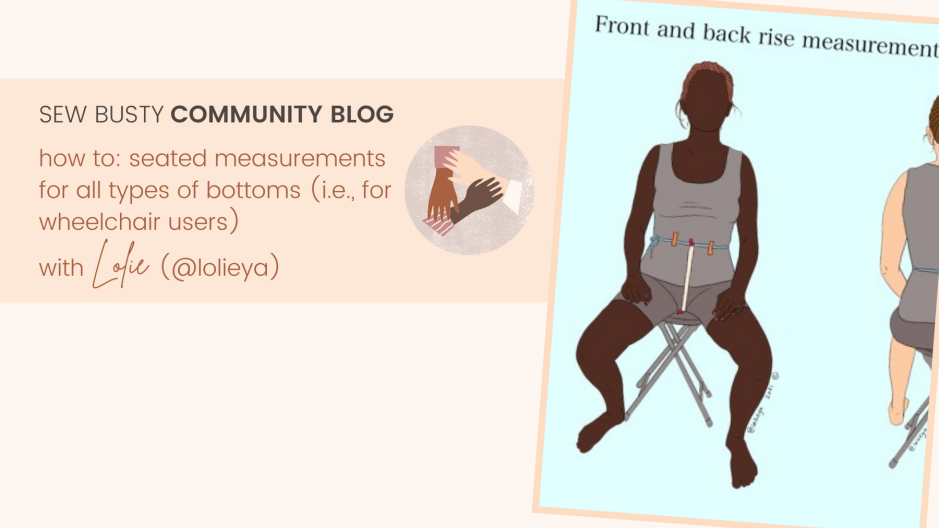
Hello, Lolie here (@lolieya on IG)! I am here today to show you my process to get measurements for panties that fit well for the permanent seated position, meaning for wheelchair users — but anyone that sits is welcome! You could use this tutorial for any kind of bottoms, but we’ll be focusing on underwear. I’ve been a full-time wheelchair user for 4 years now and getting panties/pants/bottoms that fit have been close to impossible. Let me guide you as to why and show you some solutions I’ve found.

Bottoms are complicated to fit for wheelchair users because we traditionally fit bottoms standing up. Every single book, tutorials, YouTube videos and blog posts on fitting seems to approach it that way. But since wheelchair users are not standing upright … it’s not useful for our fitting purposes. If each time someone would present a fitting problem with a picture, it were shown seated too, that would help to identify which existing technique would be best to improve the fit of the pattern. The same problem shown standing or seated will just not look the same, so it’s hard to draw parallels between them without being shown what it looks like.

The final result

Also, fitting bottoms for the seated position isn’t easy. We’re creating a different shape altogether, so we need, for example, to add shaping at the knee, elongate the rise in the back, shorten it in the front, elongate the inseam (pants will ride up), add shaping to the side seam at the hip level … The trickiest part, in my opinion, being to remove the shaped excess where the legs meet the torso at a 90 degree angle.

But for now, we’ll focus on the top part with panties. We’ll of course need appropriate crotch depth, crotch rise measurements, waist and hips and waist to hips, taken seated. Taking seated measurements is also good for anyone to ensure that, when choosing a size in a close fitting garment, you’ll end up with enough room to sit comfortably. 

In 2016, just before I had to start using my wheelchair all day long, I had just drafted a panties block for myself, and they fitted very well. I loved them and made a ton. They were medium-high rise, bikini style (low cut on the legs), really regular panties just like I personally like them. This pattern was literally drafted for me.

However, when I tried them again recently, they didn’t fit at all anymore. I had lots of excess fabric in the front (they went higher than my rib cage) and they were short in the back. Also, even if my measurements  were very similar, my body shape had changed a bit because of the year I spent in a hospital bed. My abdominal muscles were making themselves scarce, which tends to make the belly protrude. So, I had to go back to the drawing board on a quest for a comfortable pair of panties pattern once again!

Let me show you both patterns on top of each other so you have an idea of the difference. It’s impressive. It was drafted for the same person, with the same weight, the only difference is being seated vs standing.

The pattern on the bottom is the new one and the one in two pieces, off-white, is the old one.

At first, I thought I’d just get my lingerie pattern drafting book and make another pattern with my new measurements. But it didn’t work because I didn’t know how to properly measure myself while seated. I was at an impasse, as I searched the internet on how to take those measurements, and couldn’t find much (hence why I’m writing this).

Eventually, I came across Apostrophe Patterns and their MyFit Underwear pattern generator. It generates a pattern based on a number of personal measurements you input in the system. Once you purchase a pattern, you can generate as many variations as you desire, so I thought it was a safe bet. The pattern has many options, and thorough instructions. There is also a maternity option which would make it simple to tilt the waist forward, but most of the time these options offered will cover the belly and make a bigger waistband, which is not what we want, so I preferred to go with only measurements.

To take the measurements, you will need two strings/piece of lingerie elastic long enough to go around you, scotch tape (any kind), a wooden stool, a mirror, two rulers or one ruler and something very thin and straight.

First, for the crotch depth:

  1. Sit on a flat and hard surface, preferably a stool, to see all around easily, or adapt to your needs.
  2. Put a string (light blue) around your waist, in exactly the same place where you want your waistband to hit, and tape in place (orange). It’s very important to be as precise as possible about this.
  3. Your waist placement doesn’t have to be parallel to the floor, if that’s your preference.
  4. Take a big ruler and place it between your thighs, one end perfectly flat on the stool.
  5. Take the other ruler (or any straight object) and place it at the same height as of your waist string and perpendicular to the first ruler. Mark where they cross. This is your front crotch depth measurement. 
  6. Do the exact same but in the back, asking for help if needed so the rulers stay at a 90 degree angle to each other.

Tip: you can use a clip to mark where the rulers intersect so it’s easier to read.

The administrators on Apostrophe Patterns page suggested adding 1,5cm (0.5″) to the back rise and subtracting 3,5cm (1.5″) from the front depth, so I suggest the same to you. This method gave me great results.

Example:

Let’s say I have identified a front crotch depth of 21,5cm (8.5″) and a back depth of 21cm (8.25″): 

Front: 21,5 – 3,5 = 18 cm (8.5 – 1.5 = 7″)

Back: 21 + 1,5 = 22,5 (8.25 + 0.5 = 8.75″)

For the rise, stay in the same position. You will need to use a flexible tape measure. 

  1. Put the flexible tape (light beige) between your legs, as shown in the picture.
  2. For this measure, it’s useful to have at least three clips (hot pink) and string or elastic (light blue) on your chosen waist placement, well taped in place (orange).
  3. Clip one end of the tape measure onto the string.
  4. Put another clip on the tape measure where you want your inseam to be (the seam from hem to hem inside of the legs).
  5. Finally, clip the tape with a third clip on the waist string in the back, making sure you don’t tug on anything in the process. It’s supposed to be snug but not tight. Adjust if necessary by looking in the mirror.
  6. Once done, take the tape measure off while keeping the clips in place and note the measurements. Don’t mix up the front and back!

Now, our last step is to take our hip, waist and waist-to-hip measurements seated. 

For the waist, just take the measure on top of the blue string, while seated. It doesn’t matter if your waistline is tilted for this. I have no pictures as it’s pretty self explanatory.

For the hips, it is not complicated. 

  1. If possible, stand up and wrap the tape measure (light beige) around your hips, parallel to floor, making sure it’s in the widest part of your bum/hips. Tape it or hold it in place. 
  2. Just note that it will probably not be parallel anymore once you sit down and that’s ok.
  3. Sit down and let the tape expand around you to take the measurement. 

Tip: If you’re not able to stand, alternatively you can roll over in your bed, have someone tape the flexible tape measure on the widest part of your bum, transfer like usual, make sure the tape is still well placed and measure around yourself.

Waist-to-hip measurement

  1. Measure from your waist string to where your hip line (the tape measure) ended up on the side. 

Those are the measurements that I would start with and add in a pattern generator or use for pattern drafting instructions. Then, make a toile of your new pattern and adjust if necessary. Our bodies come in many different shapes, so there might still be some things to fit even if it was made to your own measurements. 

If you want to use an existing pattern, choose a your size according to the numbers you found, but know that it wasn’t drafted for someone sitting so there will be lots of other things to adjust. But with these and knowledge in pattern alterations, you can certainly do it. Trousers would be much more difficult than panties to adapt though.

About the MyFit Underwear pattern generator, if centimetres are not your jam, there’s the option to use both centimetres or inches in the pattern generator, so no need to worry! I usually use inches, except when I do pattern drafting. I find centimetres easier to calculate and more precise. 

And there you have it! Now, you only have to draft your underwear block using your preferred method or use a pattern generator system and toile your comfortable masterpiece!

Apostrophe Pattern offered me a 15% discount on their patterns for anyone reading this blog post and wanting to try their formula out! This is not an affiliate link, just a discount I asked for you guys because I want you all to be able to feel fabulous in your clothes, no matter your physical needs!

Discount code: SEATED15 

Come follow me on instagram @lolieya for more info on fitting for the seated position and all my creative endeavours! Thanks Sew Busty for having me 💗

Lolie (he/her) sews because she likes wearing comfortable, cute clothes and cute clothes that fit are a rarity for wheelchair users like her. Wearing garments that she feels good in is a way to care for herself, feel empowered and relax through stressful medical stuff and, just, life. You can find Lolie on Instagram @lolieya.

Community Blog | Planning a capsule wardrobe – aka thinking about sewing even when you aren’t sewing with Laura

I think we have all been there, we have a stack of patterns and a cupboard full of fabrics and so many plans for things to make with them. When our precious sewing time finally comes around after work is done for the day, and the house is clean, and the family are fed, and the kids are in bed, and we are paralysed by indecision.  What do we want to work on? We end up spending half of the precious allotted time just deciding which project to start.

This is why I take a pre-planned capsule wardrobe approach to my sewing. Hi, my name is Laura and I make plans. All the time, in every aspect of my life. I even plan in spontaneity! 

Why does capsule planning work for me?

I love sewing, in particular, having control over the way I dress. But left to my own devices I would have 900 pairs of jeans and nothing else in my wardrobe. They are my favourite thing to make but we all know that a pair of jeans is not an appropriate outfit on it’s own. There are also occasions when jeans might not be my first pick to wear, for example when the temperature outside is above 20 degrees Celsius (68 degrees Fahrenheit). So I need to make some other things too.

By planning a capsule collection, I can make sure I have pieces in my wardrobe that will definitely go together and can be worn interchangeably. I wear almost exclusively separates anyway because that is my personal comfort zone, so having tops and bottoms and toppers (think jackets, cardigans, overshirts etc.) that work together takes all the guess work out of getting dressed.

Some of my capsule collections have been designed with a particular activity in mind, such as summer holiday capsule or work wear capsule. Some have just been designed centring around a particular colour or print I want to include in my wardrobe.

What is a capsule wardrobe?

The answer to this is really whatever you make it. There are several established capsule wardrobe templates that you could use. For example:

  • a mini capsule, which I first heard about from Whitney (TomKat Stitchery on youtube)- 3 tops, 2 bottoms and 1 topper.
  • the 3×3 grid capsule – 3 tops, 3 bottoms and 3 toppers
  • the perfect 10 – 4 tops, 2 bottoms, a dress, a sweater and 2 layering pieces (jacket or cardigan).

If all of those feel like a lot to start with you could start with one bottom piece (trousers or a skirt) and two tops that will go with it. This is a capsule wardrobe in its most simple form.

For some people thinking more than one project ahead is too much, so what about a rolling wardrobe model? Start with one wardrobe piece, for example a dress in a print you love. The next thing you make will go with that item, for example a cropped jacket in a complimentary colour. The next item will go with the 2nd item but doesn’t necessarily go with the first, so in this example maybe a skirt in the same fabric as your jacket? and so on…. This method allows you to work spontaneously but will still mean you have a cohesive closet to pull from with items that go together. (If this interests you check out this pattern review thread where they are looking at this concept.)

Top tips for planning your capsule wardrobe

  1. Plan around existing pieces in your wardrobe – Do you have an item in your wardrobe that you love but it doesn’t get much wear because you don’t have much that really goes with it? Why not make it some friends? Remember that not everything in your capsule has to be me made. Why not buy a really great classic skirt and make three tops to go with it?
  2. Think about what you love wearing – maybe you need another one of that item in rotation? This might be a good jumping off point for planning a capsule.
  3. Plan around a theme – workwear, loungewear, formal wear, all wovens / knits, activewear, work to weekend, holiday wardrobe (etc. etc. you get the idea). No matter what your life looks like there is a capsule for you.
  4. If you are including prints choose one multicoloured print as a starting point, then pull in co-ordinating colours. Personally, I do not feel that comfortable with print mixing so I usually go for prints on the tops in my capsules and plains on the bottoms and toppers. That way I know everything will work together. BUT if you love print mixing then go for it! Just try and keep everything in a cohesive colour scheme.
  5. What comes first the pattern or the fabric? – I have done capsules both ways and both work so it really depends on your process and what you want to achieve with the capsule. Personally, I find I buy more new stuff if I start with patterns because I won’t often have the perfect fabric in the perfect colour in my stash. If I start with fabrics, I can usually find a suitable pattern that I already own.
  6. Know your neutrals and incorporate them into your capsule – this will help you make pieces that fit into your wardrobe as a whole. Remember that neutrals don’t have to be black brown, white, grey etc. Hot pink and neon green can also be neutrals, they are just colours you return to over and over. Mine are currently olive green, brown, ivory and navy
  7. Consider accessories – If you knit or crochet or do some other fibre art why not consider hats, shawls, gloves etc for your capsule. Shoes, bags and jewelry also change the way an outfit can look. Think simple white tee for a day at the beach but put on a statement necklace for an evening out.
  8. Step back – once you have an initial plan step back and look at it with an evaluating eye. Does this look like something you will actually reach for? If not, why not? Does the overall collection look too wild/ colourful/ boring etc? If you don’t like the way certain styles look together, make sure you aren’t including them. The example I always use for myself is cropped tops with low rise trousers. Your examples might be different. It is about understanding your own style preferences and honouring them.
  9. Plan in a spontaneous make – If you are the type of person who thrives on falling in love with something and just diving right in, but you also want to try your hand at capsule sewing, why not plan in some spontaneity? There is nothing that says because you have planned these 6 or 9 items that you must make them one after the other. Maybe make one thing from your planned list and then allow yourself to choose a project at random. Then go back to your planned list.

Capsule wardrobes for busty sewists

When Lindsey from Sew Busty asked me if I would write a community blog post about capsule wardrobe planning one of the questions she asked me was “how does being busty effect your wardrobe planning?” I have thought a lot about this in the weeks since I agreed to write this post. For me I am always aiming for items that I will wear and love. So perhaps the real question here is “how does being busty effect what you wear?” The answer is, it does affect it but not in the way you might think.

We have always been told that busty people should wear V necks and wrap dresses because less fabric on the chest will make you look smaller. In contrast I might be considered a modest dresser (for personal comfort reasons rather than religious ones). I choose high necklines because I have never felt particularly comfortable showing cleavage and like to be able to move naturally without worrying about showing more than I want to.

As a result, I don’t think my capsules are constrained by what will “suit” my body shape but more by my own personal style rules. Understanding your own comfort levels when it comes to clothing is key to creating a capsule collection, or even just individual items, that you will love and wear. Shapes, motifs, colours, silhouette, fibres, substrates and finishing details all feed into this. Sometimes the only way to really understand if something is really right for you is to try it. Experimentation is key and doesn’t stop. What you like and are comfortable with can change for different situations, different times of year, and develop over time. Just because I don’t choose to wear skirts now doesn’t mean I never have or never will.

I hope I have shown you how planning a capsule wardrobe can be exciting and help channel your creativity into core wardrobe pieces that will really earn their keep. If you decide to do your own capsule wardrobe please tag me on Instagram @sewnandshown I would love to see your planning.

Community Blog | Fitting Fancy Fronts: Full Bust Adjustment for Midriff + Princess Seam Top – Tia Dress and Peplum with Karey

Sew Busty has been doing an excellent introductory series on getting started on sewing for big busts, including introduction to doing Full Bust Adjustments (FBAs). While doing my two posts on doing an FBA on a wrap dress or top for Sew Busty, it occurred to me that because being able to do an FBA for various styles of garments is such an essential skill for busty sewers, it would be good for more experienced sewers who want to extend themselves, to do a series of posts on doing FBAs for less common or more challenging styles, for which standard FBAs won’t work.

Also, while Sew Busty has developed an extensive database of designers who provide patterns for a range of cup sizes, only a handful go up to my cup size. While of those that do have larger cup sizes, some only provide them for larger base sizes. In order to have a full choice of styles to sew, I had to develop skills in doing FBAs. Other members of the Sew Busty community are in the same boat, and learning to do a wider variety of FBAs will expand your sewing options.

Figure 1: Finished Tia peplum

This post includes the details of the tutorial for the FBA Laura Nash, Sew Chic Patterns, provided for the vintage inspired LN1312 Tia Dress (Figure 2a) in her Craftsy Class: Sew Vintage: The Flirty Day Dress. This dress has a princess seam bust section, and a separate midriff section attached to a skirt. To save fabric while testing the fit, I hacked the dress into a sleeveless peplum top – Figure 2b). I provide a simple skirt hack for drafting your own peplum below.

While this tutorial was developed specifically for the Tia dress, there are many dresses with similar bodices. The recently released TINAlisa jersey Vicky dress (Figure 2d) does not have the midriff section, but does have the princess seam bust section. This is one of the first designs TINAlisa has released with a large bust front, but the designer, Martina Blasius, also always includes an FBA instructions for the specific design (see Note* below), and all designs include seamlines that make large bust fitting easier.

Before I retired, I had planned to copy a Mix-It-Up hack by one of the Craftsy participants, which combined three of Sew Chic’s designs: the Tia bodice, the Beatrice sleeve and skirt, and the Phantom sleeve cuff (shown in Figure 2c)), but I don’t often have the need for such formal dresses anymore. Many other patterns have midriff panels, which may need to be adjusted if you do an FBA, and the Tia FBA instructions can also be used for any princess seam FBA. I think it is a much simpler adjustment than the one most tutorials provide.

Figure 2: Style examples of princess seam bust with midriff panel: a) Tia dress; b) Tia Midriff; c) Tia, Beatrice, & Phantom mix-up; e) TINAlisa Vicky

SewBusty has tutorials on the two main ways of determining the cup size you need, one is primarily used for sewing clothes, and the other used to be the main way to measure for bra cups, but some pattern companies mix it up, including Cashmerette.

While the Tia pattern doesn’t include cup sizes, the FBA tutorial specific to this style of bodice provides instructions for (sewing cup) A (cup reduction) to DD cup – calculated by subtracting high bust (HB) measurement from full bust (FB) measurement. Cashmerette, on the other hand. uses bra cup sizes.

Figure 3: My cup size(s)

Because the Craftsy class materials didn’t go up to my cup size, Laura of Sew Chic provided details for the adjustments I needed, and information for going up additional cup sizes. Unfortunately, that information was provided in the questions feature on a platform that got closed and sold on. So while the class is still available on the new platform, and the Sew Chic FBA tutorial is also available on their website, the information about doing a bigger FBA is only in my class notes, hence my wanting to share it here. Before making any adjustments to a pattern, follow the steps in Figures 4a) and b), and make changes to traced pattern, not original.

Figure 4: a) trace pattern pieces; and, b) mark every seam allowances (5/8″ for Tia) on each piece. I trace onto non-woven tracing Vilene, which is partly transparent, cheap, strong, flexible, and drapes like fabric, so is excellent for tissue fitting and adjusting the pattern..
*Note: all pattern adjustments are made from sewing lines not from cutting lines, hence the necessity to mark all the seam allowances (SA). It also allows for accurate pinning for tissue fitting.

Figure 5 shows the steps for making the FBA.
a) Mark a line through the bust apex at the point of greatest width on the pattern (a). You will need to adjust actual bust apex, and possibly find tune extension curve in tissue fit and muslin.
b) Spread the Side Front (SF), hinging at the side seam sewing line, and opening in a wedge at the bust apex, as per the amount specified in column 2 in Figure 6. Spread the Centre Front (CF) by the amount specified in column 4 in Figure 6. Note that as cup size increases, so does the amount the CF is spread increases by more than the SF increases per cup size.
c) Extend the curve of the apex on the SF by the amount specified in column 3 in Figure 6.

Figure 5: FBA illustrations

Figure 6 provides the amounts of spread and extending for SF and CF for a woven dress. The instructions for the FBA for the TINAlisa Vicky dress are almost identical, except amount of spread is for knit dress. See Note* below for details.

Figure 6: Bust adjustment guide: amount to spread and extend for each cup size
*Note: the amount the CF is spread/reduced is the same for the A cup, but for C to E the amount the CF is spread increases with each size. There is no B cup on the chart because the pattern was drafted for B cup.


Although the chart does not have any extension on the CF on the seam over the apex, I had to extend my CF apex seam by about the width of the seam allowance. This is just one of the things that tends not to extrapolate smoothly as you go beyond a DD cup. I have my suspicions that this is one of the reasons designers limit their cup sizes to DD because bigger than that creates distinct design and fitting issues. This is just one of the reasons for tissue fitting and making a muslin if you have to adjust for larger cup sizes, as we are getting in the realm of ‘honking great darts’.

Finally, you need to ‘walk’ the apex seamline of the SF along the apex seam of the CF. Threads Magazine has an excellent tutorial, if you don’t know how to do this, including a video. See ‘How to Walk the Seamline’. This ensures the princess seam on SF and CF match. If they are not the same size, adjust how much you spread the CF, then walk again to recheck and mark notches on both pieces.

Before I show you my fitting steps, I want to show you the scale test I did using my scale b-cup and FBA bodices, fitted over scale boobs. I found this test allowed me to distinguish the fitting adjustments that were specific to doing an FBA on this bodice, and additional adjustments due to specificity of my particular body proportions, separately from those due to my cup size.

Figure 7 shows how a facsimile of the Tia bodice (b) (namely princess seam and midriff section) can be obtained from a sloper transformation (a). c) juxtaposes my scale B-cup and FBA boobs, while d) shows the scale ‘Tia’ bodice looks folded over the scale boobs. This order reflects narrative convenience rather than construction order. I actually placed my unmarked B-cup and FBA slopers over the scale boobs in order to mark the UB and above bust seam locations, and then marked up and cut the seam lines.

Figure 7: drafting facsimile of Tia bodice from B-cup and FBA scale bodice slopers
a) bodice cup lines marked on B-cup sloper (left) & FBA sloper (right) b) Side & midriff darts closed, UB and princess seams opened & side darts transferred to them. c) scale B-cup boobs (left), FBA boobs (right) d) cut out B-cup & FBA bodice halves (from b) taped and placed over scale boobs in c).


What I discovered was that, apart from the FBA, adjustments I made to the pattern during tissue fit and muslin were not directly attributable to the FBA. Although some may be common for those needing an FBA. For example, I deliberately kept the apex of the large half scale boob at the same height, in order to minimise the number of variables I changed. But in terms of real boobs, while there are some high sitting large ones, they are more inclined to sit lower than smaller boobs, as gravity works its magic.

So although 7d) shows the height of the midriff the same for both B-cup and large boobs, that is more a product of the test set up design, than based on any reflection of reality.

Figure 8: tissue fit comparing size 8 B-cup bodice with adjusted bodice
a) size 8: back and waist too narrow; FBA bodice, with wide back adjustment & waist graded out
b) B-cup excess back length, UB seam too high on bust; FBA bodice, waist shortened

My tissue fit and muslin confirmed I needed to grade out at waist, do large back adjustment, shorten midriff, and lower bustline, as well as do FBA.

Whereas the midriff on the B-cup and large bust are the same height in 7d) of the half scale model, I had to drastically shorten the midriff as shown in the tissue fit in 8a).

Figure 9: a) fine tuning muslin; b) Front midriff, black size 8, blue adjusted midriff, graded out & shortened c)Tia size chart, with my sizes marked

While I traced size 8 and did an E cup FBA, I also needed to shorten the back and midriff, as I am 5’2”, rather than the 5’6” the Tia pattern is drafted for. My large bust and short stature meant the 1” to 1¼” neckline trim looked too large. A large FBA often means design lines and proportions on a garment no longer work, and need some adjustment. I trialled ¾” and ½” trim on the Sew Chic Facebook group, and I agreed with the consensus that the narrower trim looked better.

Figure 10: a) final dress; b) comparing ½” trim on left with ¾” trim on right

Bonus Peplum hack
Peplums are commonly drafted as a full or half circle, but my square hips don’t really suit either the circle skirt on this dress, or as a peplum. Instead I drafted my peplum from a straight skirt that fit. Folding out the darts and spreading along the hipline.

If you prefer a full peplum you can slash the skirt from hem to waistline and spread the hem more. If a peplum top comes with a more full skirt than you prefer, you can reverse the process, slash from ham to waist, and overlap at the hemline.

Figure 11 slash and spread peplum
a) straight skirt cut at peplum length b) darts folded out, and hem spread c) extra slashes opened out. Reverse to reduce peplum spread.

Note*: TINAlisa Vicky Pattern
TINAlisa patterns are in German and don’t have seam allowances included (common in European patterns), but don’t let that put you off. You can upload the instruction pdf file to this Free Online Translator site (screenshot shown in Figure 12a), which will translate the text to English (or whatever language you prefer) while preserving format and images (Figure 12b). For the large busted, it is easier to do an FBA without seam allowances, as they have to be removed from patterns that include them before you do the FBA anyway.

Figure 12: a) screenshot of document upload box (you may need to scroll down to find it);
b) sample translated document: Vicky FBA instructions

My next blogpost will feature a TINAlisa FBA for a more complex bodice.

Karey Harrison is a feminist philosopher of science and linguistics, environmentalist, retired academic, home baker, sewist, gardener. Karey also wrote the guest blogpost: #AllButtsWelcome: Unmentionables: Crotch Variation in Pantie Fitting. You can catch Karey on instagram @kareylea and see Karey’s academic profile here.

Community Blog | Quick Bust Friendly Sews for Spooky Season with Kerri

It’s that time of year, everyone is in crunch time to make their last Halloween items.  The question always lies, to costume or not to costume.  I myself tend to lean toward making a new costume every year but you can’t always go out in full costume.  For this reason this year I decided to make a few quick tops/dresses to wear for non costumed events.

I chose the Galena Dress from Little Lizard King, The Plantain Top from Deer and Doe, and The Vista Top from George and Ginger.  I chose these 3 designs because they were something a little special.  The Galena and Vista both have fun design elements and the Plantain offers a simple beauty.  Also so important both the Plantain and Galena are free patterns!

To make these spooky I chose fabrics to represent the season.  The Plantain is made with a star embellished black mesh fabric I picked up from The Bra Makery.  The Galena is made from a knit Art Gallery Bat fabric I picked up from Phee Fabrics.  Lastly the Vista I made with a fun forest knit I got from Jumping June Textiles.  These prints could put anyone in the spooky spirit!  Happy Halloween!

Kerri is a sewist with about 5 years of experience. She is a mom of 3, a lover of fashion and all things vintage. She puts her heart and soul into everything she does and that is why she is so in love sewing: She can make things that are uniquely her! Find all of Kerri’s makes on Instagram @sewsewwonderful

Community Blog | Vintage Style Tailoring with Carly

Vintage isn’t for everyone. I know this. But somehow or other I have fallen in love with the fashions of the 1930s-1950s, and it makes me really happy to wear these kinds of styles. For those of you who aren’t into my style of vintage, don’t worry – this blog post is really just about making a princess seam tailored suit jacket.

I volunteer at Bletchley Park, which, in case you don’t know, was the base from which the Allied code breakers worked in World War Two. When I’m there, I really like to wear my 1940s style clothes and imagine working there in 1941. I think this is where my desire for a 1940s style suit came from, and since I have long given up looking for true vintage pieces that fit me, I knew I was going to need to design, draft and make it myself. 

For me, that starts with a little biro drawing in my notebook. Nothing fancy, just enough to show the seams and style lines. I knew I wanted princess seams, because I’m not a huge fan of darts on my bust (37” high bust, 41” full bust and very short torso), and also earlier this year I made a cropped version of the Princess Coat from Charm Patterns and I quite liked it. I knew I could use the princess seams from this pattern as a basis, but wanted to change the collar, the length of the jacket overall and the back would need vents to accommodate my butt.


I pulled out my traced pieces from the Princess Coat and laid over my tracing paper, and started tracing the bits I’d keep and changing everything else. I didn’t change the armscye any so I also used the same 2-piece tailored sleeve. I also referred to other patterns I had already drafted to help me with the collar.

Then I made a mock-up/toile/muslin – test version, whatever you call it. The collar was way too big for my liking, so I went and re-drafted it and made a second test garment, which is pictured above. Still having doubts about the collar size, I popped a blouse on with it and suddenly it all seemed to make sense. Now I was happy with it, I finalised all my pattern pieces and drafted the facings. Time to cut into my project fabric! 

I started by making the bound buttonholes on my jacket front. I learned how to do these when I made the Princess Coat earlier in the year and they give a really nice finish to a tailored garment.

Buttonholes complete, it was on to the princess seams. Now I’m sure we all, anyone who sews for people with a large high bust/full bust difference, know exactly what I’m talking about – your side front panel has a huge bulge in it and the centre front is, at best, straight, and at worse, curved in the opposite direction. So when we put these right sides together to sew, it can get tricky, right?? 

This is my side front and centre front for this jacket. I struggled and struggled last year trying to perfect sewing princess seams with this kind of curve. I Googled and Googled and tried and tried and nothing worked. I would get puckers, the raw edges wouldn’t line up, one piece would end up shorter than the other. If you have experienced any (or all!) of these problems, the good news is I finally found a way to do it! Yes, even on that curve.

Now, I can’t really take any credit here because the method I use is the one recommended by Charm Patterns for the Princess Coat. The silly thing is, I figured that if I couldn’t sew a princess seam, I had no business getting the Princess Coat pattern or watching the “how to” video on YouTube. Oh, how wrong I was. I don’t remember how or why but I ended up watching said “sew a retro cropped jacket” video on YouTube. But the technique for princess seams which is explained in this video, in detail, is the answer to your large bust curve princess seam sewing prayers! I mean, go check out that video if you fancy it.

Here’s how: stay stitch your centre front at 1/8” shy of your full seam allowance (so ½” on a garment with a 5/8” seam allowance like this), then clip into that stay stitched seam allowance at ½” intervals, being careful not to snip your stitching. Then lay your side front right side up on the table in front of you, and lay the stay-stitched and clipped centre front down on top of it, right sides together. Match and pin the notches first, and then you will, like magic, be able to match the raw edges of the two pieces with the opposing curves by spreading the clips on the centre front to match the side front. Use as many pins as you need! Then you can just sew the seam like normal at your required seam allowance.

Then you need to notch the seam allowance on the side front piece. Cut out small triangles at ½” intervals, making sure the points of these triangles are between the clips on the other side. You don’t really want your clips and triangles meeting at the seam! Then you can press the seam open, using a tailor’s ham. 

Ta da! Obviously this is going to leave lots of flappy bits of seam allowance, which I think is why people prefer darts, since really princess seamed garments are going to need a lining to cover all this.

With my front and back princess seams sewn, I moved on with the rest of the construction. Shoulder seams, side seams. Collar, facings. It was starting to look like a jacket at this point, and I was excited to sew and set in the sleeves. I used a bias strip of my fabric to ease the sleeve cap (another Charm Patterns trick) and I love how easy it is and how it gives just the right finish for tailored garments.

I could really see the project starting to take shape at this point. Although I will say, it does not look great on the hanger. It took me a while to realise that this is because I’ve just spent all this time sewing a garment with a lot of room in the bust and sadly my coat hangers are less well endowed! Anyway, on to hand catch-stitching the jacket hems. I know not everyone is a fan of hand stitching, but it does have its place in projects like this. 

Time to start over! What?? Well that’s how I feel when I have to start making the lining. I can’t be the only one. I repeated the necessary steps to construct the lining, using the same princess seam sewing technique as on the outer. On the home straight now, I attached the lining to the jacket, and then hand finished the lining hems, the bound buttonhole openings in the front facing, and finally sewed on the buttons. Finished jacket!

I mentioned at the start that I wanted a suit, so here I am wearing the jacket with the matching pencil skirt I made. I love my suit, and am very pleased with how the jacket compares to my original biro drawing. 

Carly is self-taught and has been sewing since 2018. Her favourite thing about sewing is making whatever you want to fit however you want. Carly wears vintage style daily and this has helped to push her to design and sew her own as it is difficult to find true vintage garments for busty bodies.