
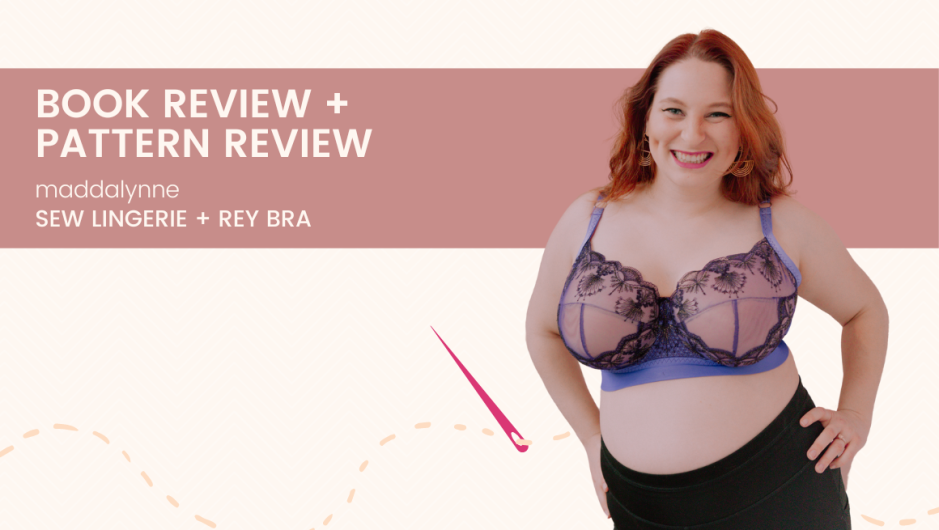
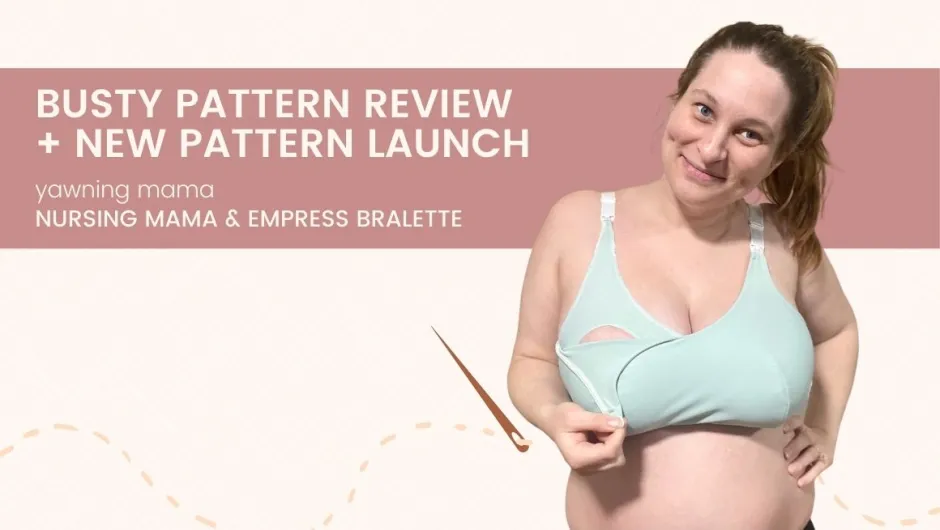
Book + Pattern Review | “Sew Lingerie” + Rey Bra from Madalynne
I remember Maddie Kulig, the girl boss behind Madalynne, talking about writing a lingerie book a few years ago. (I live about 20 minutes from Madalynne’s studio, and would often go to open studios there before I had my little.) While there were a few lingerie sewing books on the market, like the vintage Singer book “Sewing Lingerie,” as well as several bra drafting books, like Porcelynne’s “Bare Essentials,” there wasn’t really a modern book about bra sewing and pattern fitting techniques.
With “Sew Lingerie,” Maddie has fixed that!
Okay, let’s have an honest moment. Yes, I know that Madalynne has a reputation of not being the best for busty bodies, and of having marketing images where the bras don’t properly fit the models (including criticism of images in the book). And I’ll also be honest that I avoided Madalynne patterns for a long time because I shared the doubts that many of you have. But I’m honestly so glad that I finally gave Madalynne patterns a go, as I’ve been just so pleased with my last couple Madalynne makes (this one and the S9833) — even with a bust that’s technically outside her size chart.
I received this book from Madalynne and her publisher in exchange for taking part in her virtual book tour, but it’s important to note that I did not and would not promise a positive review. Everything in this post is totally, 100% my honest opinion.
Sew Lingerie: The New bra sewing manual
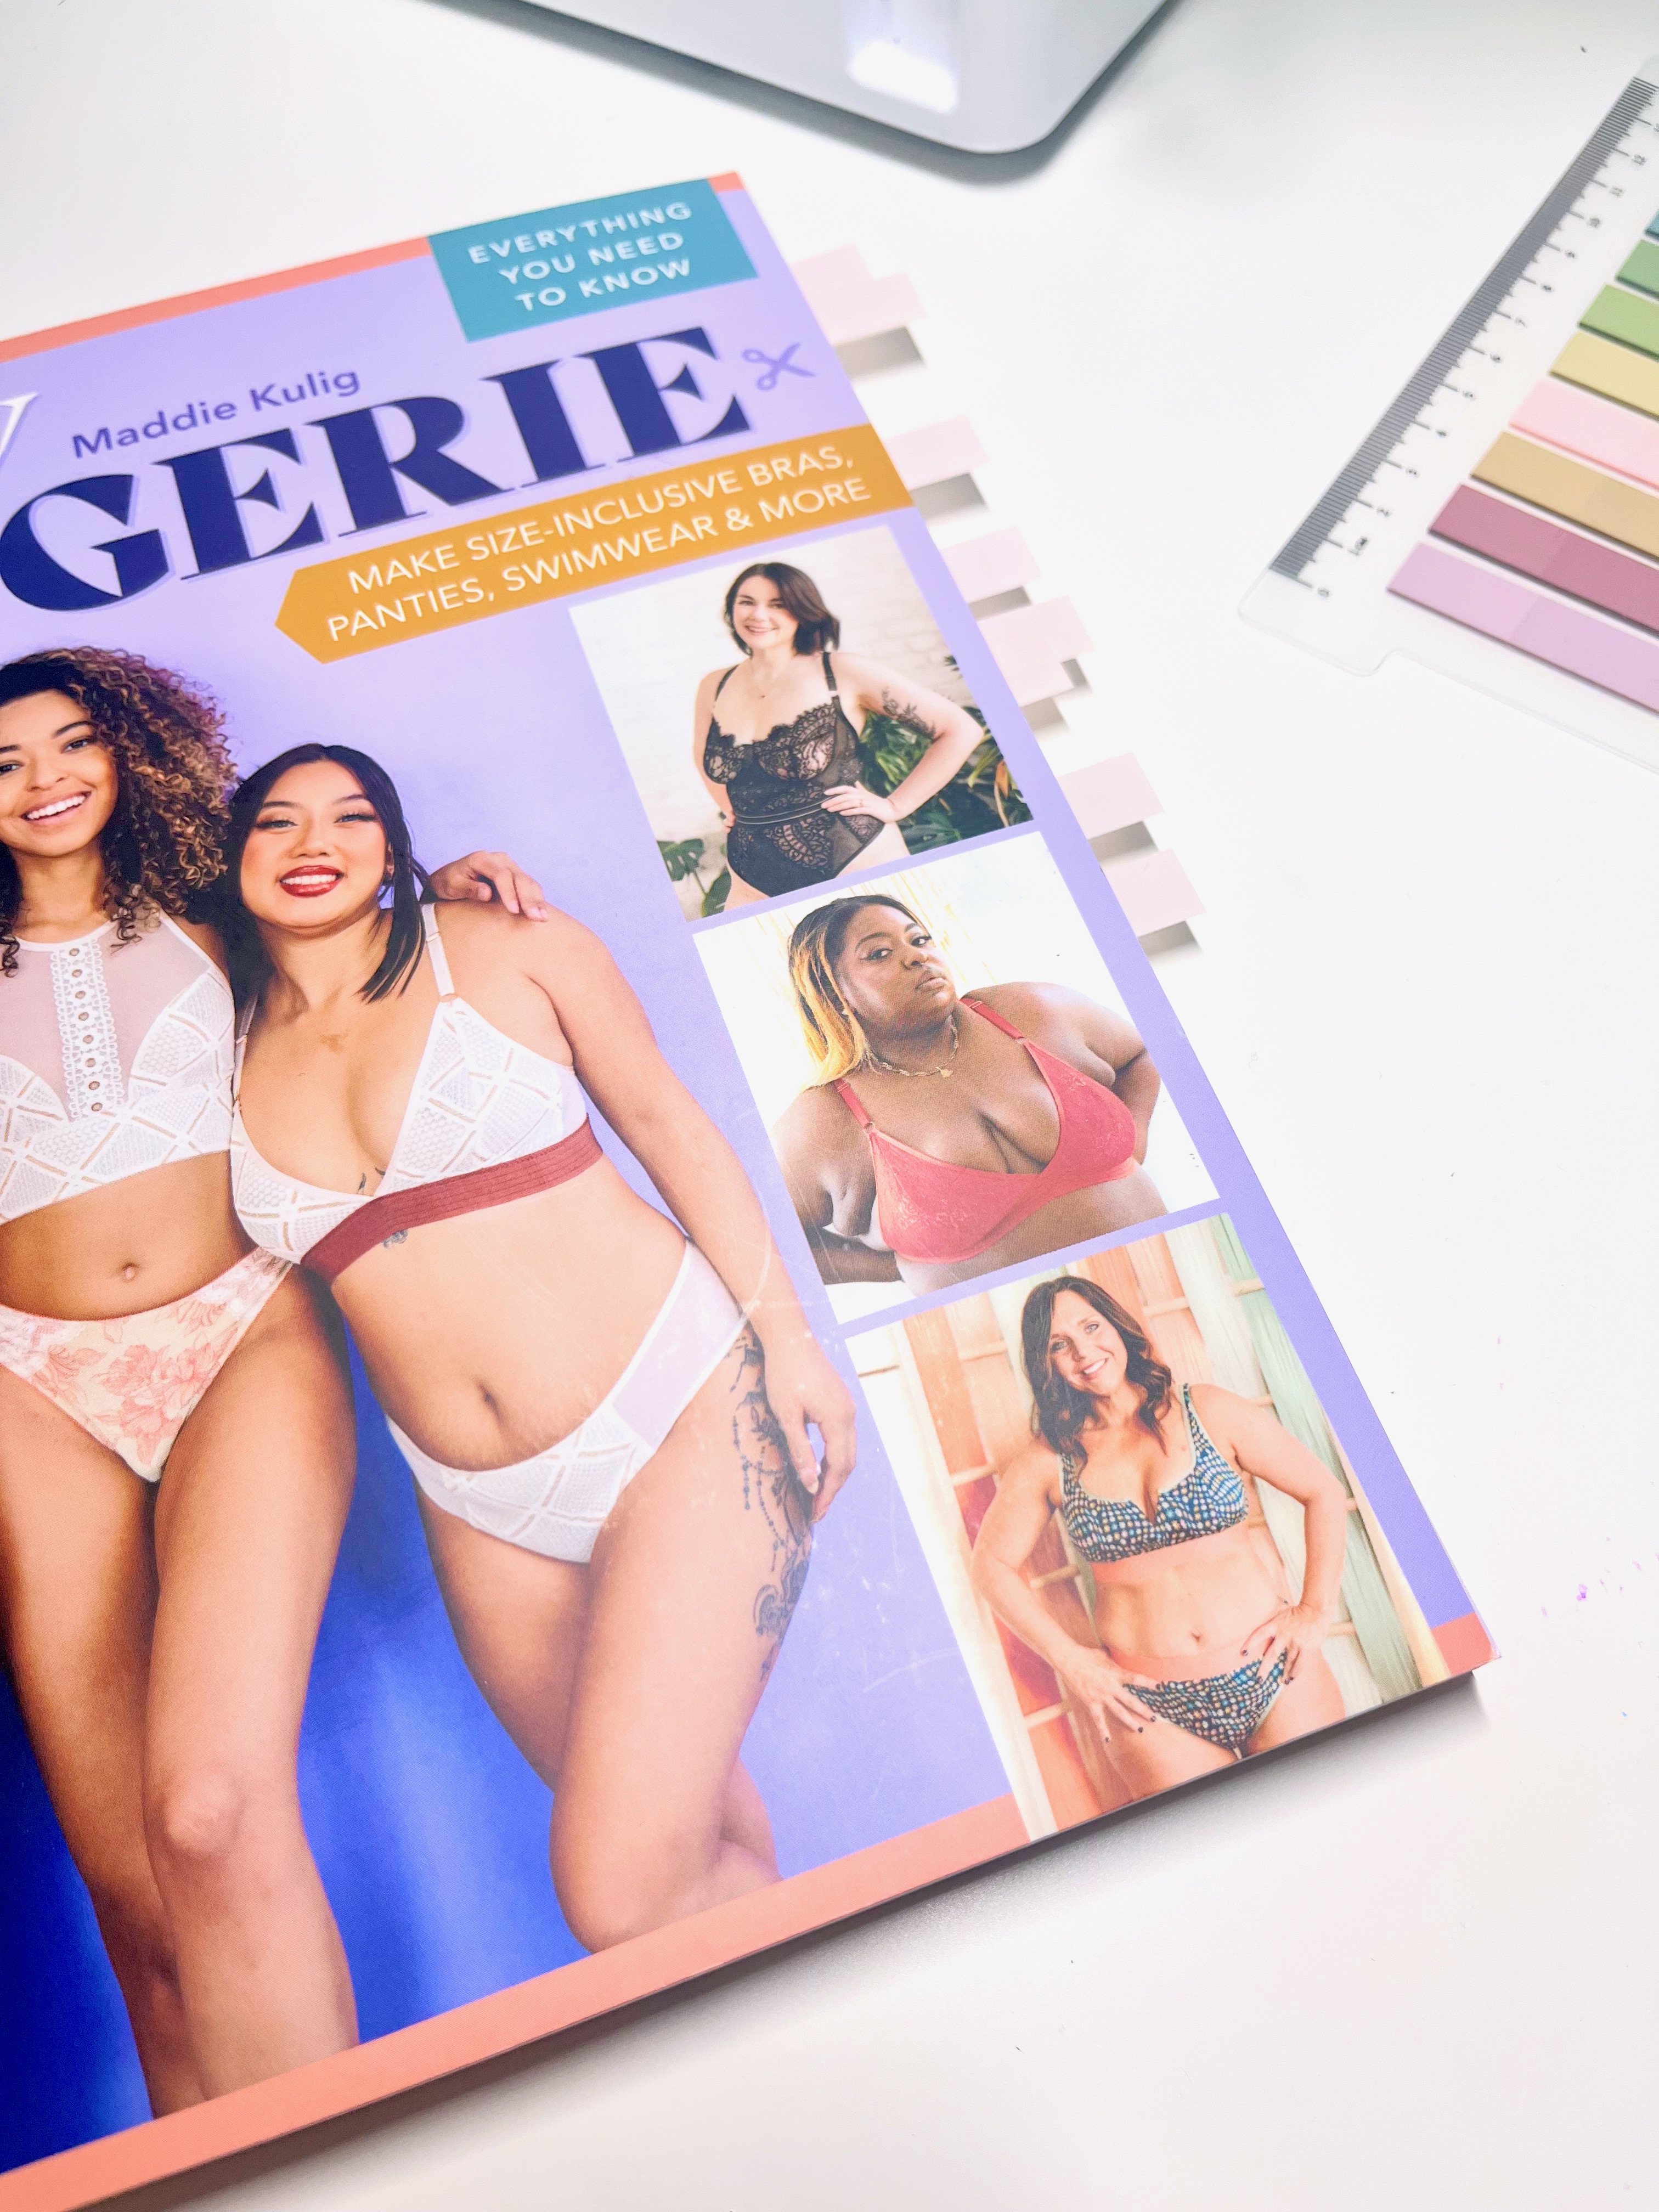
Let me tell you: “Sew Lingerie” is it. It’s perhaps the book for beginner bra makers. The book goes over basic sewing techniques, choosing materials, basic fit alterations, and also includes several (I think 11?) patterns for a bra, bralettes, panties, a swimsuit, and a bodysuit. The size chart for these patterns is fairly inclusive, covering a 26-44 band with A-J cups.
Now, I do wish this was a bit more inclusive, as I’m nearly at the top of the cup range (more on this later), and I know I have many followers who have larger cups than me. Similarly, while a 26 is a really impressive lower band size, I’d love to see Maddie extend her band sizes up — Porcelynne and LilypaDesigns, for example, both include bands up to a 52.
But even for folks for whom the patterns may not work, the book is excellent as a reference for your sewing library. (Similar to how I have Jenny Rushmores’ books in my library, although I’m below her book pattern size range.) Just to give you an idea, I tabbed the pages that include technique I used while sewing a bra pattern:
Let’s talk more about some of these techniques that you can learn in this book:
- sister sizing
- making a toile and fitting band
- clean finishing
- band and frame alterations for different torso shapes and gore widths
- wire alterations
- fabric suggestions, lingerie history, and so much more
The fit tips are also on point, going over how the wire should follow your breast root, how the band should be snug, how you must avoid quadding, etc.
making the rey bra
When I received the book, I originally planned to make something easy — a panty, perhaps. But Maddie asked me nicely to try the Rey bra, and I (somewhat reluctantly) agreed. But, boy am I SO GLAD I agreed! I’ve been teasing this bra on my instagram as “the bra with alllll the lift,” because, my goodness, does this bra offer a lotta lift.
Now, the reason I was somewhat reluctant to make the Rey is because I knew it was going to be a bit of work. There are a few reasons for this:
Not on the size chart
As I mentioned above, I’m not technically on the Madalynne size chart. According to her chart, I’d be something like a 32N or 34M (my underbust has been fluctuating lately). As I mentioned earlier, her cup sizing only goes to a J. But here’s where that sister sizing lesson from earlier in the book comes in: a 32N/34M is equivalent to a 40J — 3 sizes up in the band, 3 sizes down in the cup. So I knew I could make the 40J cup.
Narrow roots: Always a struggle
If only it were as simple as making a 40J and shortening the back band. But, for me, it wasn’t that easy. I have narrow roots, meaning my ideal wire is several sizes below “average” for my cup volume. What does this mean? An omega adjustment, baby.
Now, the book doesn’t go over omega adjustments, and that’s one thing that I would have like to see in the book. BUT omega adjustments are definitely a more advanced technique (though one that’s necessary for many folks), while the book is aimed at beginners. LilypaDesigns has, in my opinion, the best online tutorial for omega adjustments.
I started my adjustment by comparing my normal wire — a Porcelynne 44 Vertical heavy-gauge wire — to the frames for the 40 band size. (I decided to stick with the 40 band size since it would be nested with the 40J cup I needed, making my adjustment a bit easier.) I landed on the 40A frame as closest. Madalynne’s patterns use a standard wire, meaning they use the wire of the B size sister equivalent of that cup, in this case, a 38 regular wire for a 40A frame (since 38B is sister size to 40A).
A 38 regular wire has a similar curve to a 44 vertical wire, although the 44 vertical is definitely taller, so I had to add height to my frame at the underarm and bridge to accommodate the wire. I also slightly reduced the wire spring, because I generally prefer no wire spring, and this bra has a lot of spring built in.
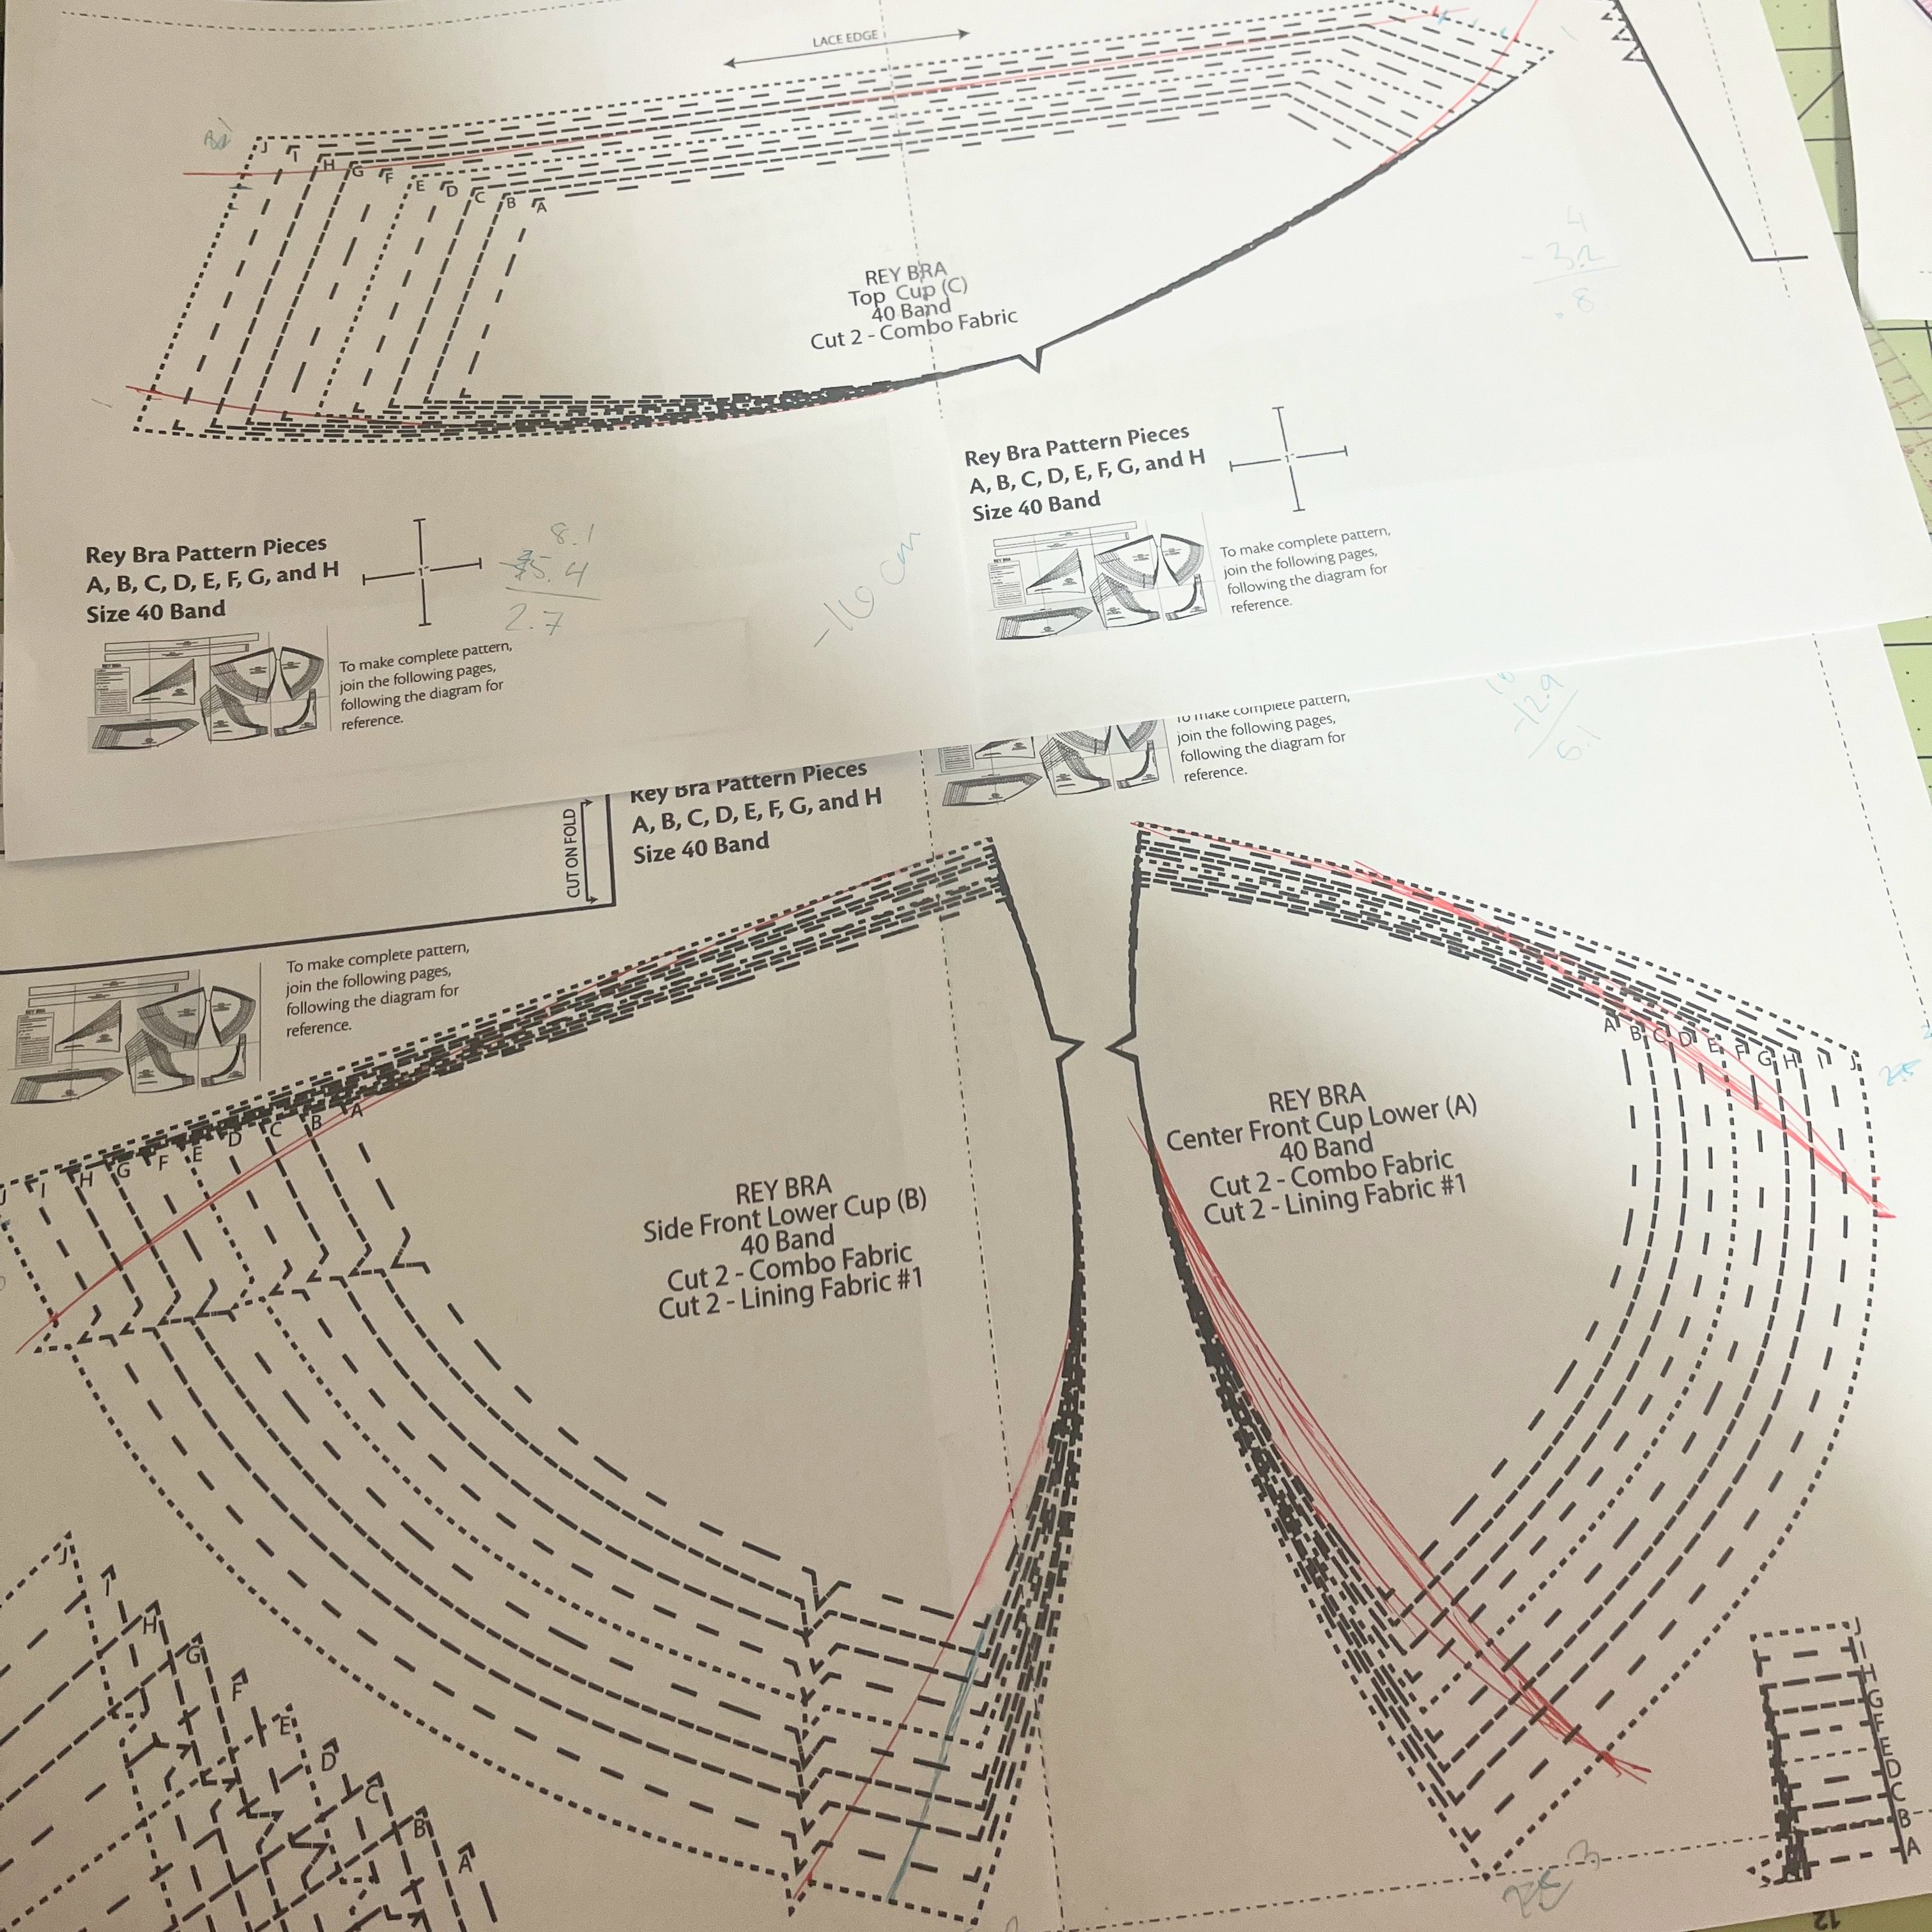
Once I had landed on the 40A frame and adjusted it for wire height and to reduce spring, I turned to the cups. Remember how I was using the 40J cups? That’s nine cup sizes different. Nine. That certainly qualifies for what LilypaDesigns calls an “extreme omega.” So, I of course used Lily’s extreme omega tutorial, reducing the cup wireline by something like 13 cm (~5″) by creating darts incorporated into the seamlines.
You’ll see my omega adjustment with the red lines in the image above. (Though I realized after this that the outer edge of the upper cup is not part of the wireline; I of course fixed this! I had initially done a 16 cm adjustment, as shown, but ended up only really needing a 13 cm adjustment.)
Adjusting the band & frame length
Because I was using the 40A frame, I decided to make things easier on myself and use the 40A band, but shorten it to match the length of the 34 band. I also shortened the 40A frame length to match the 34 frame in length. I also narrowed the gore because my breasts are very close-set since having my kiddo.
TOILE trials
I went through, I think, 3 toiles. To no one’s surprise, I needed to reduce the volume at the upper cup, as I have needed to do on every bra I’ve made since having my little one. I think I reduced the neckline by an inch, but it may have been more. I also reduced the back band by 3/4″.

a moment on the importance of fabrics
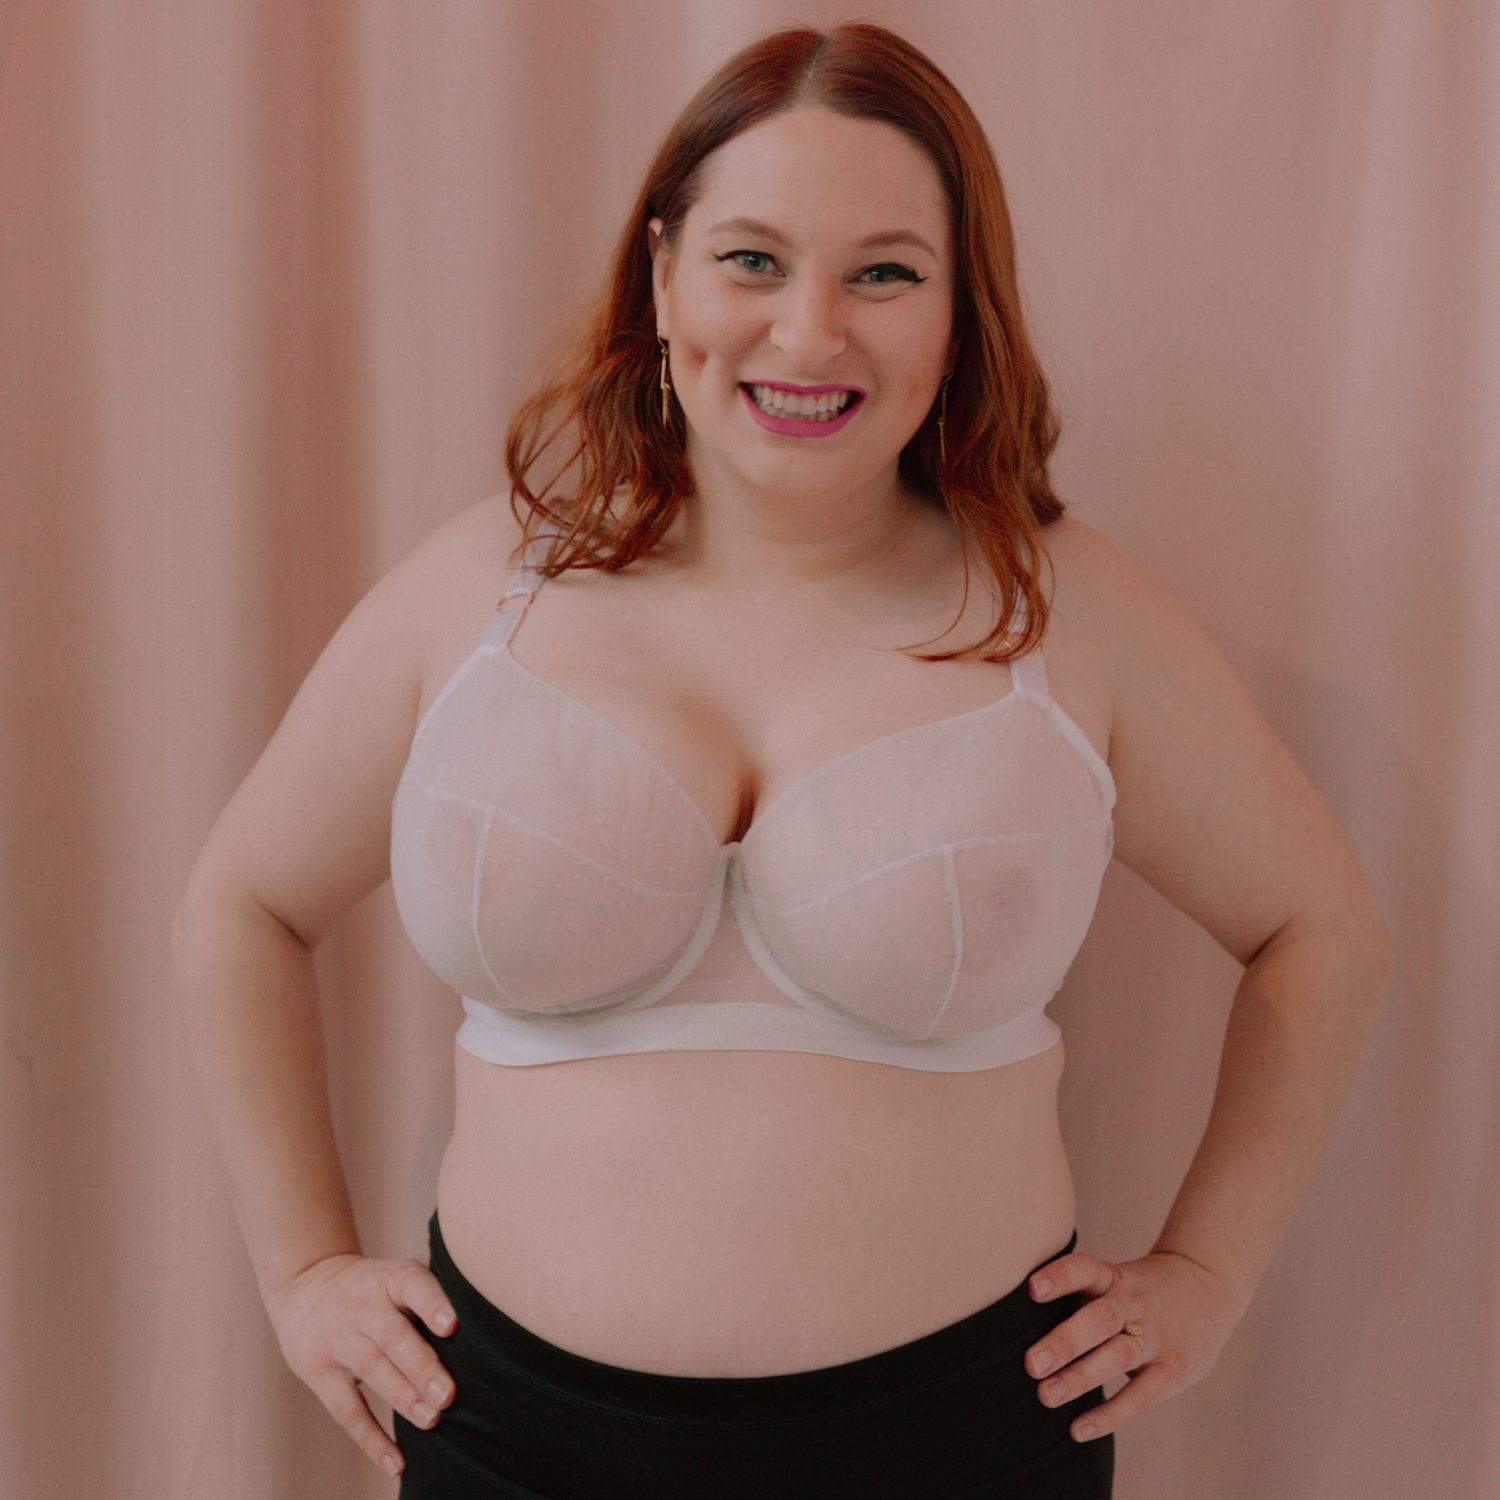
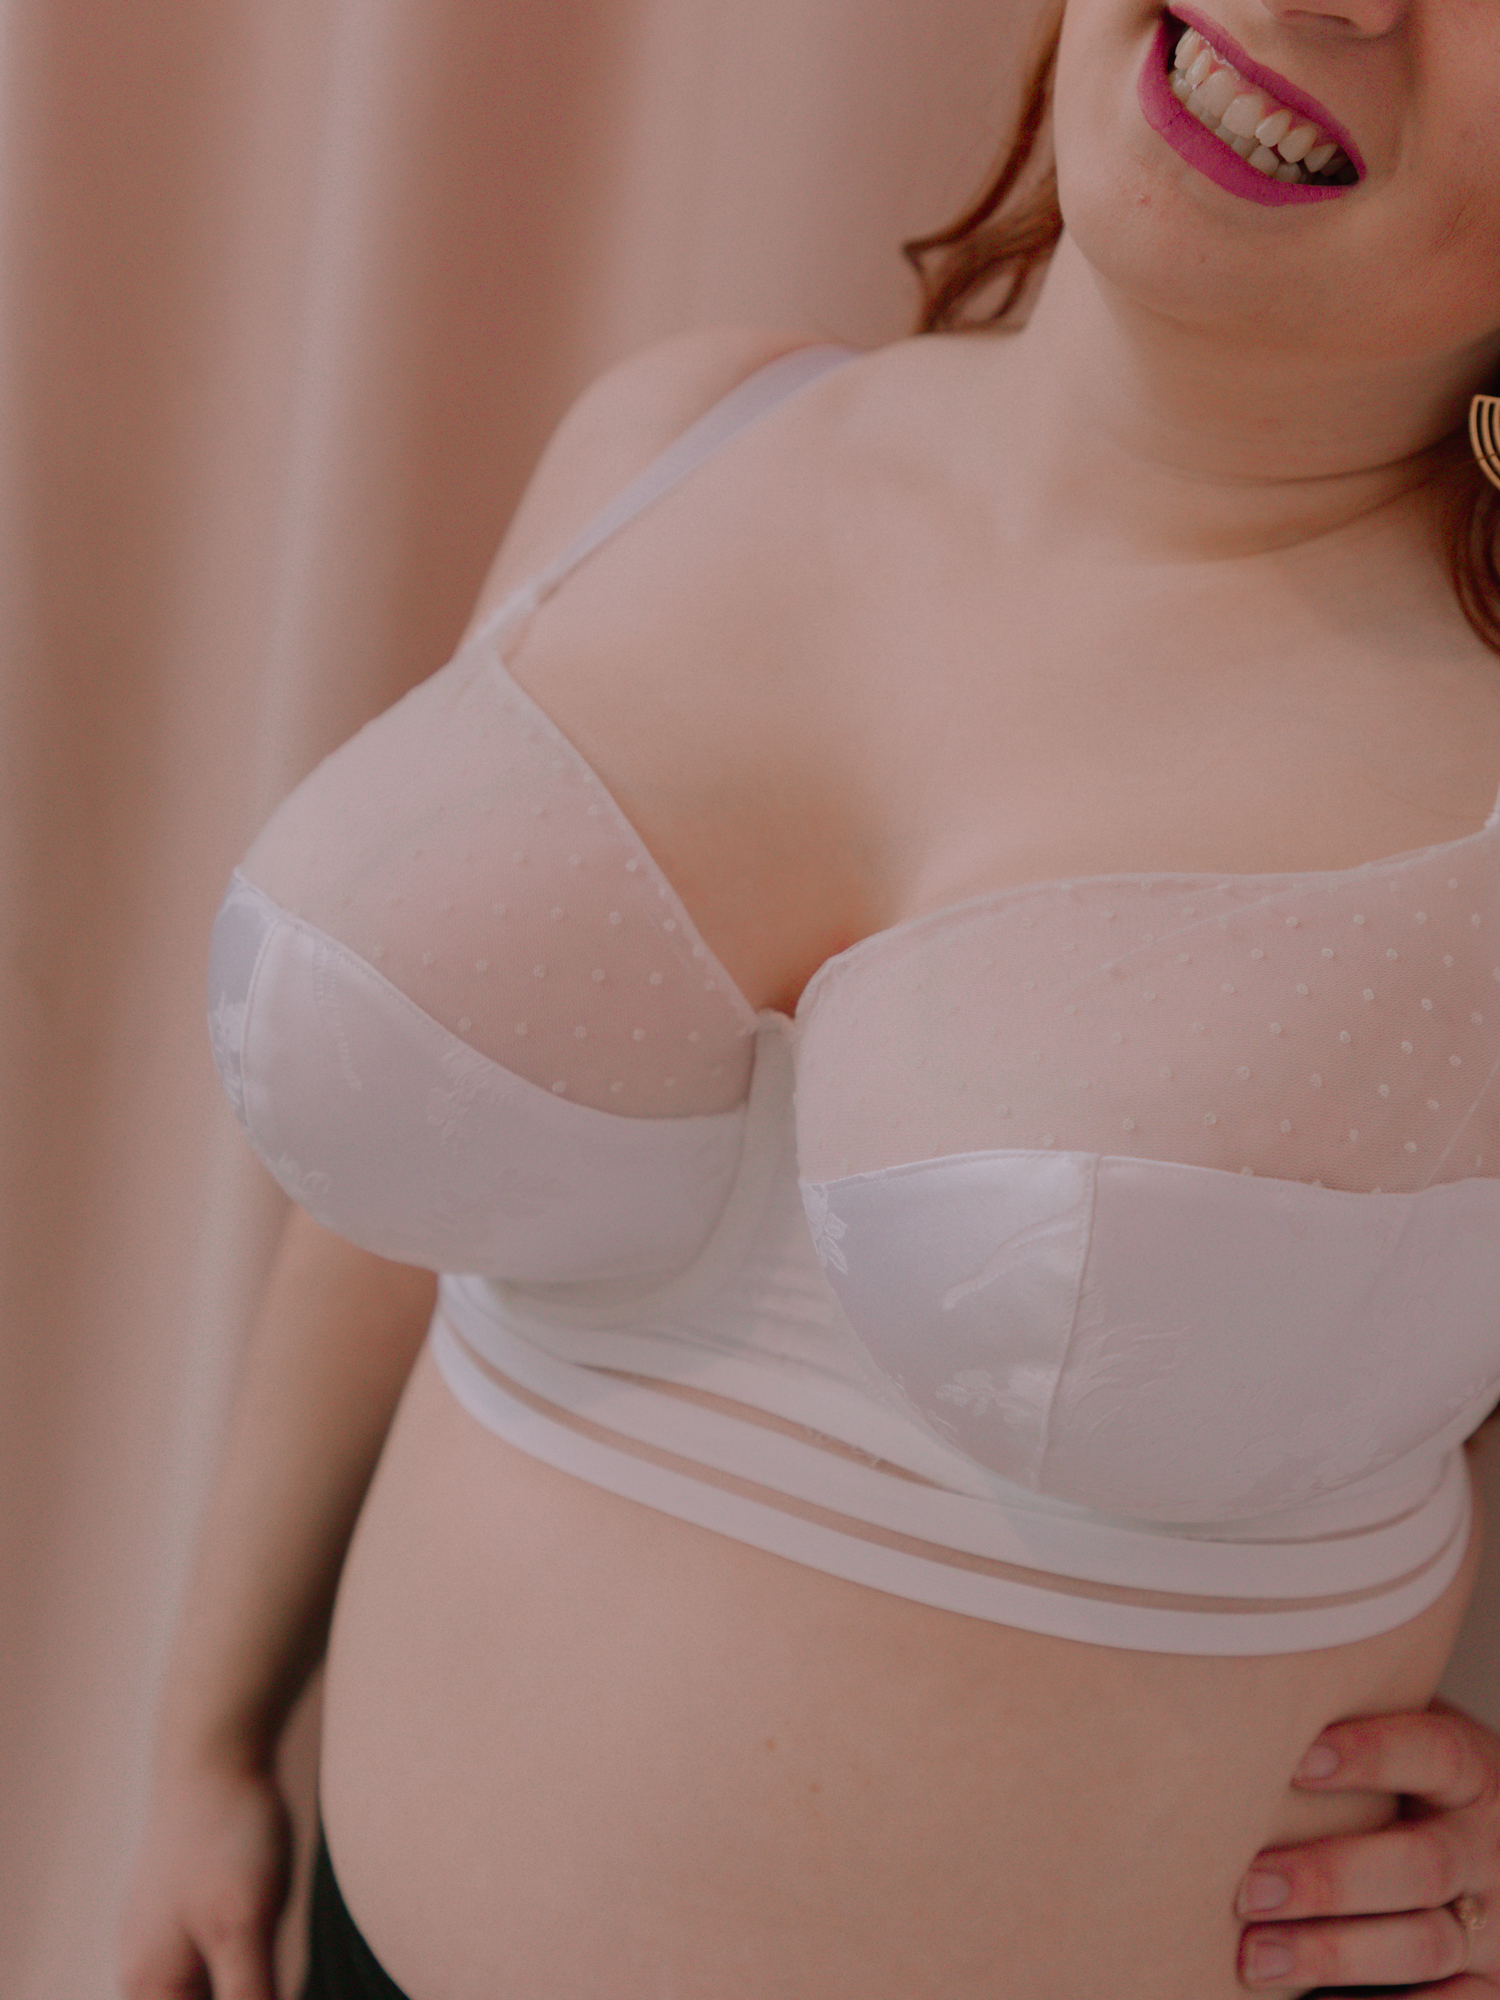
Now, feeling super confident that my latest toile had been a downright success, I decided to make it up in pretty fabrics. I chose to mix a lovely dotted mesh for the upper cup (paired with sheer cup lining for support) with stabilized satin from Porcelynne for the lower cup.
Well, this bra might look pretty, but in reality, it doesn’t fit very well. The gore doesn’t tack. The lift is literally unreal. But the fit is sacrificed. I need to think more about how to use this fabric in the future, but I’m thinking sizing up a bit is called for.
Now, this is the second time that a bra I’ve made with this stabilized satin has felt smaller than I expected. As you may remember, I made a Porcelynne Eve in a 34L using this fabric, and while I somewhat expected it to be a smidge small, it was like several cups too small. Remembering that experience, and recognizing that my sheer cup lining toile using exactly the same pattern fit well, I decided to try again.
This go, used sheer cup lining with dot mesh all over. It fit much better. The dot mesh did stretch really oddly, so you’ll see some fabric pooling around the wireline that makes it look like it’s not following my IMF. It is, in reality. Just my constant issue with trying to put stretch fabrics over non-stretch lining. Anyway.
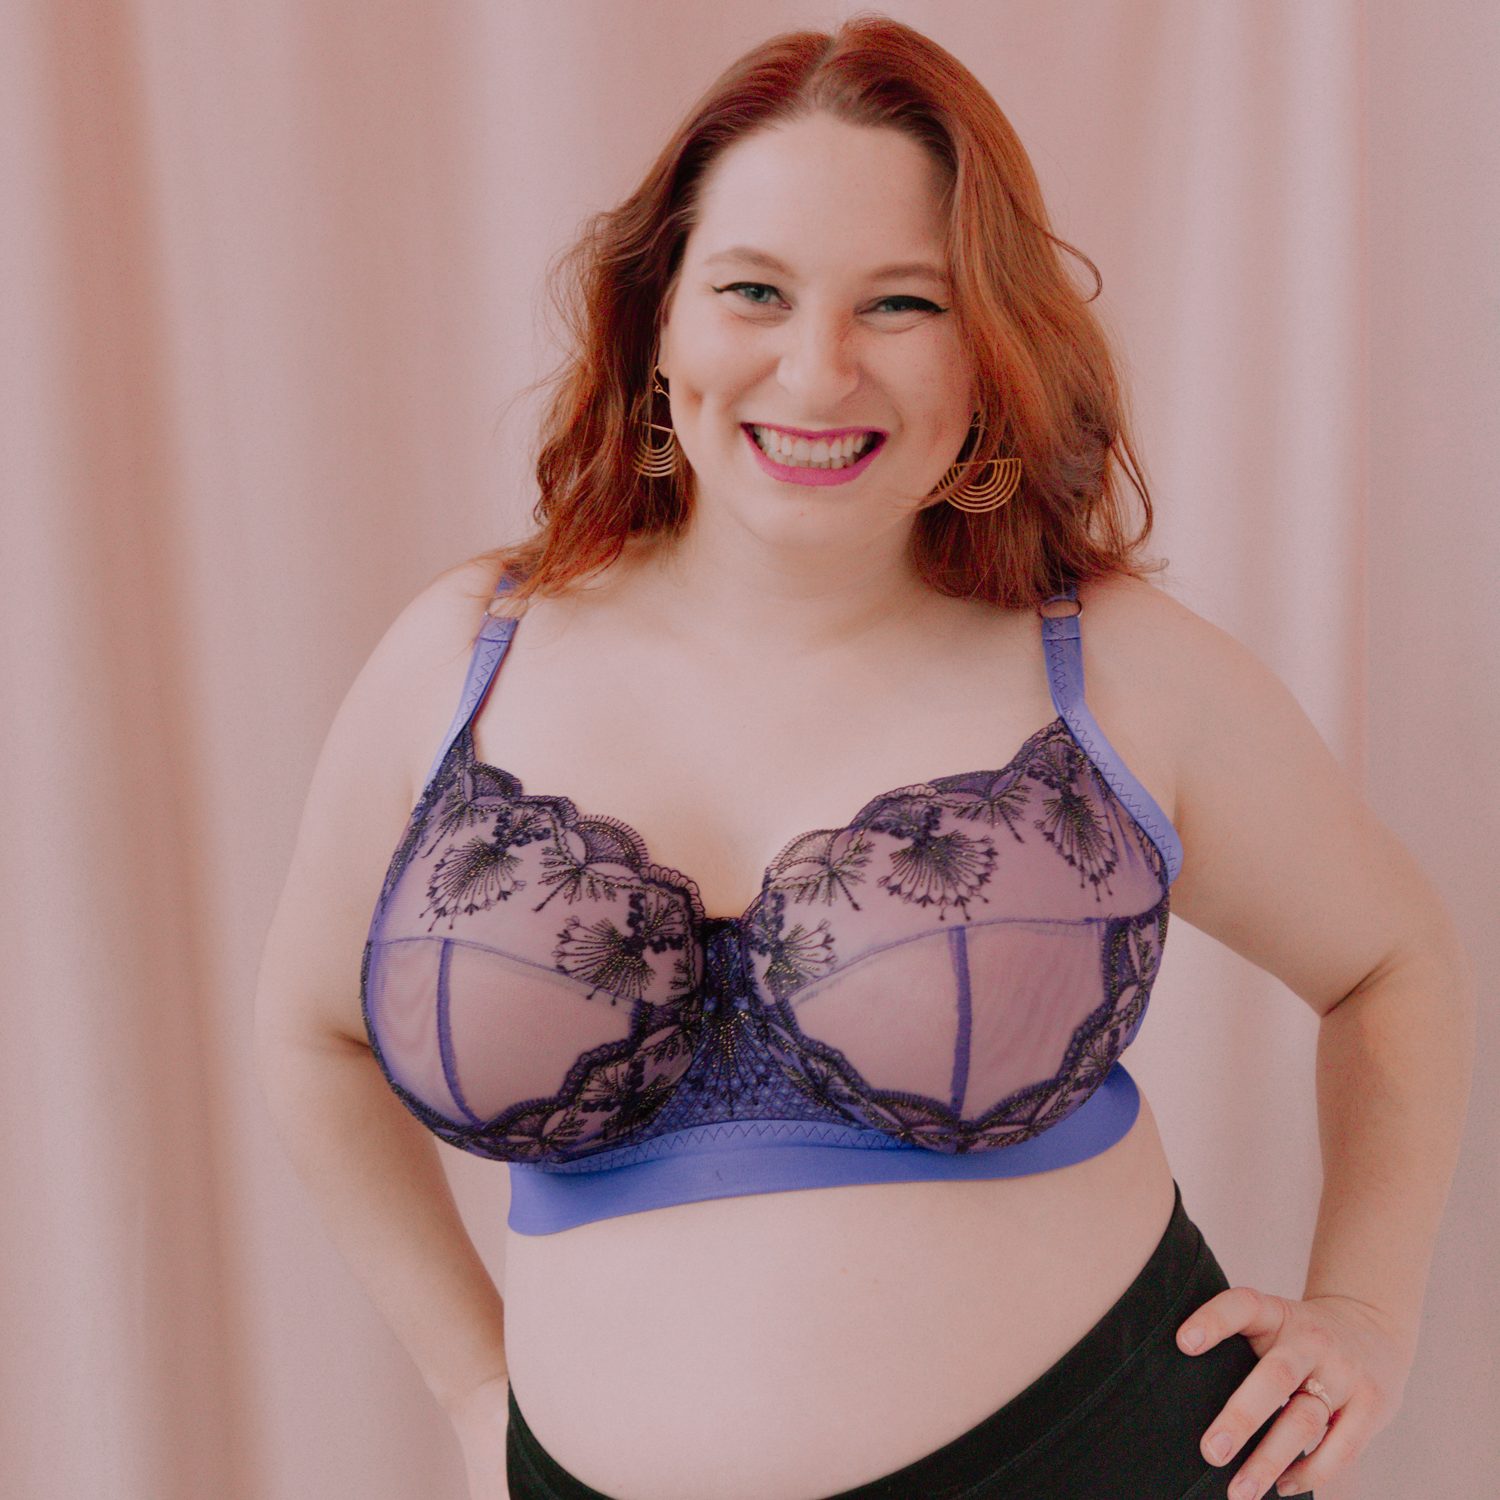
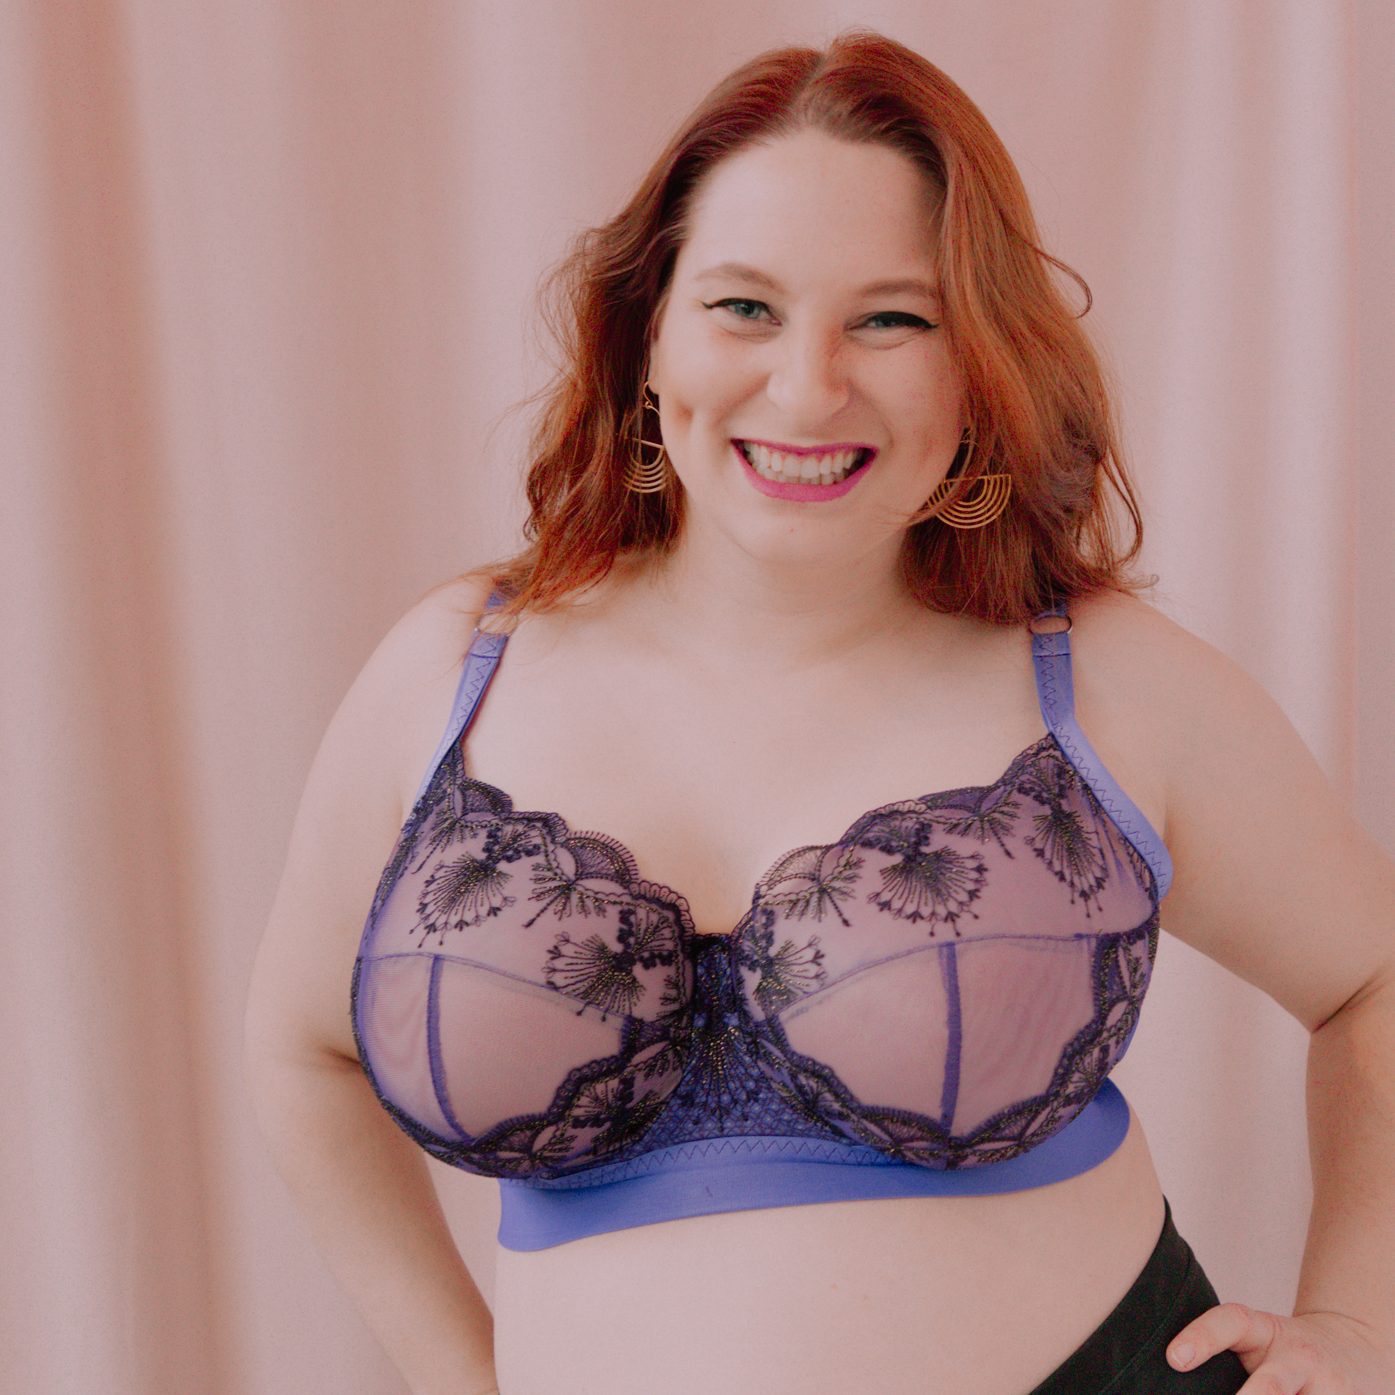
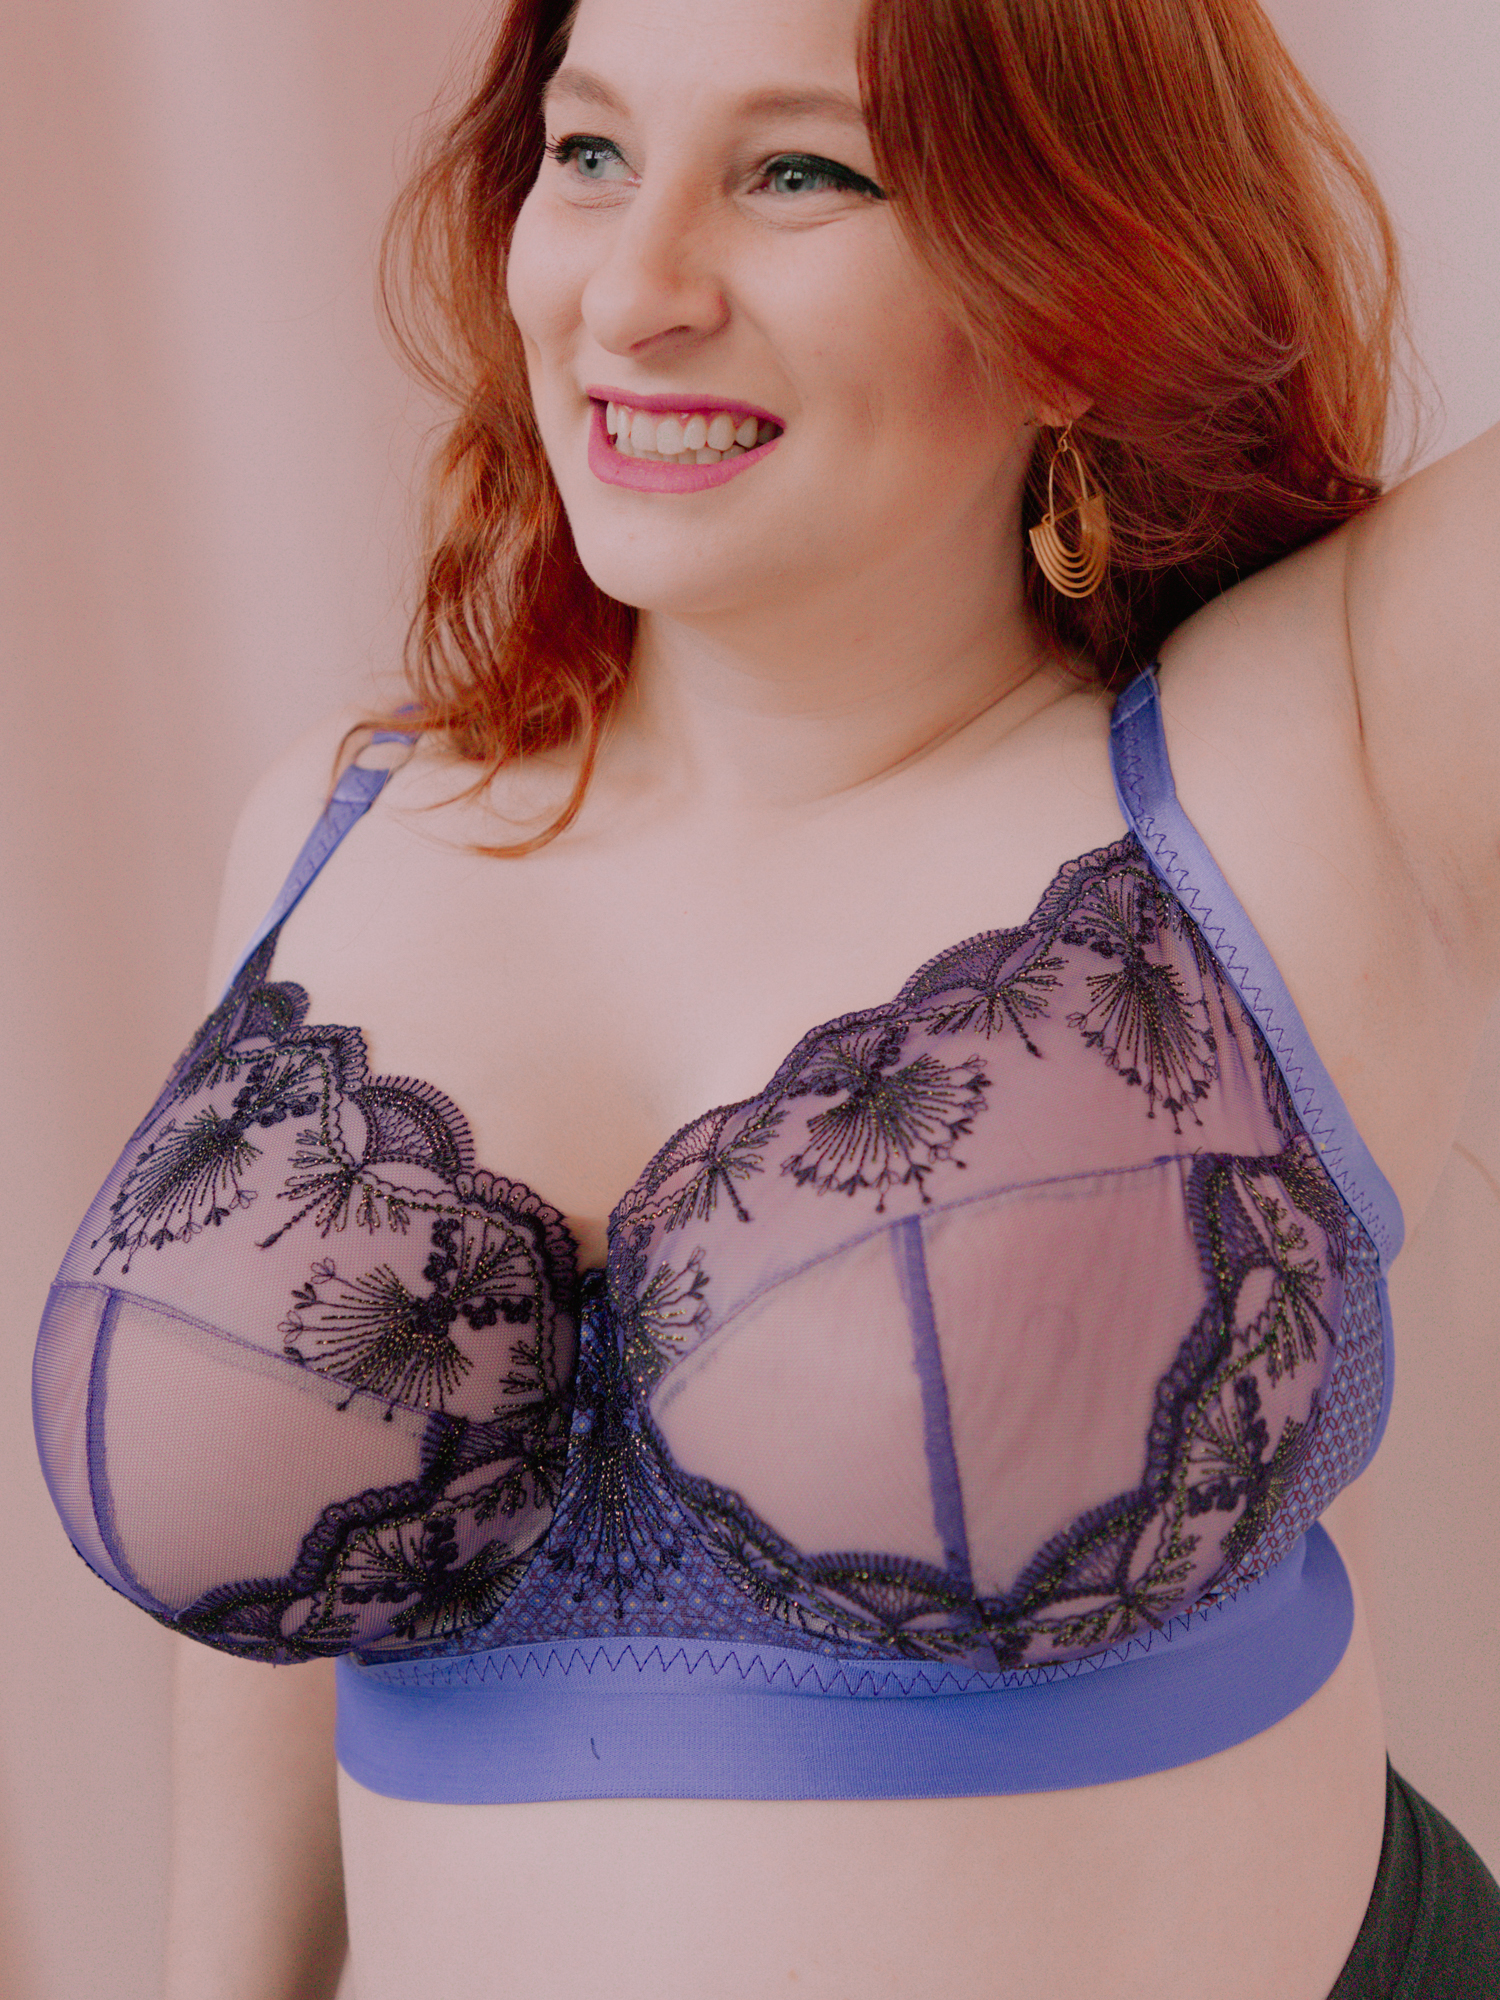
Sewing my final rey
Feeling confident in my altered pattern, I reached for a lovely kit Maddie gifted me from her holiday collection.
Y’all, I’m obsessed. This bra fits perfectly, and it is so comfortable. And THE LIFT.
Overall, I really love this pattern. I did notice that the cup pattern pieces were missing grainlines. This wasn’t a big deal for me, since I’ve been making bras for a while and have drafted some bra patterns myself. But this would be a tough obstacle for a beginner. Maddie did tell me that she will go over proper grainlines in her upcoming Rey sew along, so I’d probably recommend true beginners wait for that video tutorial before trying this pattern.
Otherwise, this pattern is just so great. Highly recommended! I’ll be making the Godiva bodysuit (the top half of which is just the Rey reimagined) this weekend, and I can’t wait!
^Some of the links in this post are affiliate links. This means if you click on the link and purchase the item, I will receive an affiliate commission at no extra cost to you. All opinions remain my own.
Lina
December 11, 2023How in-depth does she go into adjustments for different breast types? I have breastfed two children and I have lost a lot of volume and firmness. And so I find the tissue is quite often “squished out” of several bra types. I do not know how to adjust for this.
Also, what does she explore in her section on lactation/breastfeeding bra adjustments? Does it cover drafting a sling, different types of slings for sports bras vs regular bras?
Thank you for a wonderful and honest review.
sewbustycommunity
December 11, 2023Hi Lina! The adjustments section isn’t super in depth. The book is really targeted at beginners, so it’s more basic fitting than advanced troubleshooting. There is a section on breastfeeding bra adjustments. I’ll have to peek at it closer — I finished breastfeeding 6 months ago and haven’t wanted to think about it since so I sorta skipped over that section 😂
Emily
February 20, 2024I don’t know, looks like a pretty standard amount of lift to me. Maybe you’re just not used to a bra doing actual bra things because you keep shilling the Porcelynne Eve.
Also, the cup is too loose at the underarm. That’s why you’re getting drag lines there.
sewbustycommunity
February 20, 2024I legitimately love the Porcelynne Eve, so I’m not “shilling” anything. I’ve made a grand total of $11 in the last year as an affiliate for Porcelynne, so it’s certainly not money that’s motivating me to share that pattern. I just think it’s the most intuitive pattern out there for large cups, especially since narrow rooted folks like me don’t have to do an omega adjustment, which can be a huge barrier to entry for beginners especially.
You’re right that the cup needs pinched out a bit at the underarm. It’s on my list for pattern adjustments before I make this again! Bra making is an iterative process and I rarely have a bra (me made or bought) that I don’t find something or other that can be improved the next time.