
Full Bust Adjustment Guide | Raglan Tee Giant FBA
Giant FBA: Let’s Review
This post is part of a series on “giant” full bust adjustments — adjustments for sewists who need to add more than 2-3″ to their garments. The series is a response to the fact that almost every FBA tutorial out there assumes you’re only adding a couple inches to your bodices, but for many of us, that’s just not true.
I, for example, need to add 7-9″ to most patterns.
Other posts in this series include:
- Giant FBA for a dartless knit bodice
- Giant FBA on a woven bodice
- Giant FBA on a cowl neckline
- Giant FBA on the Named Clothing Kielo (adding an armscye dart)
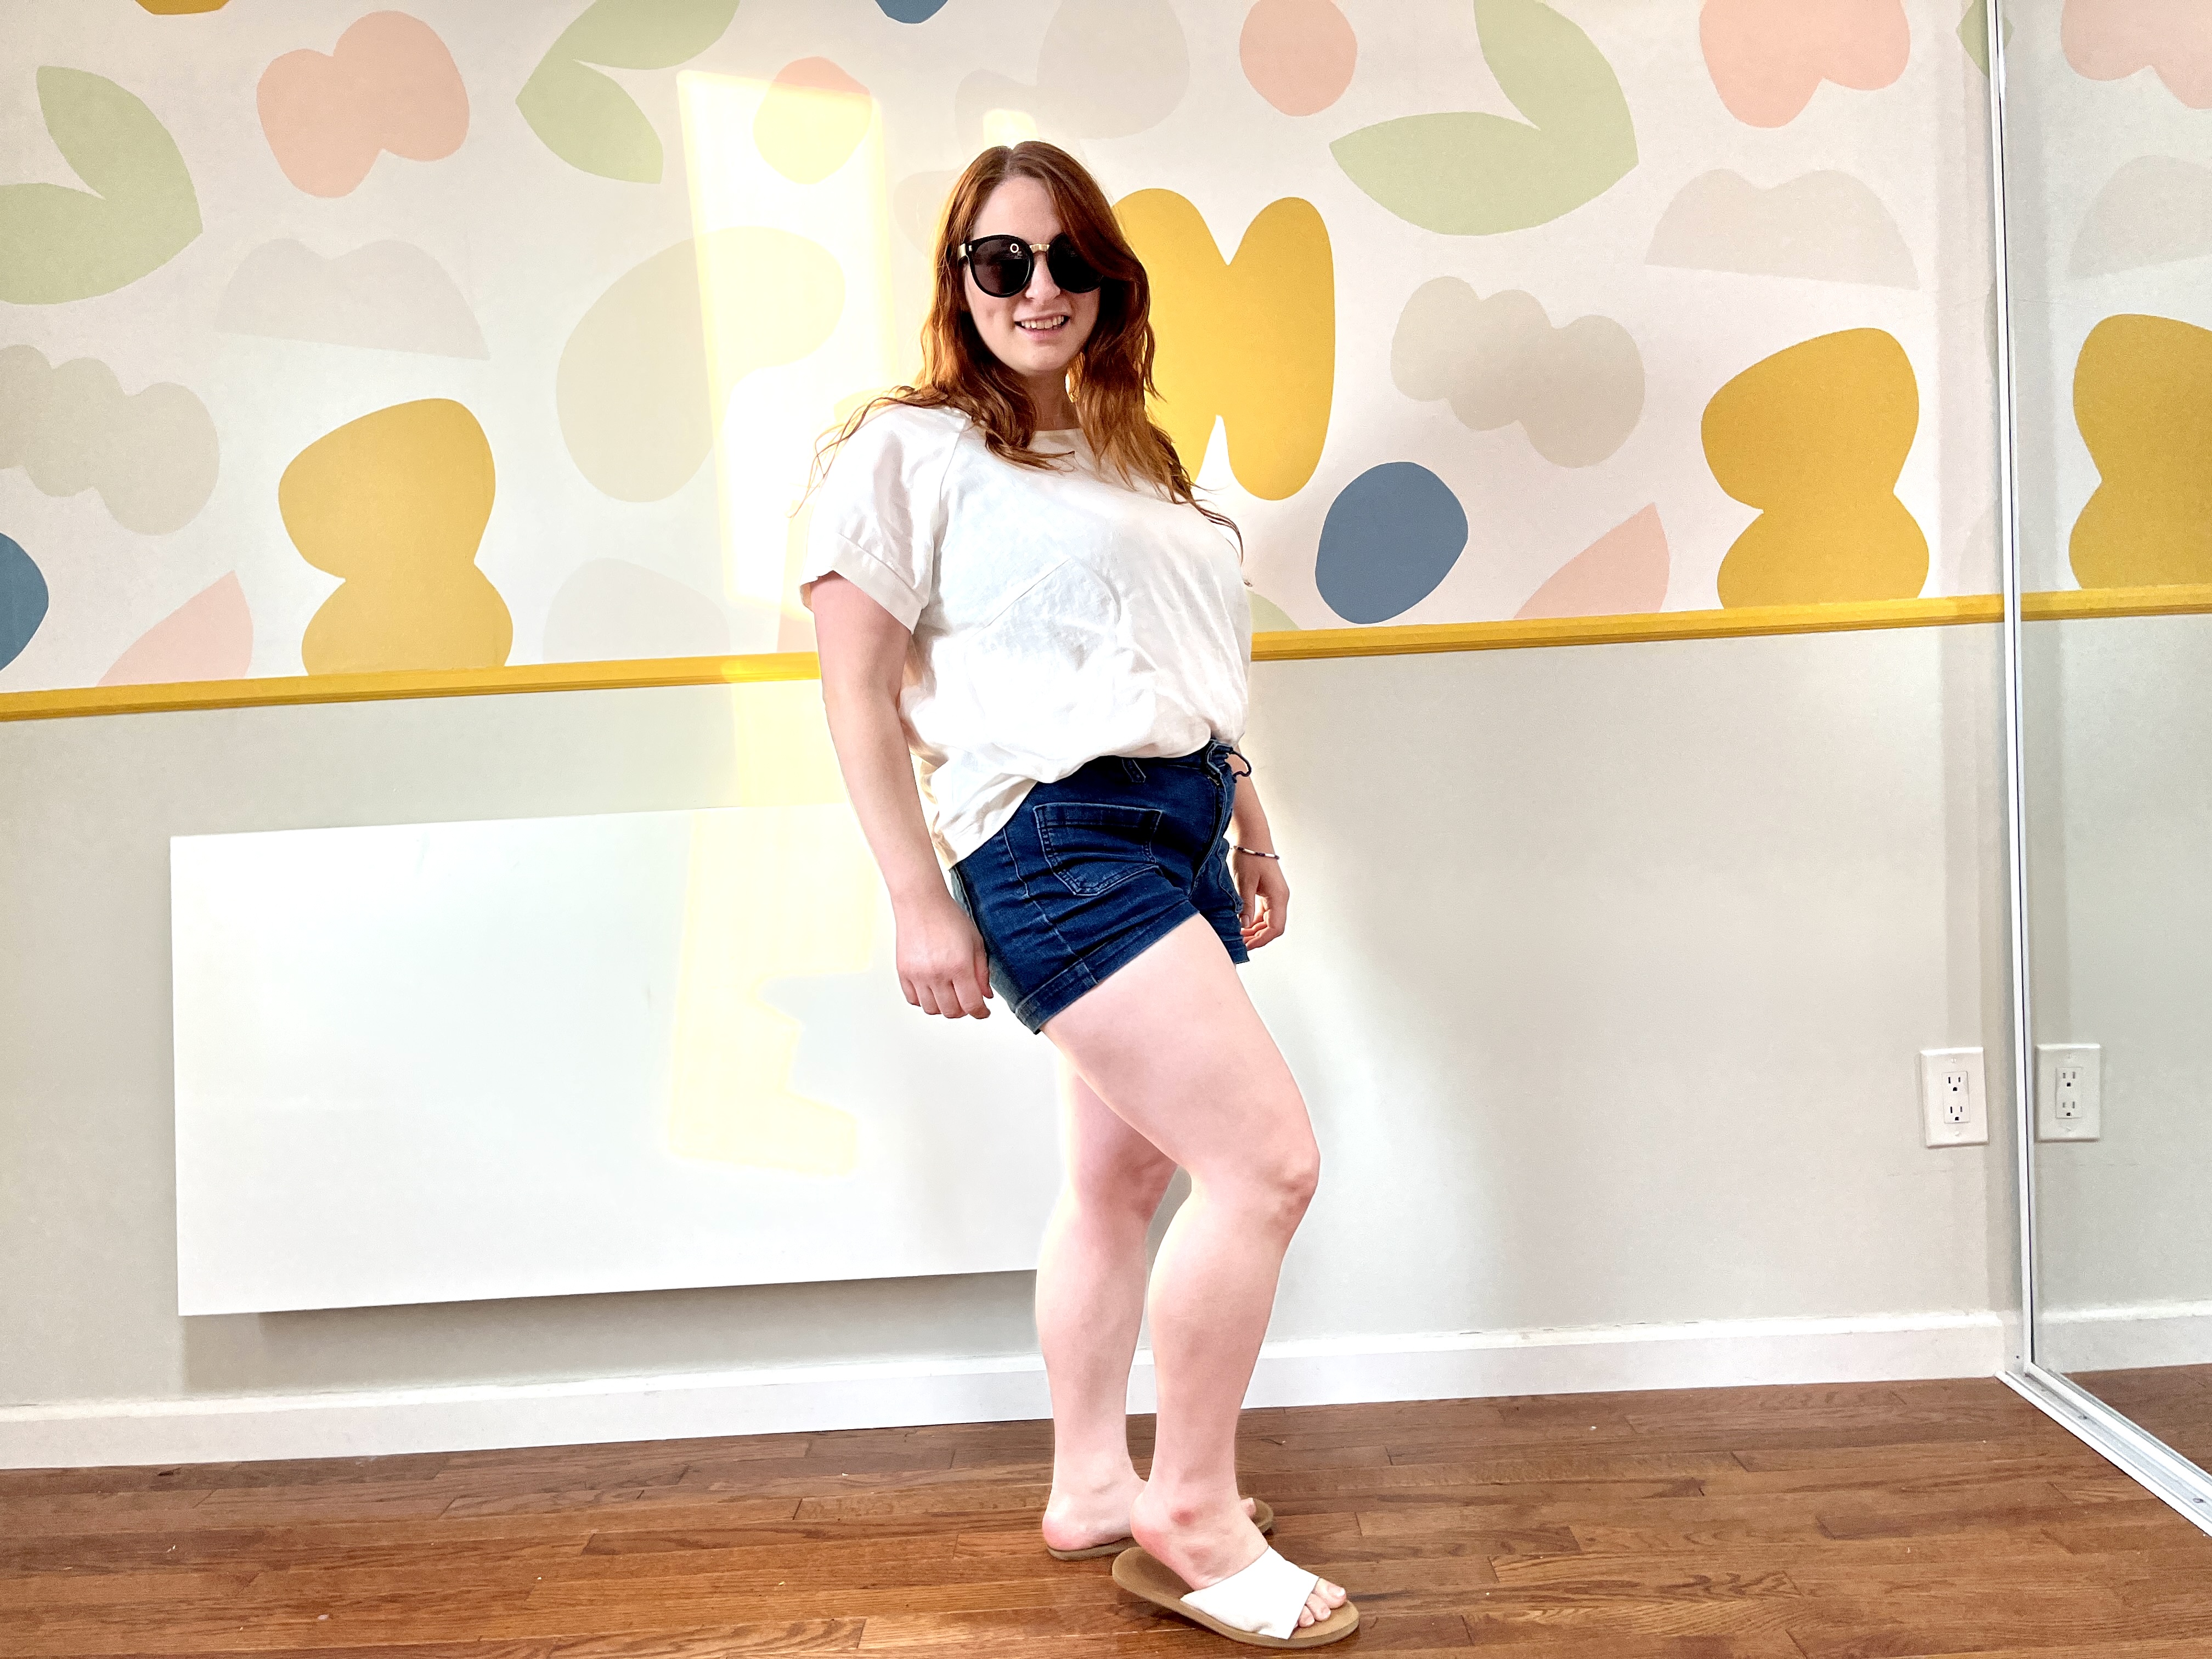
While most patterns are drafted for a garment B cup (a 2″ difference between high and full bust; different from bra cup size!), when I made this tee, I was breastfeeding and needed an M garment cup — 11″ difference between high and full bust — at my fullest. (Now that I’m done nursing, I’ve settled into an L garment cup, but that’s a story for another day.)
For this raglan tutorial, I’m using the free Chelsea Raglan Tee pattern from Fabrics-Store.com. It’s really not the most size-inclusive pattern, unfortunately, but the step-by-step of today’s tutorial can really be used on any woven raglan pattern and — if you combine the steps with the math from my knit bodice FBA tutorial — you can really use this tutorial for knit raglan patterns, too.
getting started
Choosing a base size
If you’ve read my previous FBA posts, you can skip this step. If not, hang tight because this is important.
Start with your high bust measurement, measured braless.
Measuring the high bust without a bra captures as little breast tissue as possible, which gives us a more accurate look at your skeletal frame, which is really what we’re trying to measure. Again, the high bust measurement is a proxy for your skeletal frame.
Select your size based upon this high bust measurement. My naked high bust measures about 35.5″, so I chose to start with a base size 8/10. (Importantly, my waist and hips fall into a 12/14, but since I know I’ll be adding inches with my FBA, I chose not to grade.)

how many inches to add?
For a woven bodice, all it takes is a bit of subtraction: Full bust/projected chest measurement (in my case, 46″) and subtract from that the full bust measurement given on the pattern size chart. That’s it.
For me, that means:
My bust: 46″
– Drafted bust: 38″ (the full bust measurement for the 8/10)
= 8″
This means I need to add 4″ to each side.
Performing the FBA
Find your apex & Draw FBA Lines
On woven tops, I like to find my apex by measuring on my body from my shoulder/neck point to my apex, and then from center front to my apex.
Then, I measured on the flat pattern front to find this same point — keeping in mind that you must account for half of the raglan sleeve width when determining where the shoulder/neck point is on the pattern. (I didn’t do this the first time, and ended up with my apex being 2.5″ too low! Oops!)
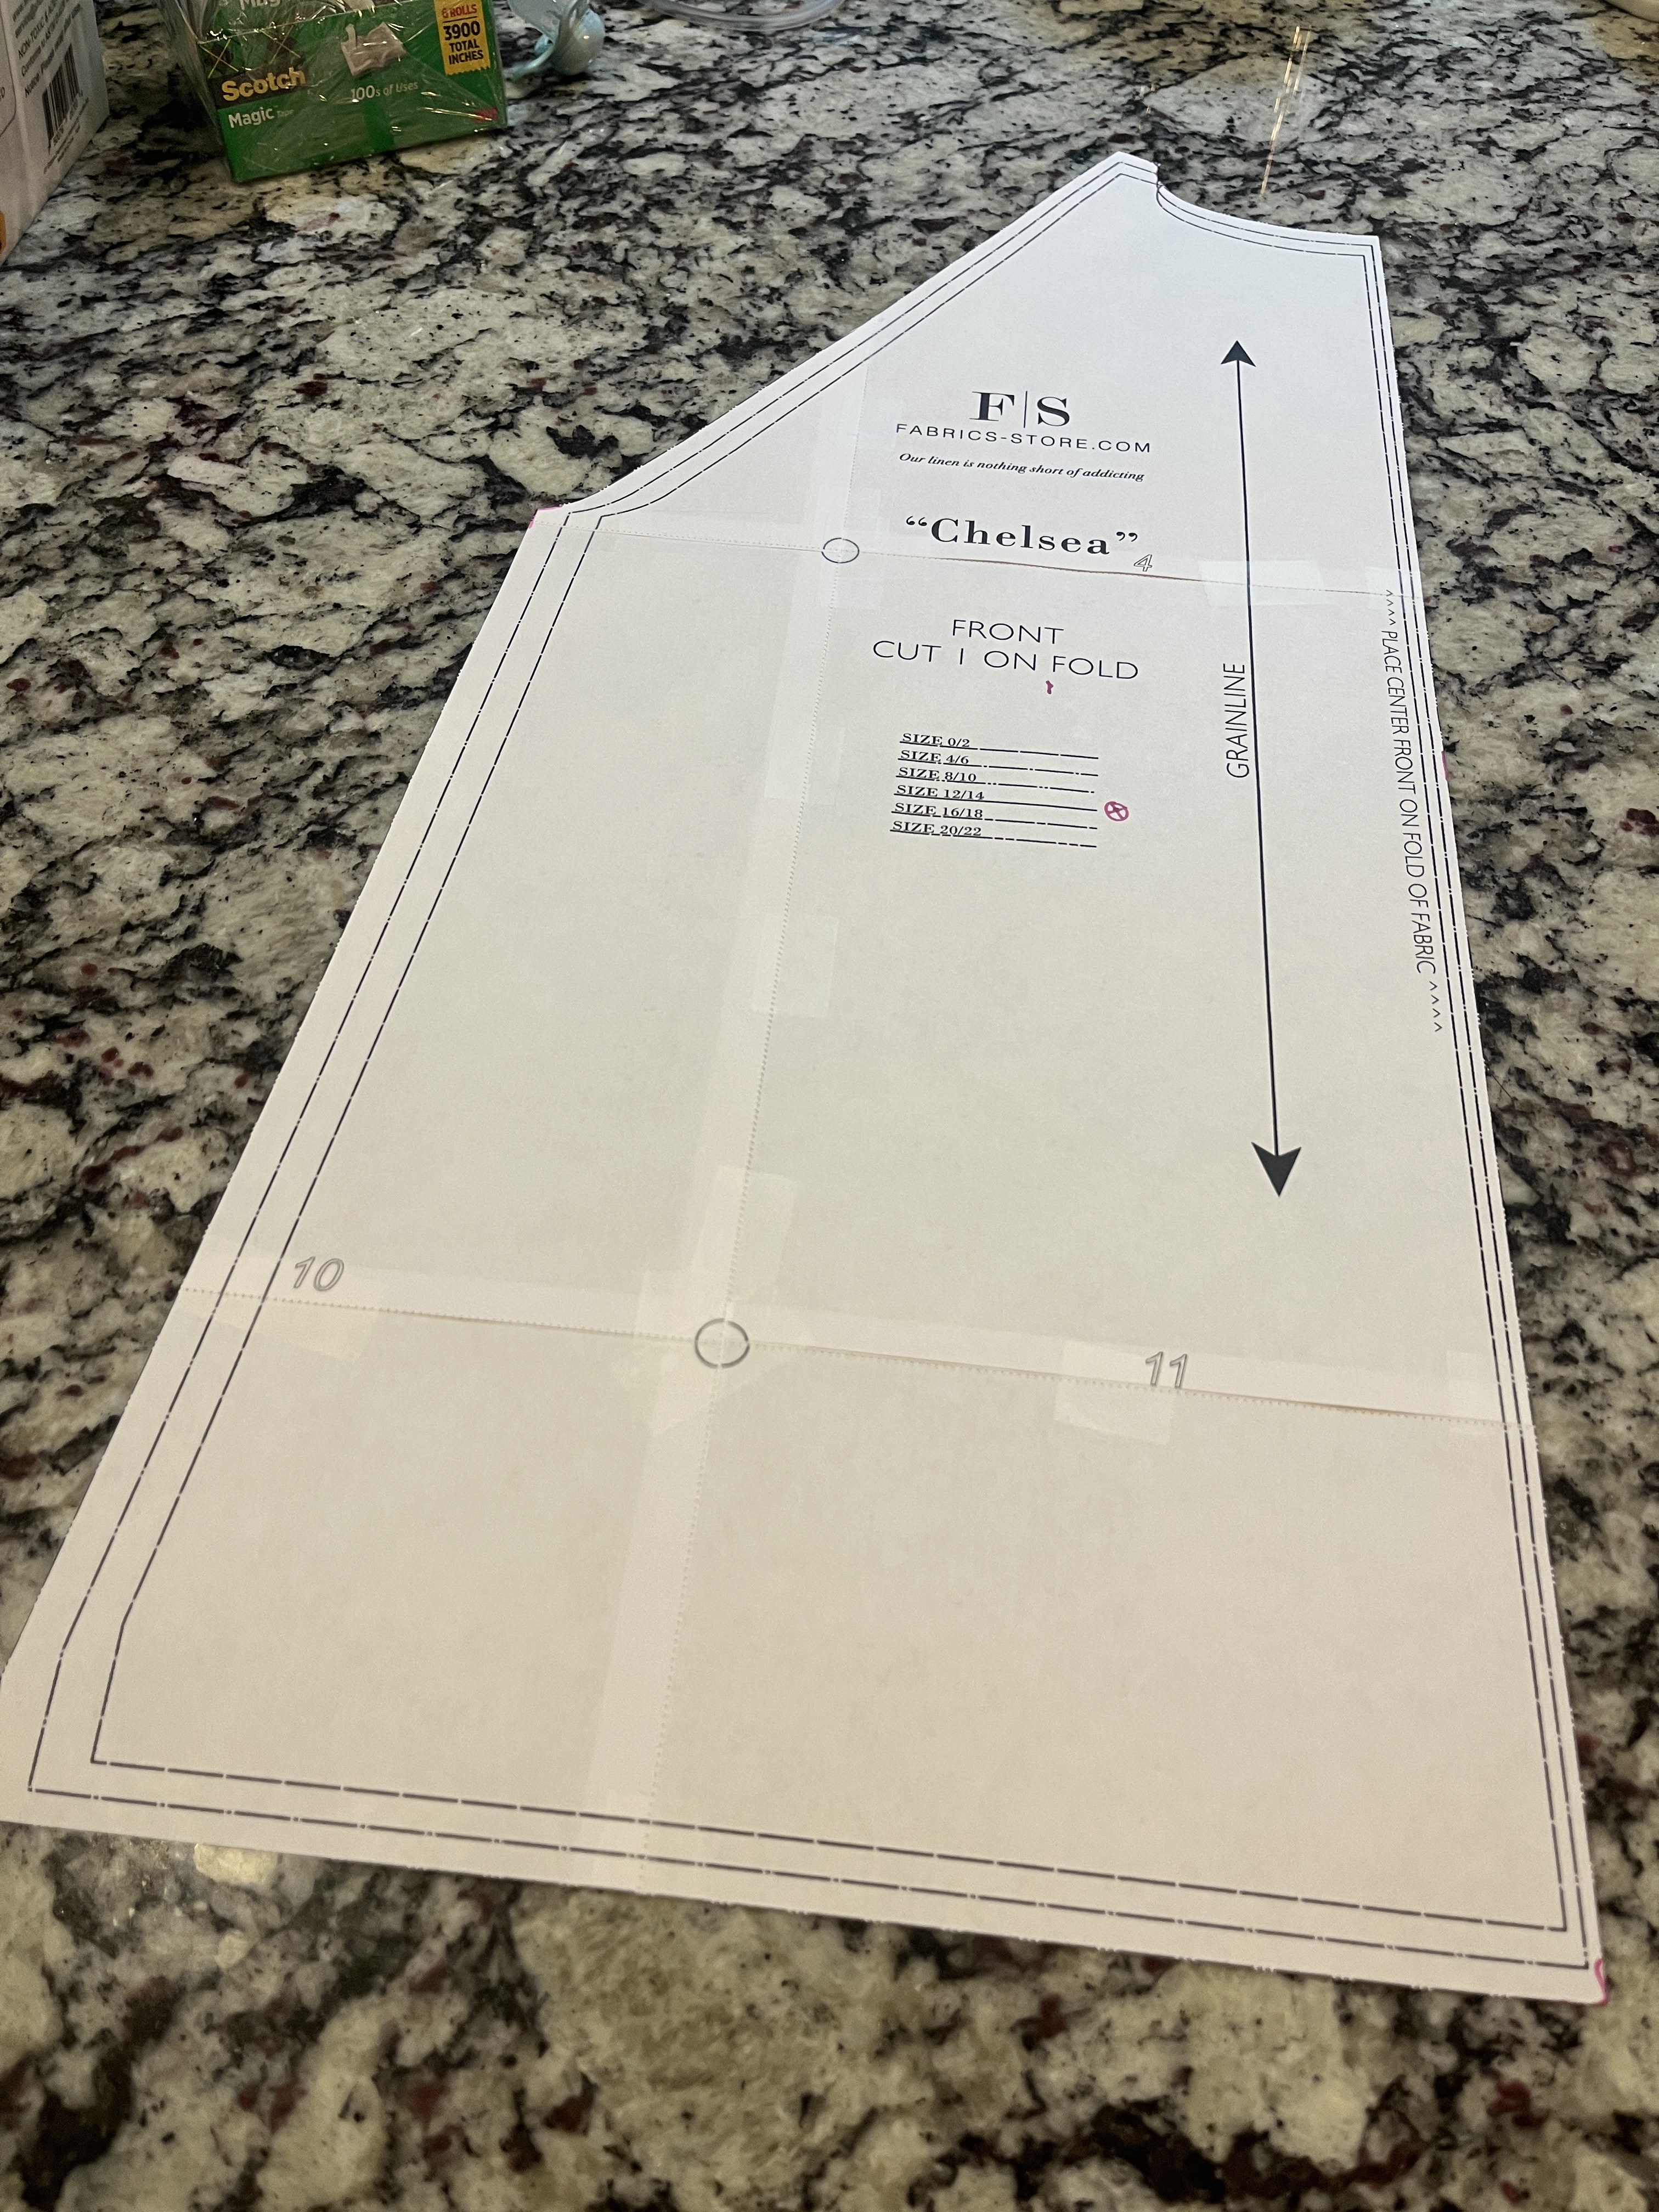
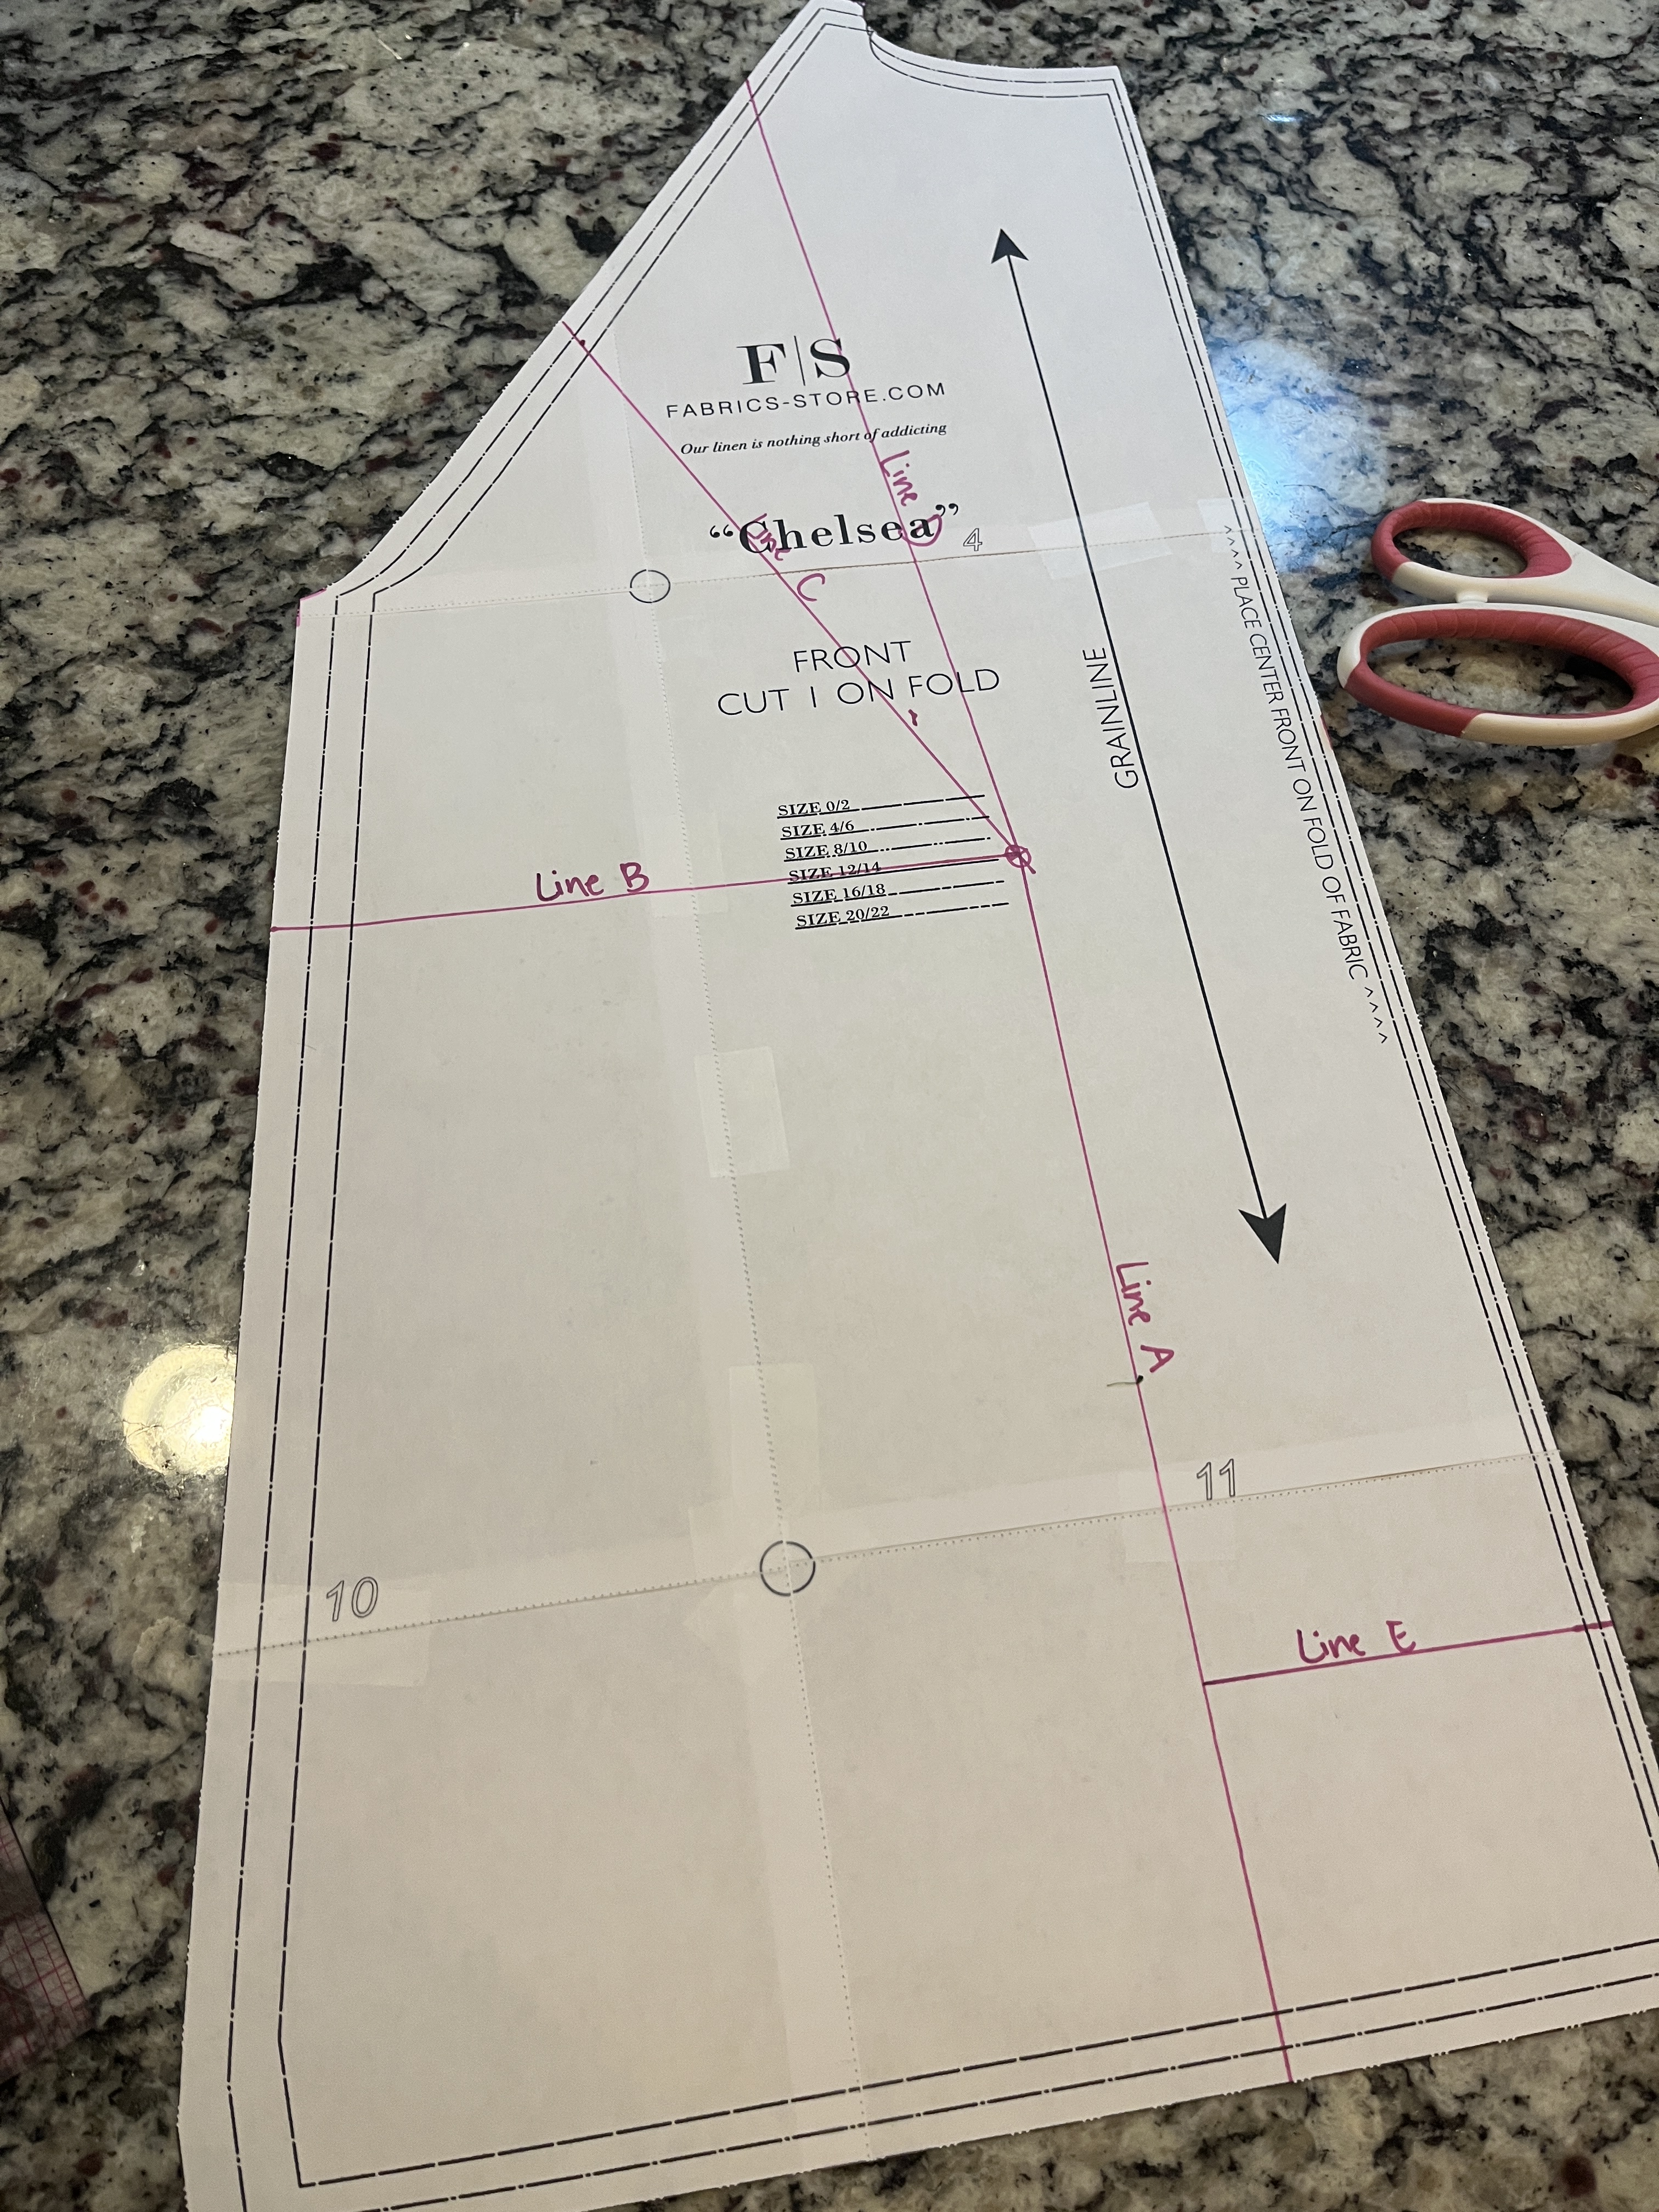
Once you’ve identified your apex, we’re going to draw some lines. We’re essentially doing a Y-FBA:
- Line A from apex to the hem, parallel to the grainline
- Line B from apex to the lower side seam
- Line C from apex to 1/2 down sleeve seam
- Line D from apex to 1/3 down sleeve seam
- Line E from Line A to center front
cutting and spreading the lines
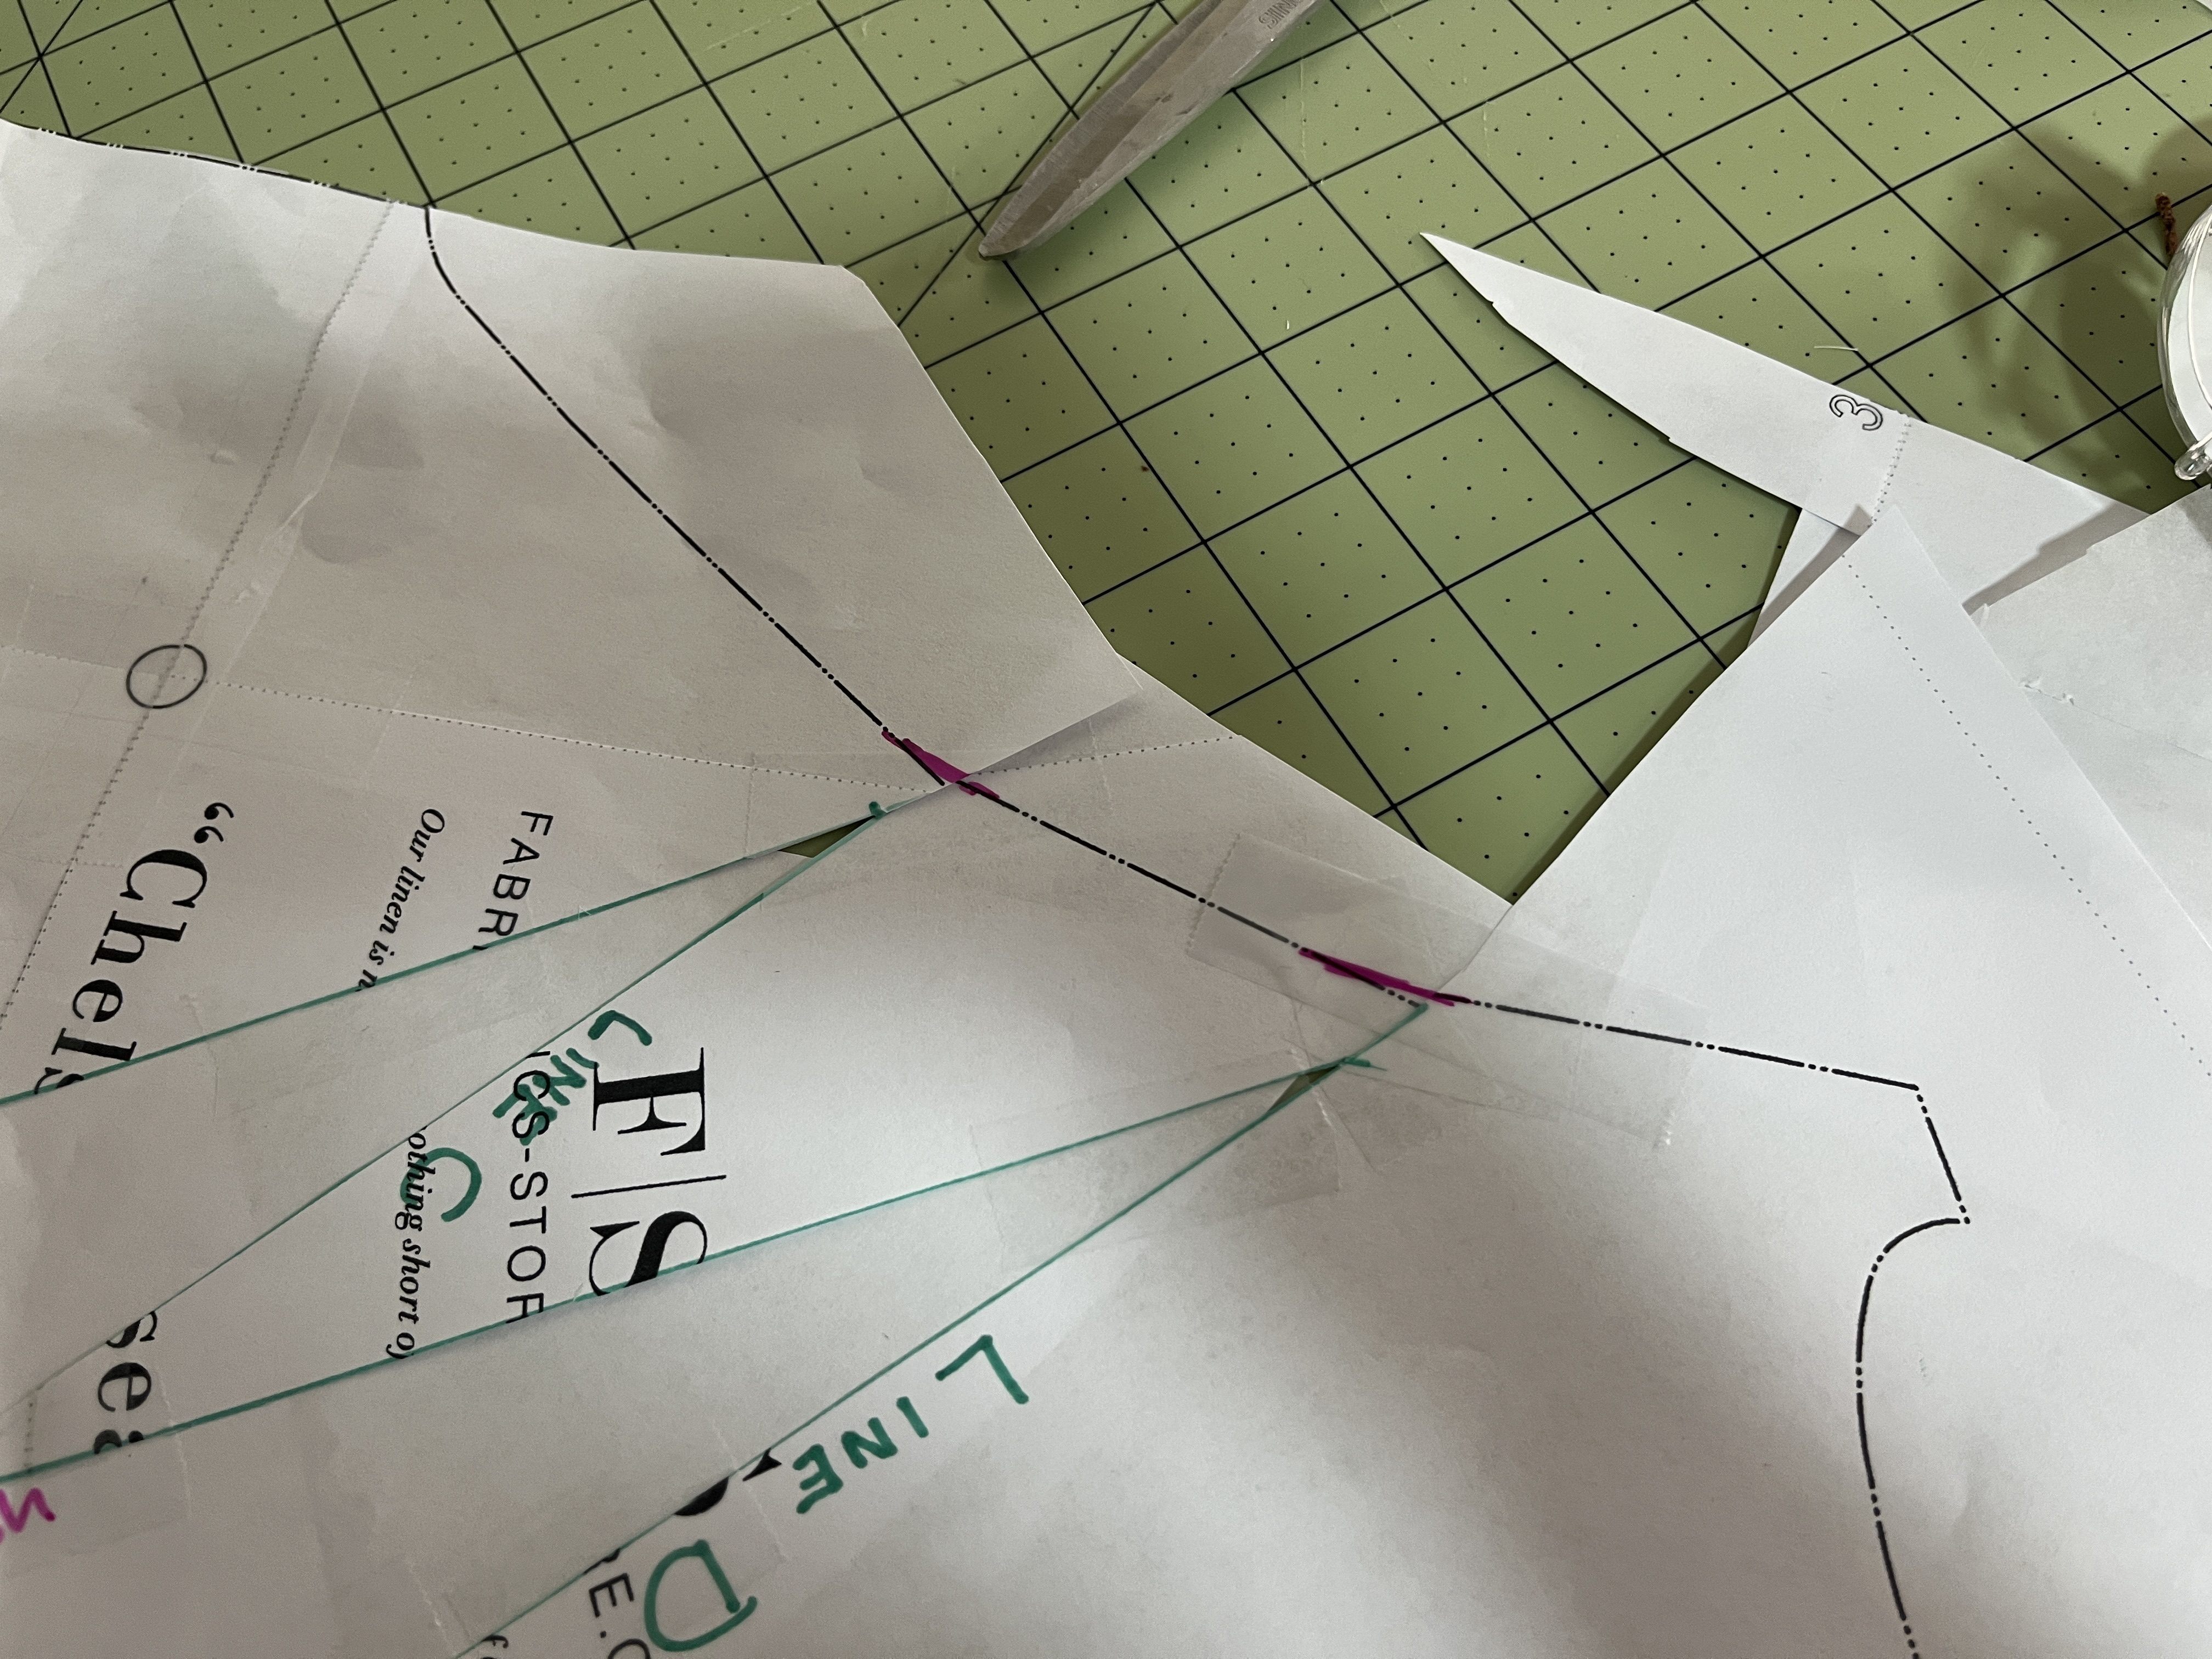
Start by marking your seam allowances at the sleeve seam at Lines C and D, then reinforce these seam allowance points as well as your apex with a piece of tape.
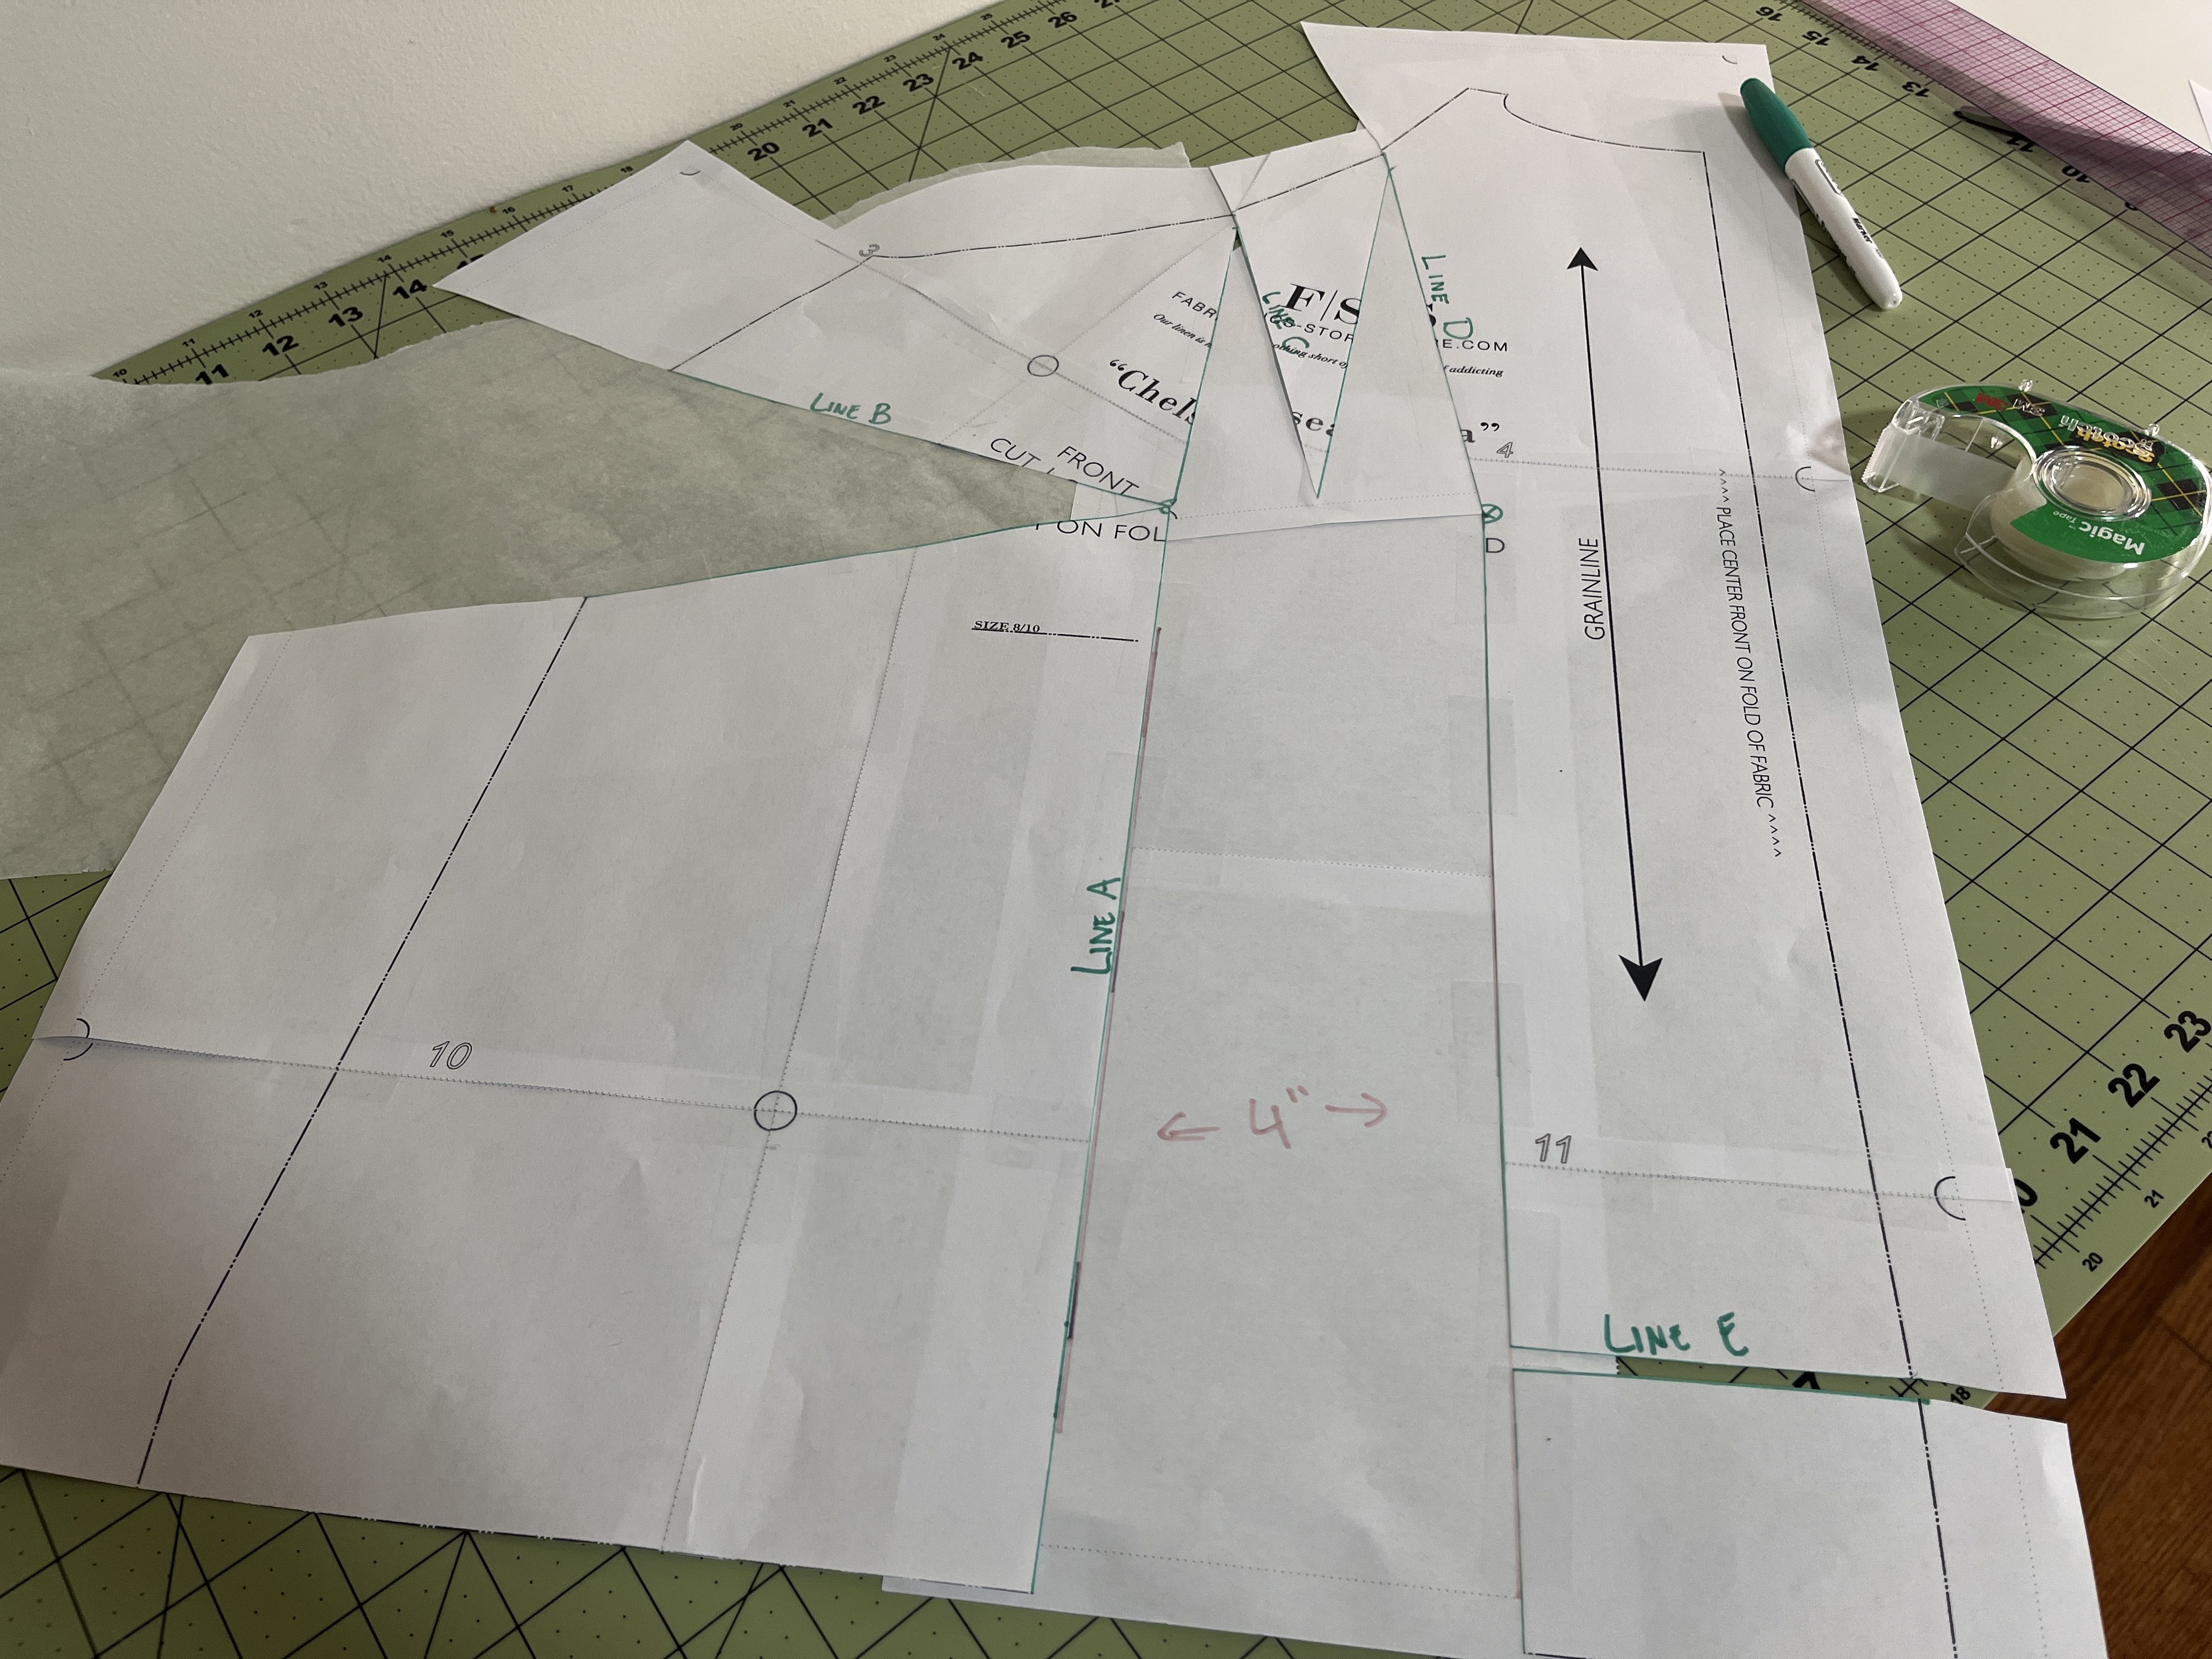
Now, cut along Line A from the hem to the apex, then along Line C and Line D from the apex to — but not through — the seam allowance markings. Then, cut along Line B from the armscye to but not through the apex. Finally, cut along Line C and Line D from the sleeve seam to but not through the seam allowance marking.
Our next step is to add those inches that we determined earlier. If you recall, I determined I needed to add 8″ to the full bust of my pattern, which means I need to add 4″ per side.
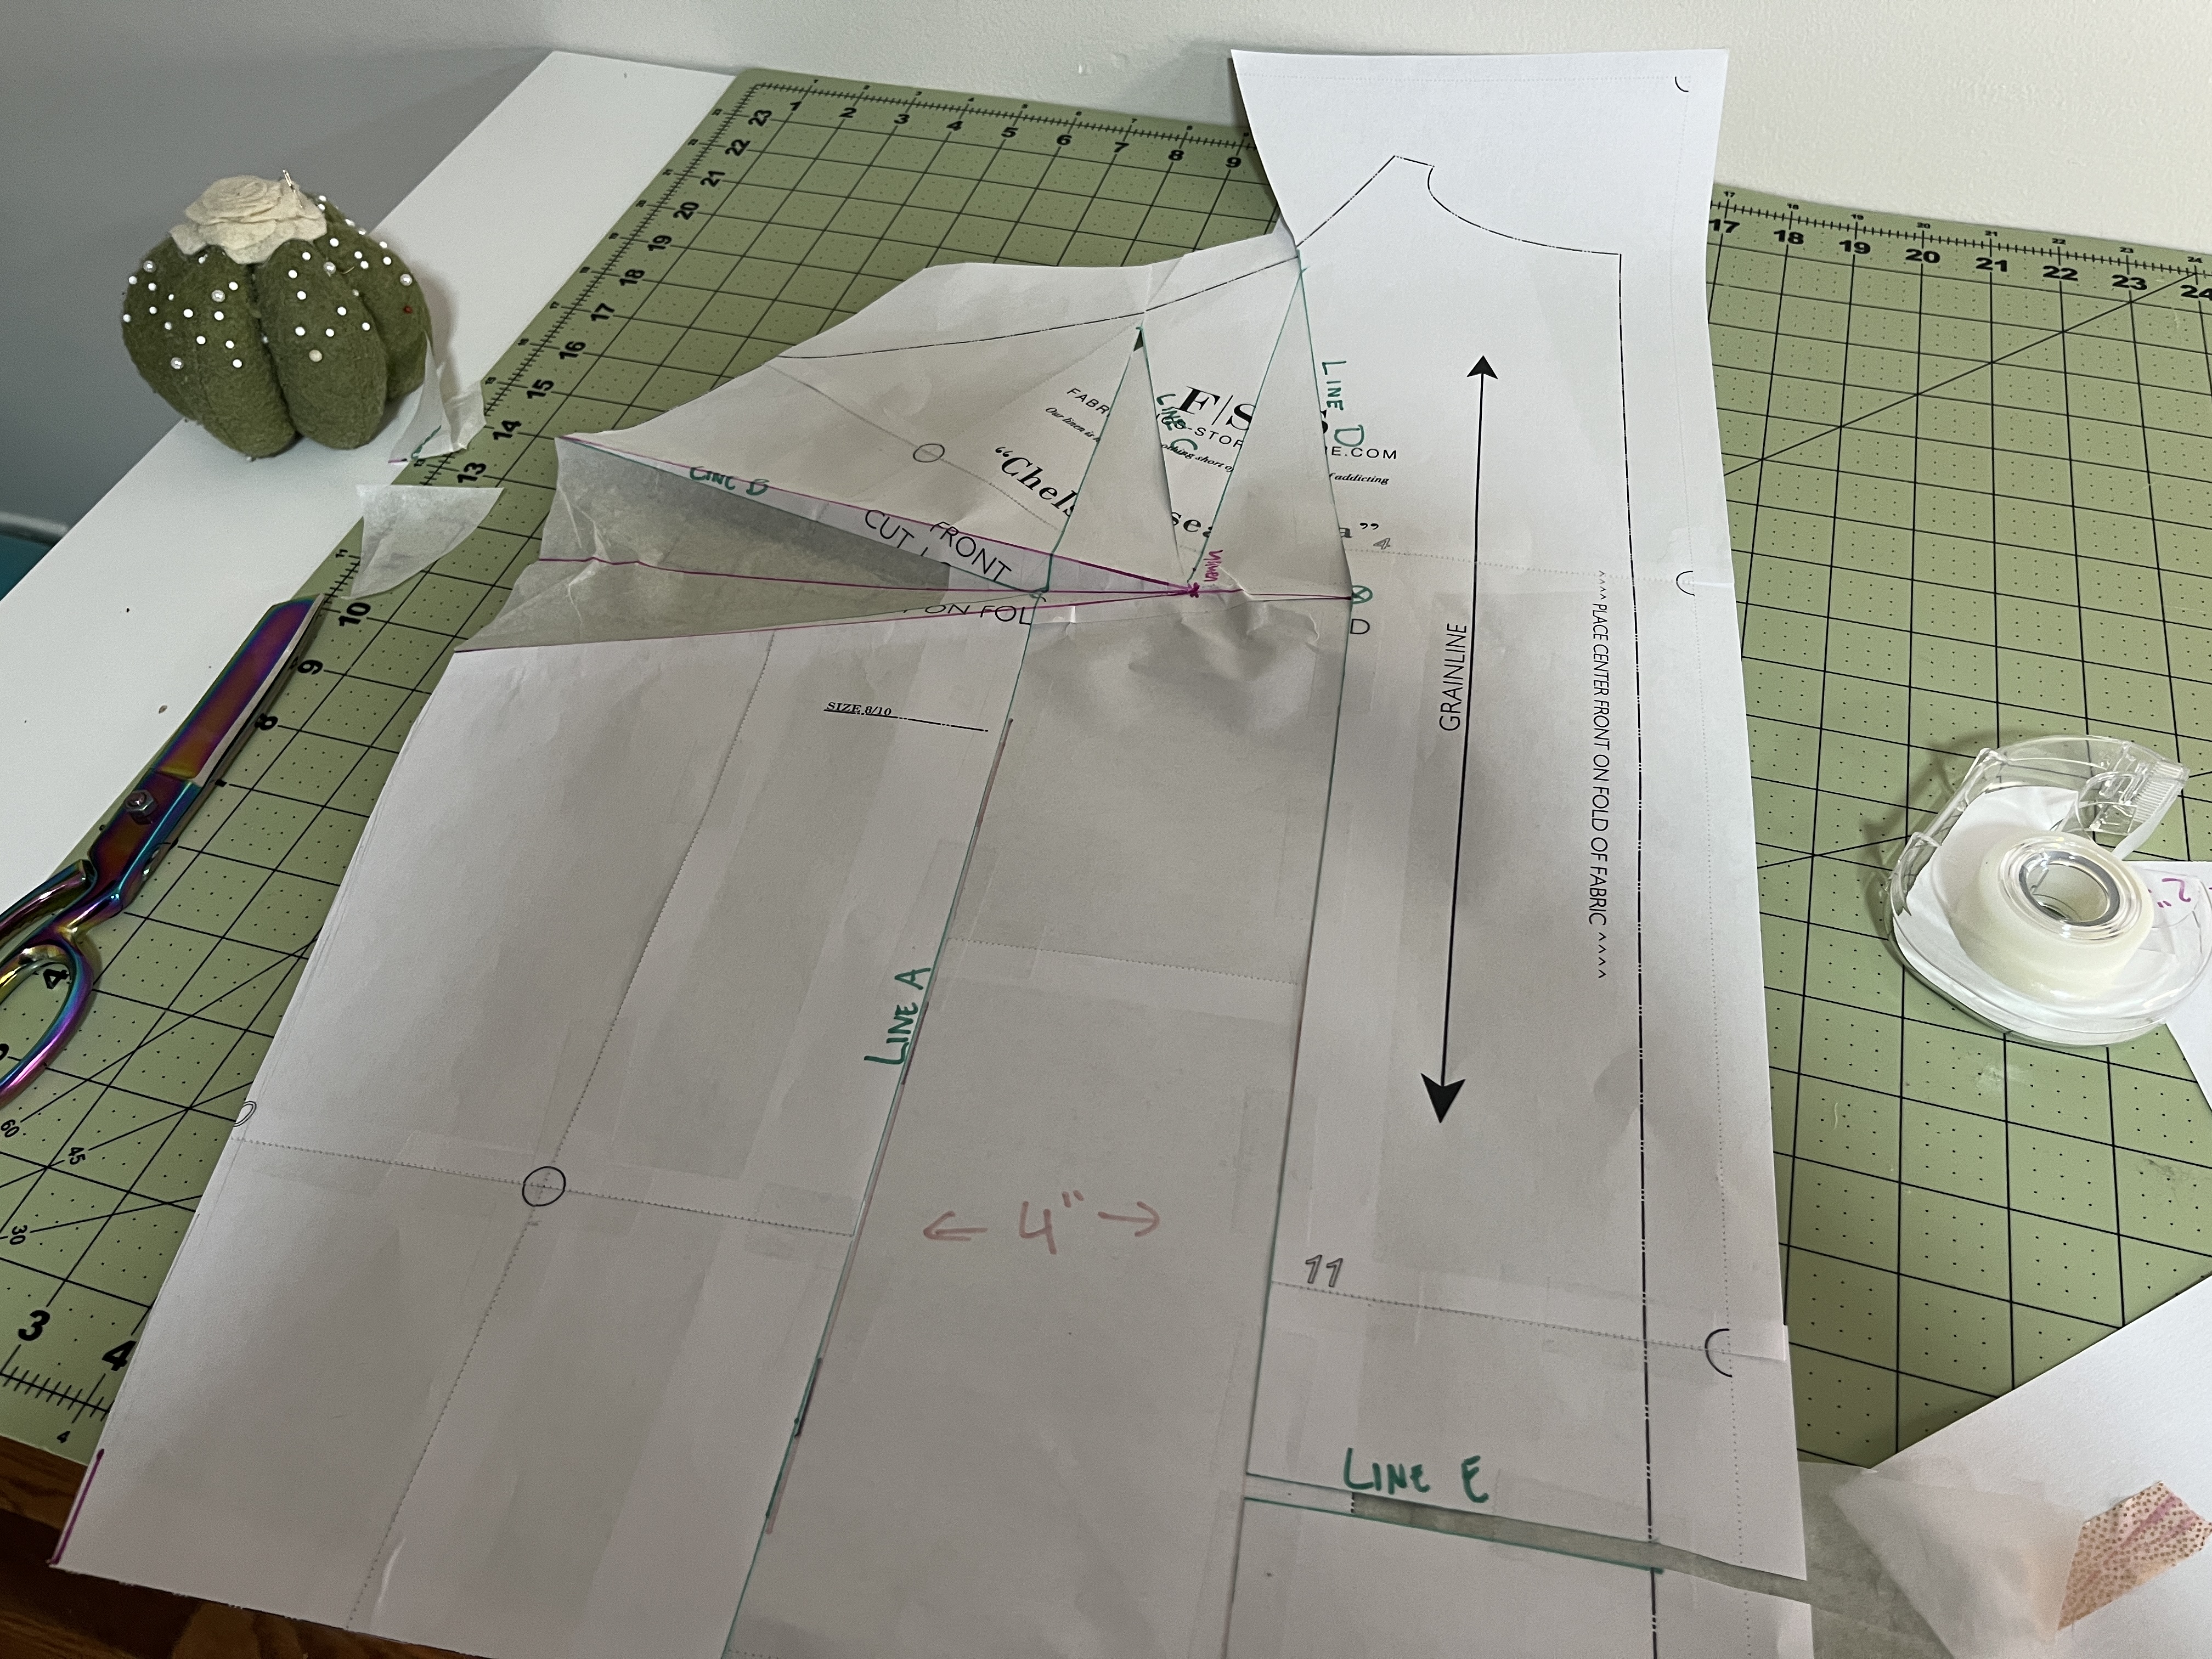
Grab a scrap piece of paper, and draw two straight lines, up and down, the same number of inches apart as you need to add per side — so 4″ for me.
Tape down your pattern piece, lining up each side of your cut Line A with the lines on this scrap paper. When spreading your pattern, you want to pull down and out, so that the upper part of your pattern remains flat.
You’ll notice that this creates an uneven hem. To fix this, we’ll cut along Line E and pull that lower corner down to be even with the other side of our pattern. Now all that’s left is to true up your hem.
Drawing your new dart
Since we did such a large adjustment, we’re going to keep the dart we created. A dart on a raglan?! I know, I know. But trust me. It’s going to fit SO MUCH BETTER than a dartless raglan would.
I start by finding the center point of my dart by measuring the total width of the dart and marking the middle.
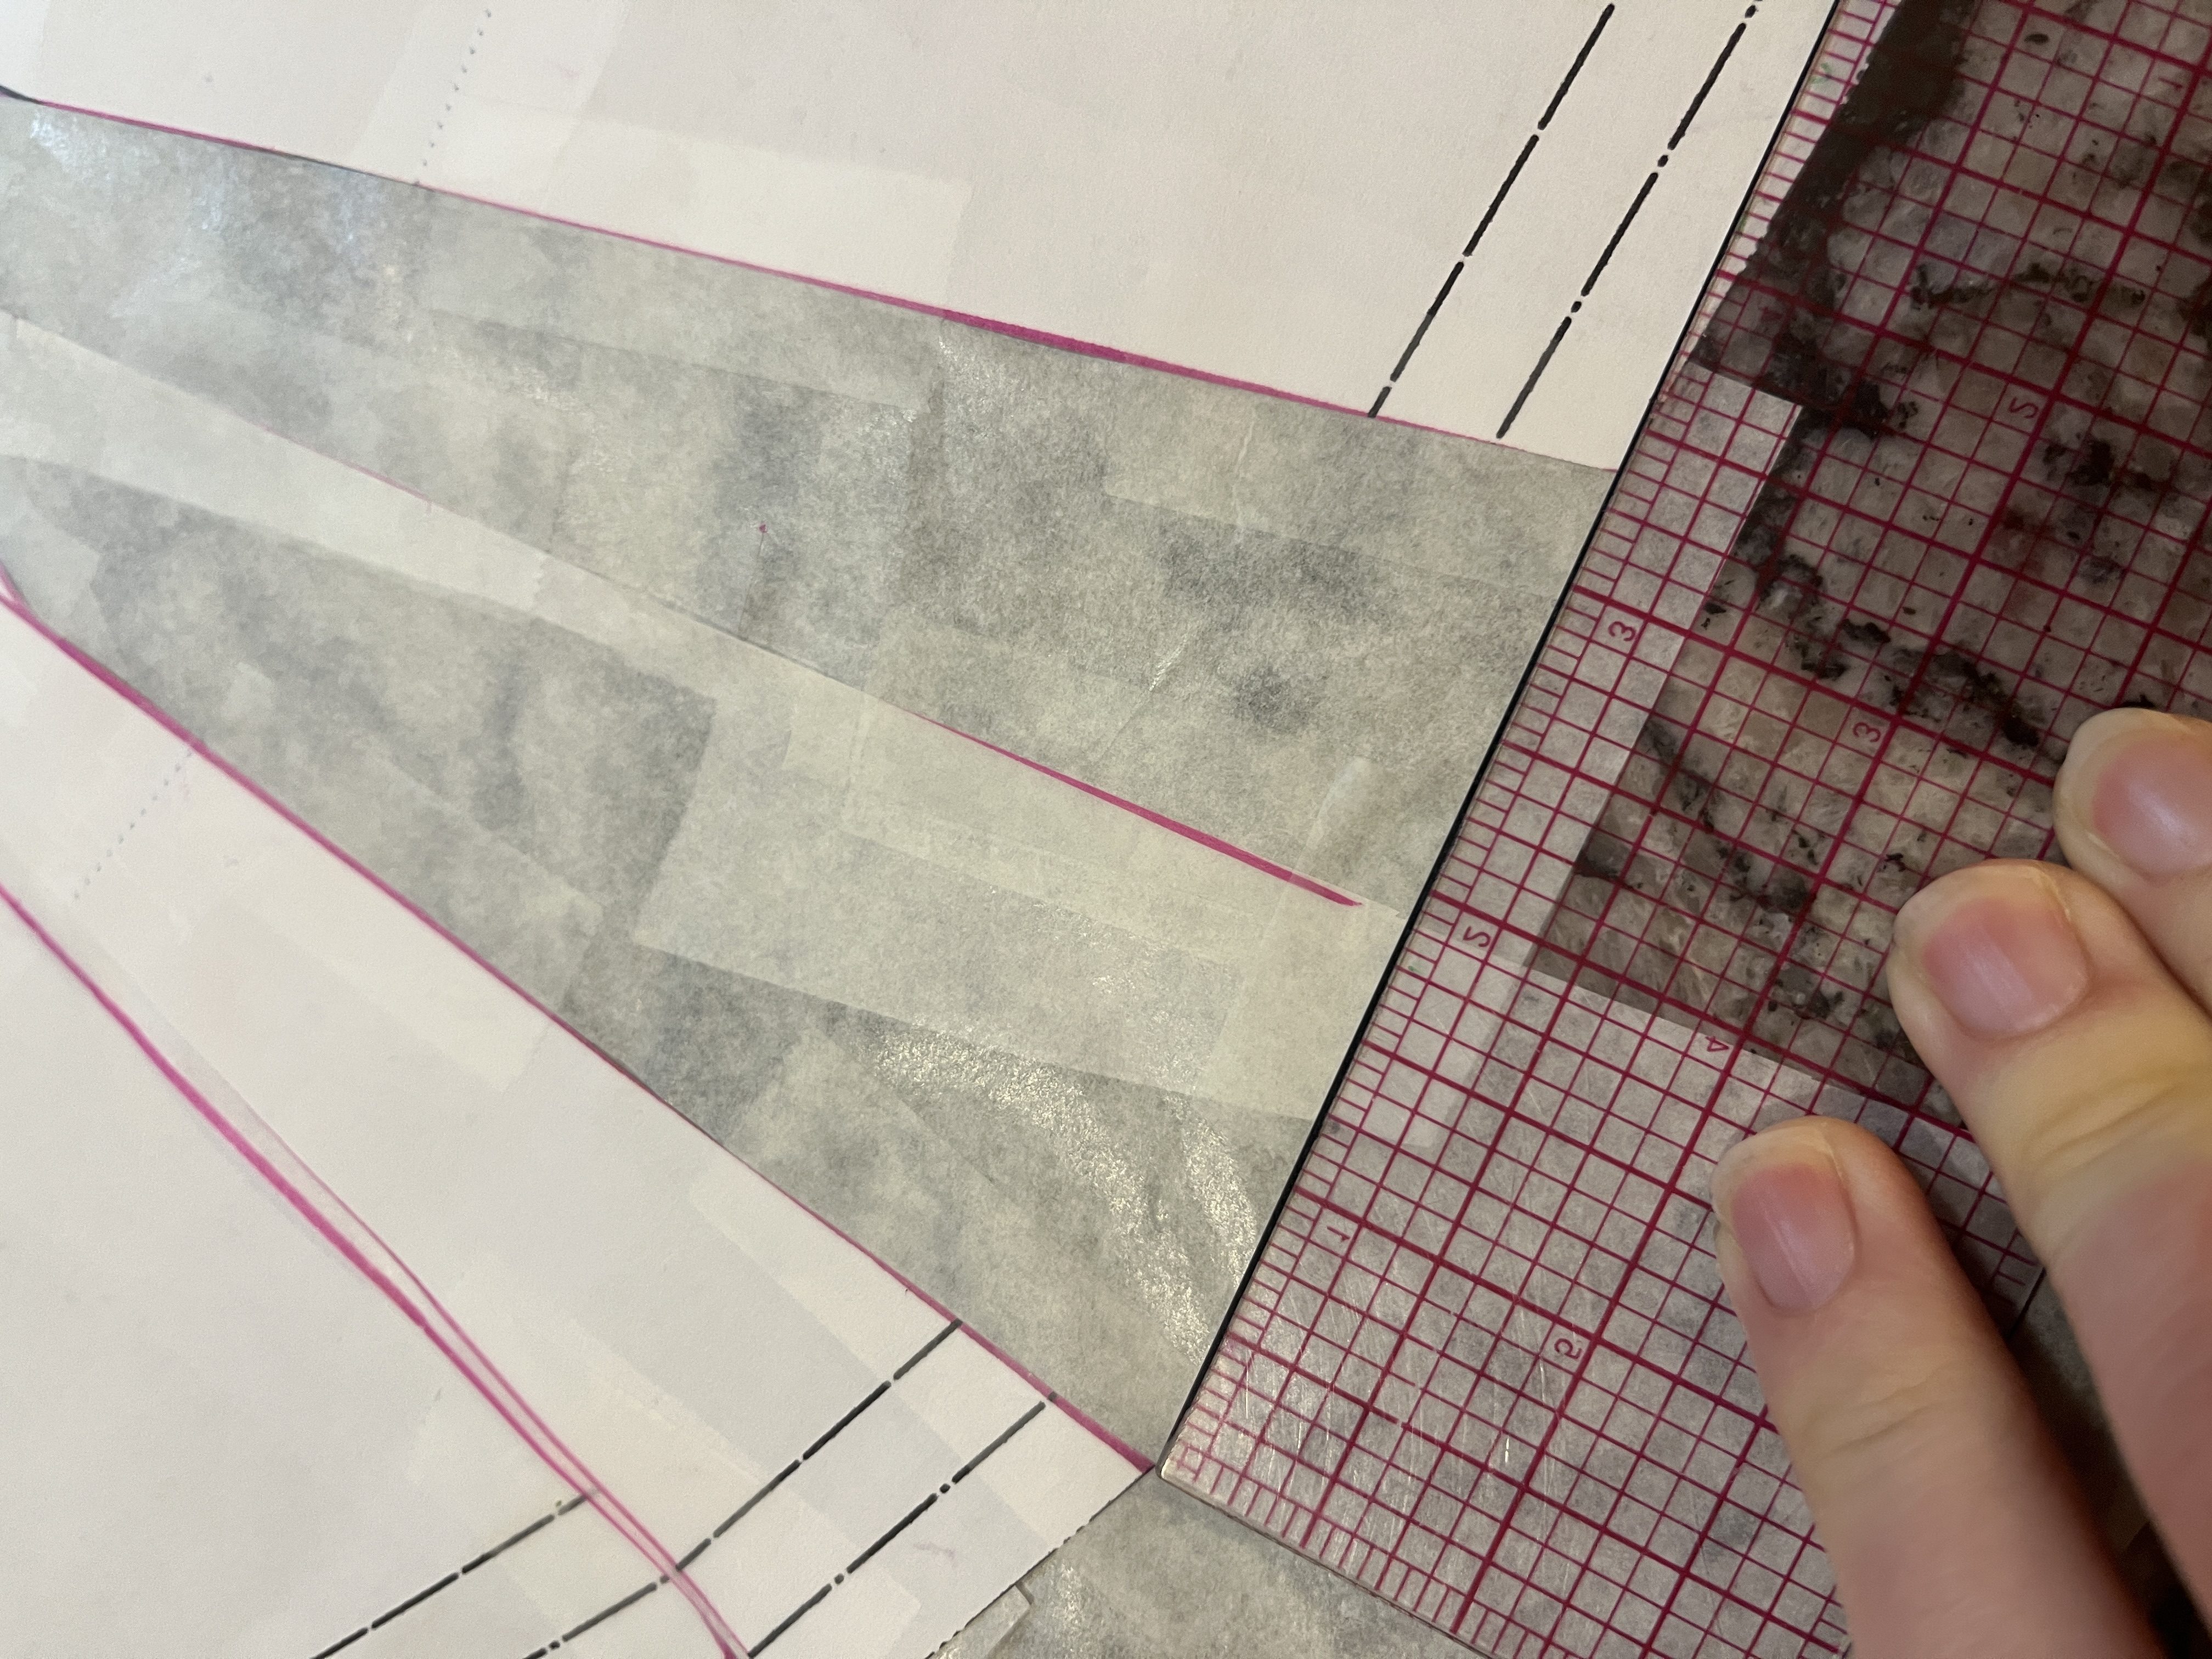
Now, draw a line from this center mark on the dart to the apex.
You’re now going to mark a point on this line a certain number of inches from your apex for your dart vanishing point, depending on your garment cups size. Here’s my rule of thumb to start, but everyone has their preferences about vanishing points, so go with what you like!
| I+ garment cup | 9″+ (22.85 cm+) full/high bust difference | 2.5″ (6.35 cm) |
| G-H garment cup | 7-8″ (17.8-20.3 cm) full/high bust difference | 2″ (5 cm) |
| DD/E-F garment cup | 5-6″ (12.7-15.2 cm) full/high bust difference | 1.5″ (3.8 cm) |
| D garment cup or smaller | 4″ or less (10.2 cm) full/high bust difference | 1″ (2.5 cm) |

So I made my mark 2.5″ back from the apex. This will be my vanishing point, or where the dart will actually end.
Now, you’re just going to connect this vanishing point to your dart leg ends. Et voilà! You have a dart!
Reducing the waist & Truing
I like to fold my dart and secure with washi tape.
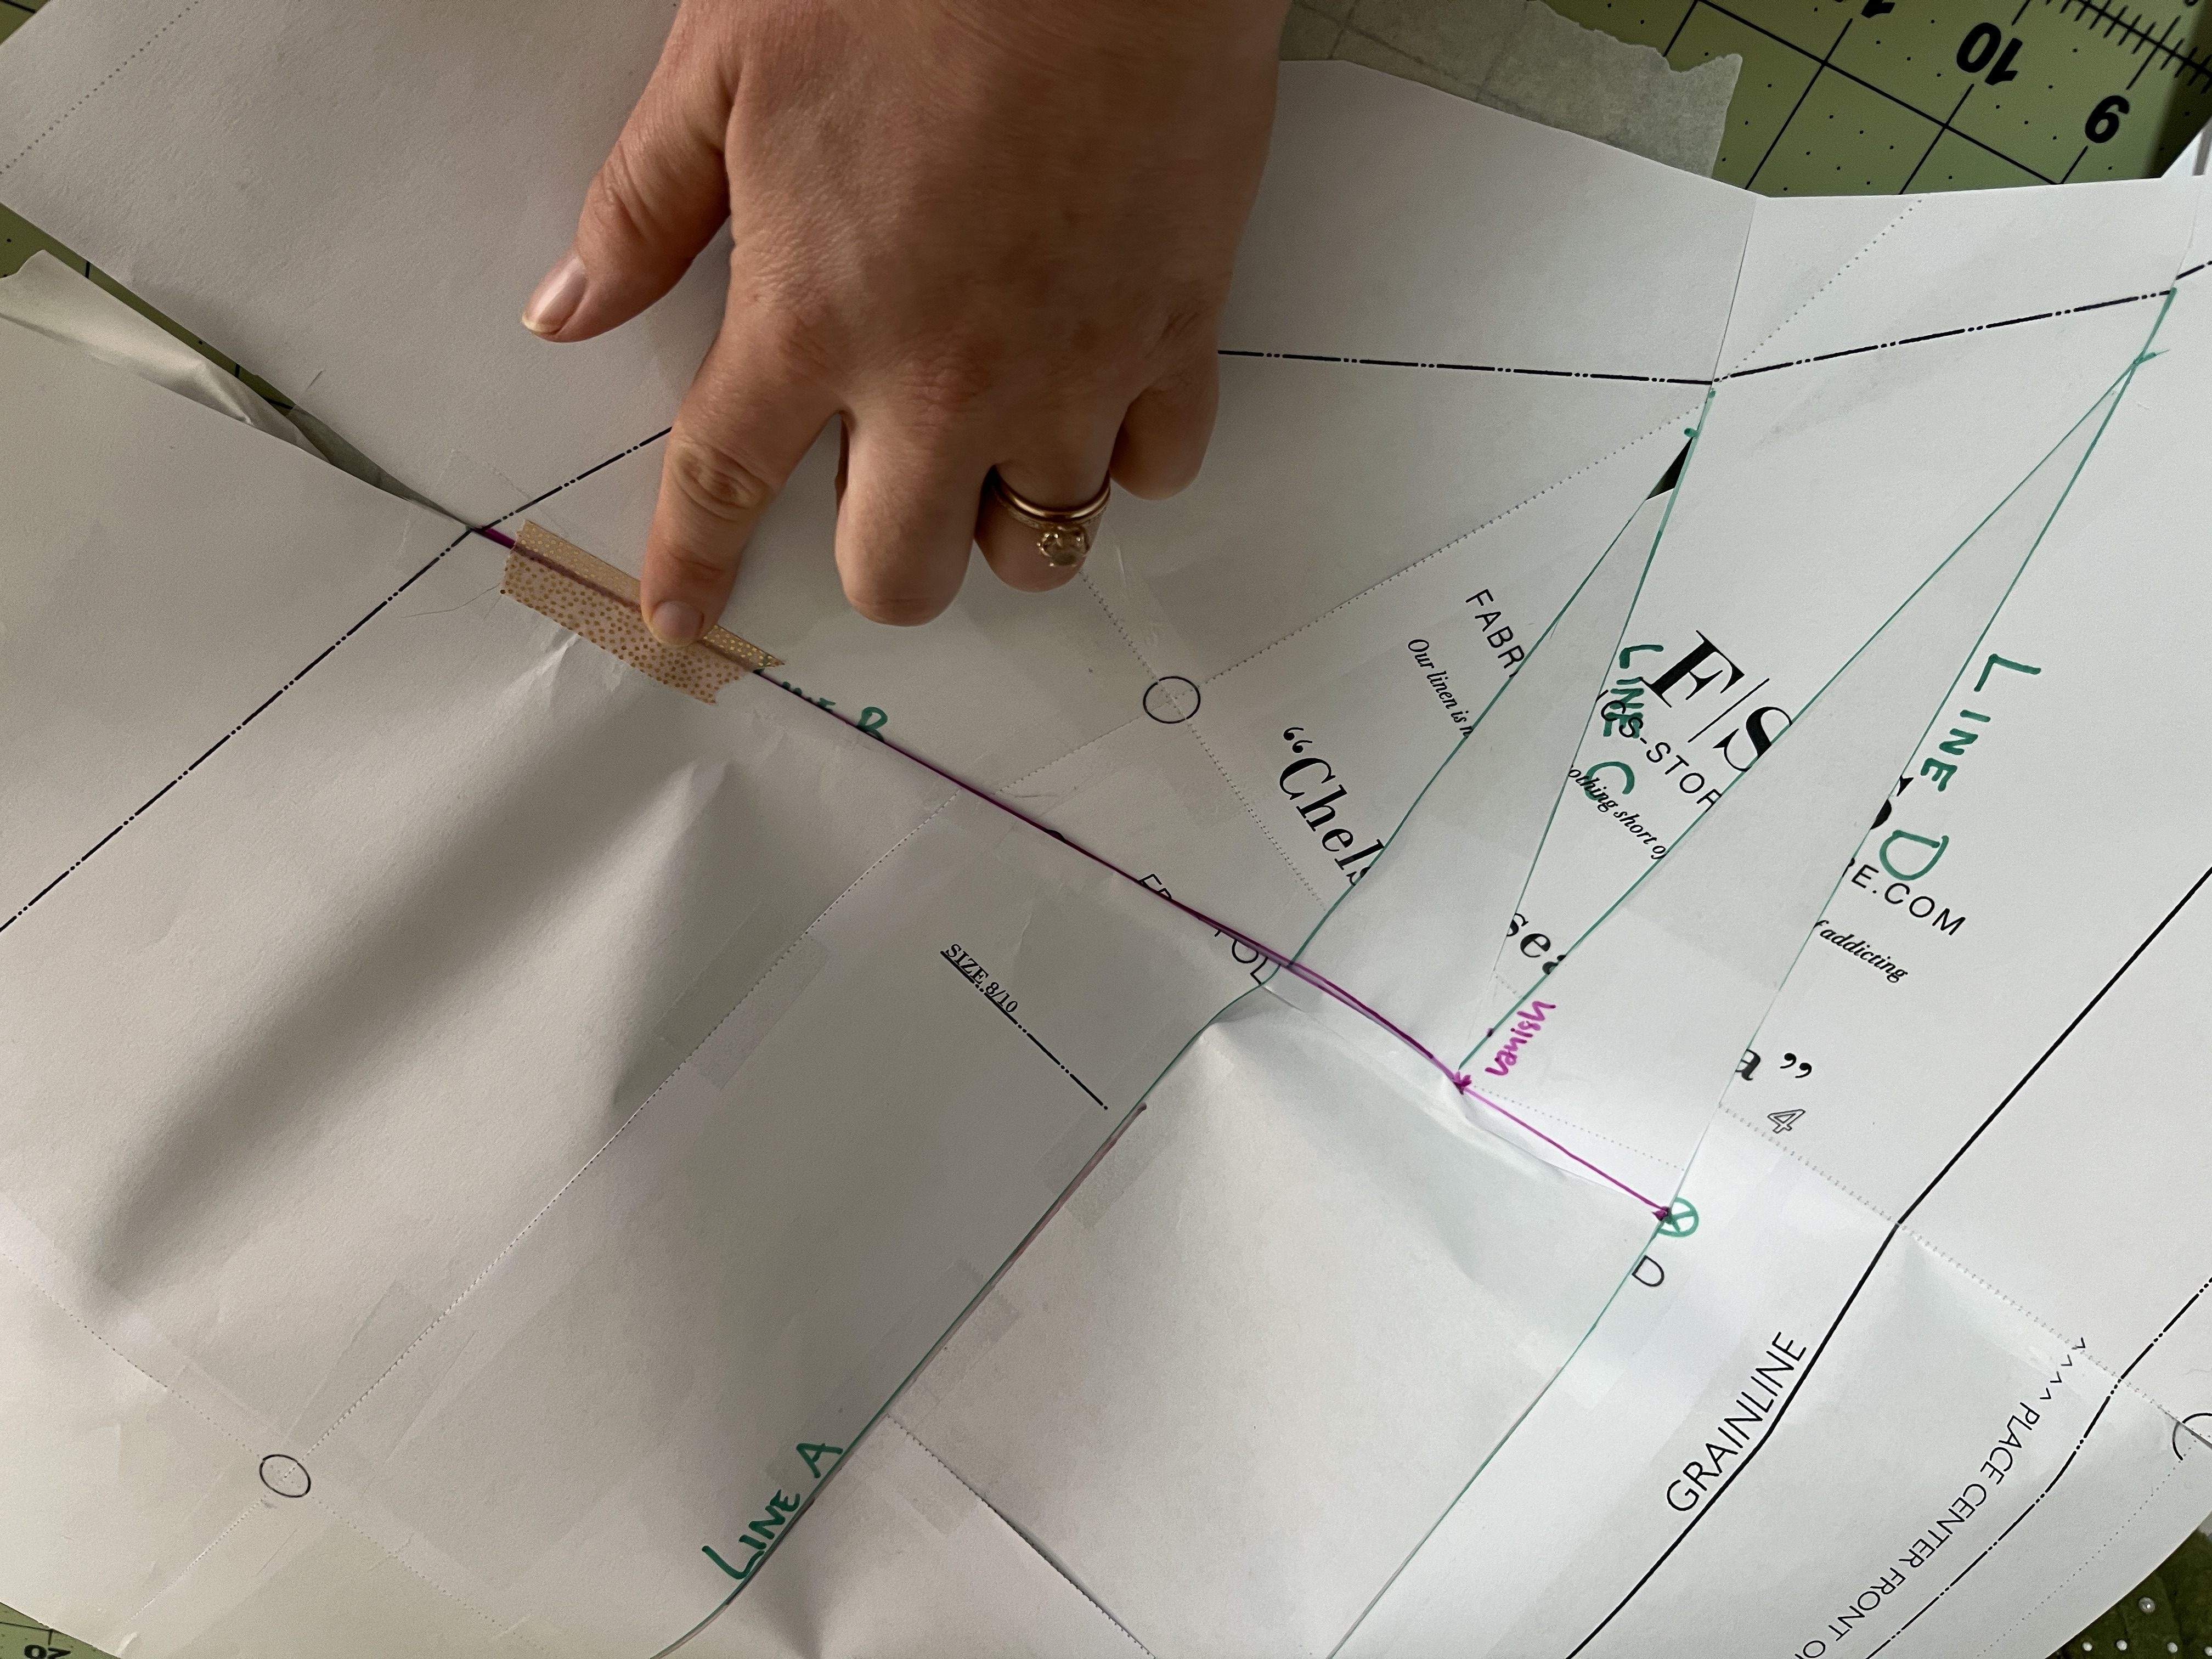
then use my handy scissors to cut out the side seam. Once you fold this out, this shows you how you should cut your dart
Since I added 4″ to the waist on each side of the pattern during my FBA, I want to reduce this a bit. As I mentioned above, my waist is a bit bigger than the 8/10 anticipates, so I didn’t need to remove all 4″ per side, but wanted to reduce by about 2″ (a total of 4″).
I did this by marking 2″ inward on the hem of the top. Then, I drew a line from this point to my new dart. Then, using my handy scissors, I cut along this new side seam line all the way through my dart.
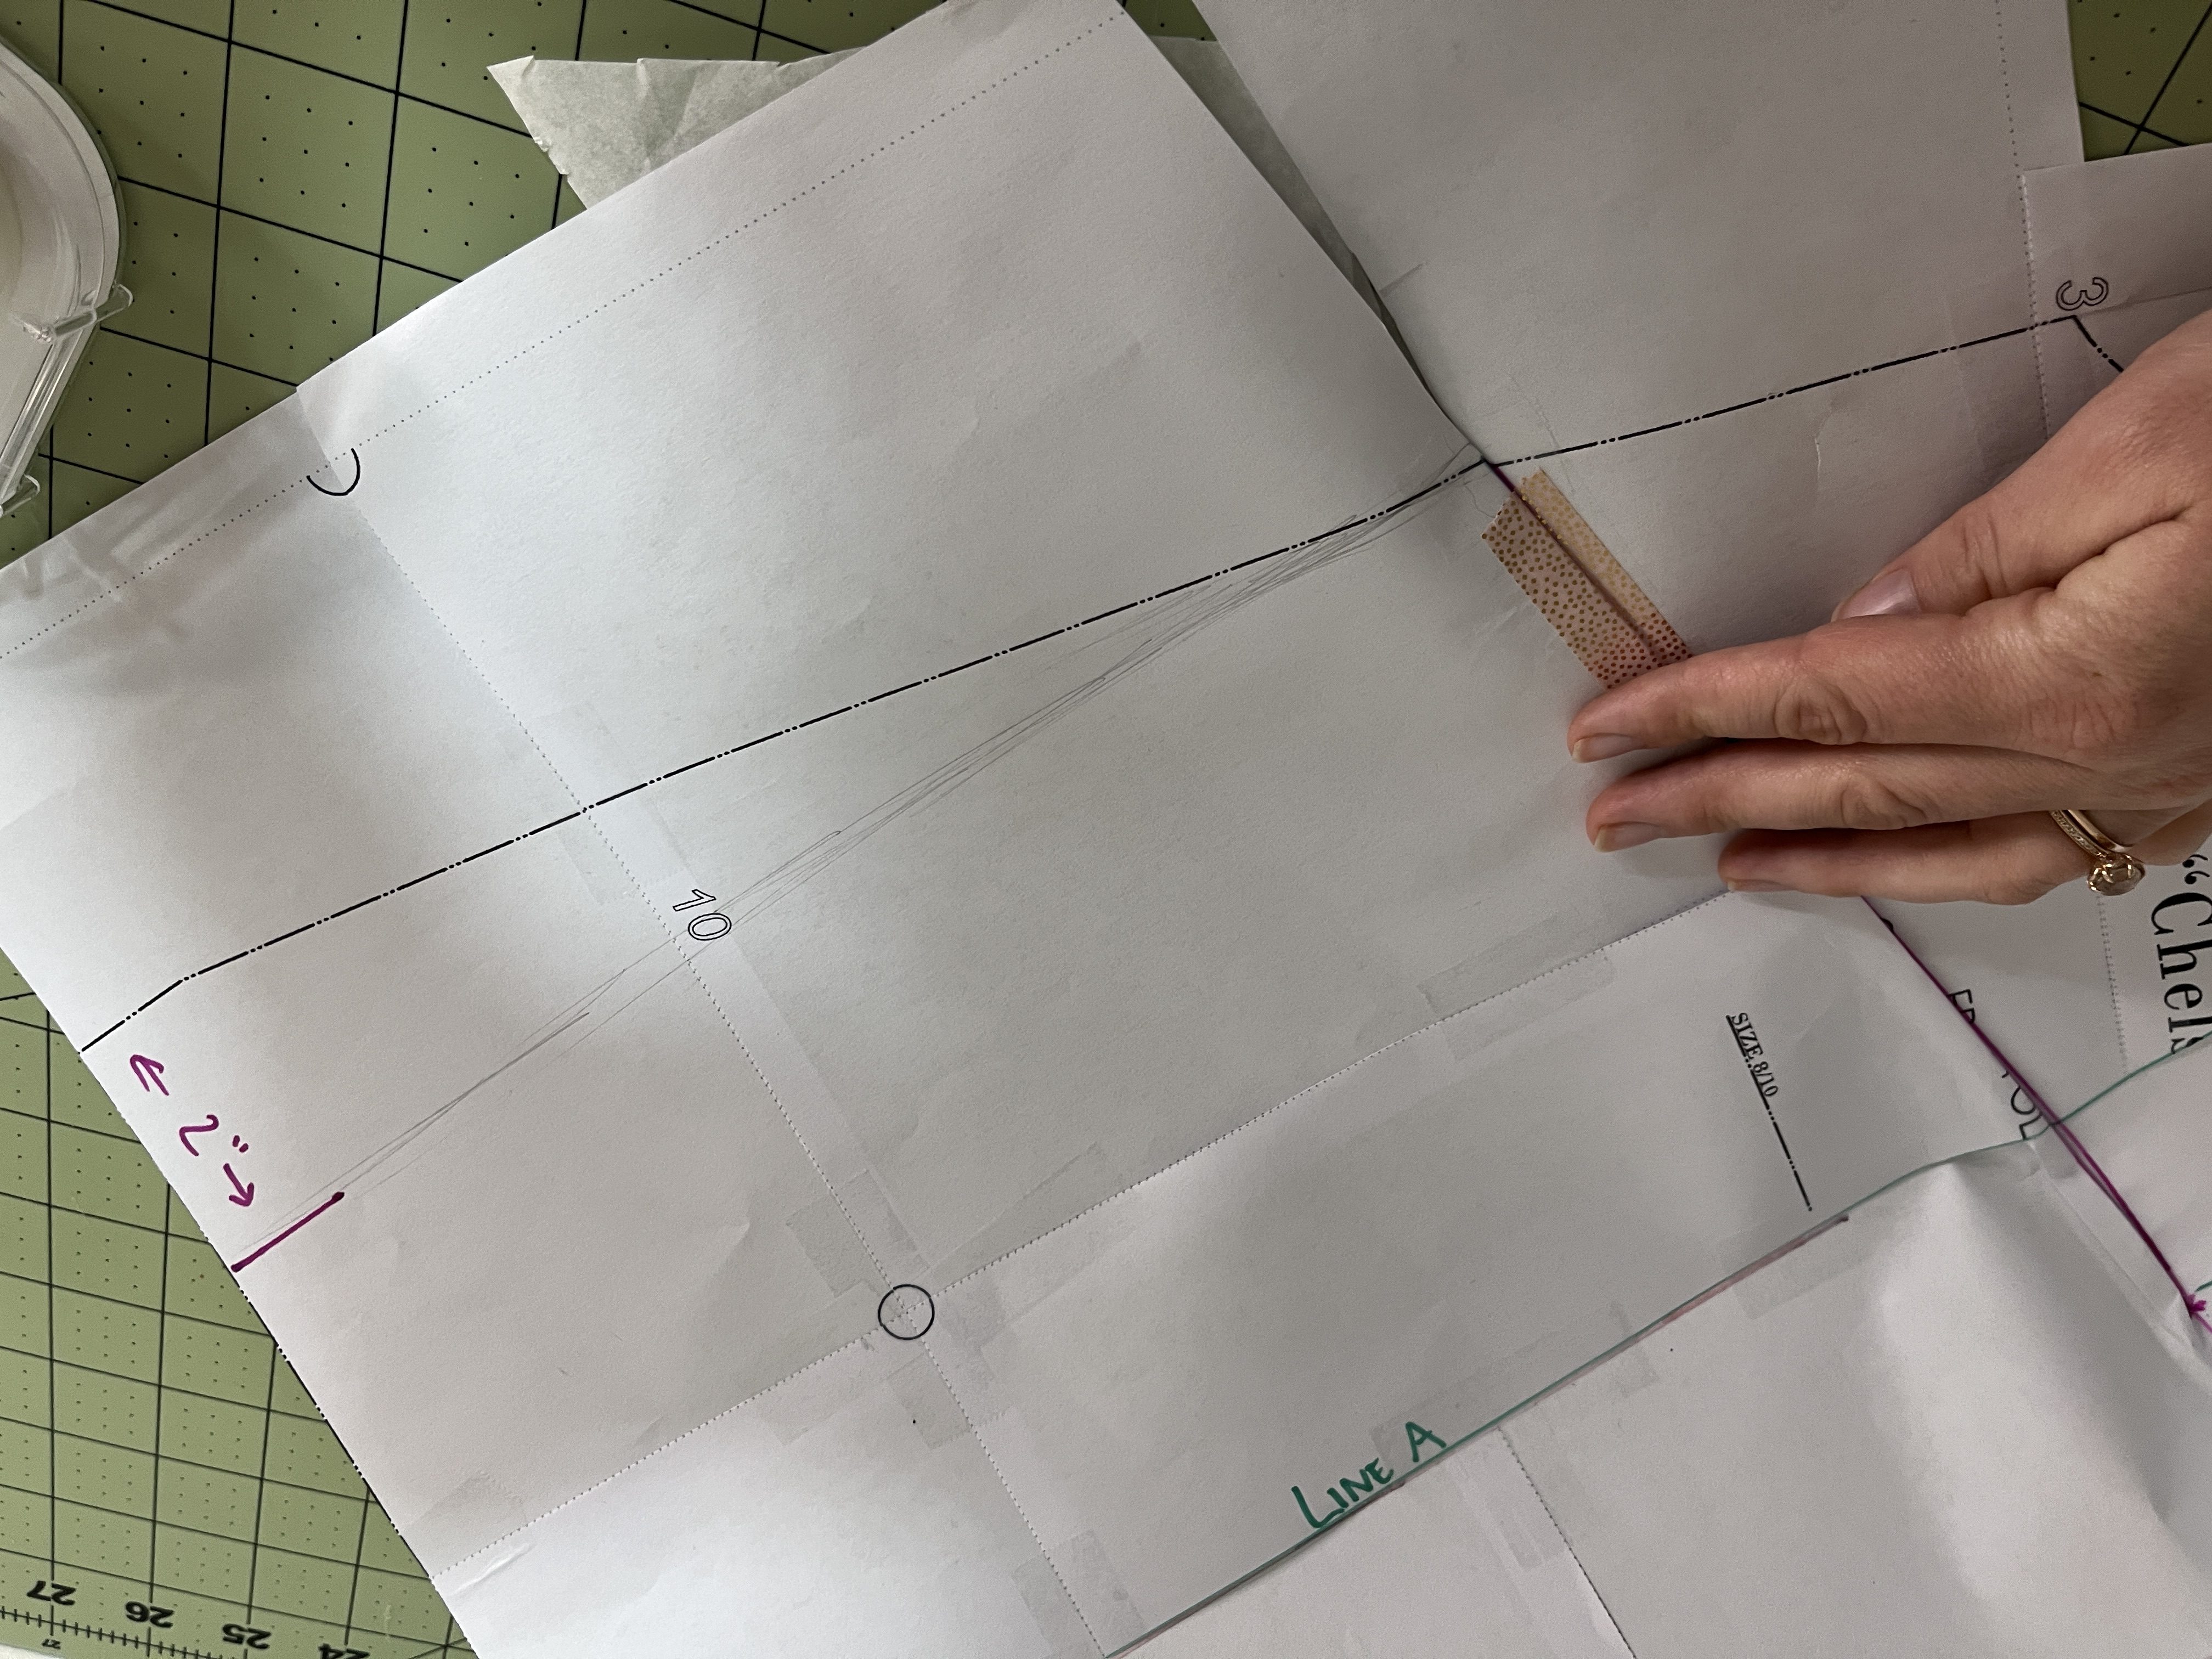
Unfold your pattern, and you’ll see your new dart in all its glory!

Your final step is to true the sleeve seam. Just smooth out the curve. Since you did your adjustment at the seam allowance, this seam line should still match up with the corresponding line on the sleeve. No more adjustments needed!
And that’s really it! Just sew up your dart first, and then follow the pattern instructions to sew the remainder.


Anon
October 12, 2023THANK YOU!! I was just looking for both a woven raglan pattern (and this one is free) and then wondering how to adjust it.
sewbustycommunity
October 20, 2023Yay! Let me know how you get on!