
Full Bust Adjustment Guide | Giant FBA on a Cowl Neckline
What’s a “giant” full bust adjustment?
This post is part of a series on “giant” full bust adjustments — adjustments for sewists who need to add more than 2-3″ to their garments. The series is a response to the fact that almost every FBA tutorial out there assumes you’re only adding a couple inches to your bodices, but for many of us, that’s just not true.
I, for example, need to add 9-11″ to most patterns.
Other posts in this series include:
Most patterns are drafted for a 2″ difference between high bust and full bust. This is commonly referred to as a garment sewing B cup (which, importantly, is different from bra cup!!). To learn more about garment sewing cup sizes and how to determine your own, check out this post.
If you are bigger than a garment B cup (more than a 2″ difference between your high and full bust measurements), you probably need a full bust adjustment. Most FBA tutorials will give you instructions on adding a couple more inches on top of that standard garment B cup.
I’m currently somewhere between a garment K and M cup (9-11″ difference between high and full bust) — depending on how full of milk my boobs are — so the couple inches most FBA tutorials add isn’t enough for me, and it’s not enough for a lot of other folks either.
That’s who this series is for (though the techniques are mostly applicable for smaller FBAs too!).
Building a nursing-friendly wardrobe
I had my (adorable) baby Arthur in August, and ever since, I’ve been trying to focus my sewing efforts on two things (1) garments that fit my postpartum body and (2) garments in which it’s easy to breastfeed. That’s what brought me to this cowl neck pattern, the Zen Llama Cowl Neck Top, which is designed to be nursing friendly.
That said, while I’m demonstrating this giant FBA for cowl neckline patterns using the Zen Llama pattern, this tutorial can really be applied to any bodice with a cowl neckline. (Struggling with an FBA? Post on the Sew Busty Facebook group or reach out to me!)
Let’s get started!
Choosing a base size
This is maybe the most important step when doing a full bust adjustment, because it’s the step that will ensure your top fits your shoulders and neckline. Fixing the shoulders and neckline is wayyyy harder than fixing any other part of the pattern, so choosing a pattern size that already fits your skeletal frame must be a priority.
Fair warning, if you’ve read my previous FBA posts, you can probably skip this part. It’ll be redundant.
Start with your high bust measurement, measured braless.
Measuring the high bust without a bra captures as little breast tissue as possible, which gives us a more accurate look at your skeletal frame, which is really what we’re trying to measure. Again, the high bust measurement is a proxy for your skeletal frame.
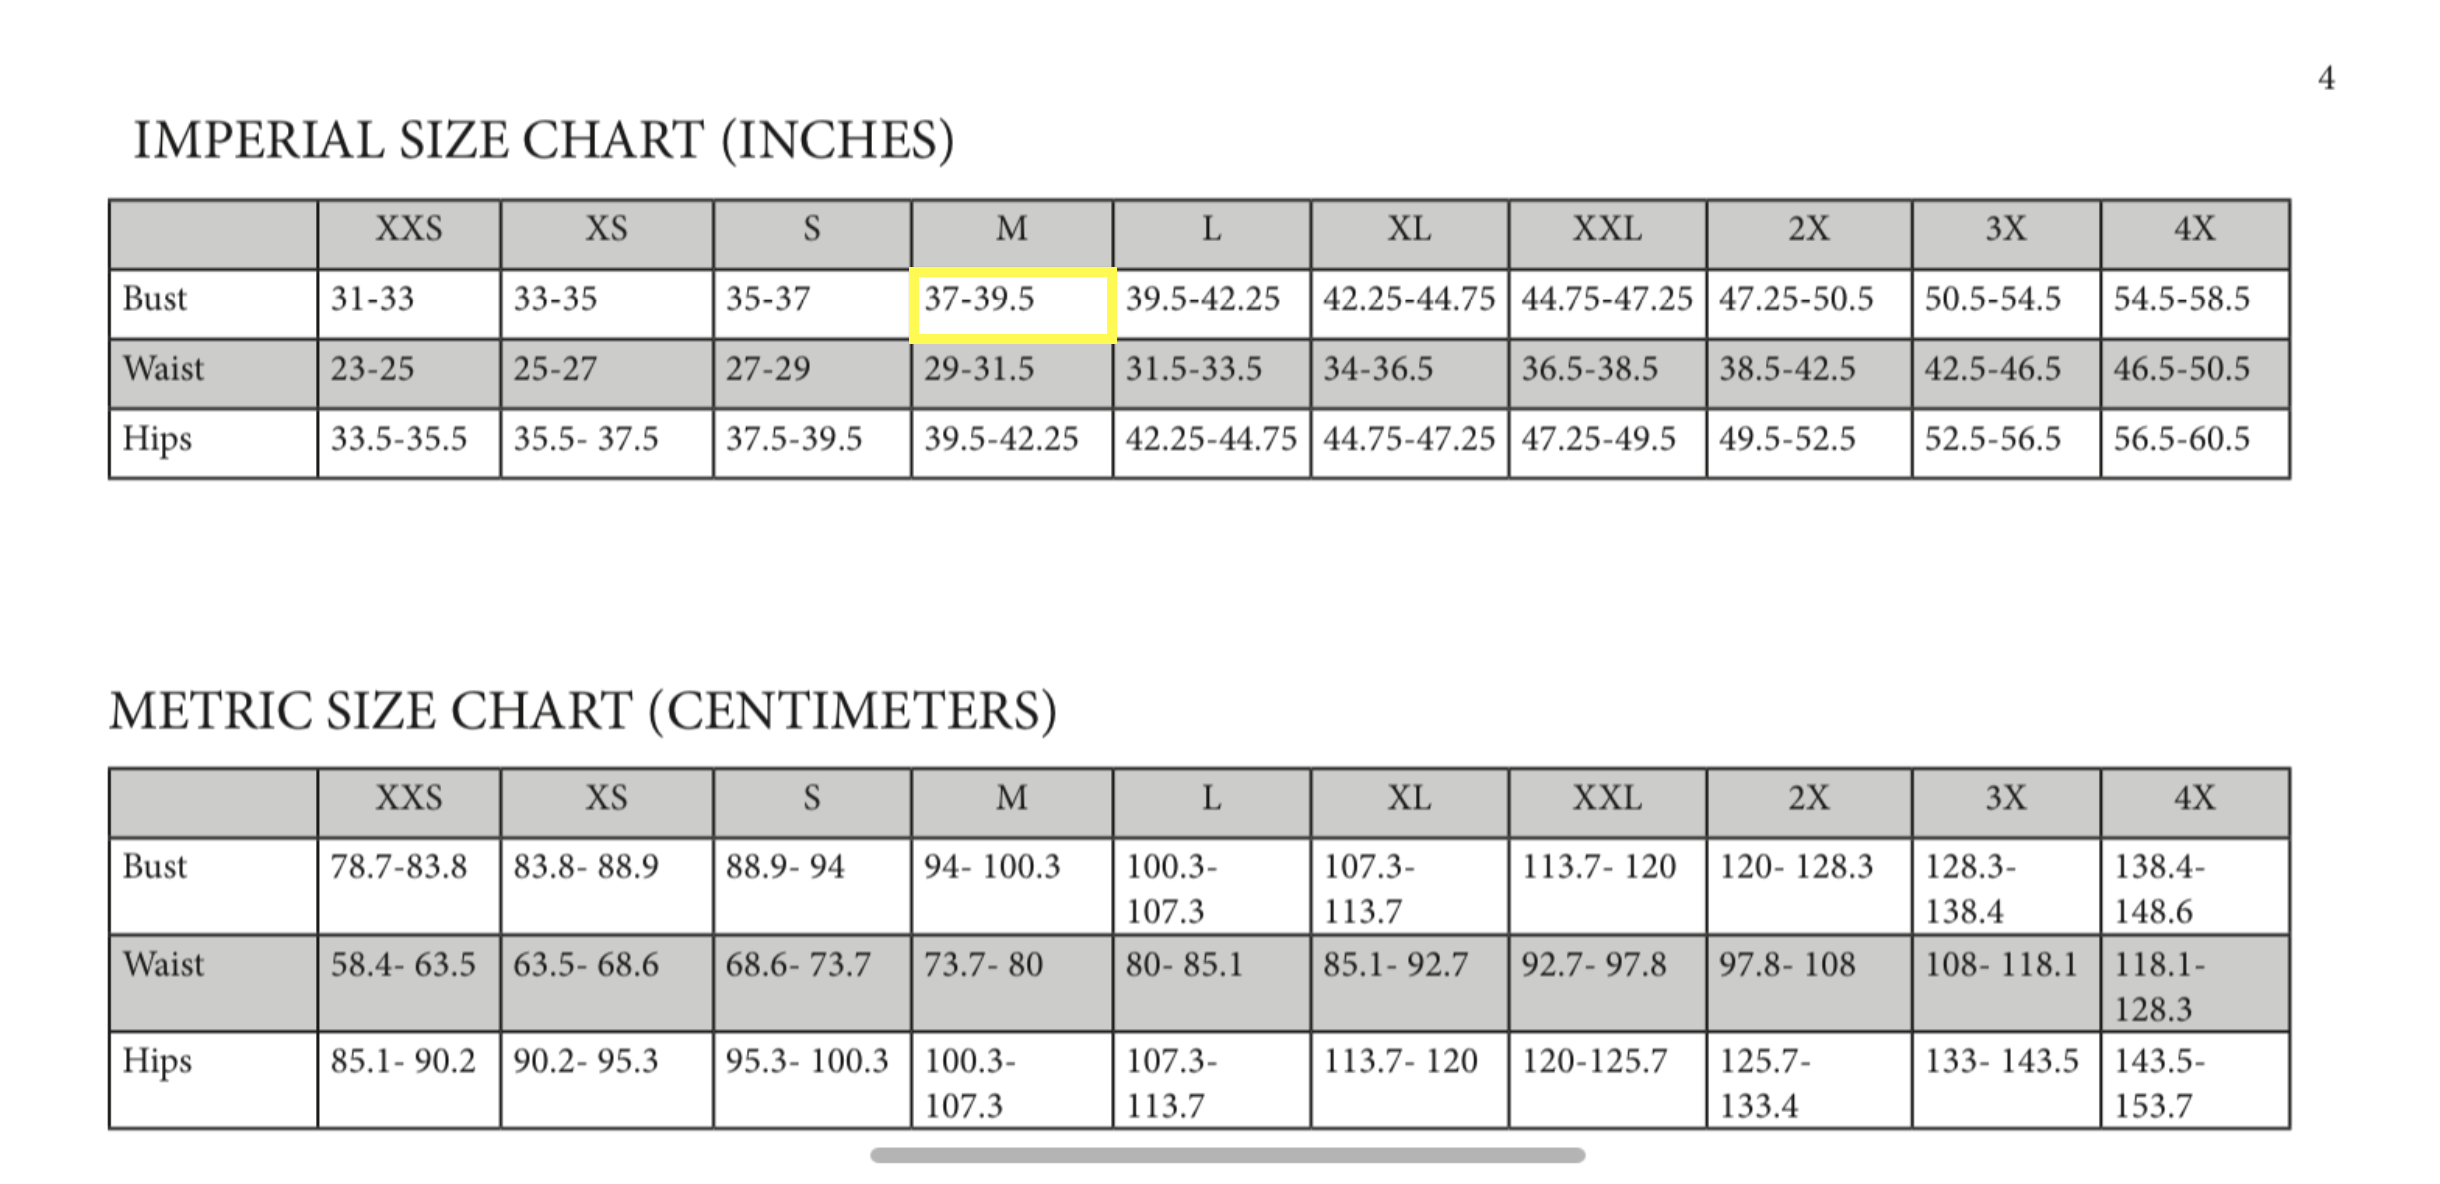
On their older patterns (of which the Cowl Neck Top is one), Zen Llama doesn’t include a high bust measurement. I reached out to the designer, though, who indicated that the older patterns assume a standard garment B cup — so the high bust is 2″ smaller than the full bust. My high bust is right about 35″, so subtracting 2″ from the high bust measurements on the size chart, I could choose a small or medium. I went with a medium, which gives a full bust range of 37-39.5″.
how many inches to add?
This tutorial should work on both knit and woven cowl neck patterns. If you’re working with a woven pattern, your math is simple: take the full bust measurement that your pattern was drafted for, subtract it from your own full bust measurement, and that gives you the number of inches to add. For example, if I was working with a woven pattern drafted for a 35″ high bust (my high bust size) and a 37″ full bust, I’d take my full bust (46″) minus the drafted full bust (37″) for a result of 9″ needing added to the pattern, or 4.5″ per side.
But things aren’t so simple with knit bodices. Let’s walk through it.
First, we need to find the finished measurements for the pattern. This isn’t the body size the pattern is drafted for, but instead the number of inches of fabric in the resulting garment.

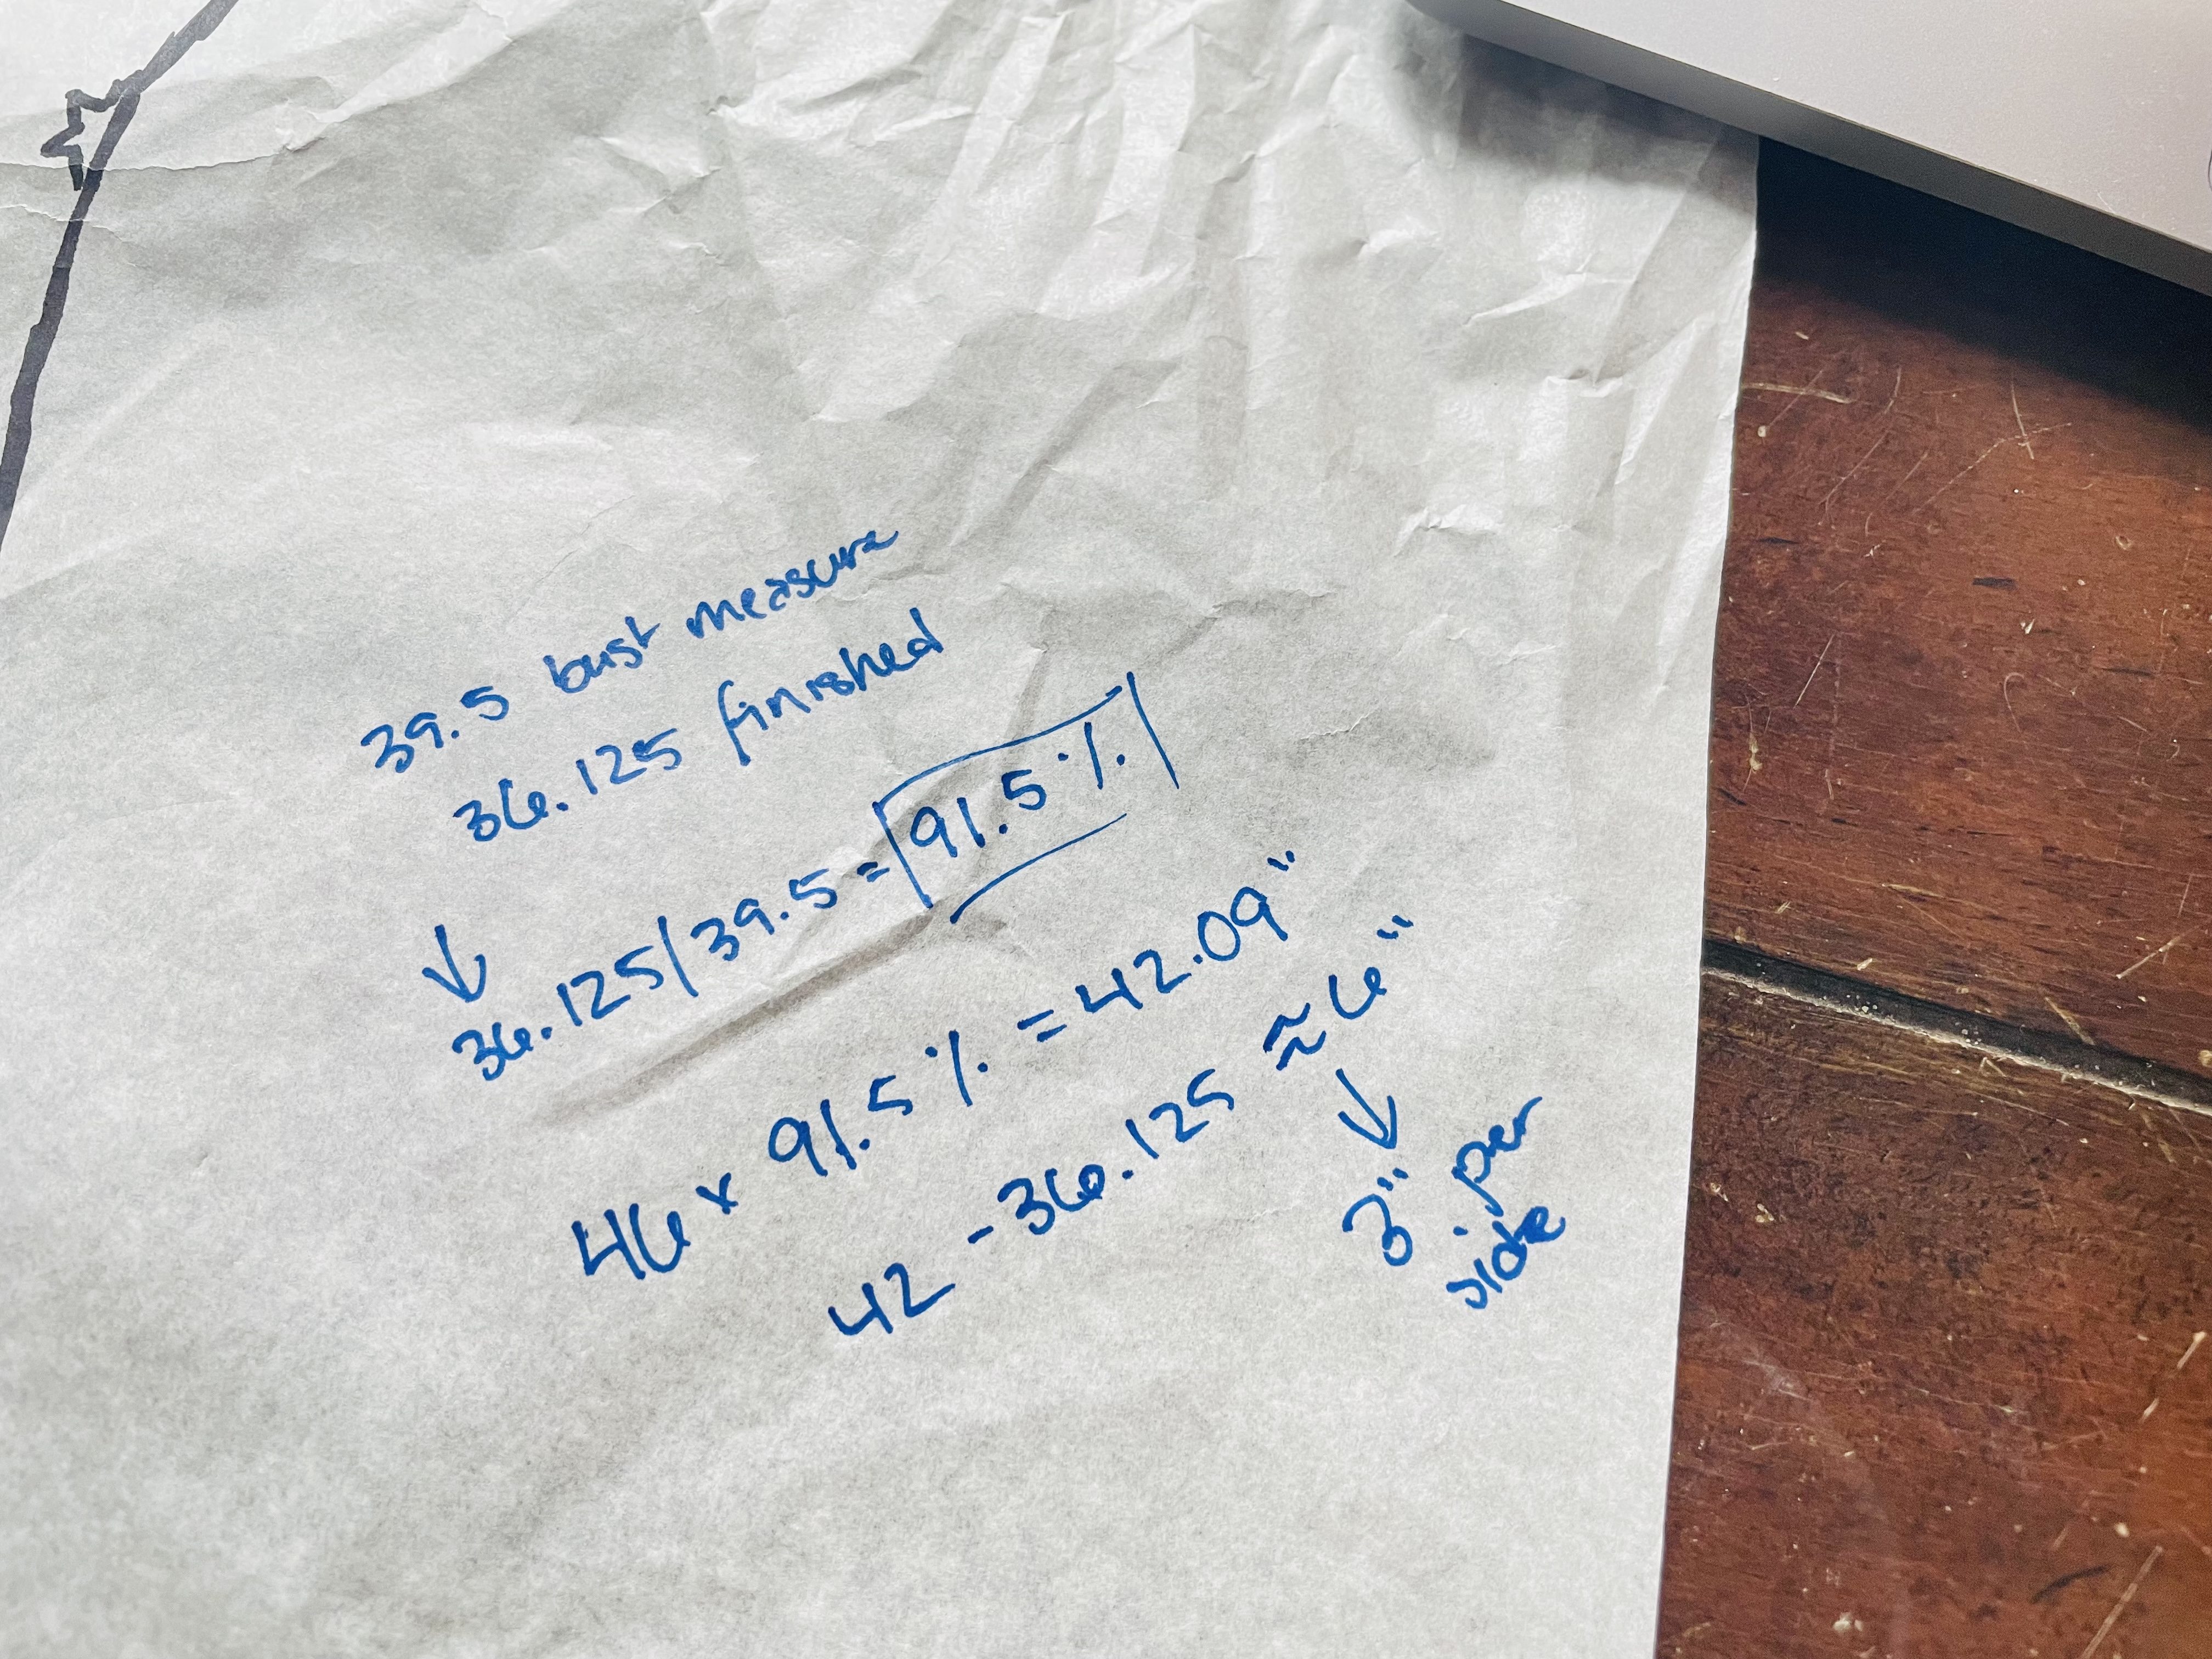
For the size medium that I chose based on my high bust measurement, the finished full bust measurement is 36-1/8″. It’s drafted for up to a 39.5″ bust. In order to maintain the same percentage of ease across my bust as indicated in the original pattern, I want take 36.125″ divided by 39.5″ to get 91.5% — meaning this pattern was drafted for a maximum of 8.5% negative ease.
The next step is to figure out what I need my finished measurement to be, which I know needs to be 91.5% of my full bust measurement. Therefore, I take my full bust measurement (46″) and multiply that by 91.5, giving me a result of 42.09″. I’m going to round that down to 42″, which should be my finished full bust measurement.
Then, I take 42″ and subtract 36.125″ — the finished measurement for which the pattern is drafted. This gives me a result of 5.875″, but for simplicity, I’m going to round up to 6″. This means I need to add 6″ to the full bust of this pattern.
Here’s my handwritten version of this math:
If you’d like to see a video of me going over this math, I did so on instagram live here (for my previous post on knit bodice FBAs)!
Performing the FBA
Removing the self facing and finding your apex
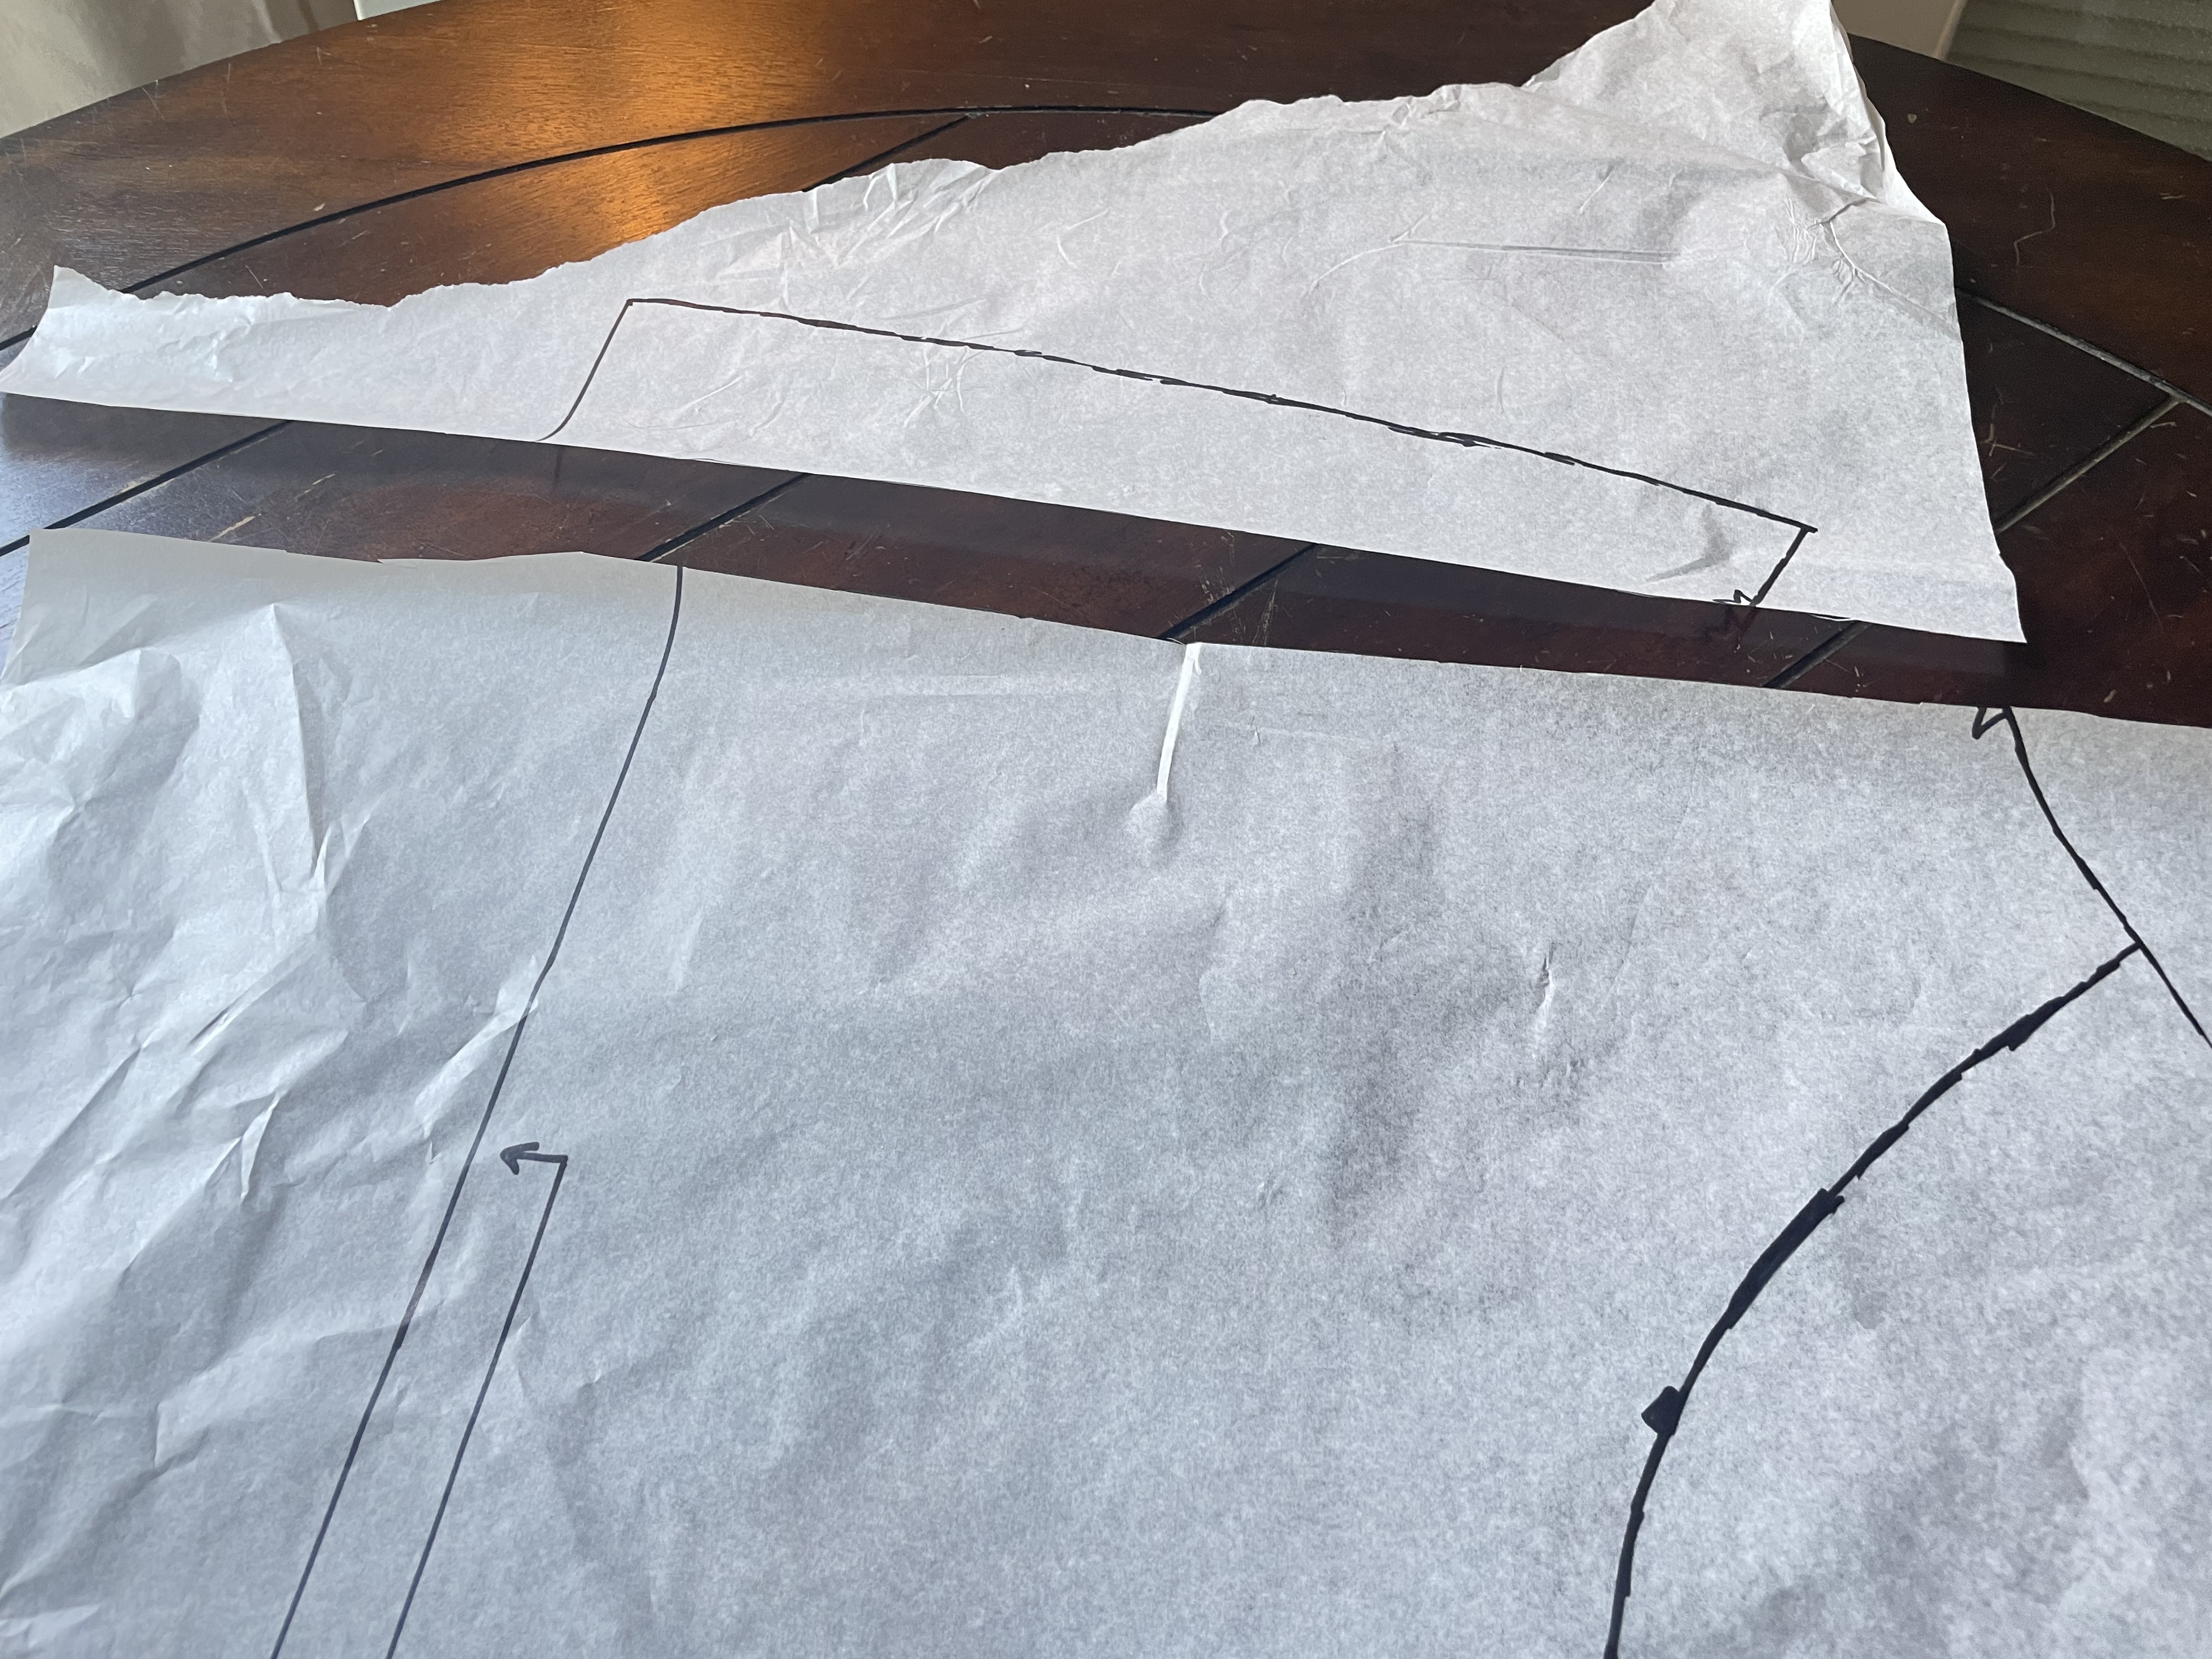
My pattern had a self facing, so the very first thing I did was remove that. We’ll add it back at the end, but it’s going to complicate things in the meantime.
To do this, I just drew a straight line across starting from the dart where the self facing starts, and then I cut this off:
The next step is to find your apex. I’m not going to go into vast detail on this here, but will point you back to my post on performing an FBA on a knit bodice for my trick on using a knit top you already have and some washi tape.
Drawing the lines
Please ignore (to the best of your abilities!) how wrinkled my pattern was. I took it on vacation and things got wild.
Once you’ve identified your apex, the next step should be familiar. We’re going to draw some lines:
- Line A from apex to the hem, parallel to the grainline
- Line B from apex to 1/3 to 1/2 way up the armscye
- Line C from apex to side seam
- Line D from Line A to the other side
- Line E from apex to midway through the shoulder seam

If you want more detail on where to draw these lines, you can reference this post, which goes over the same lines!
cutting the lines
Now that we have those lines drawn, we need to do some cutting. But first, mark your seam allowance at the armscye on Line B and Line E:
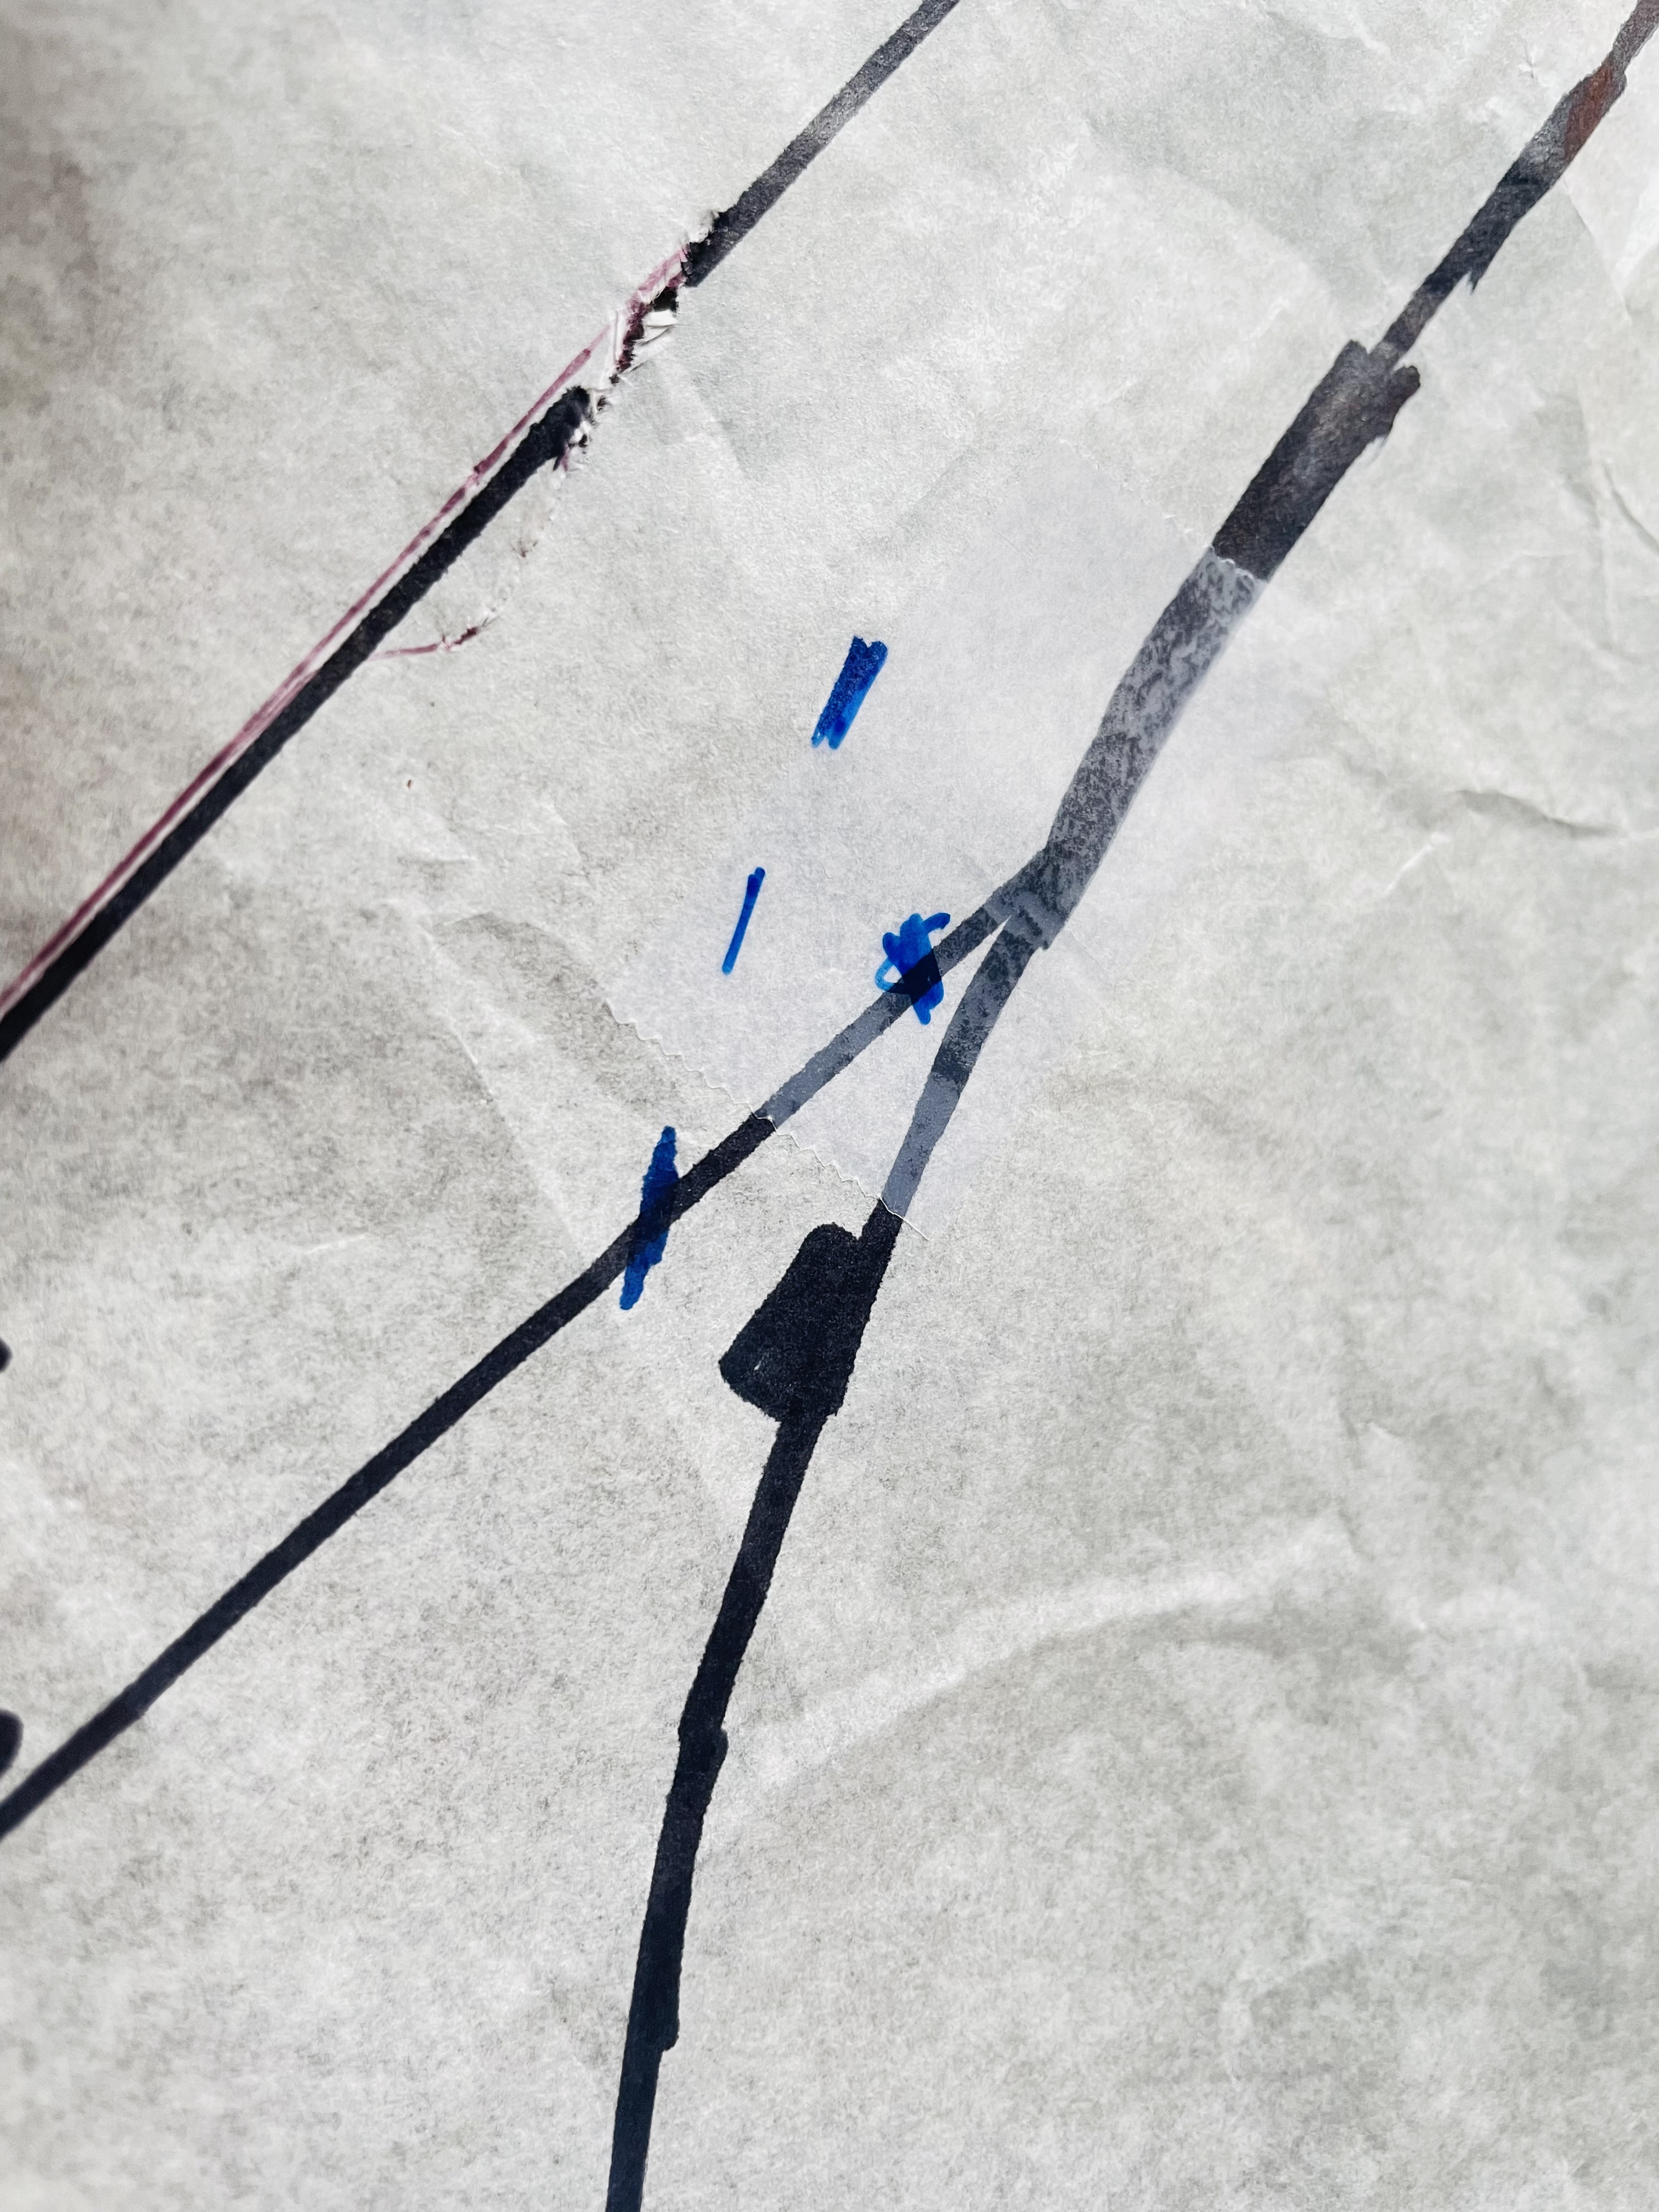
It’s also a good idea to add a bit of tape at the apex as well as at the intersection of the seam allowance with Line B and Line E.
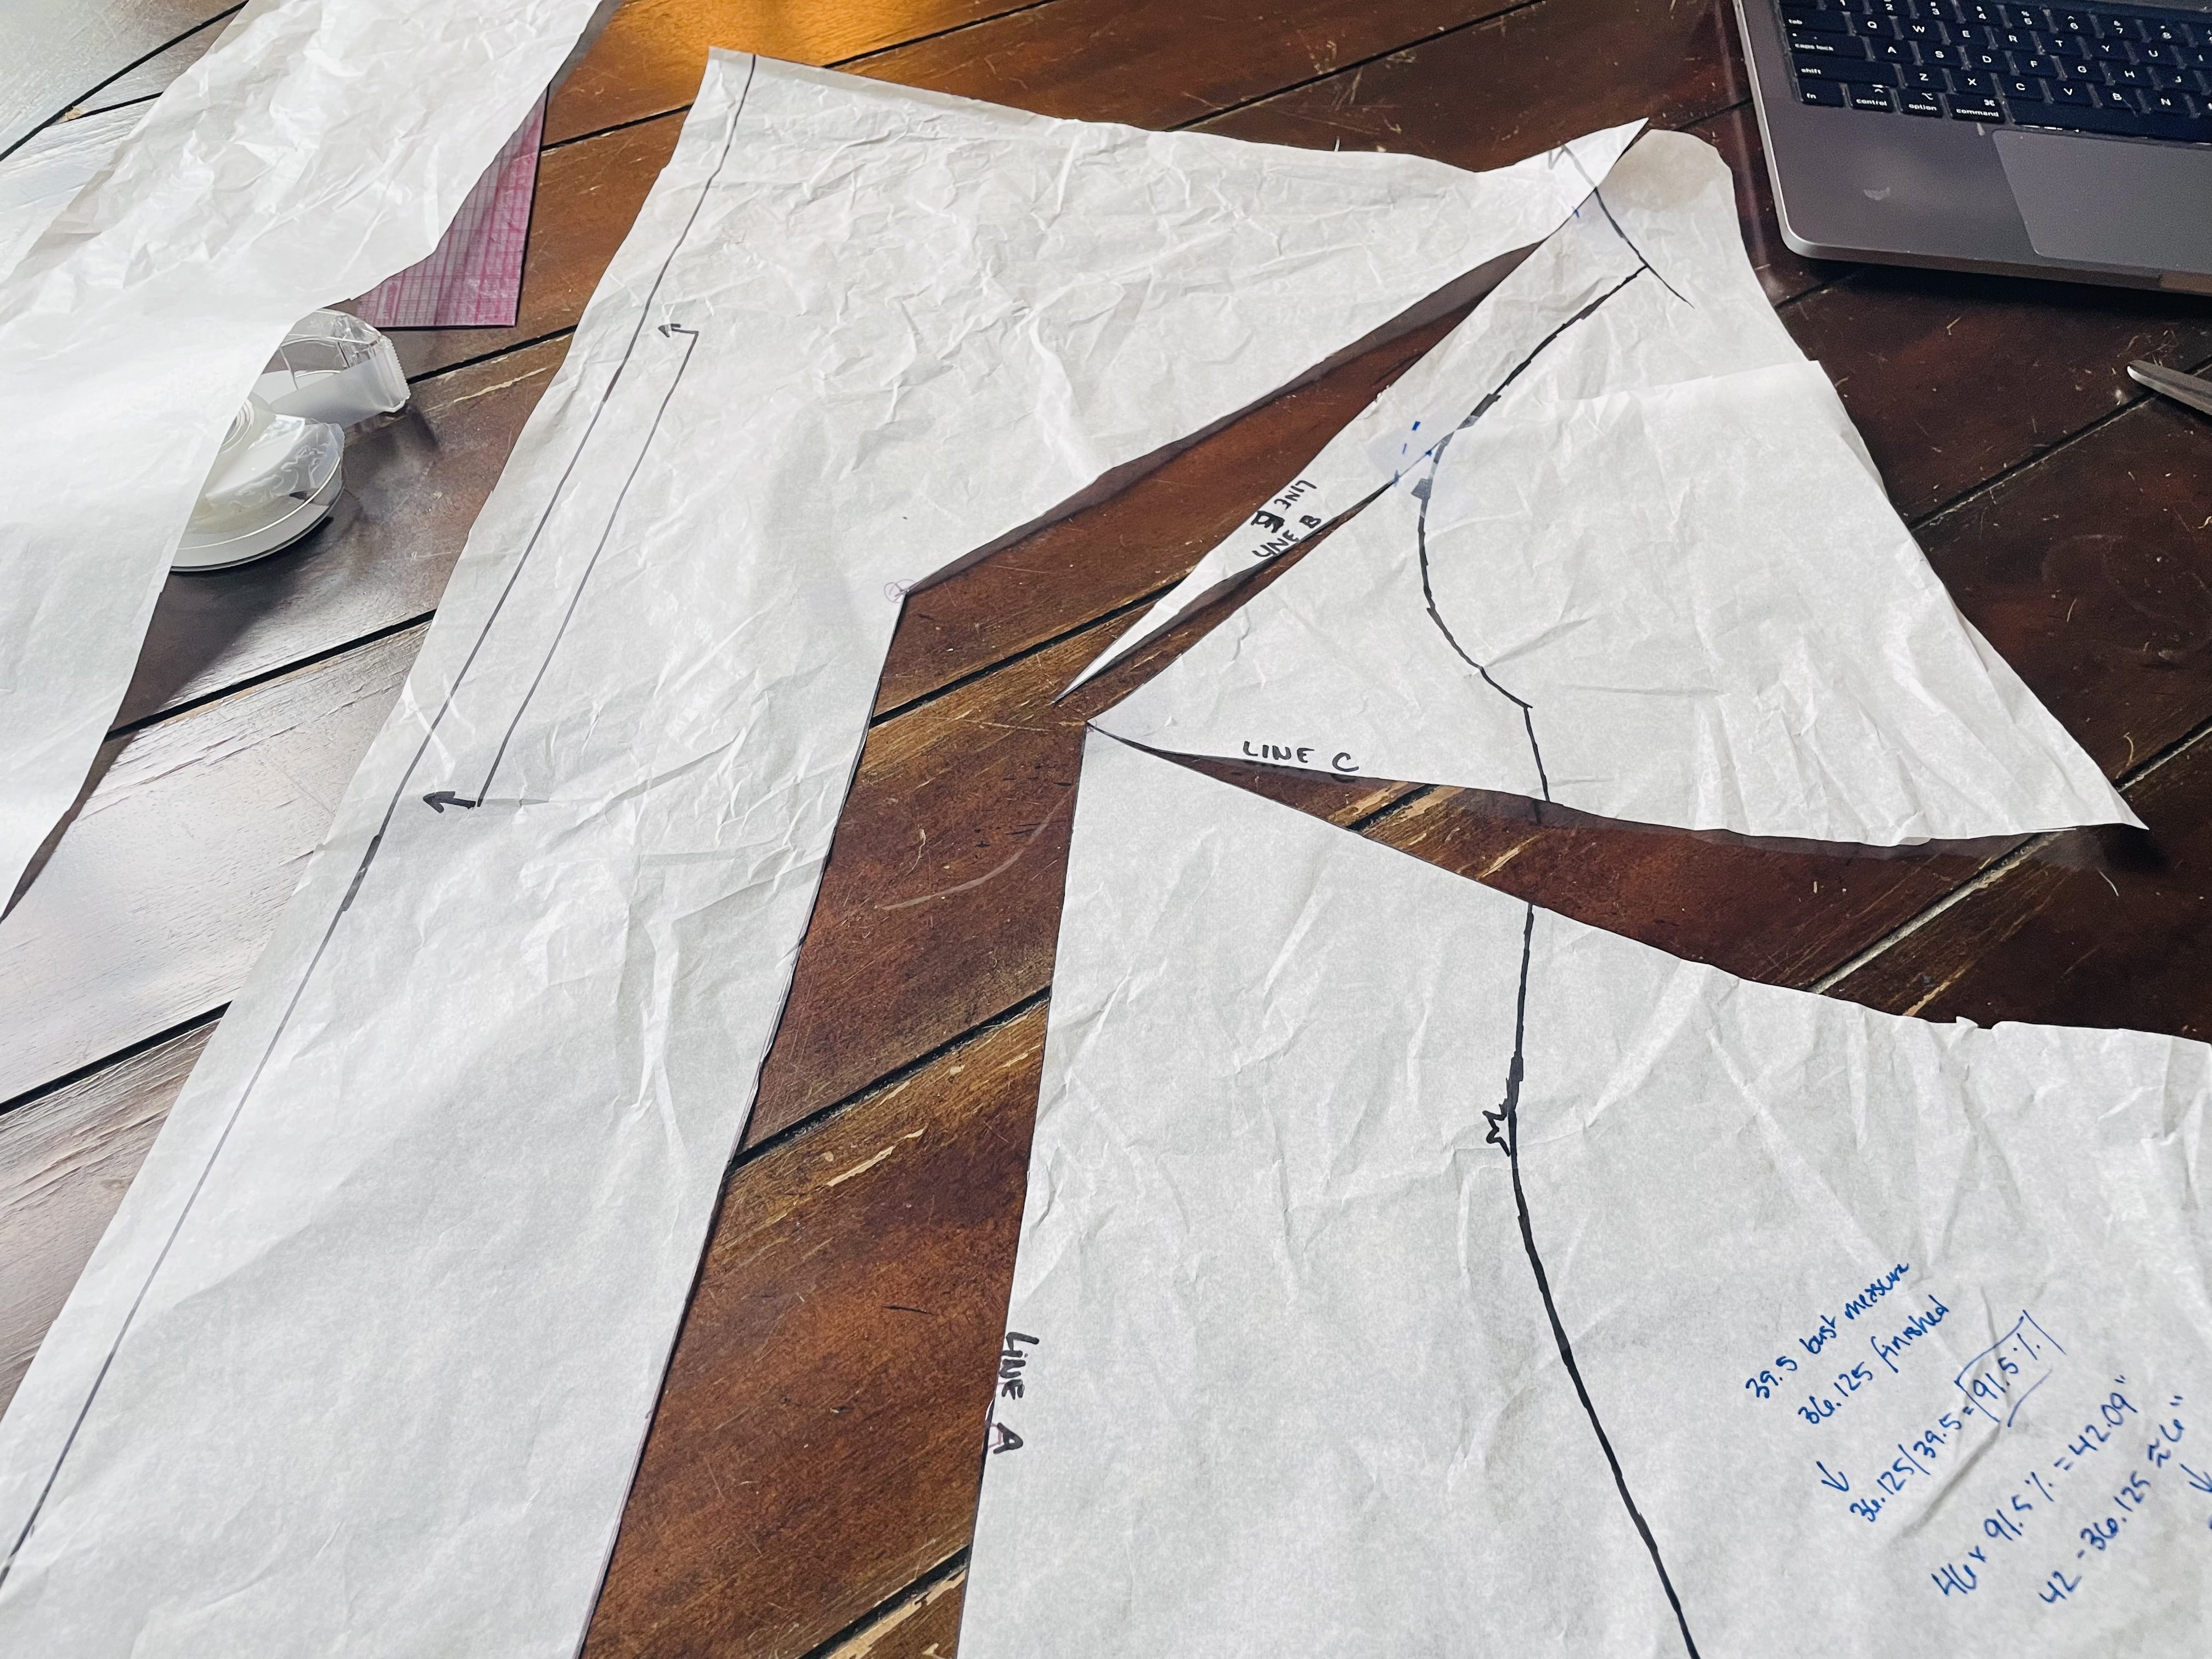
Now, cut along Line A from the hem to the apex, then along Line B and Line E from the apex to — but not through — the seam allowance marking. Then, cut along Line C from the side seam to but not through the apex. Finally, cut along Line B and Line E from the armscye and shoulder seam, respectively, to but not through the seam allowance marking.
You should end up with something like this:
Adding those inches
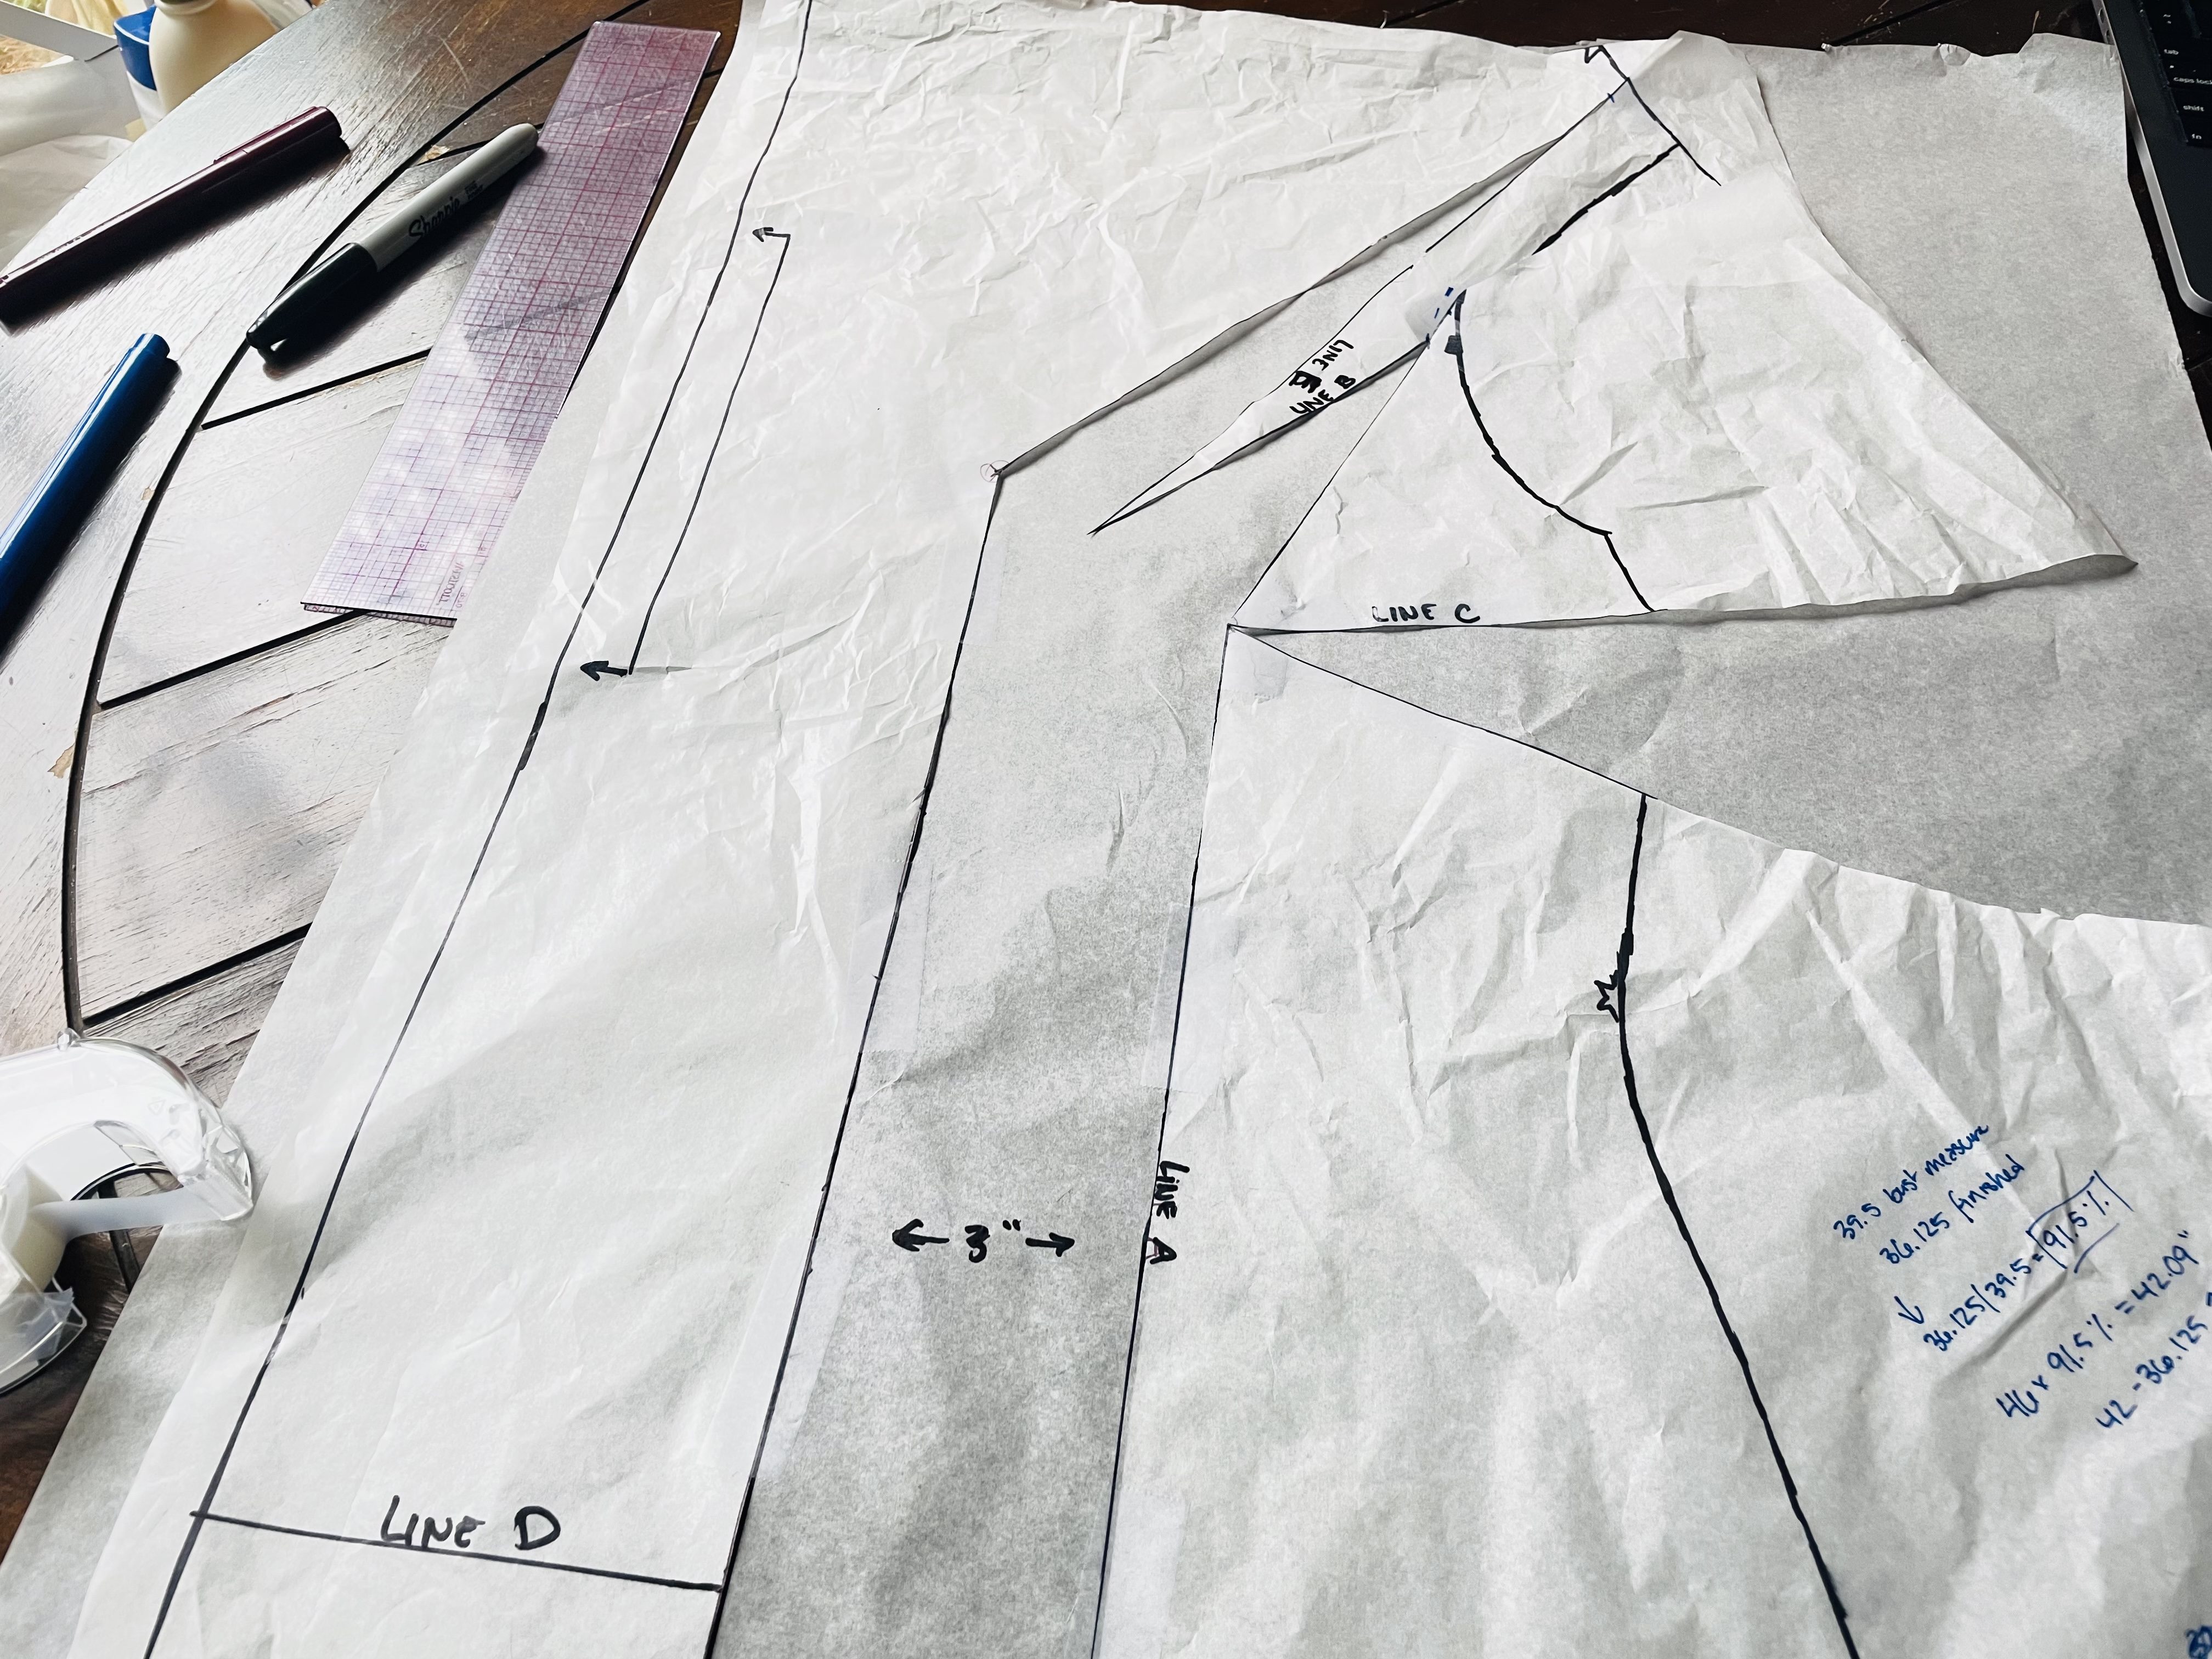
Our next step is to add those inches that we determined earlier. If you recall, I determined I needed to add 6″ to the full bust of my pattern, which means I need to add 3″ per side.
Grab a scrap piece of paper, and draw two straight lines, up and down, the same number of inches apart as you need to add per side — so 3″ for me.
Tape down your pattern piece, lining up each side of your cut Line A with the lines on this scrap paper. When spreading your pattern, you want to pull down and out, so that the upper part of your pattern remains flat.
Truing the hem
You’ll notice that this creates an uneven hem. To fix this, we’ll cut along Line D and pull that lower corner down to be even with the other side of our pattern, like so:

Redraw your foldline and true up your hem.
Removing the dart
Now, you’ll notice our FBA added a dart. You can keep this dart, but you do not need to.
If you choose to keep the dart, you can follow the “drawing your new dart” section in this post, and essentially you’ll be done.
But if you want to move that dart back into the cowl neck for a dartless look, that’s possible too!
Drawing more lines
In order to rotate your dart into the cowl neck, you need to draw yet another line — this time from apex to somewhere along the neckline. We’ll call this Line F.
When choosing where to mark your new apex, you have a few options:
- the part of the original apex point that’s closest to the center front,
- the part of the original apex point that’s closest to the side seam, or
- somewhere in between
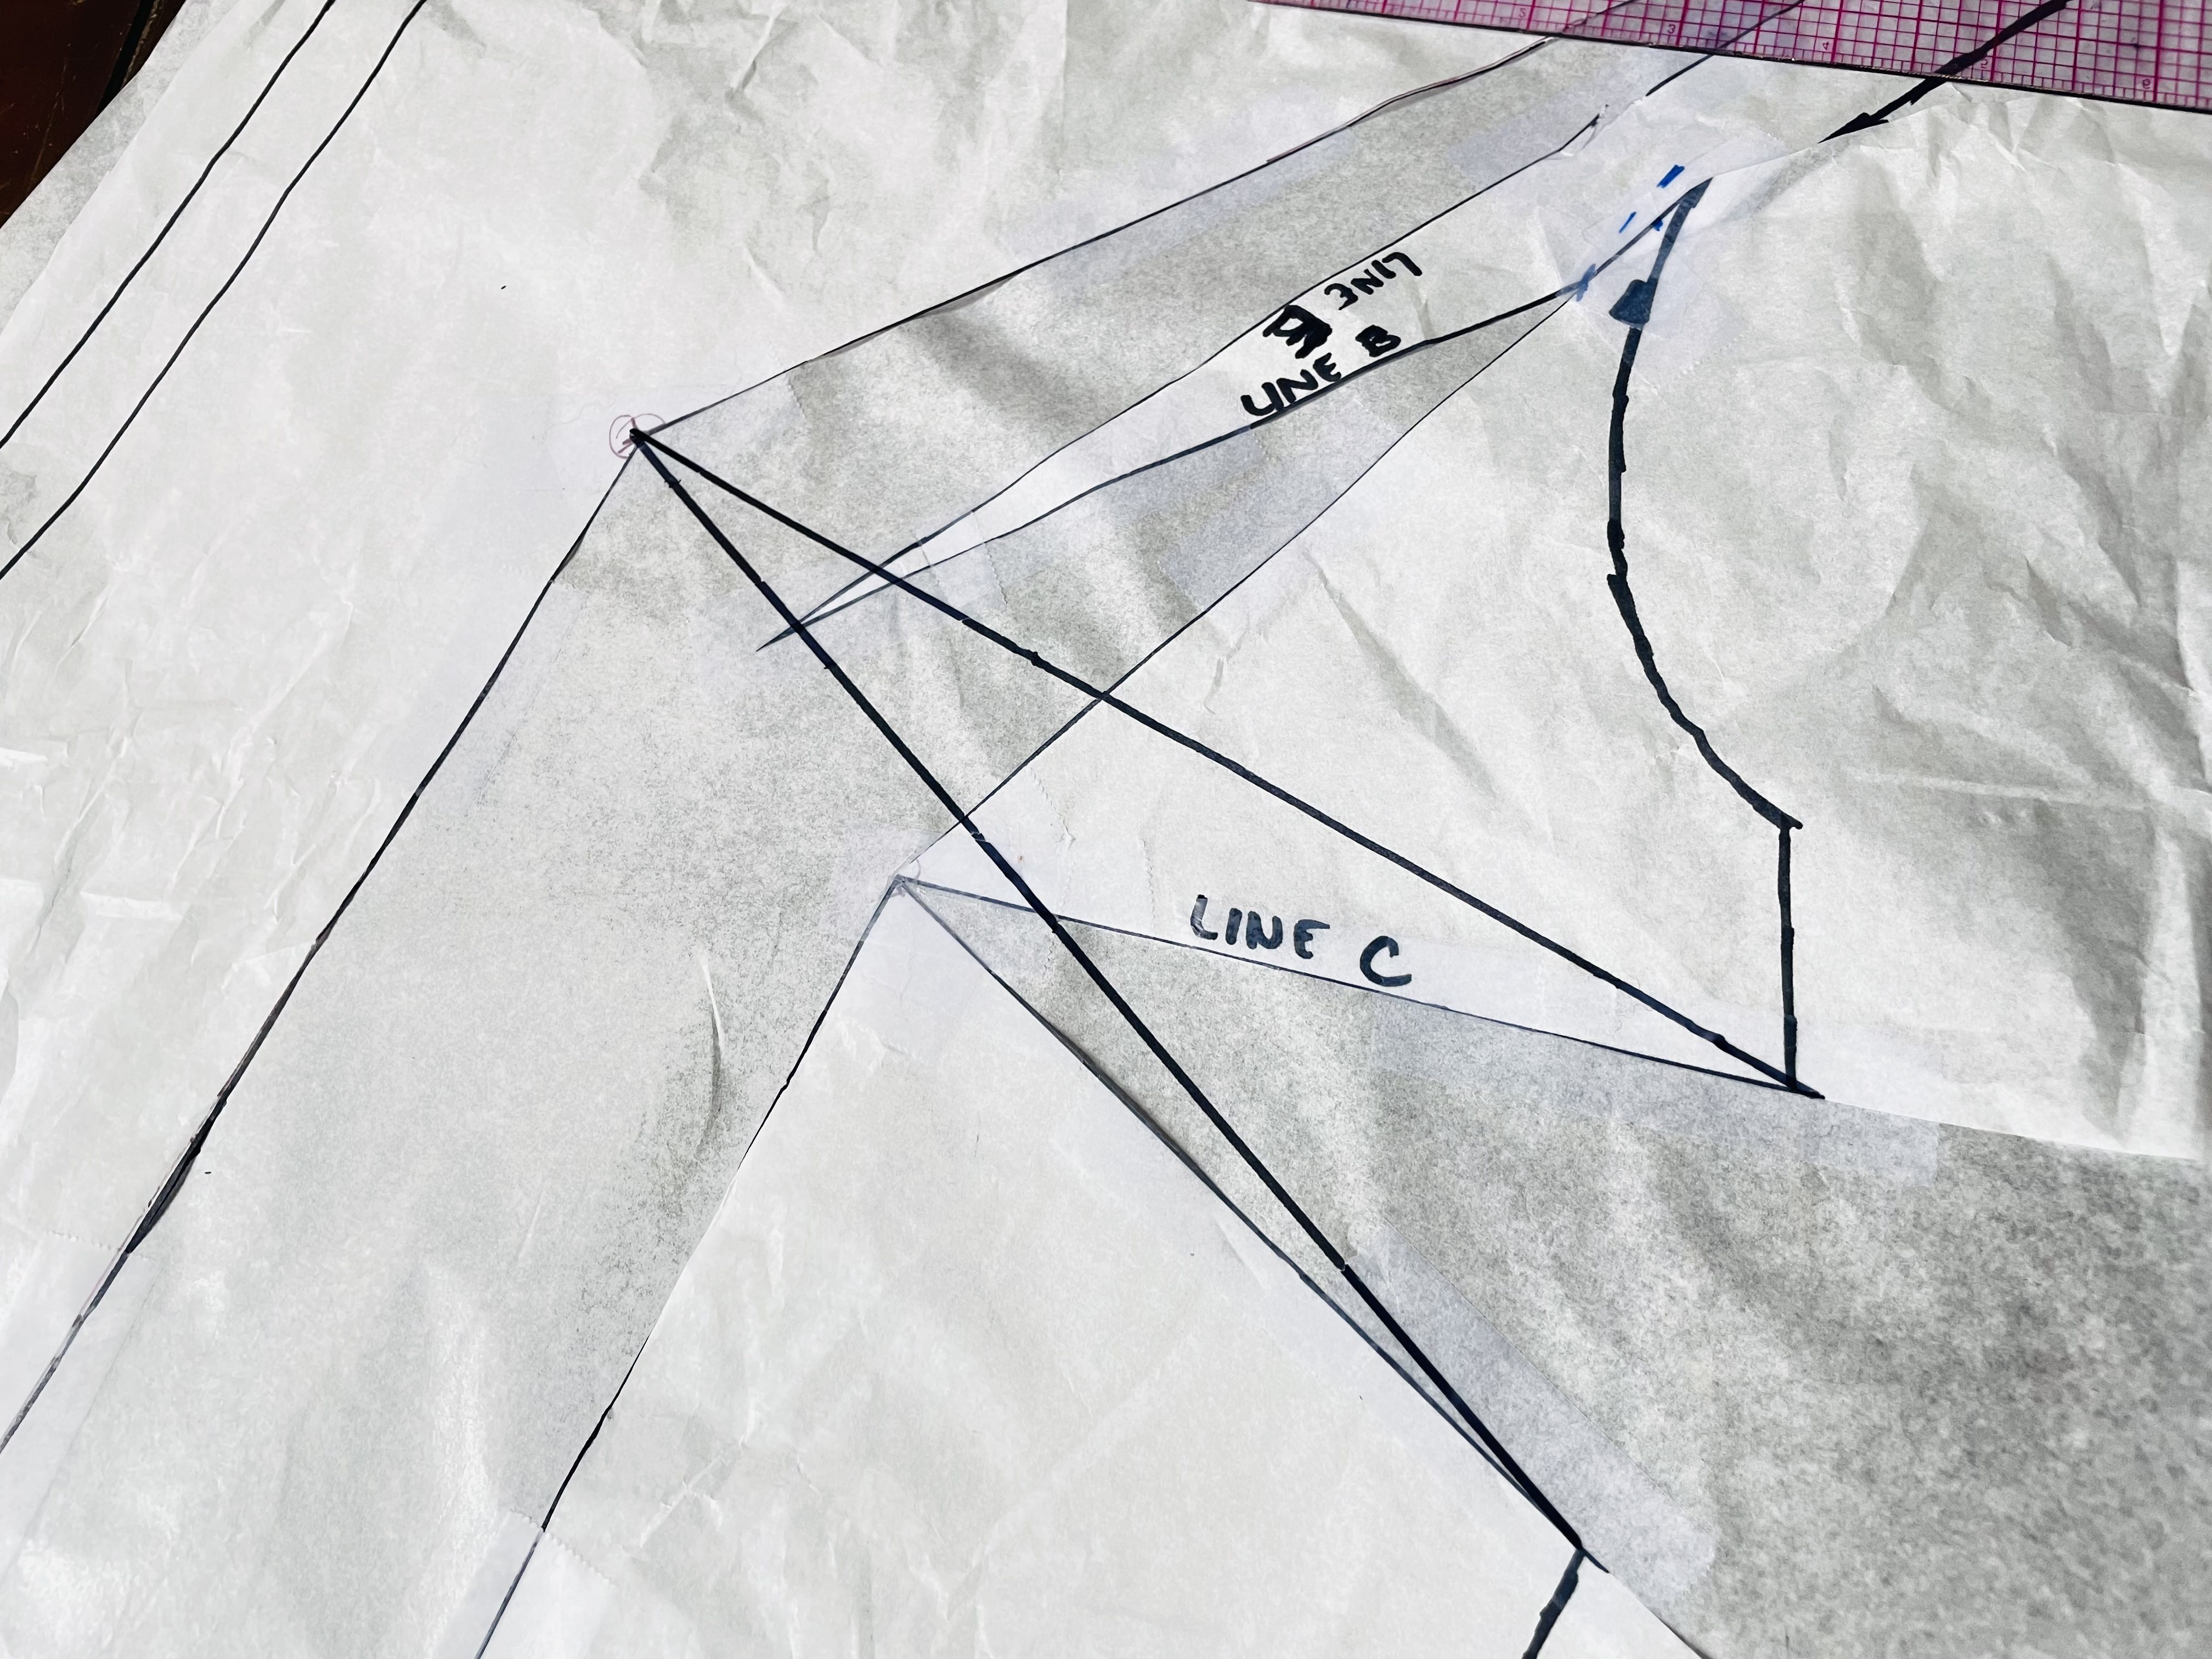
Because of how I find my apex on new patterns (by lining the pattern up with an existing pattern or garment along the center front and marking), I choose the first option — the part of the original apex point that ends up closest to the center front after performing the full bust adjustment.
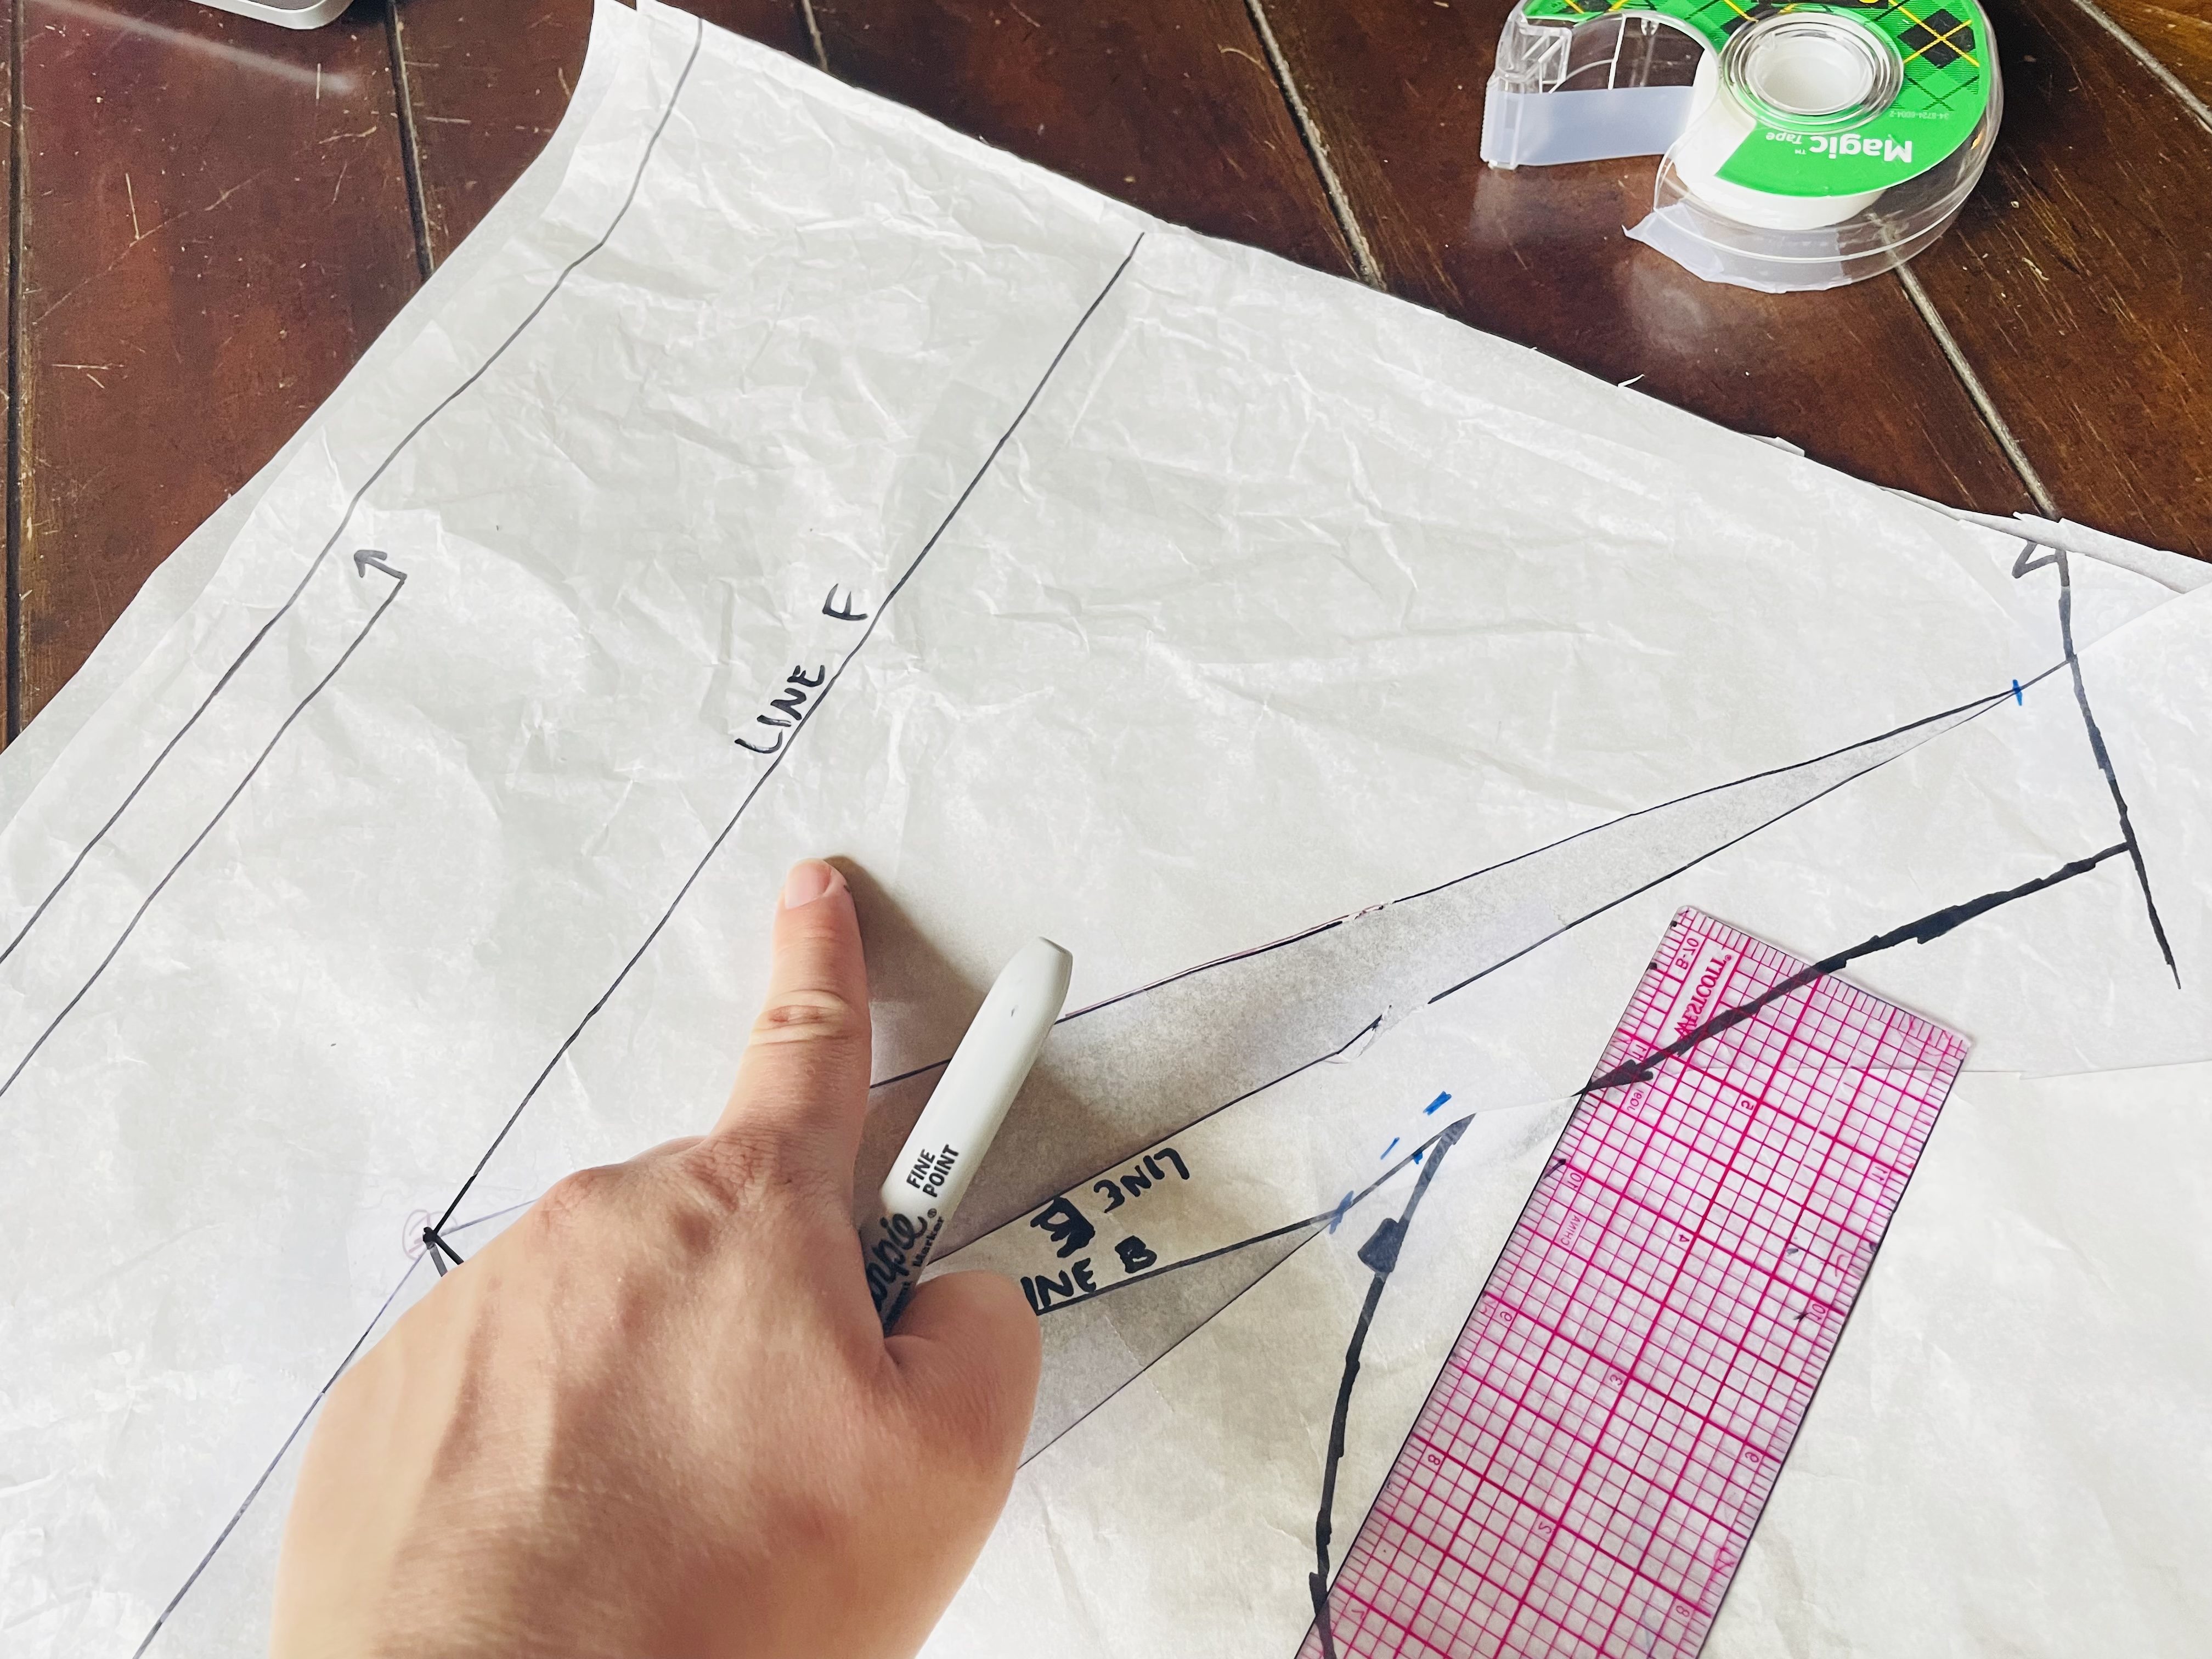
You also need to connect the ends of the dart to the apex point:
Cutting and pivoting
Go ahead and throw another piece of tape on your apex point to reinforce it, as it will become your pivot point here in a sec.
Now, cut from the side seam along one of the dart legs — it doesn’t matter which one — to but not through the apex. Starting from the neckline, also cut along Line F to but not through the apex, creating that pivot point at the apex.
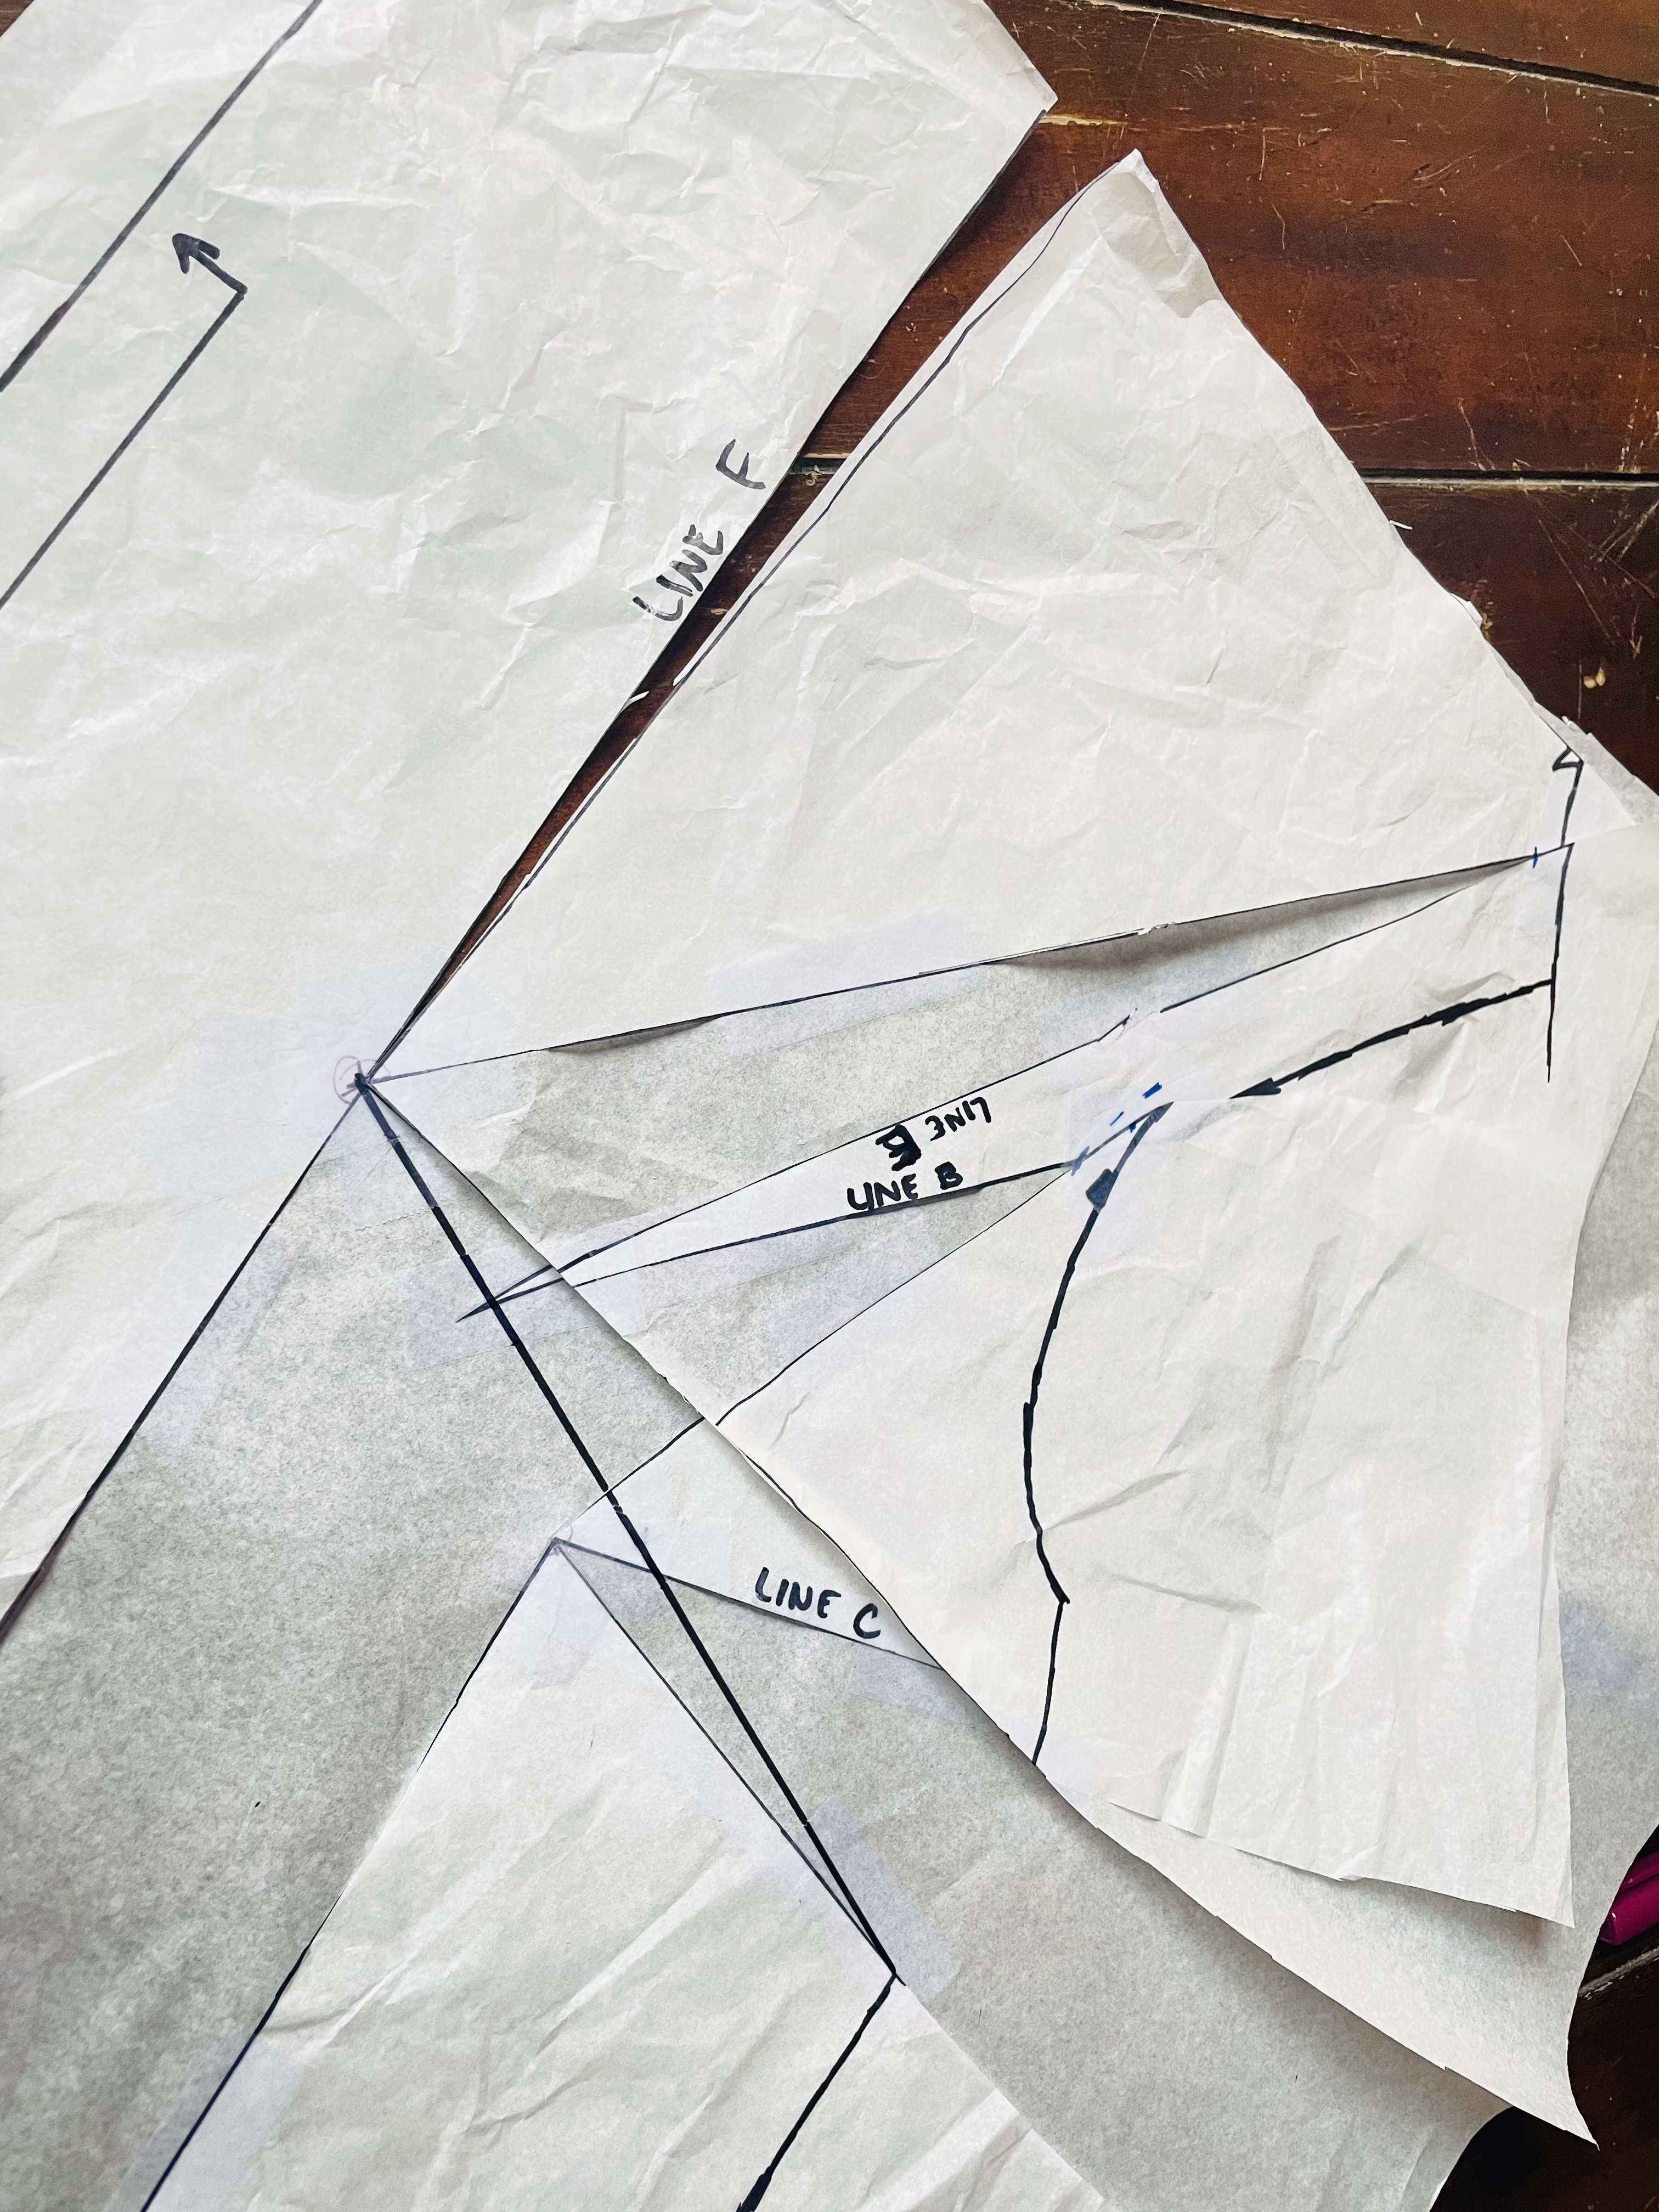
You’ll now pivot that dart closed, opening essentially a new dart at the neckline:
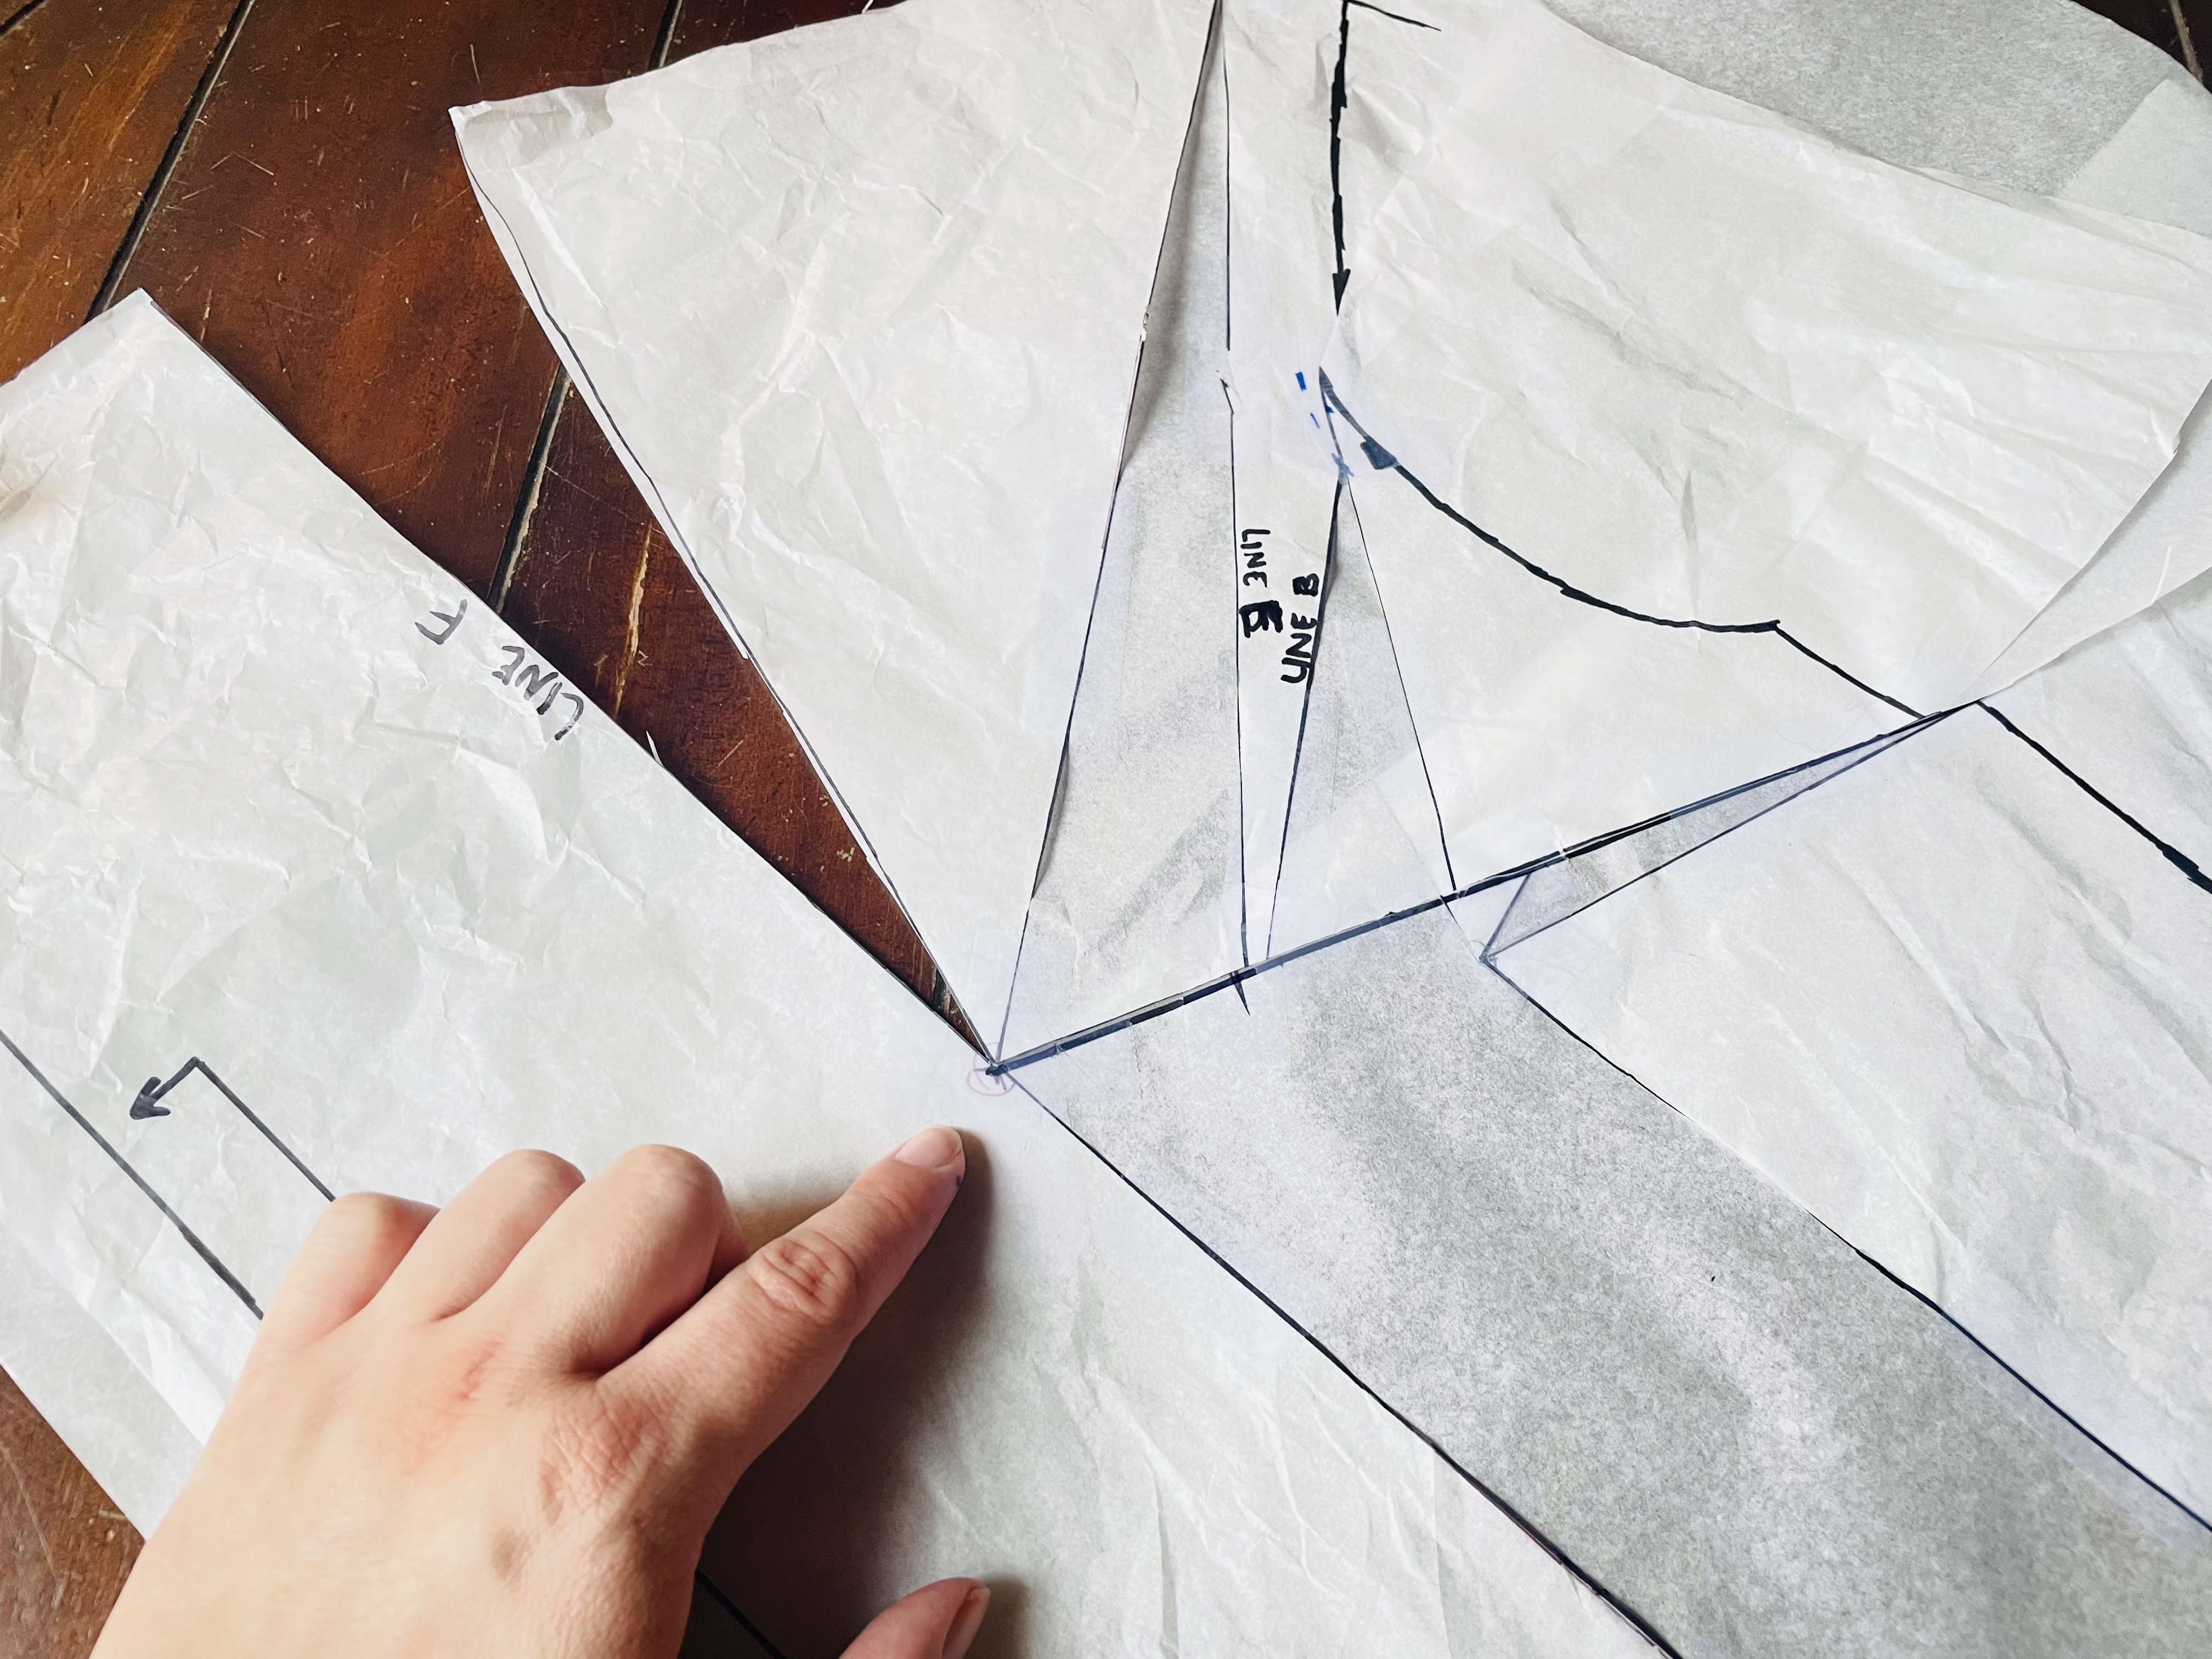
Tape this into place. Add a piece of scrap paper behind the dart at the neckline and tape that into place, too.
reducing the waist and truing lines
Redrawing the side seam
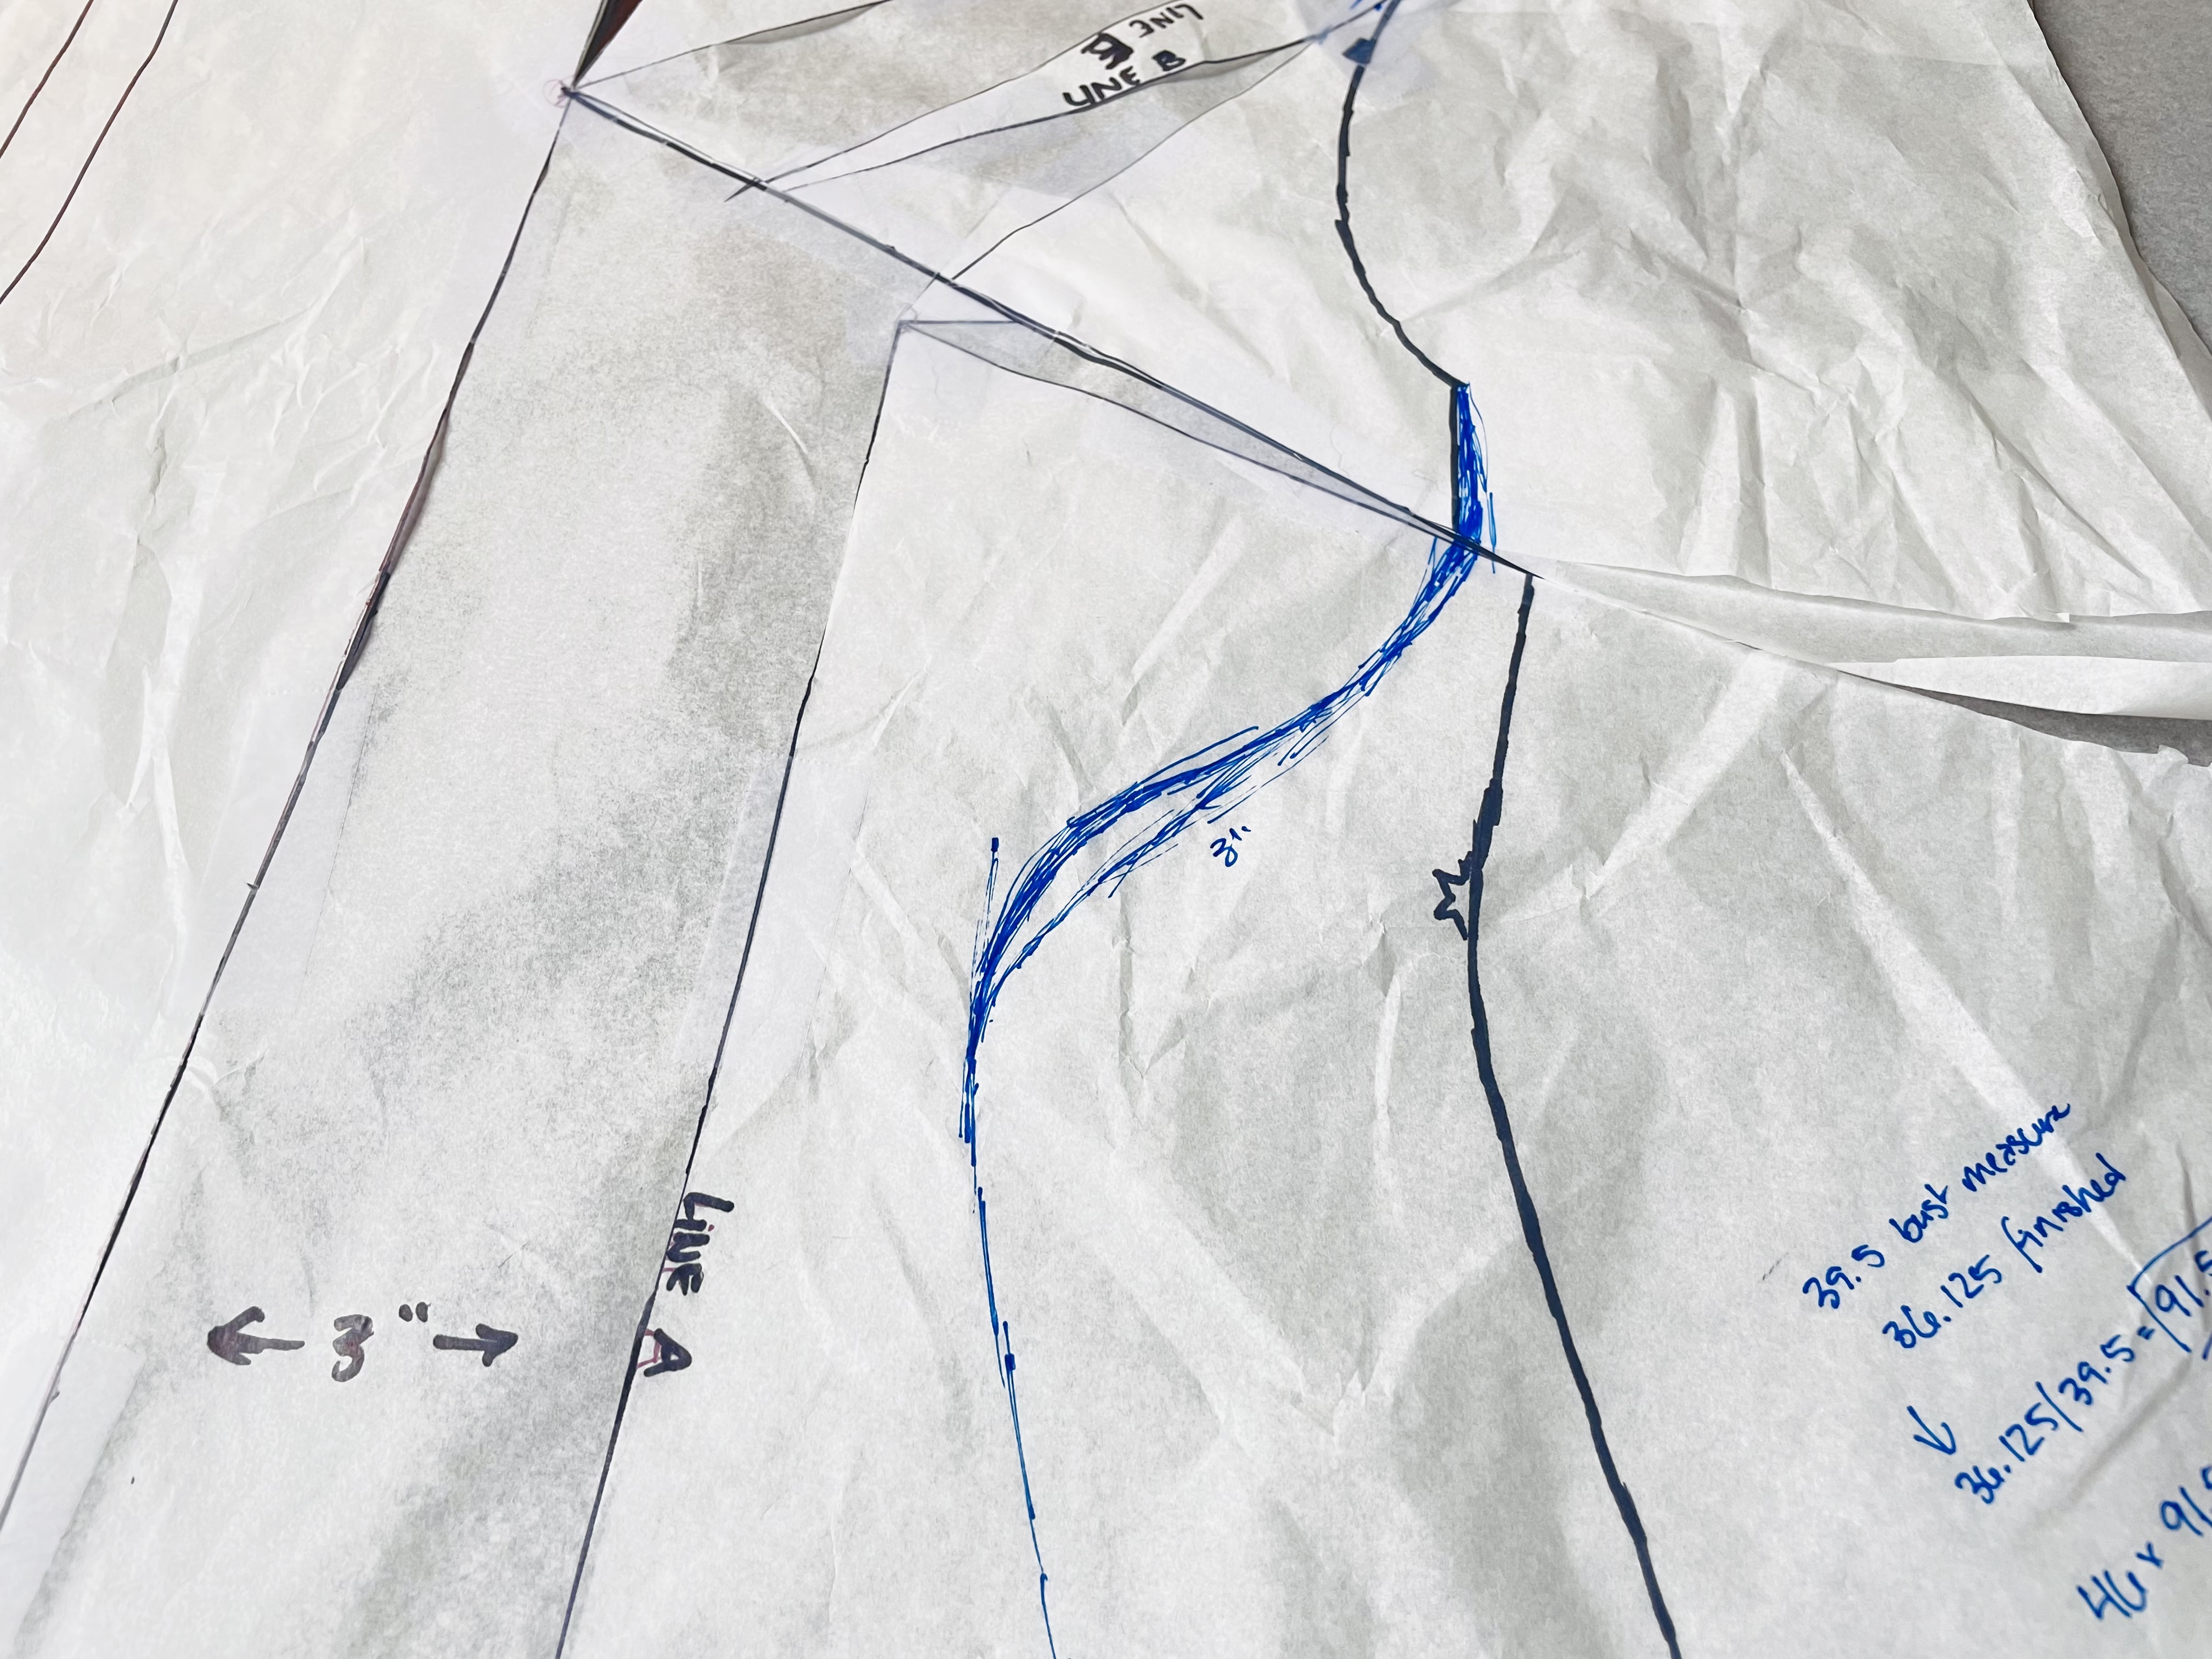
Next, we need to true up our lines and make the waist fit. Start by identifying your waist, and measuring inward the same number of inches you added above during the full bust adjustment. This will be your new waist point.

Continue making markings at this same number of inches (so, in my case, 3″) all the way down the side seam. This will become your new side seam.
Next, true the line from your bust line (where we closed the bust dart) to the new waist point. You can use a French curve to do this, but I generally prefer to just freehand it. For us curvy folks, this will be quite a curvy line. That’s okay!
Truing the armscye
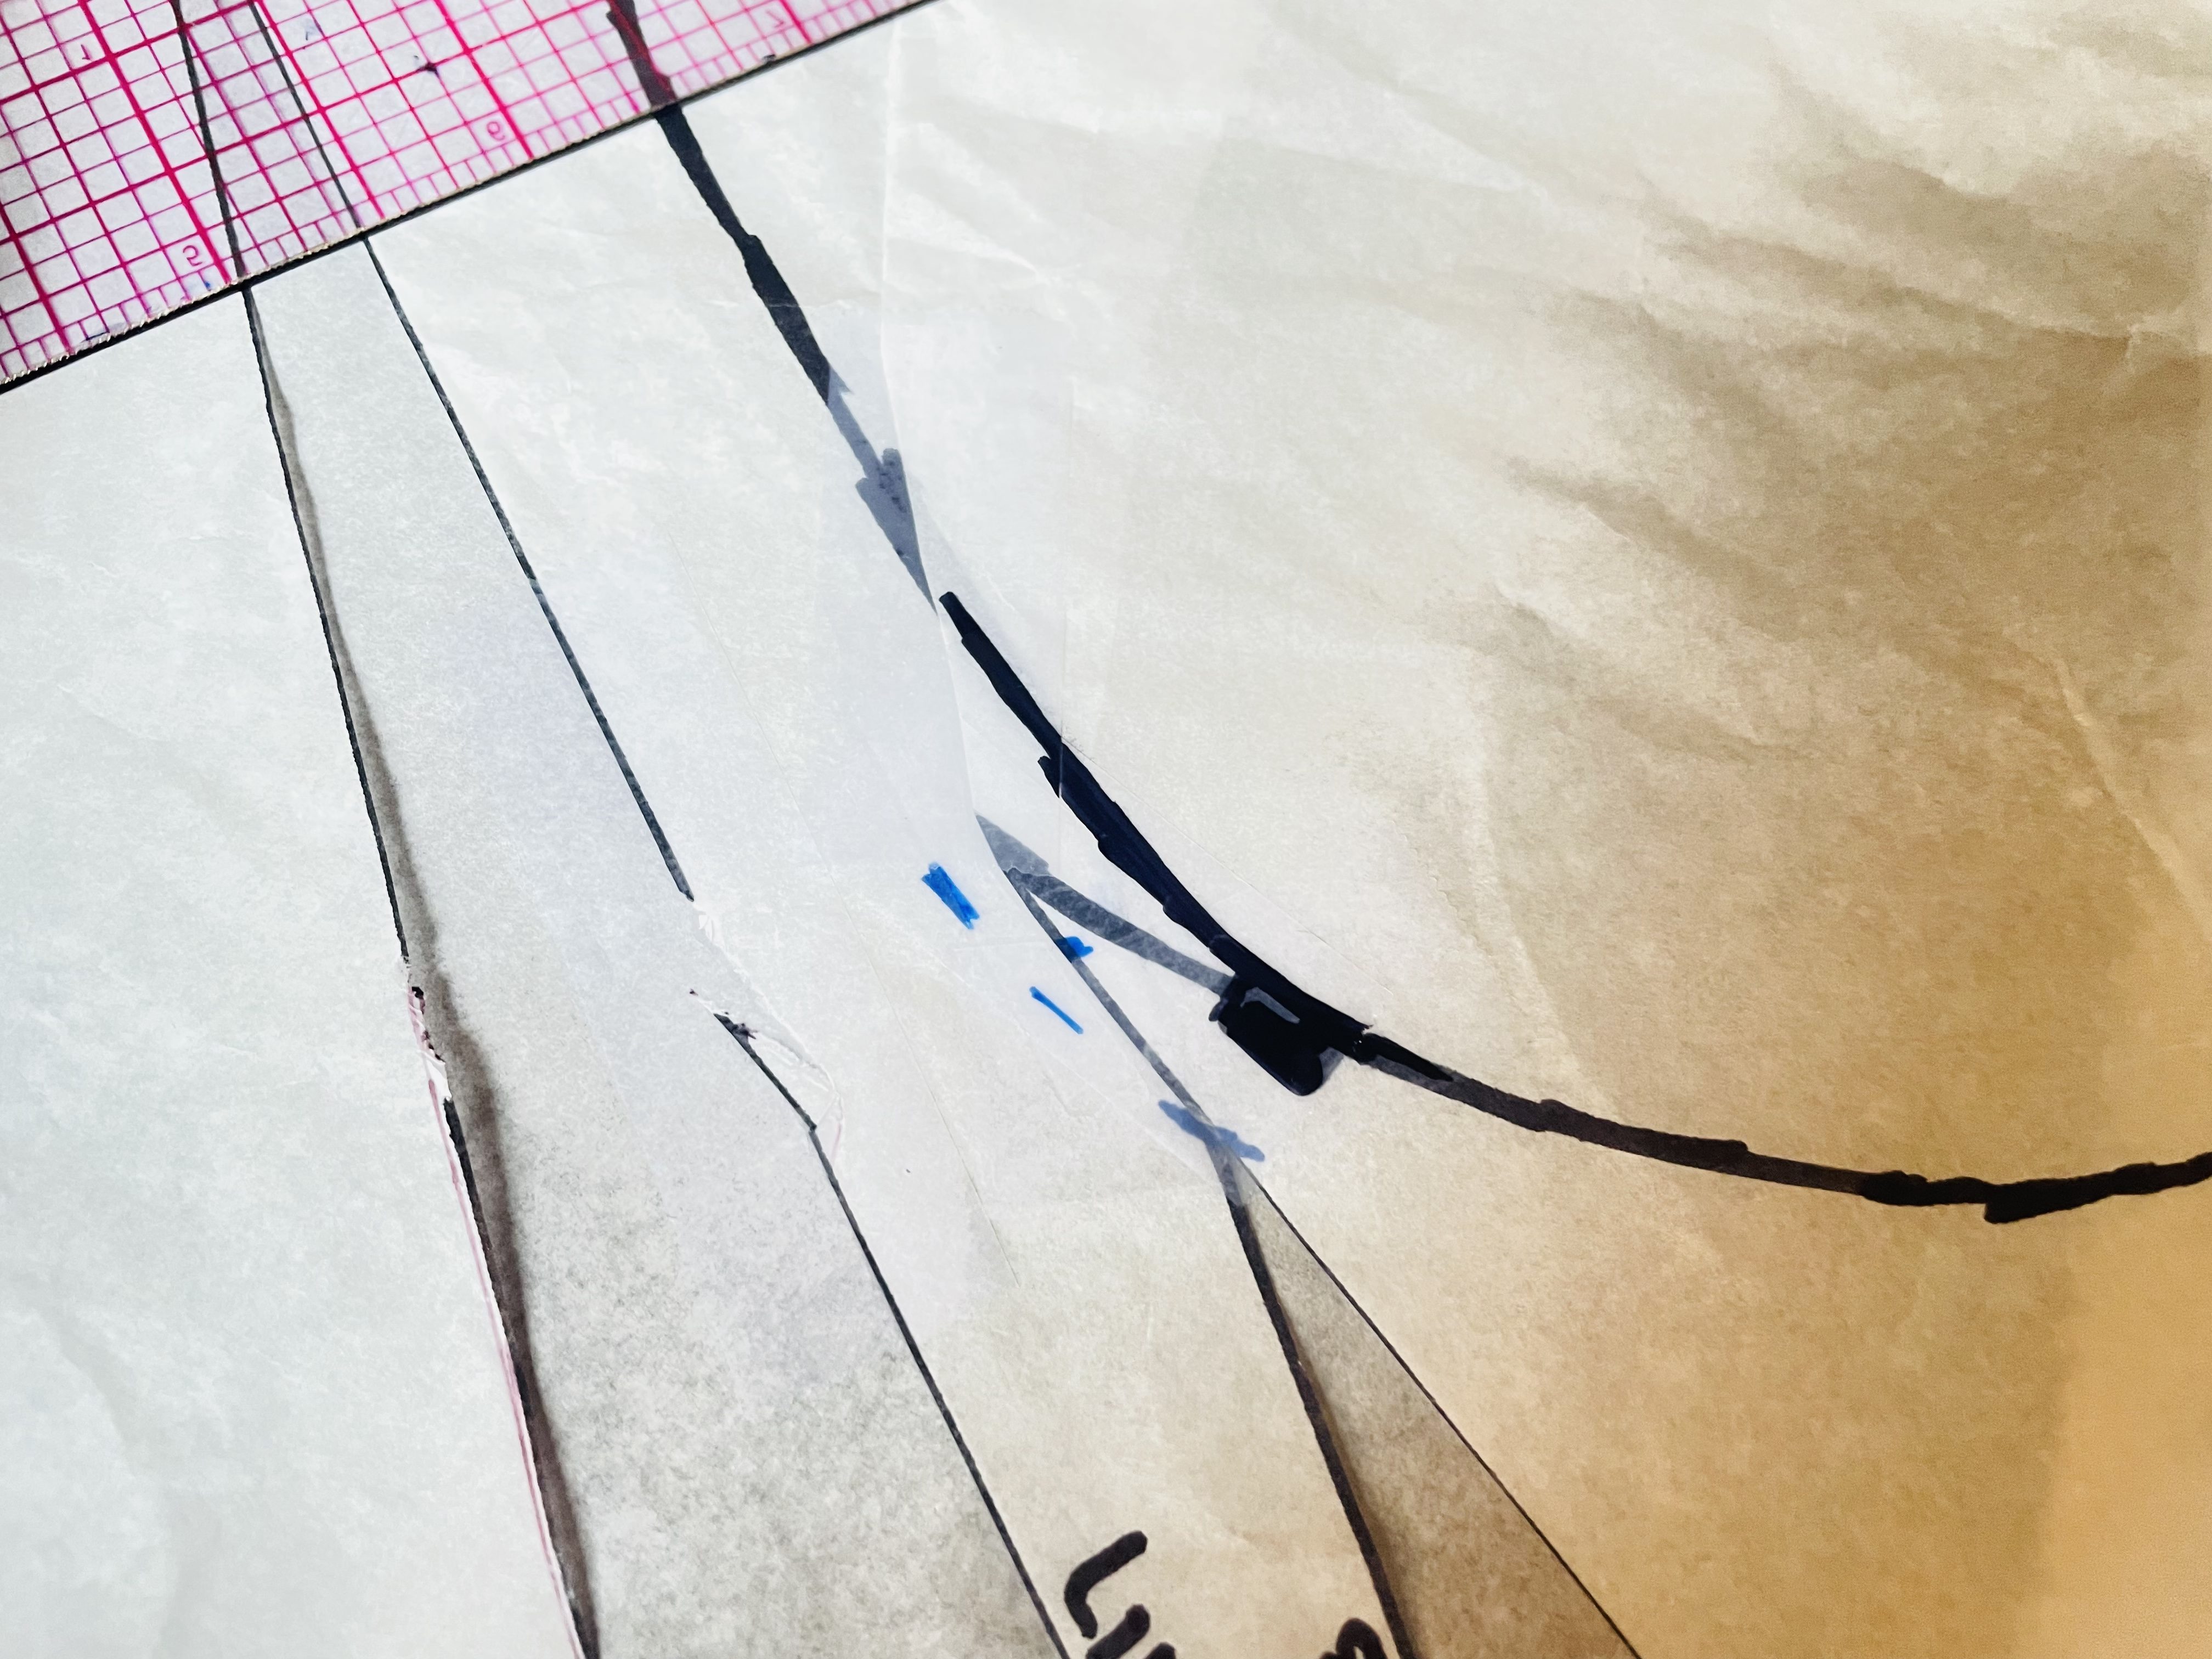
You also need to true up your armscye. Since we pivoted along the seam allowance, you should be able to just draw it in following the seam allowance.
Truing the neckline and re-attaching the facing
You’ll also need to true up your neckline where you added a “dart” there. I did this by re-attaching my self facing, matching the shoulder seam. I then needed to extend the self-facing by the same number of inches as my resulting dart was wide:

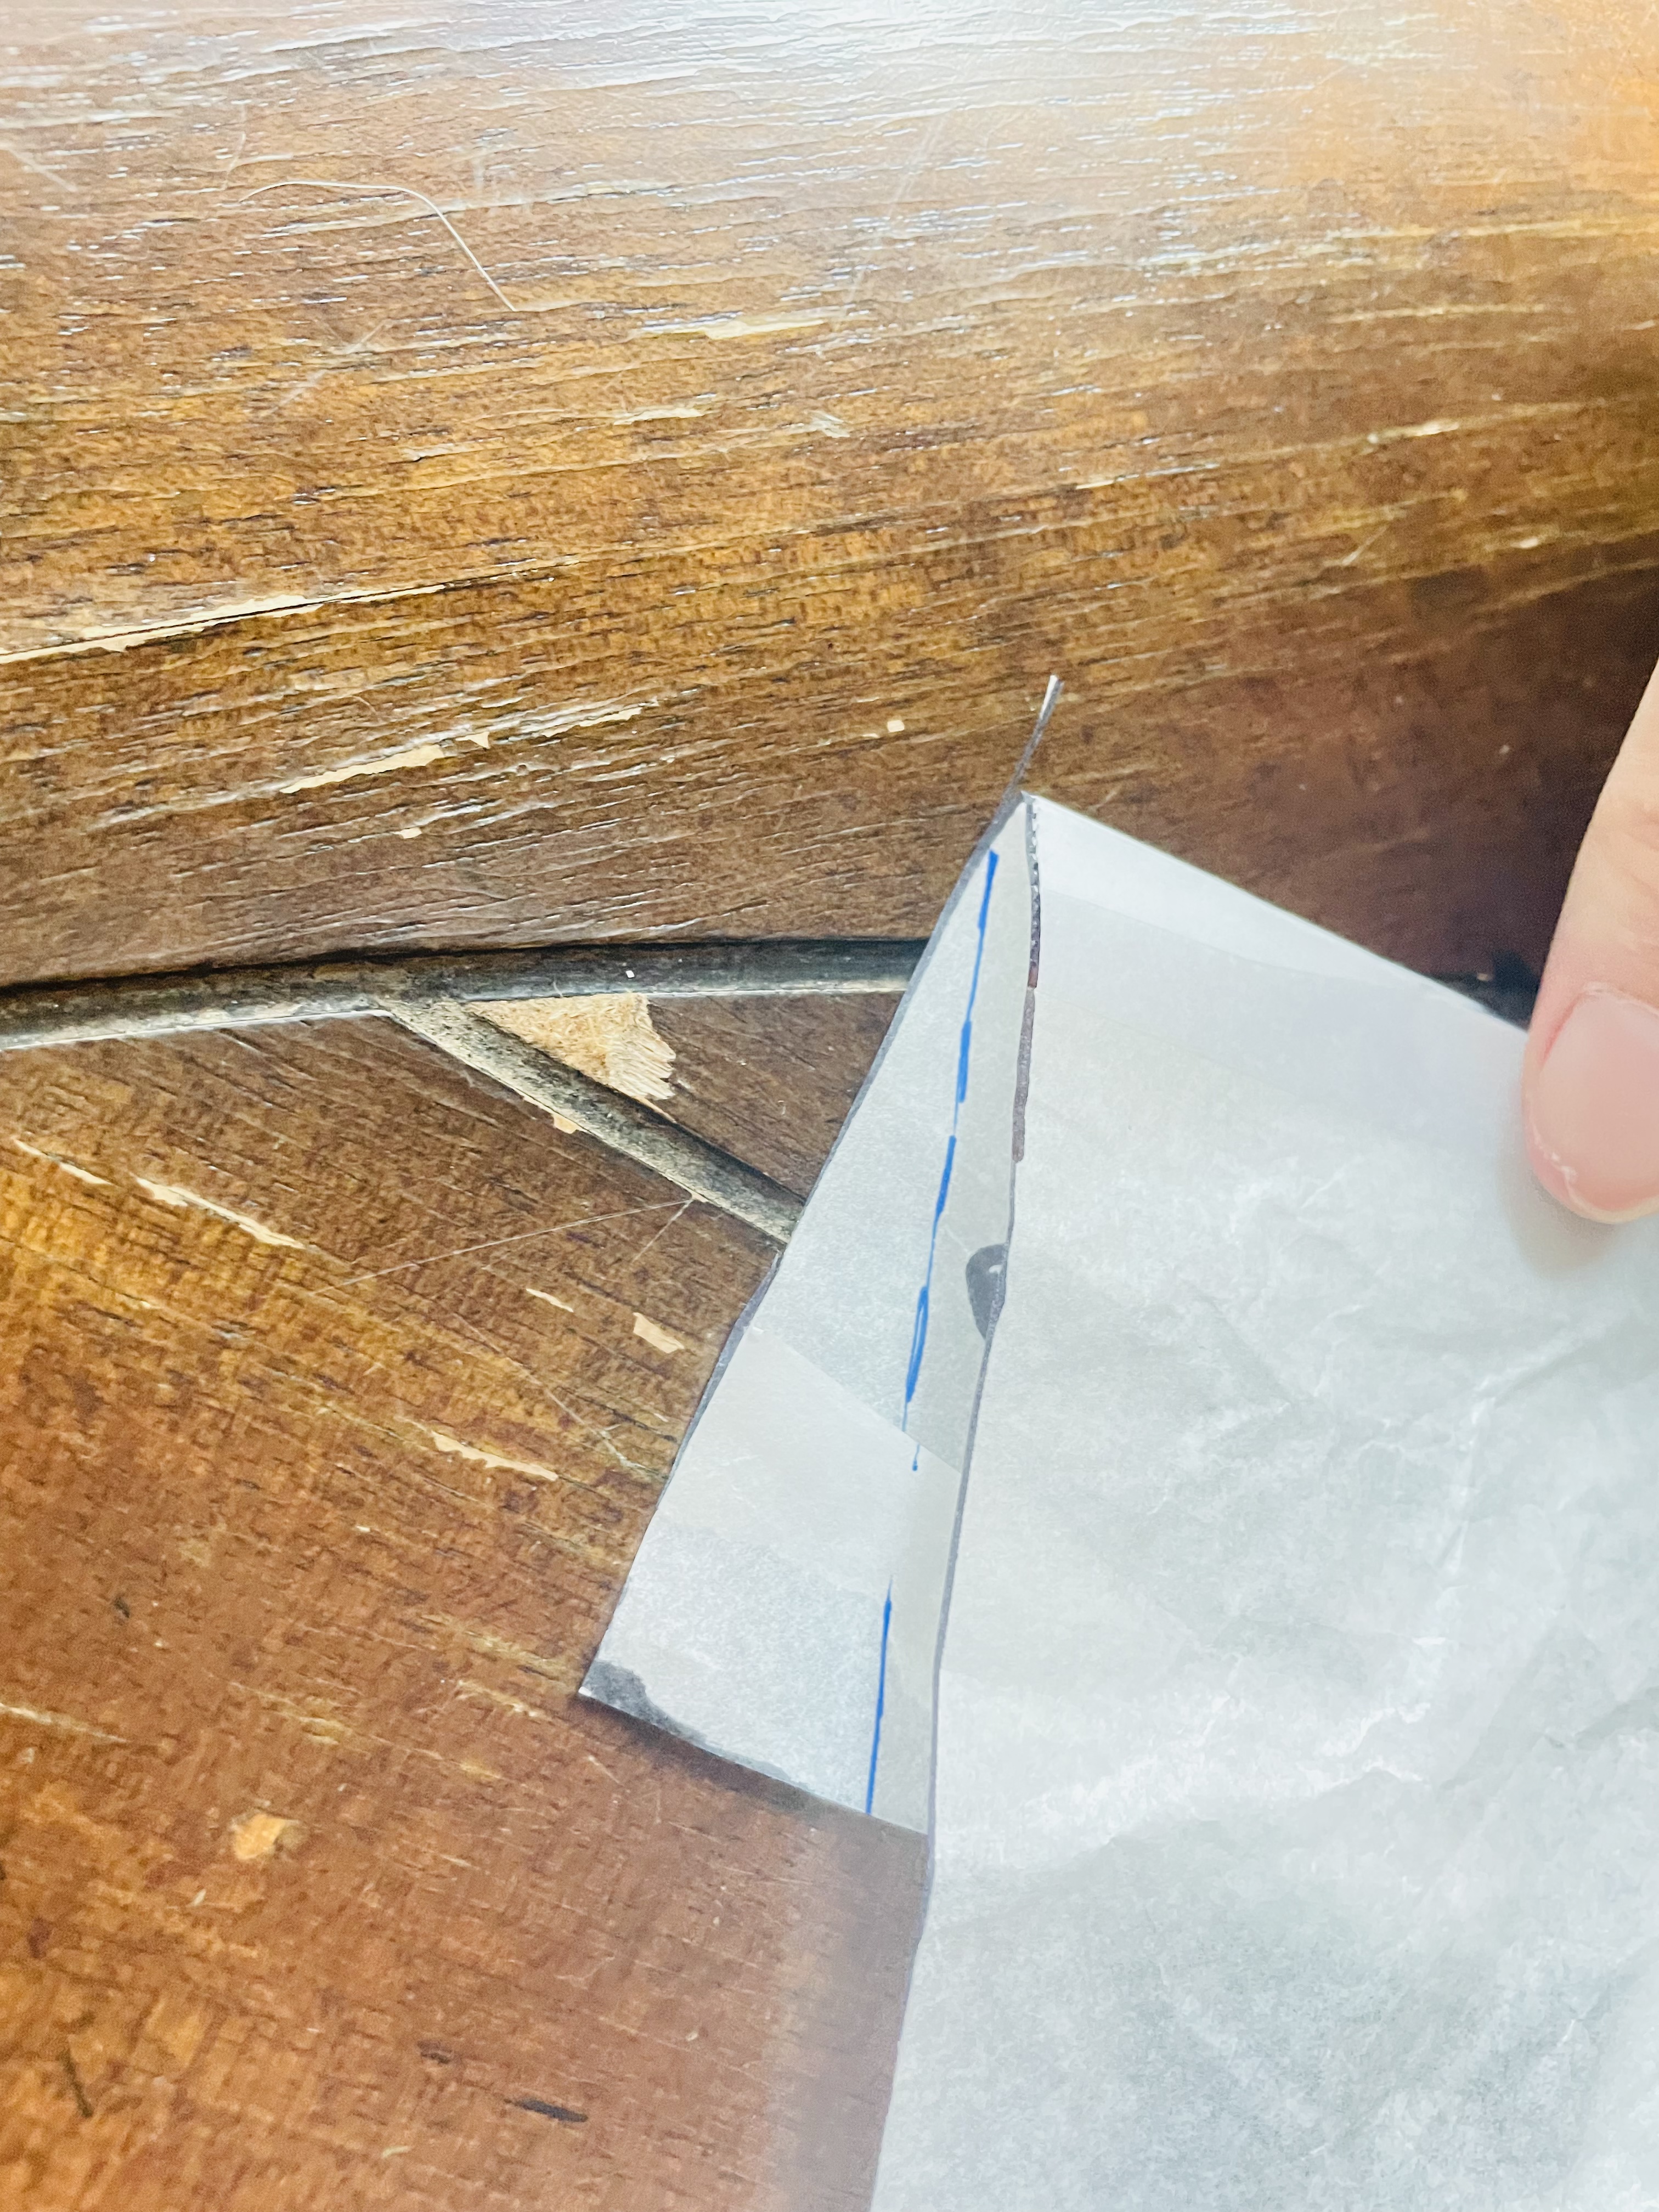
Finally, you’ll need to true your self facing by folding it onto the main and clipping:

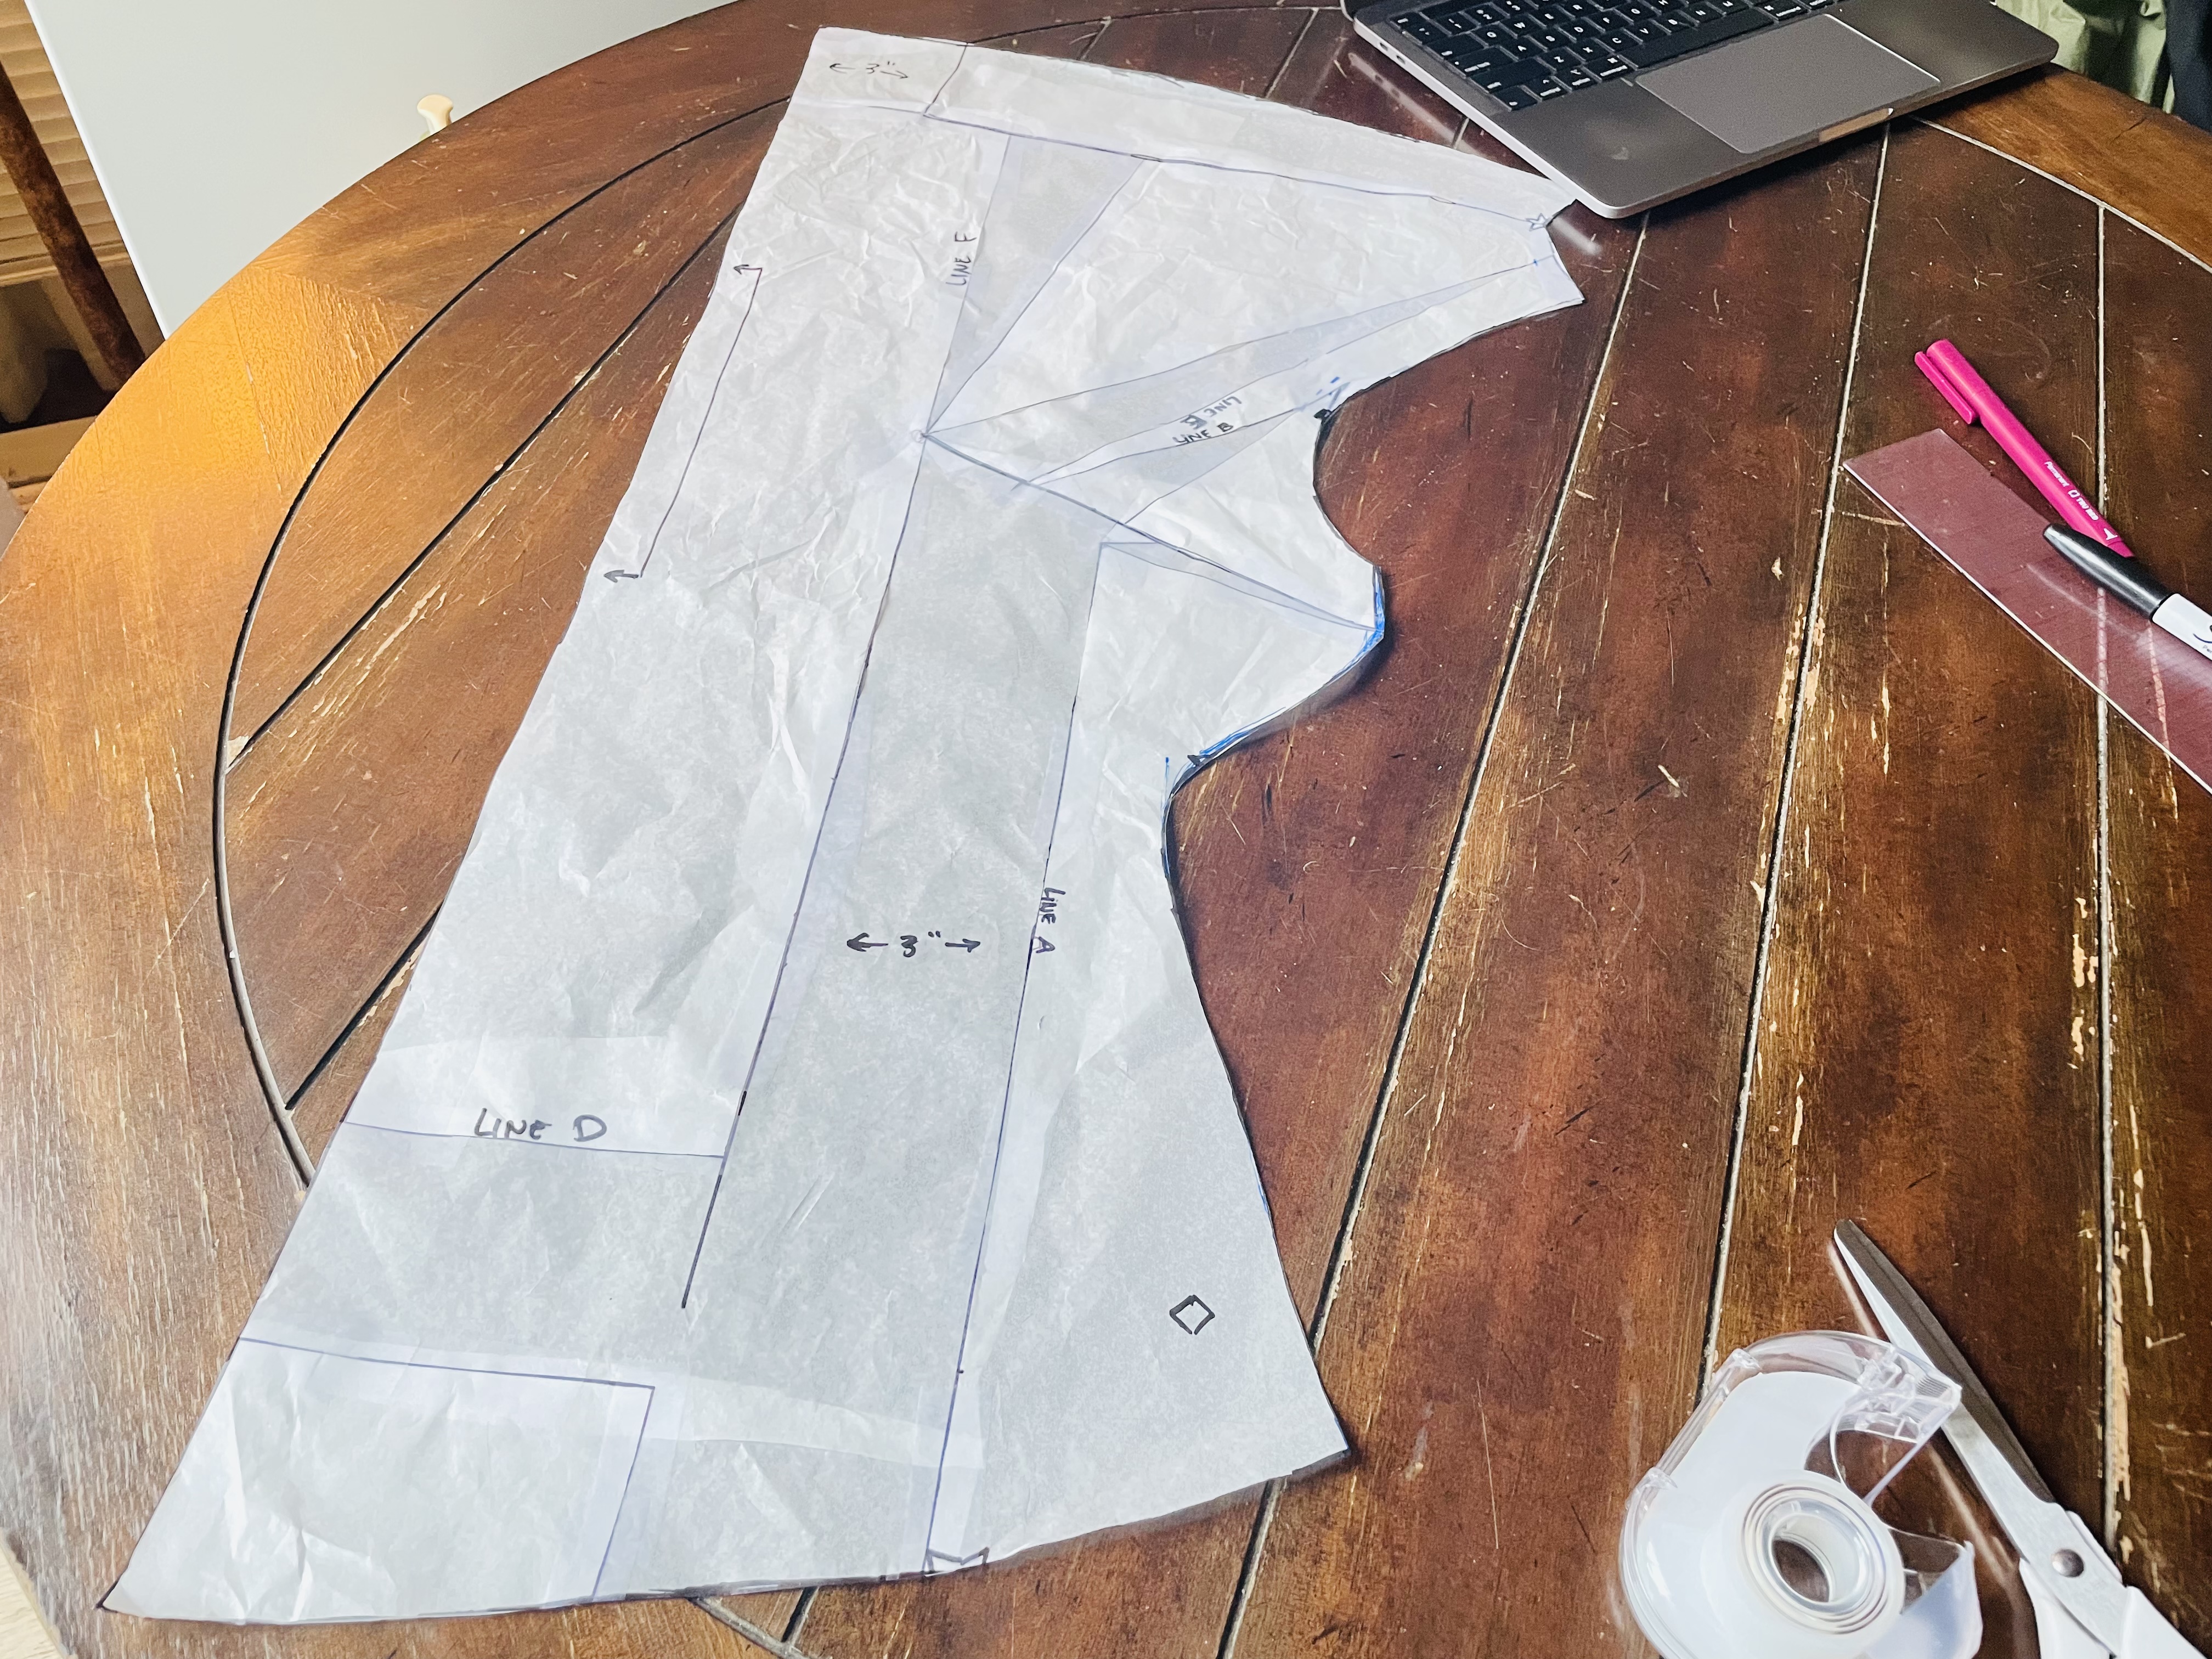
You should now have a full pattern:
Sewing it up!
Now, you can just sew your top according to the pattern instructions! (If you added a dart, you will of course want to sew up that dart.)
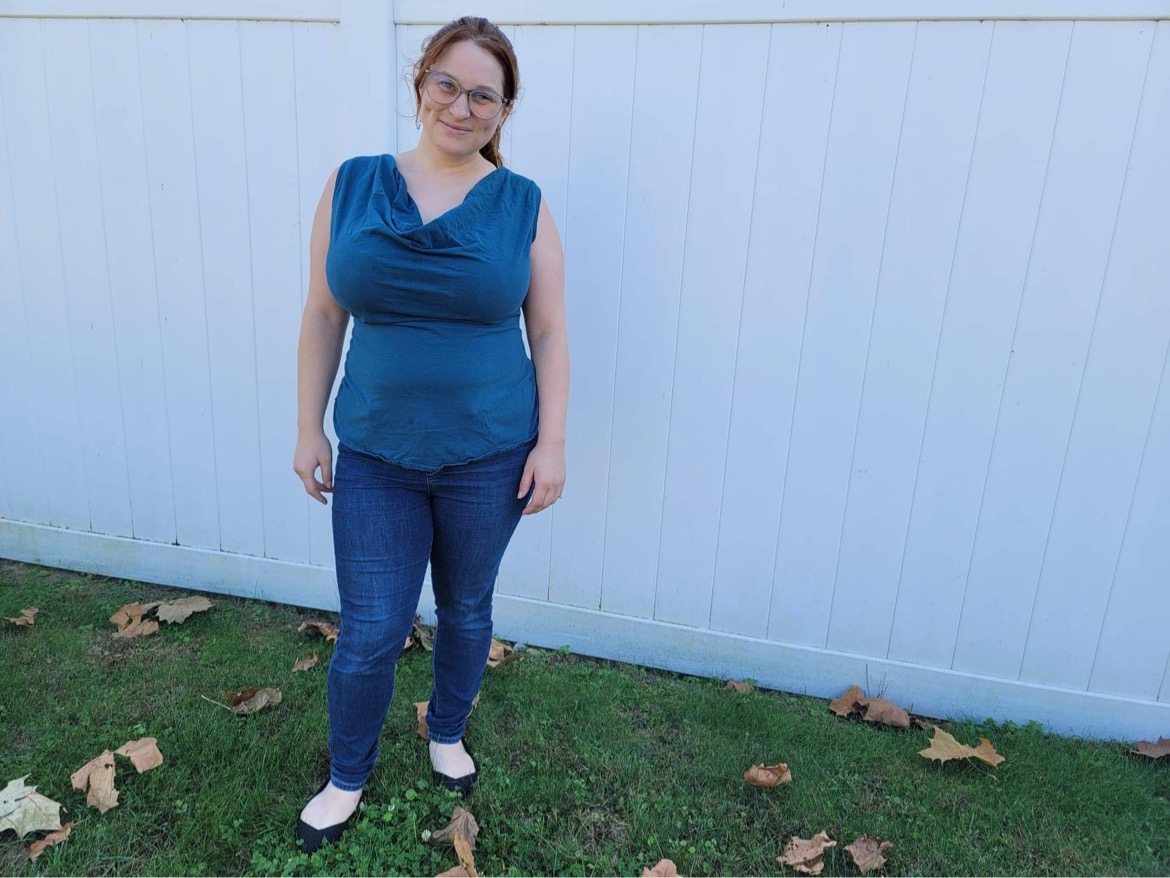
Here’s how my initial go went (while I was still pregnant!):
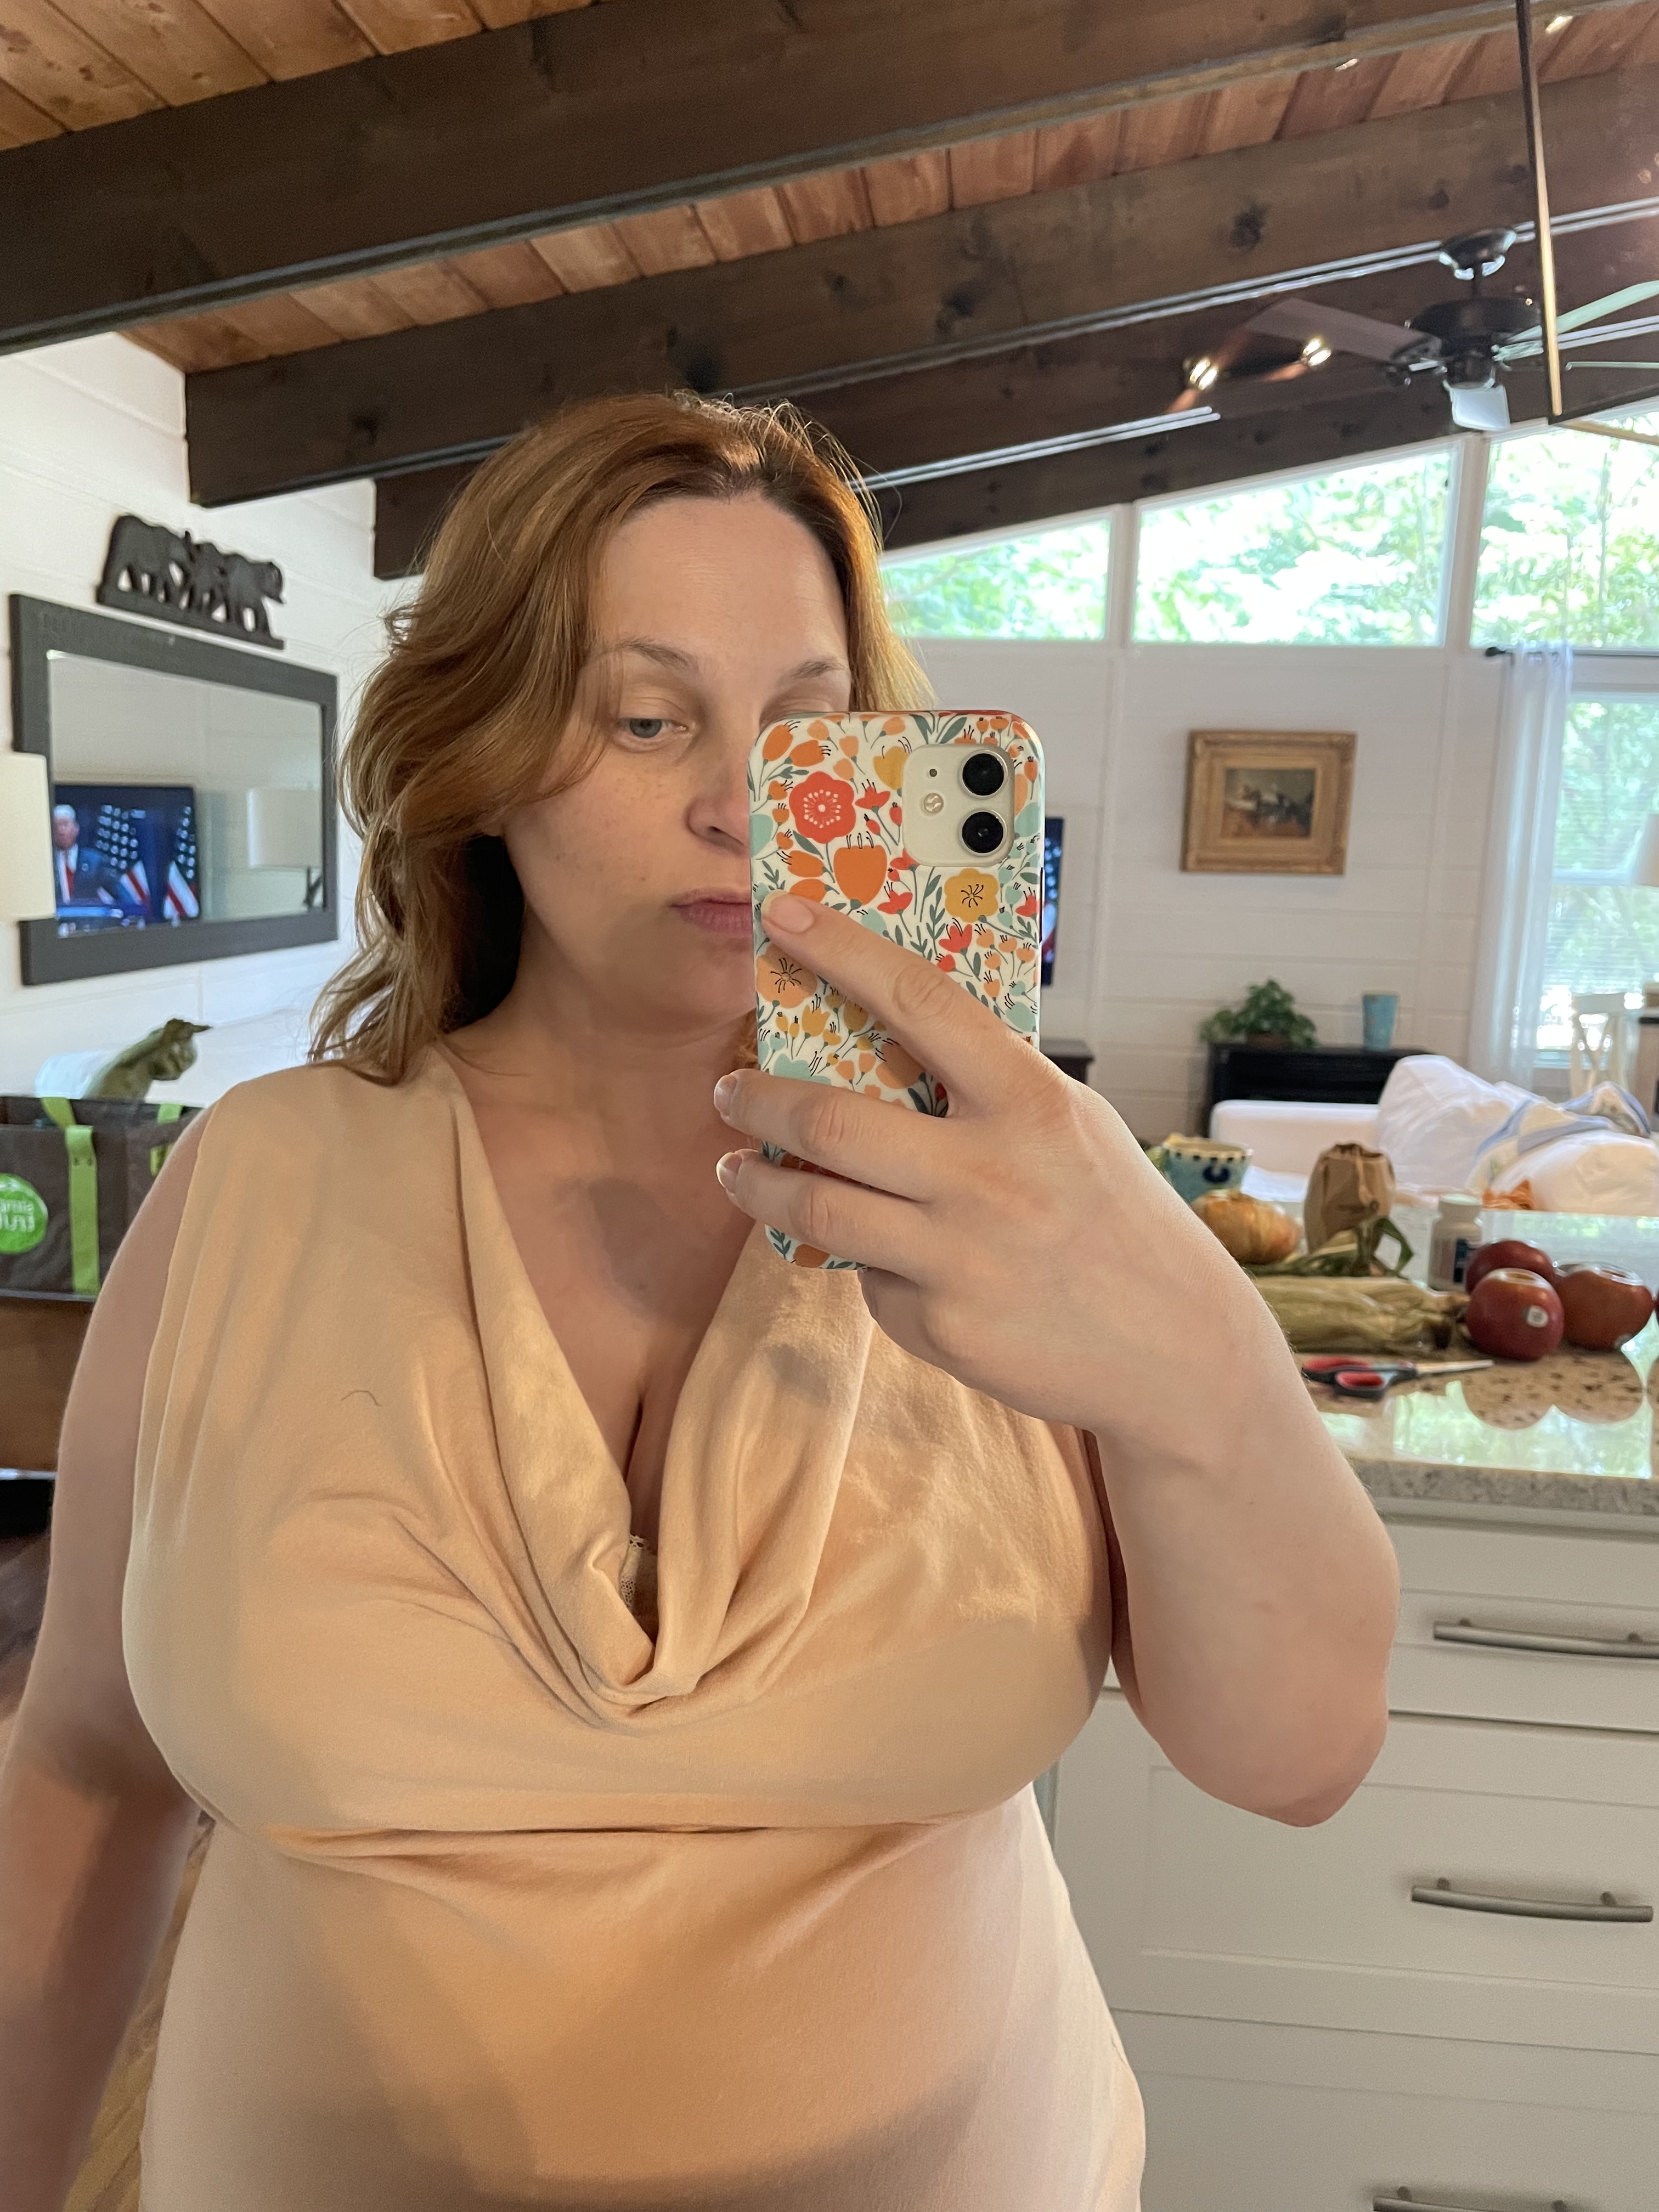
I felt like this was a bit low cut for my preferences, so I did decide to raise the neckline for my next version. I’ll write another post soon about raising necklines in cowl neck tops, but this post is plenty long for now!
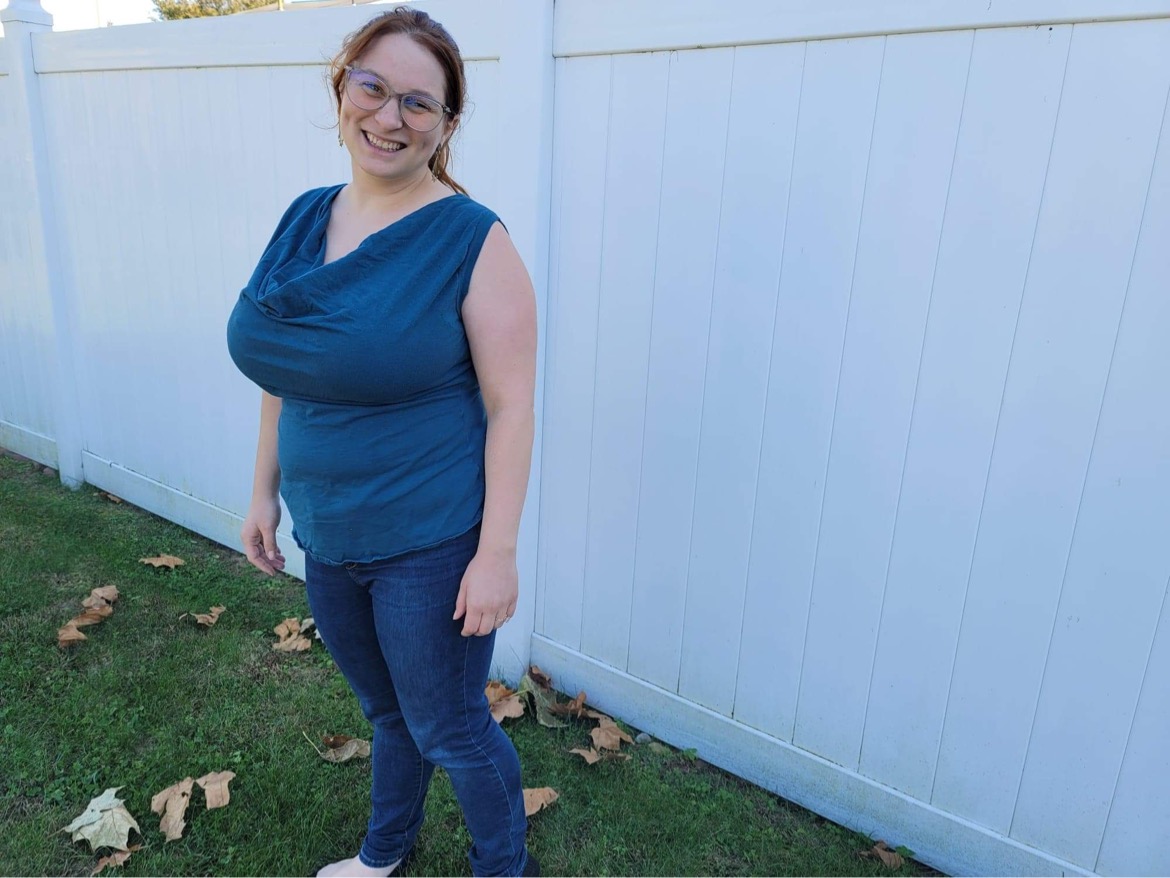
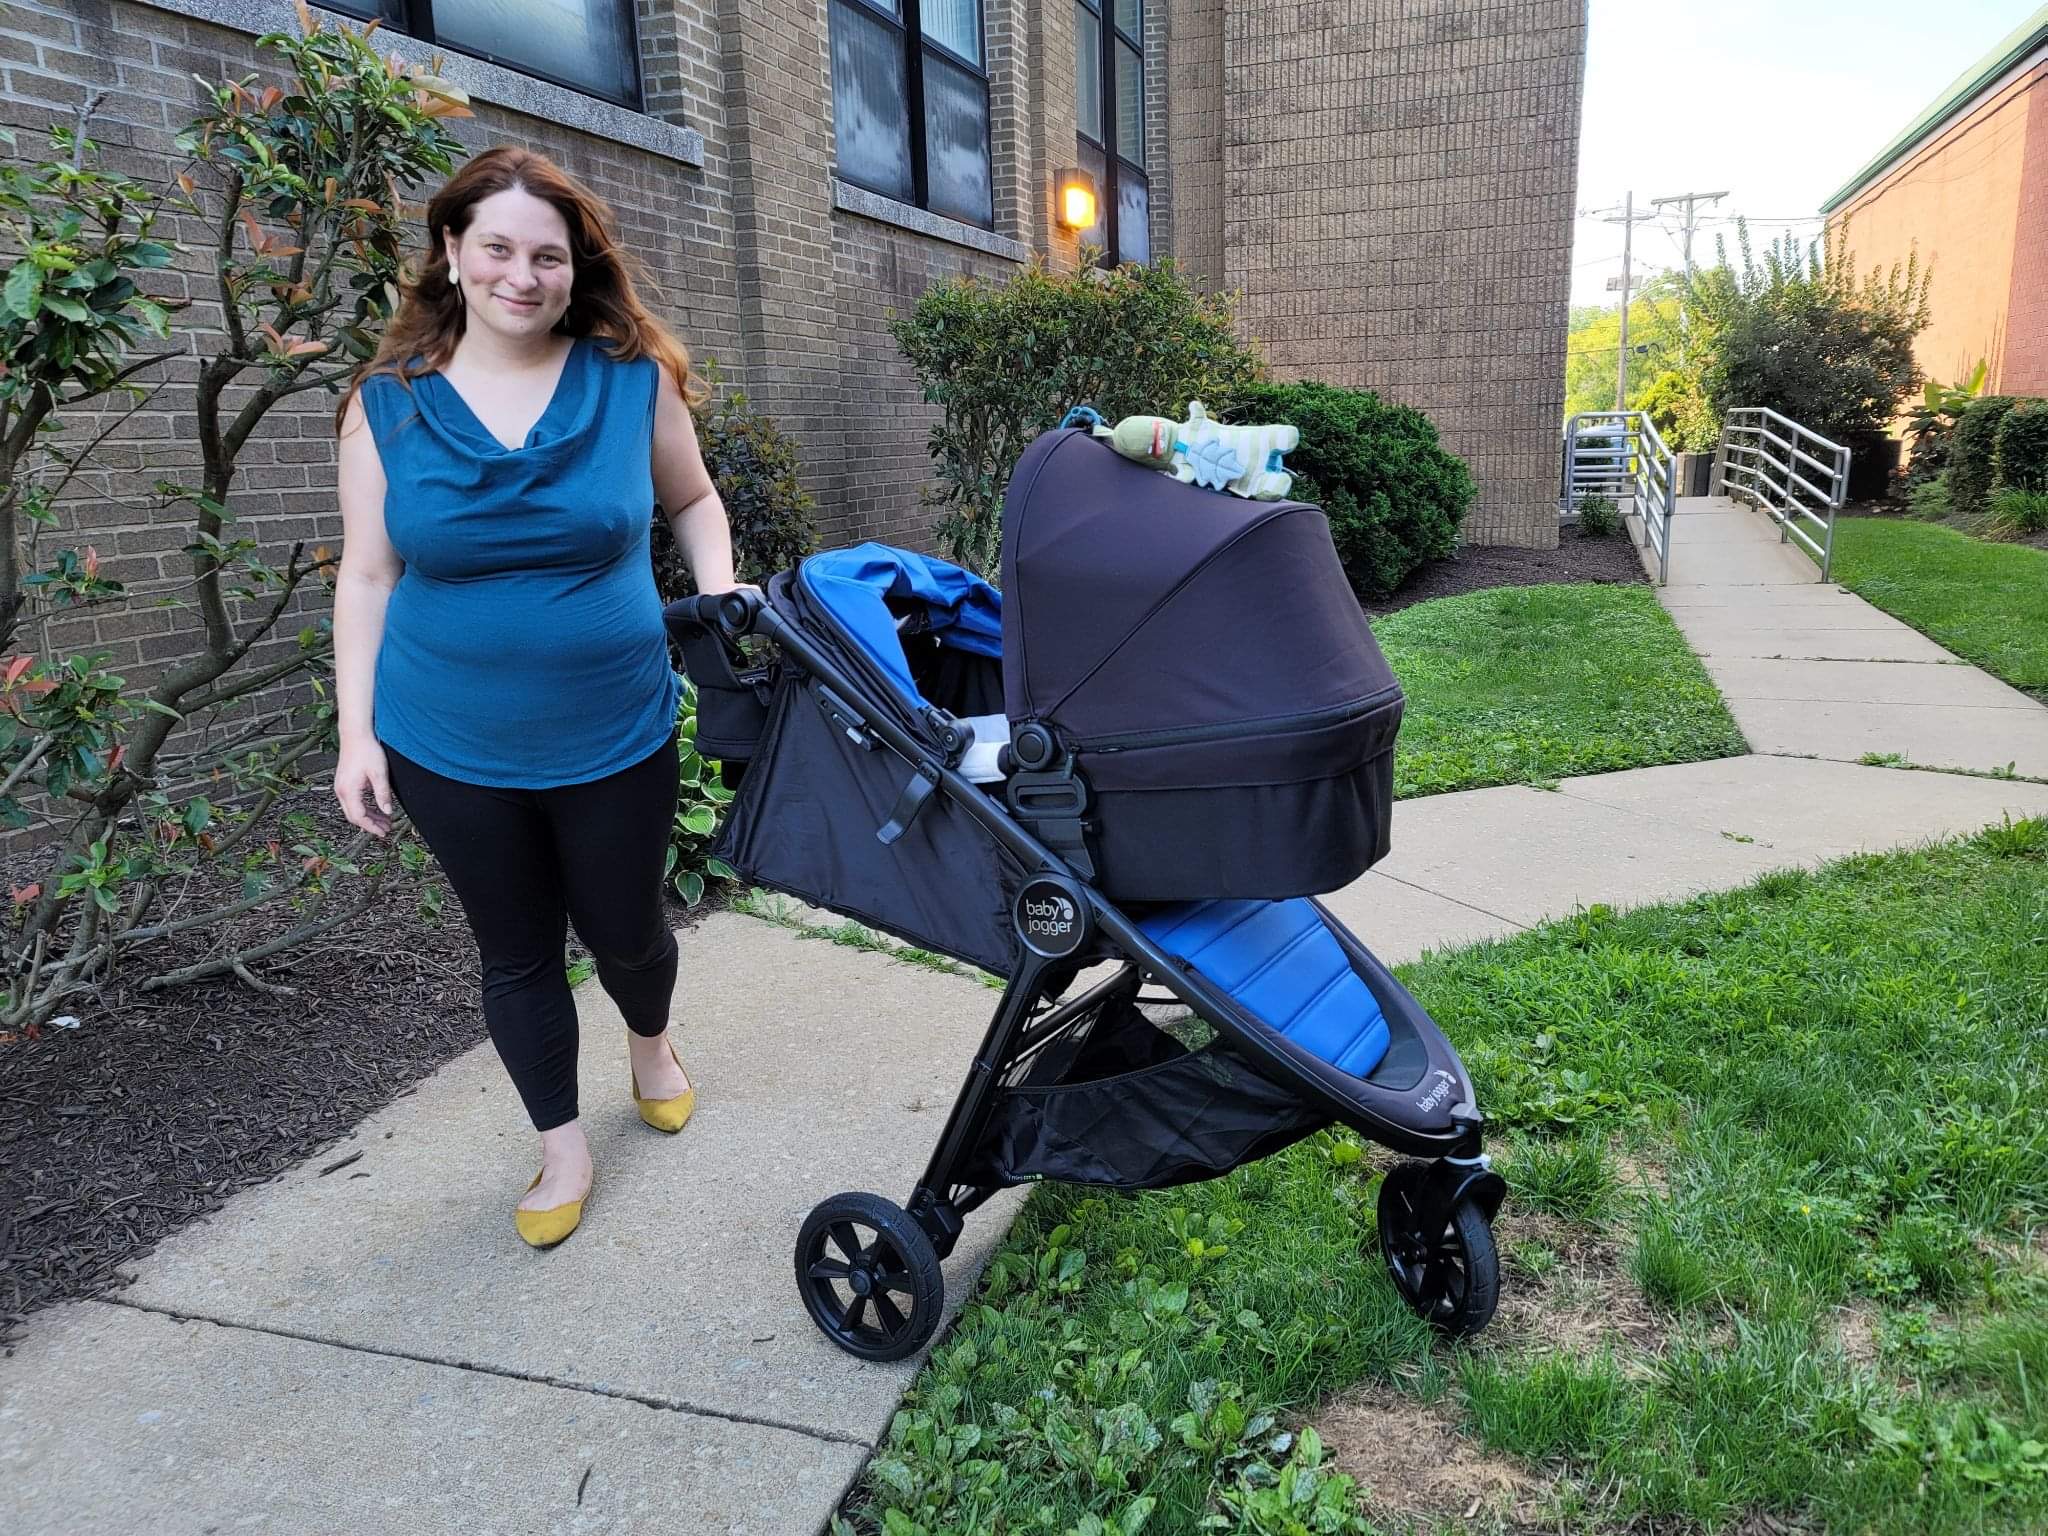
Here’s my version after I raised the neckline, when I was about 2 weeks postpartum (after my milk came in, so please excuse it being a bit tight at the bust — should have added more than 6″ it seems!):


Alex
February 18, 2025Any chance you’ve made a YouTube tutorial? I am such a visual learner! I am new to sewing clothes (but I can make a flawless tote bag 😅) and really want to learn!
Lindsie
February 20, 2025I haven’t done a cowl neckline video tutorial yet, but I am doing a series of video tutorials! You can find them here: https://www.youtube.com/playlist?list=PLp-hZ27BzMOplks-cvslgZpoMbYBJihlA
I’ll do a cowl neckline tutorial at some point soon! 🙂