
Full Bust Adjustment Guide | Giant FBA on a Woven Bodice
Let’s talk again about Giant full bust adjustments
As I mentioned a couple weeks ago in a post about performing a giant full bust adjustment on a dartless knit bodice, most full bust adjustment tutorials out there assume that busty sewists are needing to add maybe a couple inches to their bodices.
Fit books seem to think that people with large busts/projected chests top out at a garment sewing DD. (Remember that bra cups aren’t the same as your garment sewing cup size! Learn more about determining your garment sewing cup size here!)
Well, as a current garment sewing K cup (11″ difference between high and full bust), I call bullshit.
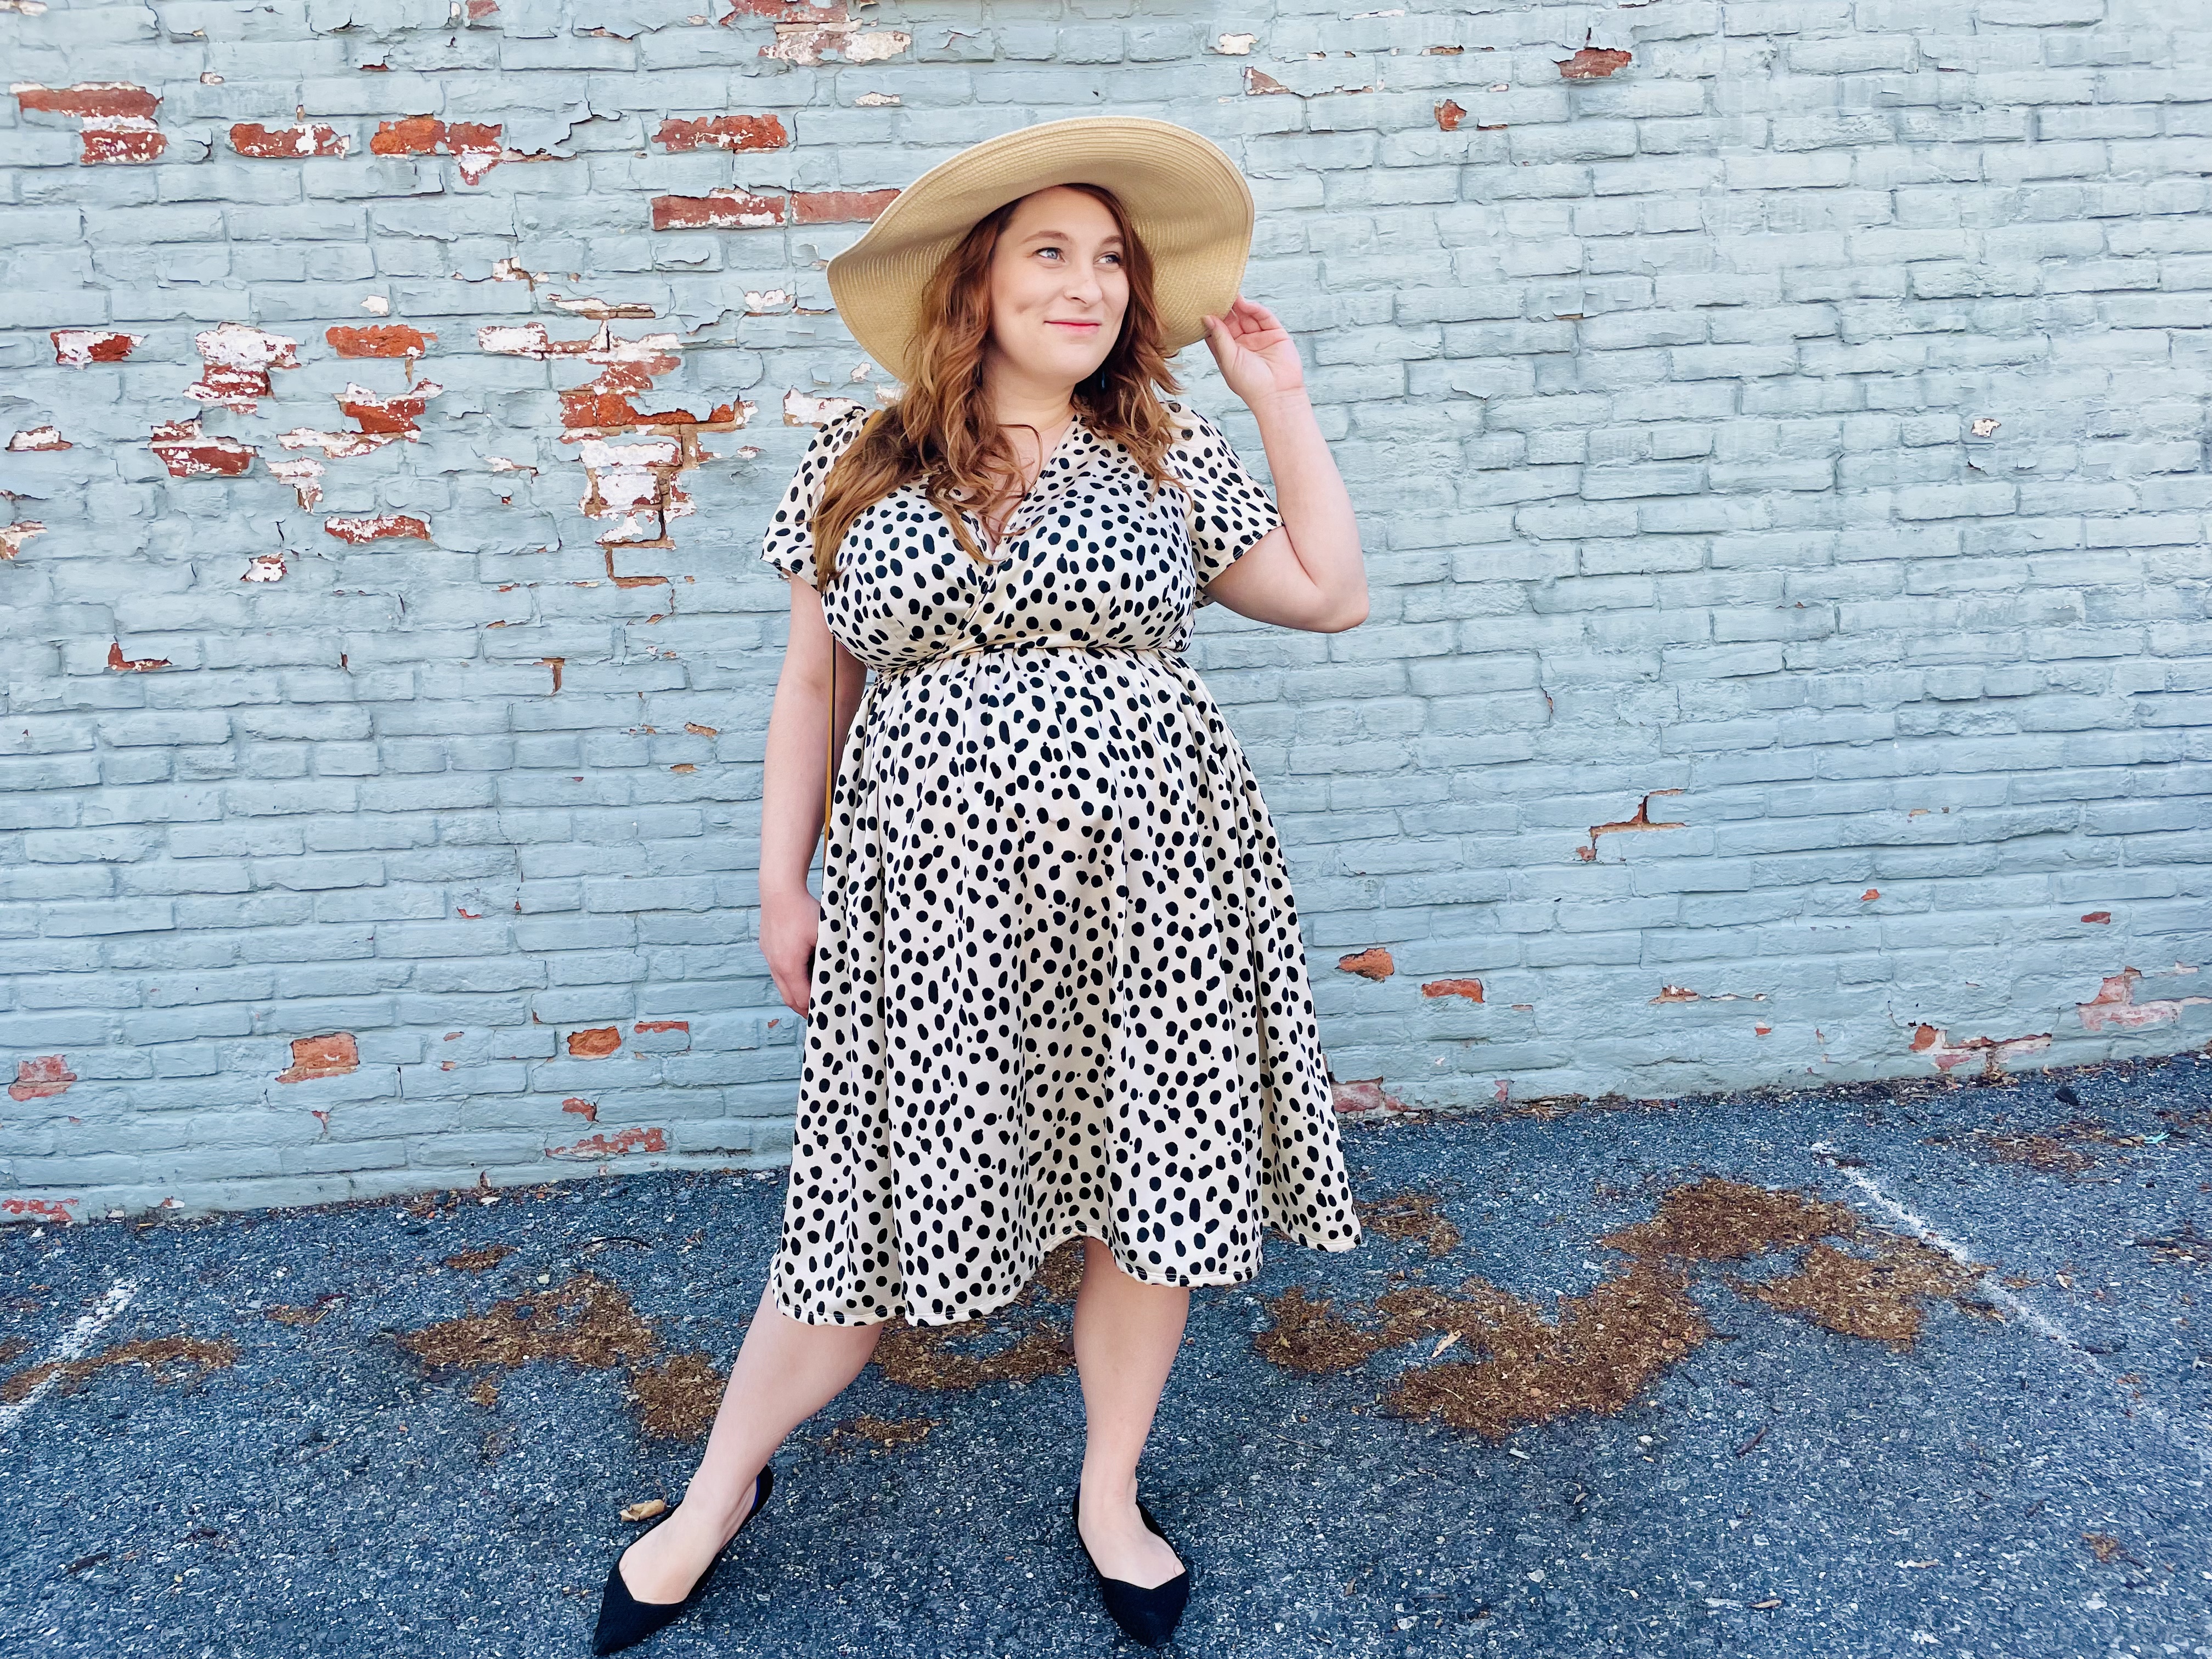
Giant full bust adjustments can look so different from what you see on normal FBA tutorials. That’s why I’ve started this series on GIANT FBAs.
I’m here to show you what it looks like when you need to add more than 4″ to your bust/projected chest — without adding to your waist!
Fitting the cashmerette Roseclair … again
As avid Sew Busty readers will recall, we’ve had a lot of Cashmerette Roseclair content on the blog. Last year — back when I fit perfectly into Cashmerette’s G/H cup size (remember that Cashmerette uses a nonstandard nomenclature for their cup sizes, such that their G/H is equivalent to a standard garment DD cup) — I did a Roseclair sew along. We’ve also had a couple of posts about altering the Roseclair to eliminate neckline gape, as well as a post on altering the Roseclair’s dart for different bust/projected chest shapes.
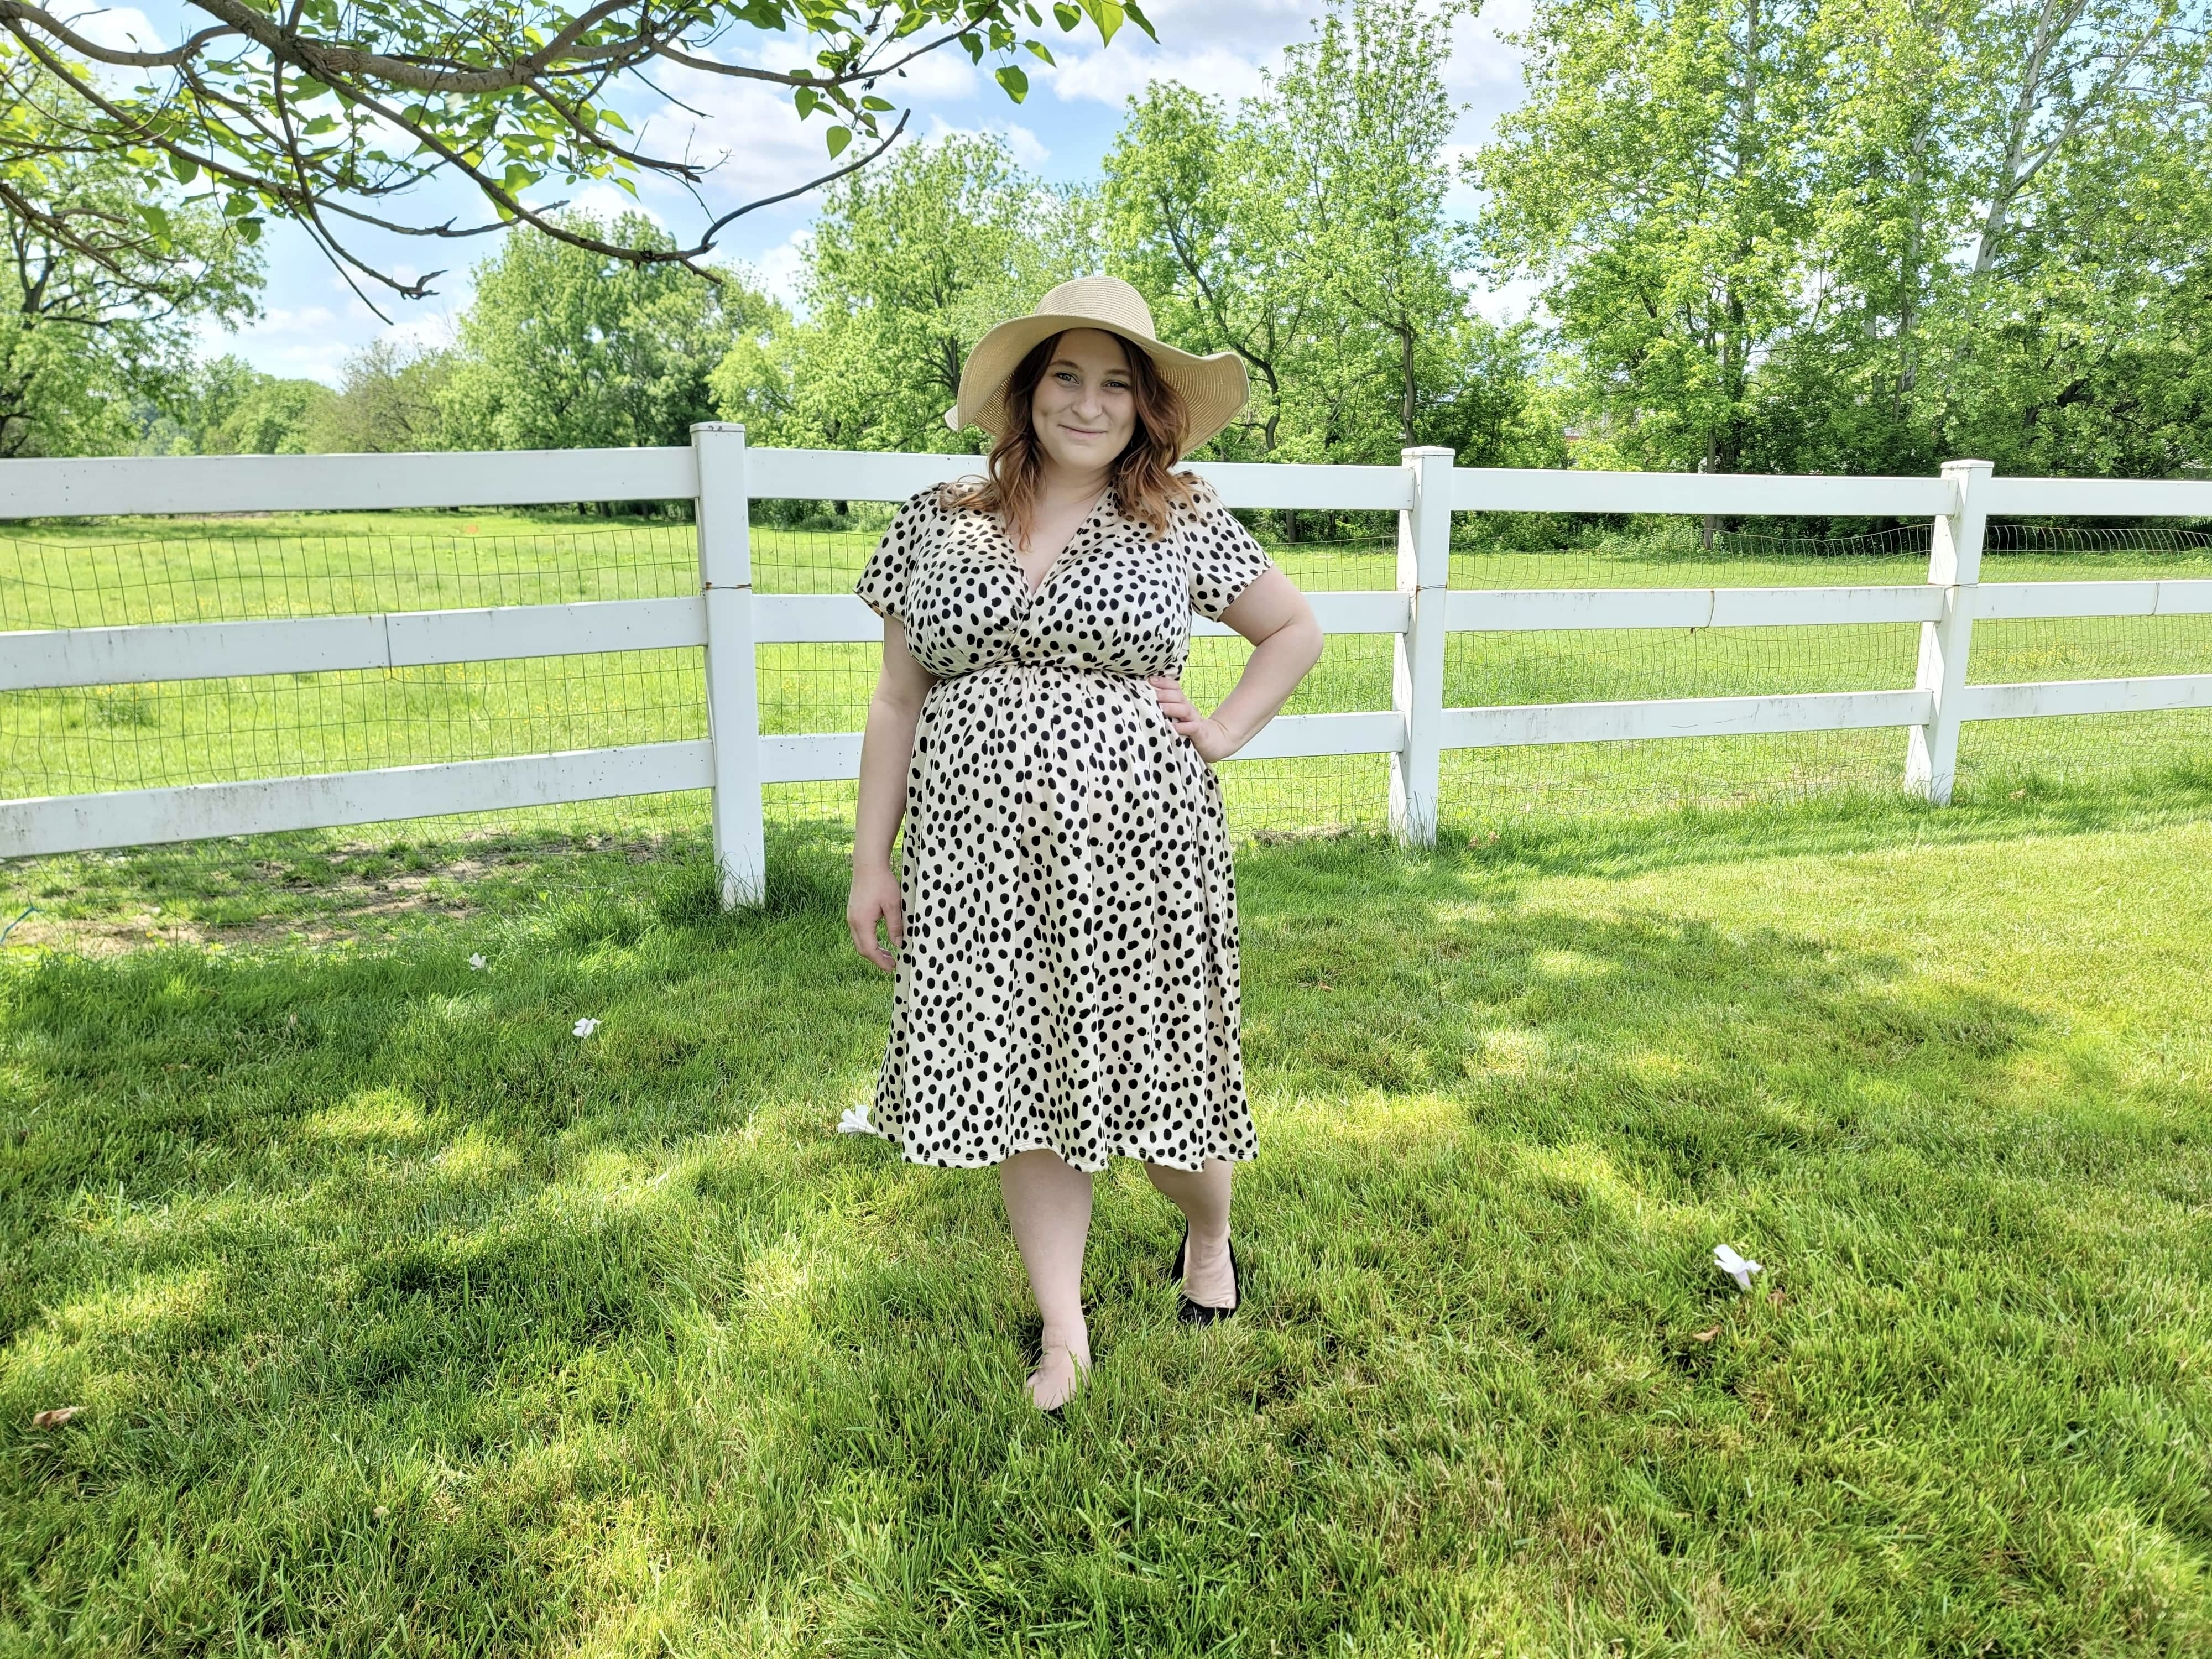
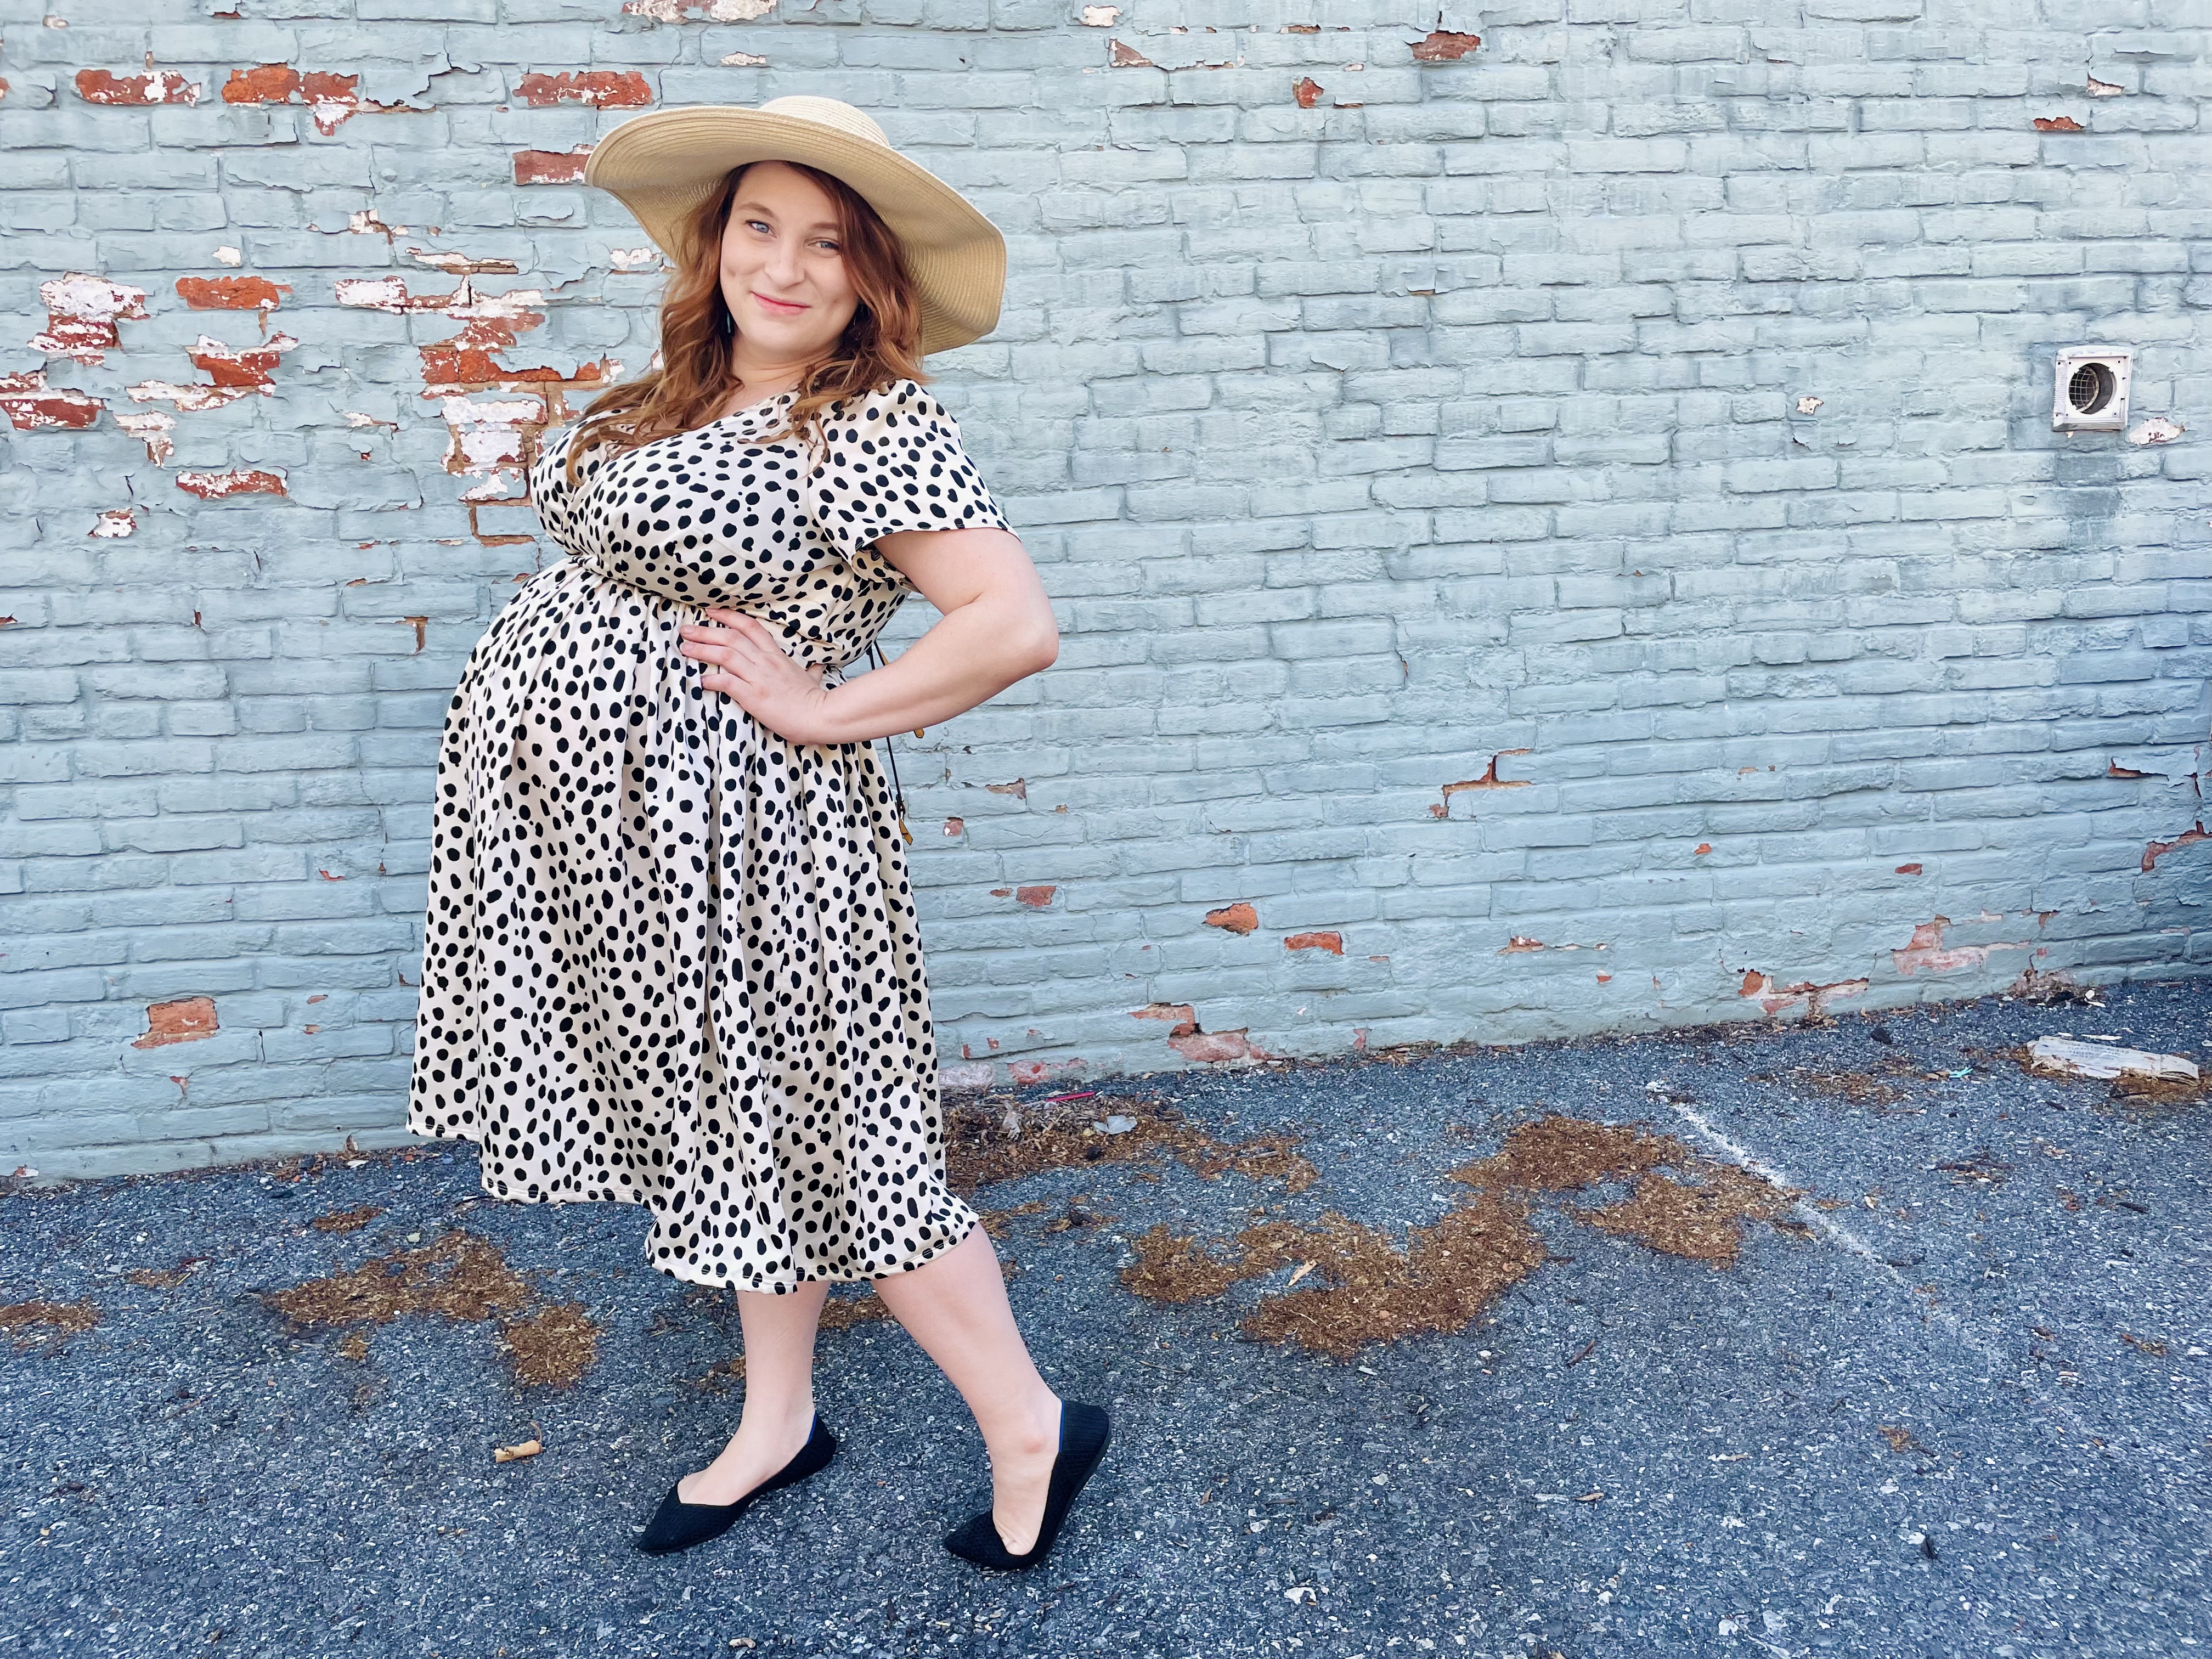
When I saw this dress from Baltic Born (knowing it would never fit my bust correctly), I was inspired to make something similar for my upcoming maternity photos. In comes the Roseclair!
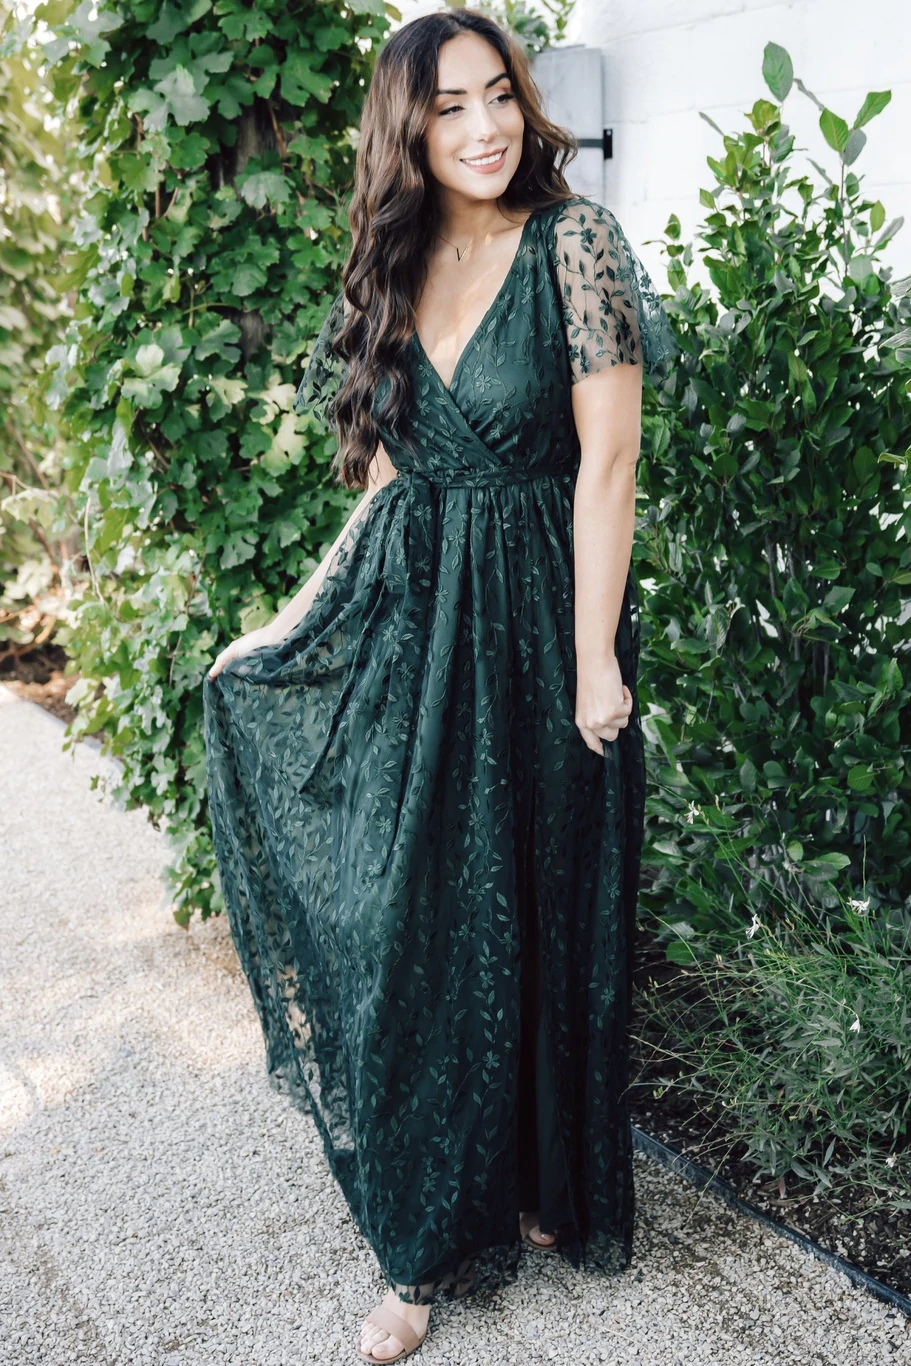
I wanted a faux wrap, surplice neckline and a gathered skirt that would accommodate my growing tummy without being only usable for maternity.
So this is not only a FBA tutorial, but also a Roseclair hack — I’ll give a quick run down of how I took the wrap style and turned it into this surplice + gathered skirt.
It’s worth noting that while I’m demonstrating this giant FBA for woven bodices on the Roseclair, this alteration is 100% do-able on other woven, darted bodices. The steps will essentially be the same. (Struggling with an FBA? Post on the Sew Busty Facebook group or reach out to me!)
Getting prepared for your FBA
Choosing a base size
As usual, you need to start with your high bust measurement, measured braless.
I will repeat this every time I write about performing FBAs: You need to measure your high bust without a bra on because you want to capture as little breast tissue in this measurement as possible. This is because you’re not really trying to measure your high bust, as it’ll measure in the garment (when you’ll probably be wearing a bra). You’re really trying to measure your skeletal frame; high bust is just acting as a proxy for this.
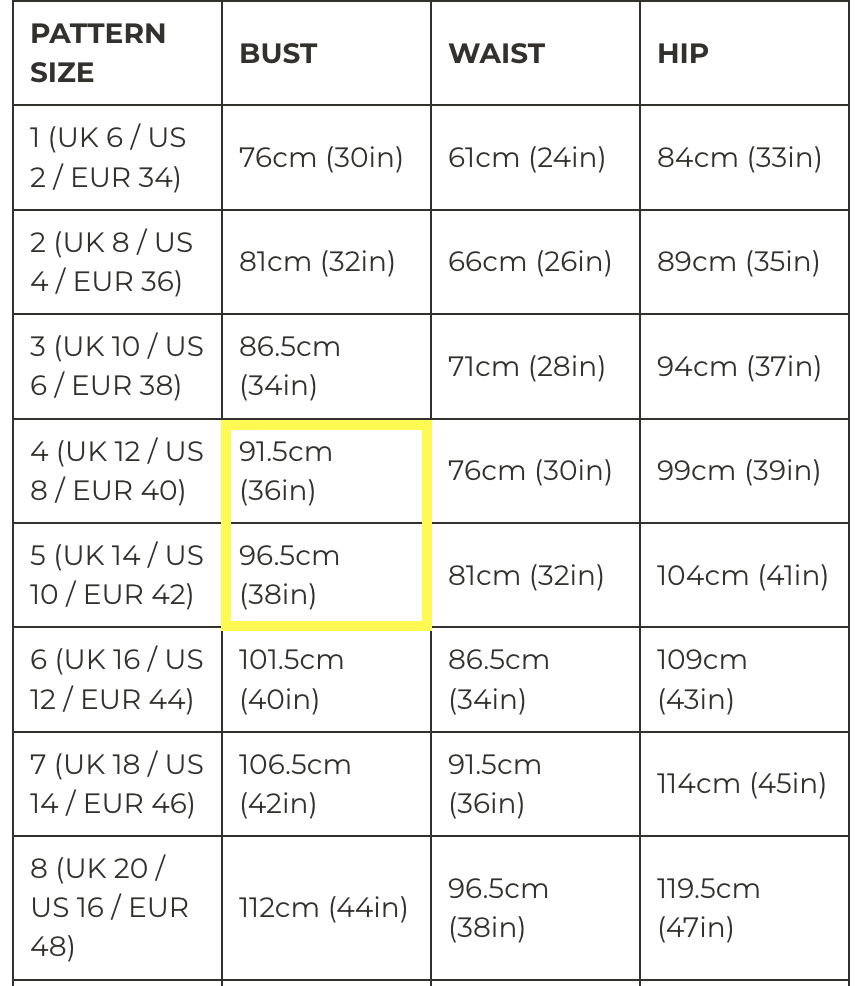
Lucky for me, the Cashmerette Roseclair lists the high bust measurement on the size chart. I measure about 35″ at the high bust, which puts me at a size 10 for my base size.

If your pattern does not include a high bust measurement, choosing your base size will require a bit of math. It will also require you to know what garment cup size the pattern is drafted for. Most garment patterns are drafted for a garment B cup — a 2″ difference between high and full bust — so if yours doesn’t specify, this is a semi-safe assumption. That said, it’s worth taking a peek at the Busty Pattern Database to double check that the designer doesn’t draft for a larger cup size.
If this pattern was drafted for a garment B cup — again, 2″ between high and full bust — I’d add 2″ to my high bust measurement for a total of 37″. I would then use this to choose size based on the full bust line. (We’re adding 2″ because we’re assuming that the high bust the pattern is drafted for is 2″ smaller than the full bust measurement.)
For example, on the Tilly and the Buttons Lyra Dress — which does not have high bust listed and is drafted for a garment B cup — I’d need between a 4 and a 5 based on my high bust + 2″ measurement of 37″. Again, this is assuming that the high bust of the size 4 is 34″ (36-2) and the size 5 is 36″ (38-2), while my high bust is 35″. Since I’d be between sizes, I’d probably look at the finished garment measurements to decide which size to go with — size 4 if the pattern appears to include more ease, and size 5 if the pattern doesn’t include much ease.
figuring out how many inches to add
Remember how figuring out how many inches to add for a knit top was sort of complicated, considering percentages and ratios and such? And remember how I said it’s easy for a woven bodice?
Well, let me deliver on that promise.
For a woven bodice, you just need to do some subtraction.
Take your full bust/projected chest measurement (in my case, 46″) and subtract from that the full bust measurement given on the pattern size chart. That’s it.
For me, that means:
My bust: 46″
– Drafted bust: 40.5″ (the full bust measurement for the 10 G/H cup)
= 5.5″
I needed to add 5.5″ total. (However, I rounded up to adding 6″ since pregnancy/postpartum boobs are unpredictable, so I’ll be showing a 6″ FBA.)
Going back to the Lyra for reference to a pattern that doesn’t include high bust, if I were making a size 4, I’d do 46 – 36 = 10, and know I’d need to add 10″ total.
You’ll need to divide this total by two to figure out how much to add on each side:
5.5″/2 = 2.25″ per side (but, again, I’m rounding up to 3″ to give myself some extra ease).
Doing the FBA
Finding your apex
I happen to know from making Cashmerette patterns in the past that the apex is pretty much spot on for me, so I didn’t bother moving the apex. However, if you’re using a pattern by a designer you’ve never sewn before, it’s a good idea to double check apex placement before performing your FBA.
I like to get the apex placement mostly correct before doing an FBA, and then fine tune after, since the FBA can move the apex slightly.
There are a couple ways to do this on a woven bodice:
- You can hold the tissue pattern up to your torso, marking roughly where the tissue skims over the “peak” of your bust/projected chest.
- You can use your bodice sloper to compare and mark the apex.
- You can use a well-fitting pattern to compare and mark the apex.
If you need to move the apex, I recommend following this tutorial from Curvy Sewing Collective.
Preparing the pattern
With your apex in roughly the right place, we need to make some markings:
- Line A: from the bottom of your pattern to the apex, parallel with the grain line
- Line B: from the middle of the bust dart to your apex
- Line C: from about 2/3 up your armscye to your apex
- Line D: perpendicular to the grain line, across the bottom of the pattern (I just used the lengthen/shorten line — this needs to be all the way across the pattern)
- Line E: from your apex to roughly halfway through your shoulder
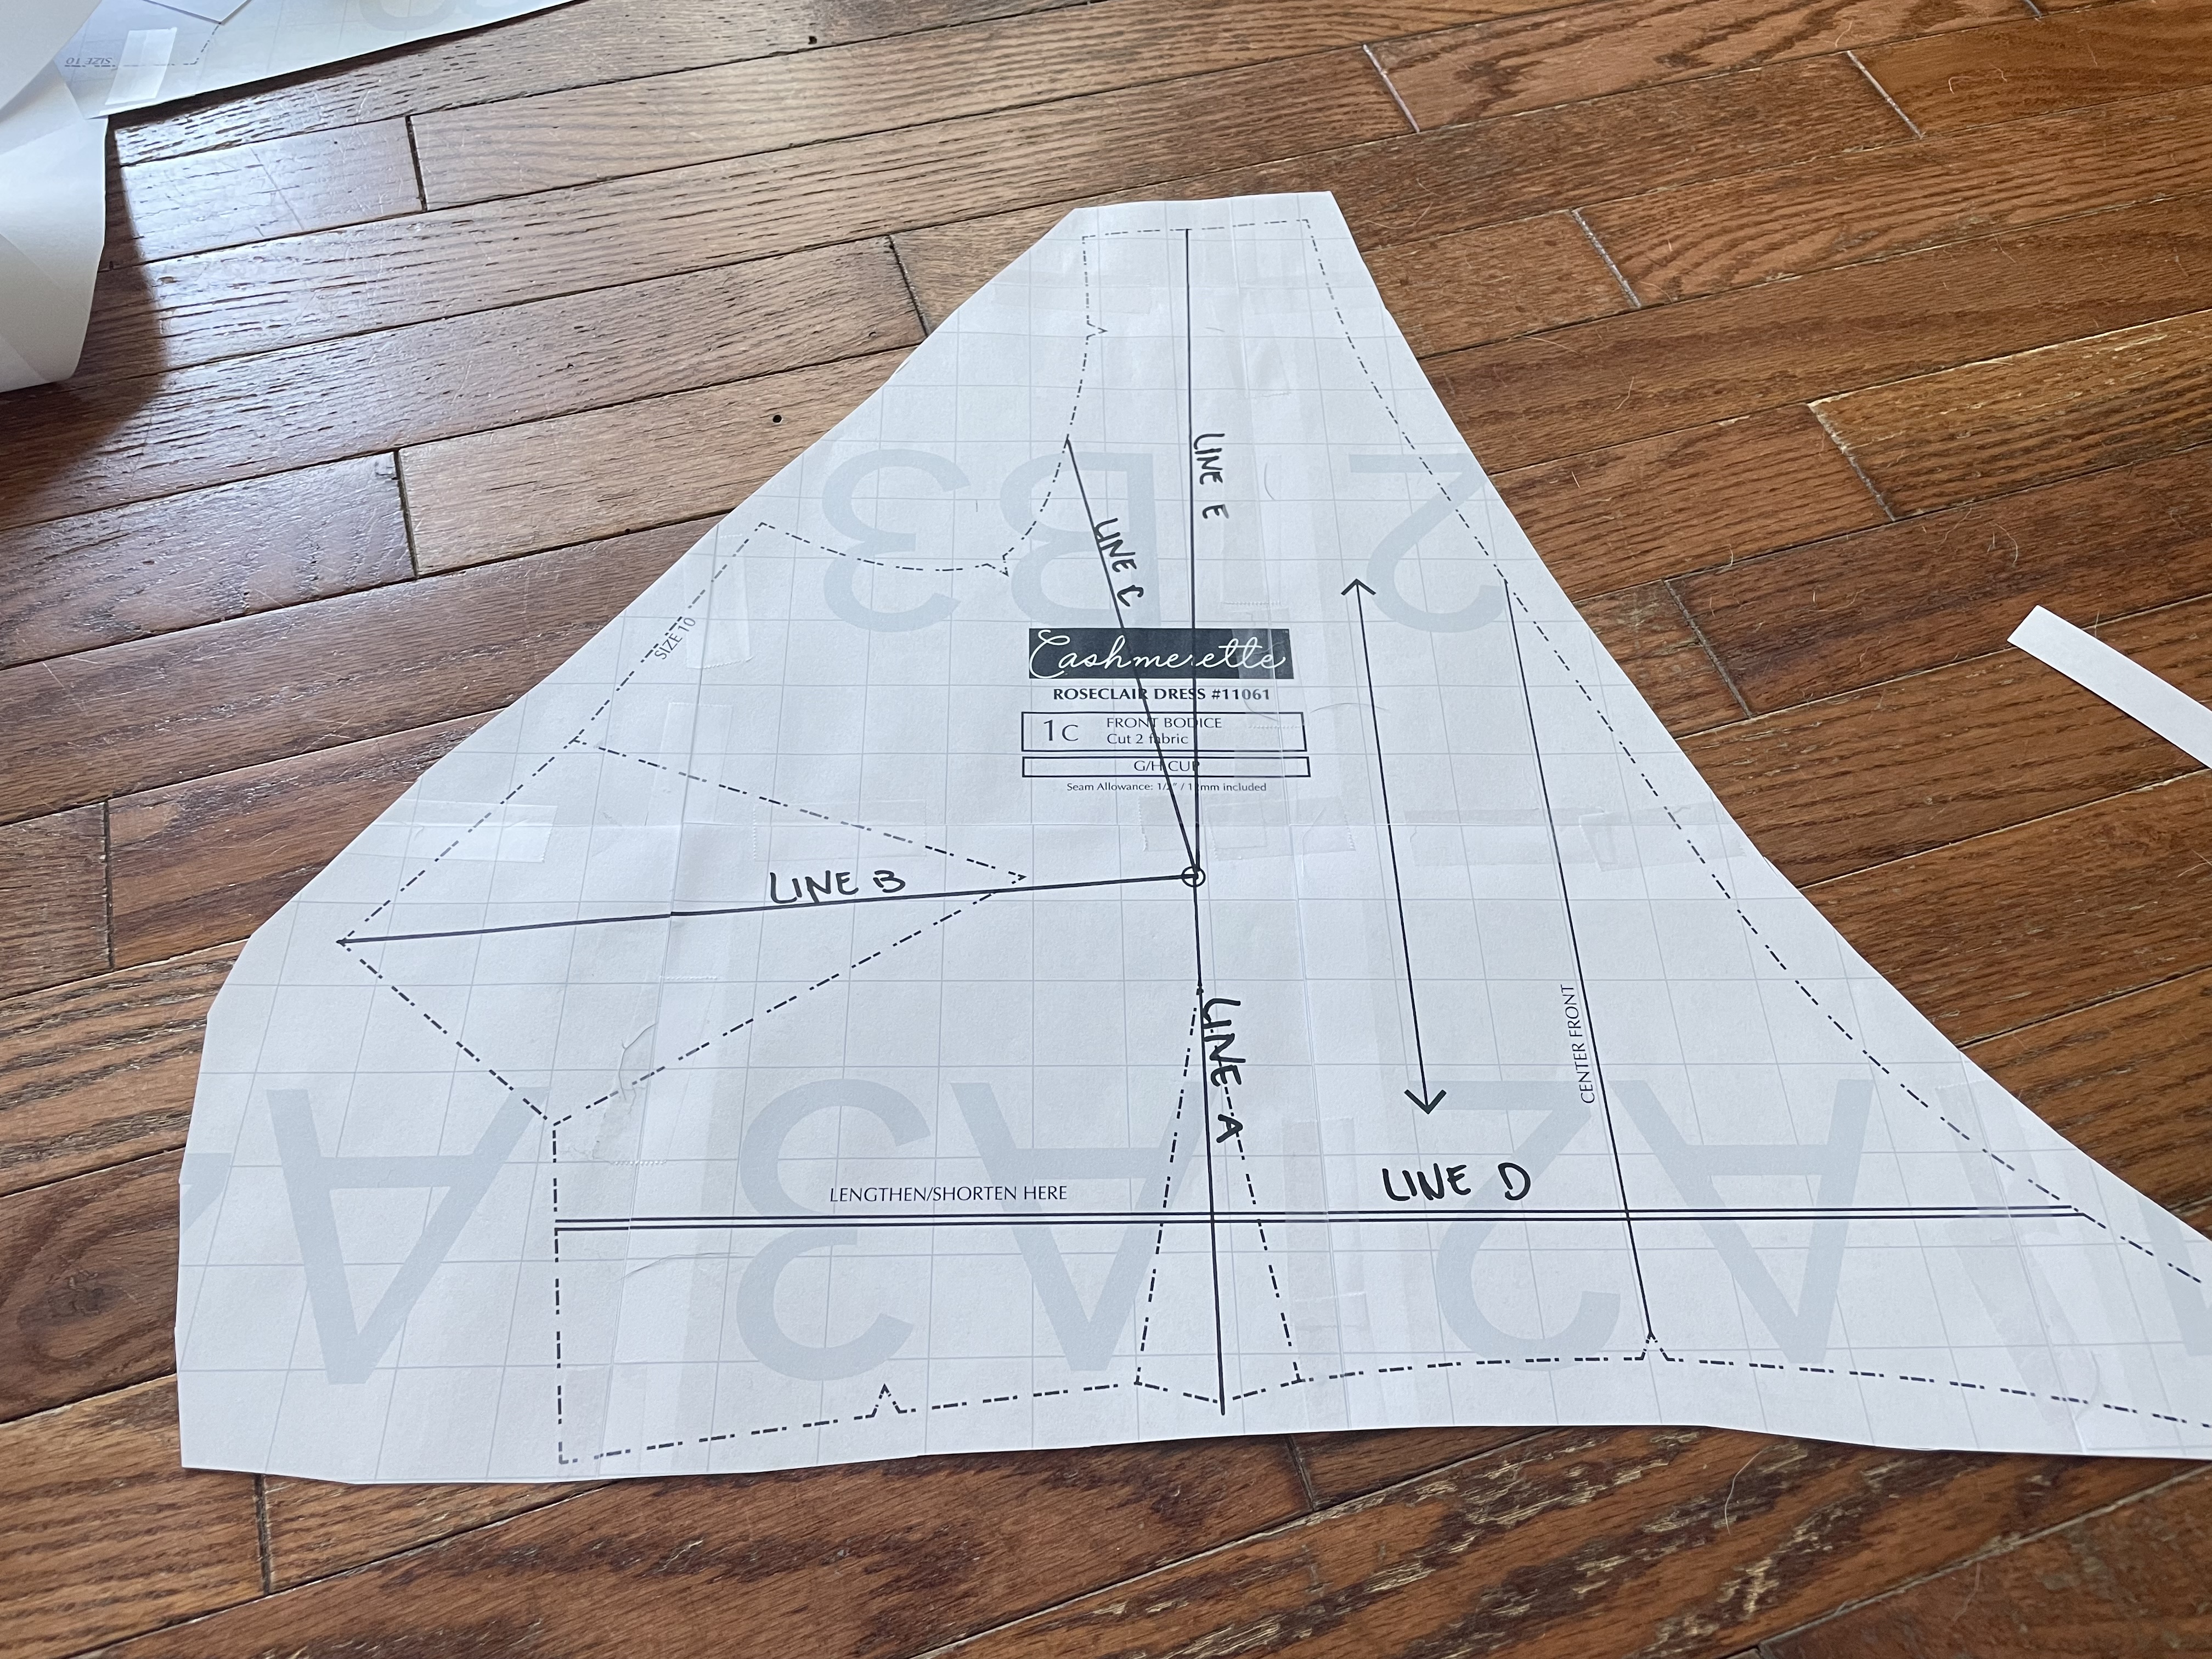
As I mentioned in the Giant Knit FBA Tutorial, many FBA tutorials will tell you to put Line C lower on the armscye. This doesn’t work very well for larger FBAs, as it causes too much armscye distortion.
Mark your seam allowances at Lines C and E. This will be super important later.
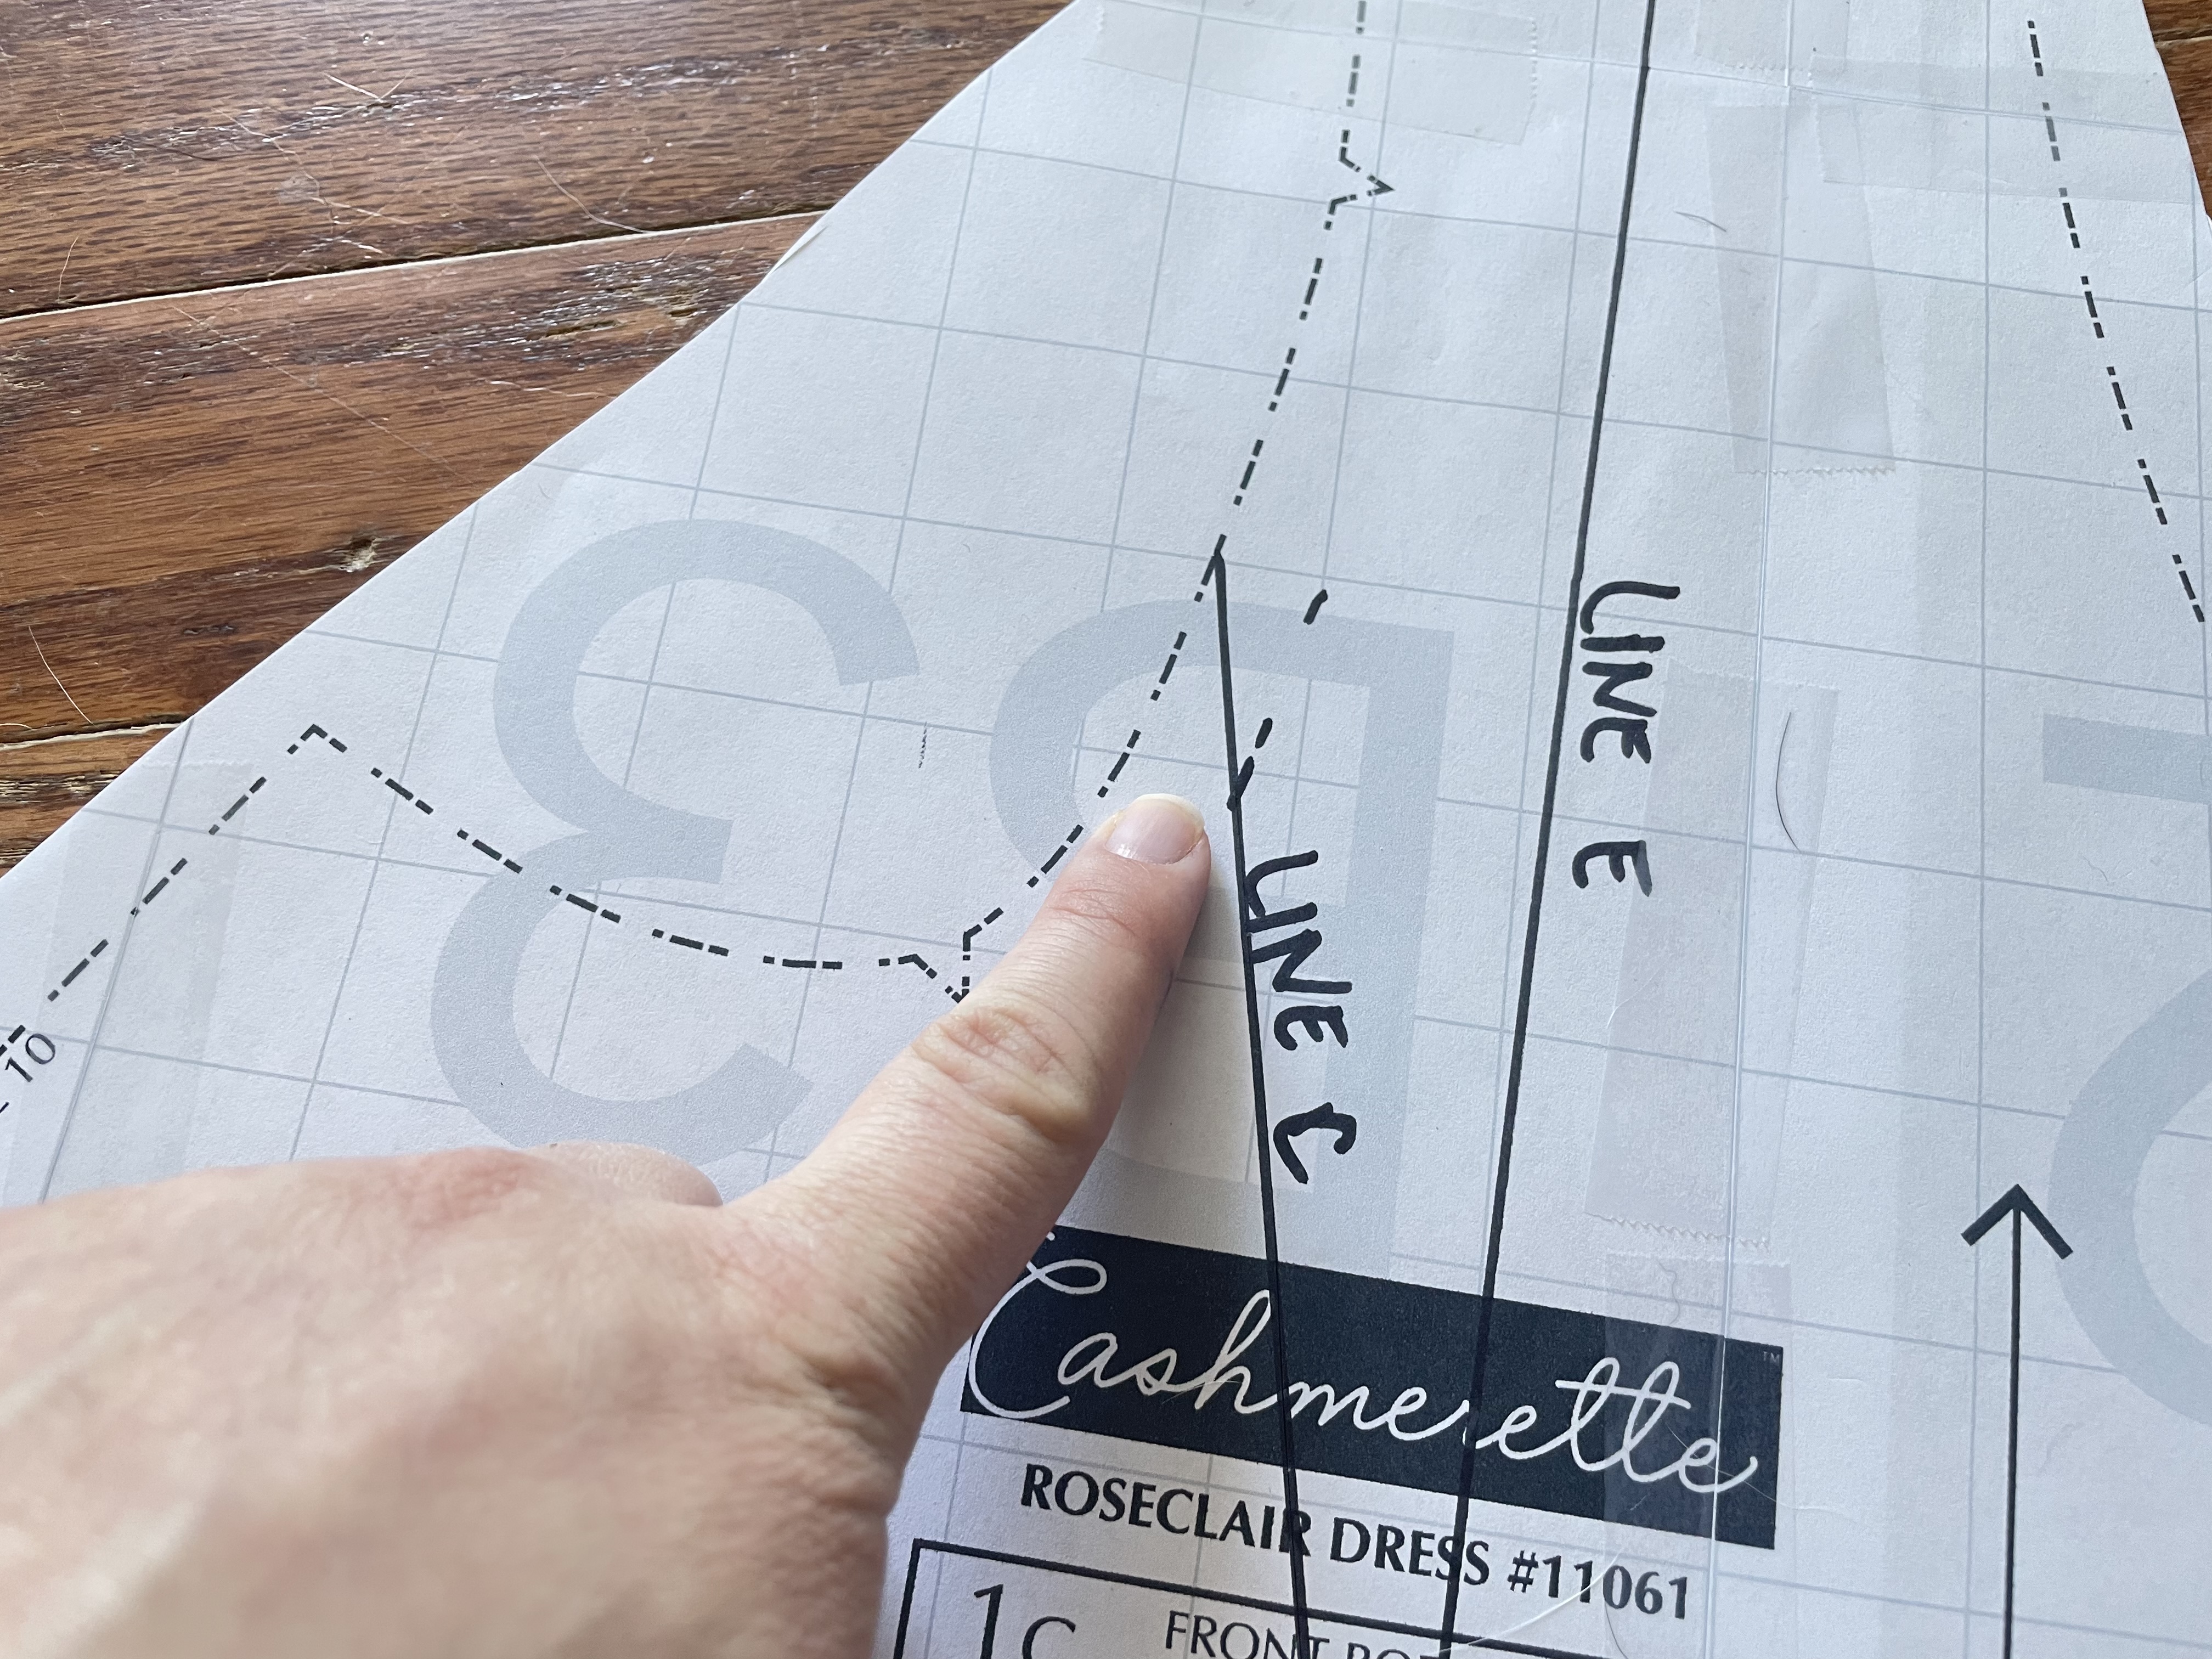
Cutting the Lines
Let’s start snipping! But first, stick a piece of tape at the apex and the seam allowances on Line C and E.
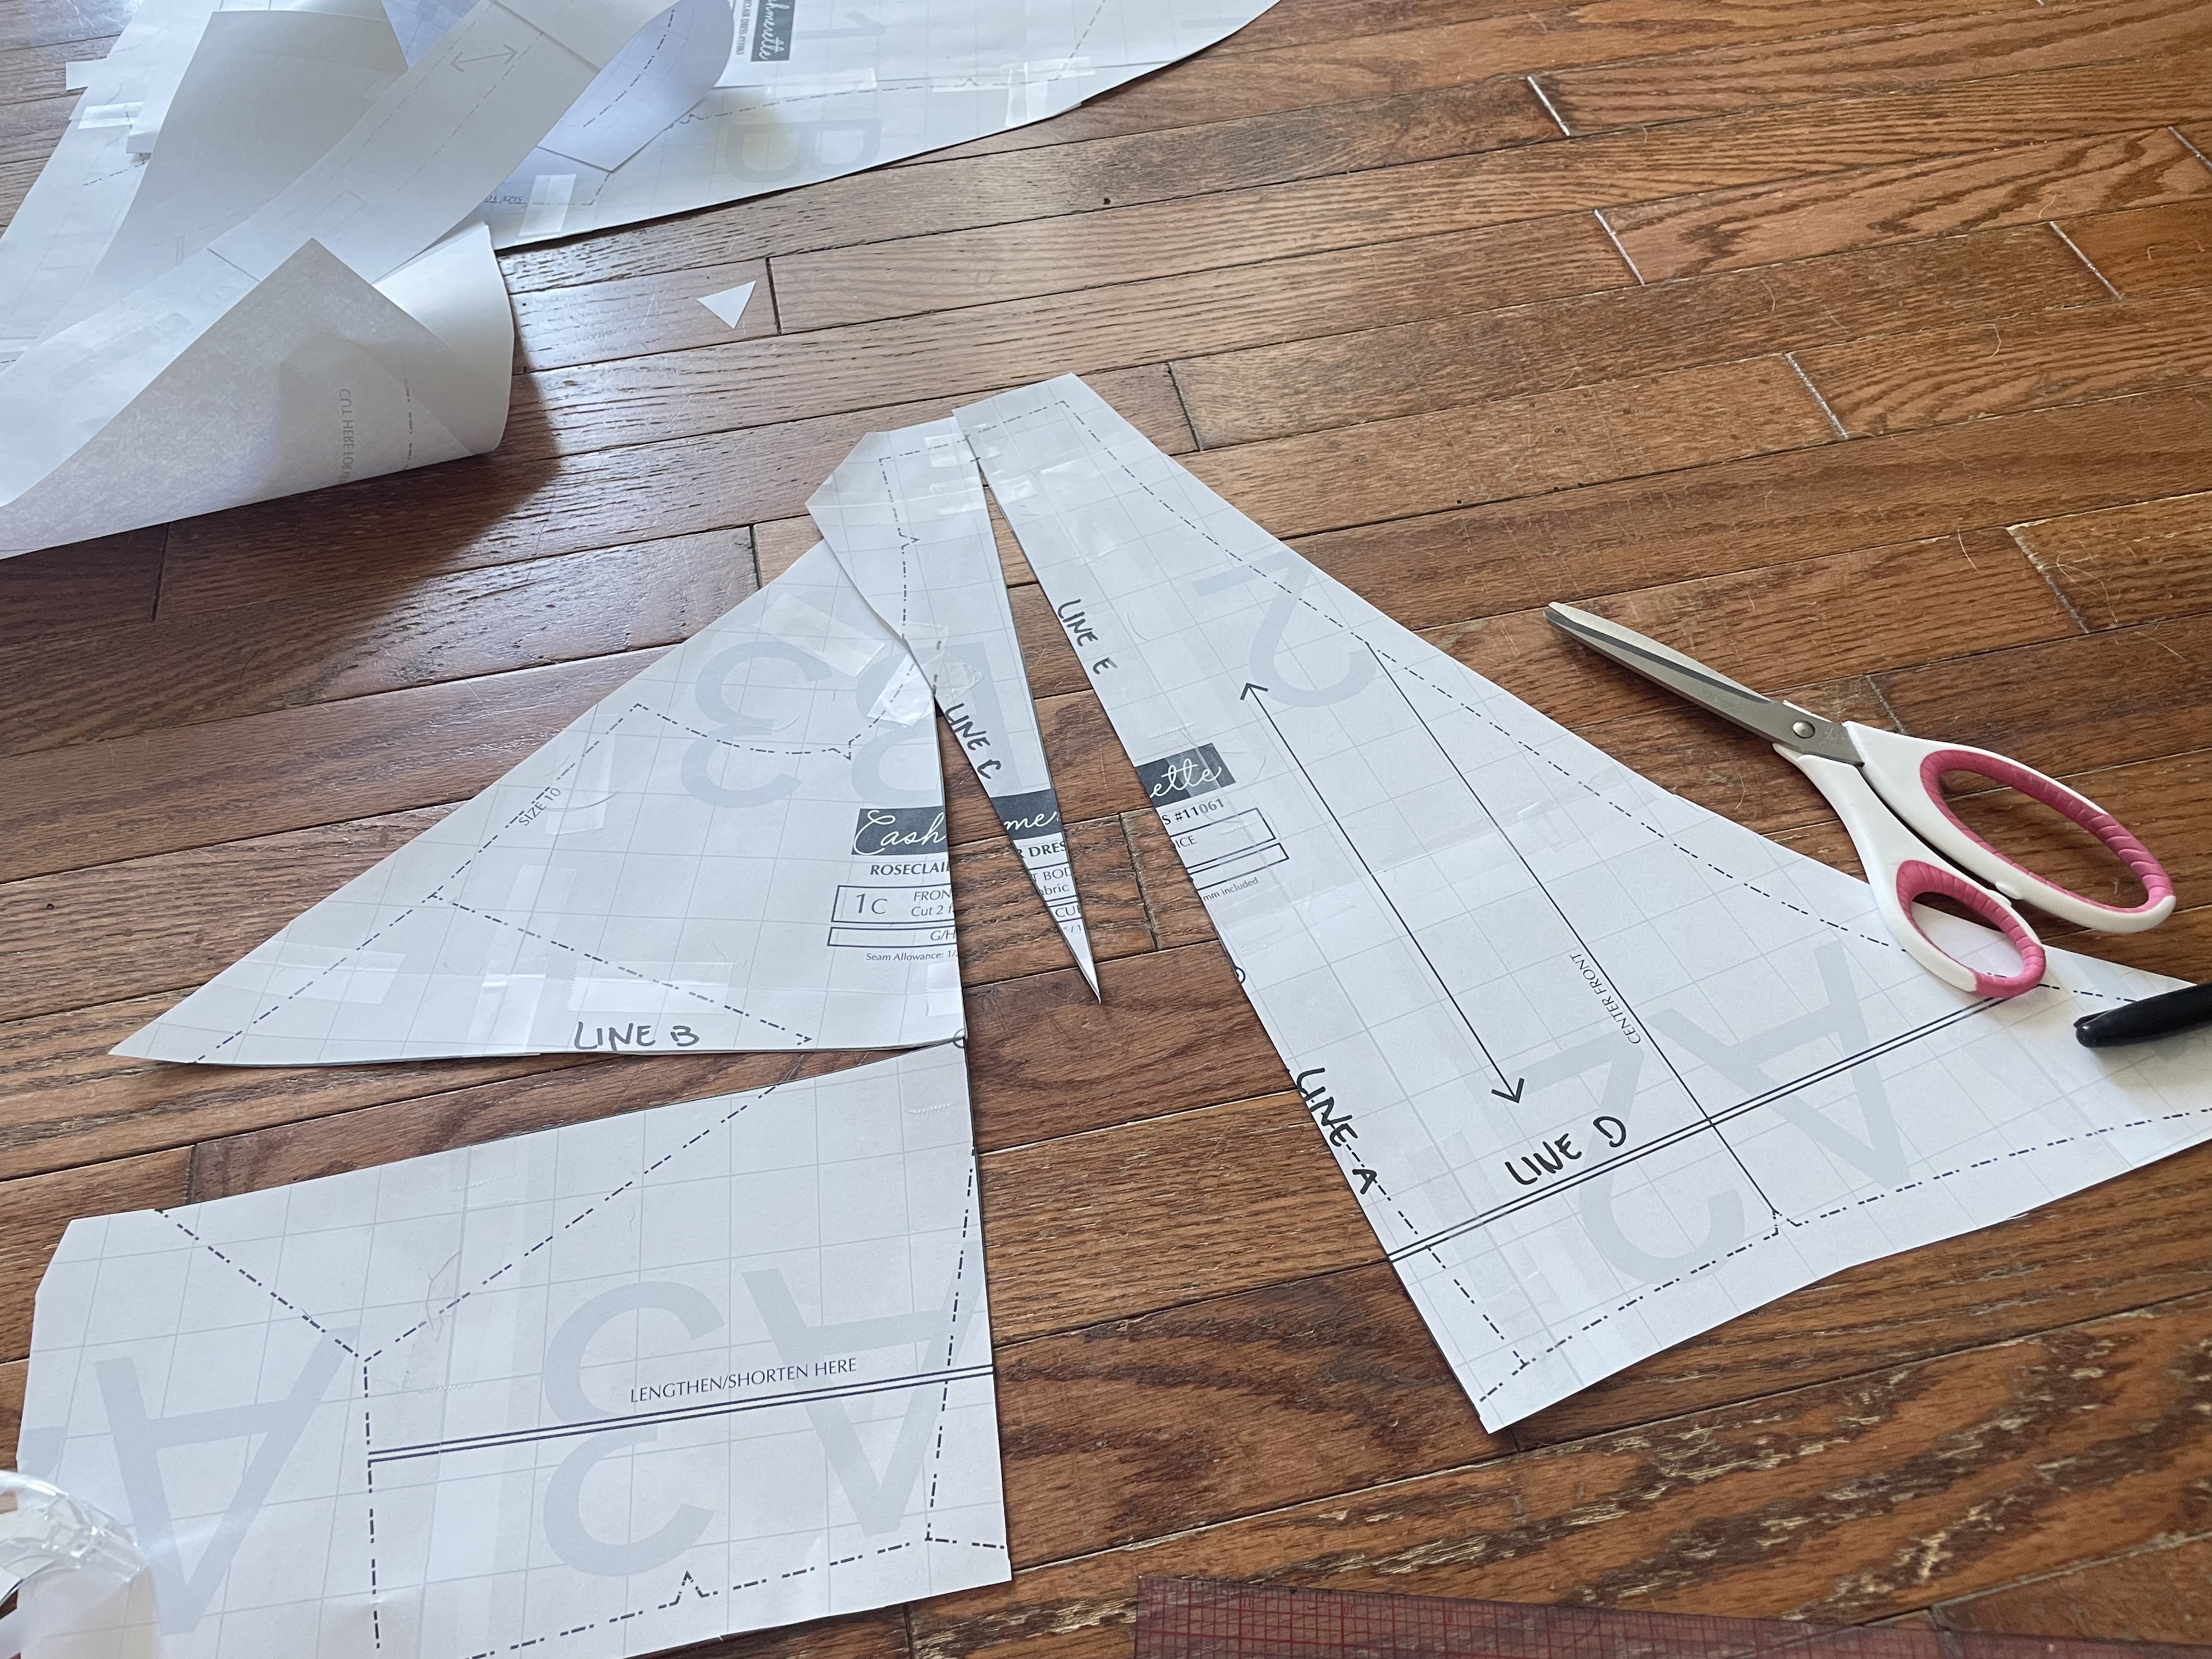
You’re going to start at the bottom of Line A and cut to the apex, then from the apex along Line C to — but not through — the armscye seam allowance. Then snip the seam allowance from the opposite direction, leaving a pivot point at the seam allowance.
Then you’ll cut up from the apex along Line E to — but, again not through — the shoulder seam allowance. Then snip the seam allowance from the other direction, again creating a pivot point at the seam allowance.
Finally, cut from the side along Line B to but not through the apex, making a pivot point at the apex.
Adding inches
The fun part: adding room at the bust/projected chest!
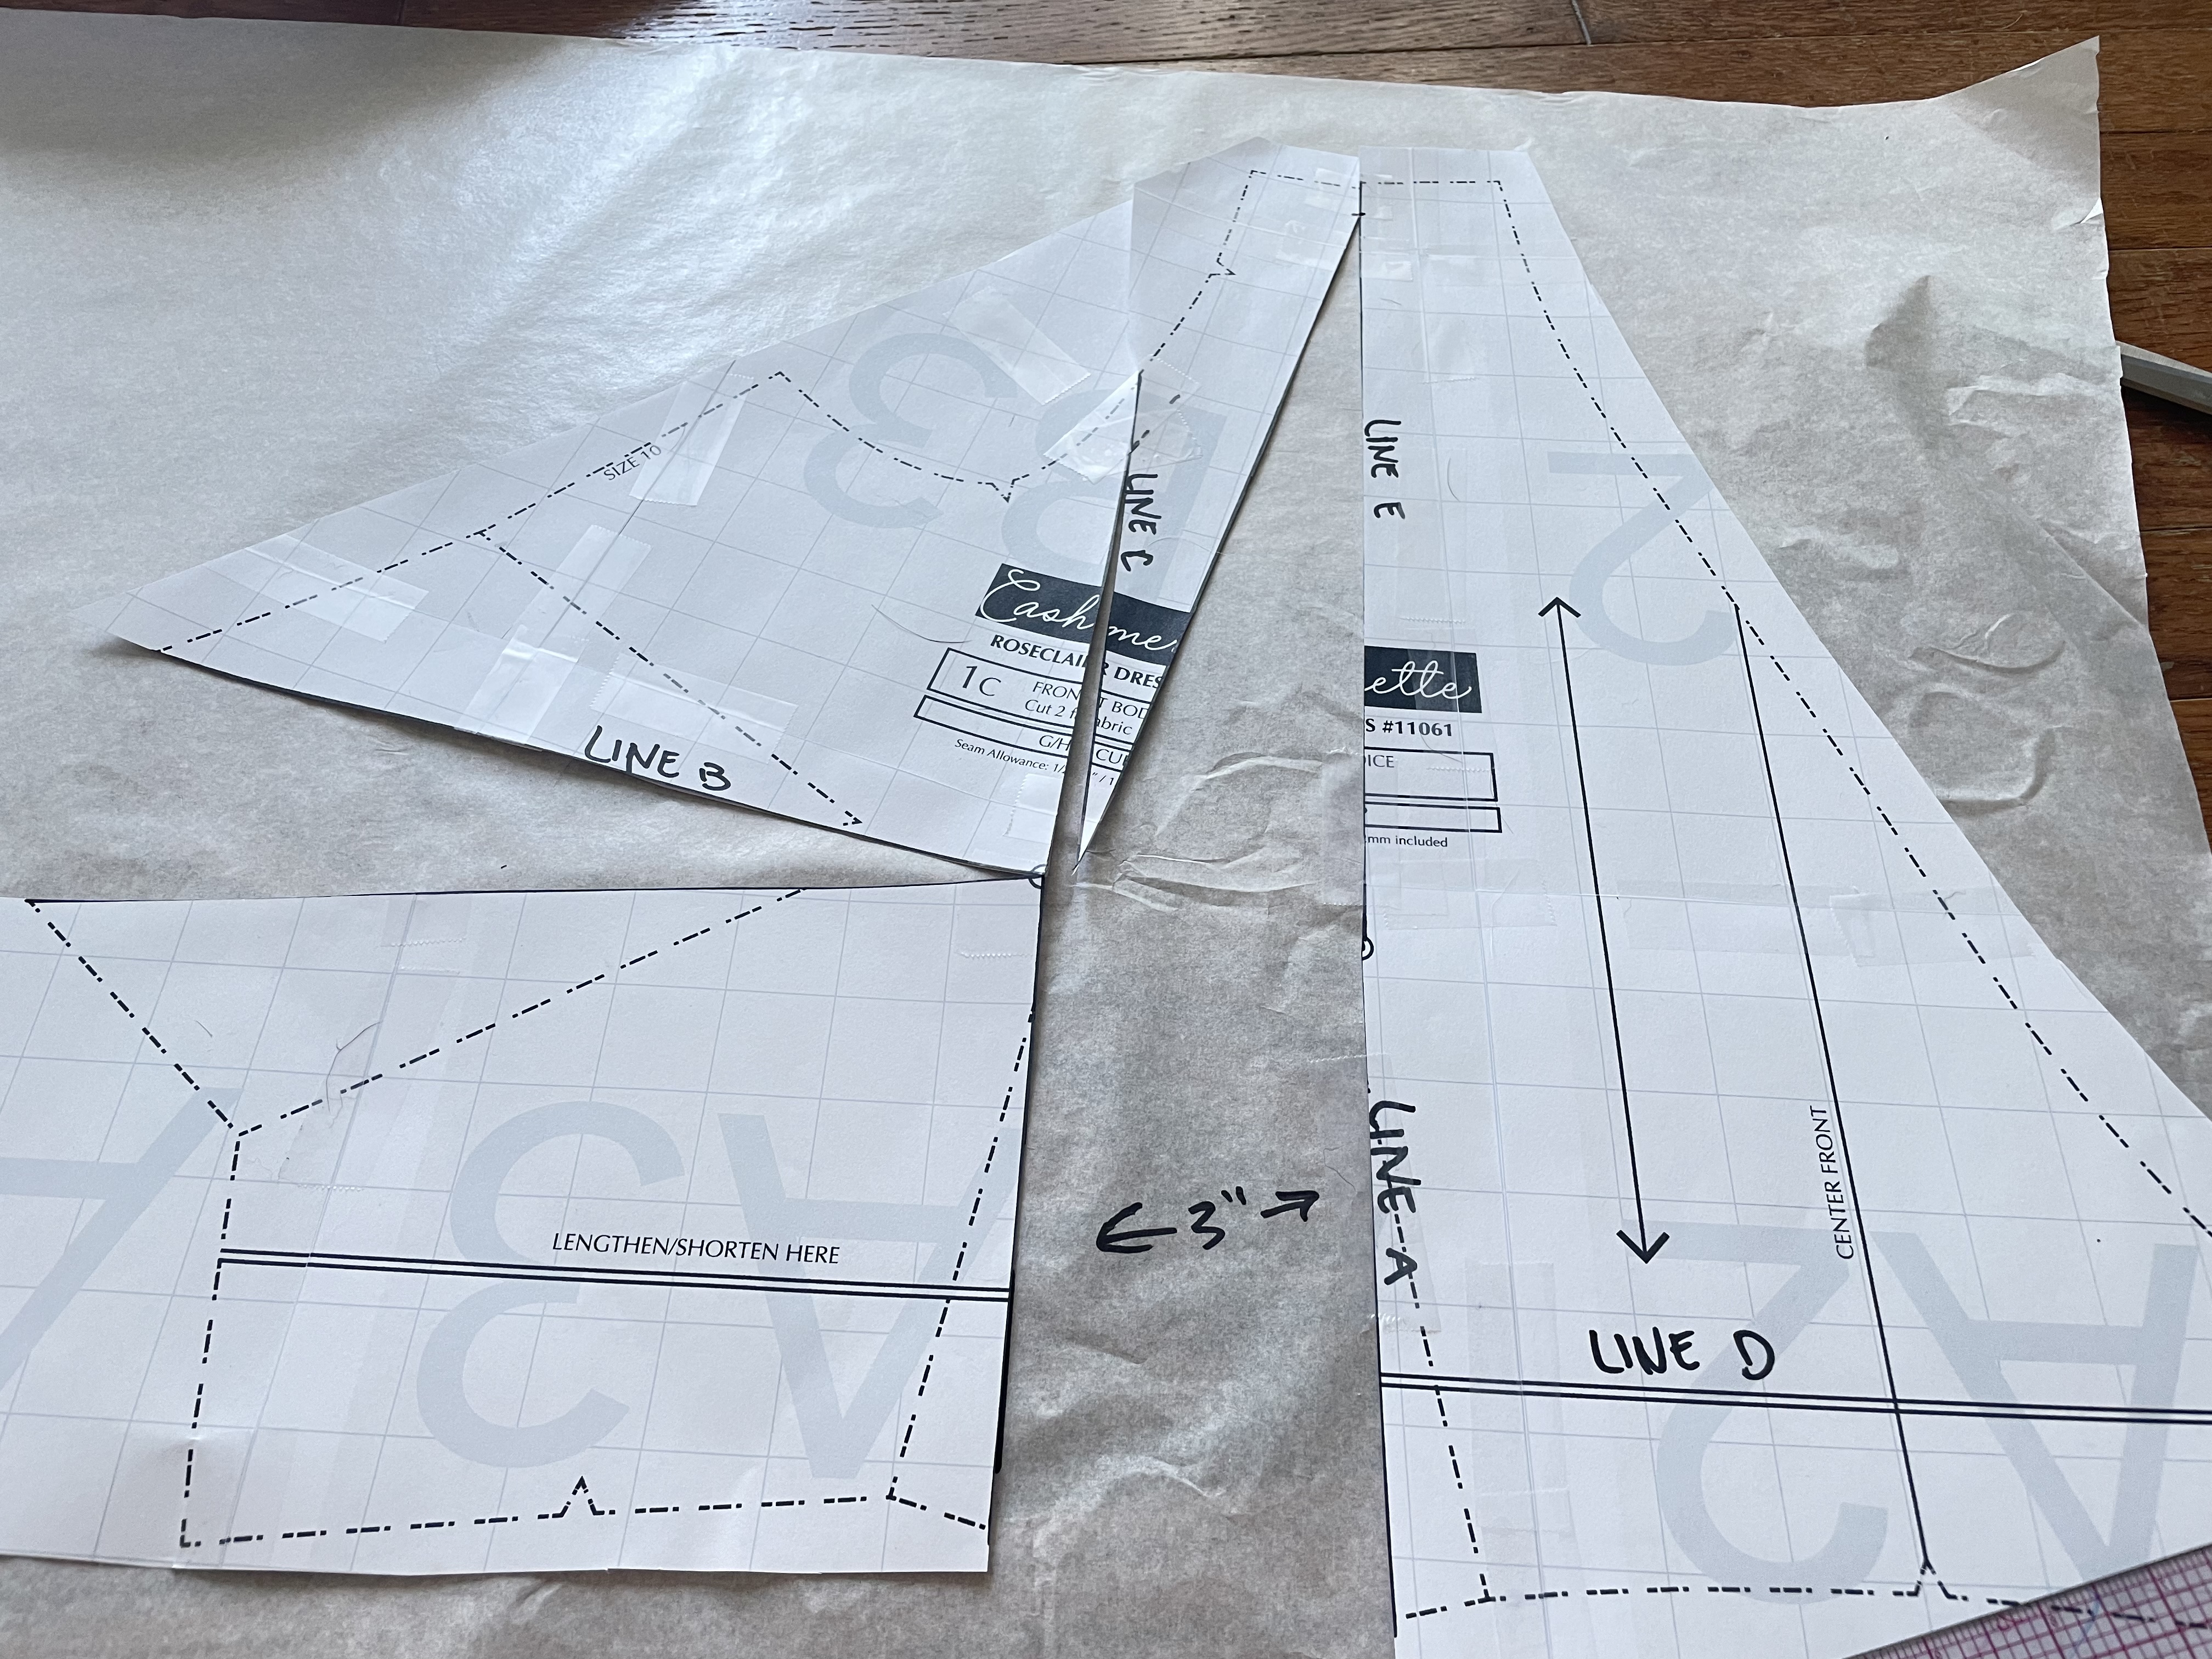
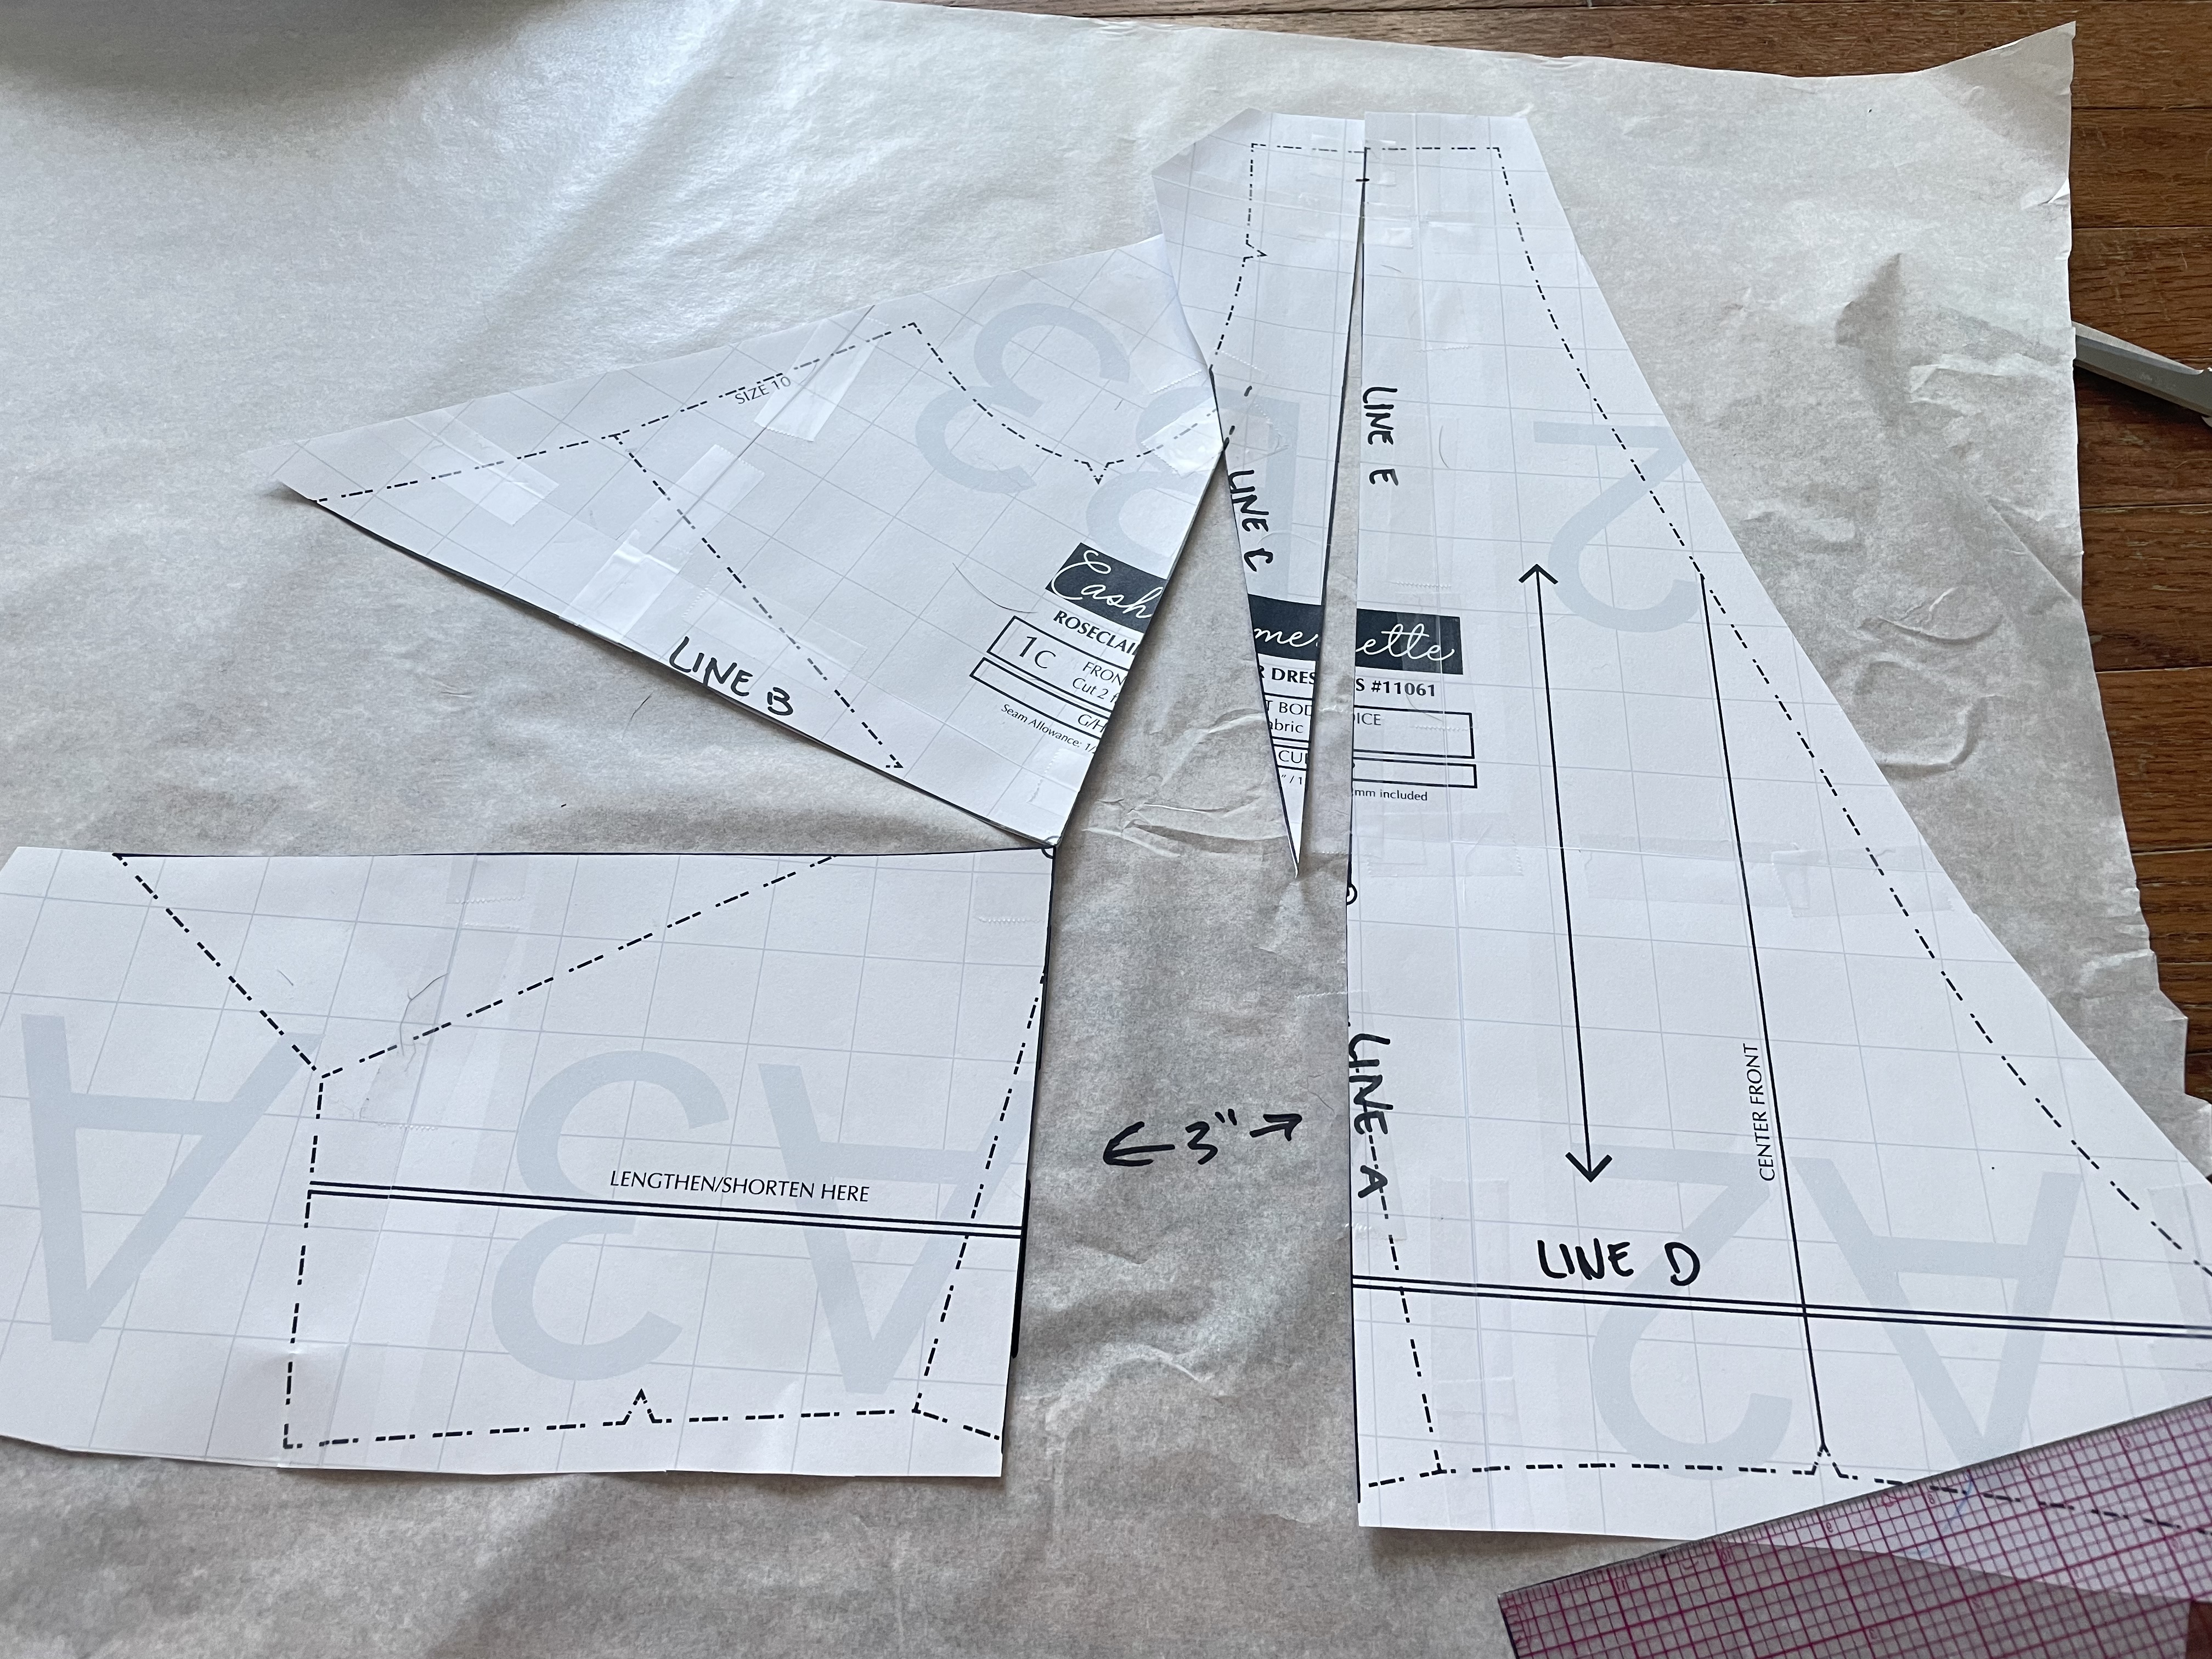
At this point, I tape down the center front side of my pattern along Line A onto another piece of pattern paper. I then draw a line however many inches from Line A on the extra paper (in this case, 3″ since I’m adding a total of 6″ — 3″ per side).
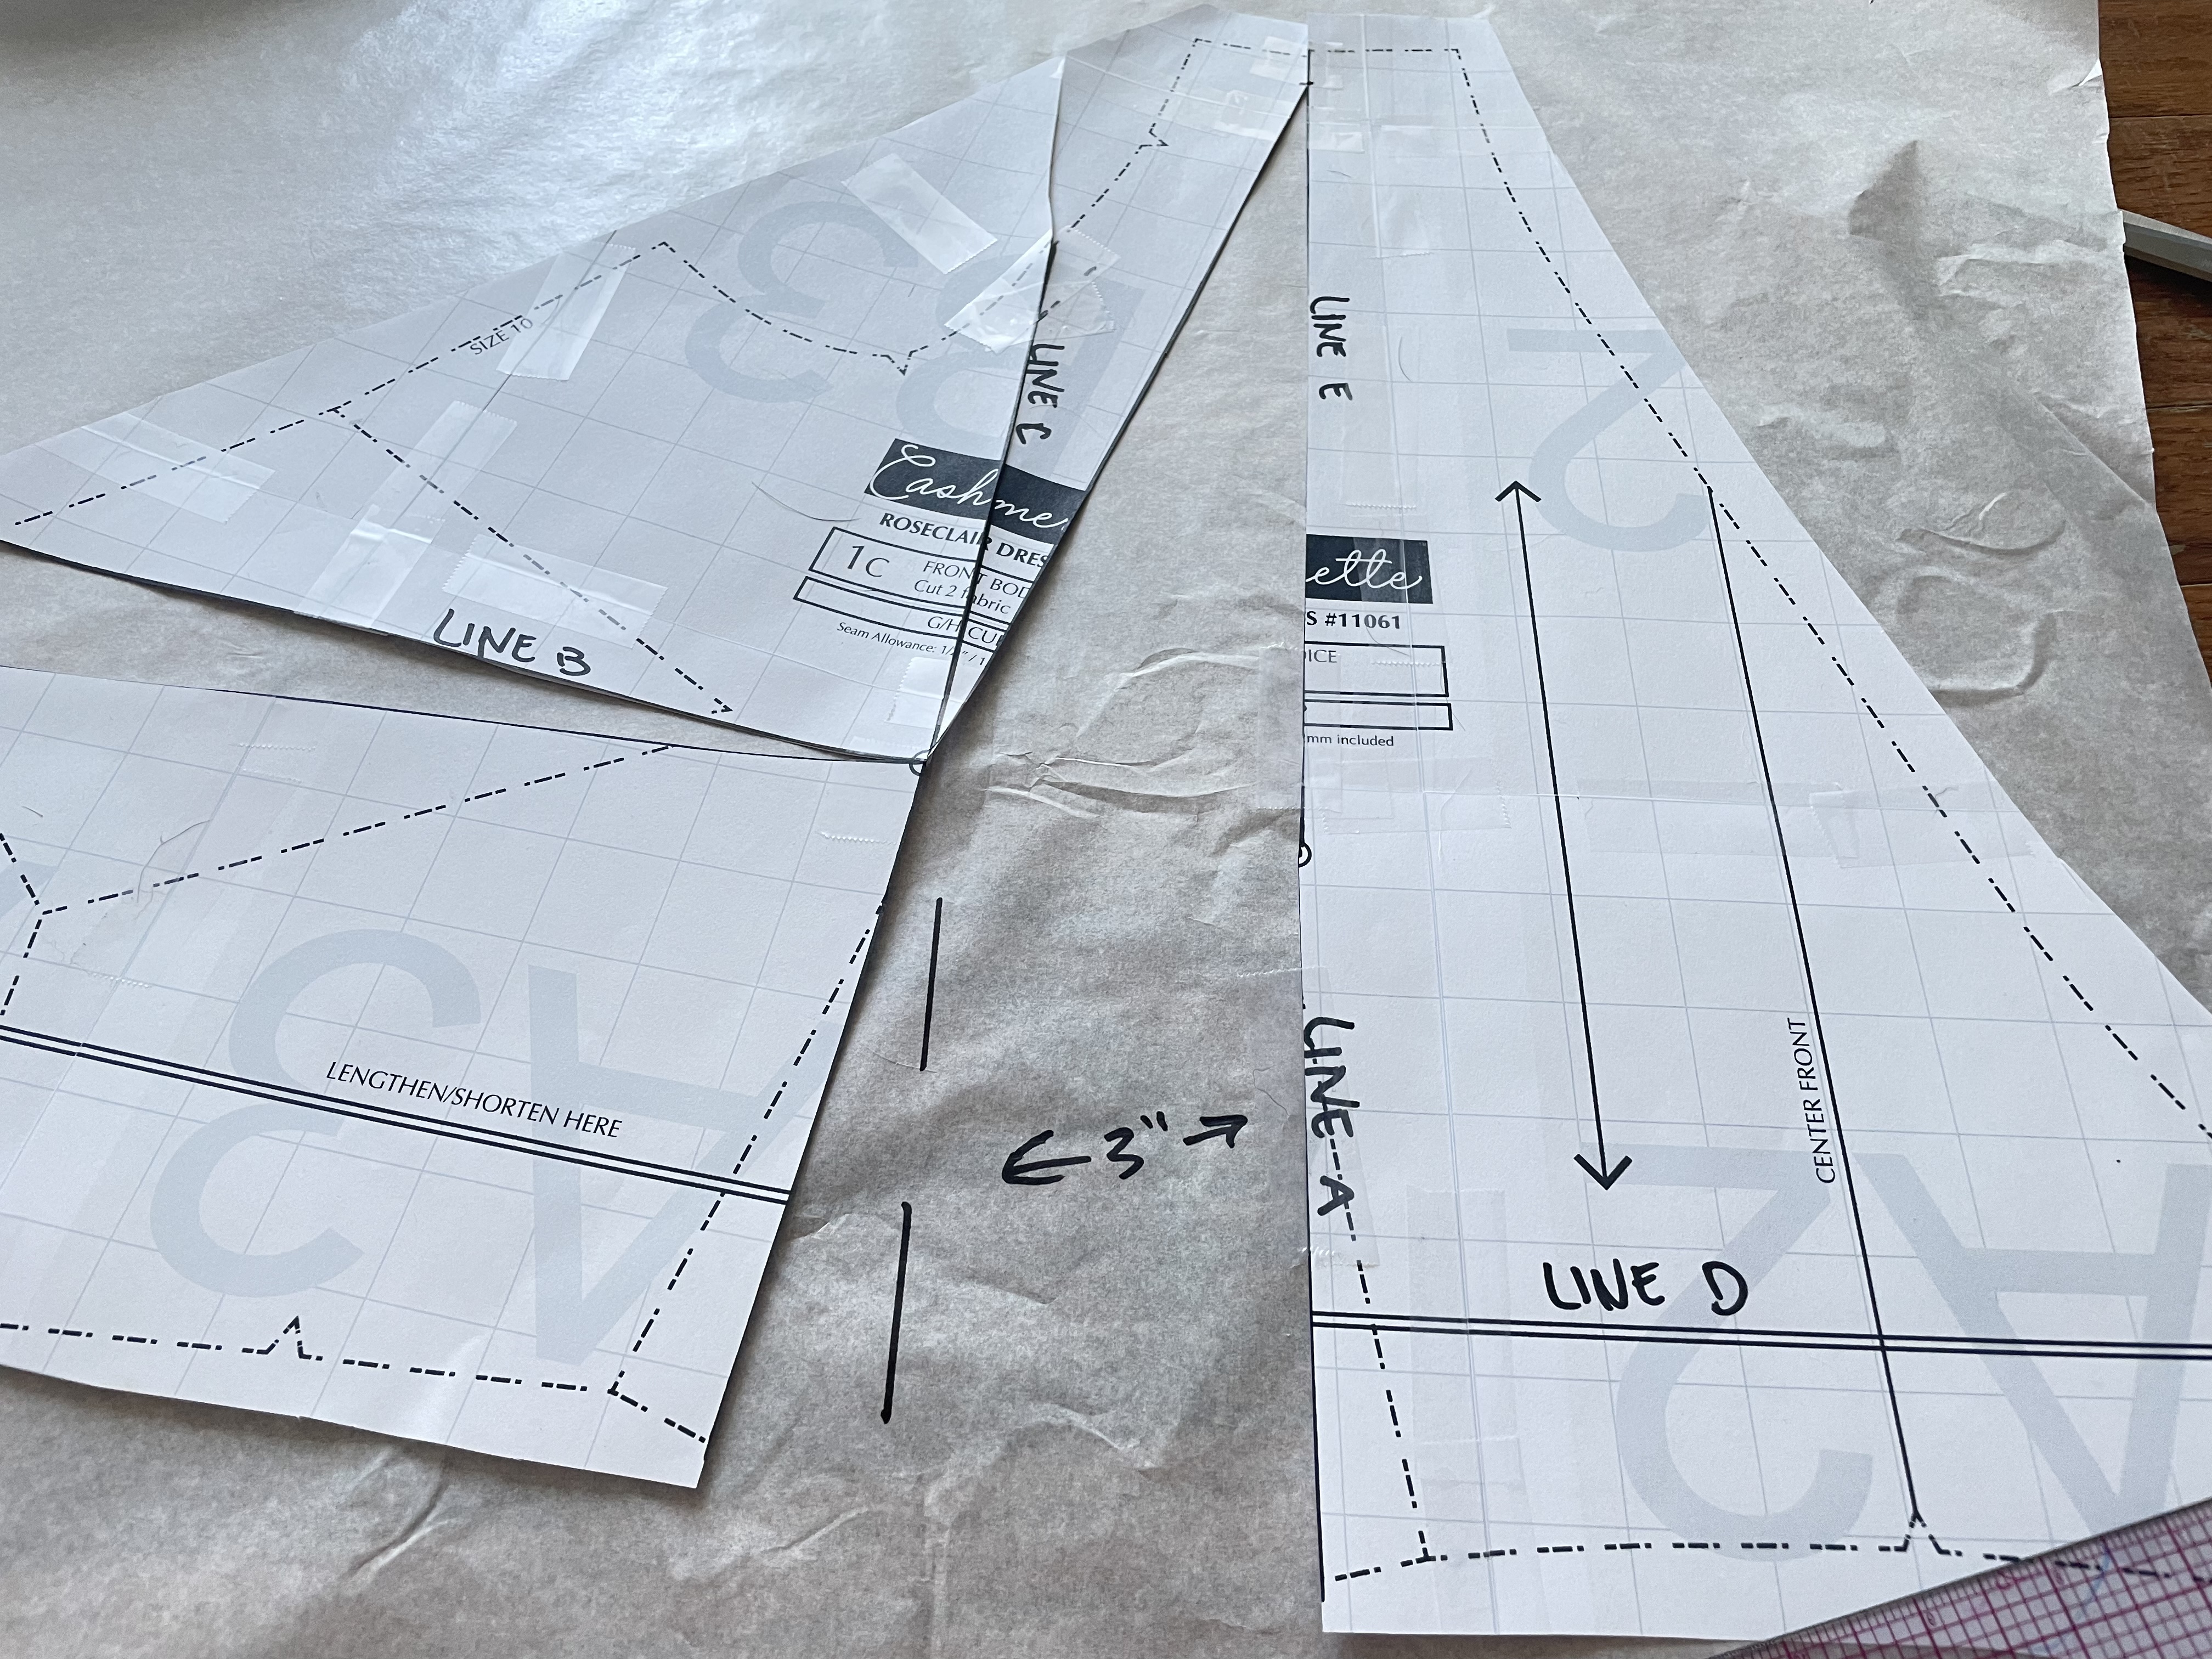
This line allows me to line up the side seam side of Line A with, which is the next step.
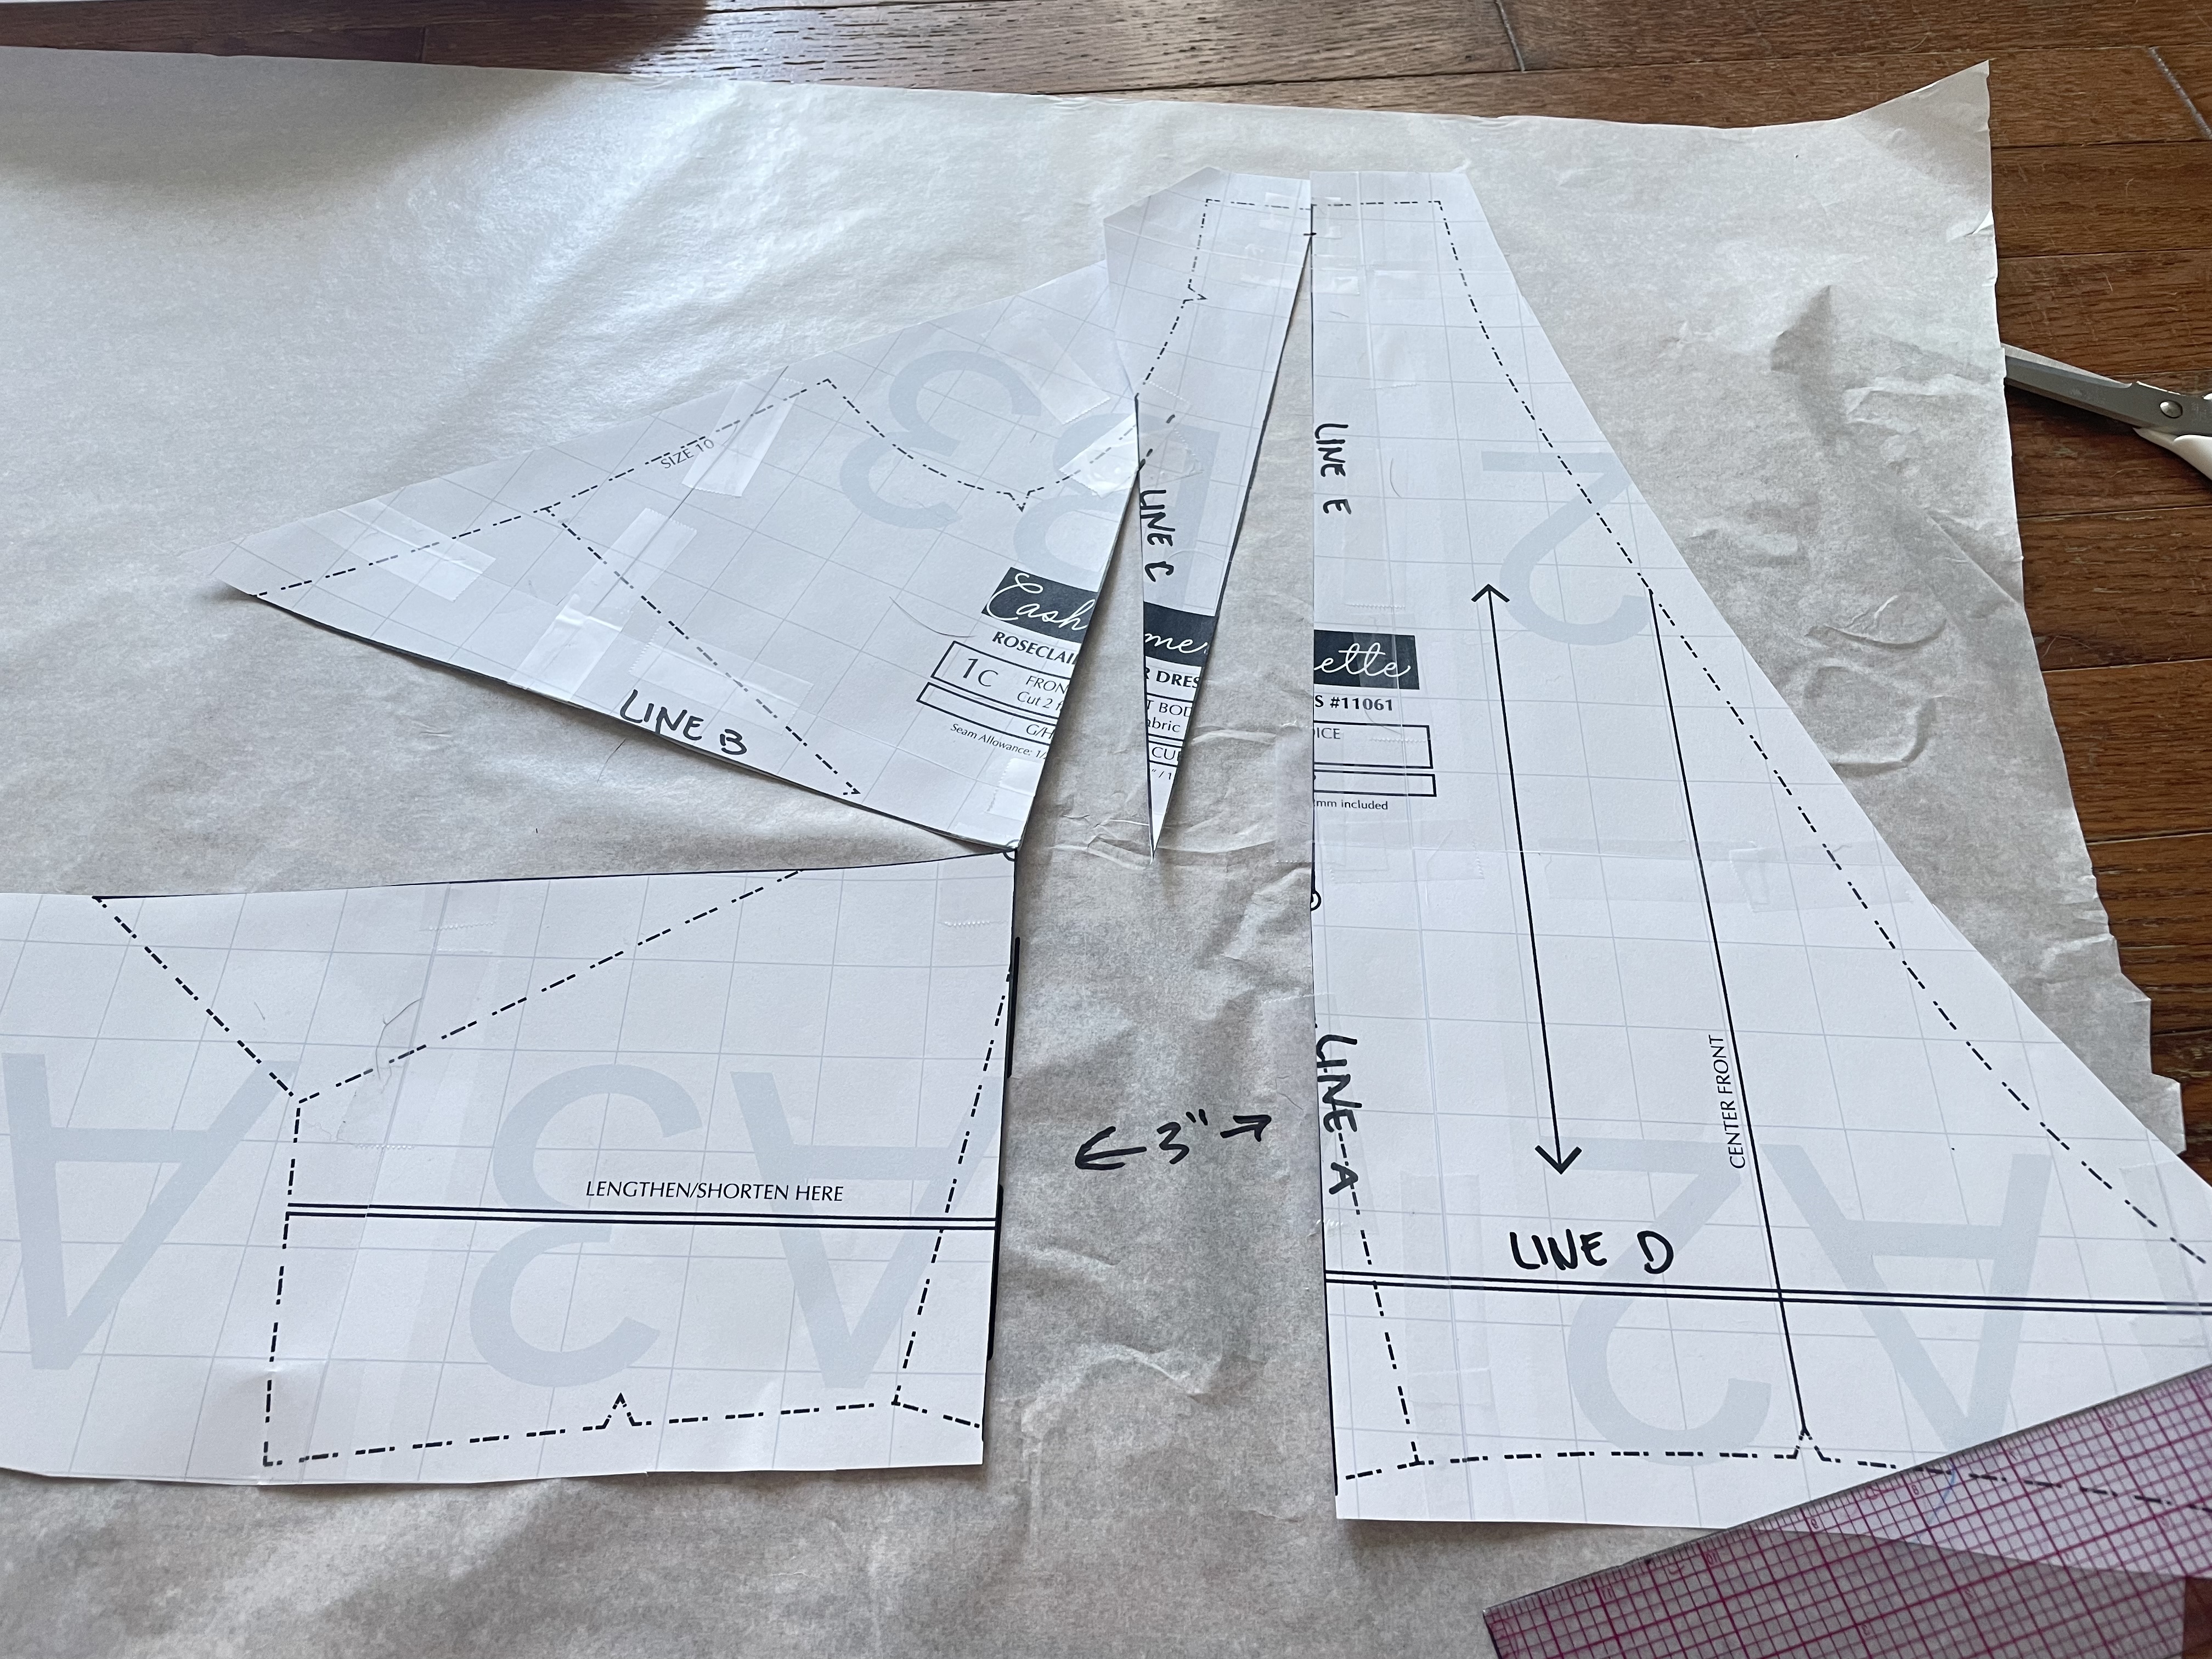
Pull the side seam side (here, the left of the photo) down and out to match that side of Line A with the line you just drew.
As you’re doing this, evaluate how much space you’d like to add along Line E — which is essentially the high bust — versus how much you’d like to add at Line C. I prefer to add as little at Line E as I can without distorting the armcye. You can see the options in this slideshow:
Deciding how much to add at Line E versus Line C is really about knowing your body. If you have a fuller high bust, adding more at Line E might work great for you! I do not, so I try to aim for a balance between inches added at high bust and limiting armscye distortion.
Once you have everything where you want it, go ahead and tape everything down, just being sure not to tape along Line A below Line D.
Adjusting length
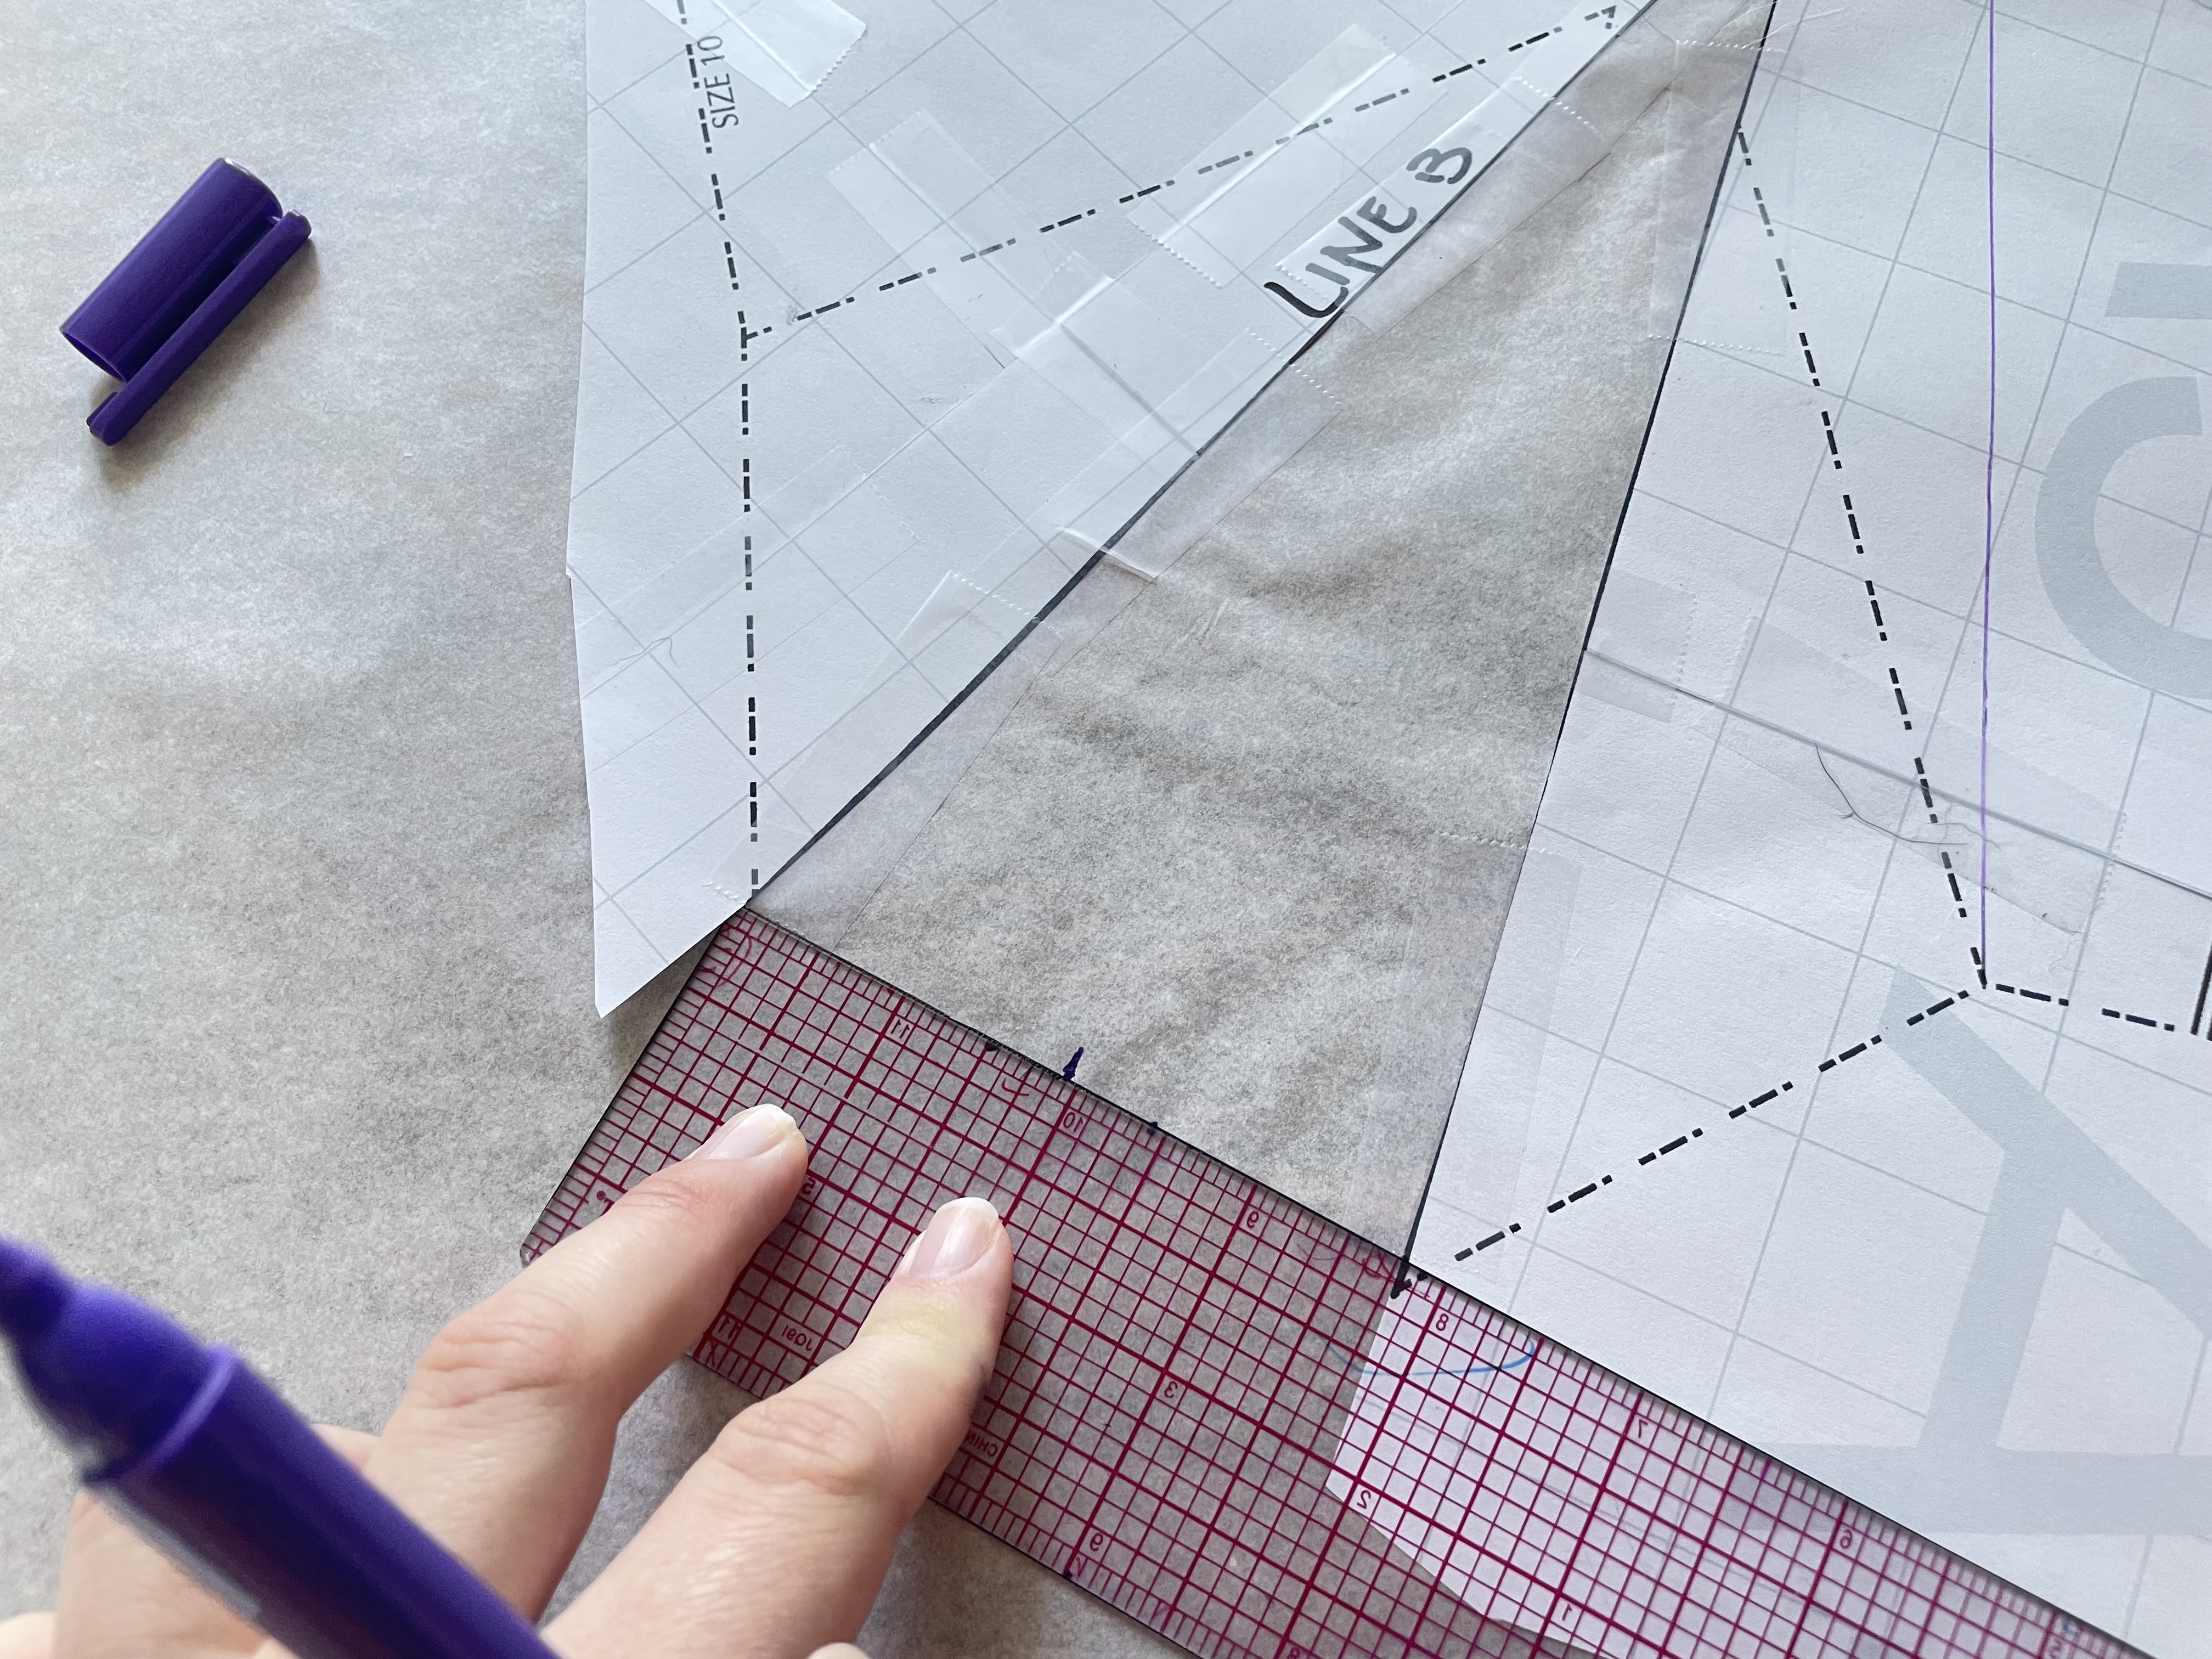
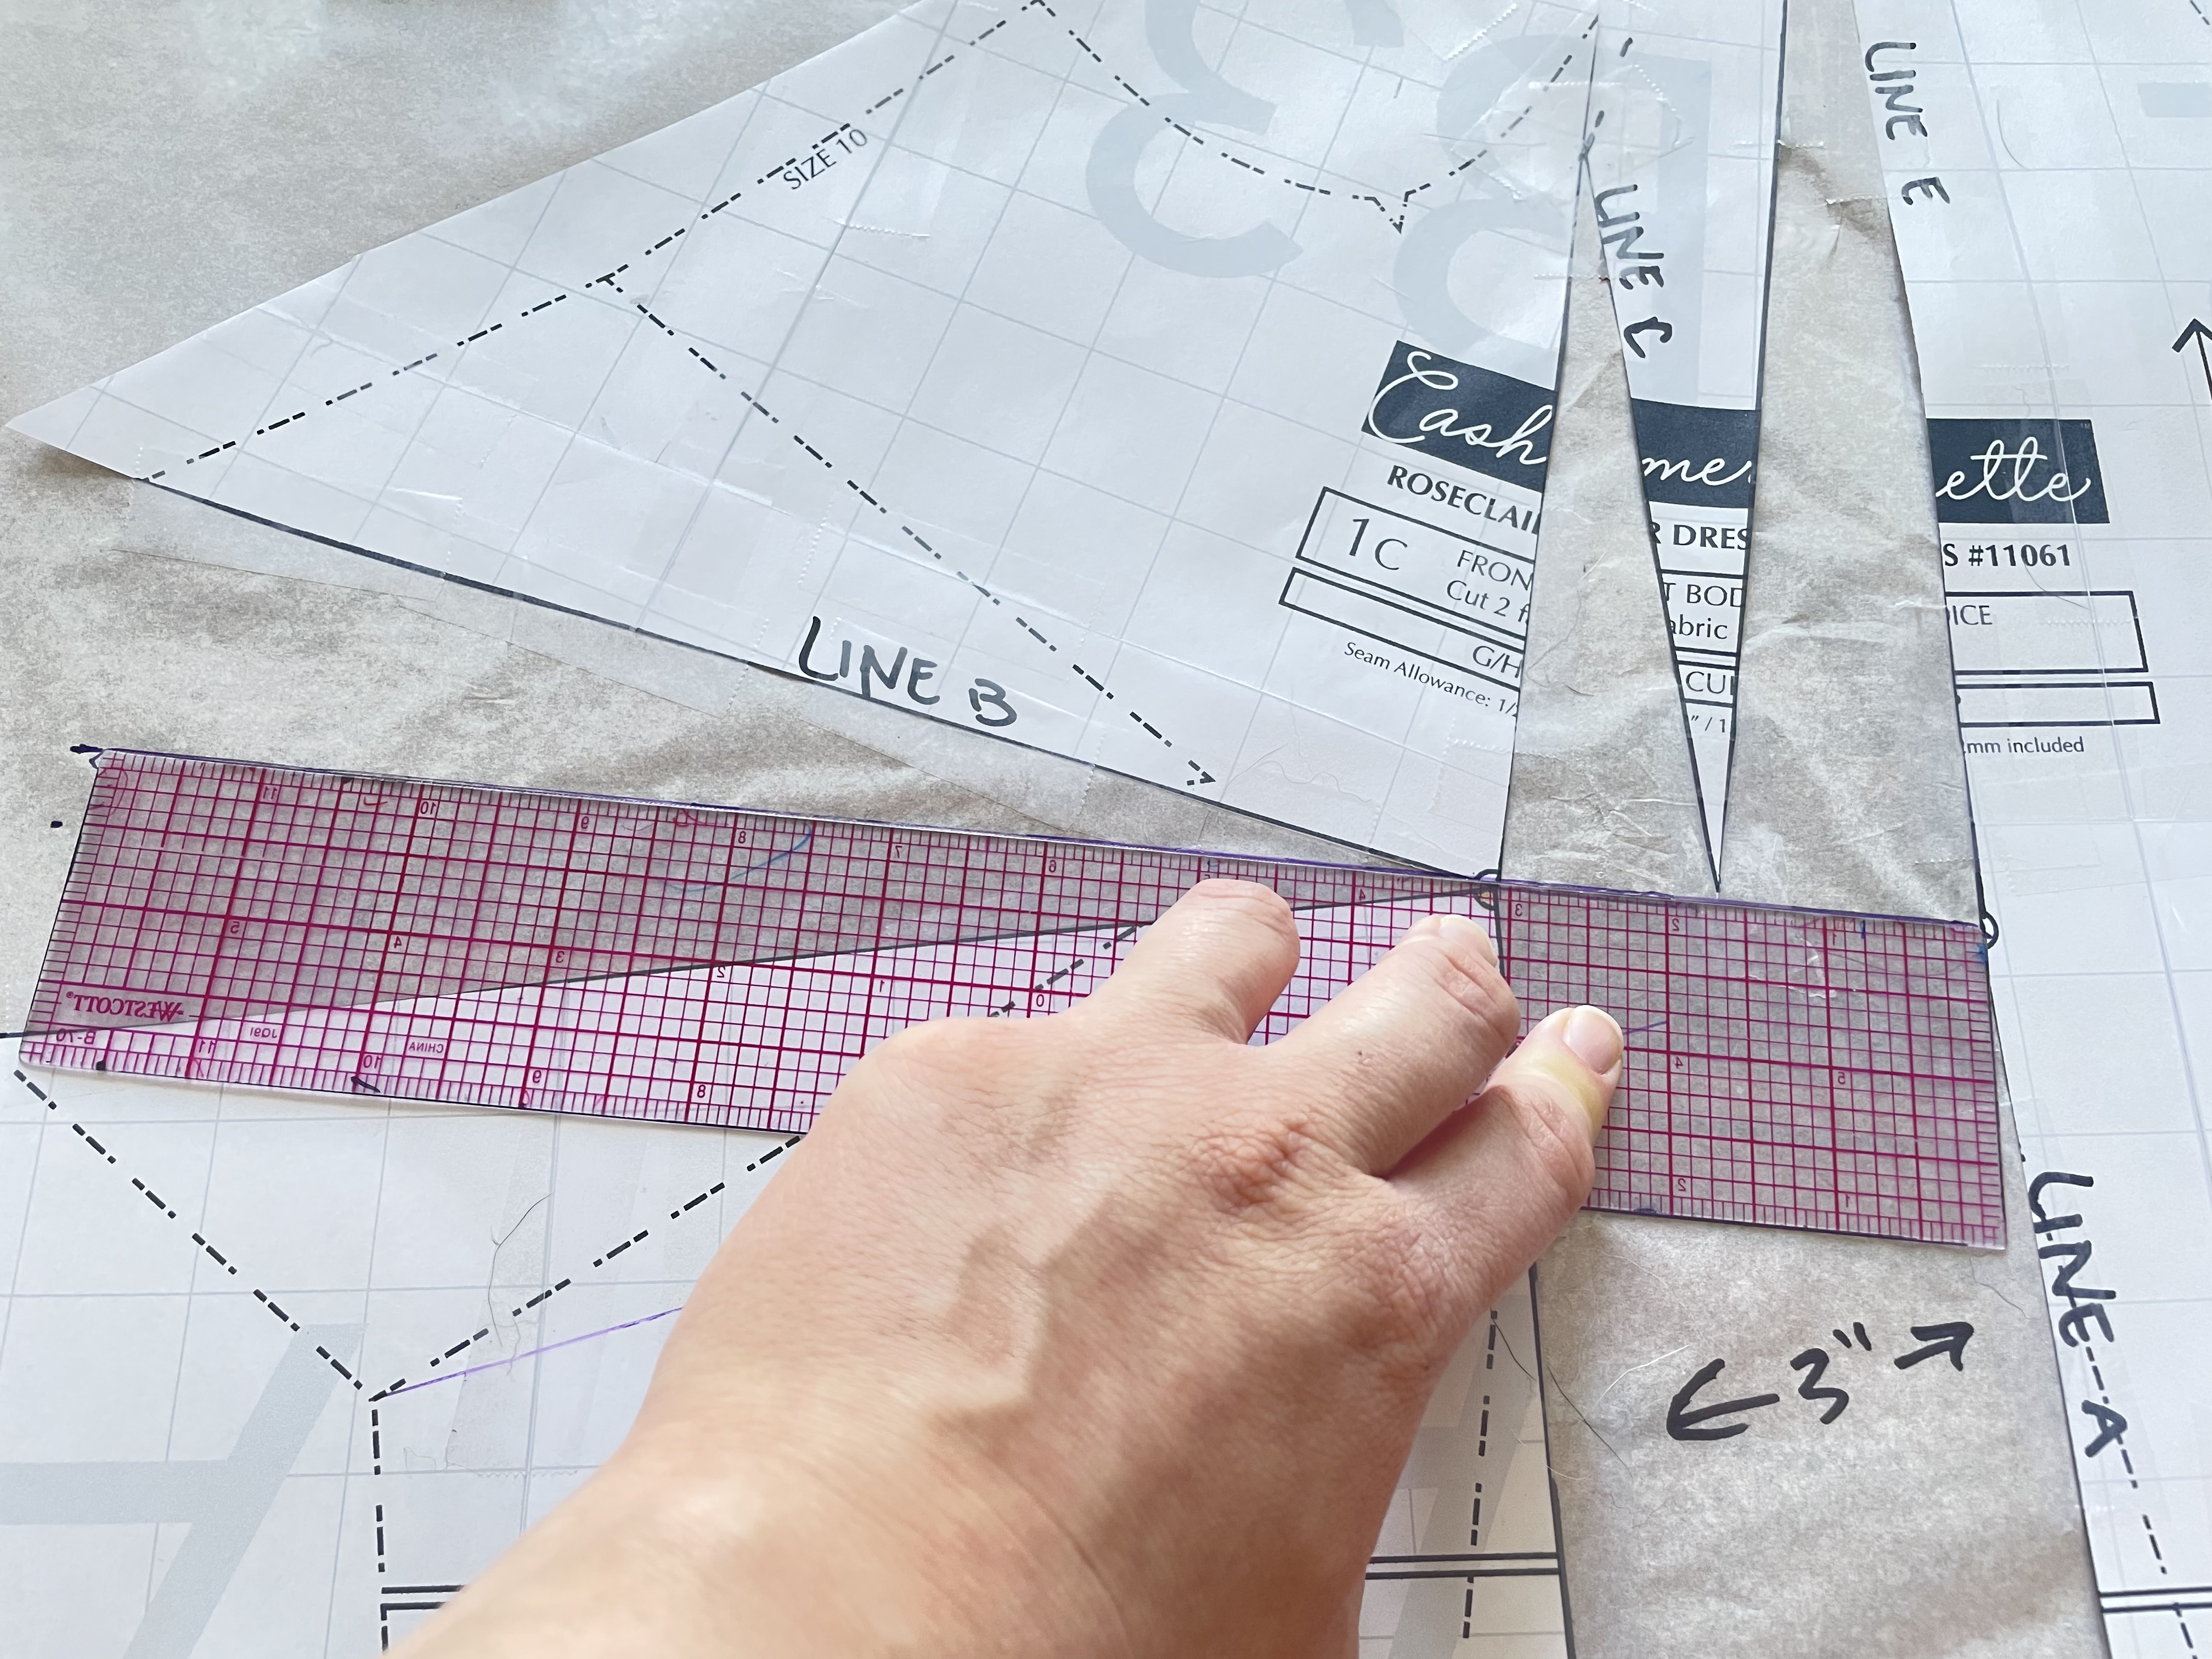
Now we need to level the bottom of the bodice. On most FBAs, this is going to involve lowering the center front side of Line A to match the side seam side. But, you may notice that at a certain point, the pendulum begins to swing back, and you may end up with a longer bodice at the center front than at the side seam. This is what happened to me!
Honestly, this has never happened to me before, so I’m not really speaking with authority here. But I went ahead and took a leap of faith and cut along Line D from the side seam to Line A, moving that down to be level with the bottom of my bodice at the center front. I recommend you do the same — it seems to have worked!
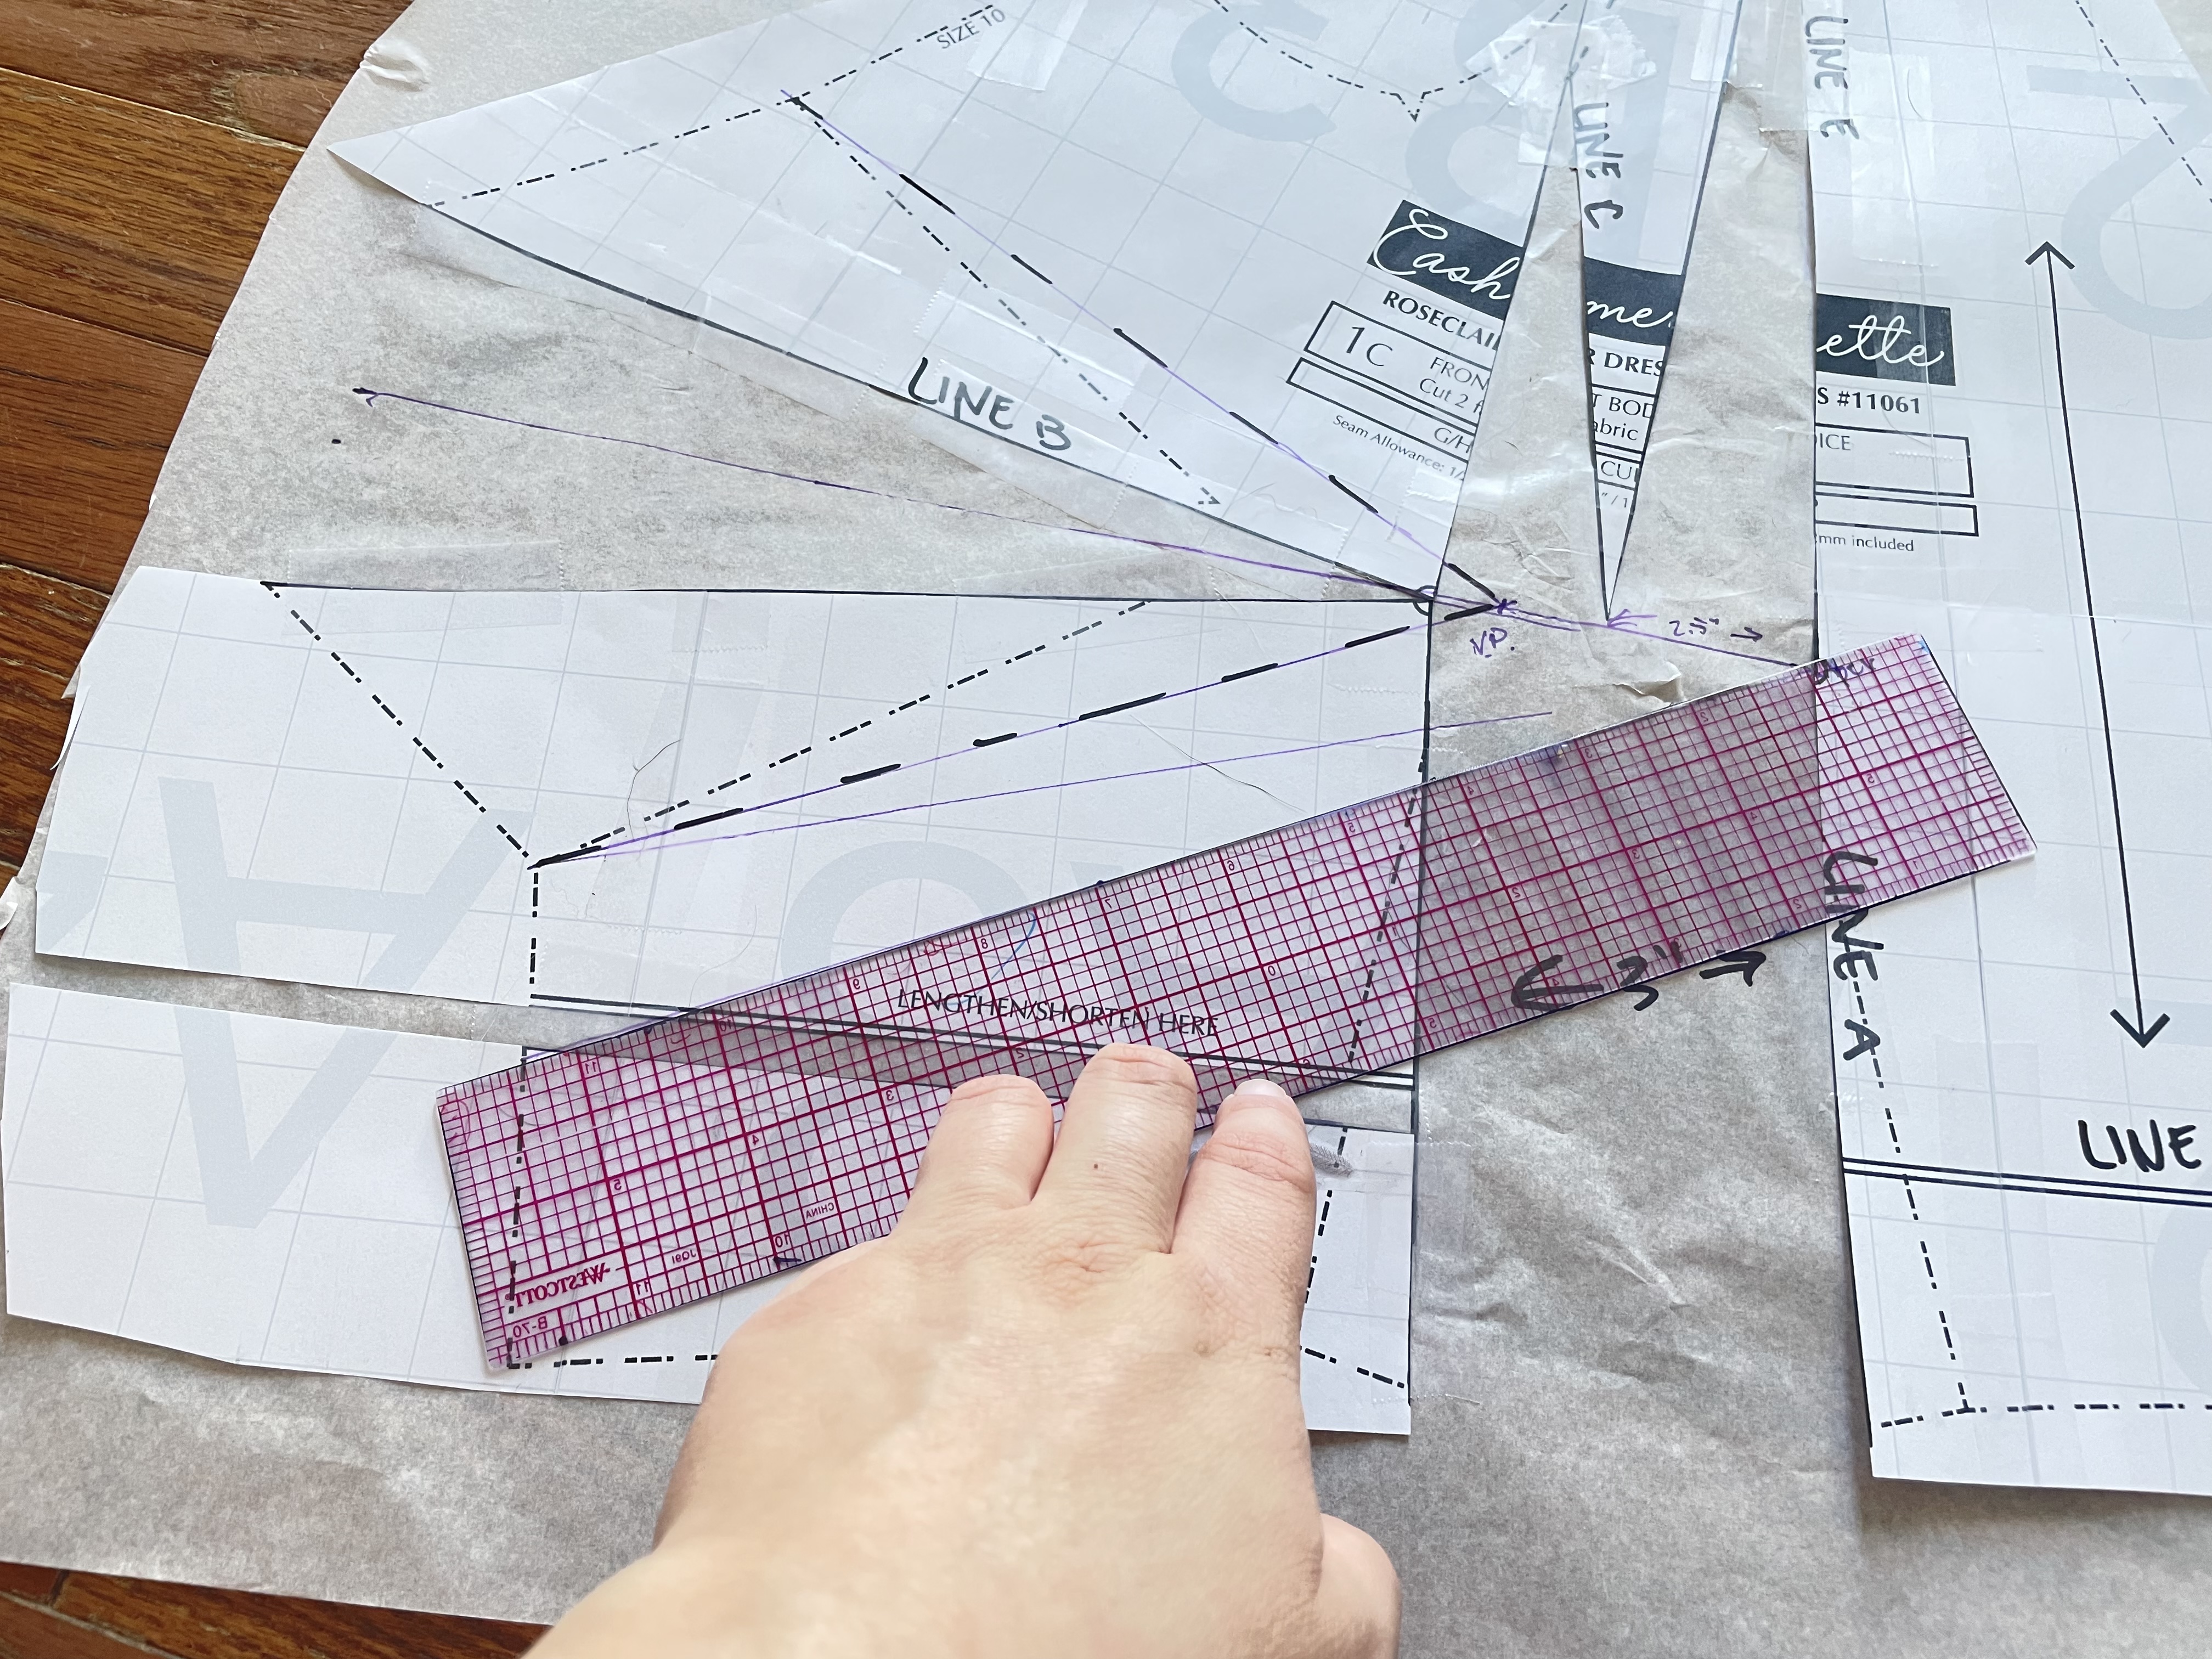
You may actually need to add even more length, because the “pendulum has swung.” Really, this only had me adding about 3/8″, which seemed like … not a lot. But I decided to go ahead and muslin this, especially knowing that I really wanted this dress to fit at the underbust rather than the true waist. Depending on your bust height, you may want to go ahead and add a bit more length at the center front before you muslin.
Now, this does make my side seam a tiny bit longer, but I also know I’m going to adjust my armscye down a bit in a later step, so that will solve that side seam issue.
splitting the dart
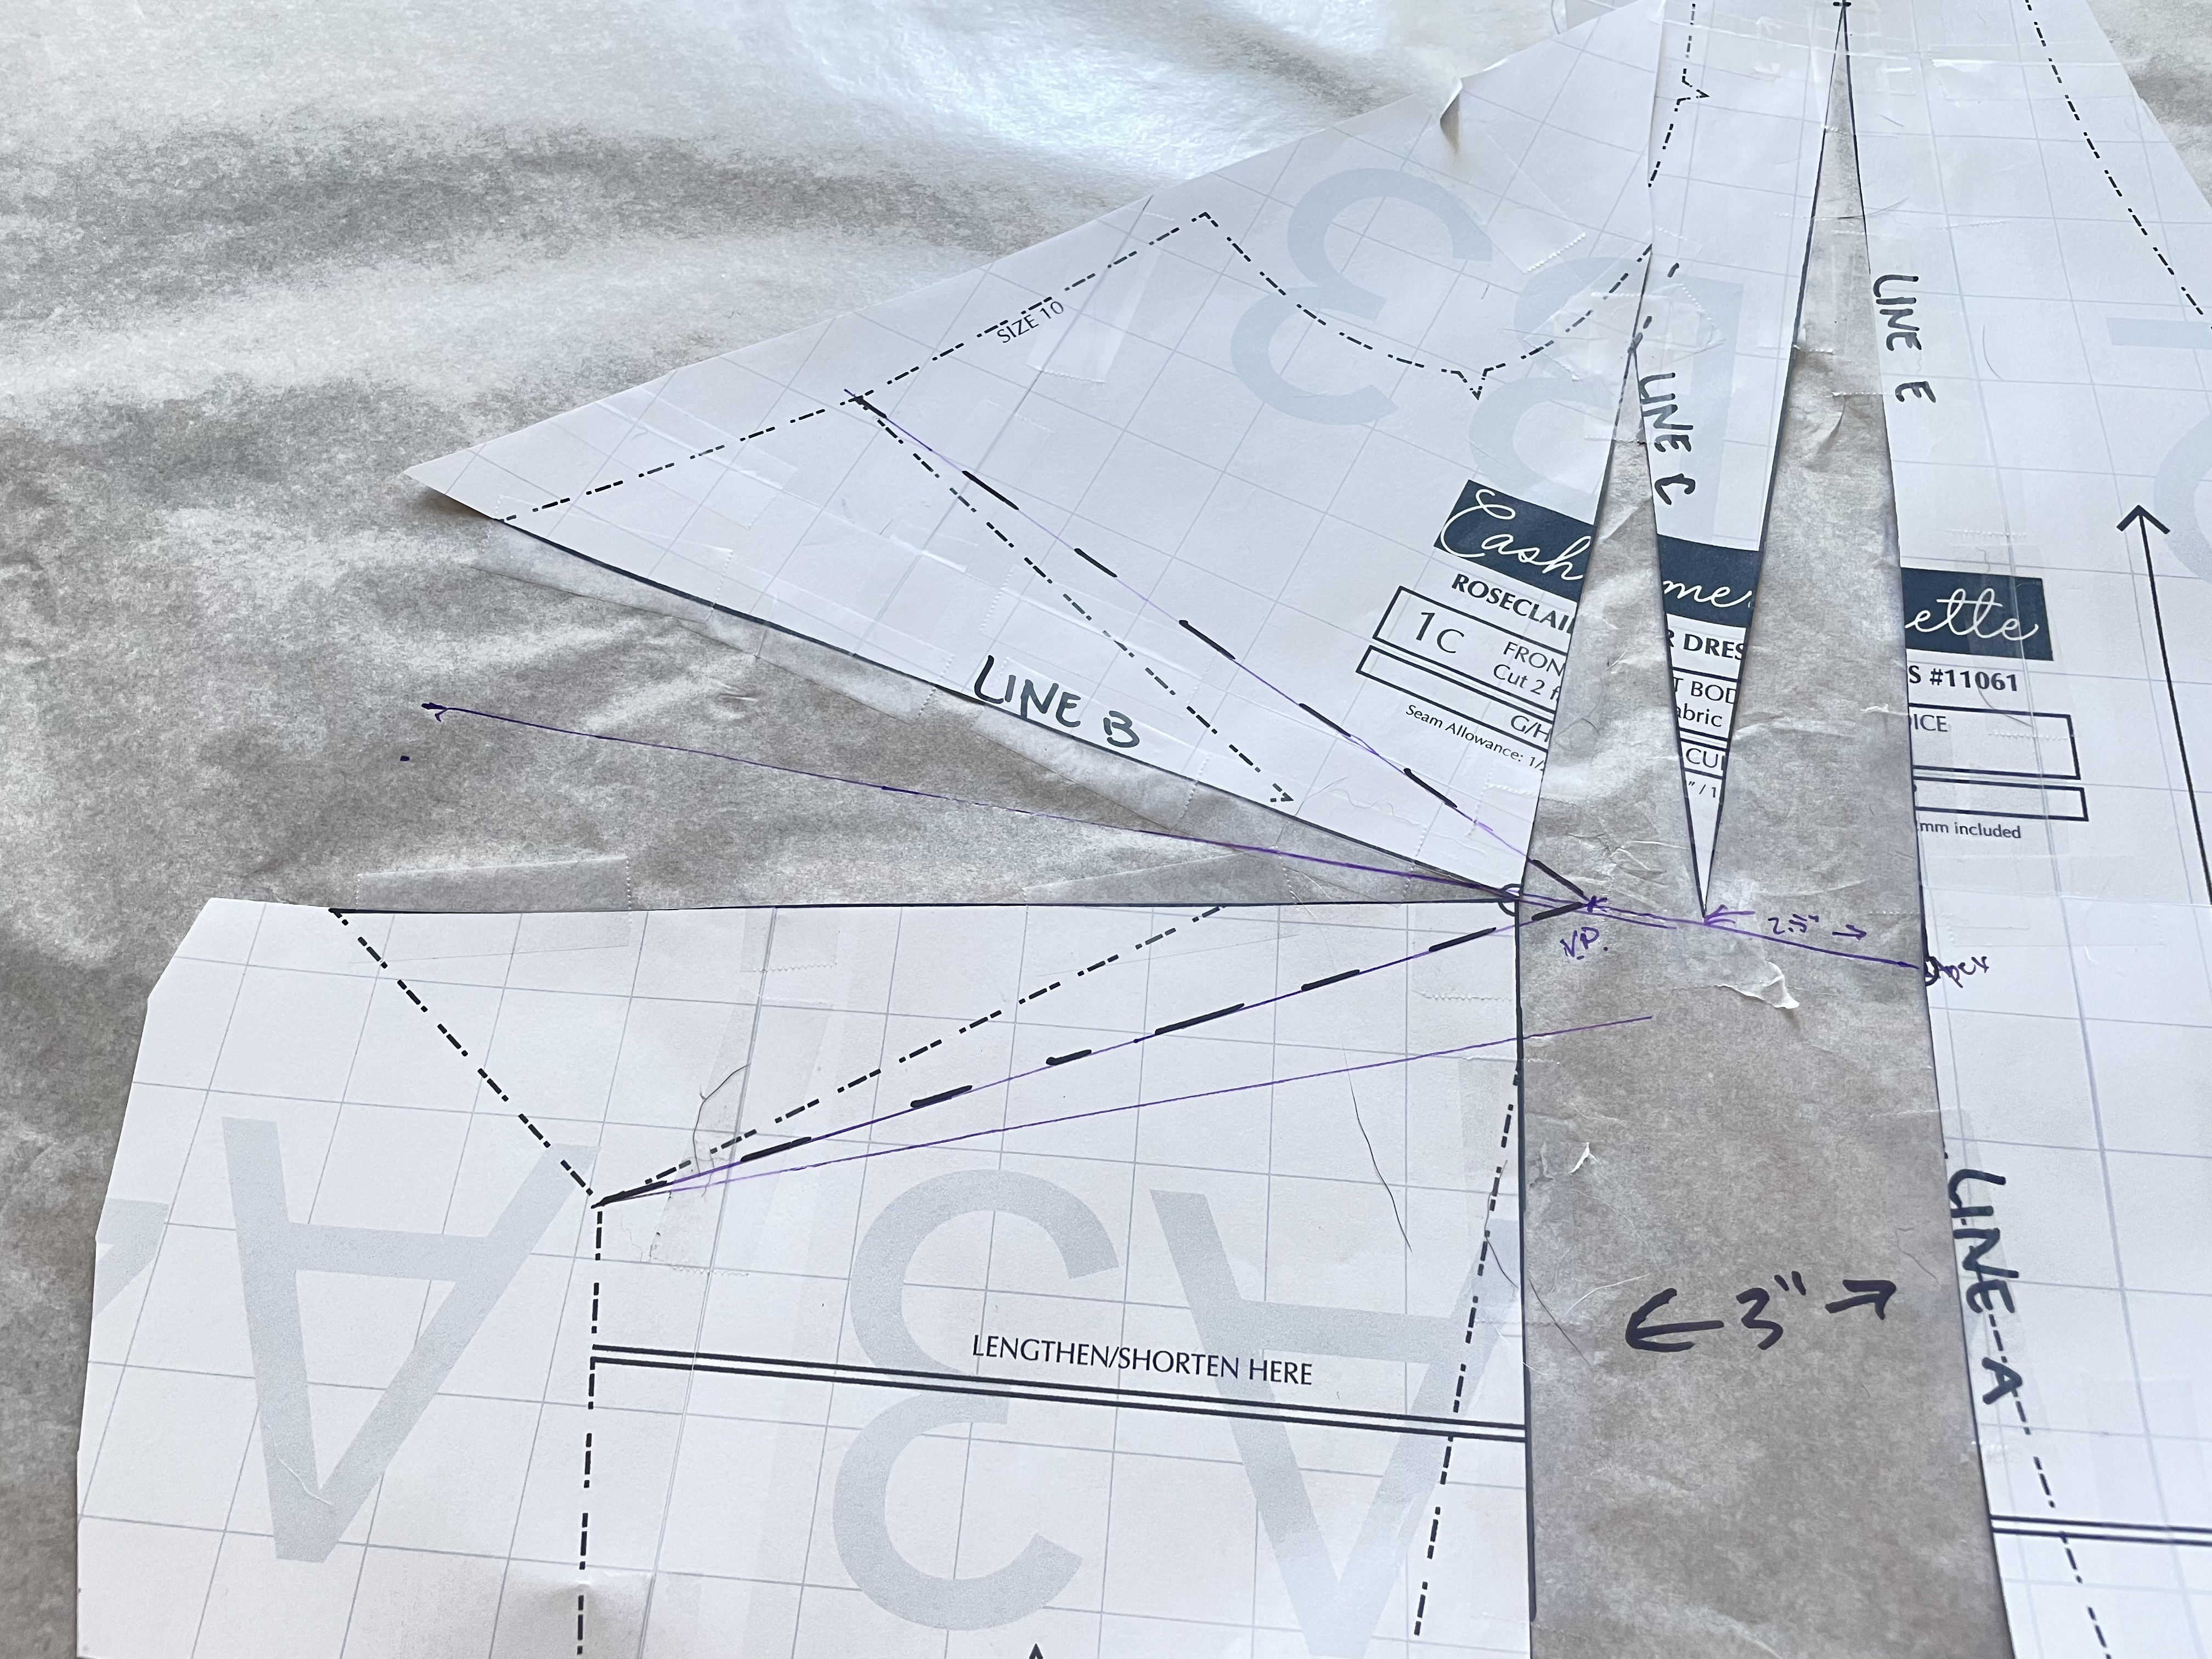
Now we need to deal with the GIANT dart we’ve created. I’m going to start by drawing in what would be my new dart, just so you can see how ridiculous it is.
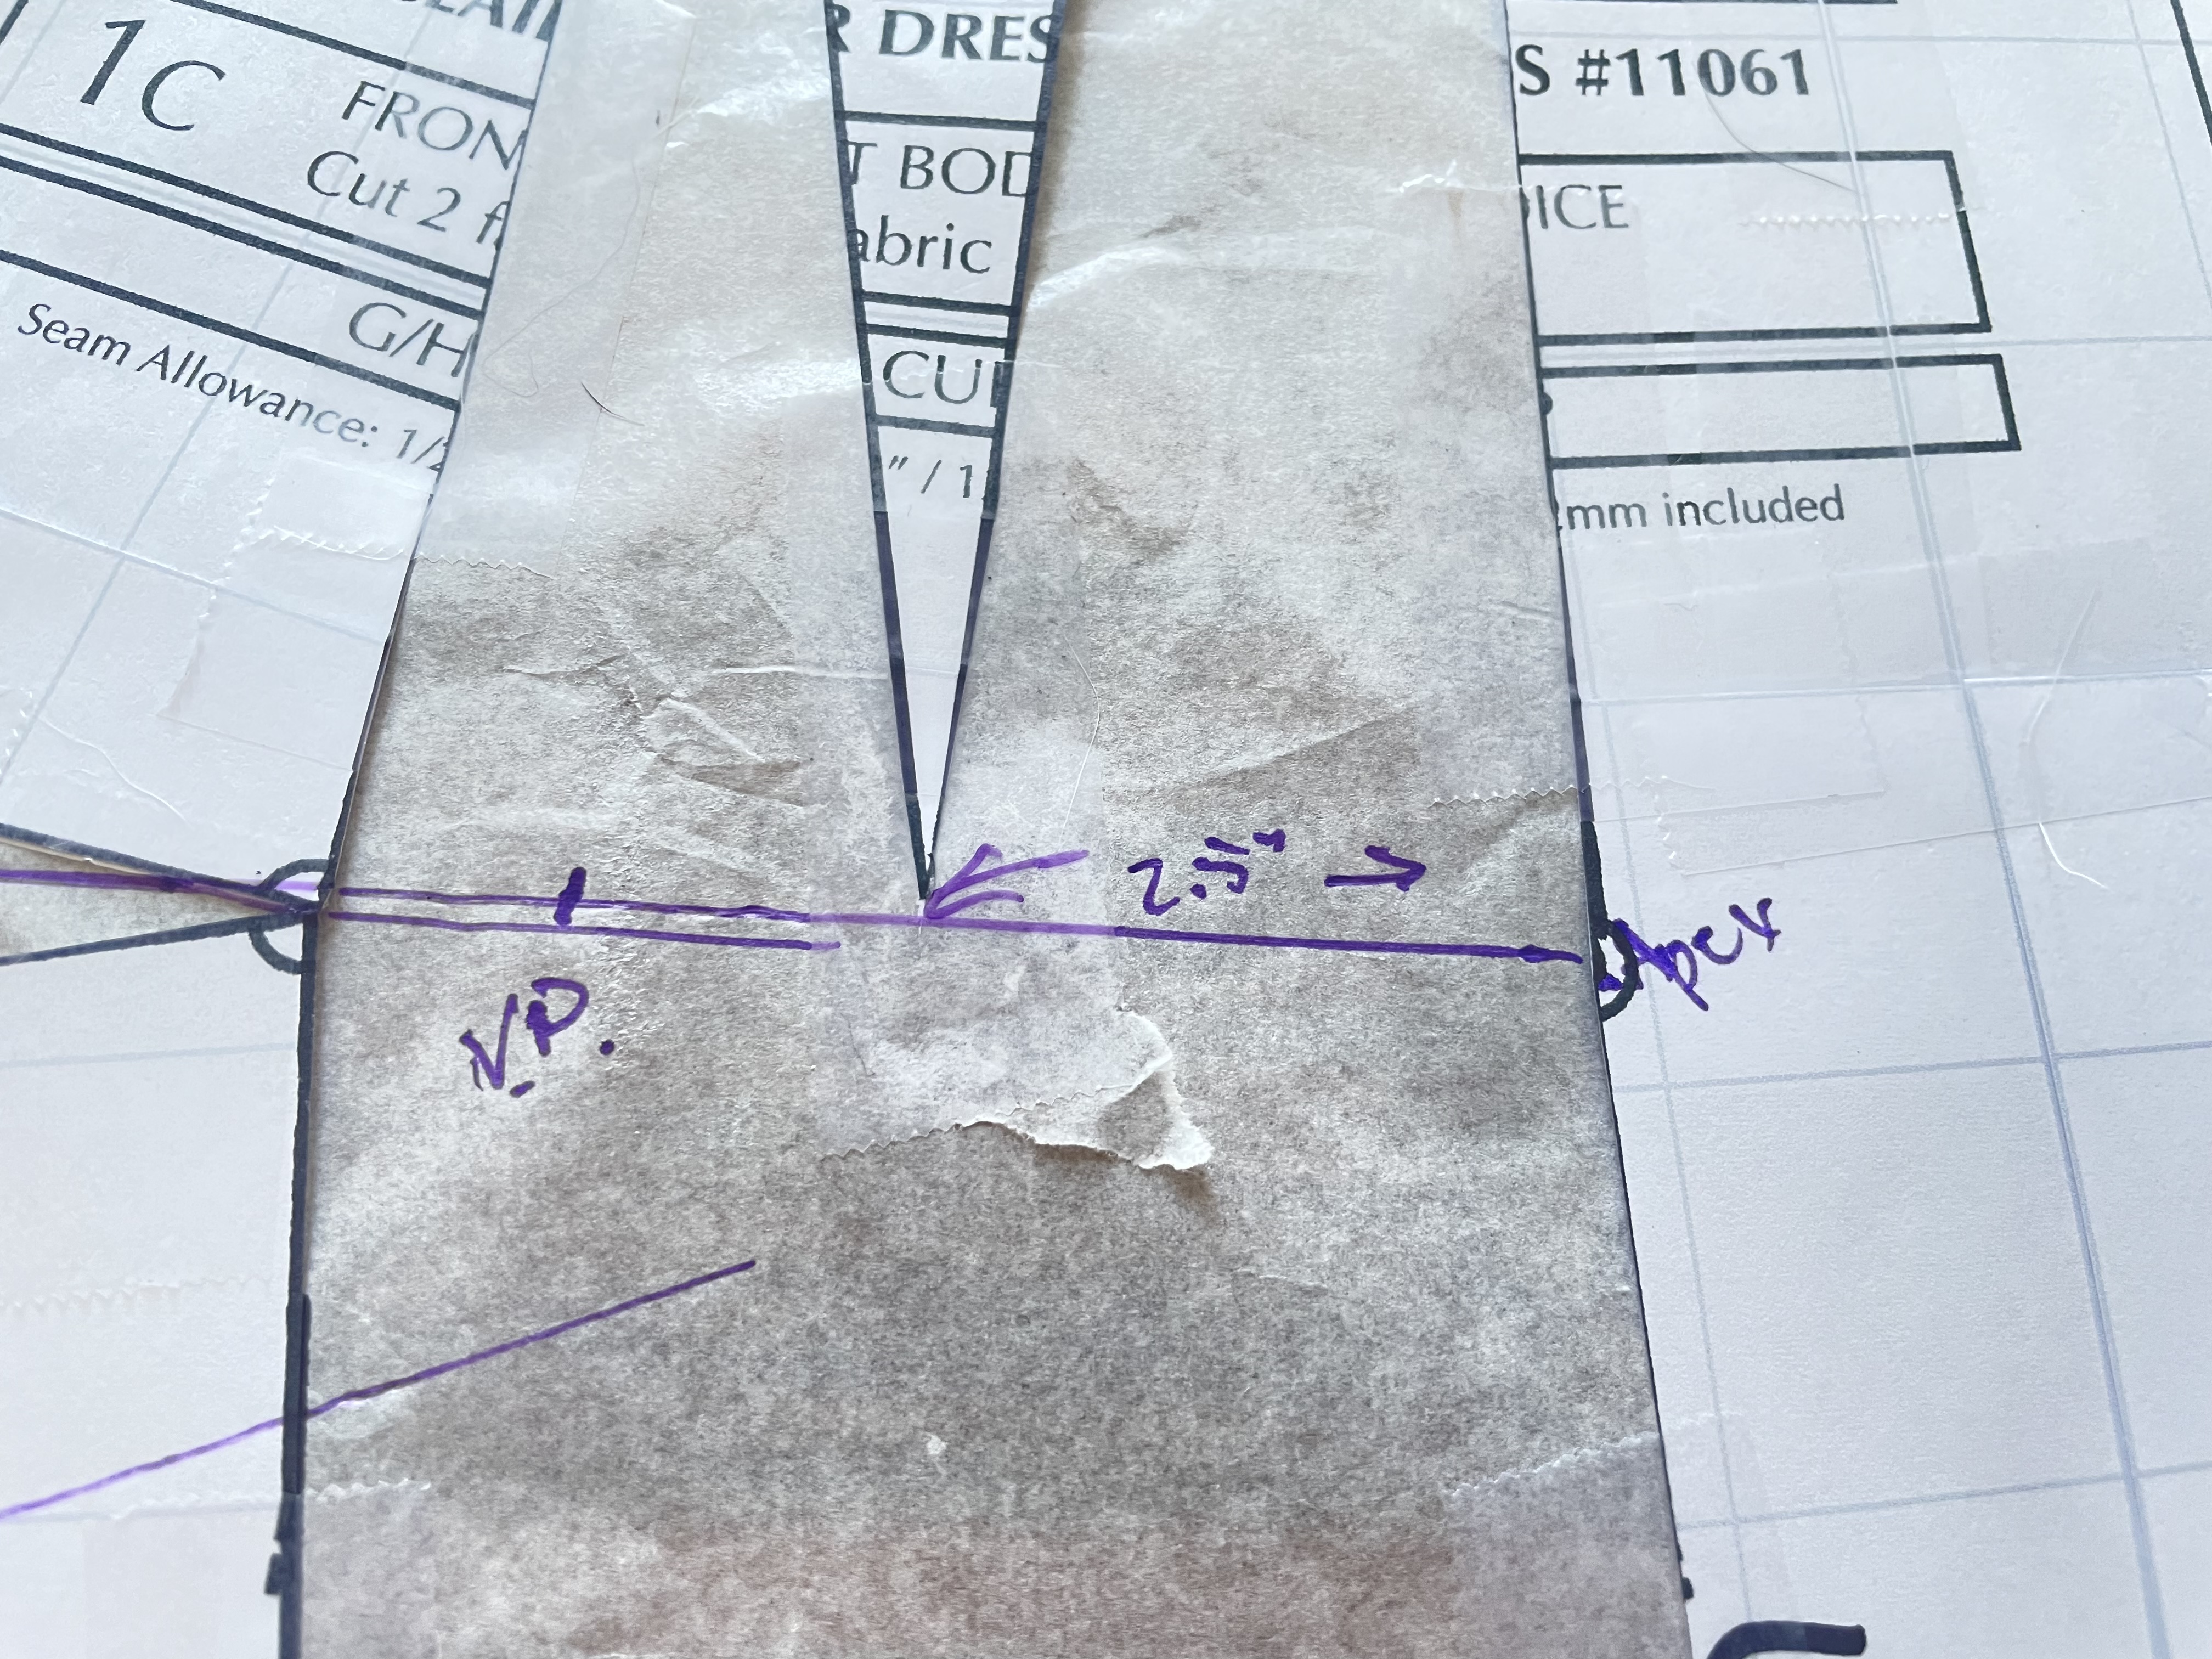
First, I marked the center of the dart. Then, I draw the center line of my new dart — the dart I’m actually going to split — all the way to the apex. Along this line, 2.5″ toward the side seam from the apex, I mark the vanishing point.
The vanishing point is what prevents darts from being too pointy. For those of us with larger busts, our vanishing points need to be further from the bust. Here’s the chart of what I recommended for vanishing points in my Giant Knit FBA Tutorial:
| I+ garment cup | 9″+ (22.85 cm+) full/high bust difference | 2.5″ (6.35 cm) |
| G-H garment cup | 7-8″ (17.8-20.3 cm) full/high bust difference | 2″ (5 cm) |
| DD/E-F garment cup | 5-6″ (12.7-15.2 cm) full/high bust difference | 1.5″ (3.8 cm) |
| D garment cup or smaller | 4″ or less (10.2 cm) full/high bust difference | 1″ (2.5 cm) |
I then connect this vanishing point to the dart ends — the original dart ends. This gives me my new dart, which I’ve marked in the final picture of this slideshow in a dashed sharpie line:
If it’s not clear, this dart is HUGE. I measured the full dart, and it was 7.5″ wide. That’s not going to work.
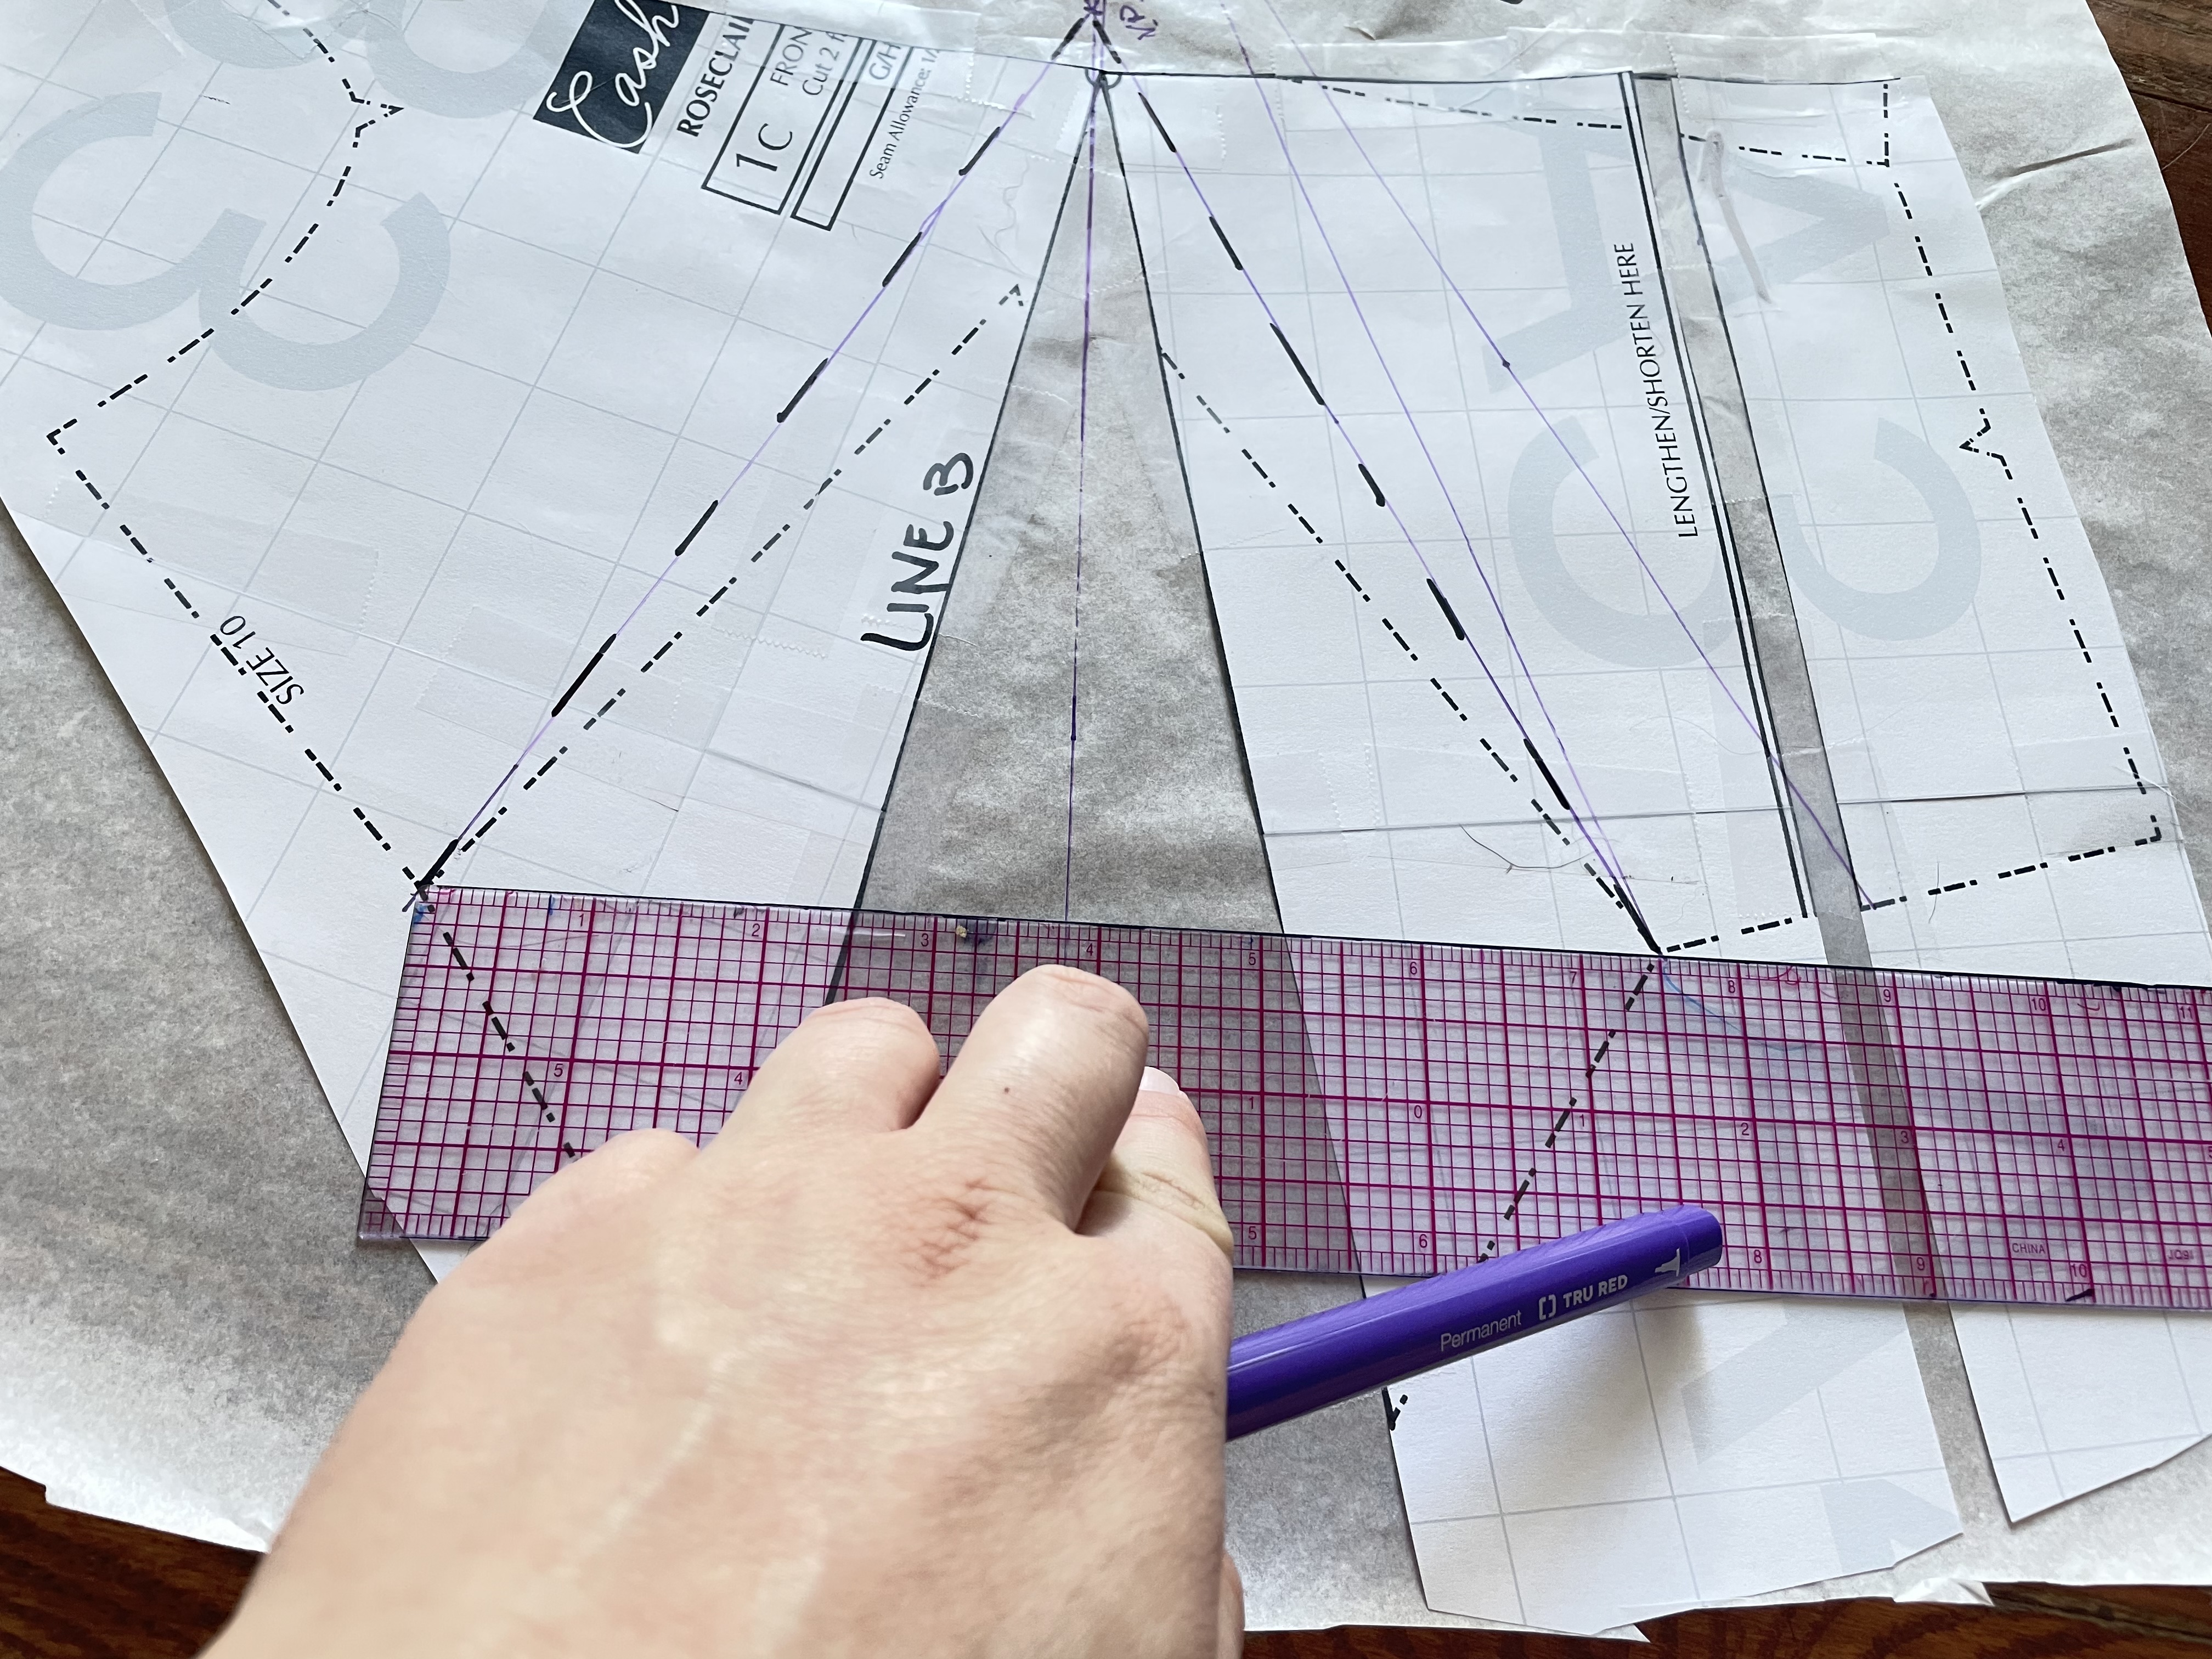
I want to split this into two, roughly equally-wide side darts. To do this, I’m first going to draw a line from my apex to the side seam where I want my second dart to lay.

Next, cut along the center line of the new dart (the one that I had outlined in dashed sharpie), to but not through the apex. Also cut along the line for the new dart that I just drew, again to but not through the apex. This will create a pivot point at the apex:
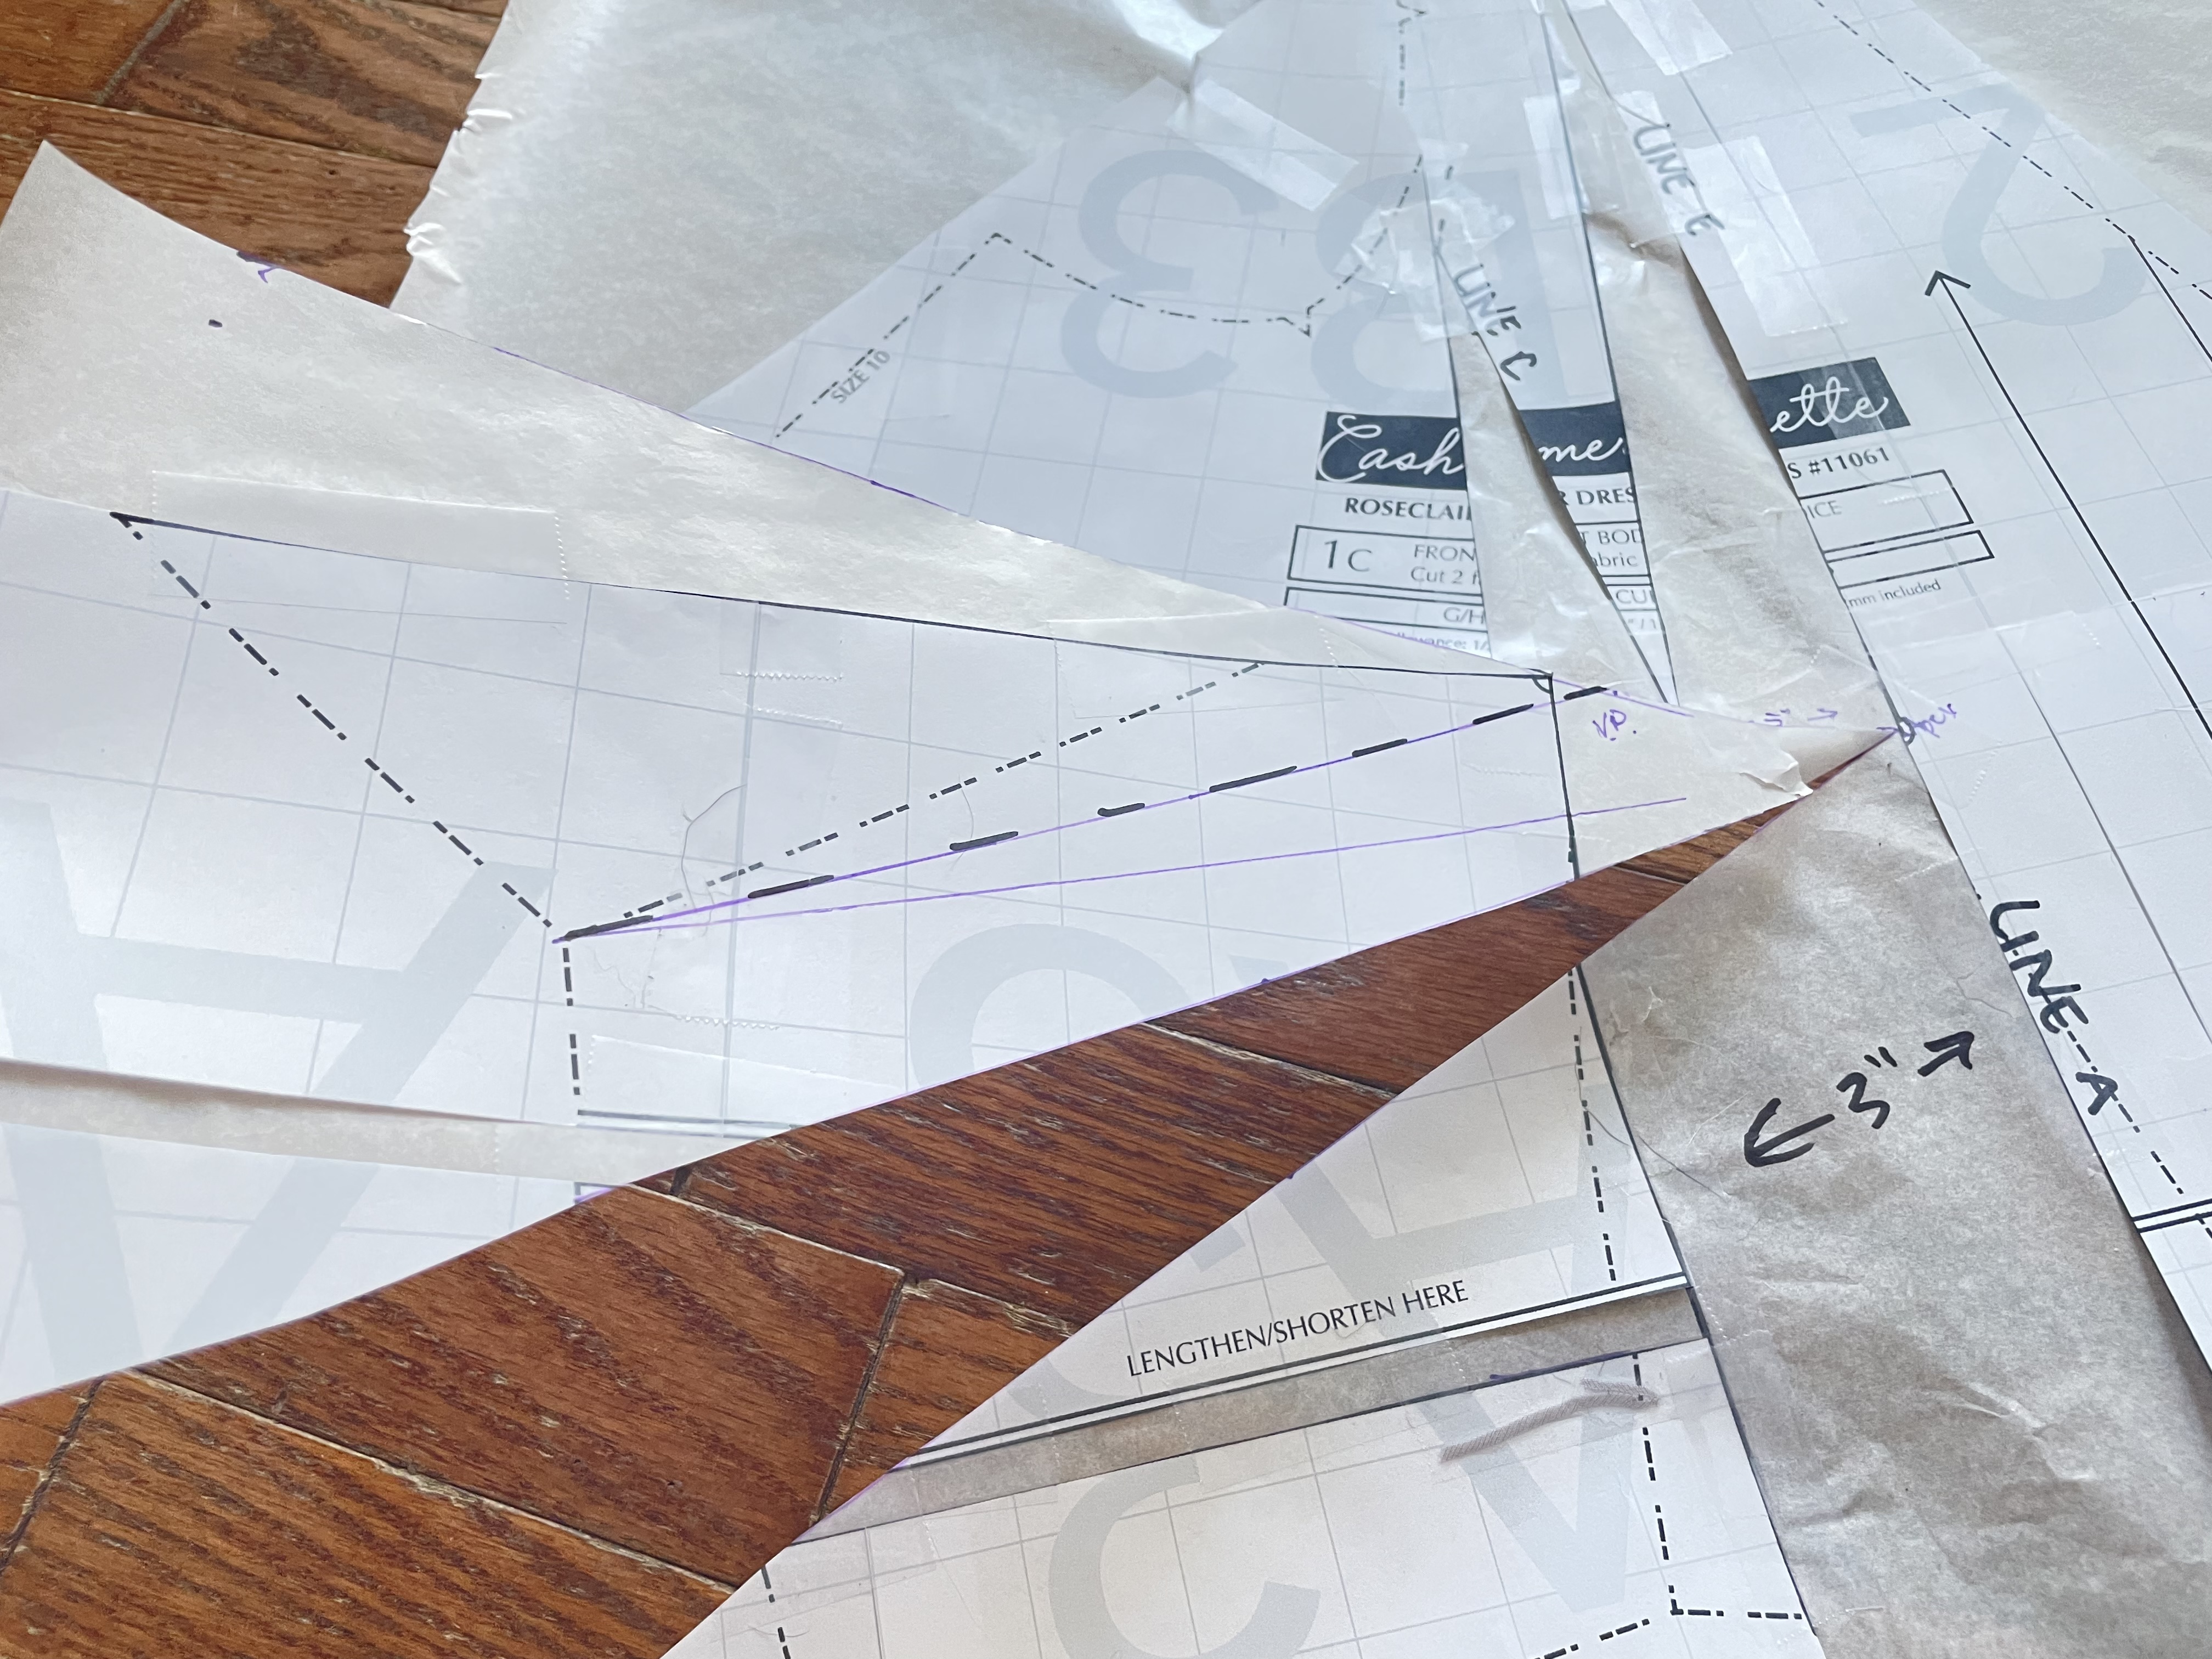
Putting extra pattern paper behind my new dart (where you can see hardwood in the picture above), I’m going to pivot upward until my darts are roughly equal width — that is, until the width between my original dart legs is roughly equal to the amount I can see the new pattern paper.
Tape this down, and find the center of the new dart, drawing a line from the apex to the center:
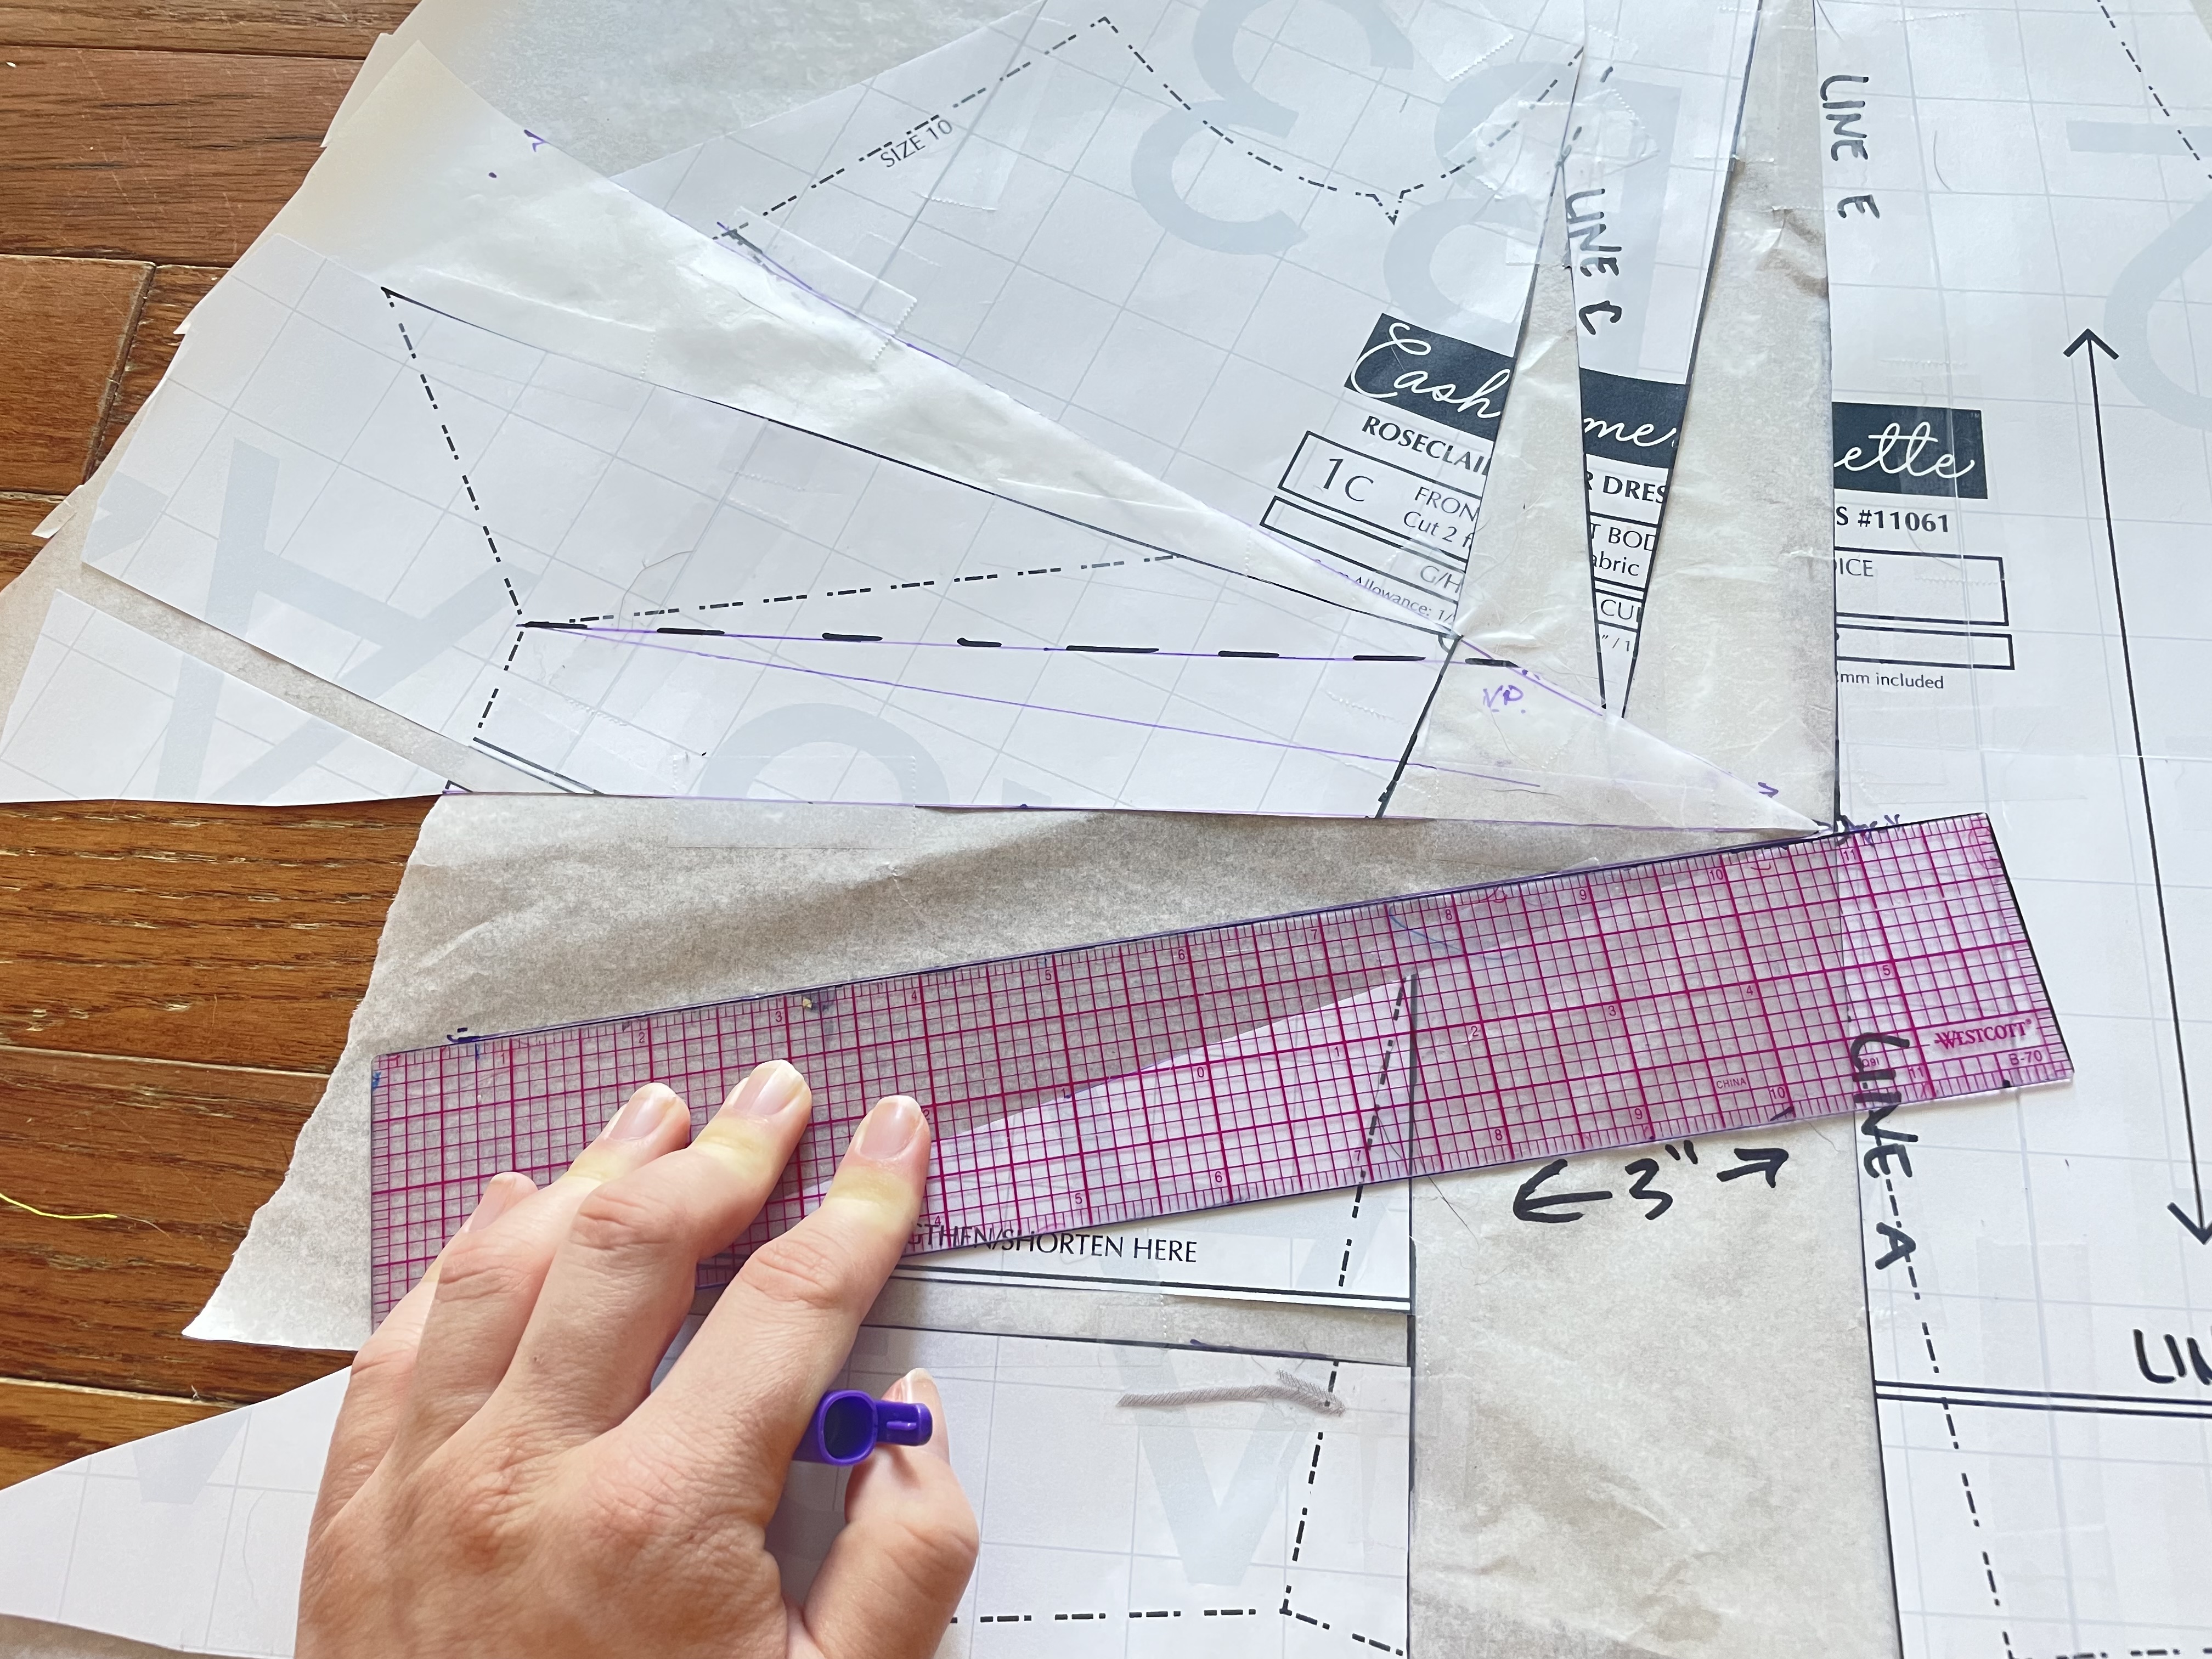
Along this line, mark your vanishing point, using the chart above to select how far from your apex your vanishing point should be (again, I chose 2.5″).
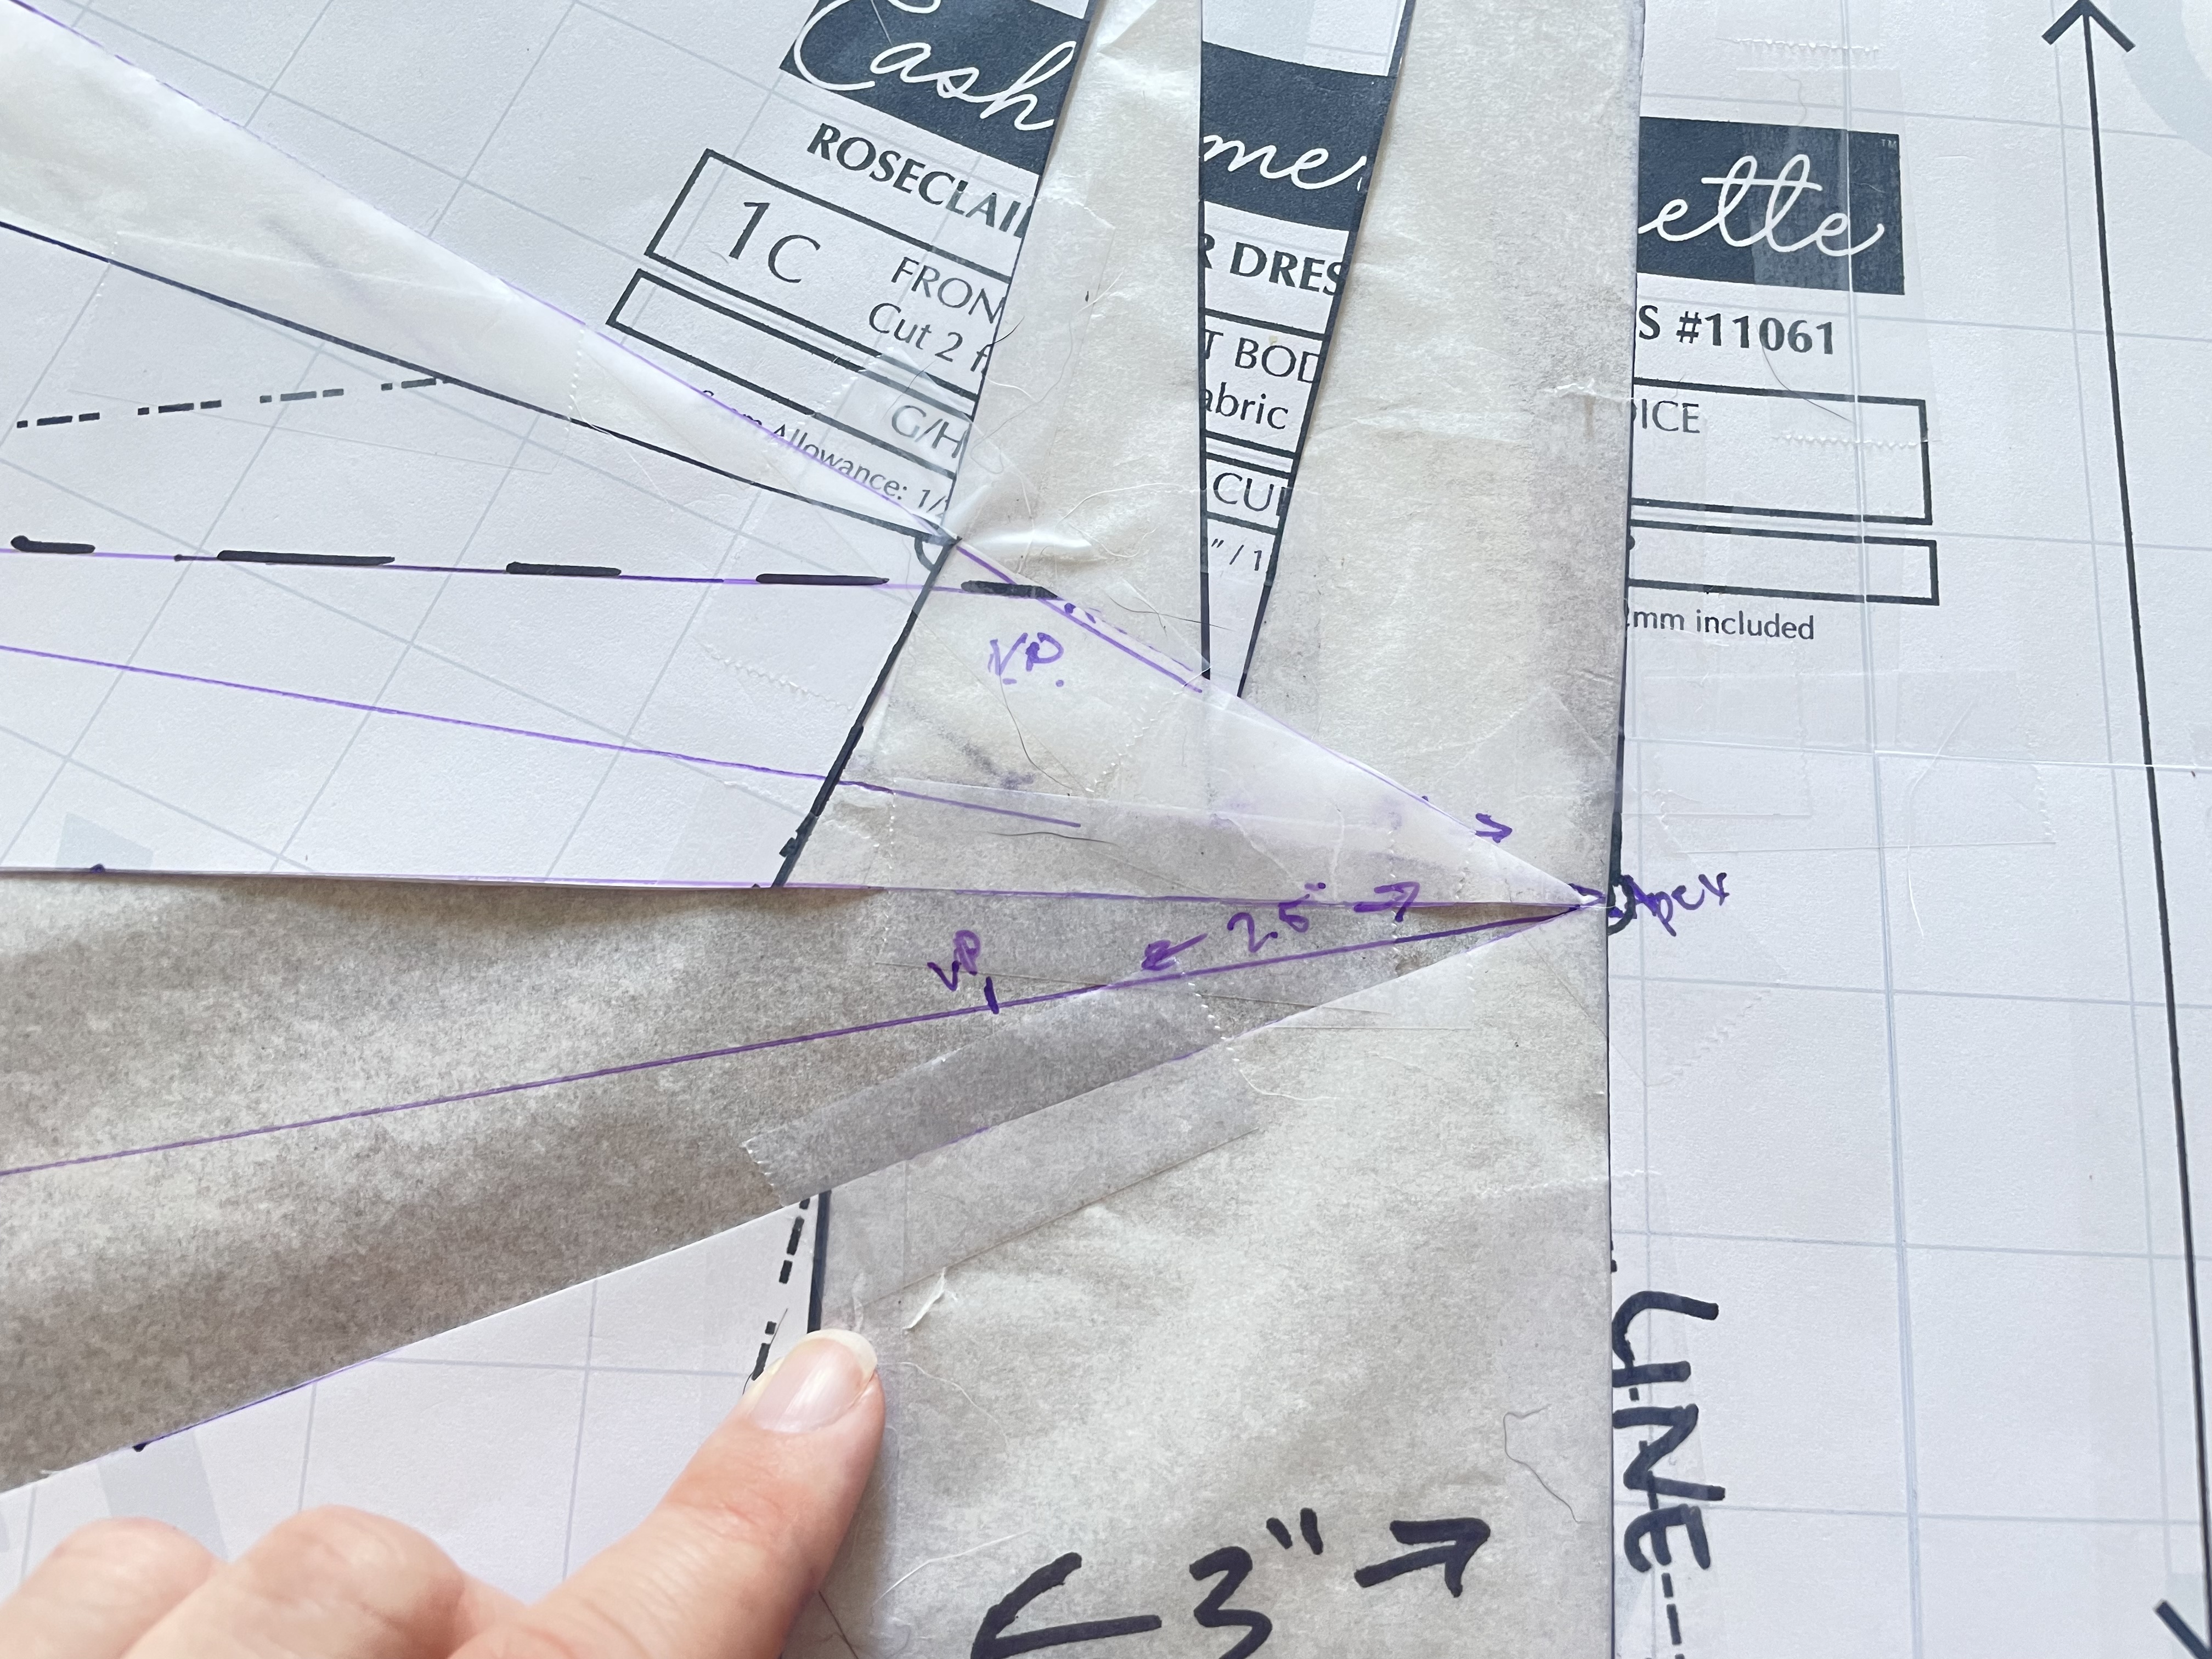
You’ll similarly need to mark the center of the original dart (which is now quite a bit smaller!), draw the center line, and mark the vanishing point, using the same method.
Finally, connect this vanishing point to the dart ends. For the original dart, your dart ends are the same dart ends as on the original pattern. For the new dart, the dart ends are where you see the new pattern paper.
Here are my finished side darts, marked in solid sharpie:
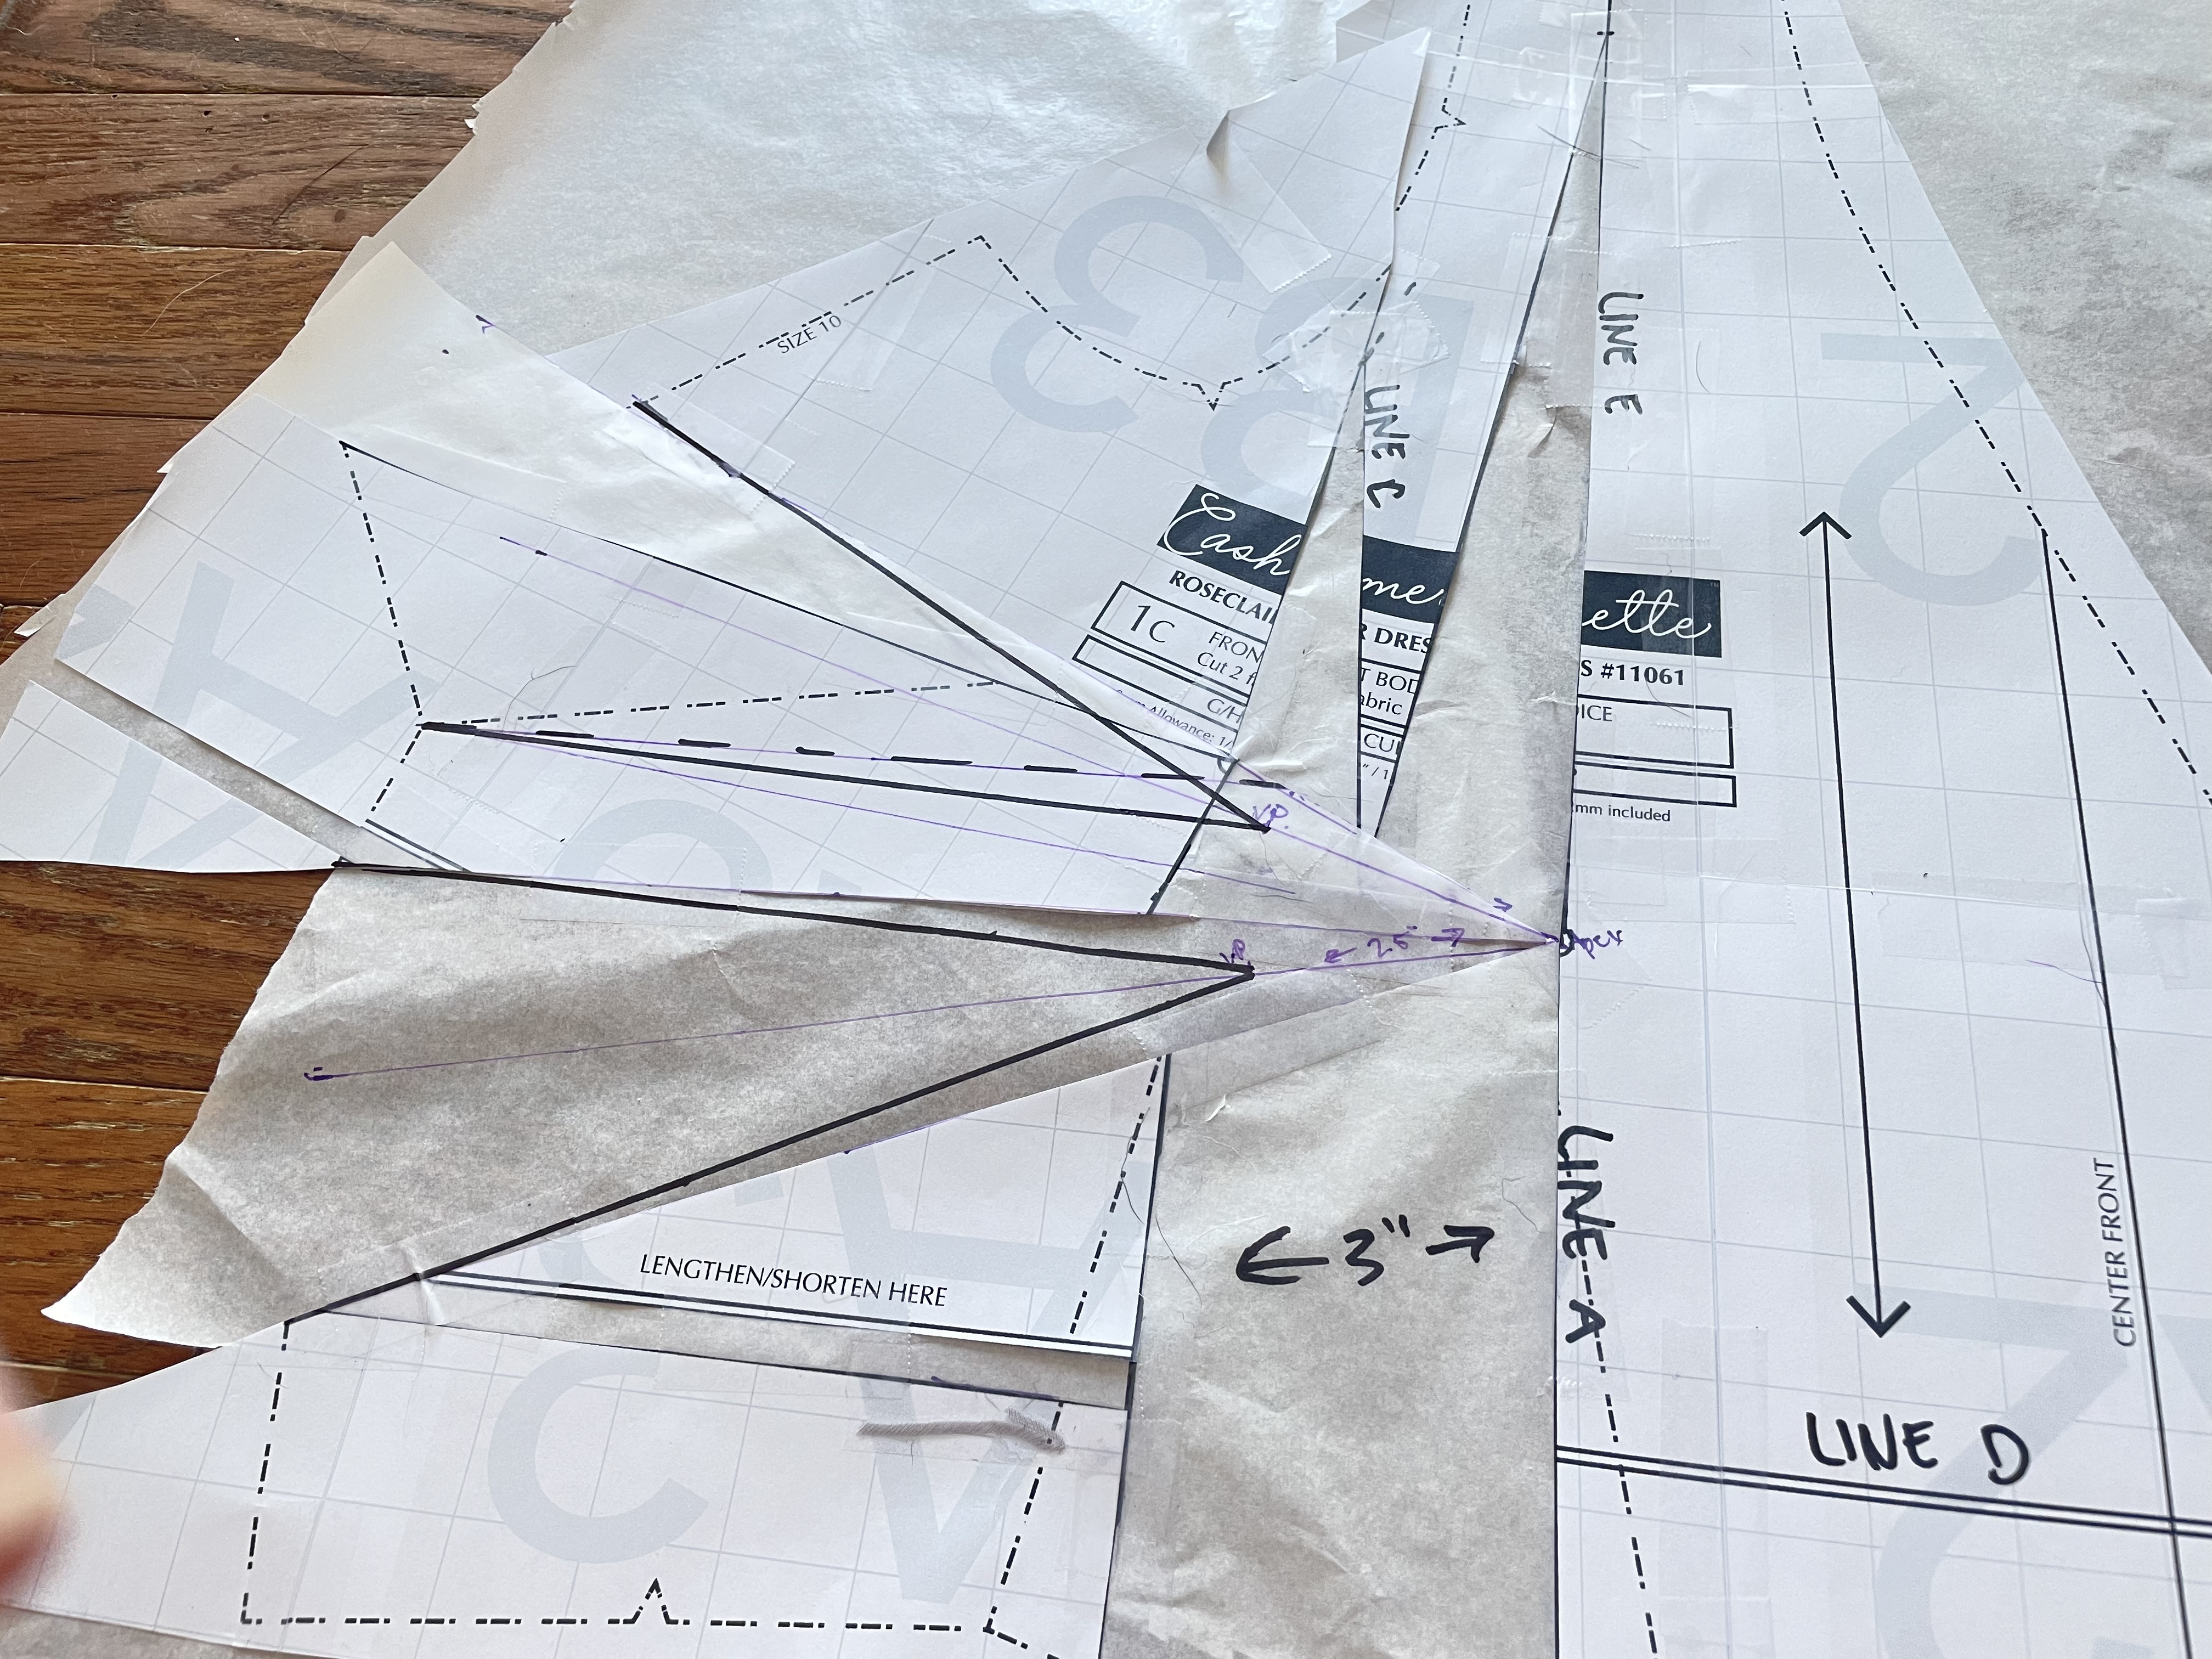
Reducing the Waist (That Is, Creating Waist Darts!)
On a lot of FBA tutorials, you’ll see a recommendation to remove the amount you’ve added to the waist from the side seam. The problem is, that really just doesn’t work well when we’re adding as much as we’re adding here.
Removing 3″ from the side seam would have me end up with a wild-looking, angled side seam. And while that works fairly well in knits, as you saw in the Giant Knit FBA Tutorial, it doesn’t work so well in wovens.
You have a couple options instead. One, you can remove a small amount, say an inch, from the side seam, and take the rest in waist darts. Two, you can take it all in waist darts (what I chose to do, and what I’ll choose here). Three, you can take a small amount from the side seam, a small amount from center front (assuming you don’t need to cut on the fold), and the rest in waist darts.
Especially because I intend this dress to fit at the underbust/empire waist — meaning I have less room from bust to underbust to remove width at the waist — I chose to take all the extra width using waist darts.
The first step to this is to measure how much total width in waist darts you’ll need. Measure from one dart leg to the other, including the inches you added during the FBA. Mine was about 4-5/8″.
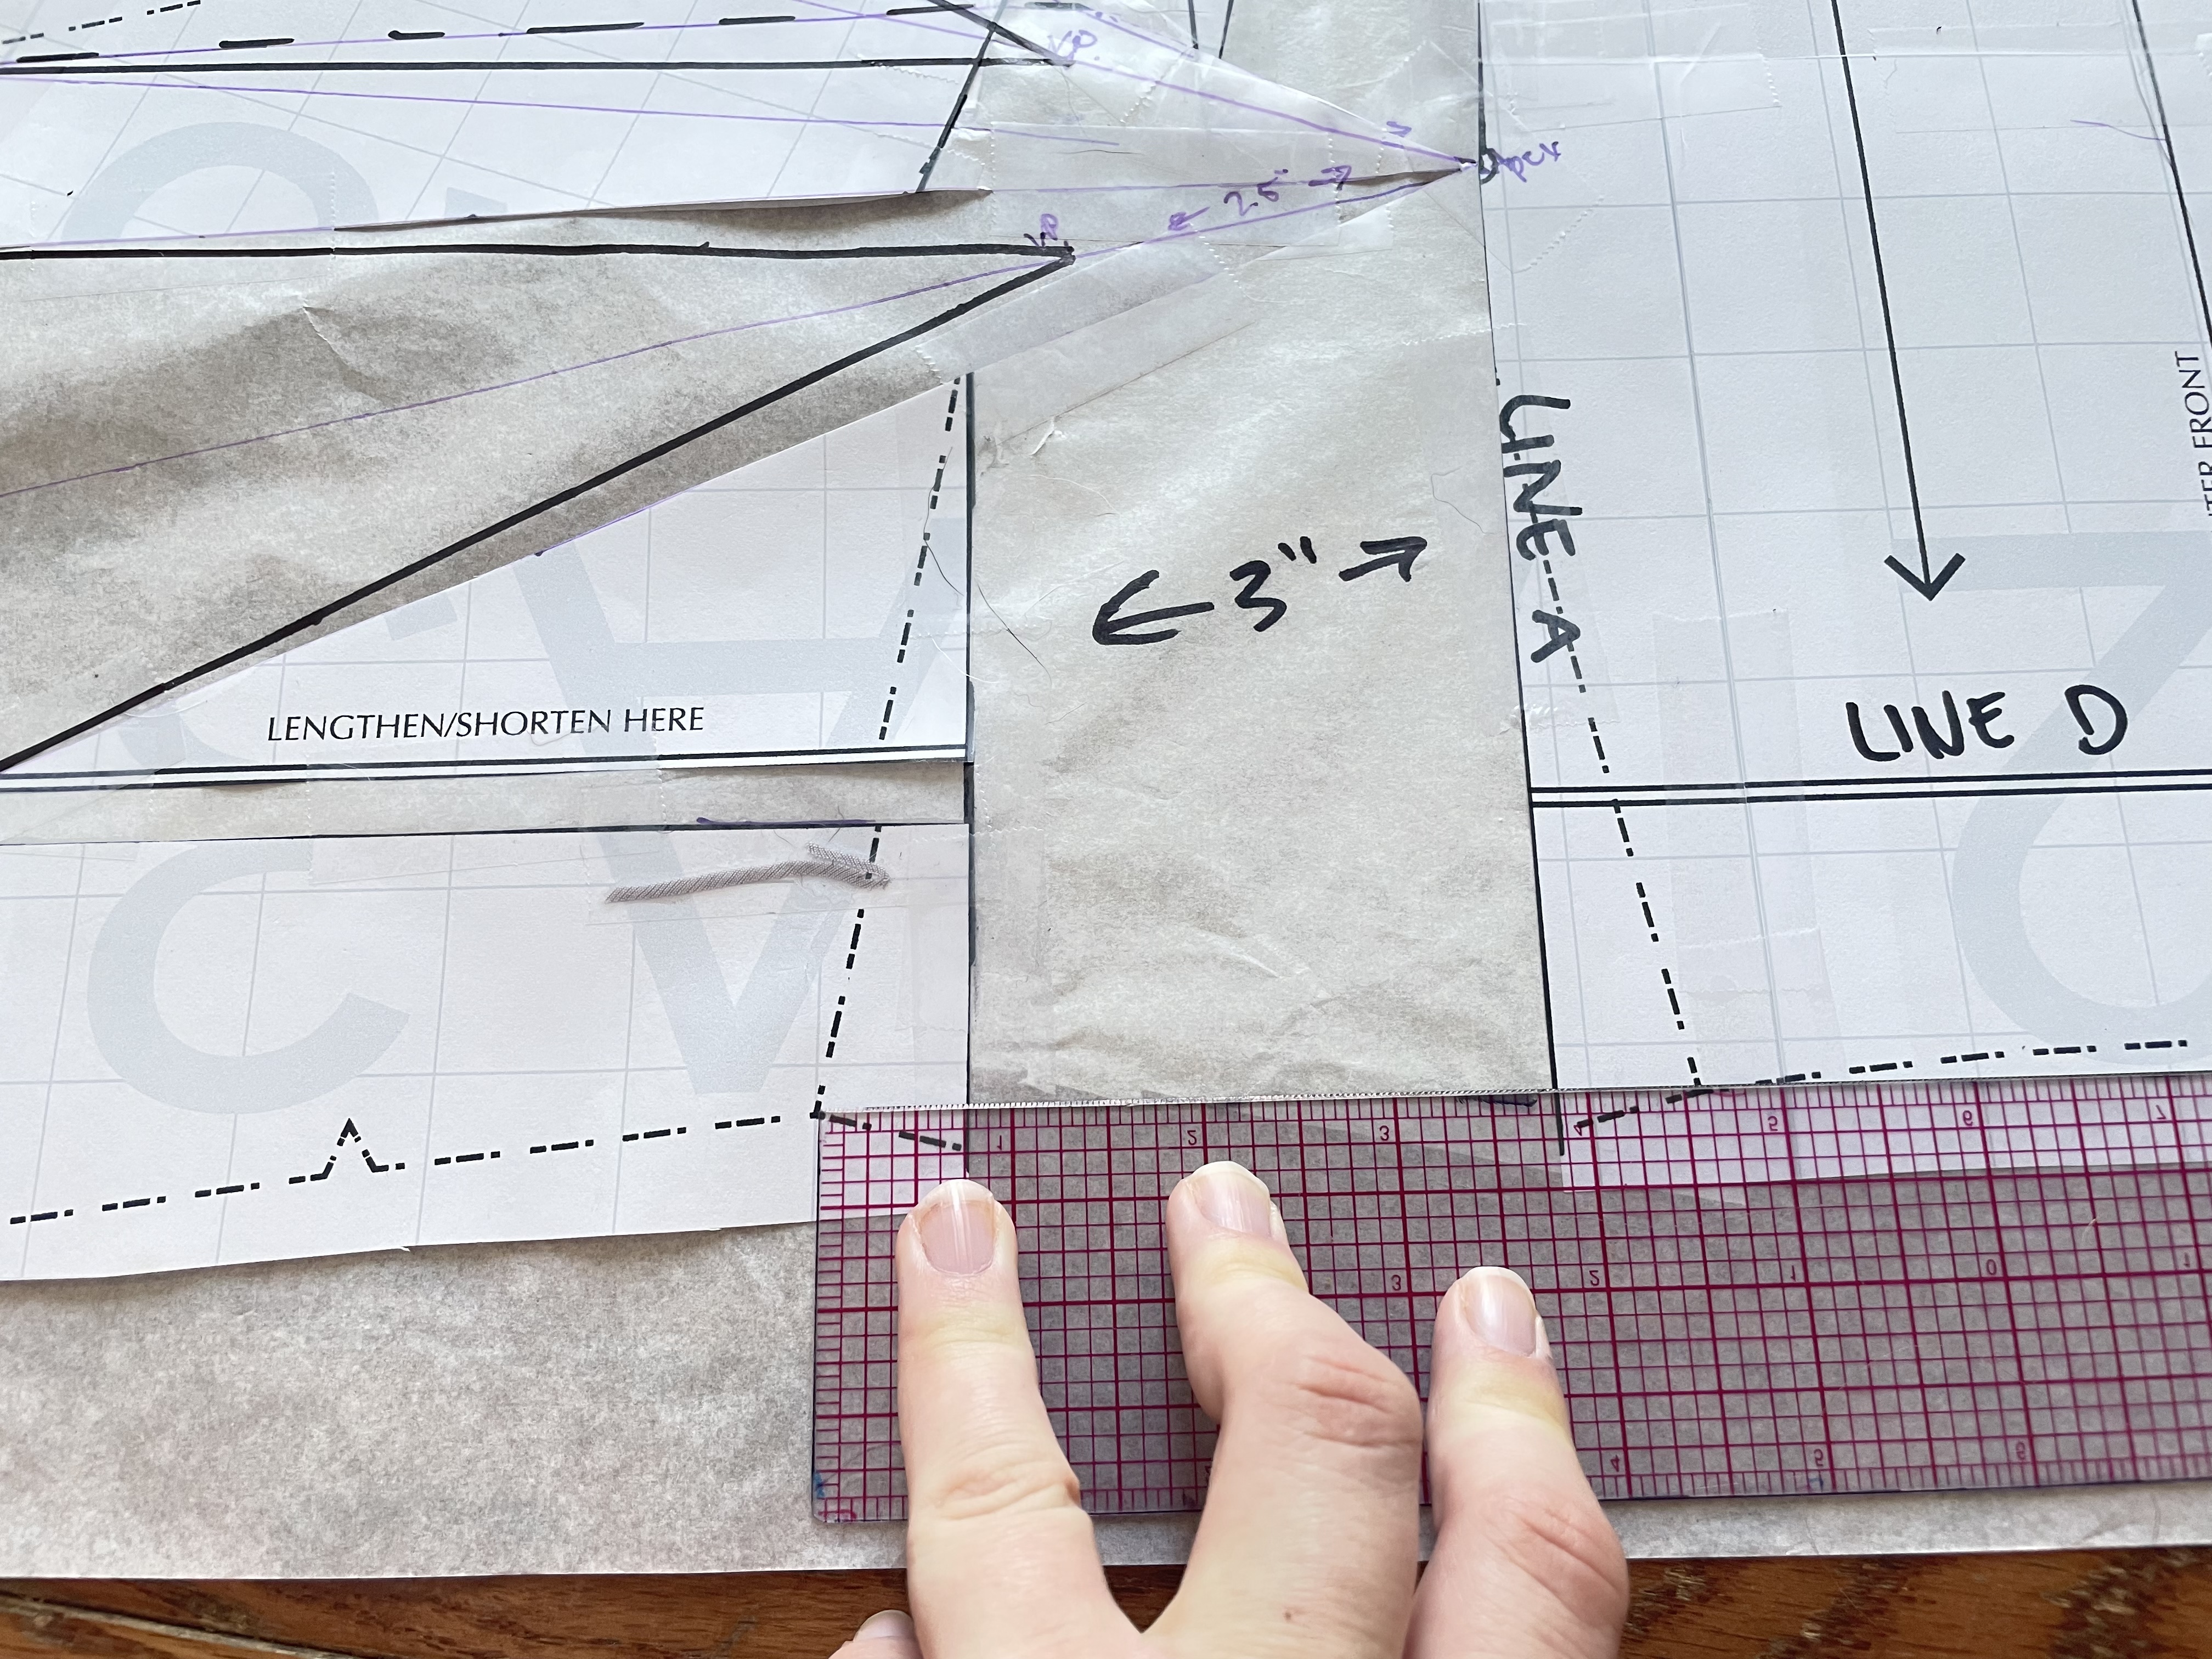
Now that you know the total width you need to remove using waist darts, divide that amount in two and mark that amount on either side of Line A (which should still be a line parallel to the grain line, running down from your apex). For me, I marked 2-10/16″ on either side of Line A.
Now, connect those points to the apex, drawing a triangle:
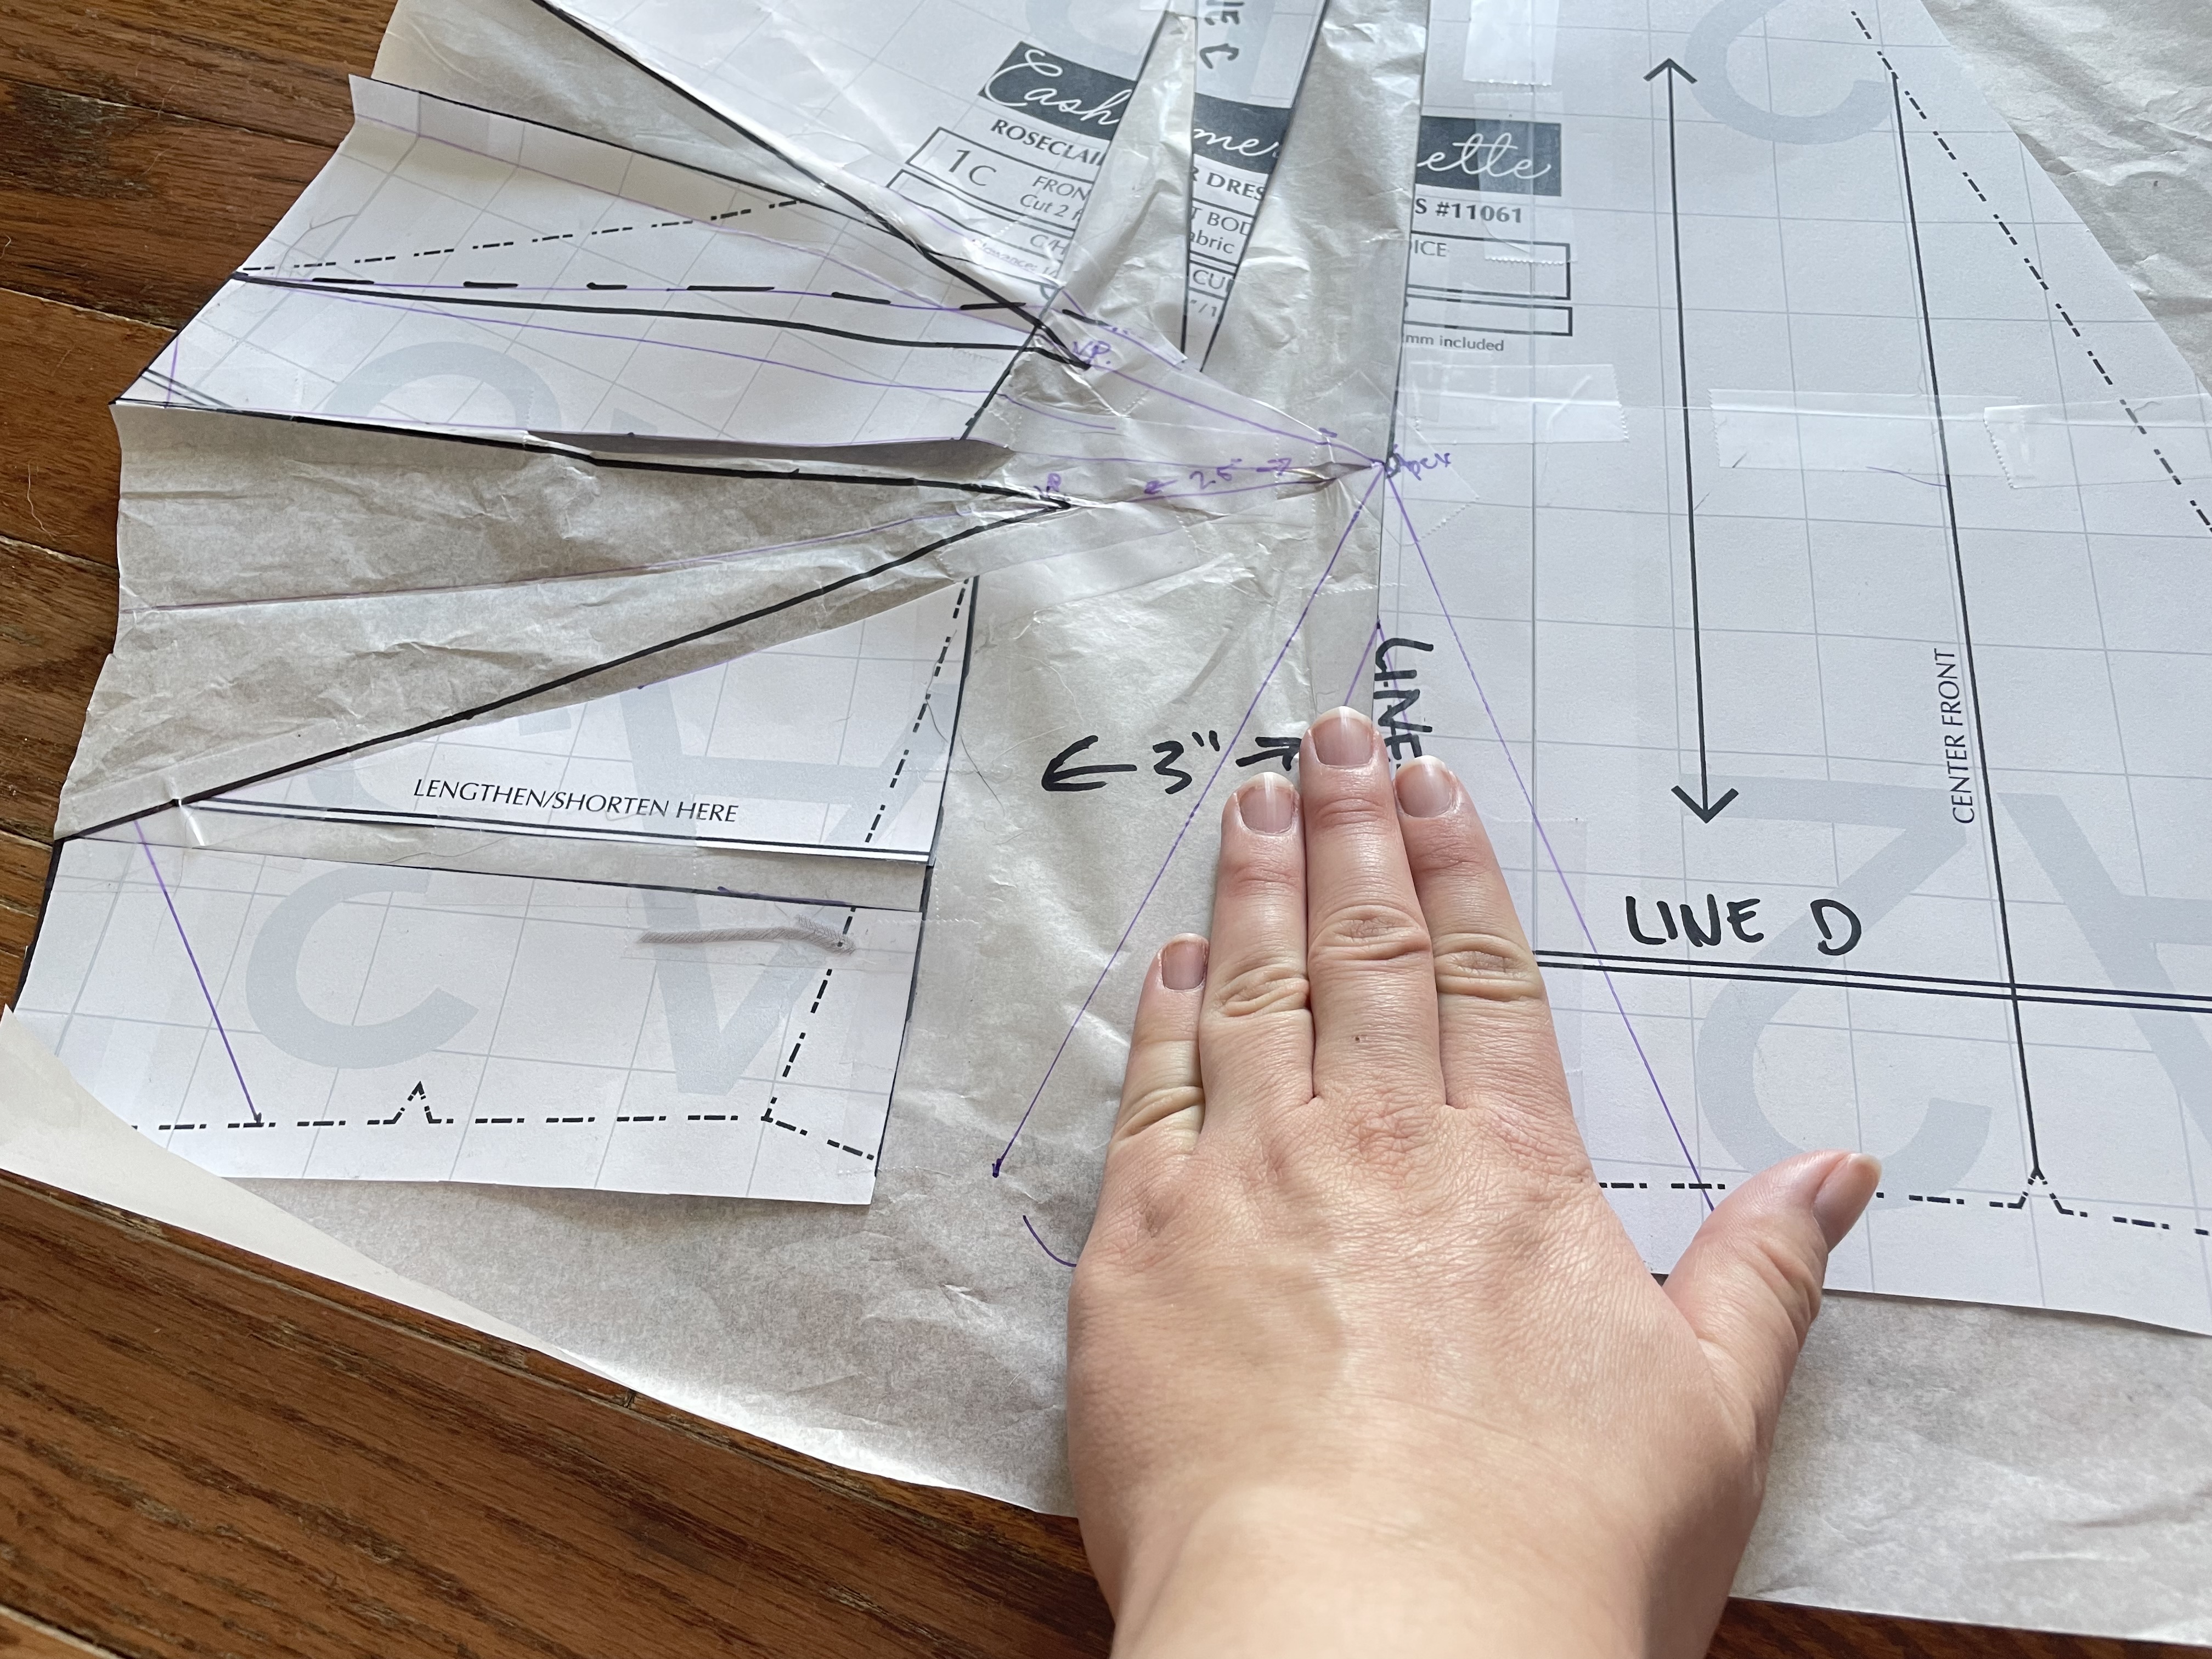
You’ll now cut that triangle out:
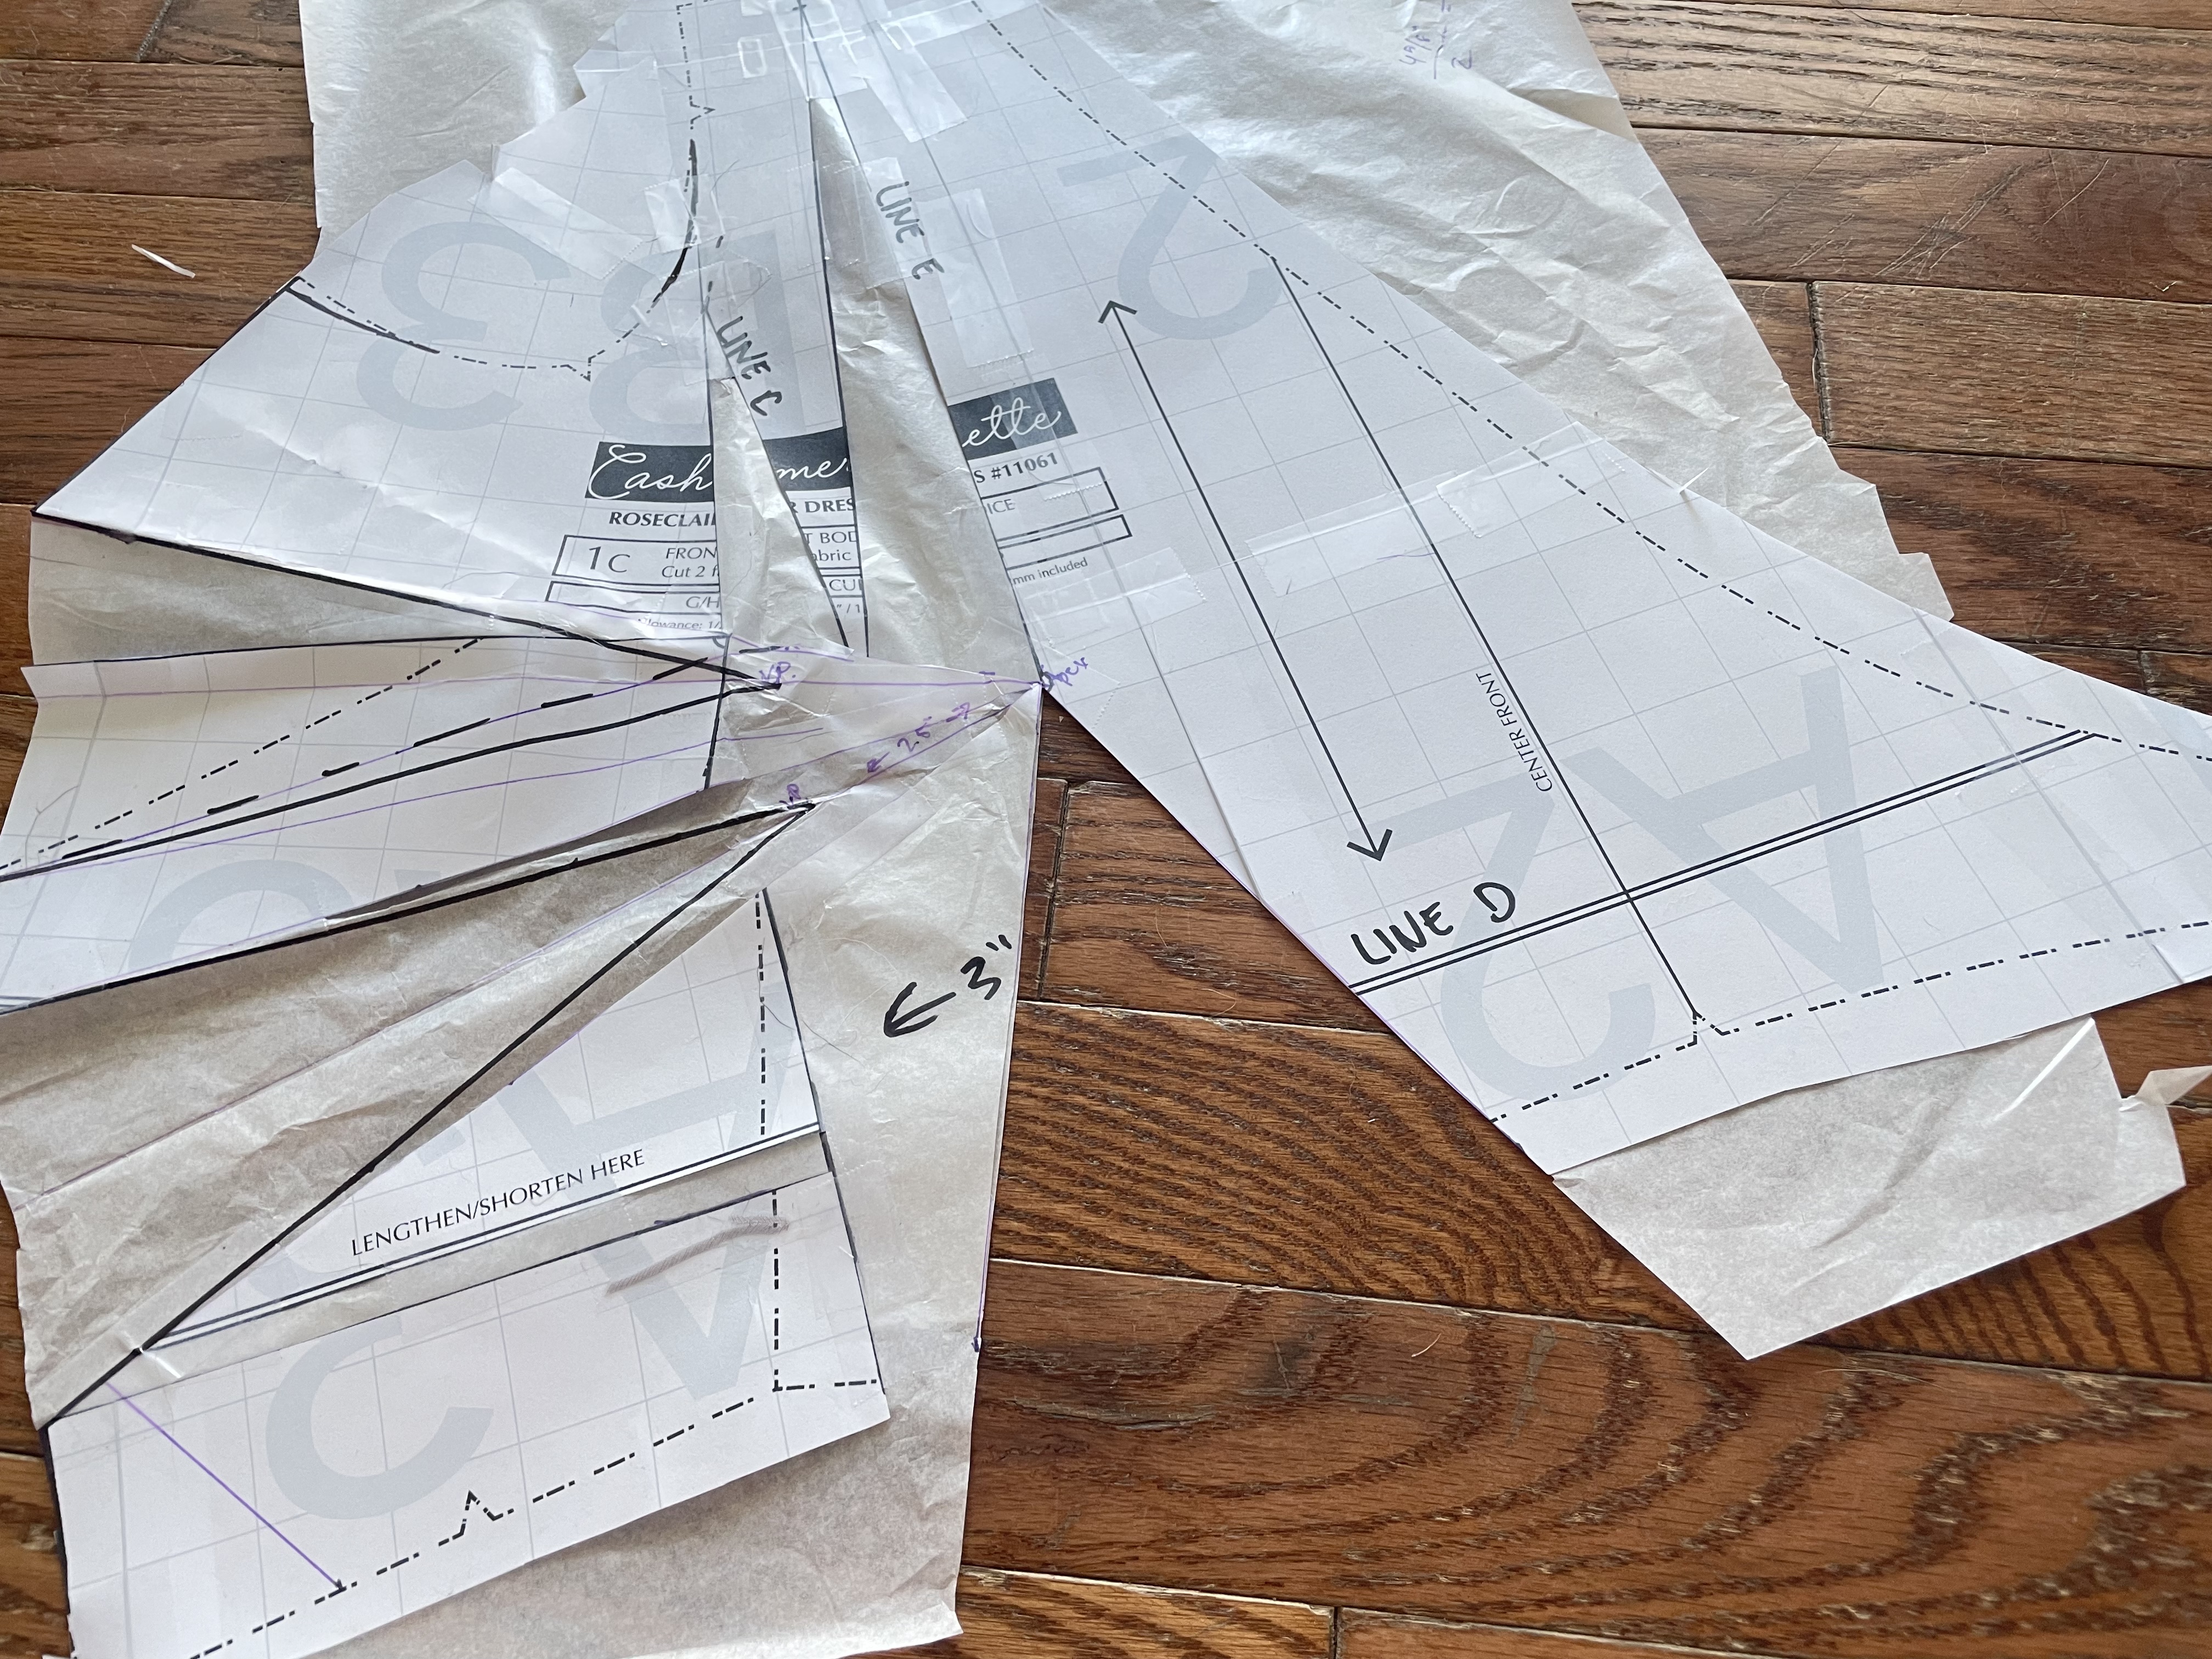
I want to split this GIANT waist dart into three darts, so I’m going to start by making some markings by the apex.
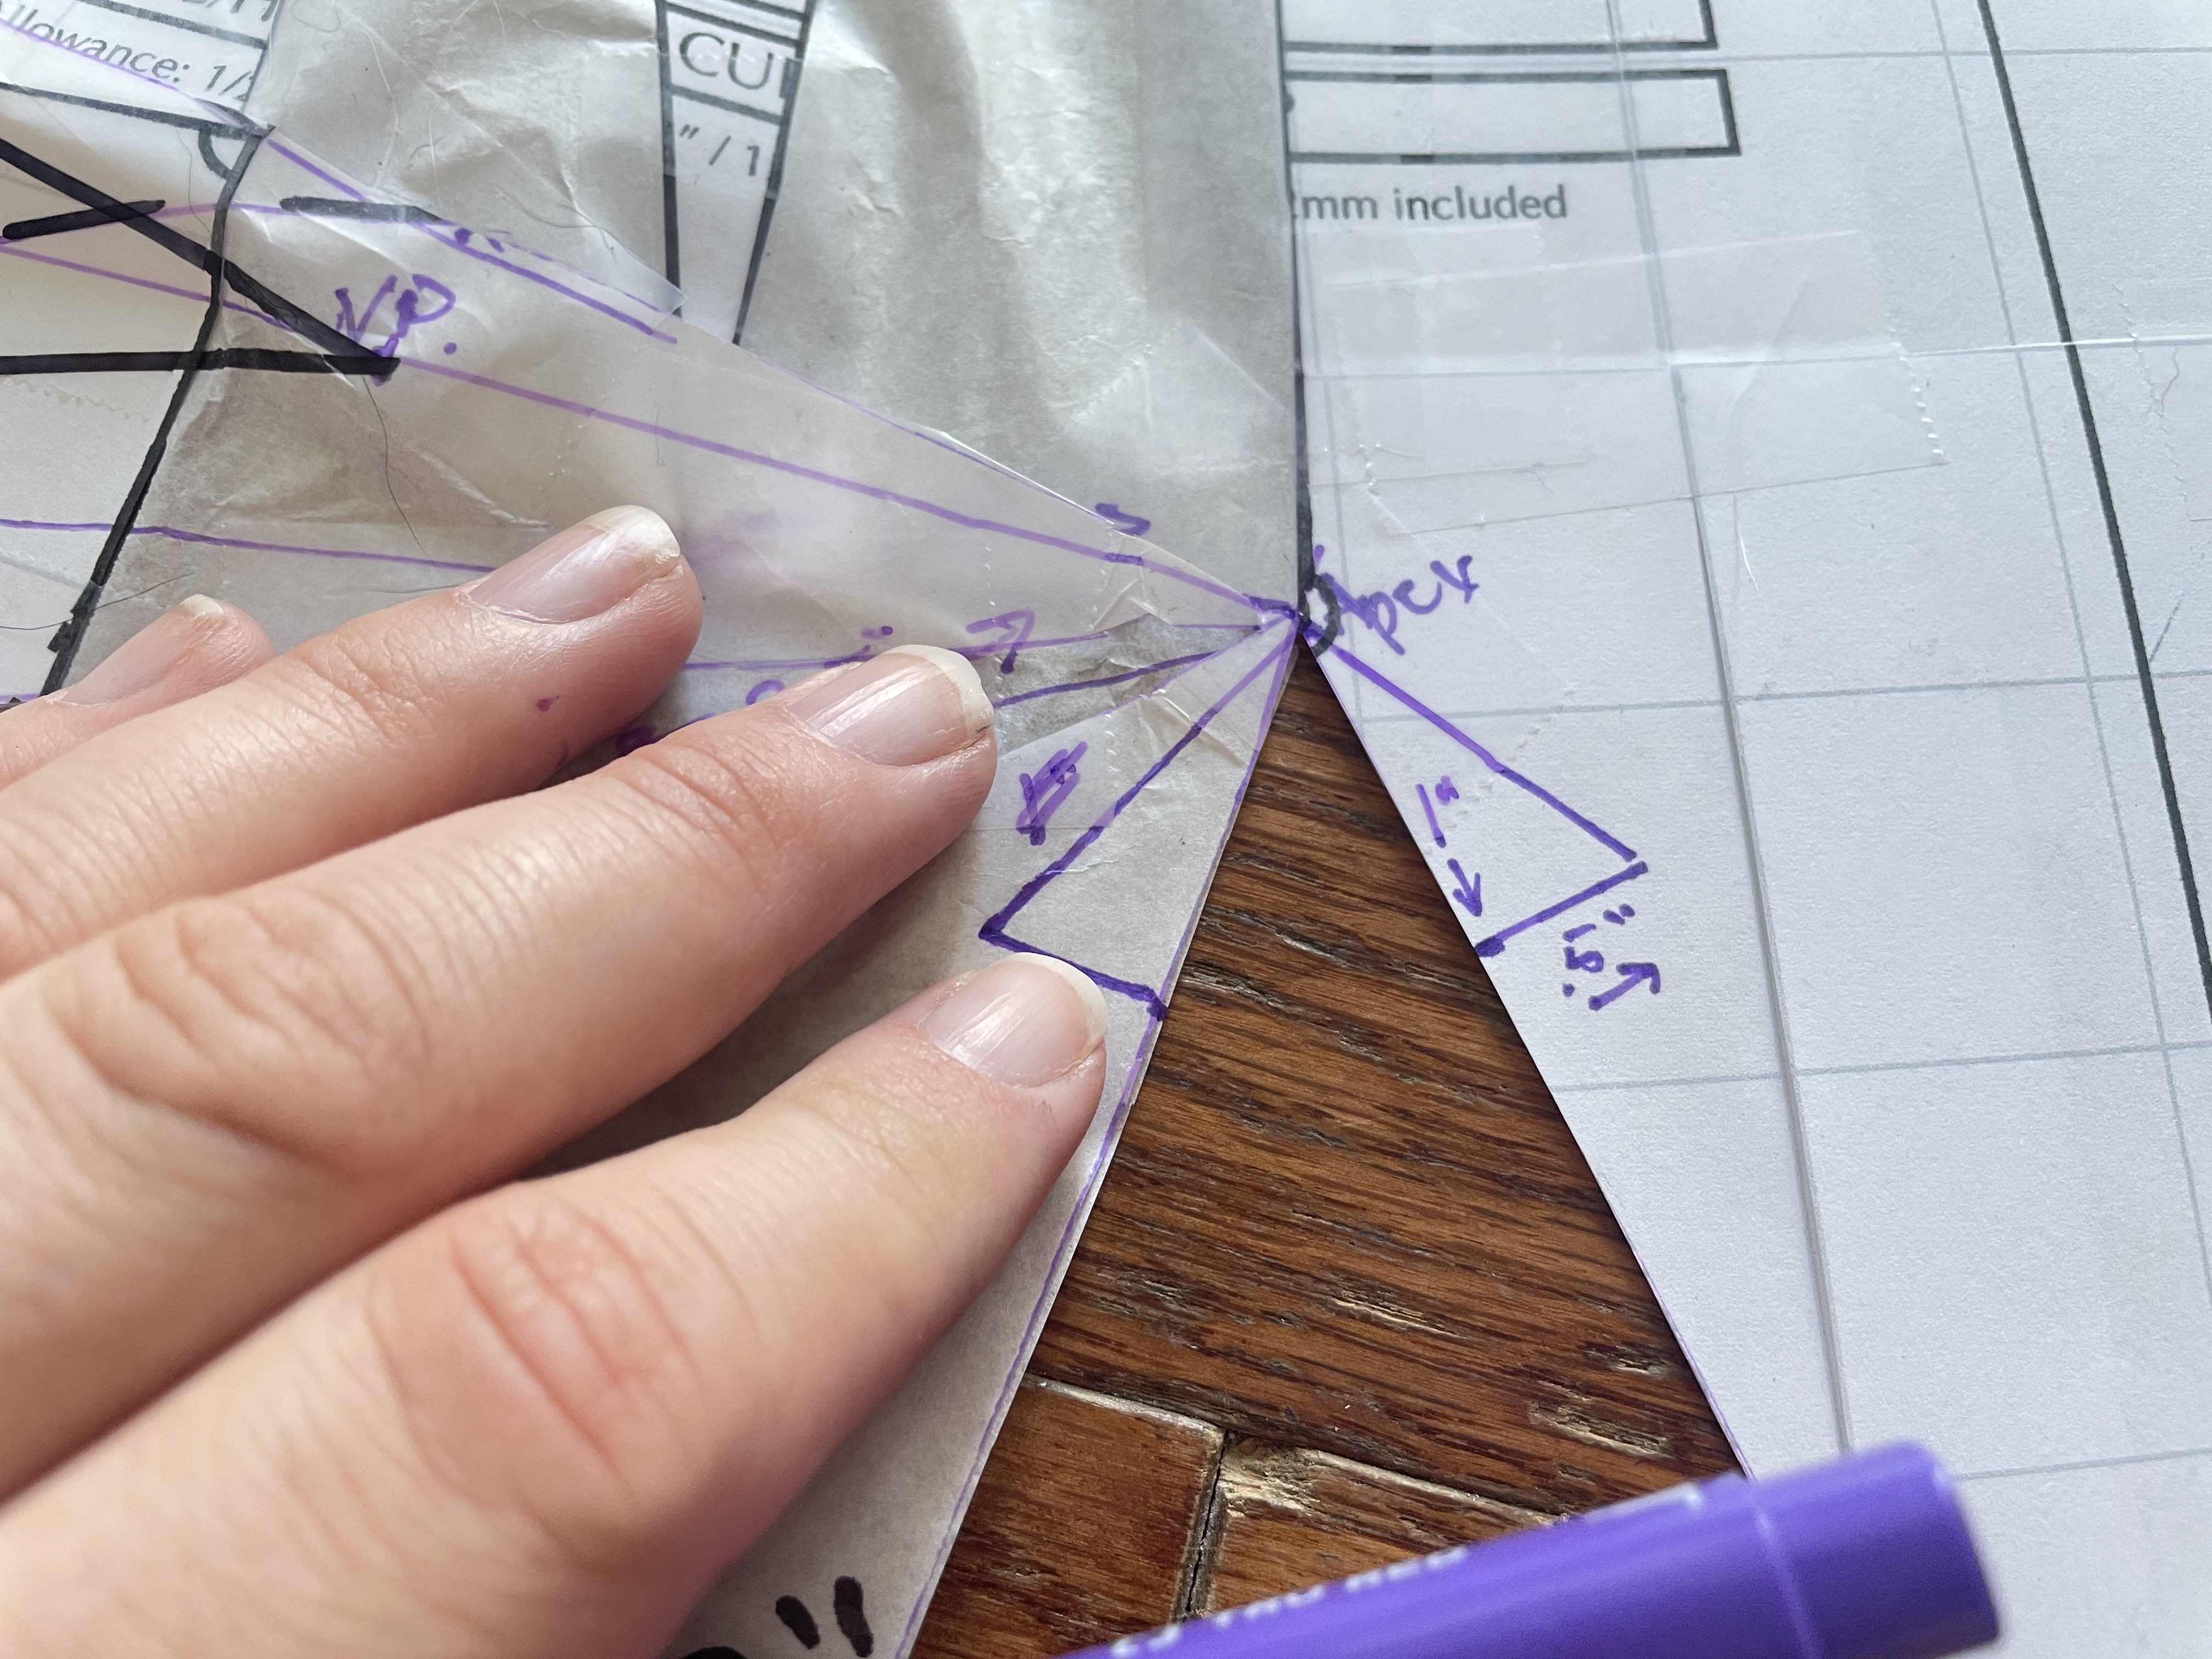
Perpendicular to each line of the cut-out triangle, draw a line 1″ down from the apex, .5″ outward. Then, connect the end of this line to the apex, like so:
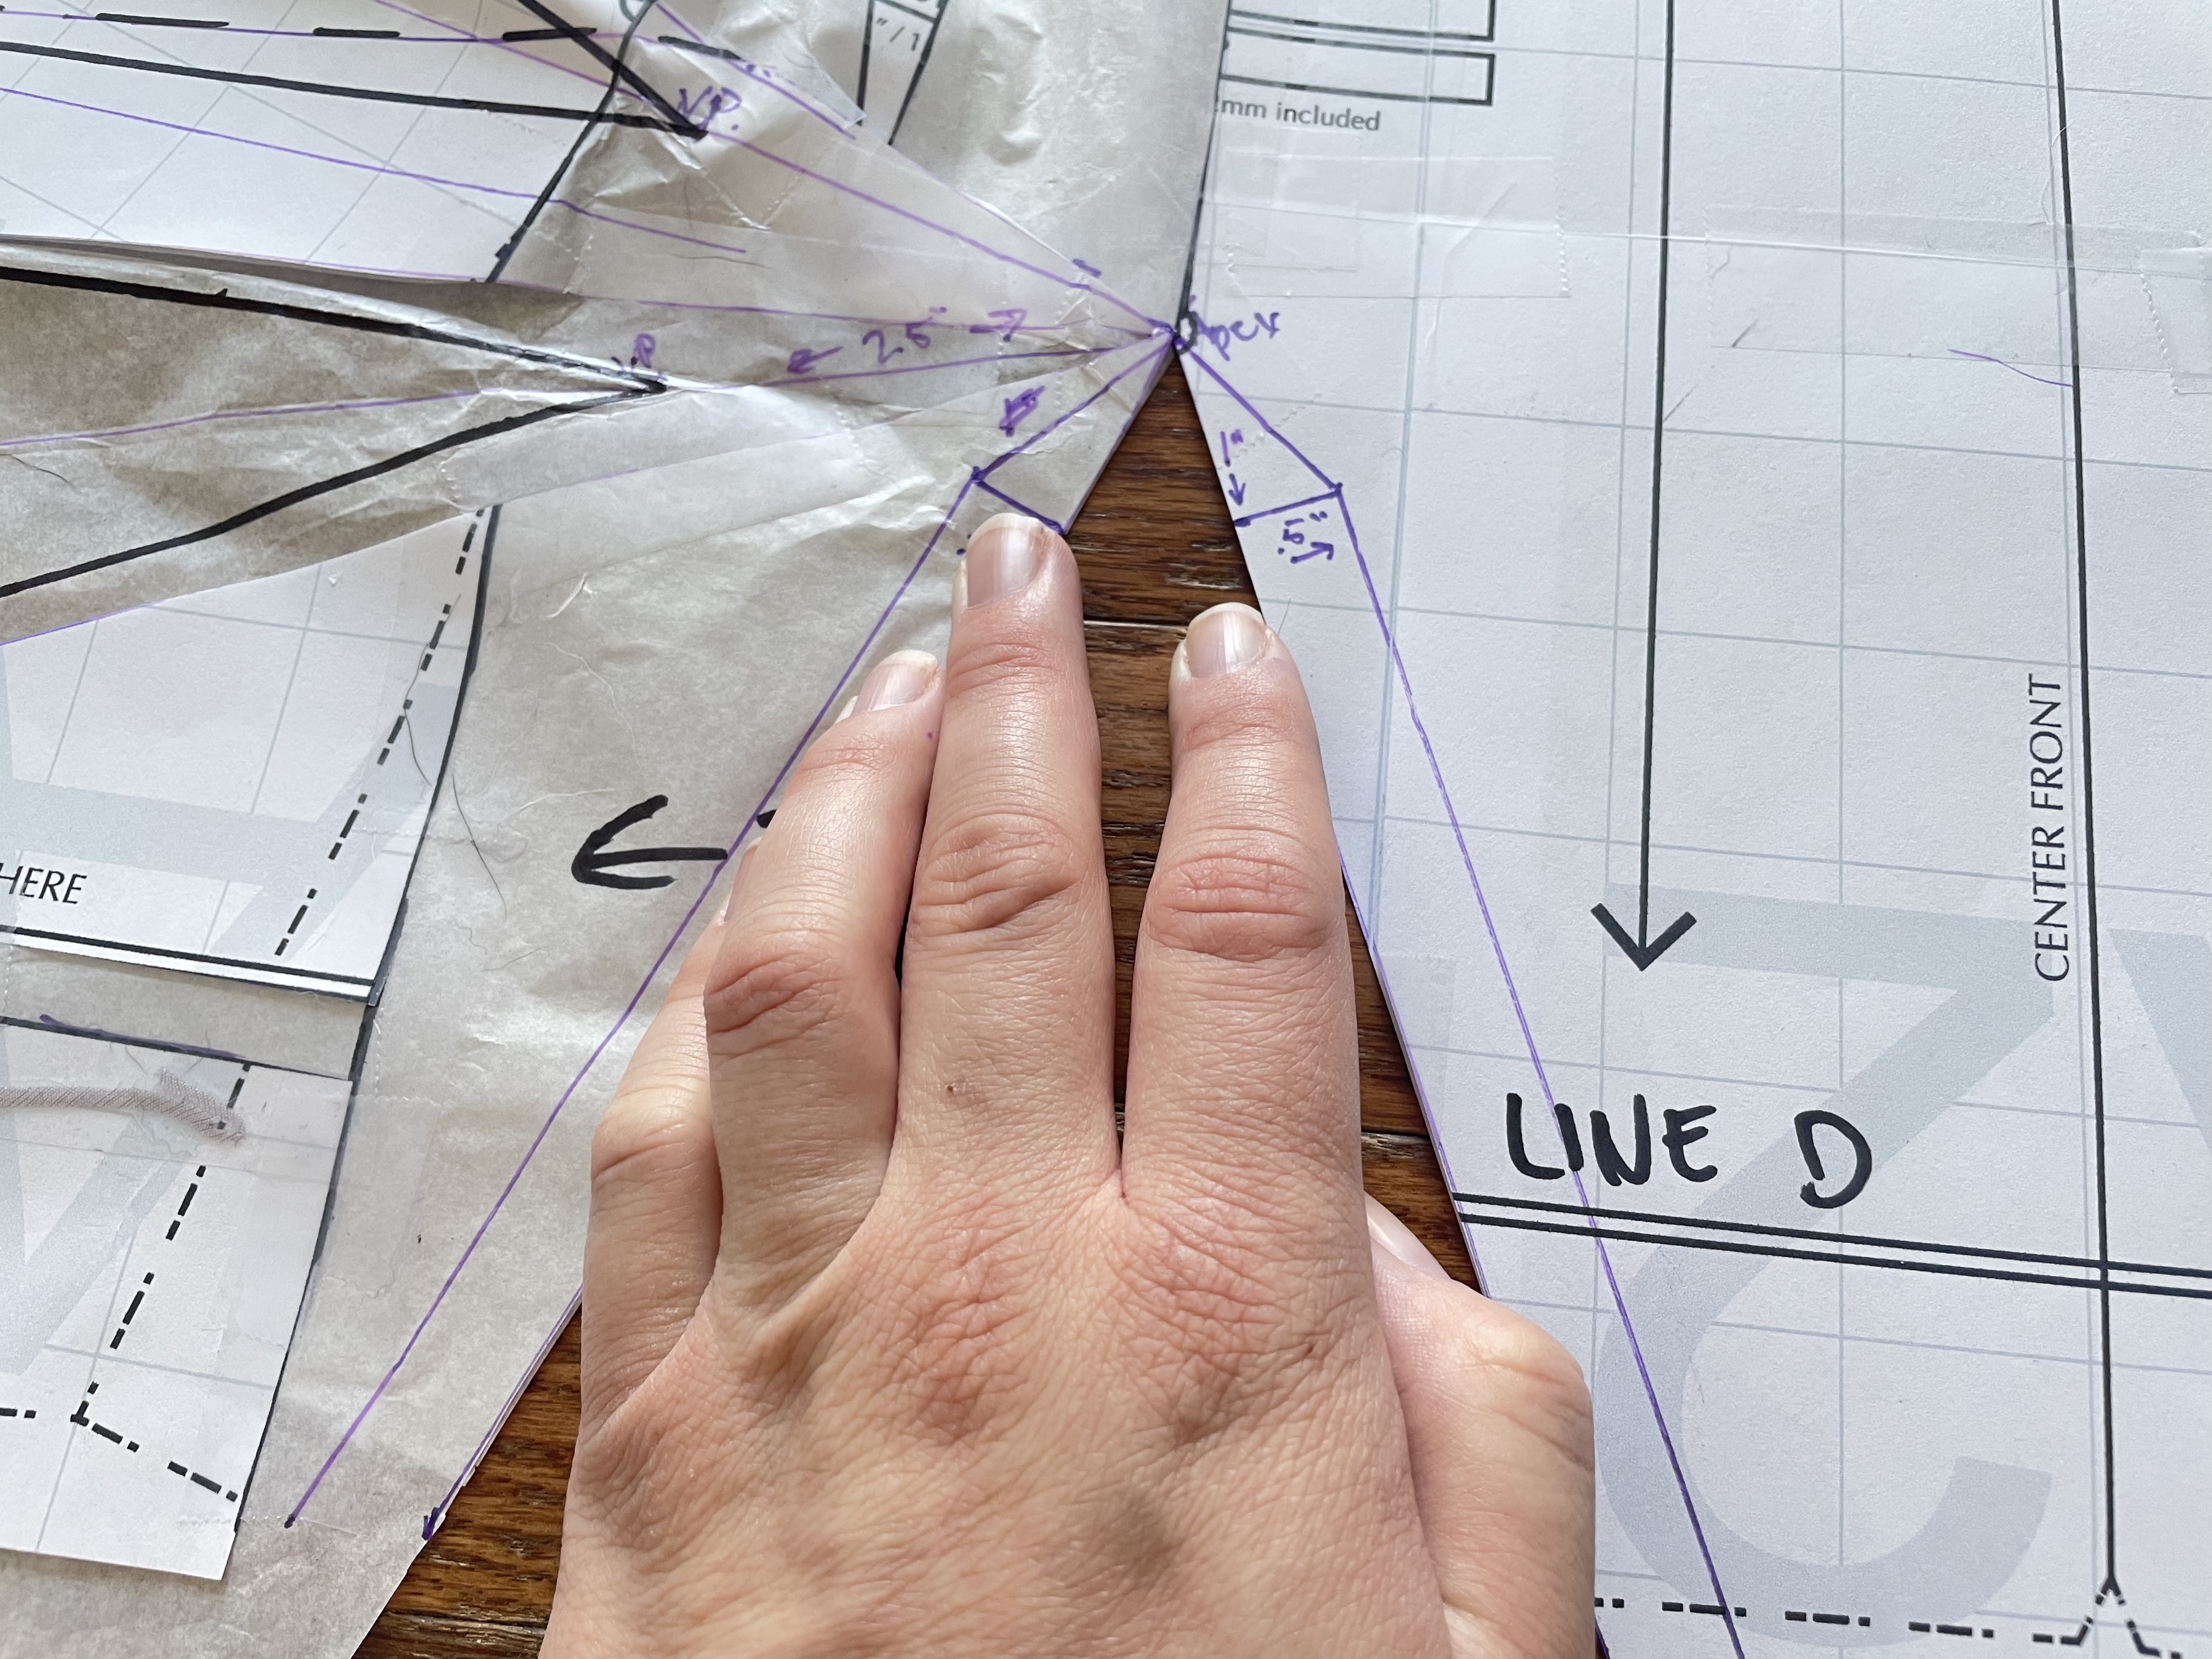
Now draw from these triangles all the way down to the bottom of your pattern, parallel to the lines of the cut-out triangle:
Cut along these lines to but not through the apex, creating a pivot point at the apex. Place extra paper behind the opening you’ve created:
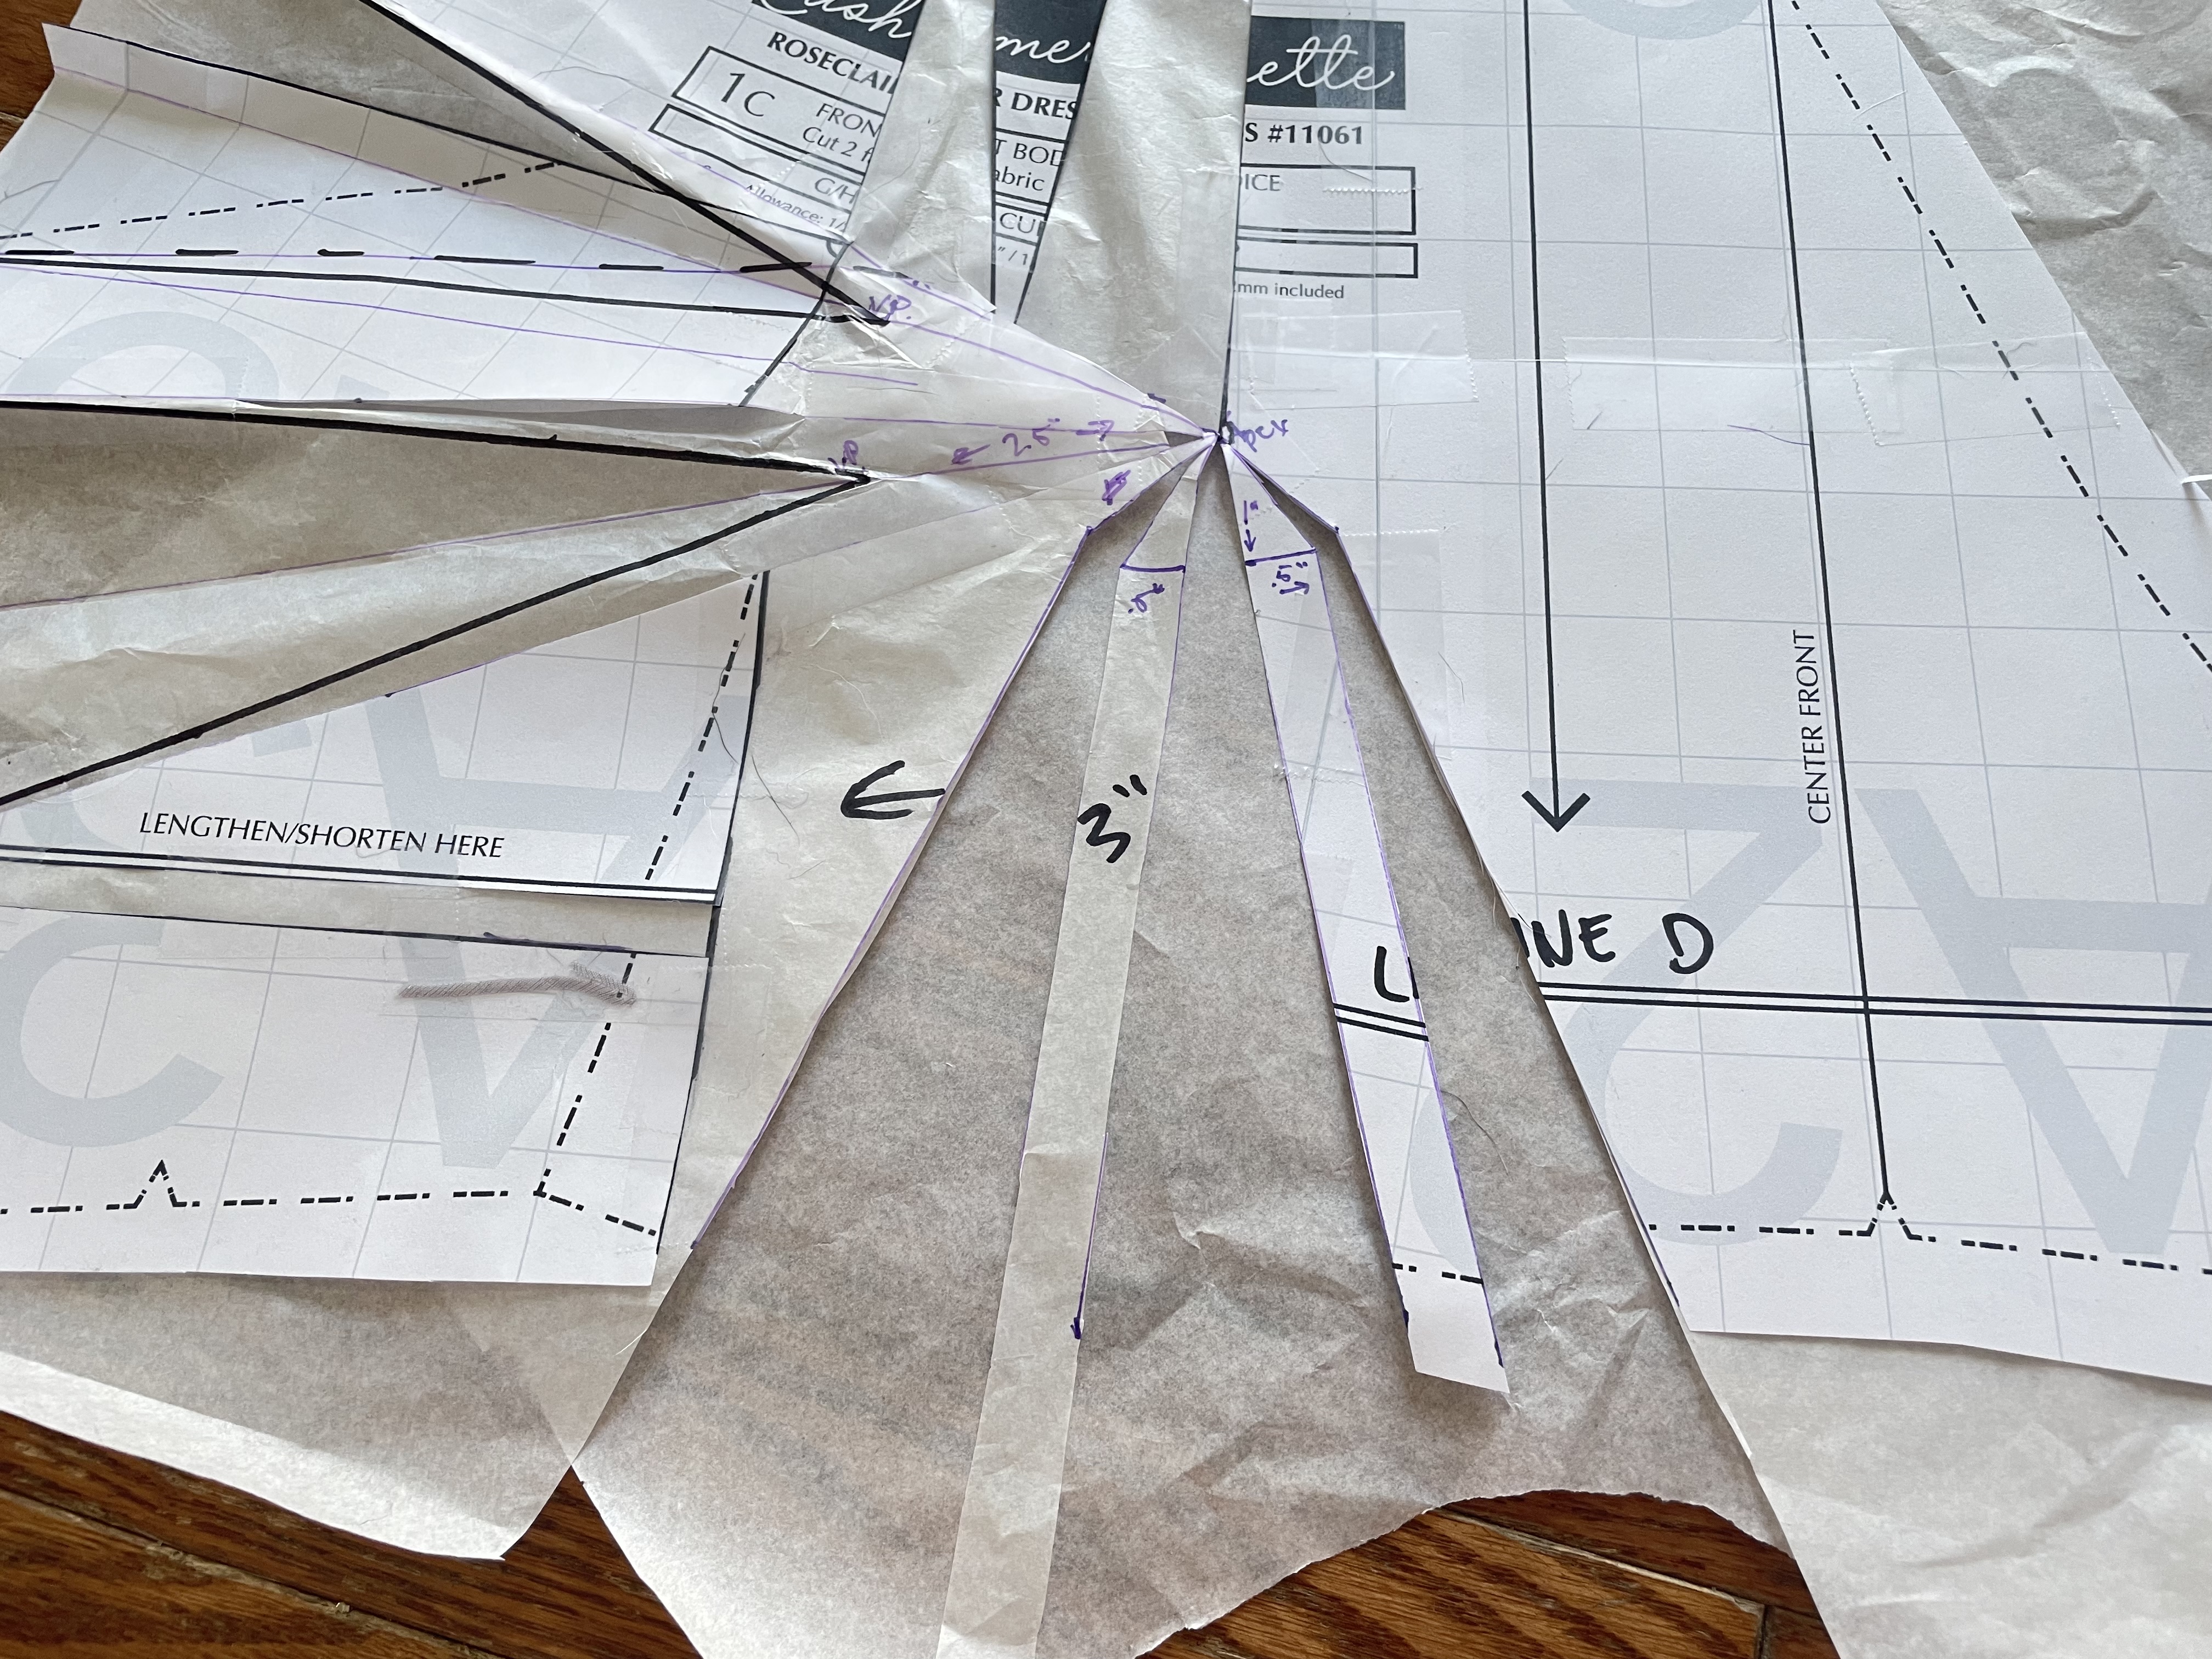
Now situate these strips of paper so that the space between them is roughly equal. These will mark your three waist darts.
Find the center point of each dart and draw a line to the apex.
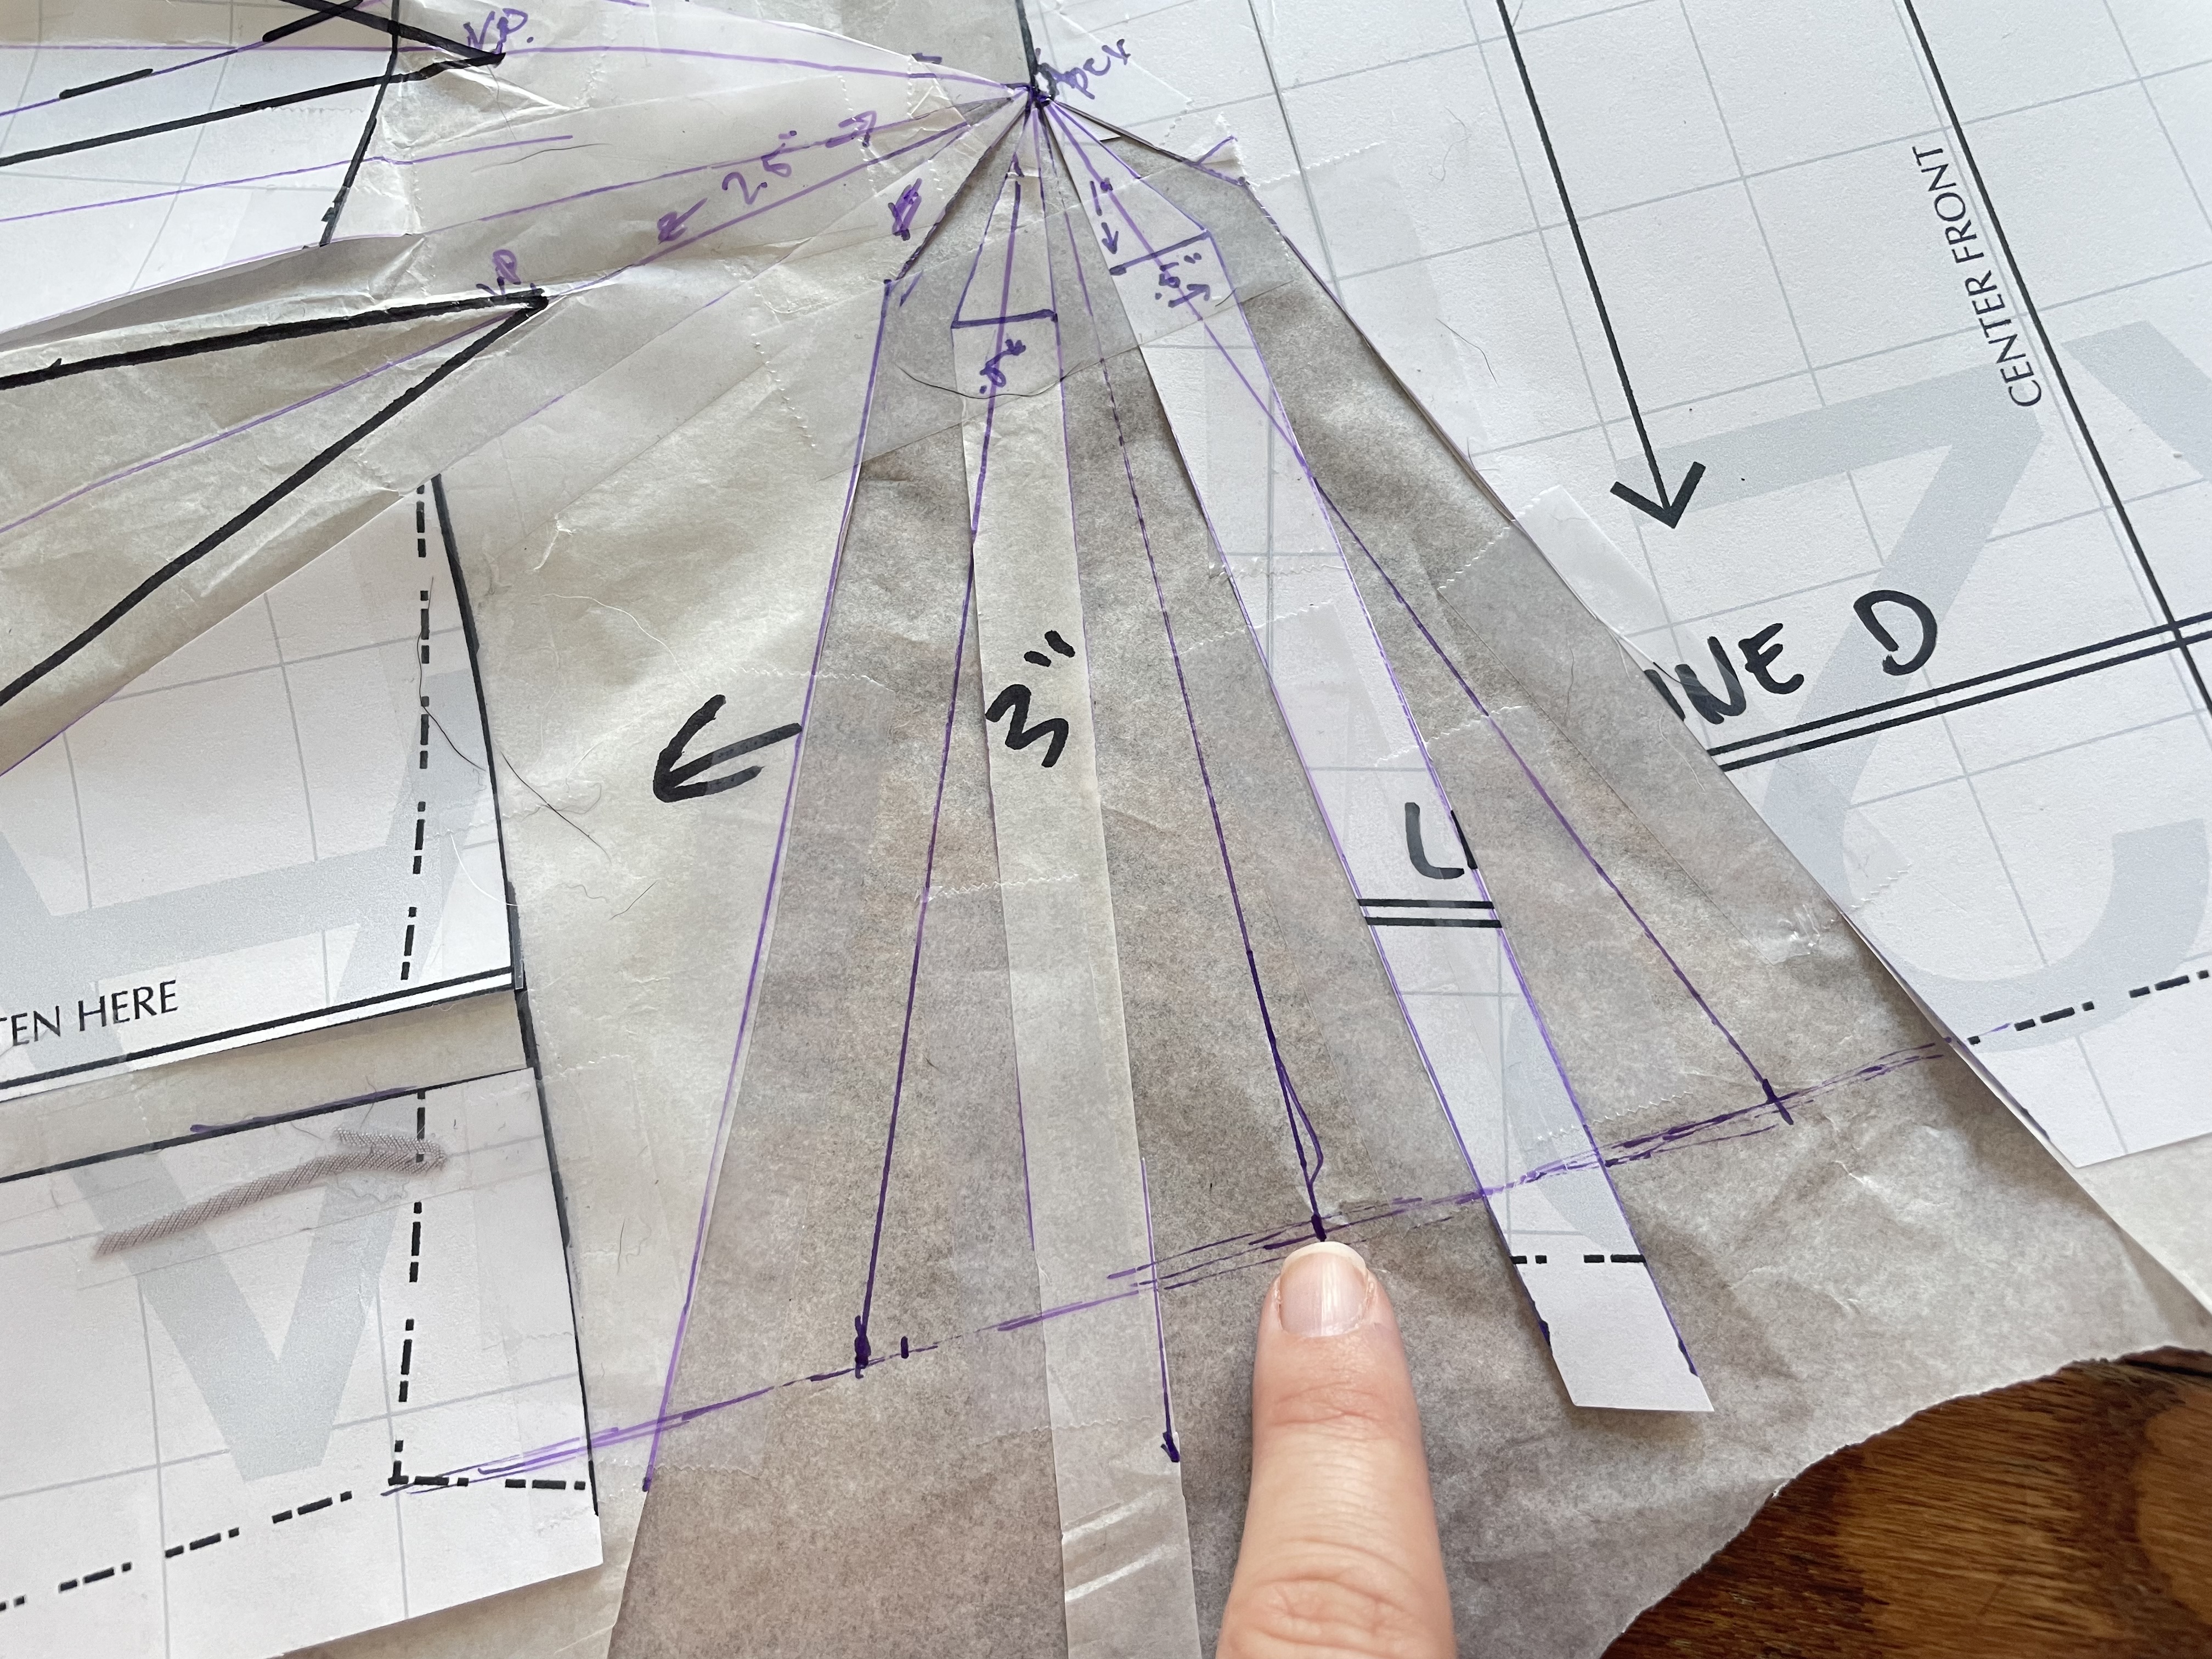
Mark your vanishing point. The vanishing point does not need to be as far from the apex on a waist dart as it does on a bust dart. I marked mine 1.5″ from the apex:
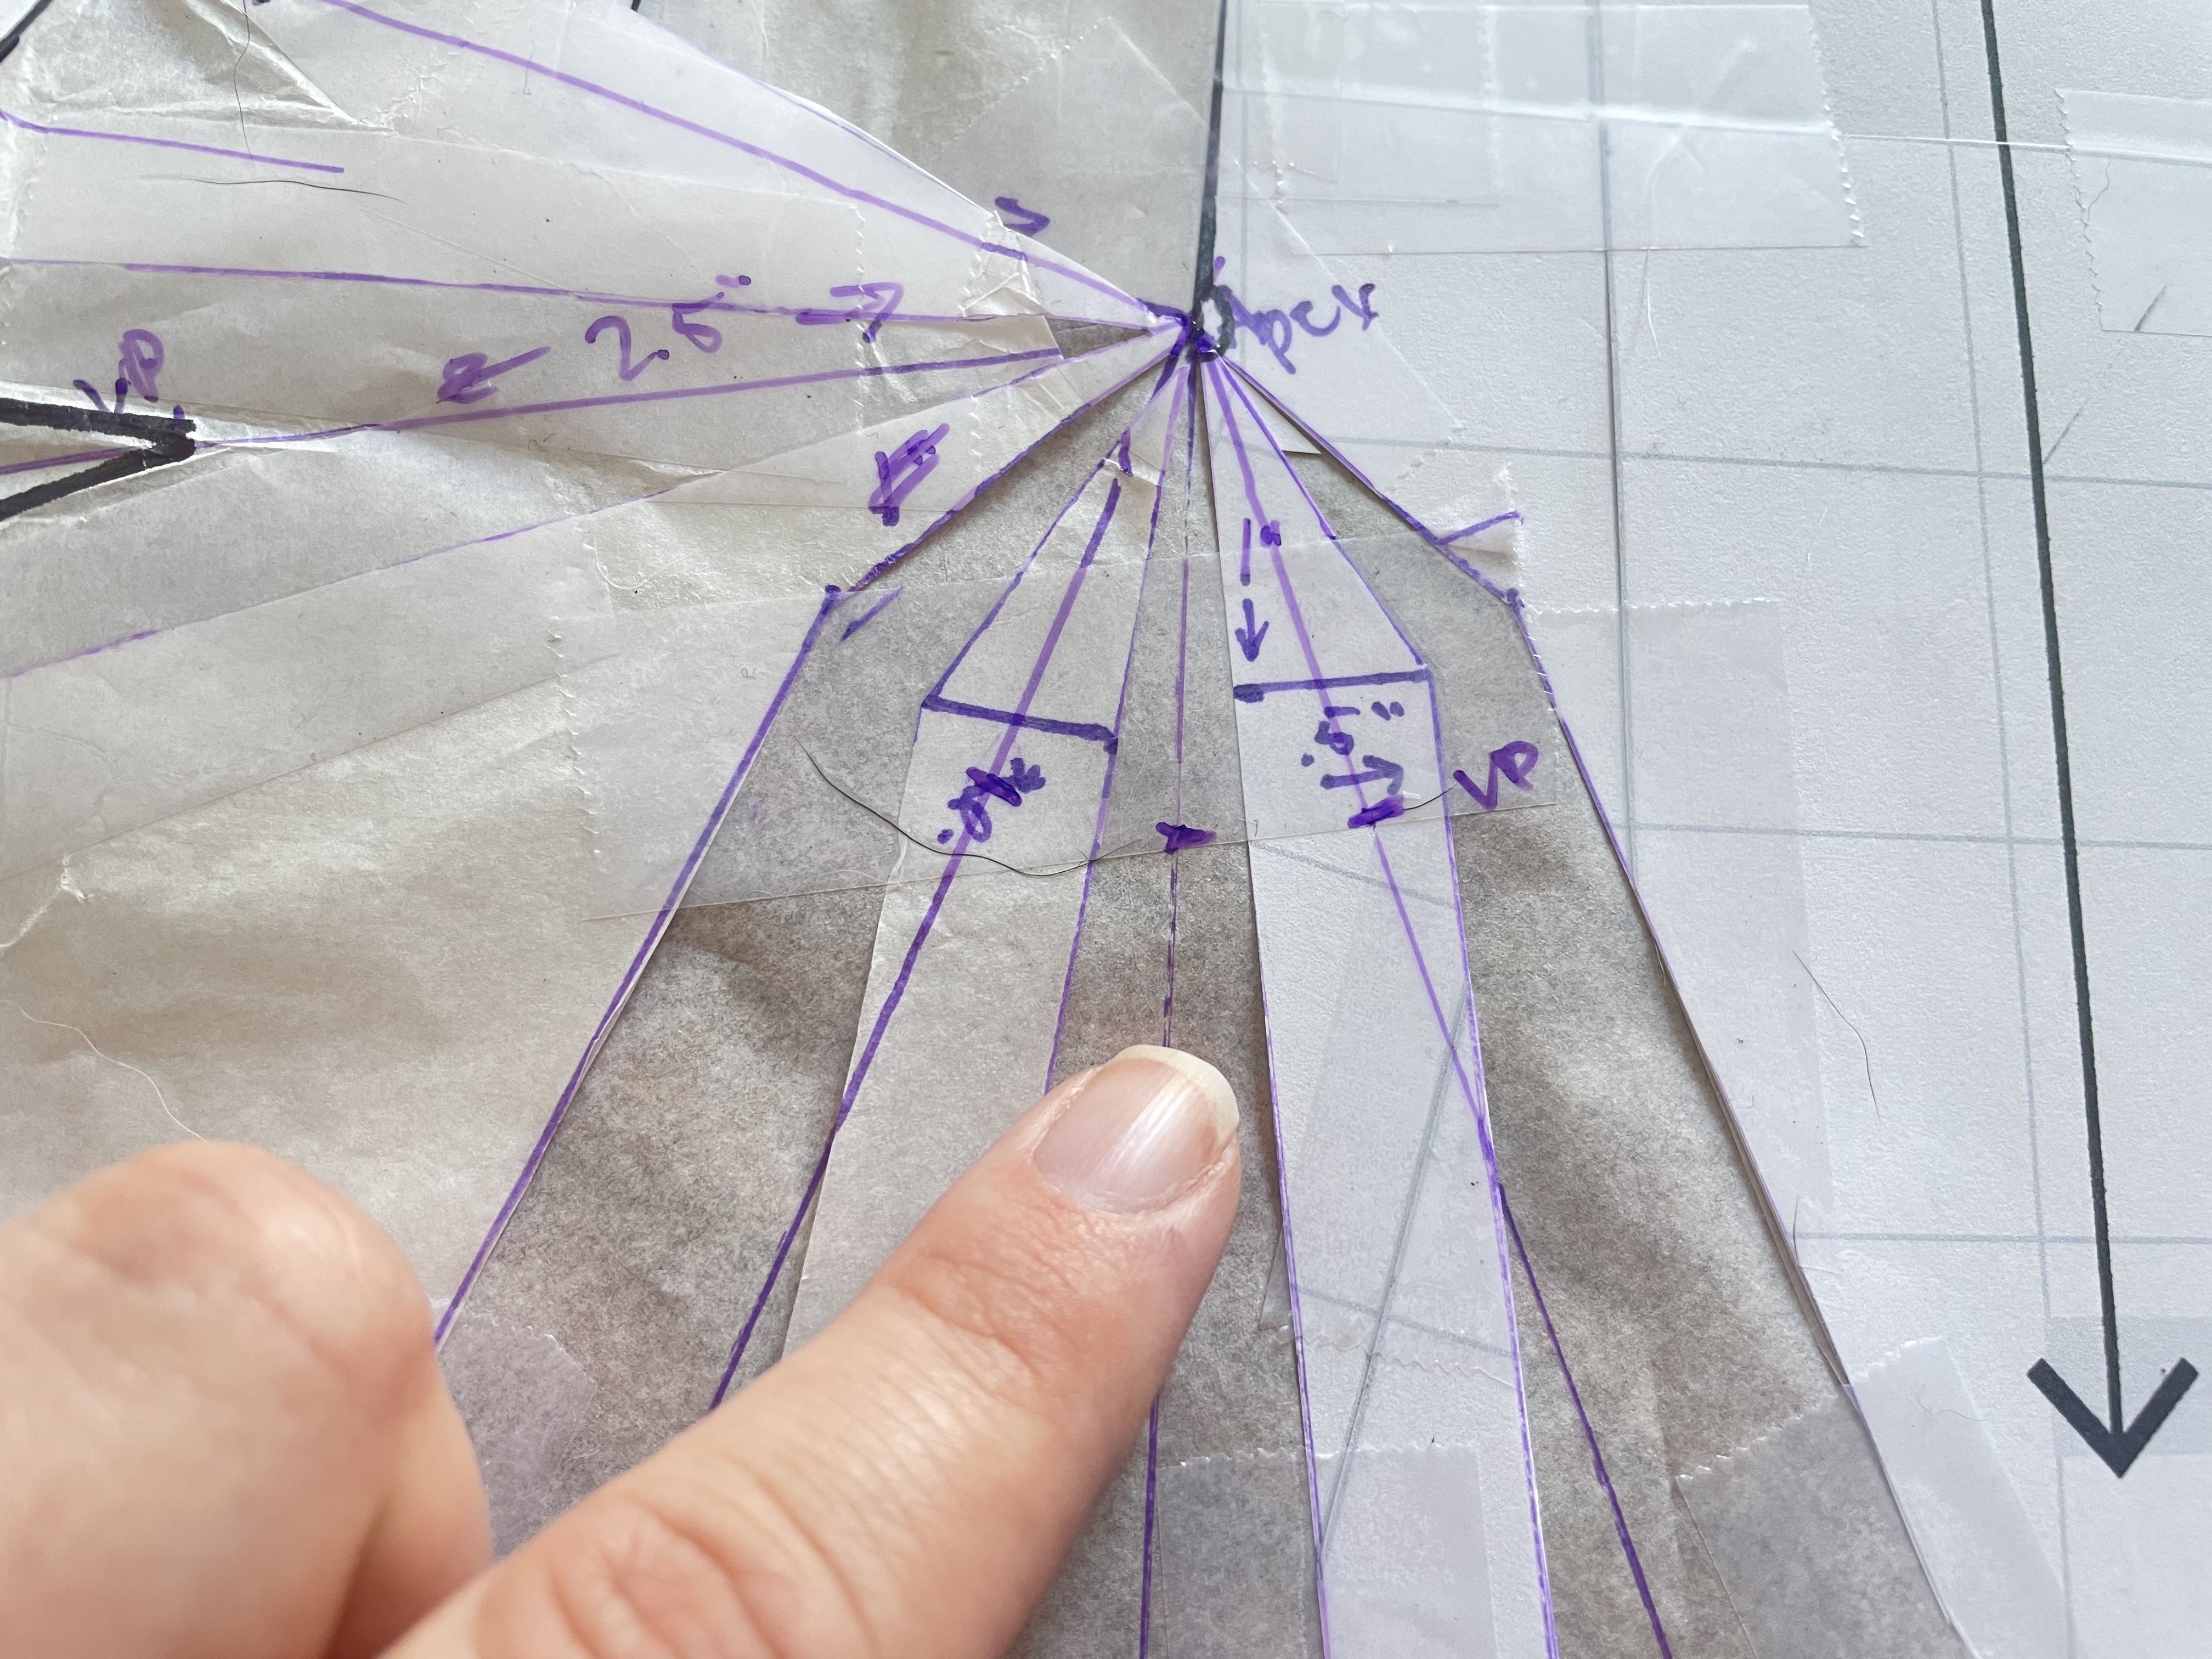
Finally, mark your finished waist darts by connecting your dart legs to the vanishing points.
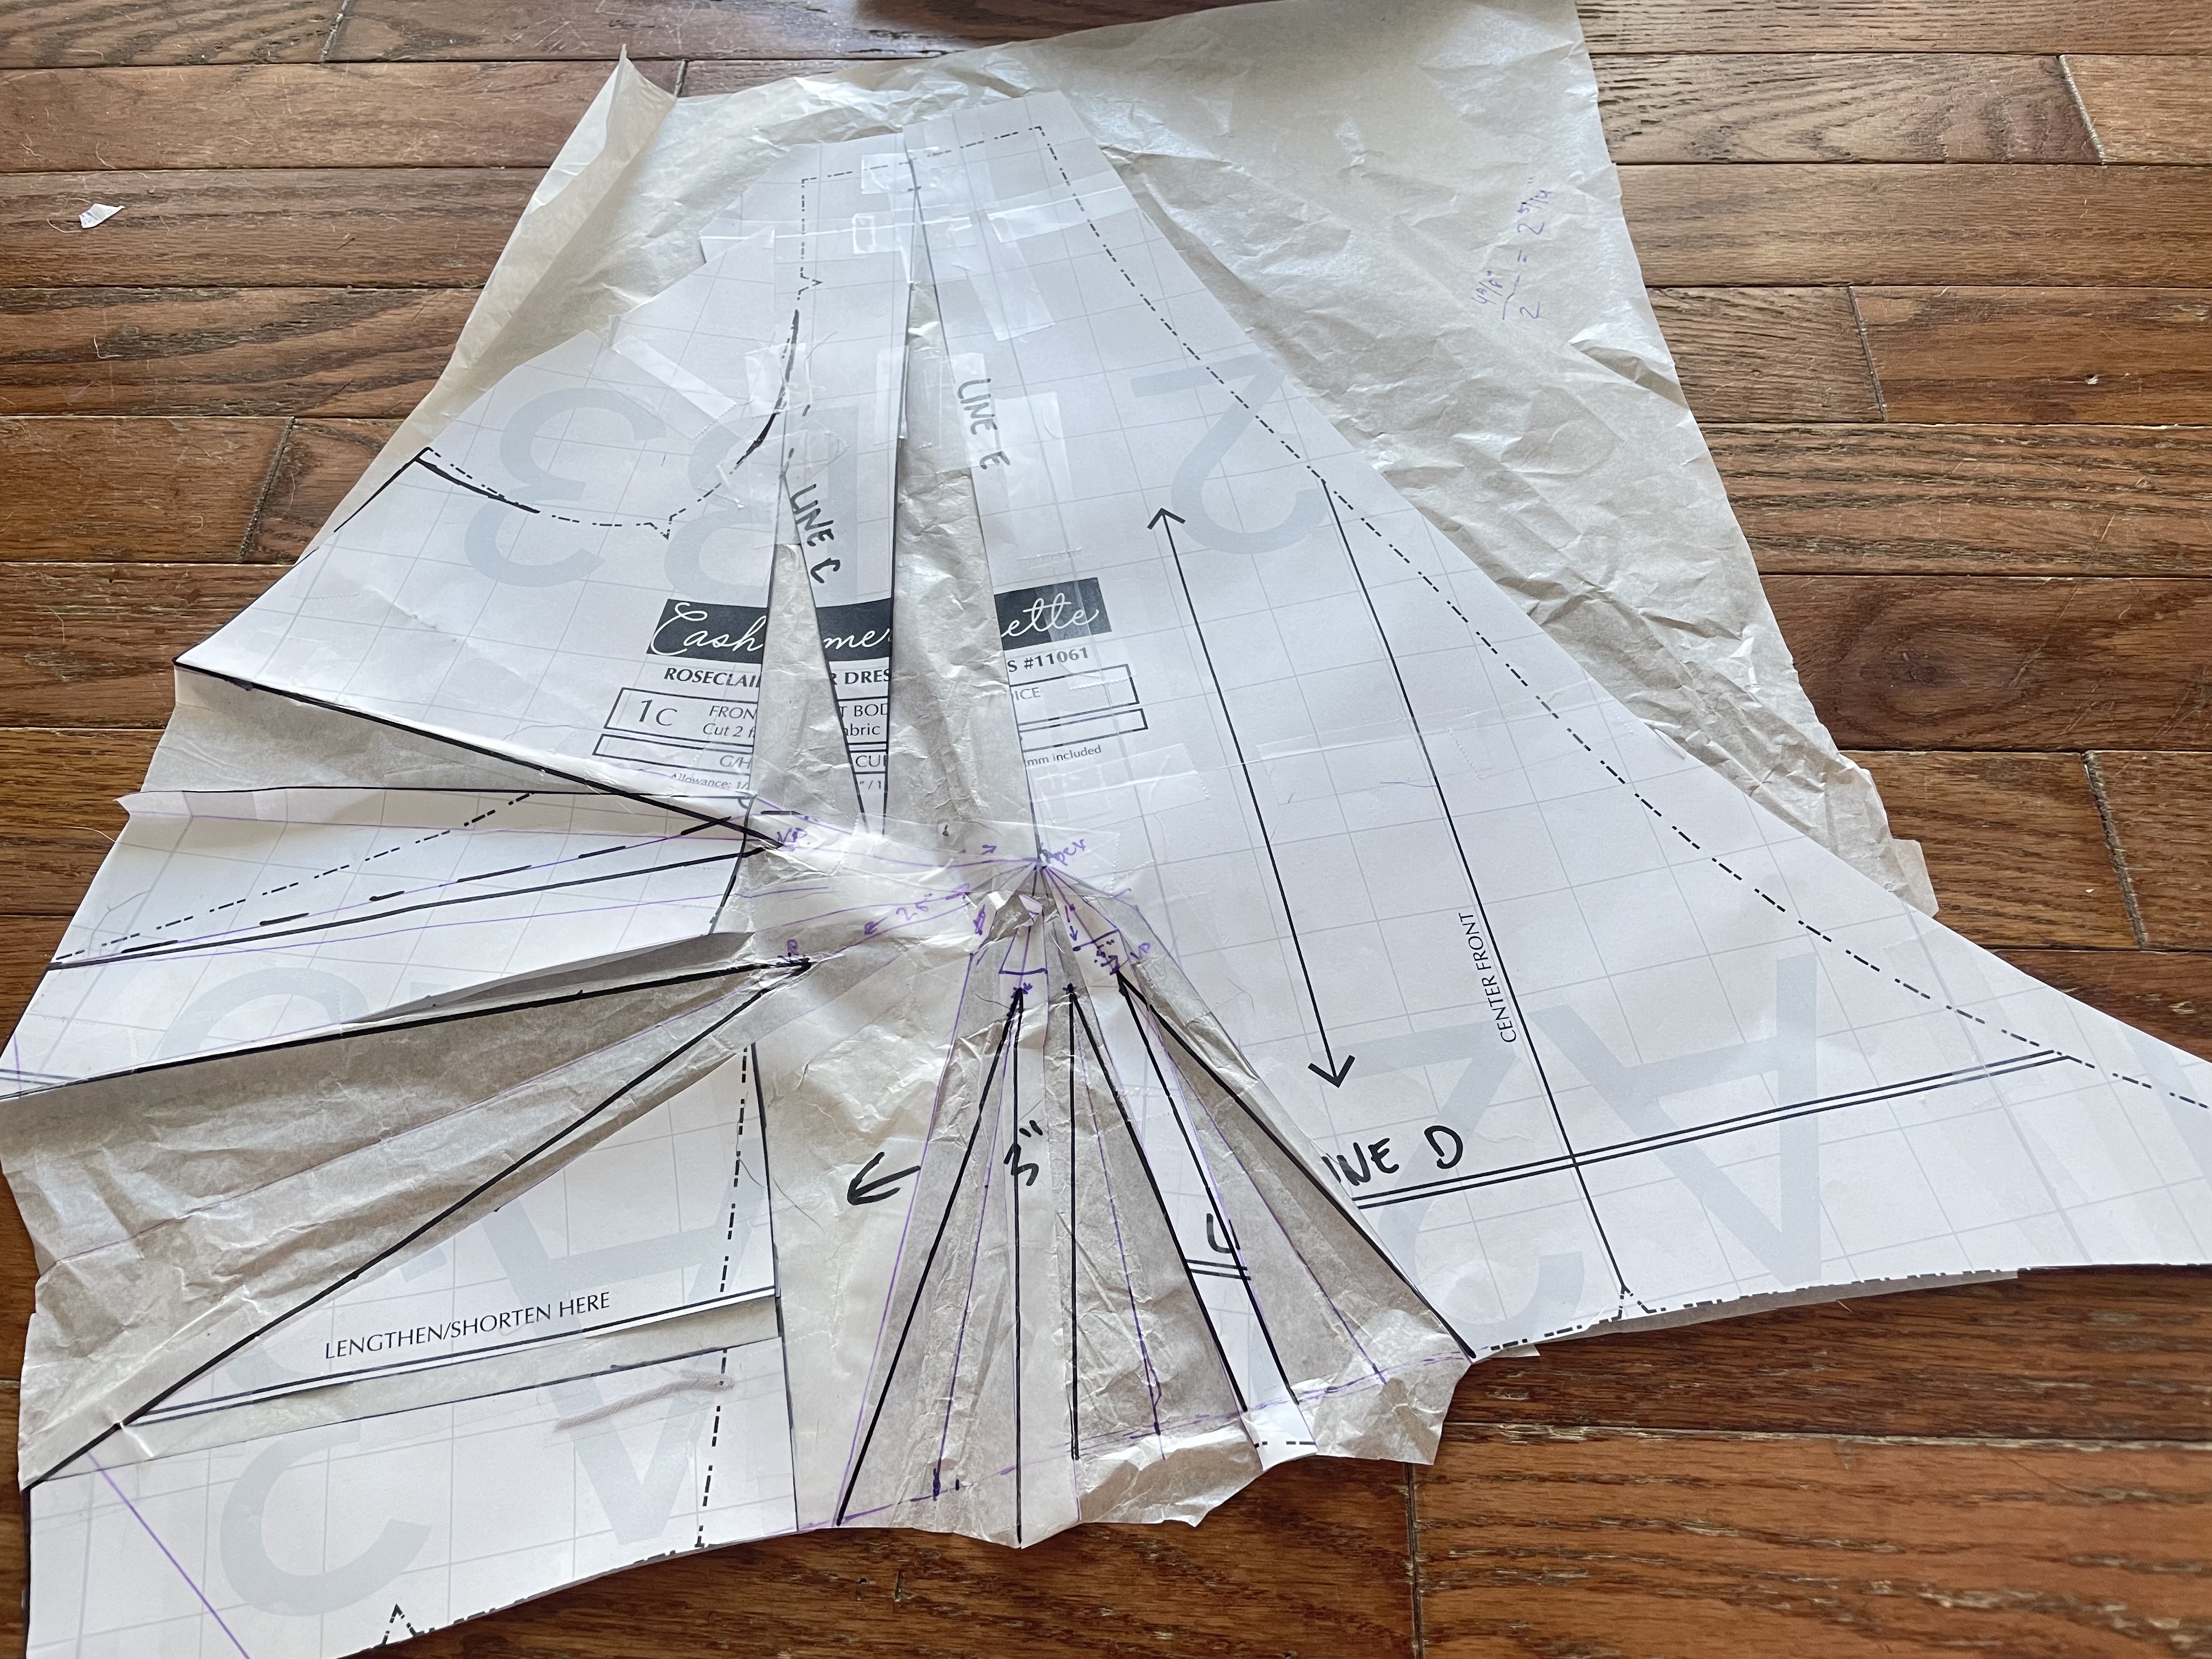
Truing the Darts
Now for my favorite part! We’re going to fold the pattern up along the darts, using washi tape to hold it in place (because washi tape is super easy to remove without ripping the paper), and cut along the side seam and waist seam lines.
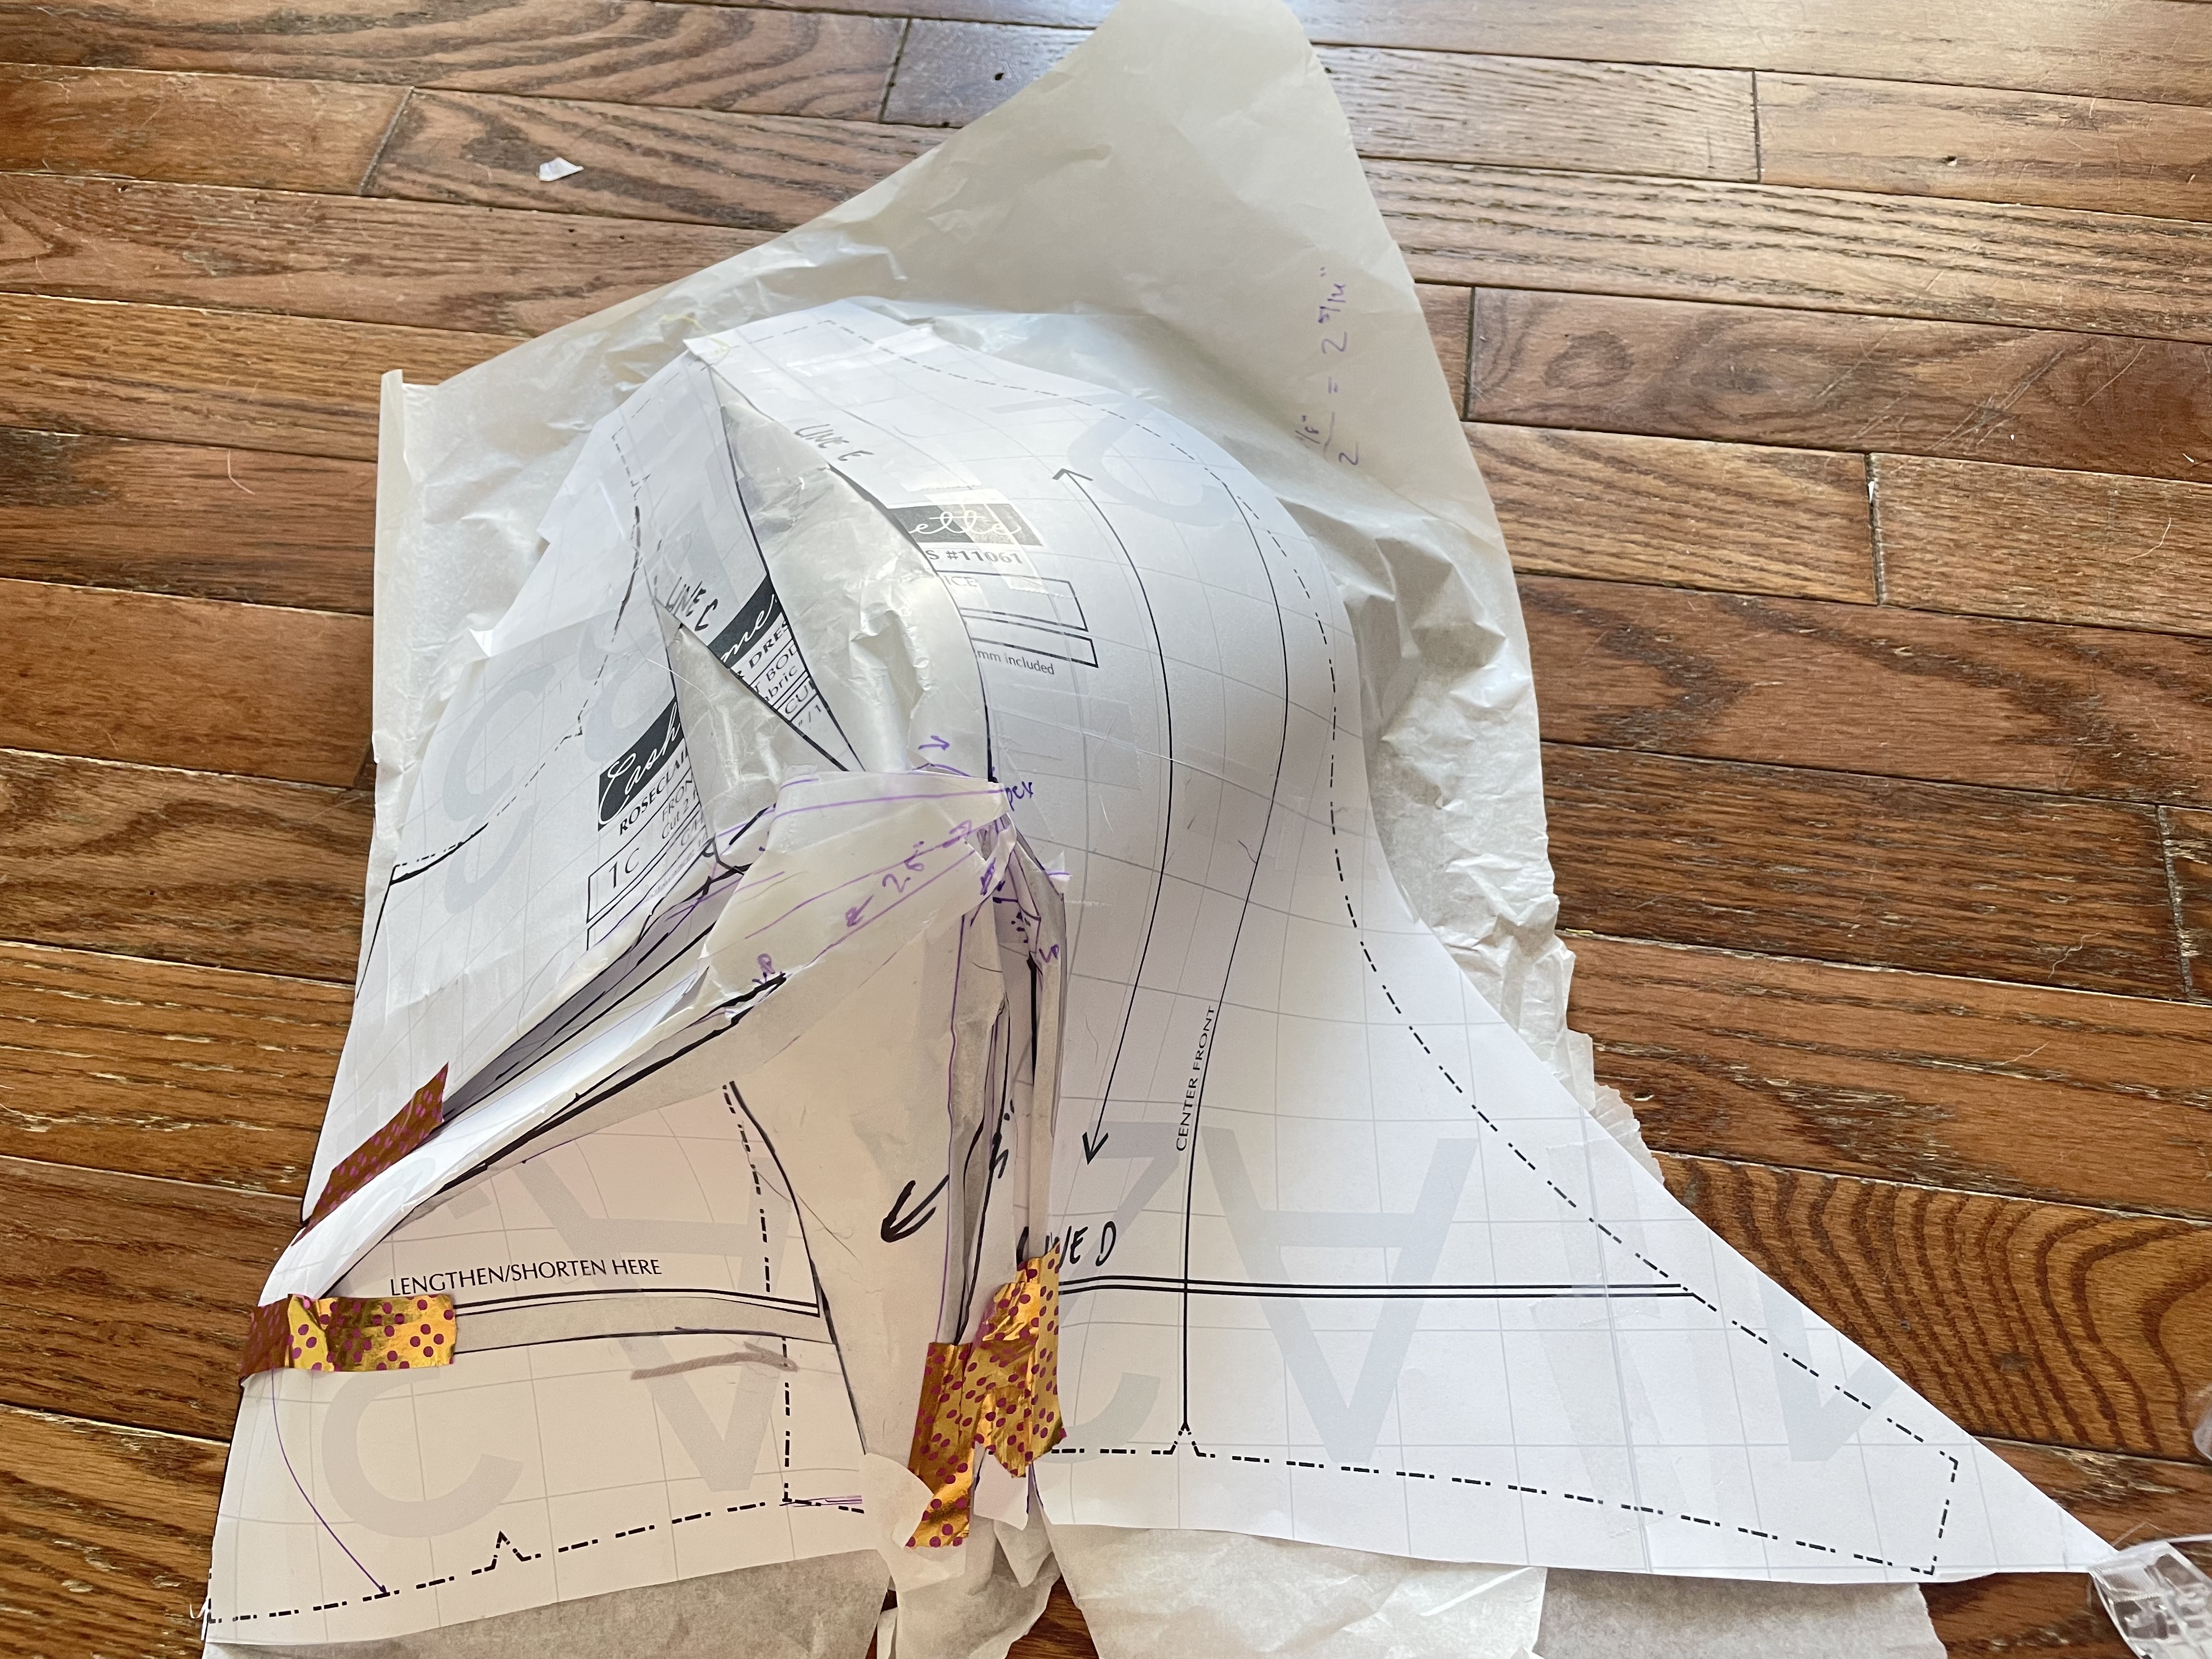
I also love to take this opportunity to hold the pattern up to my body to see if it seems like it’ll fit. In this case, it looked pretty good.
Smoothing the armscye
Once you’ve trimmed the pattern at the side and waist seams, the last step is to smooth the armscye. As you may recall, I also like to drop the armscye just a tad — essentially as much as I added to the side seam. Just make sure that when you do this, you maintain the same total length of the armscye at the seam allowance so the sleeve will still fit.
You’re finished!
Yes, you now have 5 darts per side for the front bodice — that’s 10 bust shaping darts. And yes, it looks batty. But it’s going to work.

Again, cut and sew the pattern as usual. A couple things to note:
- You may want to reinforce the side seam, since the upper part is going to be cut on the bias.
- The darts may need some finessing, so I highly recommend a muslin. I’m usually not one for muslining, but when you’re adding a full 6″ at the bust, muslins are sort of unavoidable. If you follow me on Instagram, you may have seen in my stories that I needed to curve my darts a bit.
Other changes I made to hack the roseclair
In addition to doing an FBA, I also had to make a few other changes to hack the Roseclair into a surplice neckline with a gathered skirt (instead of the true wrap it’s designed to be). Essentially, I just lengthened the side of the bodice that would usually be attached to the wrap tie so that it would be long enough to sew into the side seam.
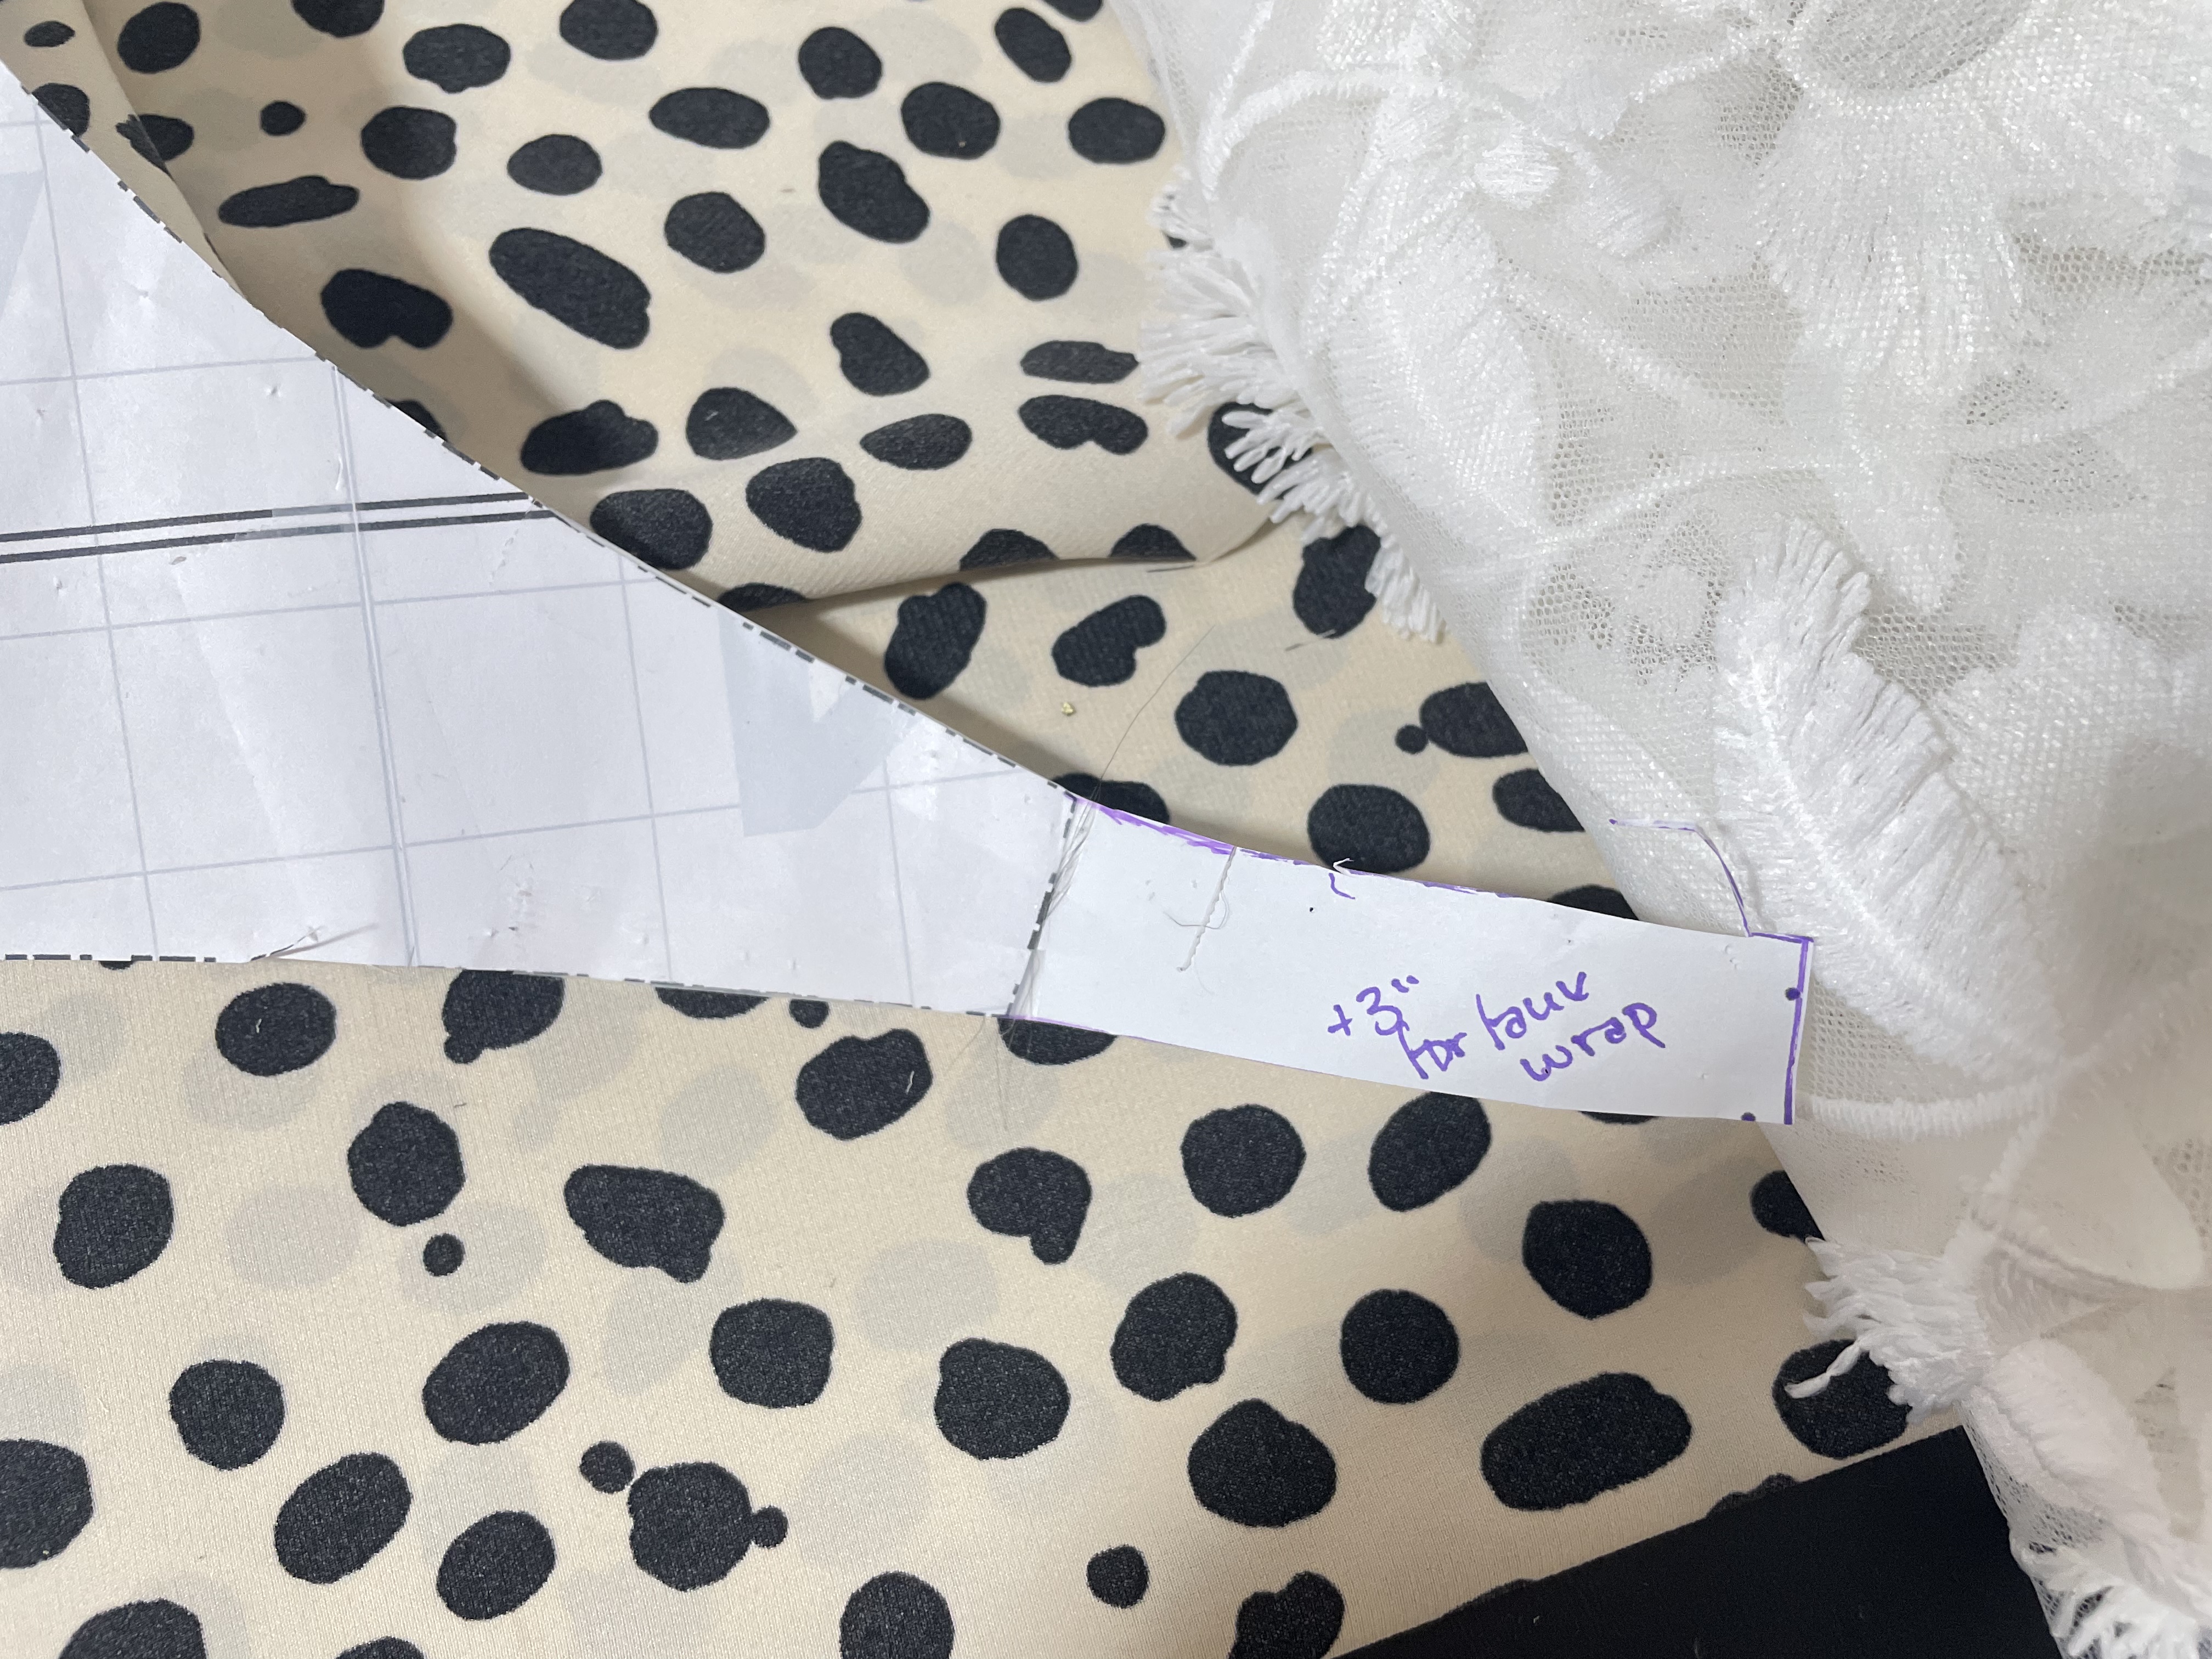
I also had to add a seam allowance to the back bodice and cut it not on the fold so that it can be attached to a zipper.
I then sewed the bodice in a slightly different order:
- darts and stay stitching
- shoulder seams
- neckline binding
- baste the two front pieces together along the waist, matching the center front
- side seams — capturing back bodice and both front bodice pieces
- sleeves
For the skirt, I just drafted a simple gathered skirt by measuring the total waist seam on the front bodice and tripling that, as well as measuring the half waist seam on the back bodice and tripling that. I then measured my chosen length and cut three rectangles — two back skirt rectangles that were my chosen length (27″) by triple the half back waist, and one front skirt rectangle that was my chosen length by triple my total front waist. These pieces got sewn together at the side seams, gathered, then sewn to the finished bodice.
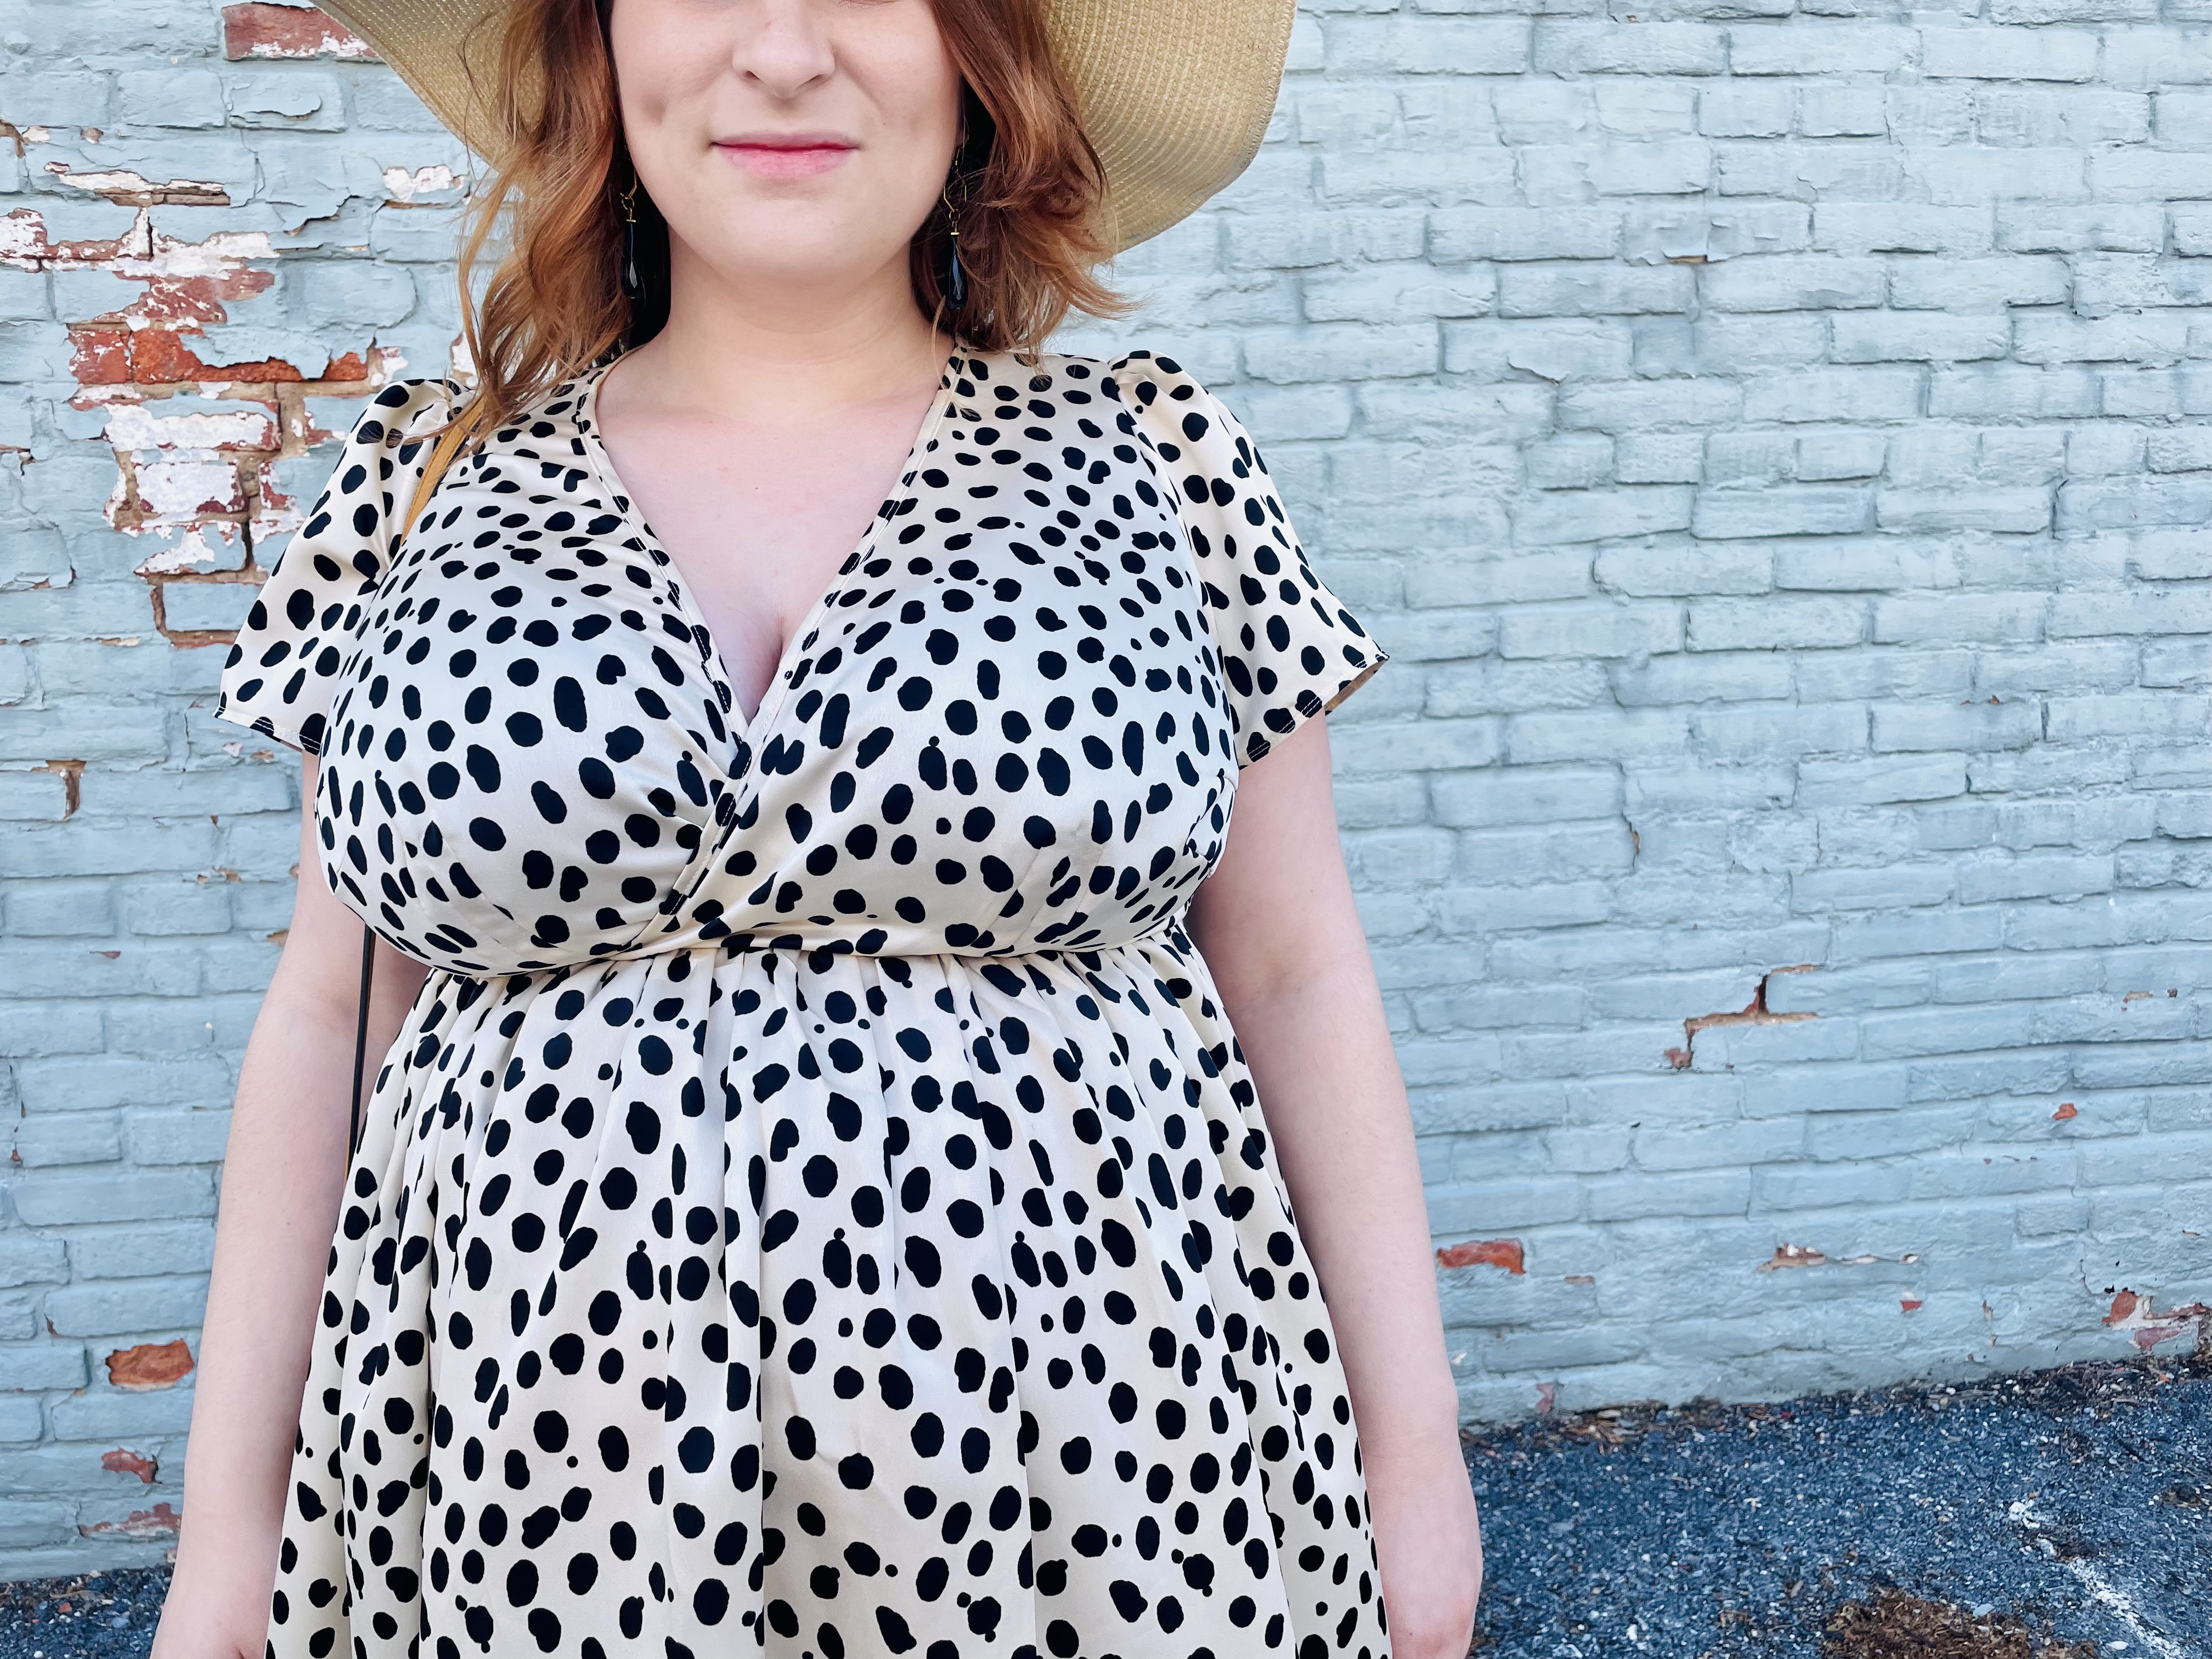
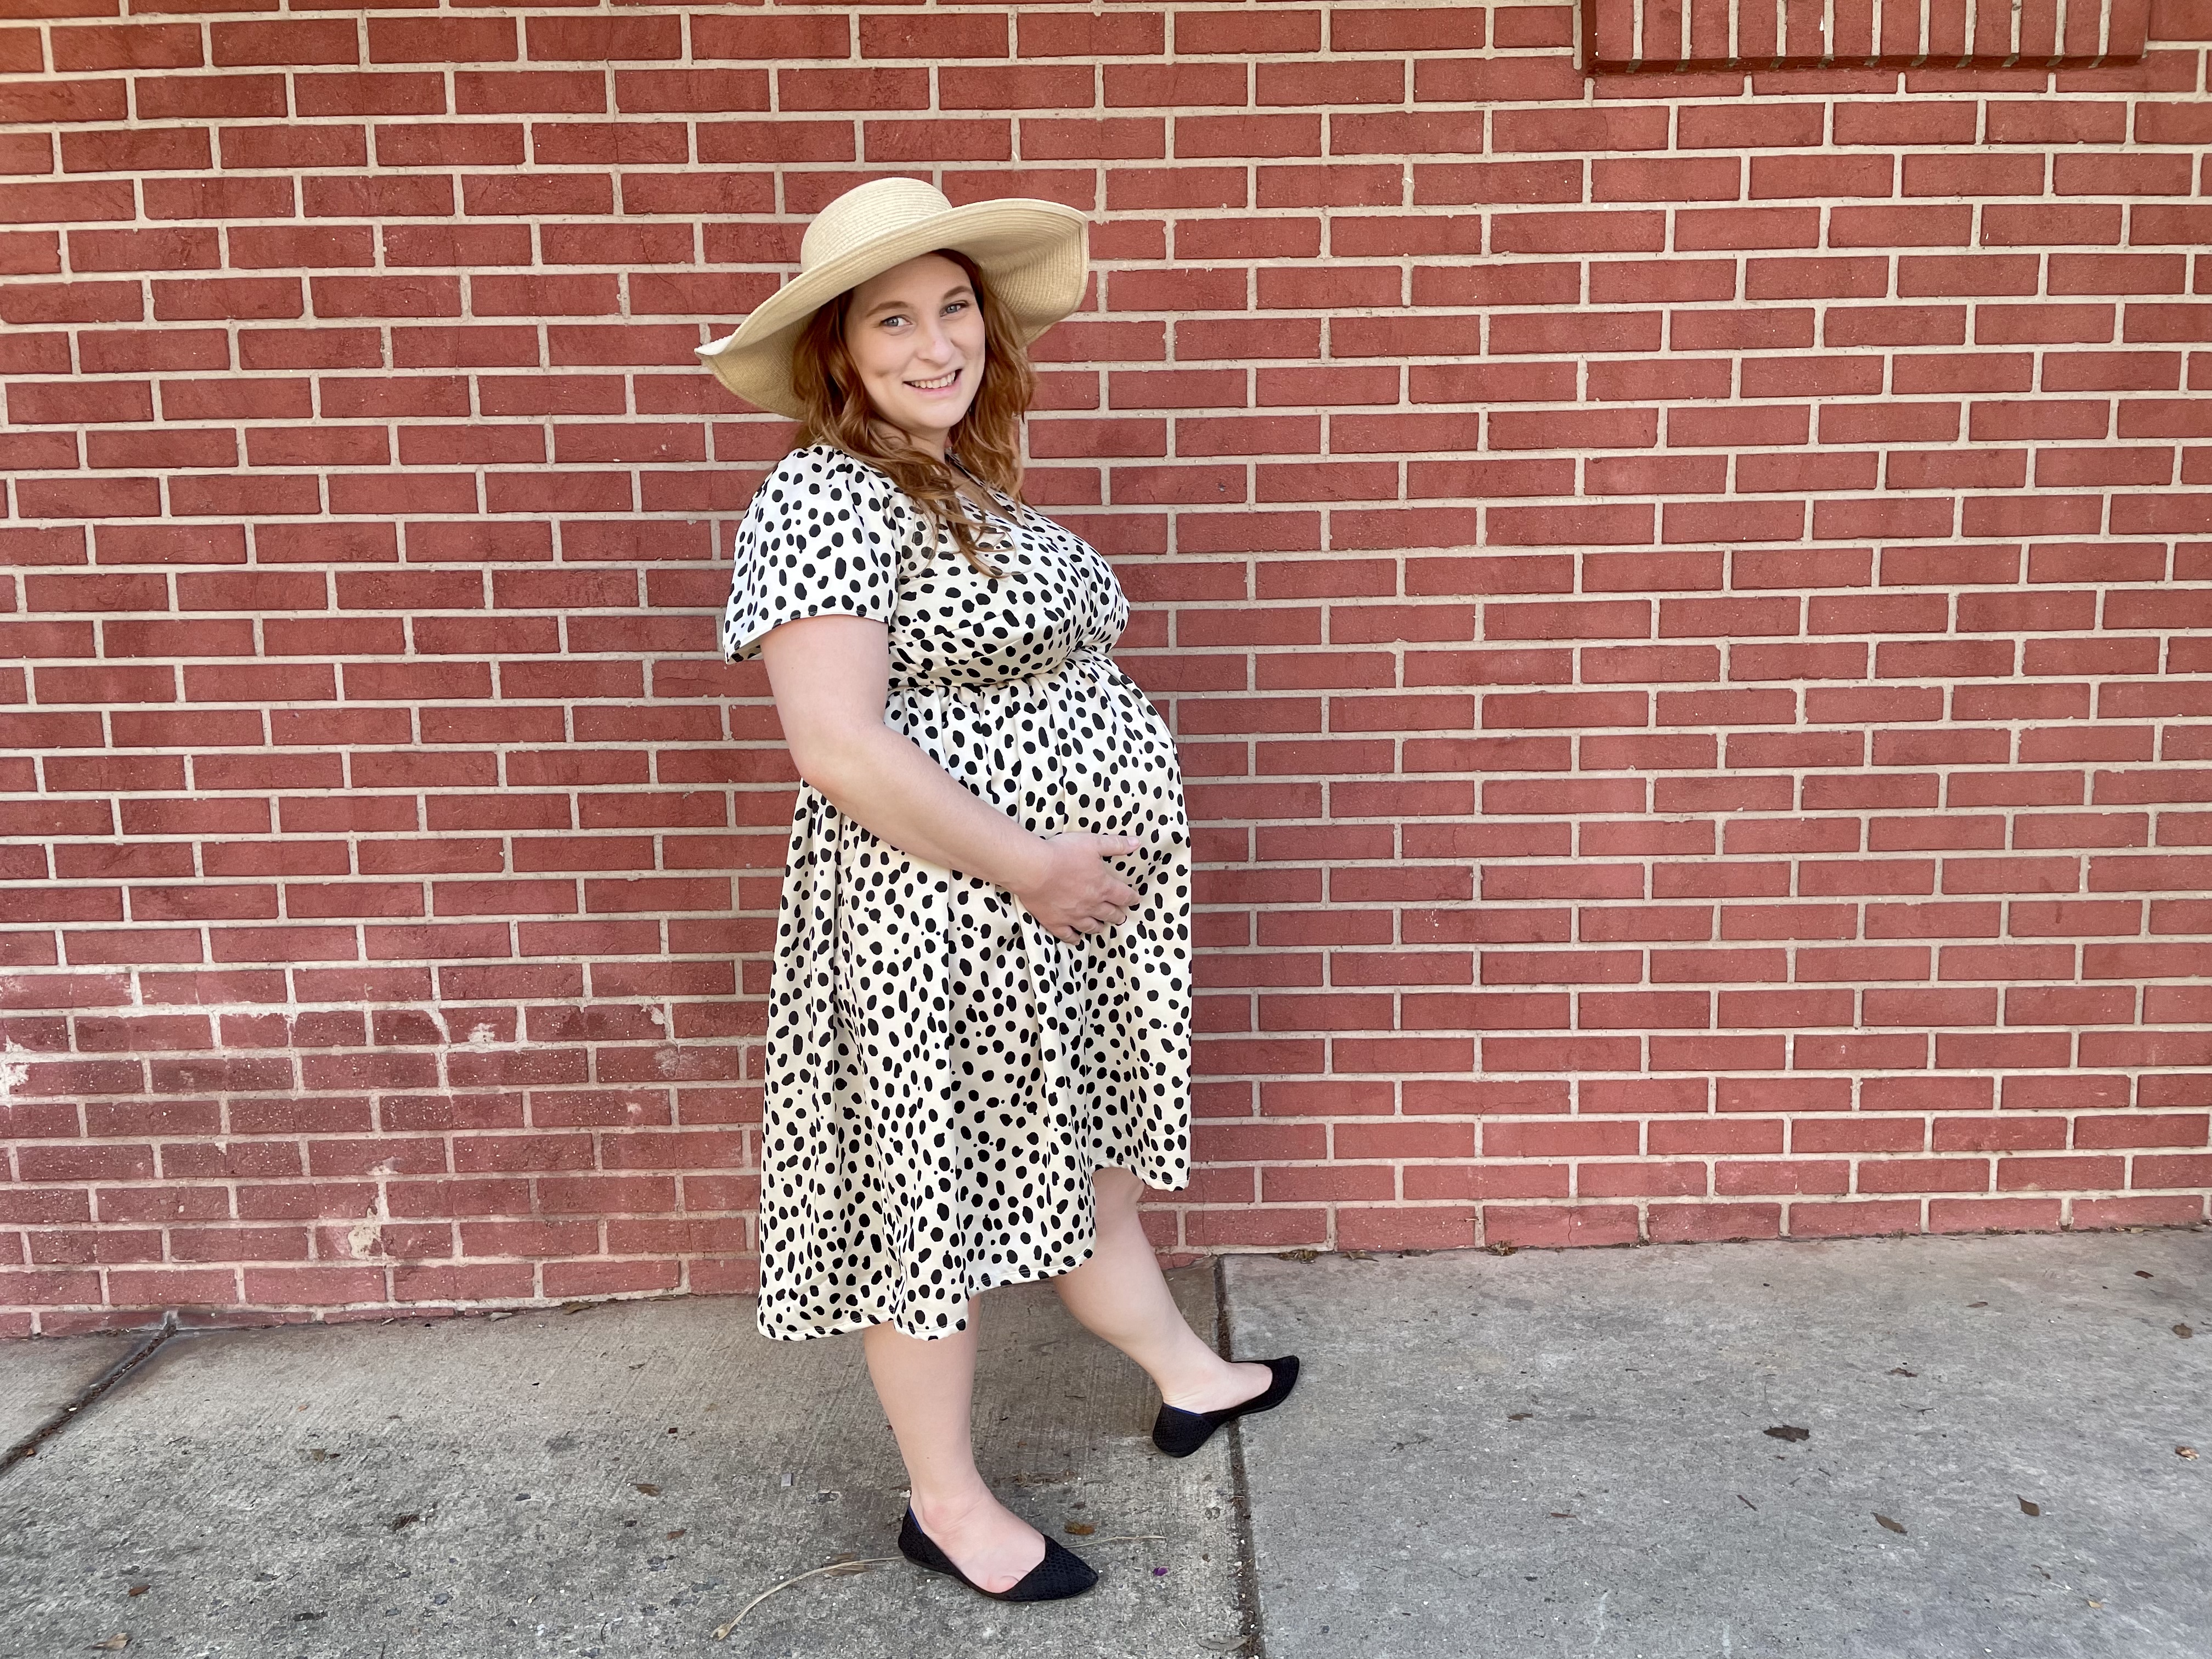
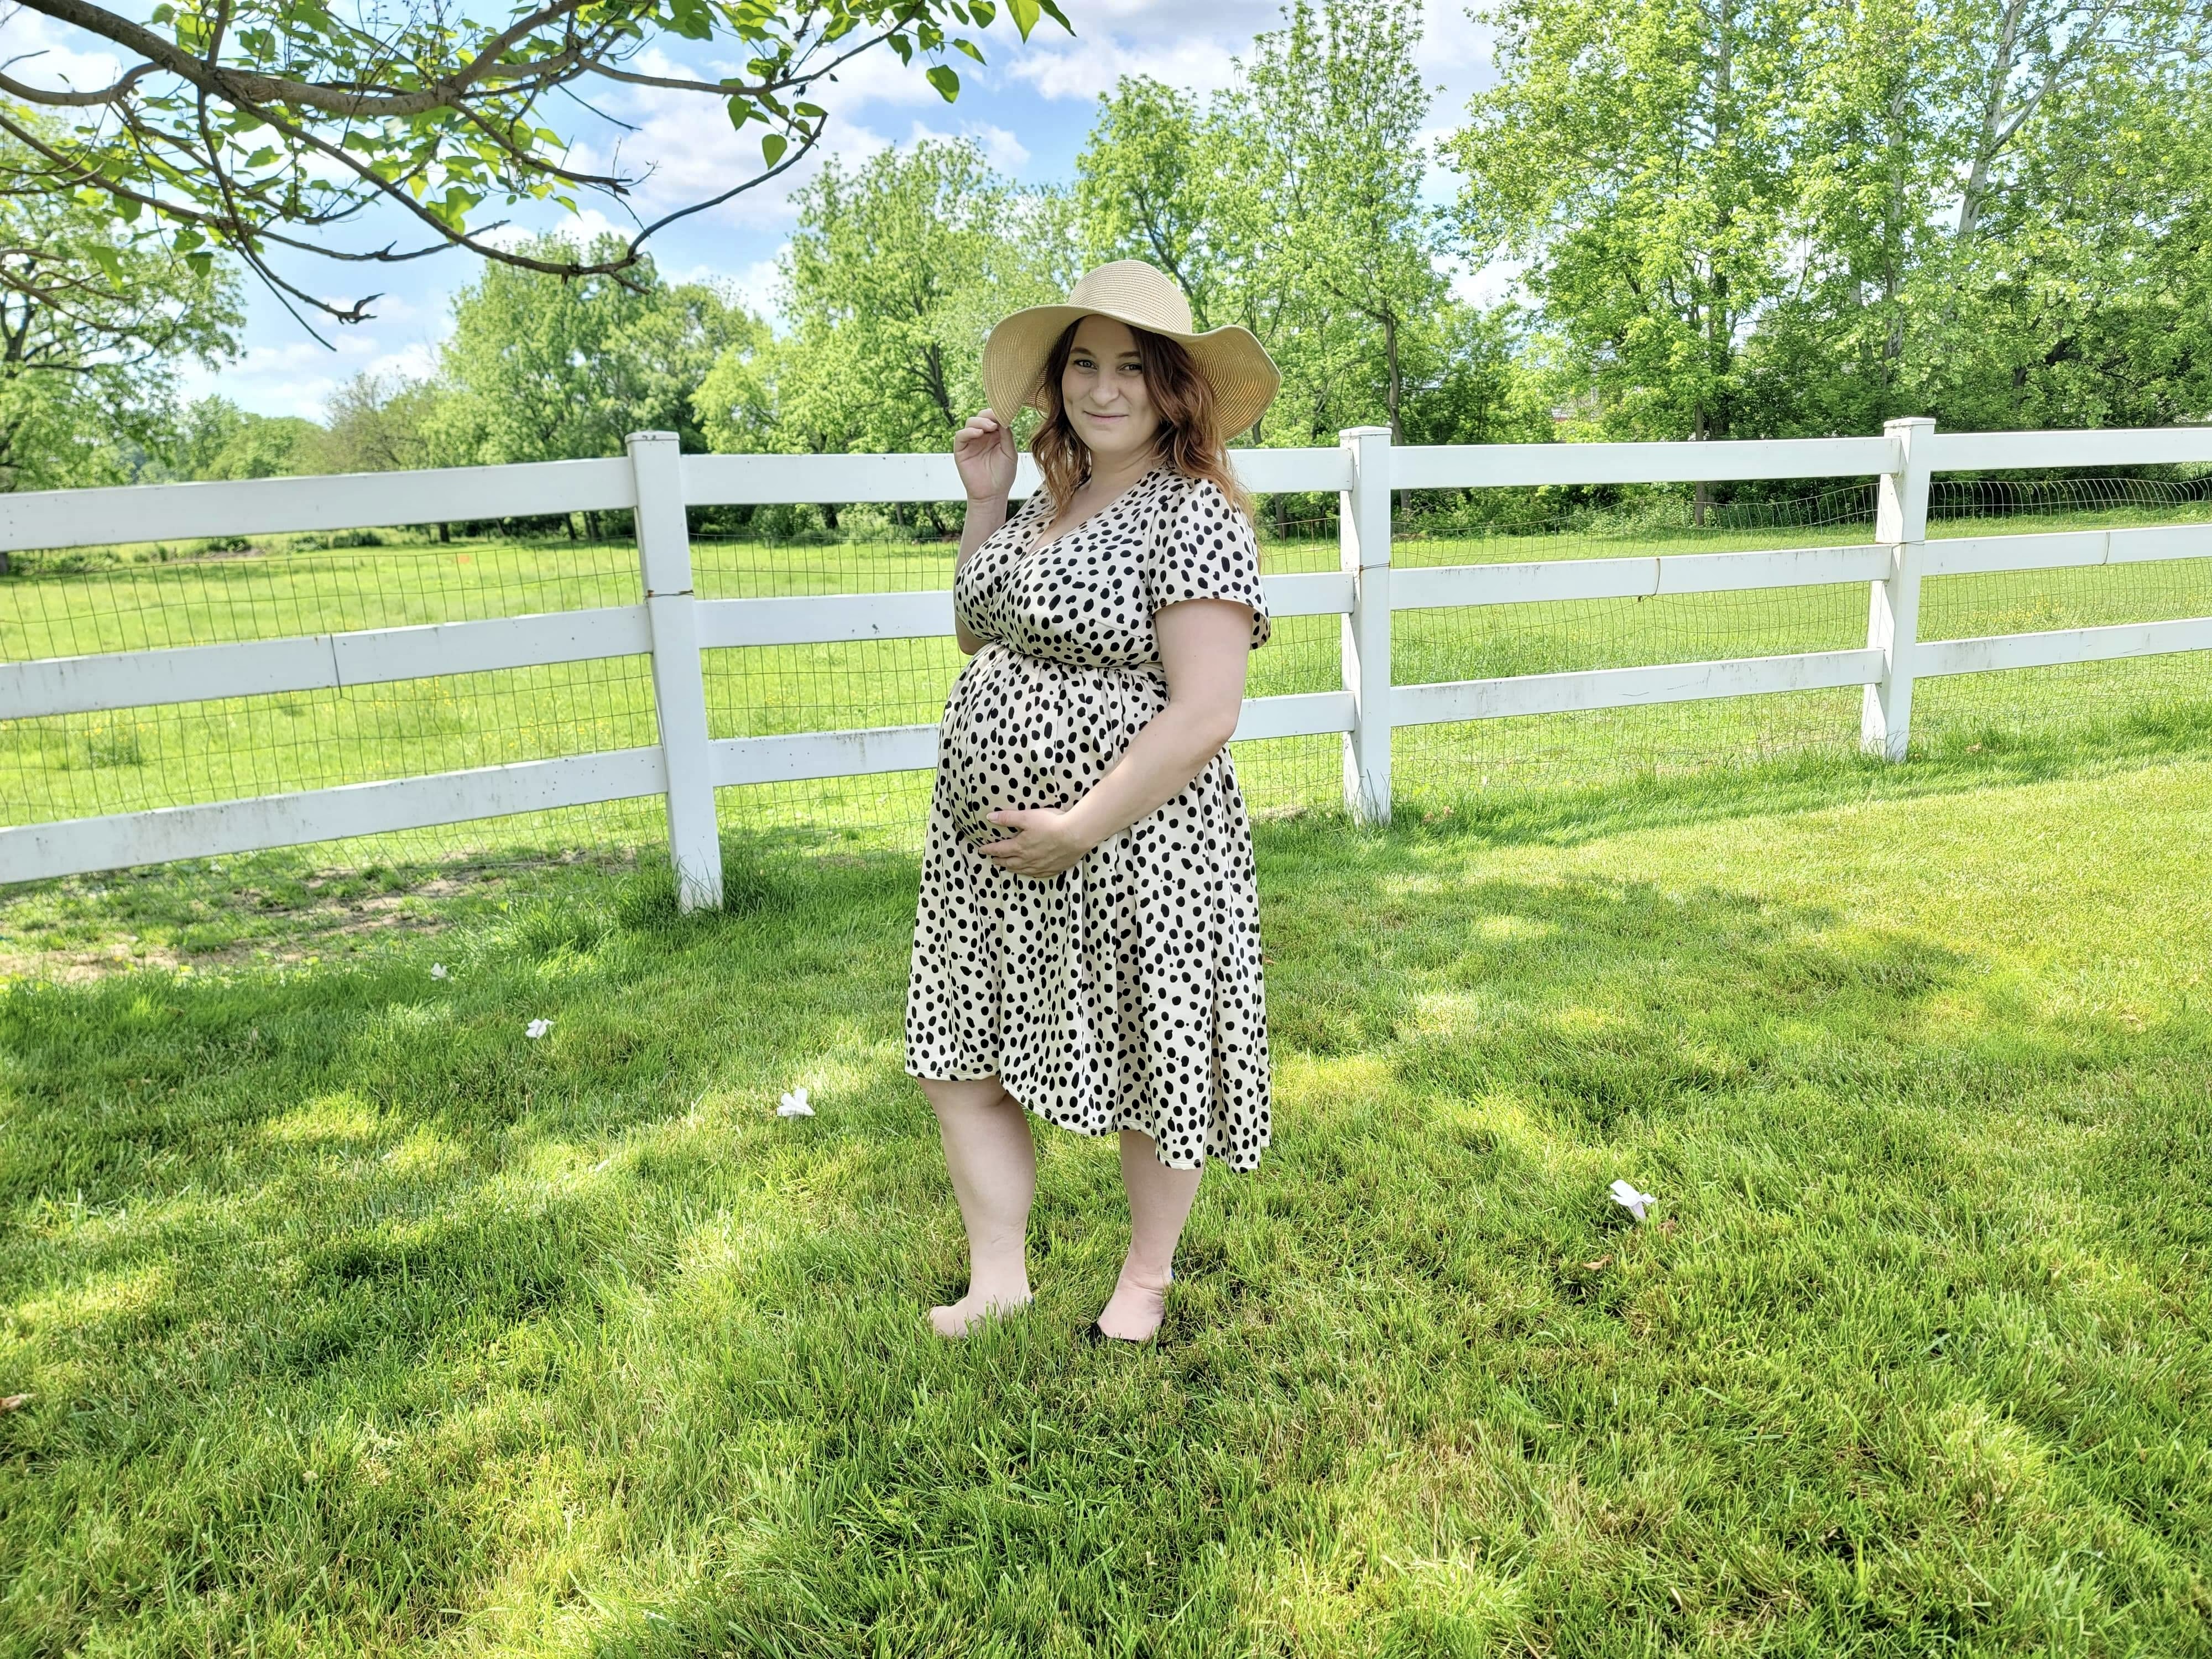
I’m basically in love with this dress. Like, seriously. It fits like a charm. And I’m very excited to make a second, floor-length version for maternity photos!
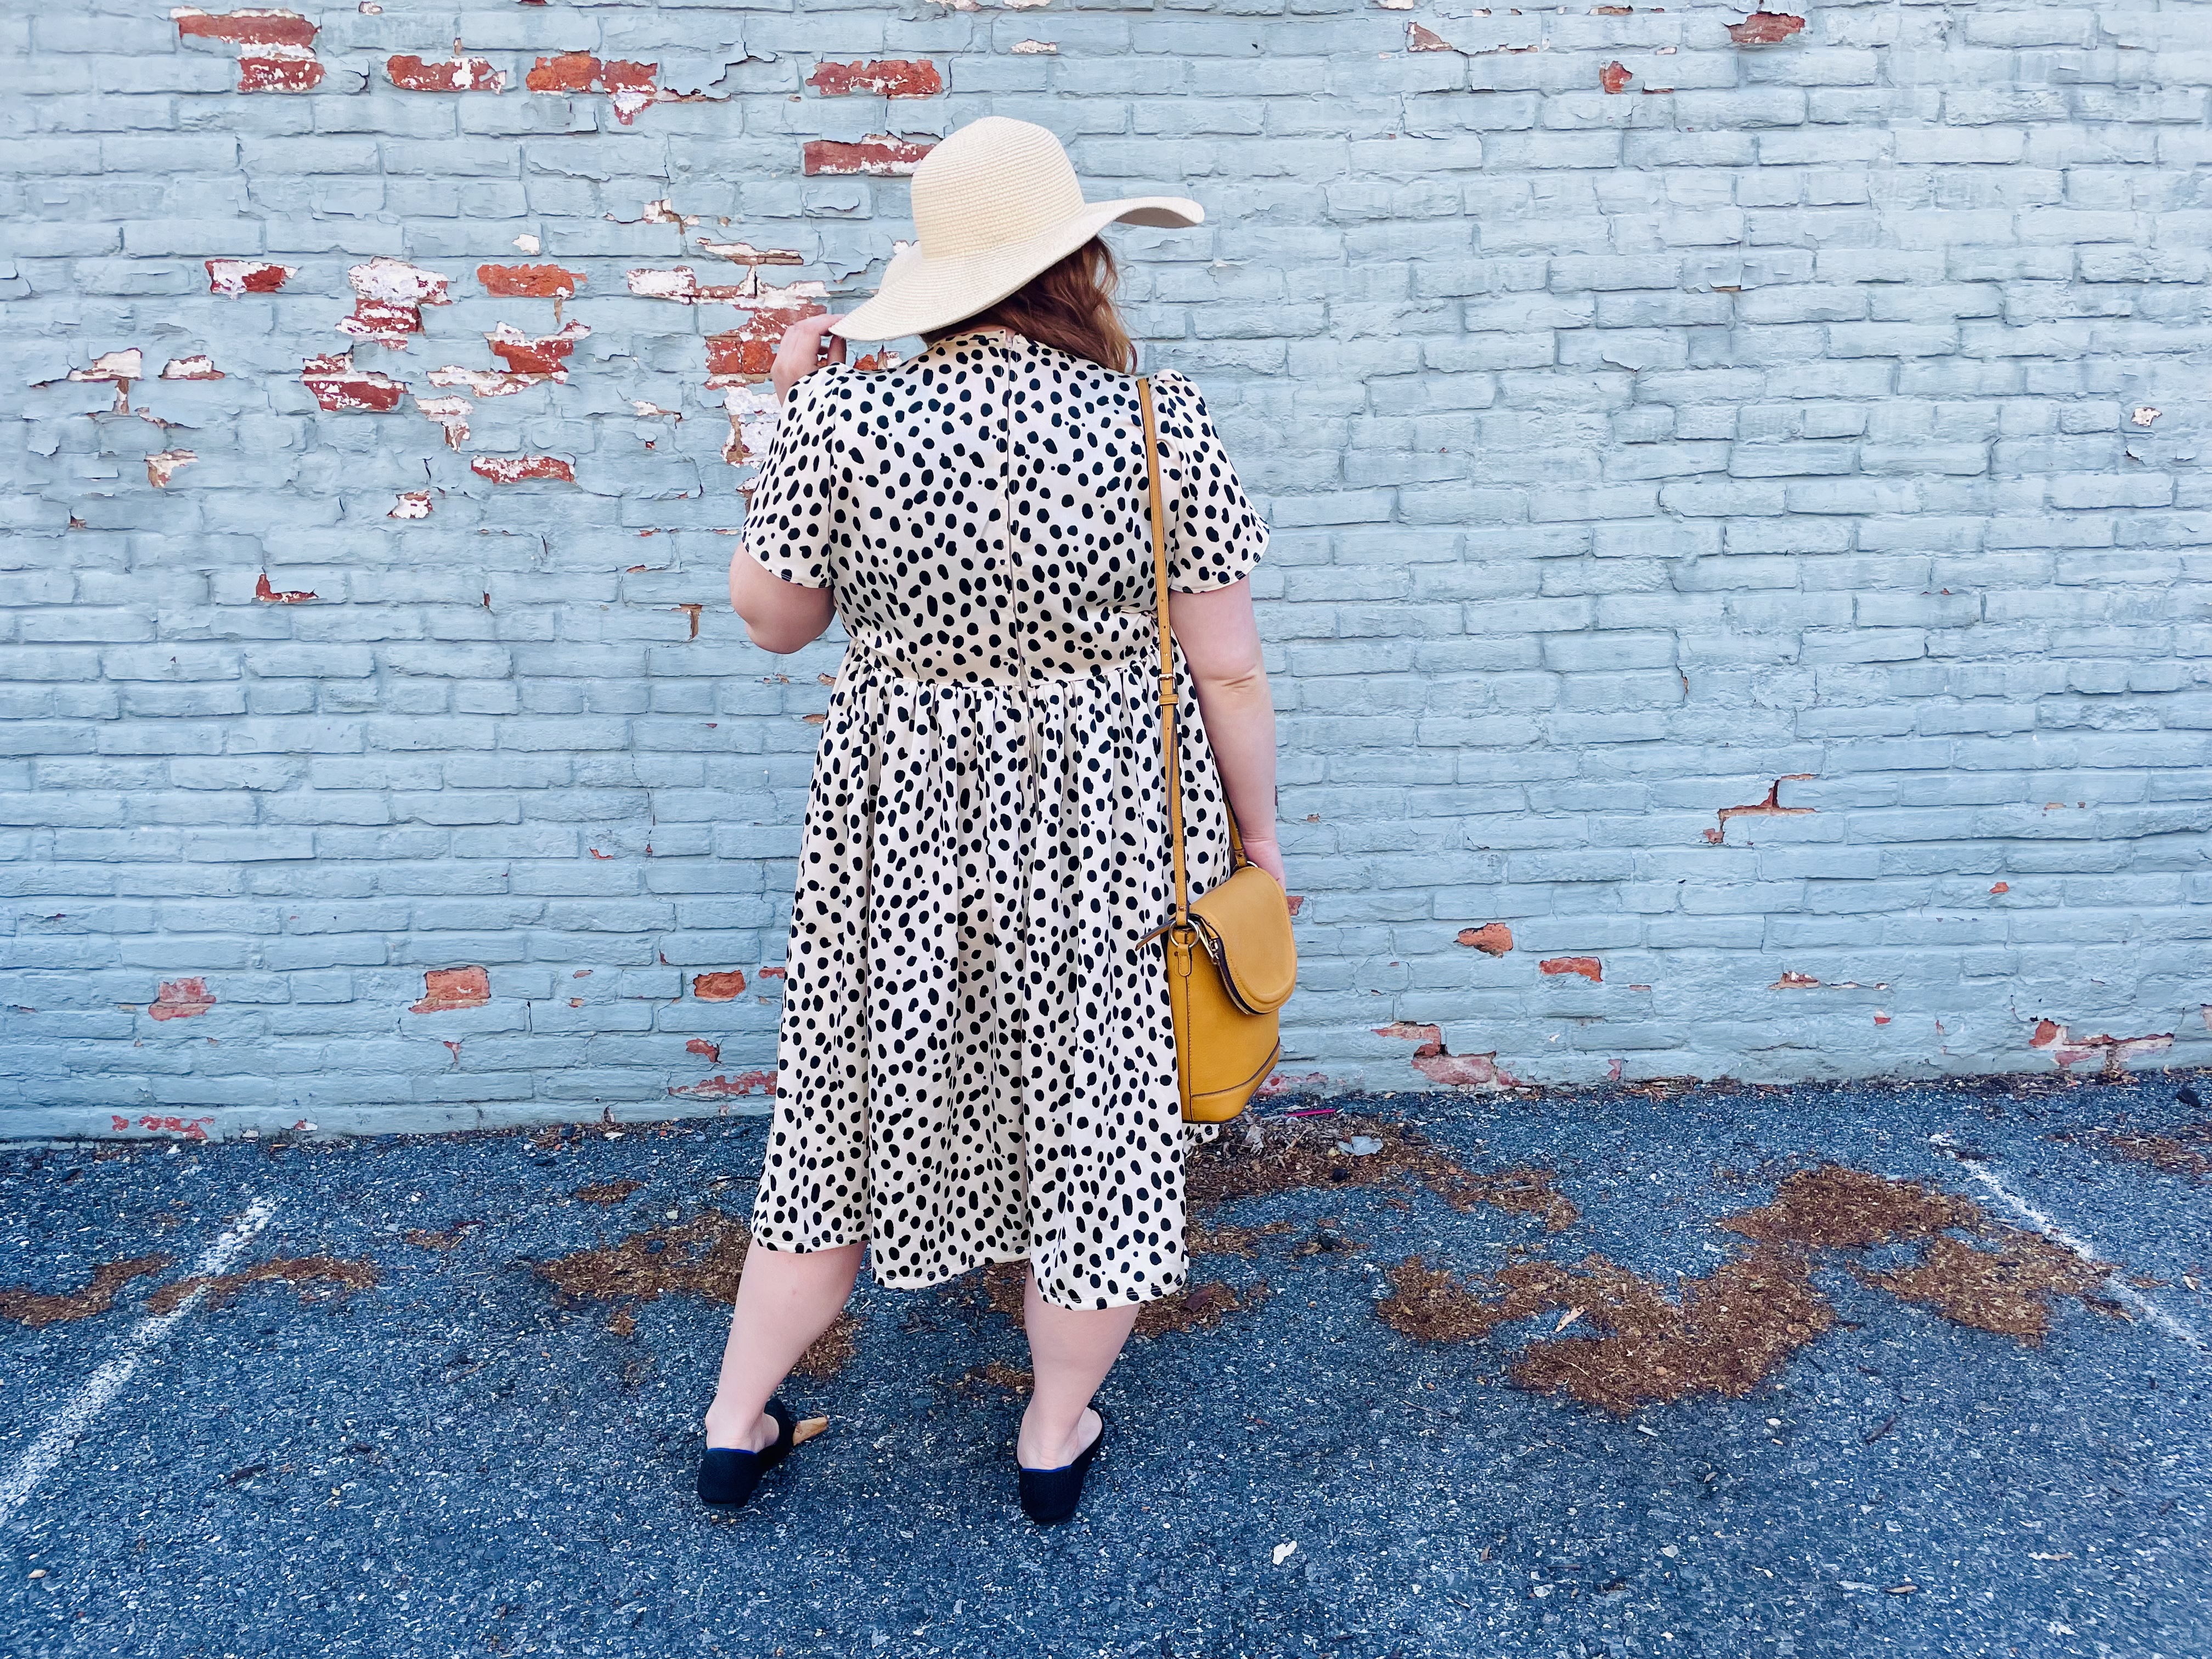
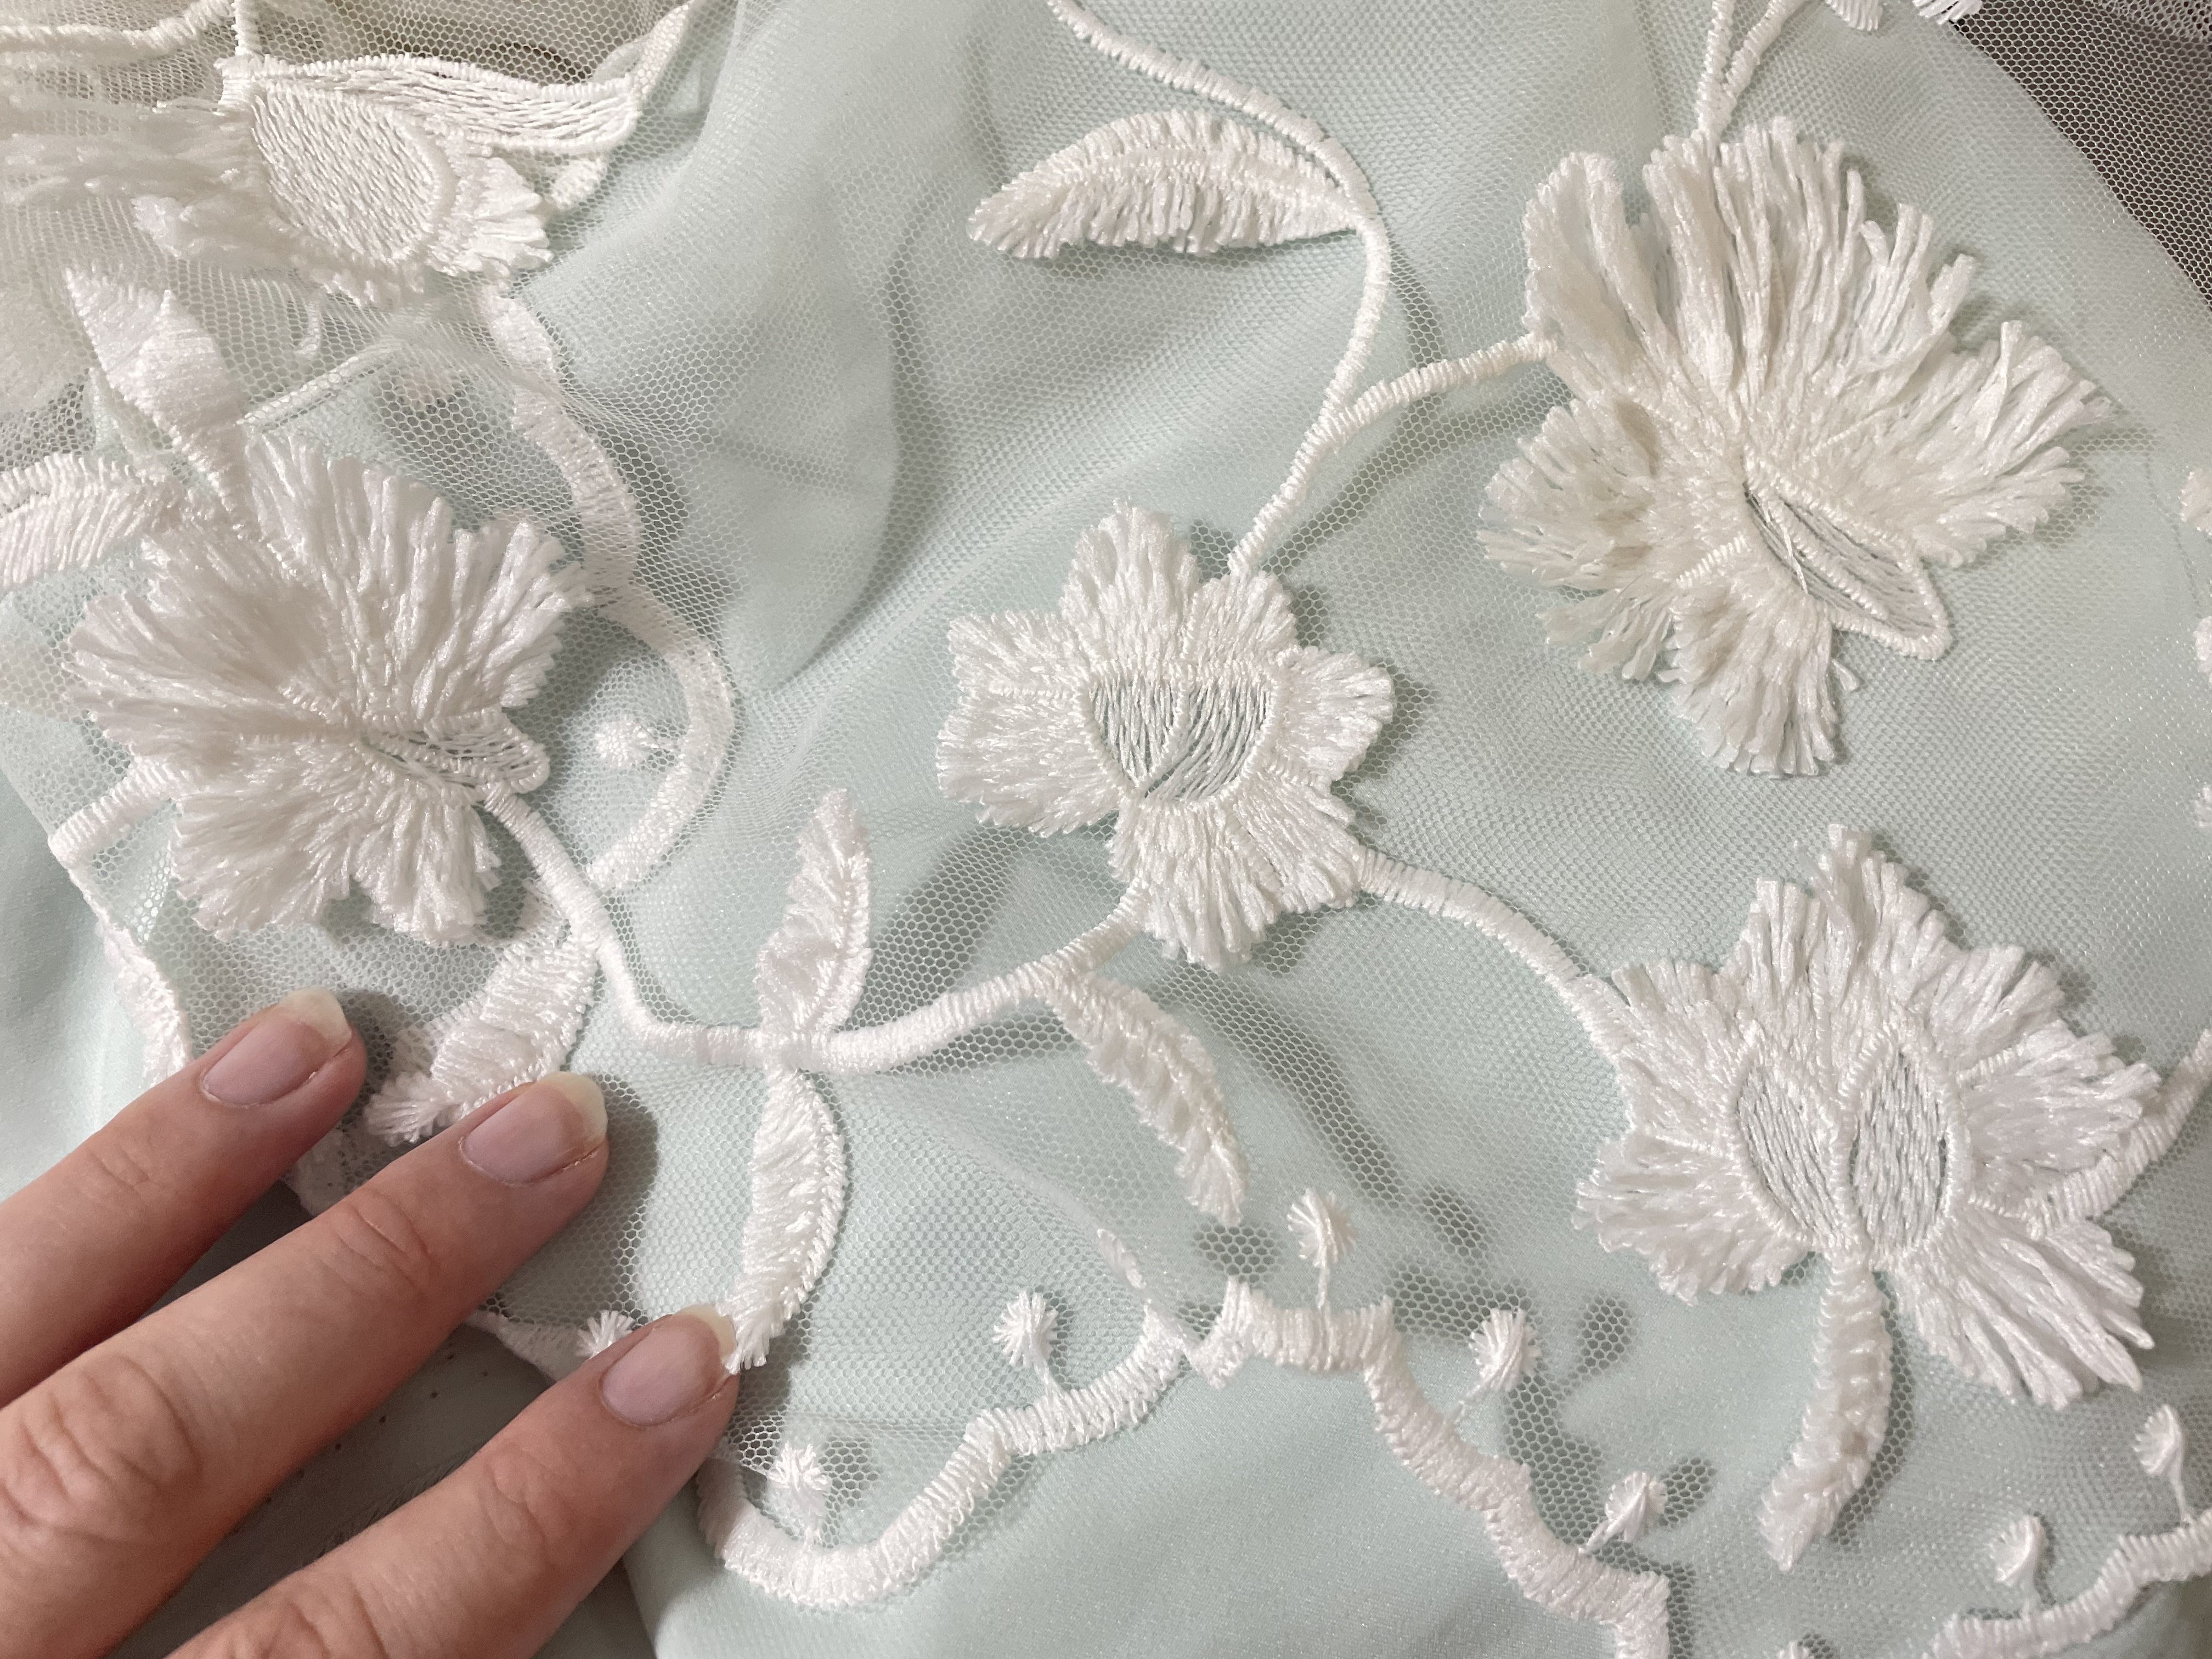
Here’s a sneak peek at the material I’m planning to use for my maternity photos version … more on that later!
QUESTIONS? Be sure to hit up the Sew Busty Community Facebook group with any questions, drop a comment, or drop me a DM. I’m happy to help!



sherrizslz
June 3, 2022I appreciate all that you offer so freely.
Others might charge a hefty fee before they would share these methods, tips and tricks!
I tried to make a donation to your work and was unable to. I believe the problem is with my email address, which is a 2-letter suffix rather than 3 letters as most people have.
sewbustycommunity
June 3, 2022Thank you so much for your sweet words! I have no idea how the donation system works (it’s through a third party), but I definitely appreciate you trying! This isn’t my main gig, though — I’m a nonprofit lawyer in my other life — so it allows me to offer everything for free! I wish more resources were out there for free!
sherrizslz
June 3, 2022I love your comment, “I wish more resources were out there for free!”
Any environment where we share things we’ve learned and figured out thru trial and error is one example of making our world a better place.
Allora
June 3, 2022WOW, I’ve only tried a FBA once and I could never get it right so gave up. It was on a surplice pattern and I would still love to make it. With your wonderful instructions I’m going to try again. Thanks
sewbustycommunity
June 3, 2022Yay! Please report back with how you get on! And if you have any questions, seriously feel free to post on the Sew Busty fb group or shoot me a DM! Happy to help <3
M
August 24, 2022This is a wonderful instructional, thank you so much for making everything so clear, especially the references to grainline and the details as to why you want to distribute room in different ways! I’ve struggled before but I just made 3 bodices and they muslined out perfectly each time, thank you!
sewbustycommunity
October 20, 2022So glad you found this post useful!
Bridget Palmer
August 29, 2023I’ve just found this tonight. You have beautifully explained what to do about all the extra length on the bodice. Brilliant! Off to redraft a very small B cup Vogue pattern to a DD – could take some time! Thank you 🙏
sewbustycommunity
October 8, 2023Aw thank you so much! I’m glad this was helpful!