
Community Blog | Sewing Perfect Darts (for You!) on the Roseclair Dress with Christy
Editor’s Note: Since we are sewing up Cashmerette Roseclair wrap dress/peplum for the July 2021 sew along, I’ve asked a couple community members who are ahead of the curve to write community posts on their experiences and their tips and tricks. If you’re a beginner and following the Roseclair Sew Along as part of our Beginners’ Sewing Series, I’d bookmark these posts for later use, and stick to making the pattern as-is for now. For all you adventurous or intermediate-to-advanced sewists, today, Christy is talking all about splitting your bust dart!
Dart Splitting, Turning, & Adjustment
So – you have completed your first bodice muslin of the Roseclair Dress, and you found and fixed the big issues: the shoulders hang correctly, right on the top of your shoulders; you added a FBA if needed; and you fixed any gaping in the neckline.
Congratulations! Now your bodice fits, but you might have ended up with a new difficulty: The Big Honkin’ Dart. The Roseclair Dress already has a fairly large dart in some sizes, so it is especially susceptible to the BHD, but full-busted sewists find themselves with this problem when making adjustments to many different patterns. The BHD technically fits, but it looks blocky, and it is impossible to sew so it lies smoothly. The good news is that with all this dart-y room, you have the opportunity to adjust the fit of the bodice so it is perfectly and precisely your shape. In this article, I will go through everything you really need to know about turning large darts into a beautifully fitted bodice:
- How to split the BHD into smoother chunks
- How to decide where to place your new darts
- How to sew darts smoothly
1. How to Split a Big Honkin’ Dart into Smooth Chunks
When I had to add a couple inches of neckline into my already-large Roseclair dart, I figured out quickly that I needed to turn it into multiple darts, but after a ton of internet research I was still completely confused how to do that. I finally just traced my pattern piece and started messing around with it, and it made more sense. I will describe here the way of thinking about it that works for me, give links to a couple different tutorials that might work for you…. but if none of that makes sense, I encourage you to just start manipulating the pattern piece. I think it is easier to physically do than it is to describe.
Method: When I started manipulating my darts, I traced my pattern piece (with the first-level adjustments) onto a large roll of tracing paper, and I just kept making new tissue-paper tracings. That way my main pattern piece didn’t get muddled up. For this tutorial, I just free-hand drew the pattern piece on a regular sheet of paper. It is not perfectly to scale, but it should make sense. If I were doing it again, I would start with a mini version like that, to play with so I can see what I am doing.
Tools needed:
- copy of pattern piece
- scissors (for paper, not fabric)
- pen or marker (a couple colors)
- ruler for making straight lines
- tape
- scratch paper (to put behind pattern piece)
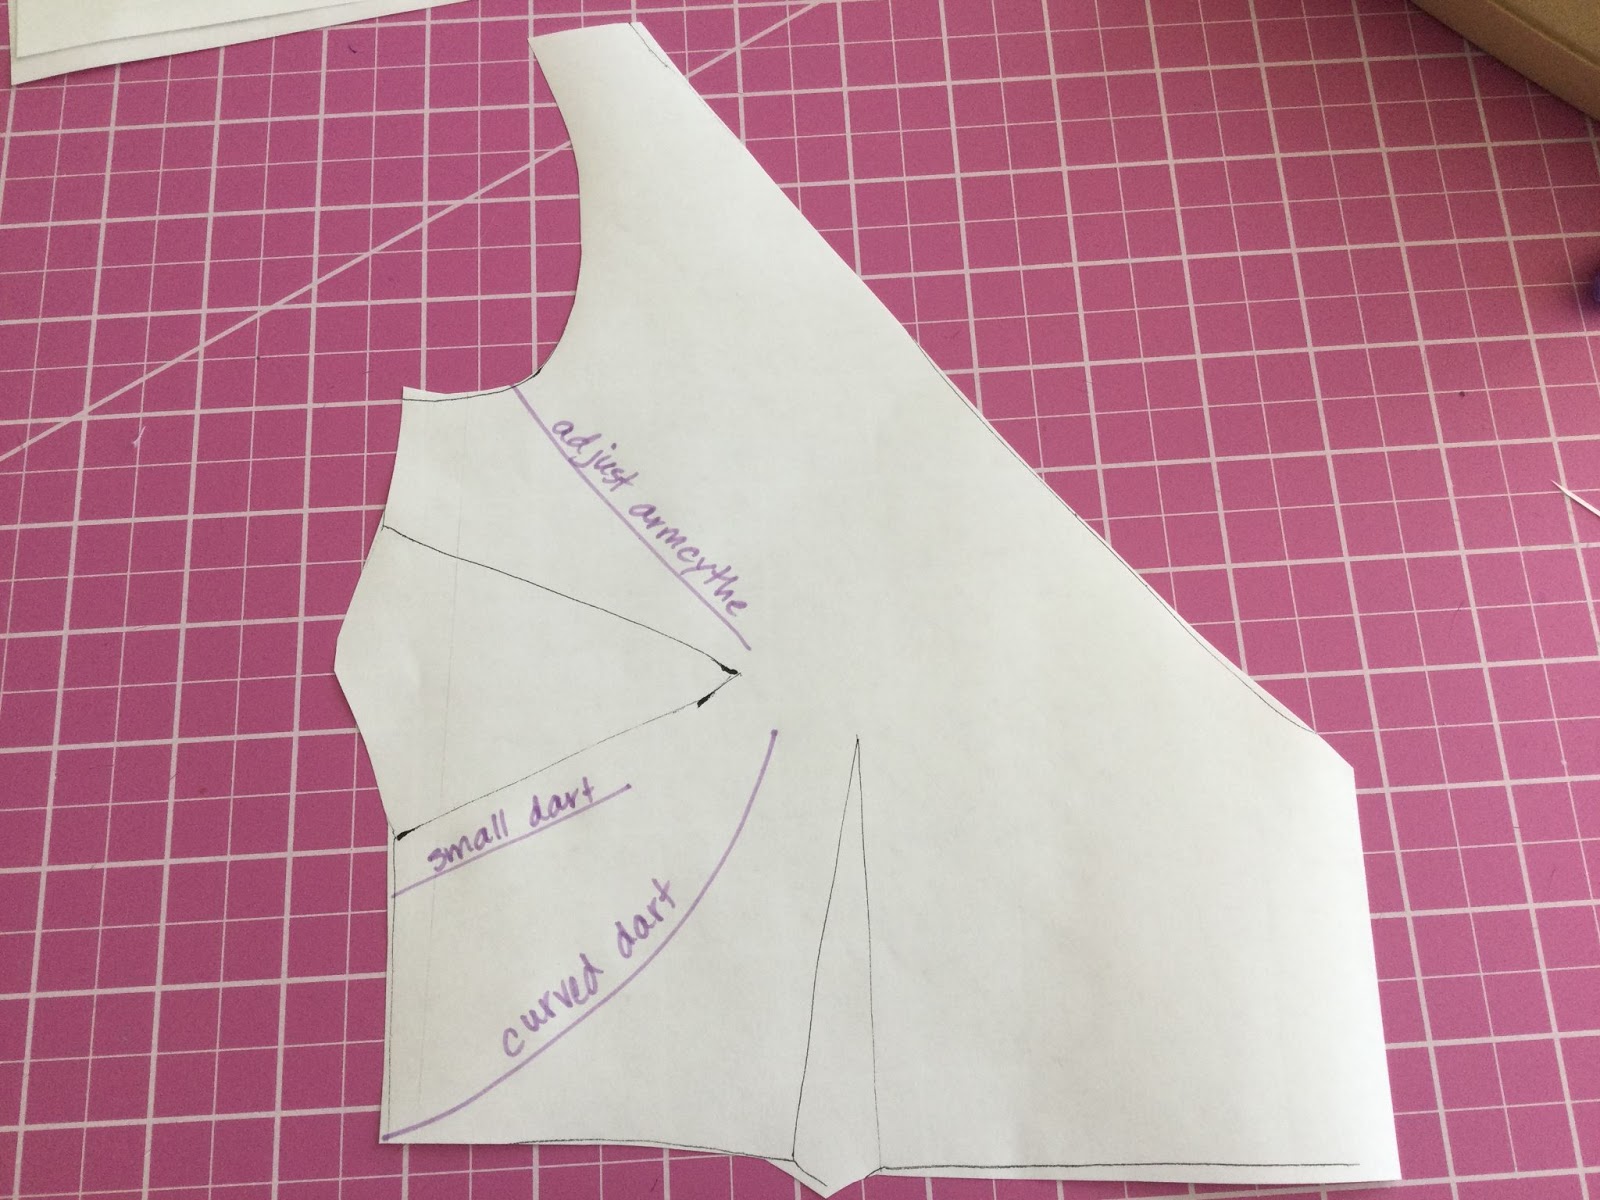
Here is the pattern piece after my initial adjustments. I had over 4 inches of width in that side dart.
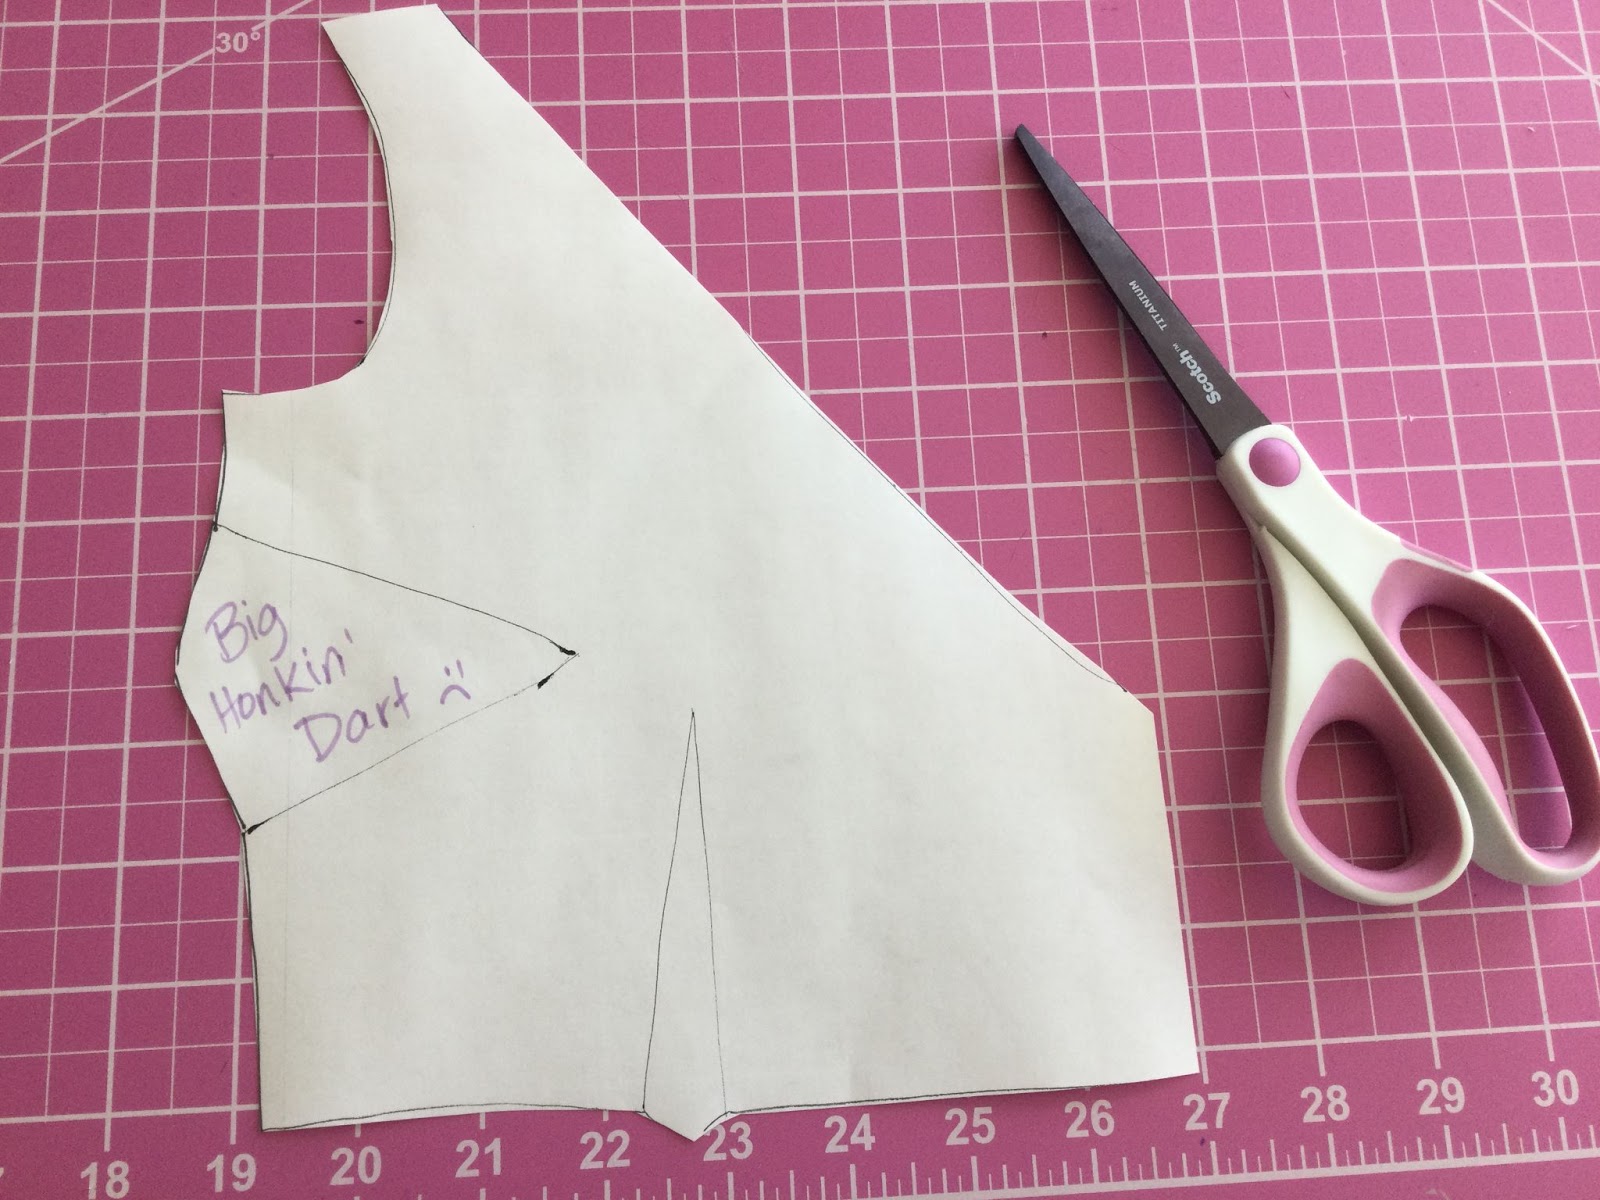
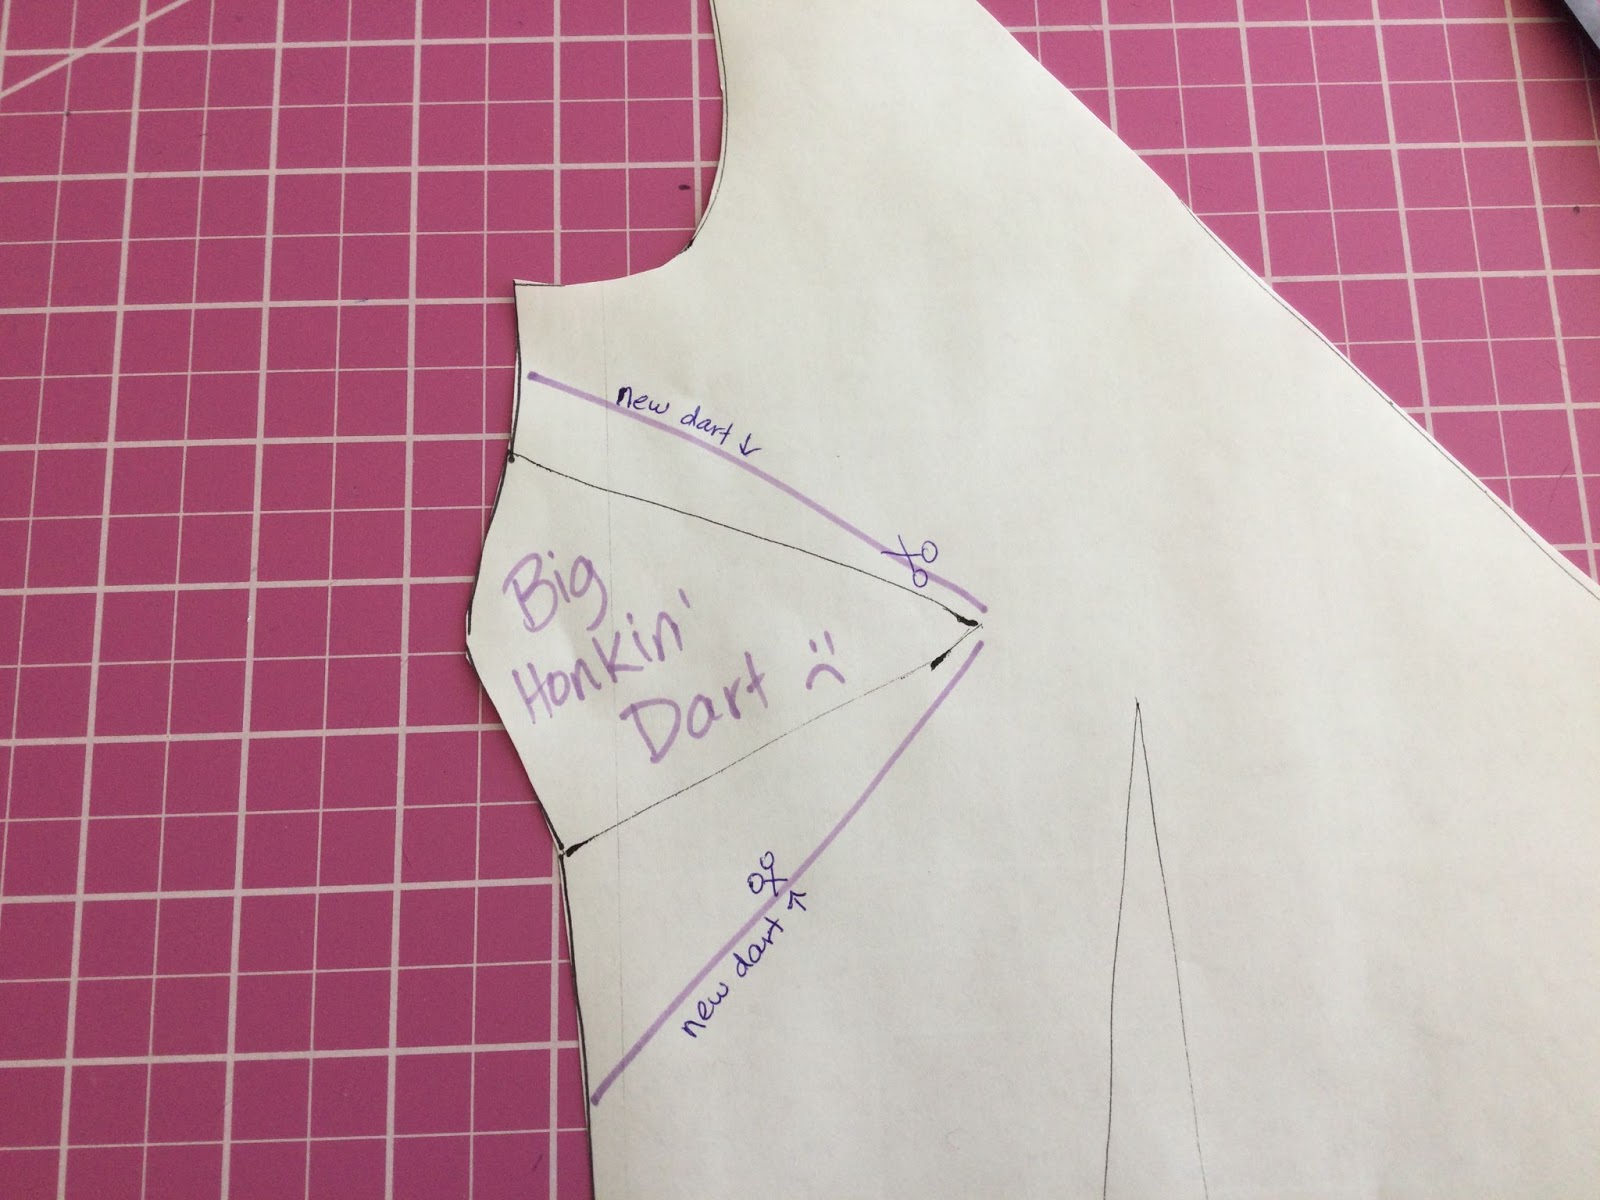
For this first section, I am going to demonstrate how to turn the one large side dart, into three small side darts.
- Draw straight lines from close to the dart apex to the edge of the pattern piece. You’ll want to use a straight edge/ruler on the real pattern piece.
- Cut along those lines.
- Cut out the triangle of the Big Honkin’ Dart. (You can also just cut one side, but I think it’s easier to see if you just cut the whole thing.)
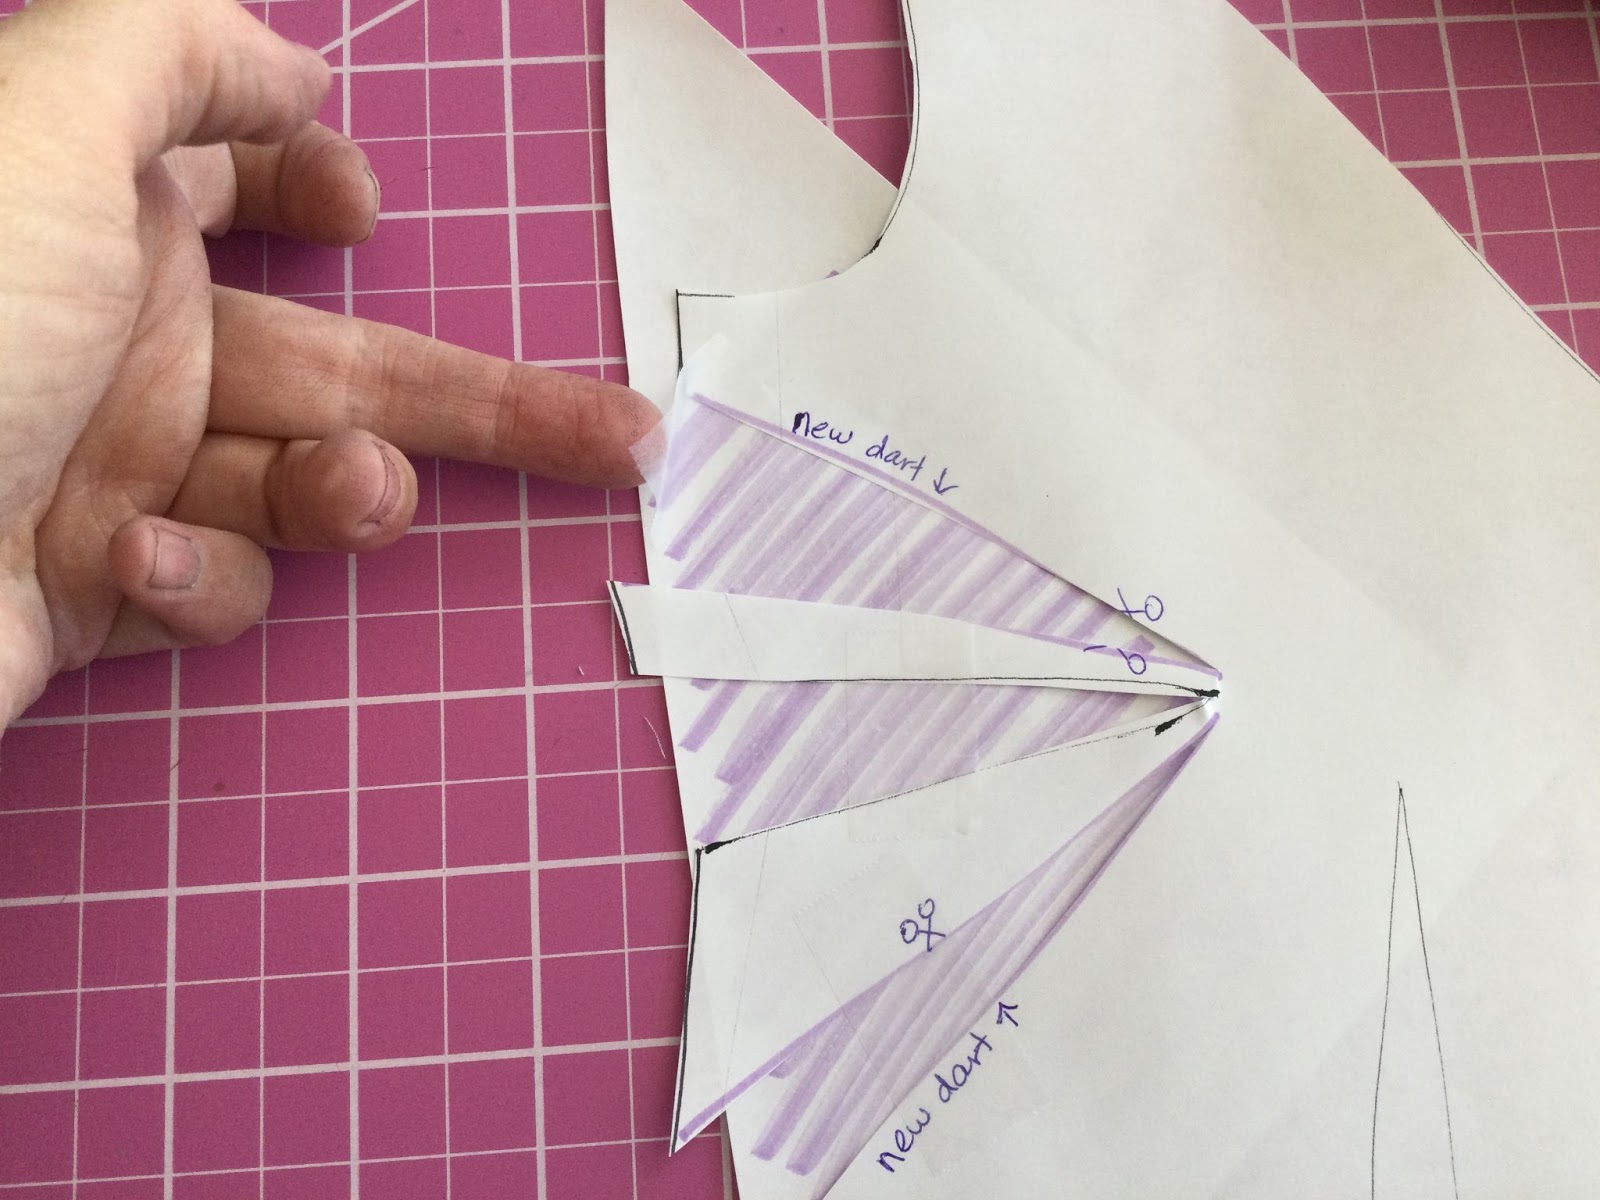
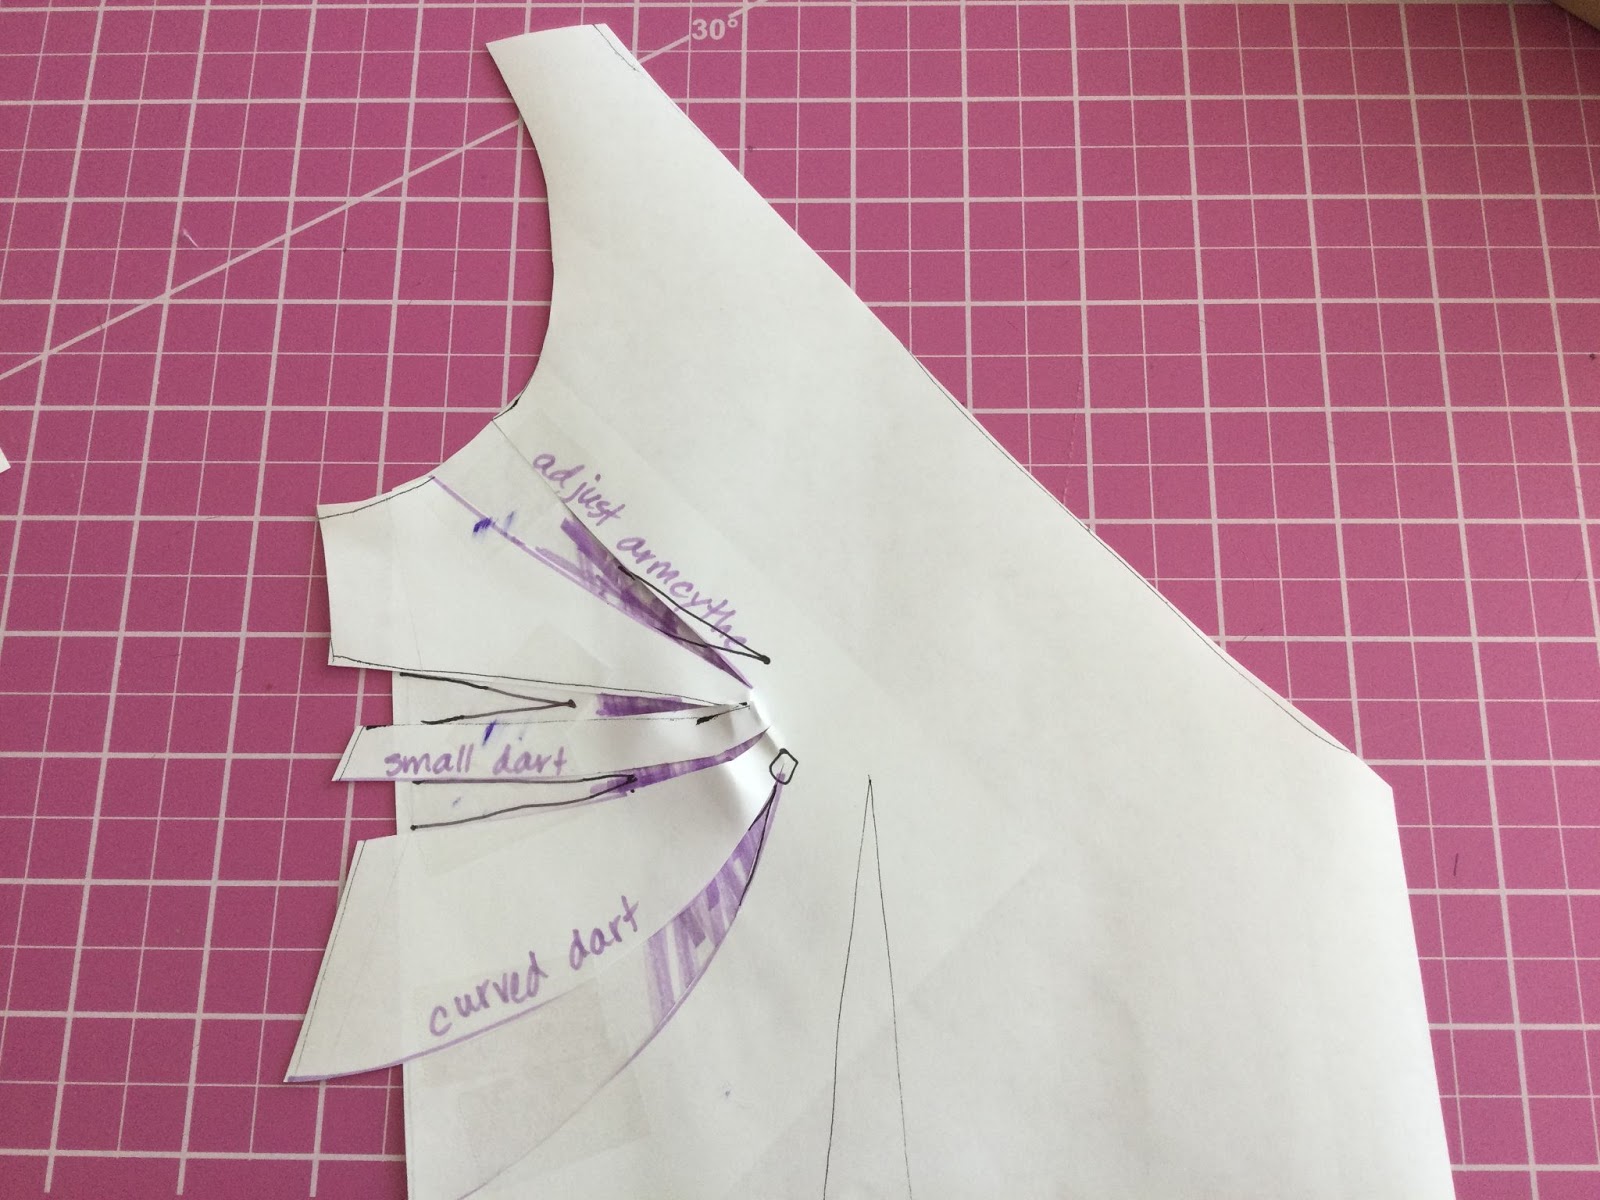
- Now you have two triangles of paper. As you move them up and down on the pivot point, you create three triangles of negative space. Those are your new darts. (This makes way more sense when you actually do it!)
- Put a piece of scratch paper behind your pattern piece, so it fills in the negative space.
- Tape the two narrow triangles of paper onto the scratch paper, making three similarly sized triangles behind them. These are your new darts. I colored them purple.
- Trim the scratch paper so it matches the edges of your pattern piece. (If you were going to sew it up, you could make a slight outward angle for each dart, like there is in printed patterns.)
- Voila! Now you have three darts of manageable size, instead of one gigantic dart.
2. How to Decide Where to Place Your New Darts
You can just sew your bodice with three small darts on the side, and it will work much better than the BHD. But now that you know how to move darts around, you might as well move them to create the perfect fit for your body. This part is not about the size of your bust or your measurements, but about the way your personal body fits together – the shape of your torso, how high or low your breasts are, which way they face – and also the way that you, personally, want your dress to fit and look.
First of all, if the pattern’s bust apex (the point of the triangle) is nowhere near your bust apex, make a note on your first-draft muslin and then your pattern piece. You will just move the point of all your triangles (the pivot place) so they are pointing towards your bust apex. If your bust apex is close to the pattern but not exact, don’t worry about it yet; we will adjust it naturally in the next steps.
In these diagrams, I am dividing the original BHD into three darts. This is what I did with my pattern; my BHD was over 4.5″ and I wanted each dart to be less than 2″. It also makes it easier to demonstrate in pictures. However, you can split your dart into two – or four, or whatever you want.
Method: This is all about fit, so experimenting with what works for your personal body! I traced the basic pattern piece (with first-level adjustments) onto tissue paper; drew new darts into place with the method described; cut my new pattern piece out of a sheet; drew the darts onto the fabric; and sewed the darts. I did sew a basting stitch down the front angle of the muslin pattern piece, so that neckline distortion would not be affecting my decisions about fit.
I did a different dart pattern on each bodice piece (so they looked different on my right and left), and once I had two, I basted them to a back bodice piece. I had about three sets with a back bodice piece and two differently-darted front bodice pieces. I pinned them together onto my body where the ties would have held them in place.
This is super quick to sew, and allowed me to go back and forth and compare different options.
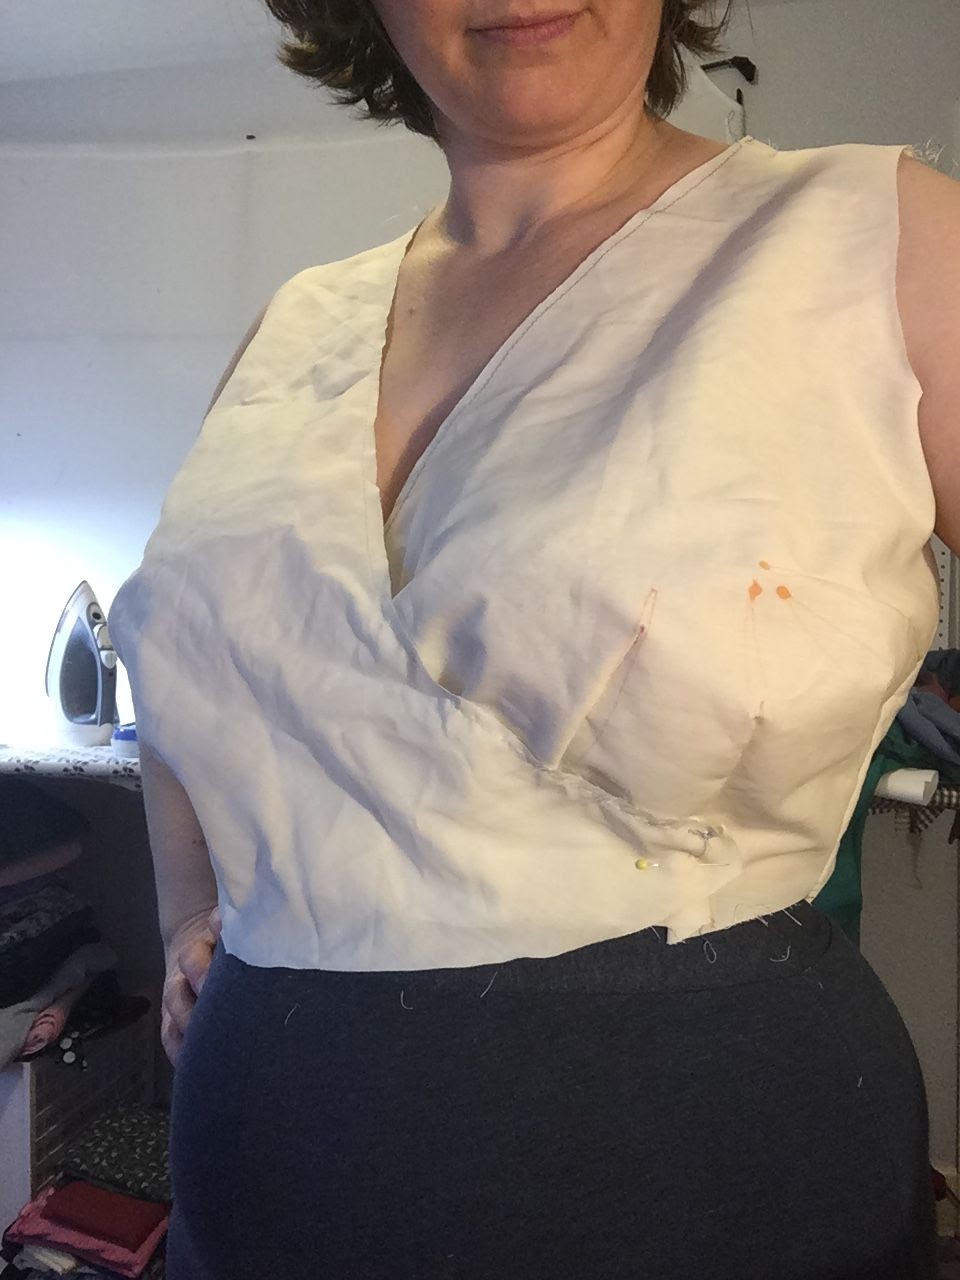
In this picture, you can see how simple this muslin is; that I basted the neckline; and pinned together the edges. You can also see where I used marker to note the apex points of the experimental darts, and drew the darts in where I can see them.
Note: In the final version of the dress, the neckline is finished and folded under. Do not adjust the neckline in this step!
For this tutorial, I am just using my small version of the pattern pieces. I’m not including pictures of what it looks like on me – I think it’s incredibly difficult to see the 3-D fit on the muslin fabric. Once again, this is something that makes so much more sense once you just do it!
Darts in Any Direction:
Remember how we drew a new line from (almost) the apex of the previous dart? You can draw that line in any direction – not just to the side seam, but to the shoulder, or to the waist, or to the neckline – and that will be your new dart and your new shape … well, where you draw these lines depends on your pattern.
In the case of the Roseclair, some of the directions head to the neckline of the wrap dress, and if we adjust the neckline then it will no longer fall right. So for the Roseclair, we are going to ignore all the directions that go to the neckline, although if you are doing a different style bodice you can play with that too! I also did not demonstrate a dart going straight up into the shoulder. To my eye, that doesn’t fit the look of this particular bodice, but you certainly can go straight up to the shoulder, and if you are having trouble getting the shoulder-to-bust proportion to fall right, using a dart might be a good way to solve that problem.
French Dart:
A French Dart is a fancy name for a dart that goes up from the corner of the pattern piece. Because it is at an angle, the dart is longer, and a longer dart gives us more room to sew it gradually and gracefully, making for a smoother finished look. So let’s draw a line to the lower corner and rotate our triangles to make one dart in the original place, and one French dart from the lower corner …
The two new darts are colored in purple. It makes the corner of the pattern piece look like a funky shape, but it works out fine once it is actually sewn up.
Dart Apexes:
Now, when we are rotating our paper triangles, we have to use almost the same apex, just leaving enough paper to allow the triangles to rotate. But if you actually sew up several darts with an almost-the-same apex, you end up with a nice, pointed, Madonna-esque breast. If you want Madonna breasts, now you know the secret!
In case you don’t want pointed breasts (I didn’t), you have to adjust the points of your different darts, so they don’t all end up in the same place. In this example, I drew a new point, farther back towards the seam line, for the original side dart, making it a shorter dart. I then drew lines (in black) defining where I would sew that dart. So in this example, now I have one long French dart coming from the bottom, and one short dart coming from the side, and the tips of the two darts point in exactly the same direction.
Having a shorter side dart worked for my body, probably because my breasts are rounder at the side, so that dart didn’t have to go as far to get towards the top of my breast. However, in real life, I pointed my darts in slightly different directions. The pattern apex was accurate for me, but once I was adding more darts, I placed them so they aimed differently around my breast, which created a rounder, softer look.
This is also the step where you adjust the pattern apex if it wasn’t quite right for you. You have to move the points of the triangle anyways, so move them wherever you want them.
other Dart types:
The next pattern piece shows three more possible darts:
Multiple Side Darts: Having darts next to each other on the side works well for some people, and the darts will be less visible because they are near the seam. You could make them next to each other, but different lengths, as they step around the larger and smaller parts of your breast.
Curved Dart: A curved dart also allows for a longer, smoother sewing line. It is also a good way to solve a problem of having a distinct shaped curve to match a more distinct breast shape. It looks confusing on the pattern piece, but it sewed up nicely. I have heard that it is much easier to create the right curve of a pattern piece with a helper, who can pin up (and mark) the pattern piece as it is on your body, and solve the exact problem (folds of fabric) that you are having. Obviously, the curve can go any direction, and come from any direction (I just showed it from the lower corner here). On this particular pattern piece, the curved dart did not help me at all, so I did not experiment with it further. My breasts are wide and round; my guess is that it would help more with breasts that are held up more distinctly.
Armcythe Dart: If your armcythe fits perfectly (once you have the sleeves on), then you probably want to leave it alone. However, if you have a little extra fold of fabric, or it feels a little tight as you move your arm backwards, you now have the perfect opportunity to tweak it. Draw your line up into the armcythe – I went fairly far towards the back, again so I ended up with a nice long line. I had a little extra fold of fabric, so I drew in the dart just at the right amount to compensate for the BHD, and then when I draw the dart in, I extended it ¼ ” outward, to make the dart slightly bigger. It worked like a charm, and made the perfectly-good armcythe even better. If you wanted a little extra space, draw your actual dart slightly smaller than the triangle you created from swinging the triangles.
The first picture shows the three new lines drawn in to make the new darts. Then I cut on the lines and arranged the negative space to make new darts (colored purple). Then I drew in adjusted apexes for each dart (except for one – one can point to the original place!), and drew the legs for each new dart in black. I would sew on the black lines.)
Note that I adjusted that top dart apex farther over towards the middle. This worked for me, because it creates a longer line, makes the curve of the breast more broad, and followed along the top width of my breast.
Bottom Dart: Your dart could also point at the bottom of the pattern piece, either straight or at an angle. Or both. Then you can adjust how far up it needs to go in order to get to the height of your breasts. It’s up to you!
That Other Dart Hanging Out Over There: There is a second dart in the pattern, which we haven’t talked about yet. That is more of a waist dart than a bust dart, although of course it also shapes the bust. Can you move that one too? Of course you can! You are a dart moving mastermind!
Personally, I kept the apex and one leg of that dart, and moved the other leg equidistant (from the first leg) towards the center of the bodice. This gave me a longer dart (again!), and I think helped shape the inner curve of my breasts. Adjusting this dart is another way to change the waist line, like we discussed with the armcythe. You could also move part of the BHD into this dart, although I think it would be easier to add a second dart on the waist seam instead – but whatever works for your body! You just have to cut out muslins and test it.
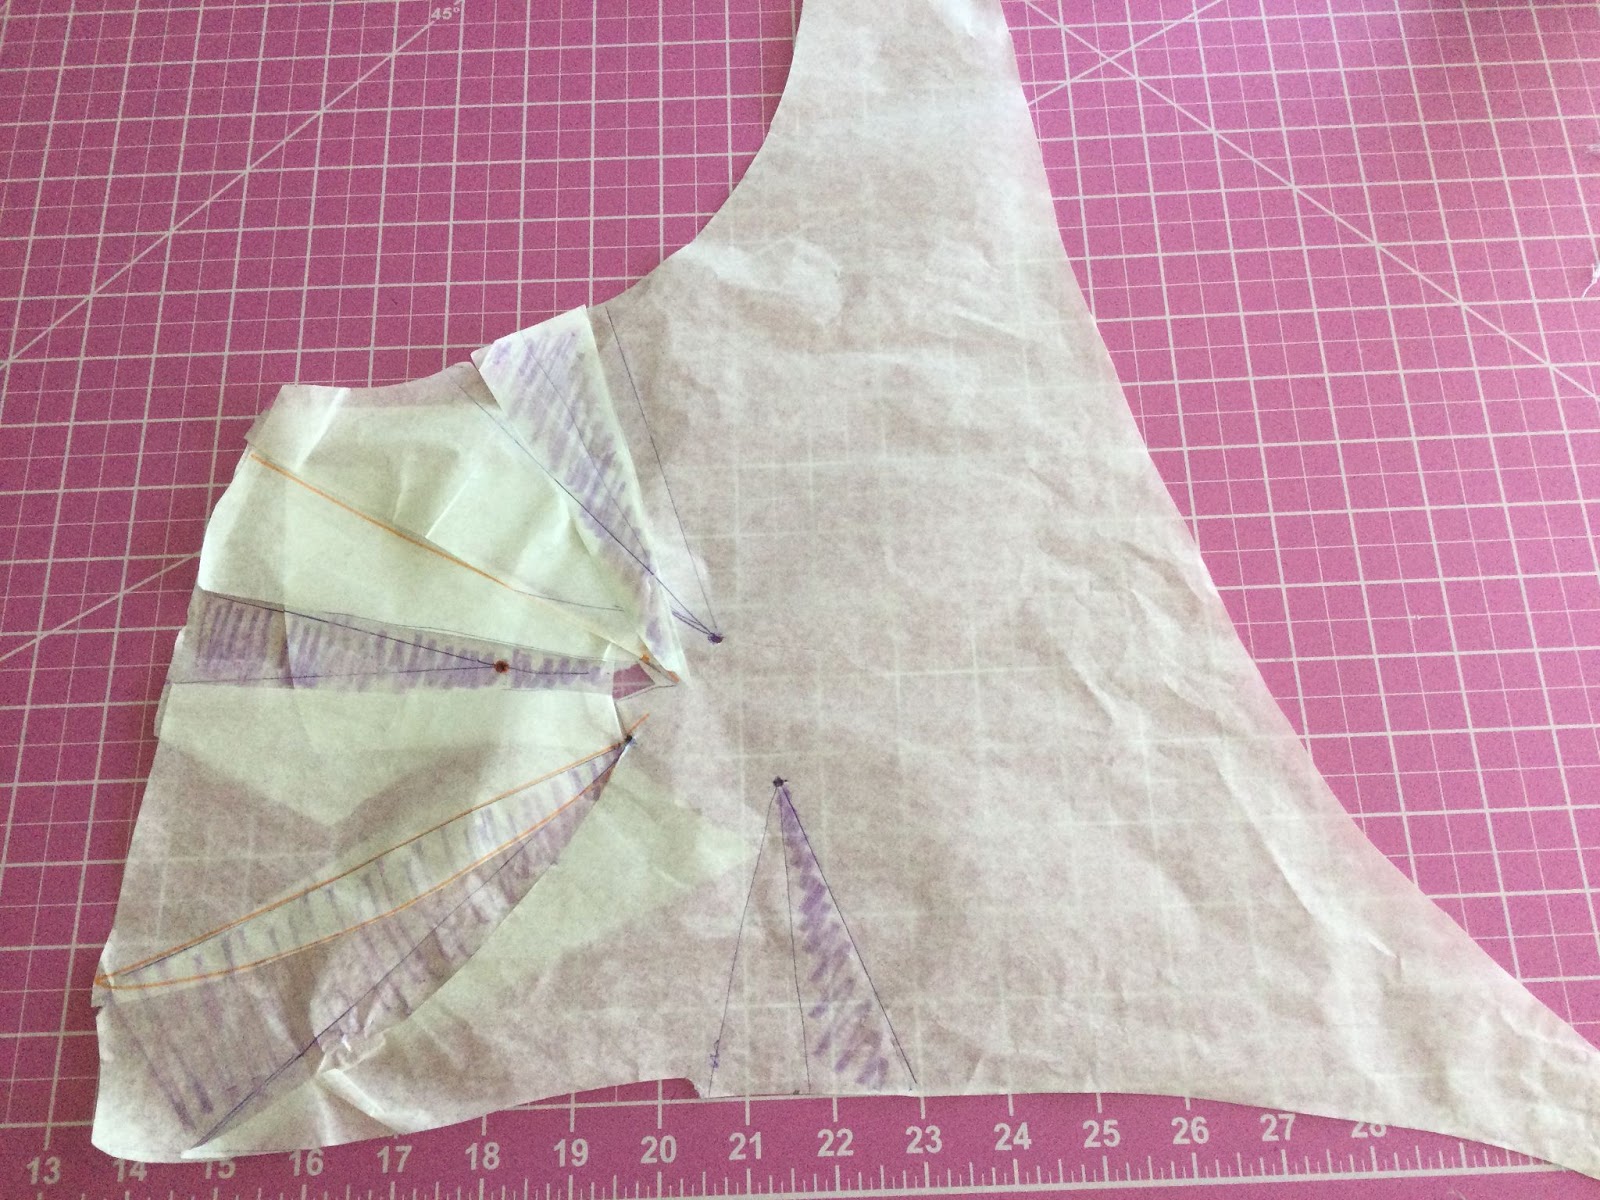
Just for funsies, here is my finished pattern piece: This isn’t “the” right way to do it, this is just the result of what worked for me. It’s kind of messy looking because I adjusted some of the darts on the same tissue paper piece so I could keep what worked. Once again, the purple shows the original paper dart when swinging from the pivot point; the dot shows where I put in the bust apex; and the lines show where I actually make the lines/legs of the dart.
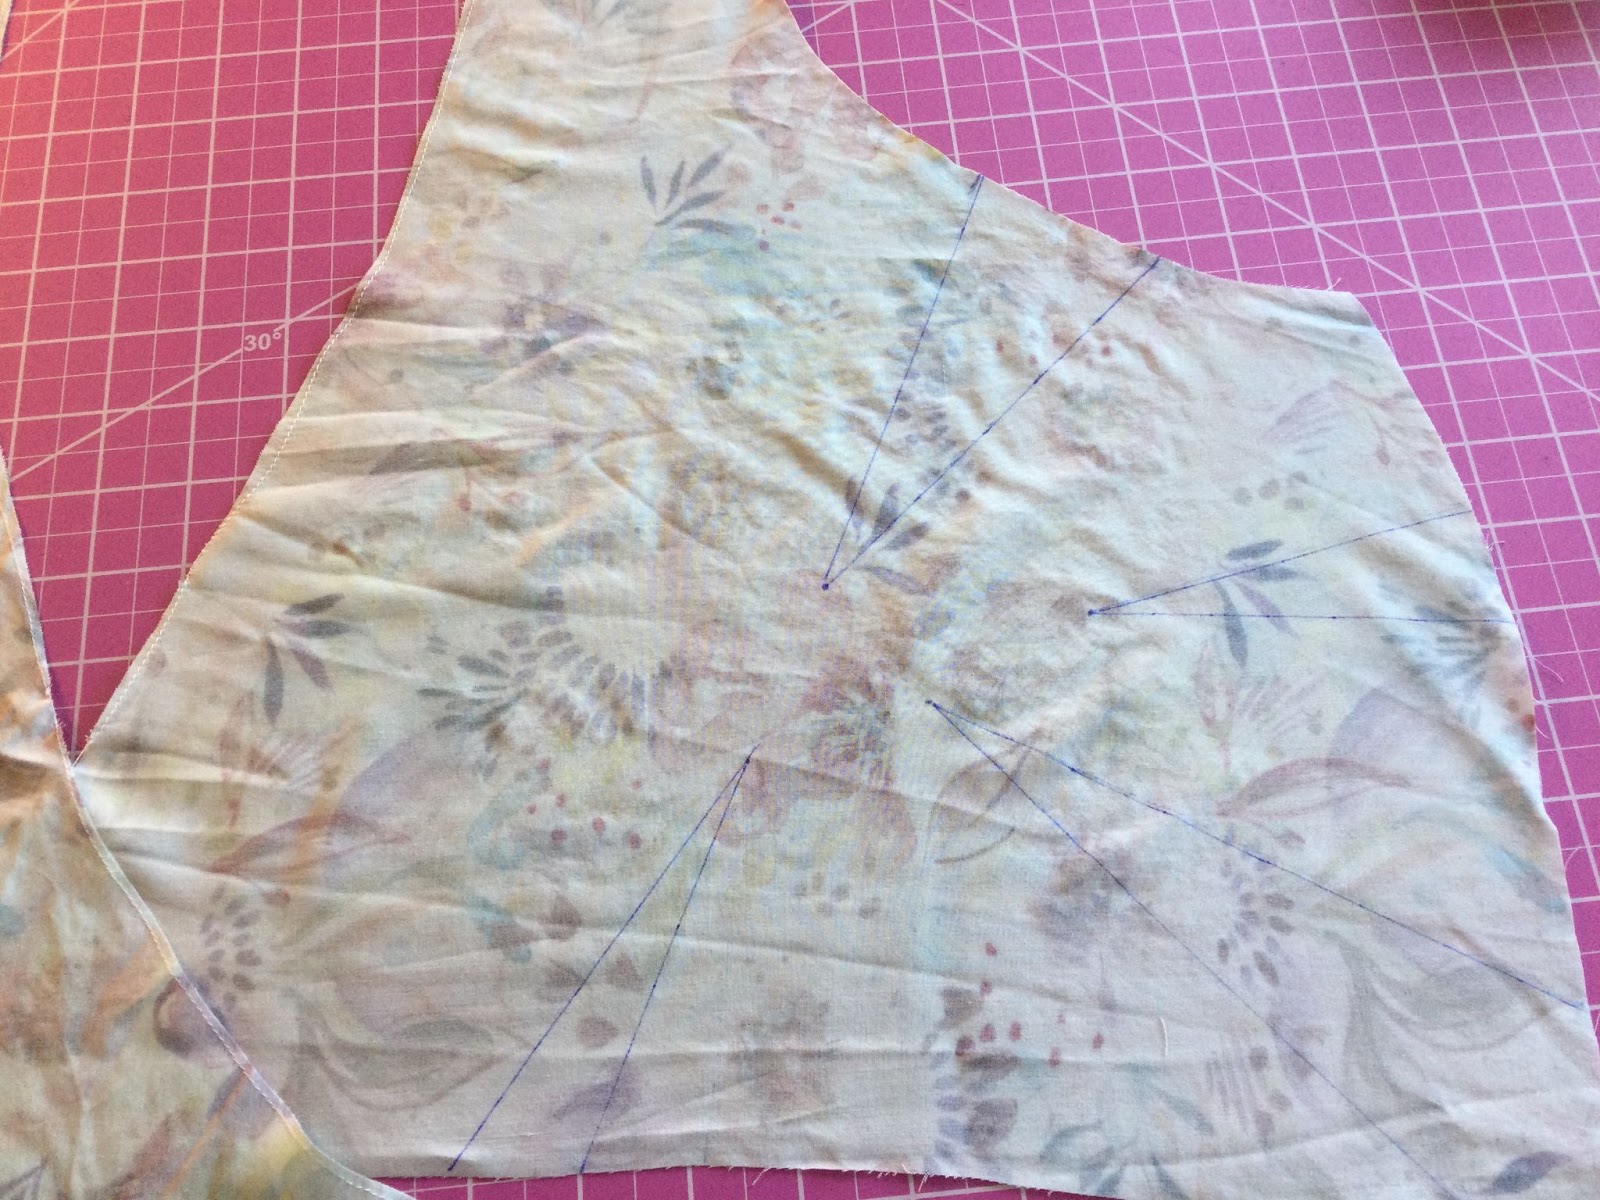
And here is what it looks like when cut out of fabric, with the darts traced on:
Which brings us to our final section …
3. How to Sew Darts Smoothly
If you are an Expert Dart-Sewist, this section will probably be review. If you are a less-confident dart sewist, then this article is your one-stop shop for darts! And here’s some really good news: all the articles about sewing darts say to get lots of practice, and suggest getting out some scrap fabric and just sewing a bunch of random darts in order to get the hang of it. Well, if you are like me, and end up sewing half a dozen bodice muslins of the Roseclair, and each one has four darts, you can skip the random darts step – by the time you are done with your muslins, you will have graduated to Expert Dart-Sewist level. Or at least upper intermediate!
- Draw your darts onto the wrong side of your fabric, including the legs and the apex.
- Pick up the fabric at the dart apex and the middle of the dart, so the two legs of the dart hang down and are more or less on top of each other, on opposite sides of the fabric.

- Lay your fabric down flat, and pin along the legs. Here are two pins going across the leg of the dart, holding the fabric in place, and I can sew over them. The third pin is placed so the head of the pin is on the apex of the dart. This is optional, but it can make it easier to see where you’re going. You must take that pin out as you sew.
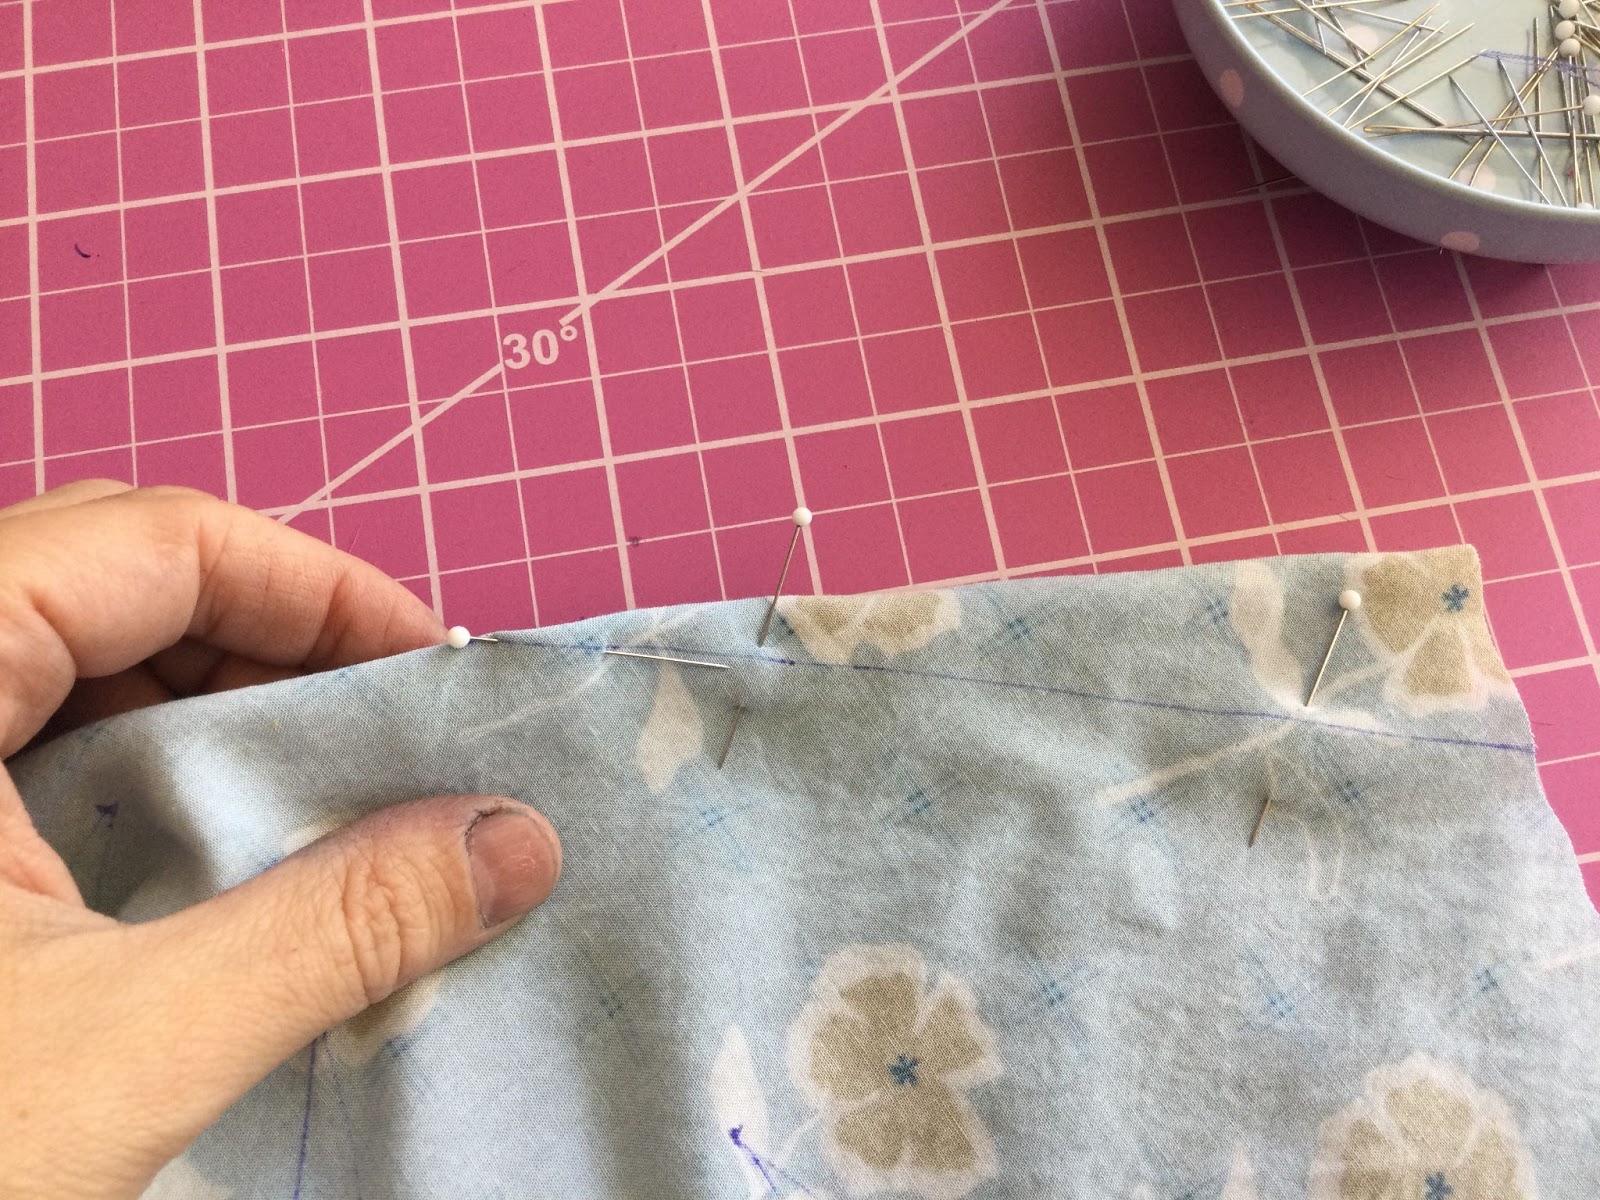
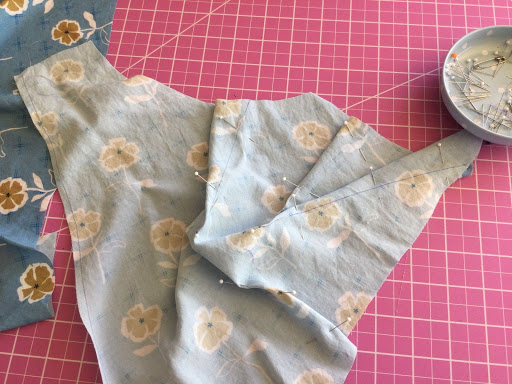
- I like to draw and pin all the darts before I start sewing. It looks like this
- Now, the trick is that you are not going to sew on that line. A straight sewing line makes for a blocky dart, because you are not straight! You want to start at the “feet” of the dart, and head towards the apex of the dart in a slightly concave line.
- Then, at the tip of the dart, you sew parallel to the very edge of the fabric for the last few stitched. Because this angle is so miniscule, it doesn’t matter if you exactly hit the apex of the dart. It is shaping more than taking out chunks of fabric.
- To create a subtle tip of the dart, lower your stitch length as you get towards the end. Here I have marked the stitch length that I use, as seen below. The first part (towards the right) I am making a curve with the stitch length at 2.4mm (the “normal” stitch length on my machine). At the first arrow, I reduce the stitch lengh to 1.8, and follow the line towards the tip of the pin and the apex. At the next arrow, I reduce the stitch length to 1.0mm and stitch right at the very edge of the fabric for about ⅛-¼ inch.
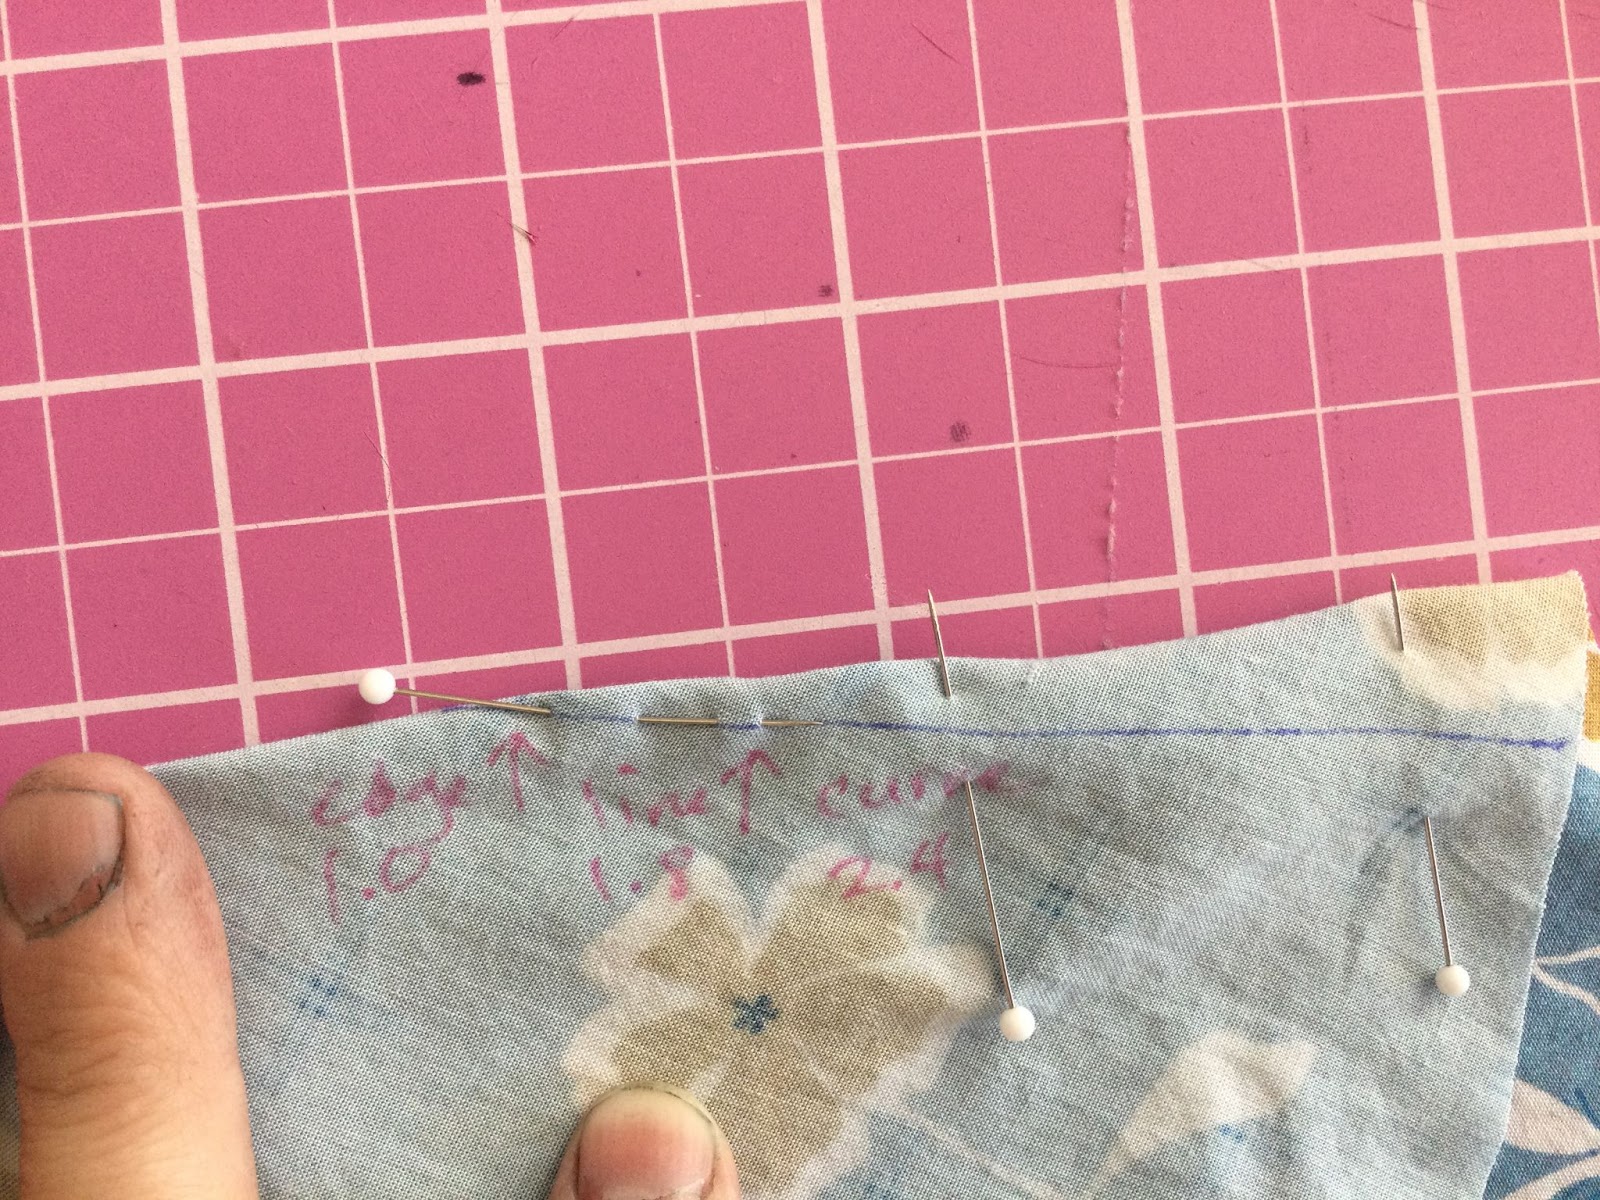
- Reducing the stitch length also means you DO NOT backstitch, which reduces bulk (aka a bump). You also do not have to leave tails of thread and tie them together (which I see some people recommend), which might work fine but is an annoying extra step (in my humble opinion!). Several 1mm stitches will hold your dart in place, and you can just trim the thread right at the end.
- The finished dart looks more or less like the image below. Note: more or less is just fine! Each of these things is subtle, and you are not going to notice little imperfections when it is finished. You can see that my concave line has a little convex bump, and I meant to go more parallel at the tip. It doesn’t matter, because you are going to …
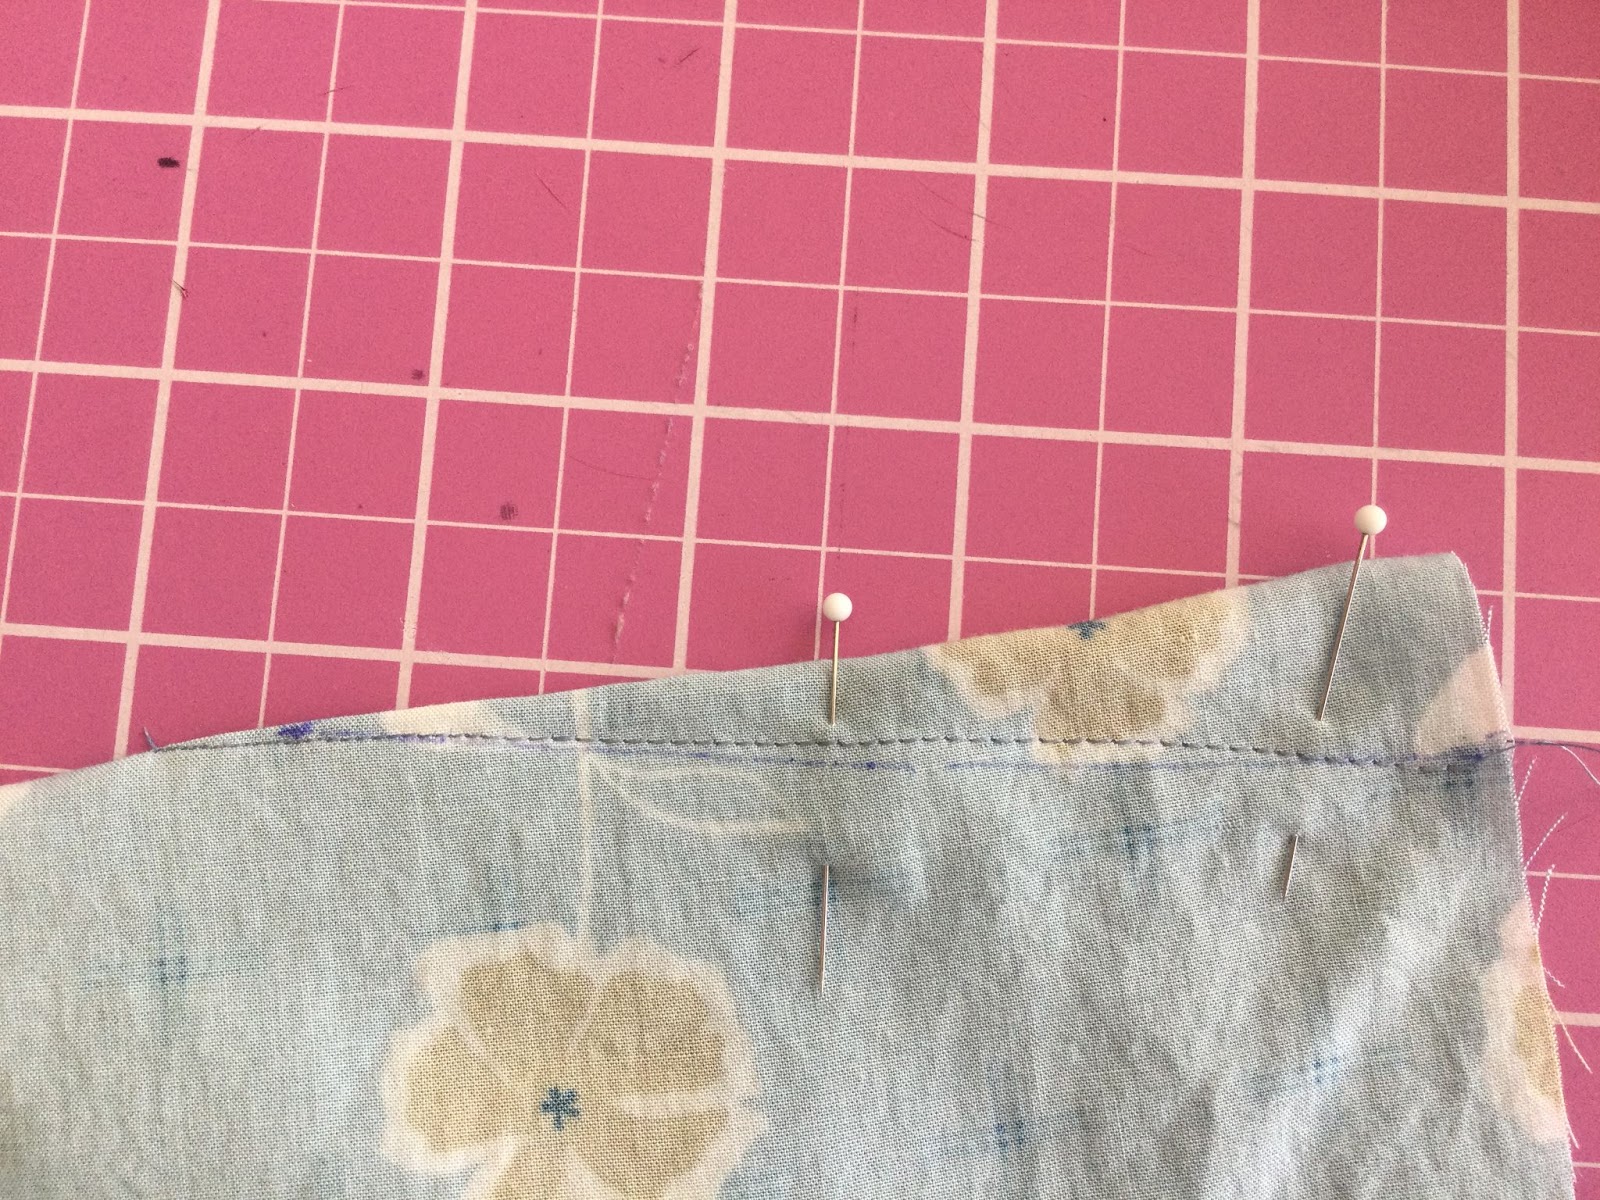
- Iron it smooth!
- First of all, just lightly iron the darts in the direction you want them to go. Cashmerette recommends up. I aimed them away from each other.
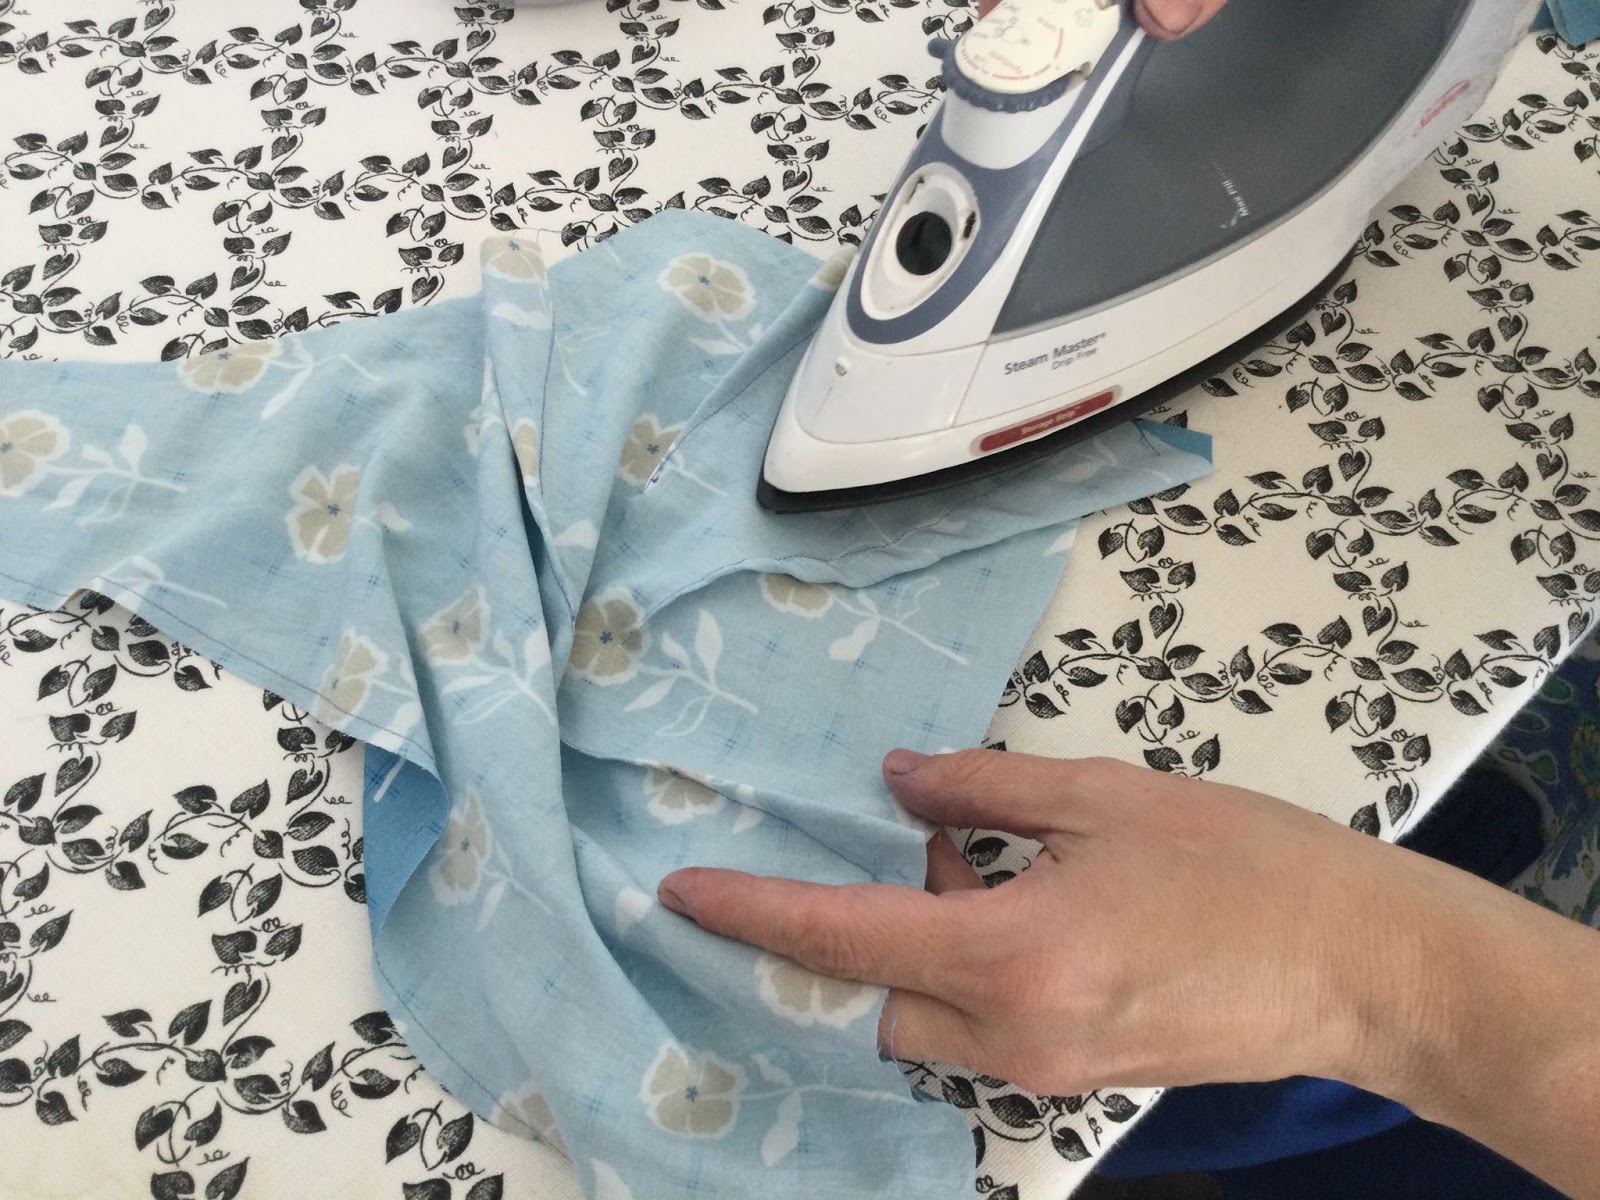
- Now put your garment over your pressing ham. (If you do not have a pressing ham, the general recommendation is to use a towel, but in this case you need a firm and breast-shaped surface…. maybe a towel rolled over a softball would work? A pressing ham is not expensive and it is much easier to create a good bust shape using one.) Separate the fabric away from the dart, and rub your iron around the seam, especially at the curve and the tip. I make little circles with the tip of my iron.
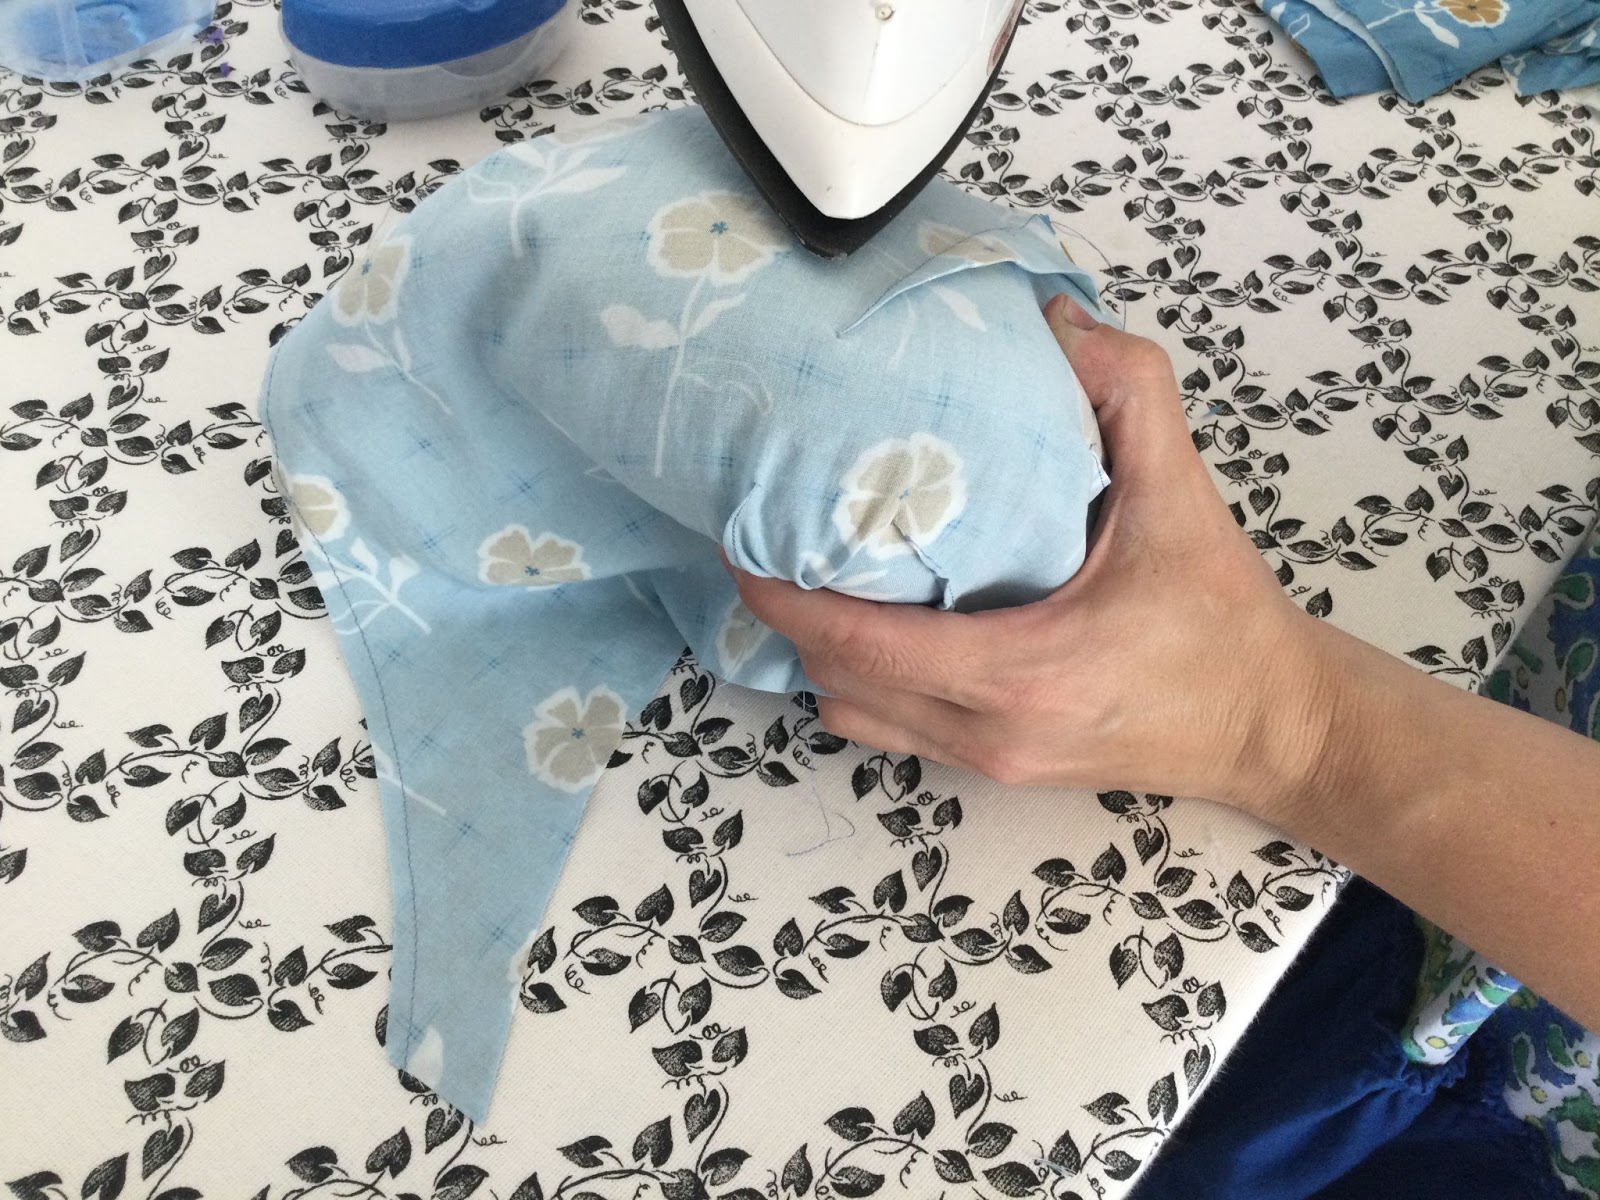
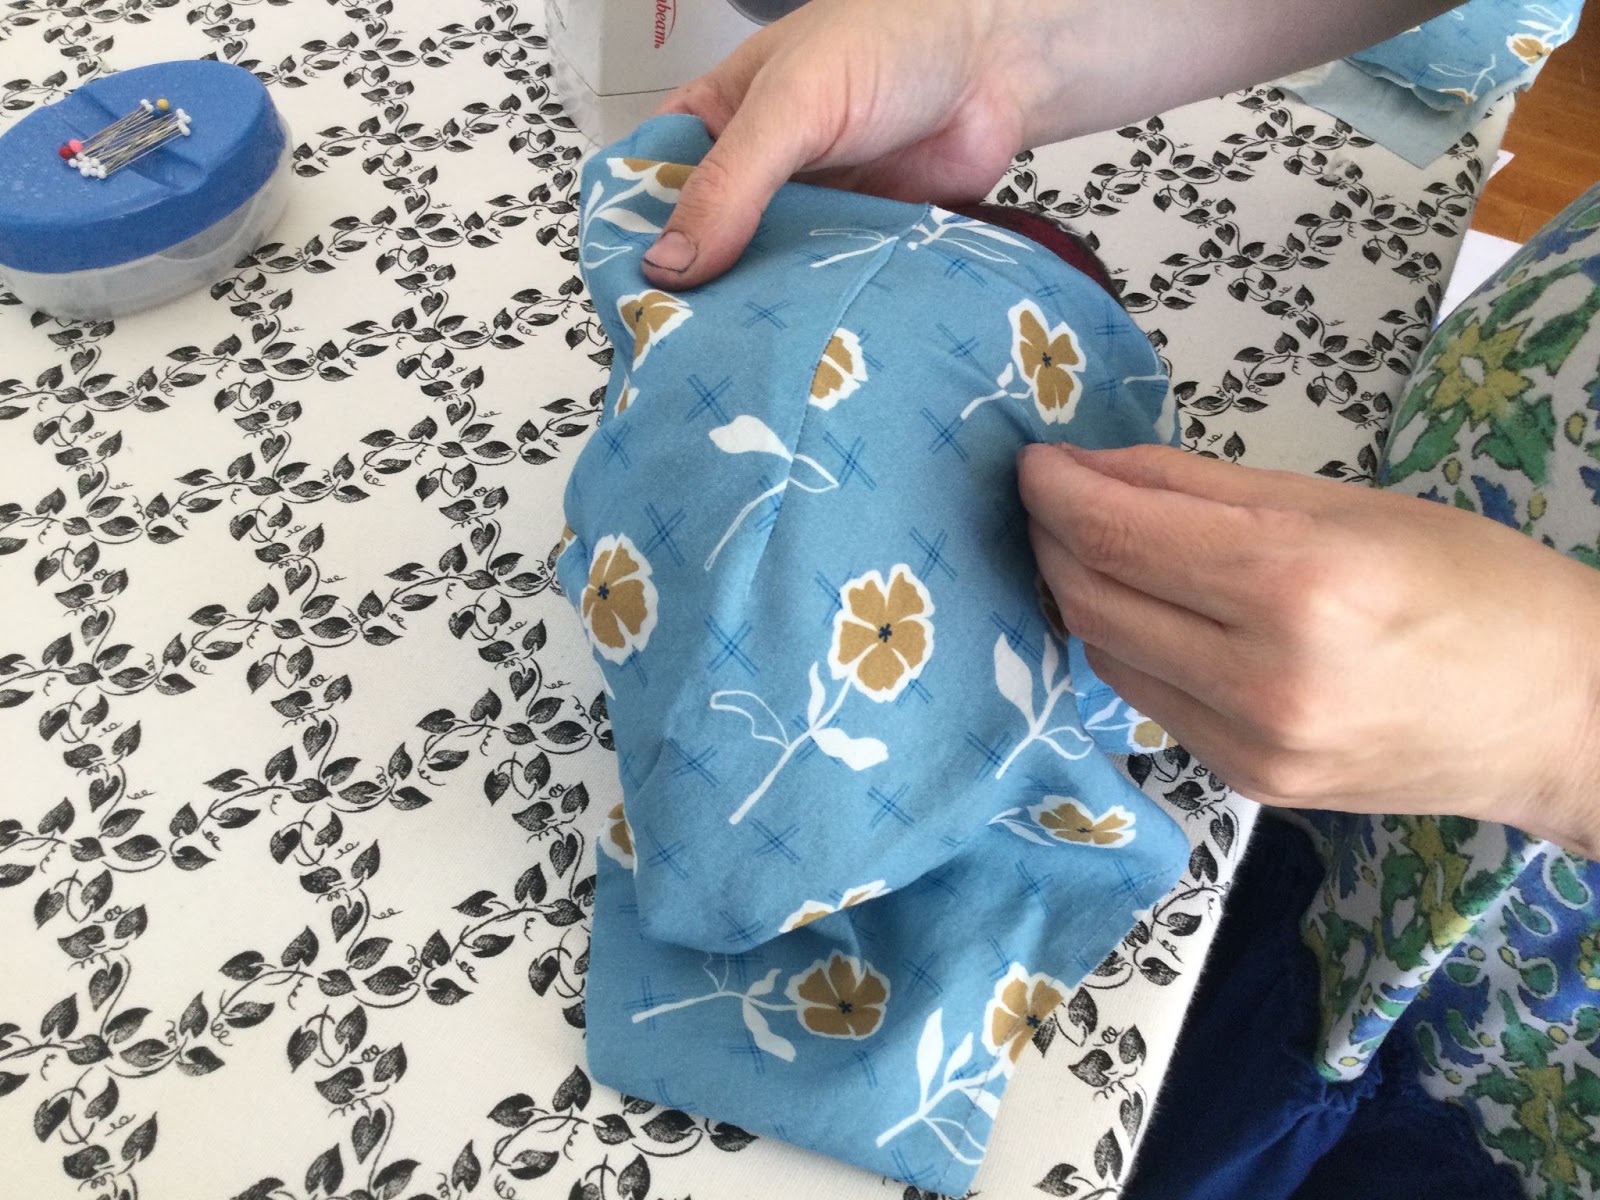
- Now turn your garment right side out over the pressing ham. You will need to pull the sides away from the seam, because from the wrong side it will have made more of a triangle than a curve. Shape it around different parts of your pressing ham, and smooth out all the curves and tips.
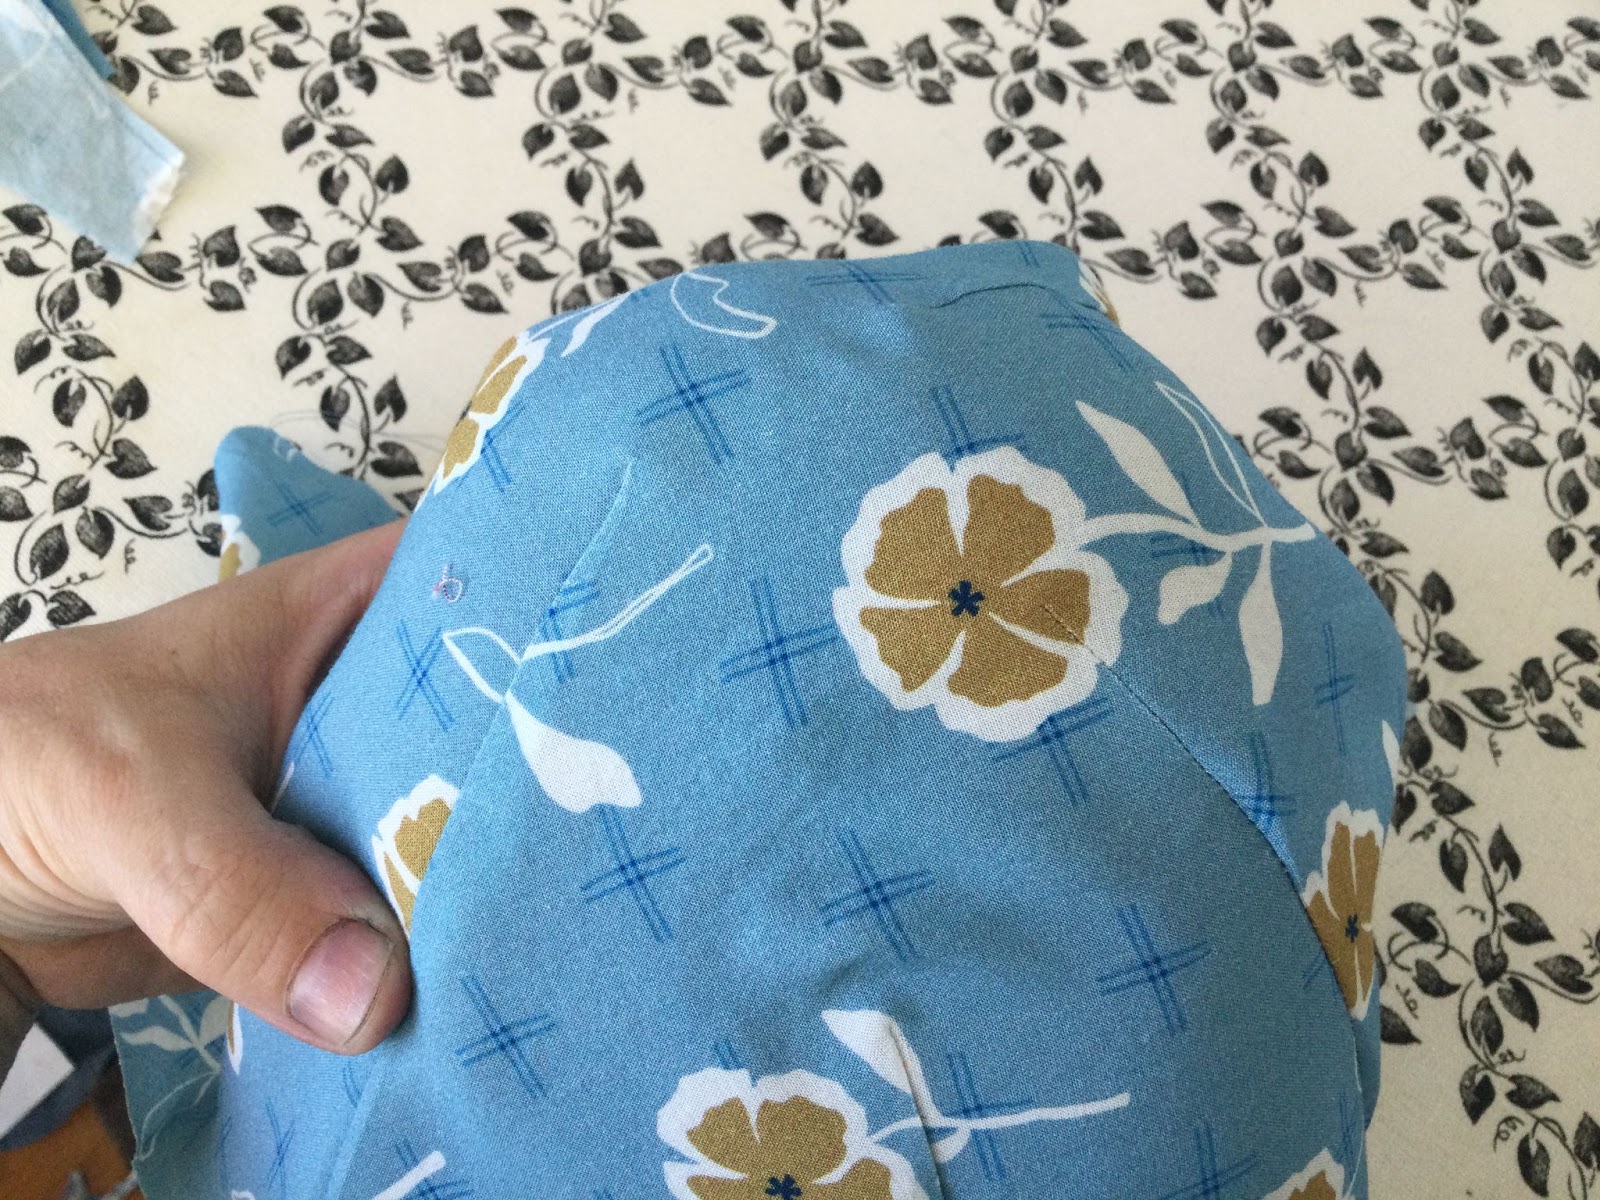
- Here are the tips of the finished four seams, at the tip of the pressing ham. This is not quite shaped like my breast, but it is also less forgiving. You can see that the tips of the darts are not making any bumps on the outside of the garment!
Conclusion, Next Steps, and Pictures
Now you know how to divide up a Big Honkin’ Dart, how to adjust the position and angle of the darts so they match your shape, and how to sew the darts so they look smooth from the outside. It will take a bunch of “quick-n-dirty muslins” to get the best shape for you, and meanwhile you’ve gotten lots of practice sewing beautiful darts!
Next, you might move on to making adjustments on other parts of the dress, like a Full Bicep Adjustment, changing the waist measurements, or adjusting the length. Or, if the dress more or less fits, you might be ready to make a wearable muslin! Cashmerette warns that this dress behaves differently in different fabrics, so you might want to use something closer to your final fabric than a stiff muslin or sheet.
I made a peplum version in a rayon/linen to test the fit of the shoulders, waist, and sleeves. I made some more adjustments once I could see how the whole piece fit together; I moved one dart again, and made a number of adjustments to the waist. (The peplum version takes approximately 2 yards of fabric in my size; used the top layer of the skirt from View A. I suggest adding 3 inches to the length of the peplum, which I did not do but admired in other people’s pictures.)
The dress is very fabric-hungry, so it is really worth making a peplum top, and then your first dress version can come out perfectly!
For many people, the Roseclair is not the easiest dress to get a perfect fit. Many people need to adjust the bodice in order to get the neckline and darts to lay properly, and the darts might not fit the first time. But this bodice is very well drafted, and once you put in the time to adjust it for your own body, this comes out as a spectacularly well-fitted dress. I enjoy both the look and feel of my Roseclair dresses, and I think they look stunning and graceful on many other sewists of different body types. I hope this tutorial helps you make a beautiful Roseclair dress of your own, now that you know how to sew perfect darts – for you!!
Here are some examples of how this method works for me:
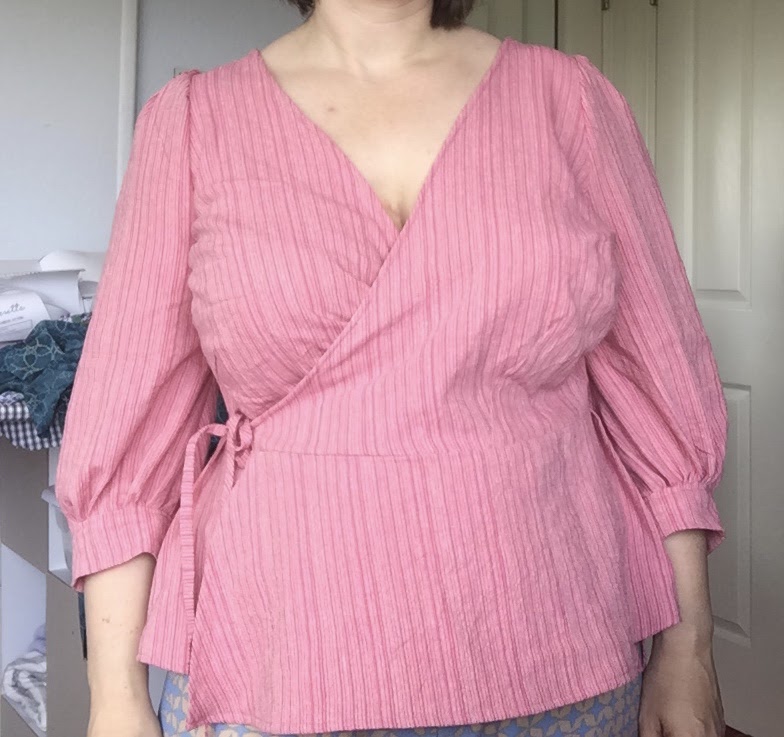
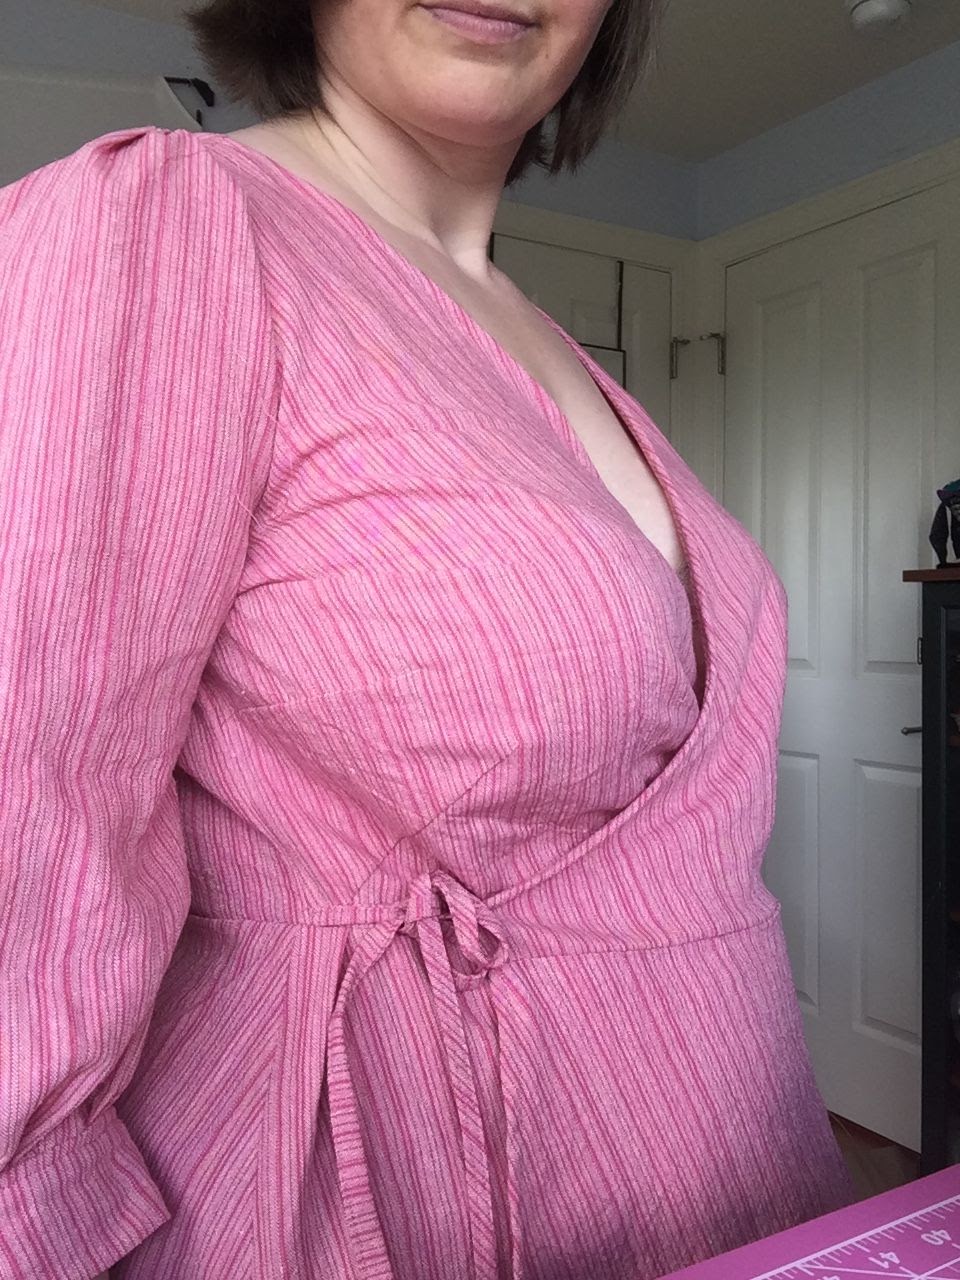
This was my first peplum. The waist sags below my natural waist, so I adjusted that. Here I have two darts in the side seam and one French dart, and the original waist dart is in its original place.
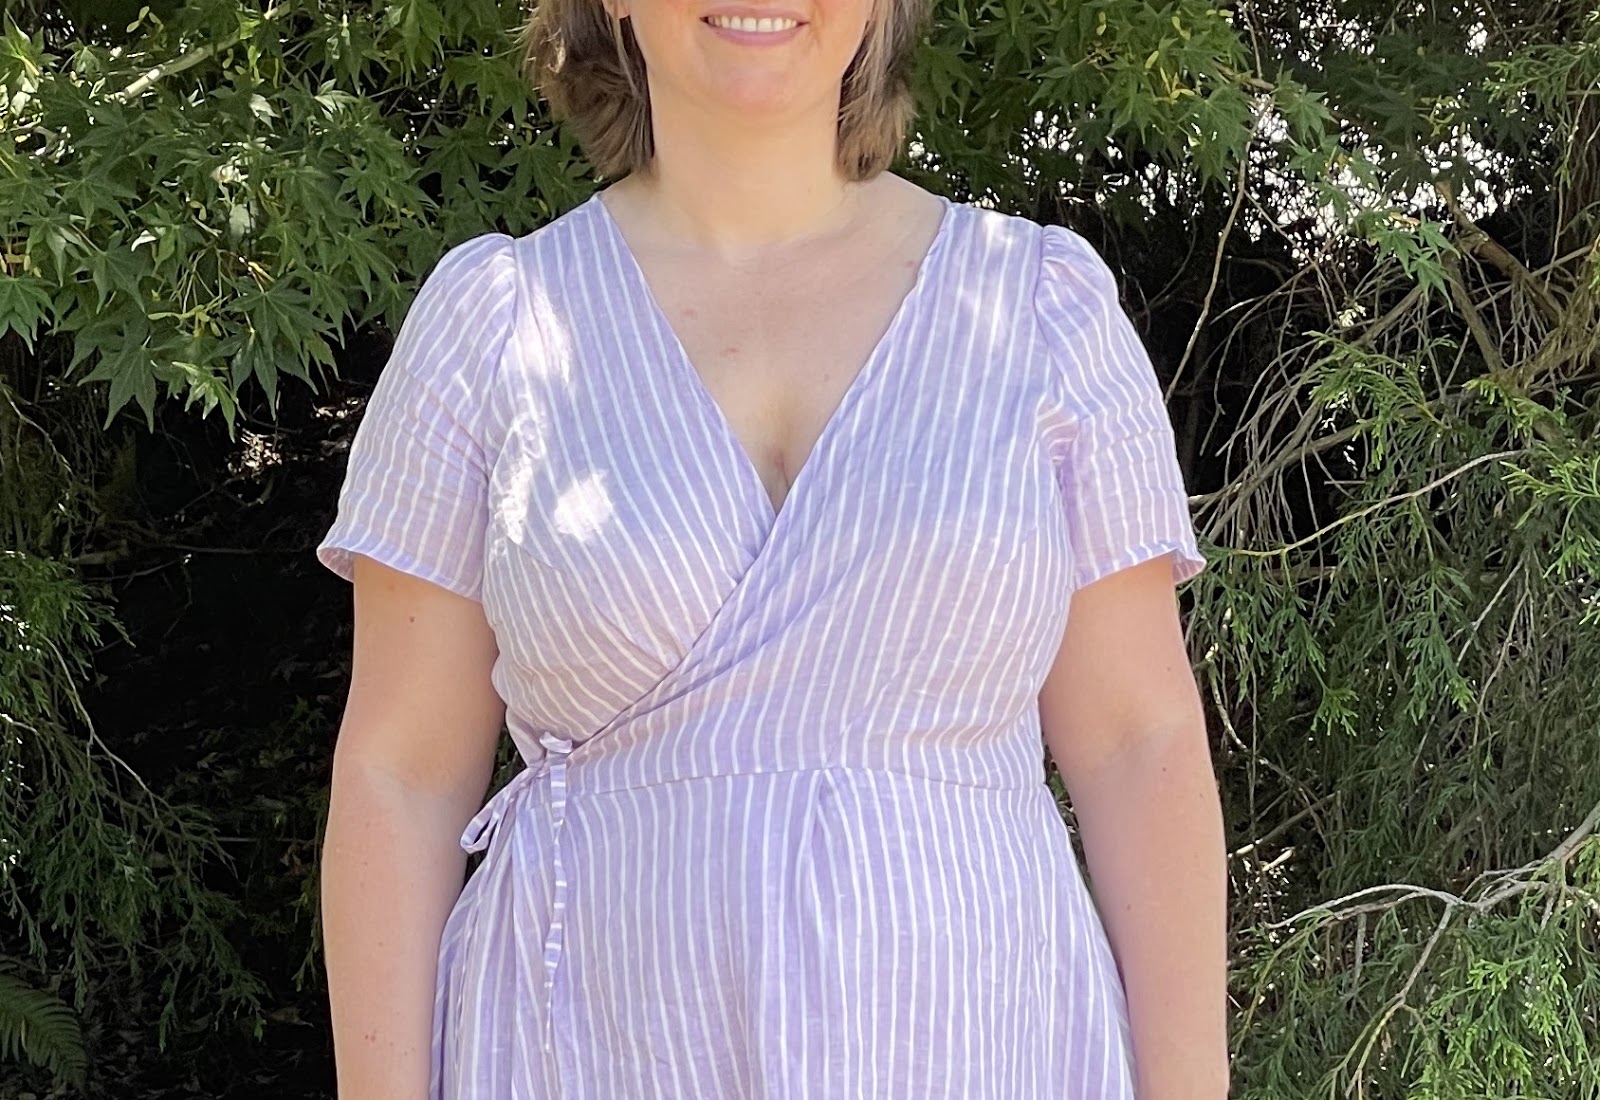
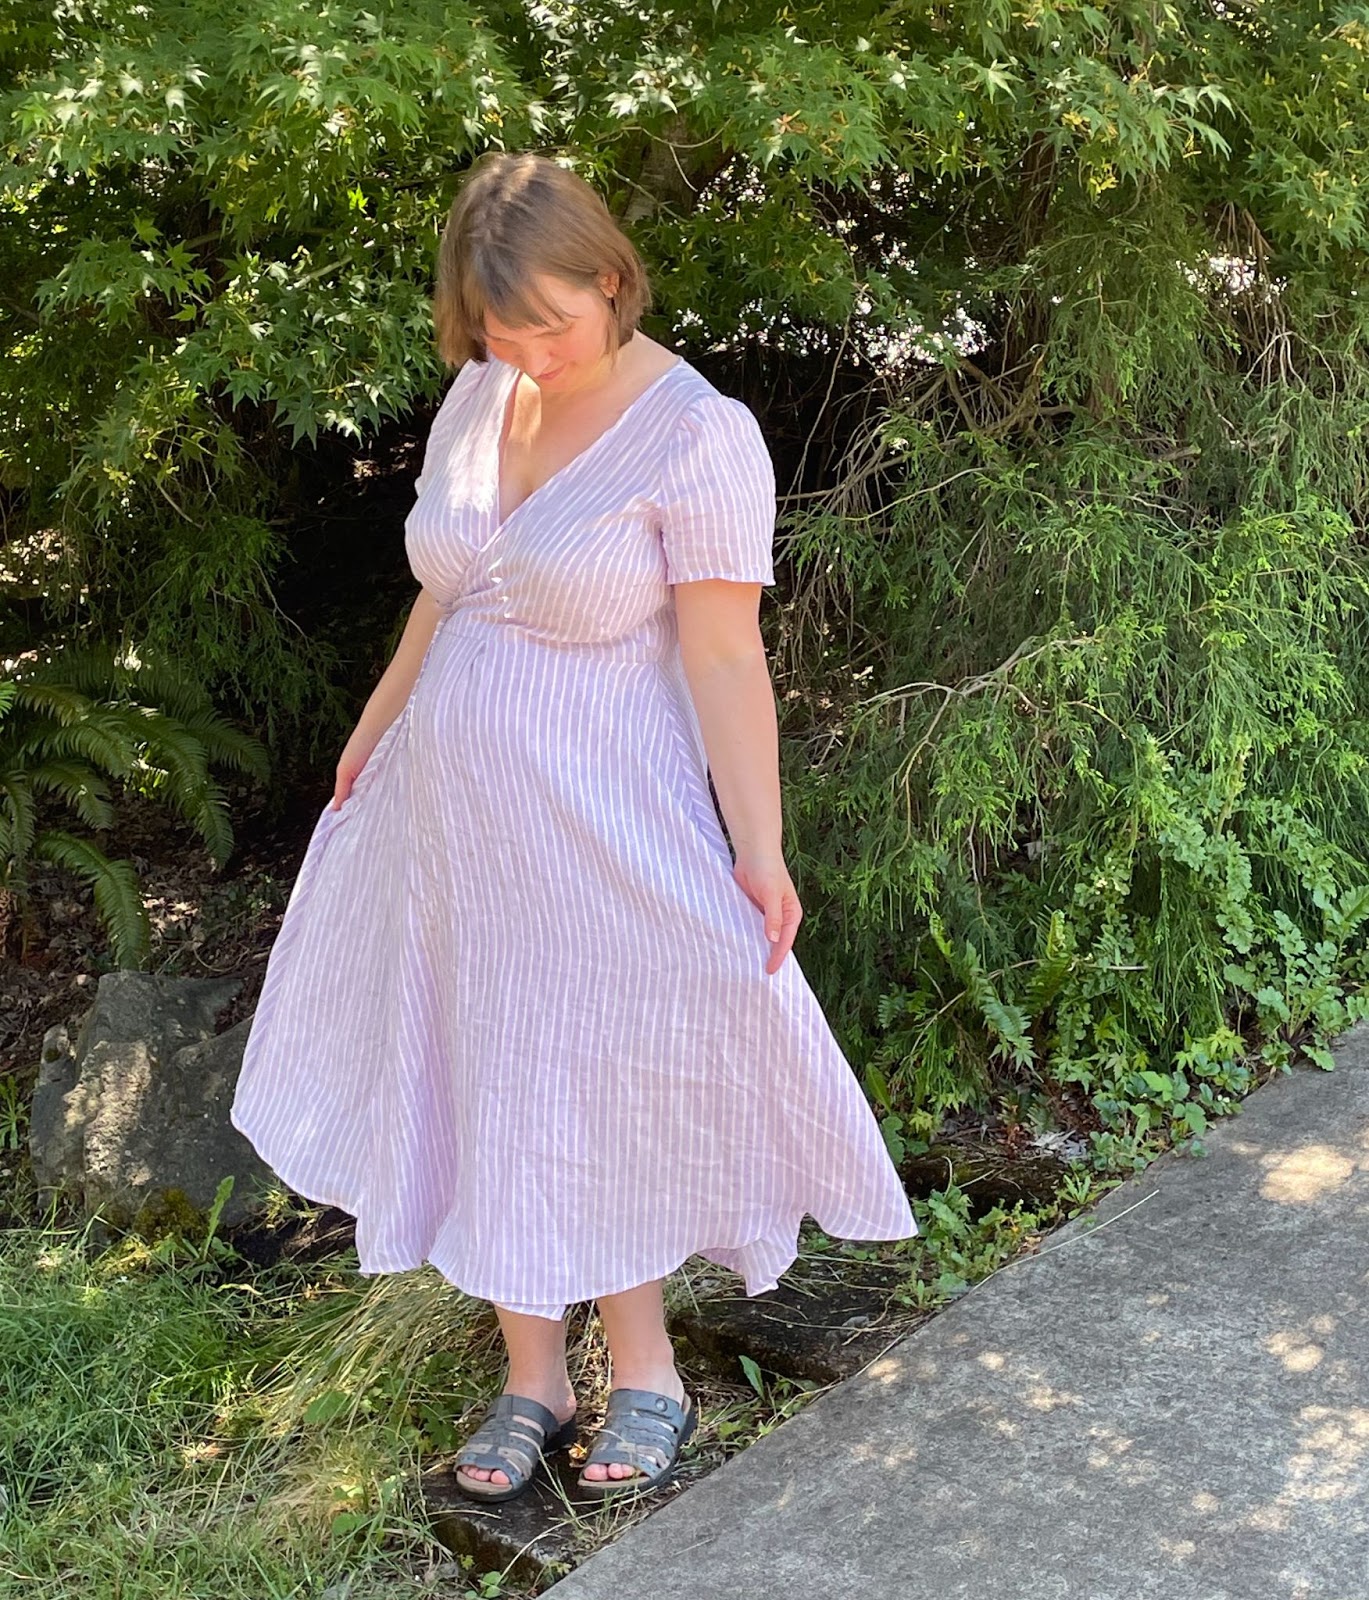
Roseclair in linen. For this version (and subsequent), I moved the higher side dart into the armcythe (see how it changes the wrinkle in the first version) and put the waist dart at an angle.
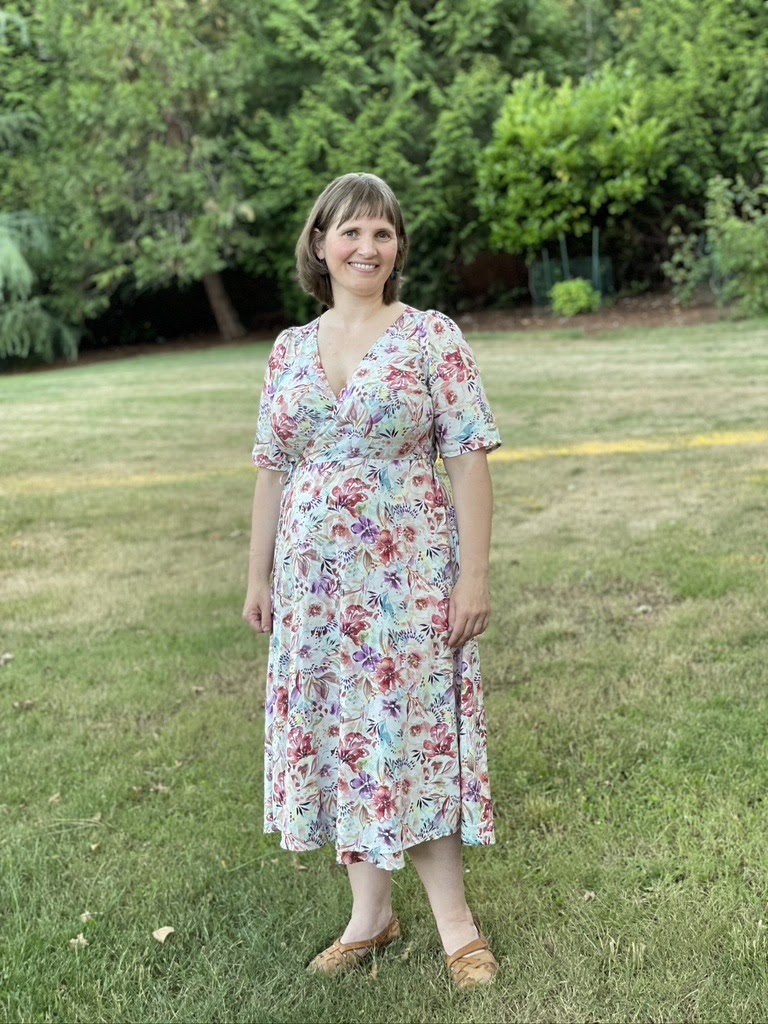
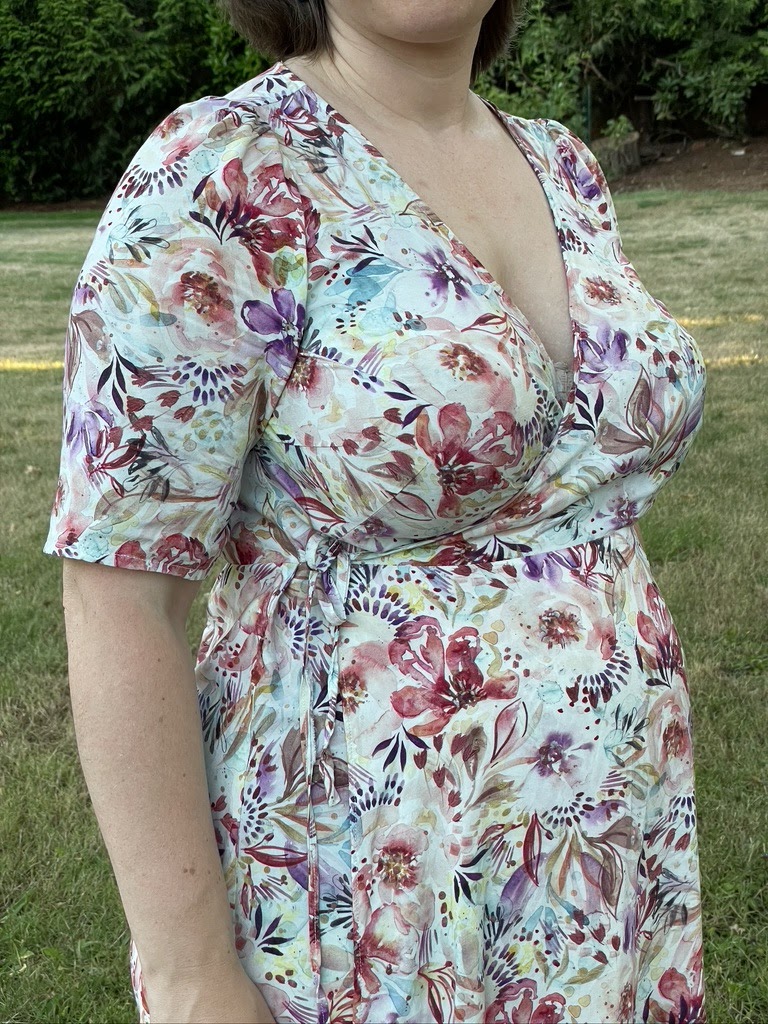
The dress behaves differently with this slippery rayon, and it is hard to see the darts in the busy print. It just looks like the bust magically fits around my shape, just the way dresses are supposed to do!

When her fourth child grew out of infancy, Christy realized that she was a better mother (and human being) if she spent less time worrying about whether the house was clean, and more time making beautiful things. She is now raising and homeschooling five children, and her current textile art passions are hand embroidery and dress-making. She shares her work, and ideas about life, at Sonata in So (which is a double entendre with her past life as a musician).


Leslie
July 14, 2021Oh, how I needed this post over the last few days! Too late, I had to send my sister home with an ill-fitted shell and possibly more negative self image. She and I will be using this often in the future—in fact, my entire family thanks you, as we are all “blessed” (ha!) with difficult-to-fit busts. One small point, though: I think it’s ARMSCYE. Thanks again.
sewbustycommunity
July 14, 2021Awwww, too bad we’re a little late! Also, I had the same question re: “armscye” vs. “armcythe” and looked it up … apparently “armcythe” is an alternate, but acceptable spelling! Who knew?! –Lindsie
Danielle
July 15, 2021Thank you so much for this post. As a busty sewist, I have learned so much about fitting over the years, but I have consistently struggled with the BHD. And I have had a hard time finding much information about this particular issue. I knew my dart after an FBA was often short and wide, making for too much of a point in the front. And I knew that I needed a set of smaller darts, but I just needed this visual to help me see how to easily manipulate that negative space into smaller spaces that were equivalent. This gives me some great practical strategies to try out. Thanks again!
sewbustycommunity
July 16, 2021I’m so so so happy that this is helpful for you! Yay!