Guide to Underwire Bramaking with Kristen | Part 2: Bra Bands
Hello again, Busty Friends!! In Part 1 of this series, I shared the outline listed below, covering an order of operations and covered proper bra wearing, choosing a pattern & the fabrics to match, measuring for size and a discussion on wires.
Sewing and Fitting Tester Bras
Part 1 – Preparation for Sewing:
- Proper Bra Wearing
- Choosing a Pattern (Method)
- Picking out Fabrics to match your pattern
- Measuring to pick out a size
- Wire Fitting
- Wire Alterations
Part 2 – Bands:
- Band Fitting
- Band Alterations
Part 3 – Cups:
- Cup Fitting
- Cup Alterations
Today we’re going over Part 2 on creating a fitting band that is ADJUSTABLE! Many people have discussed doing a fitting band so that you can try different sets of cups, but I’m offering a way to make the changes you need to get your pattern to fit. Stay tuned for next week when we cover how to attach tester cups with seam allowances so the cup is also adjustable WITHOUT sewing the seam allowances down.
Order of Operations
The order of operations is quite important in bra making in that you may see wrinkles in bras that are an indication of problems in a different area. For example, many of the wrinkles in the cup can actually be an indication of band problems. No amount of tweaking the cup can fix issues that are actually band problems.
When you make alterations, you’ll go back to this order of operations and work from the beginning to the end. The band has it’s own order, and should be worked through from the center around to the back.
This is such a close fitting garment that everything affects something else – which can sound overwhelming, but it’s like anything else, you just break it down into the steps and work through it.
Band Considerations
Now, here’s the part you’ve all been waiting for! We’re going to assemble the fitting band in a way that minimizes making a million testers that don’t fit, and we’re going to make it adjustable in size so that even if you gain or lose 20lbs, this fitting band will still work for you (unless your wire size changes, but even that we could alter if you’re only changing one or two wire sizes).
First, let’s discuss the shapes of bodies a bit, so you understand why I’m suggesting a fitting band that’s a little different than what you’ll find elsewhere.
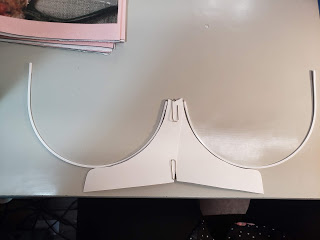
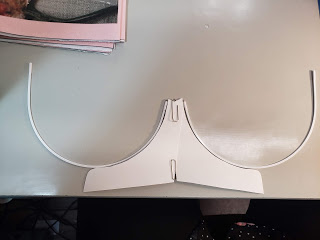
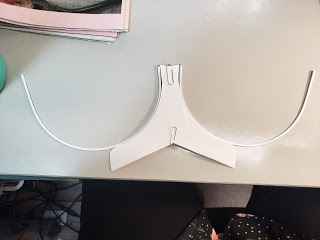
The first thing that should be assessed is how much space is between the breasts and if alterations need to be made to the bridge of the pattern to get the wires to sit in the correct position on the body. In these photos, you can see how we took a template of the bridge pattern, made two halves, and used paperclips to measure the space between the wires. You can make templates of whatever bra pattern you’re using (remove the seam allowance first) and “measure” between the breasts with these templates. Notice the different angles of the wires in the photos below.
On the fitting band, we will be adding seam allowance up the middle for alterations, so if you choose to skip the cardboard cut out idea, you can simply alter the fabric. Sometimes you need a different angle for that seam, but other times the whole width of the bridge just needs to be wider or narrower.
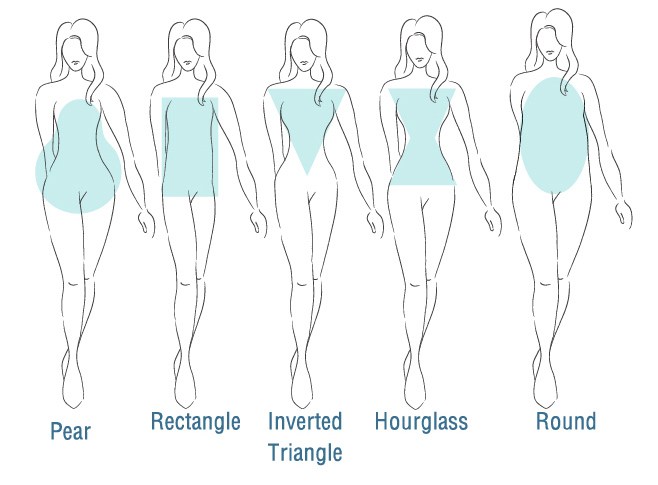
We all know from buying clothing or just a simple comparison of ourselves to others, that body torsos are all different. Look at this chart, specifically with regard to the area where a bra would sit. Some bodies have a very small waist compared to the overbust area like how the inverted triangle and hourglass are shaped like a V in the torso. If you look at the rectangle or the round silhouettes, they’re shaped more like | | (parallel lines) and have nearly no difference from underbust to overbust. The shape of their bands will be different and not match each other at all.
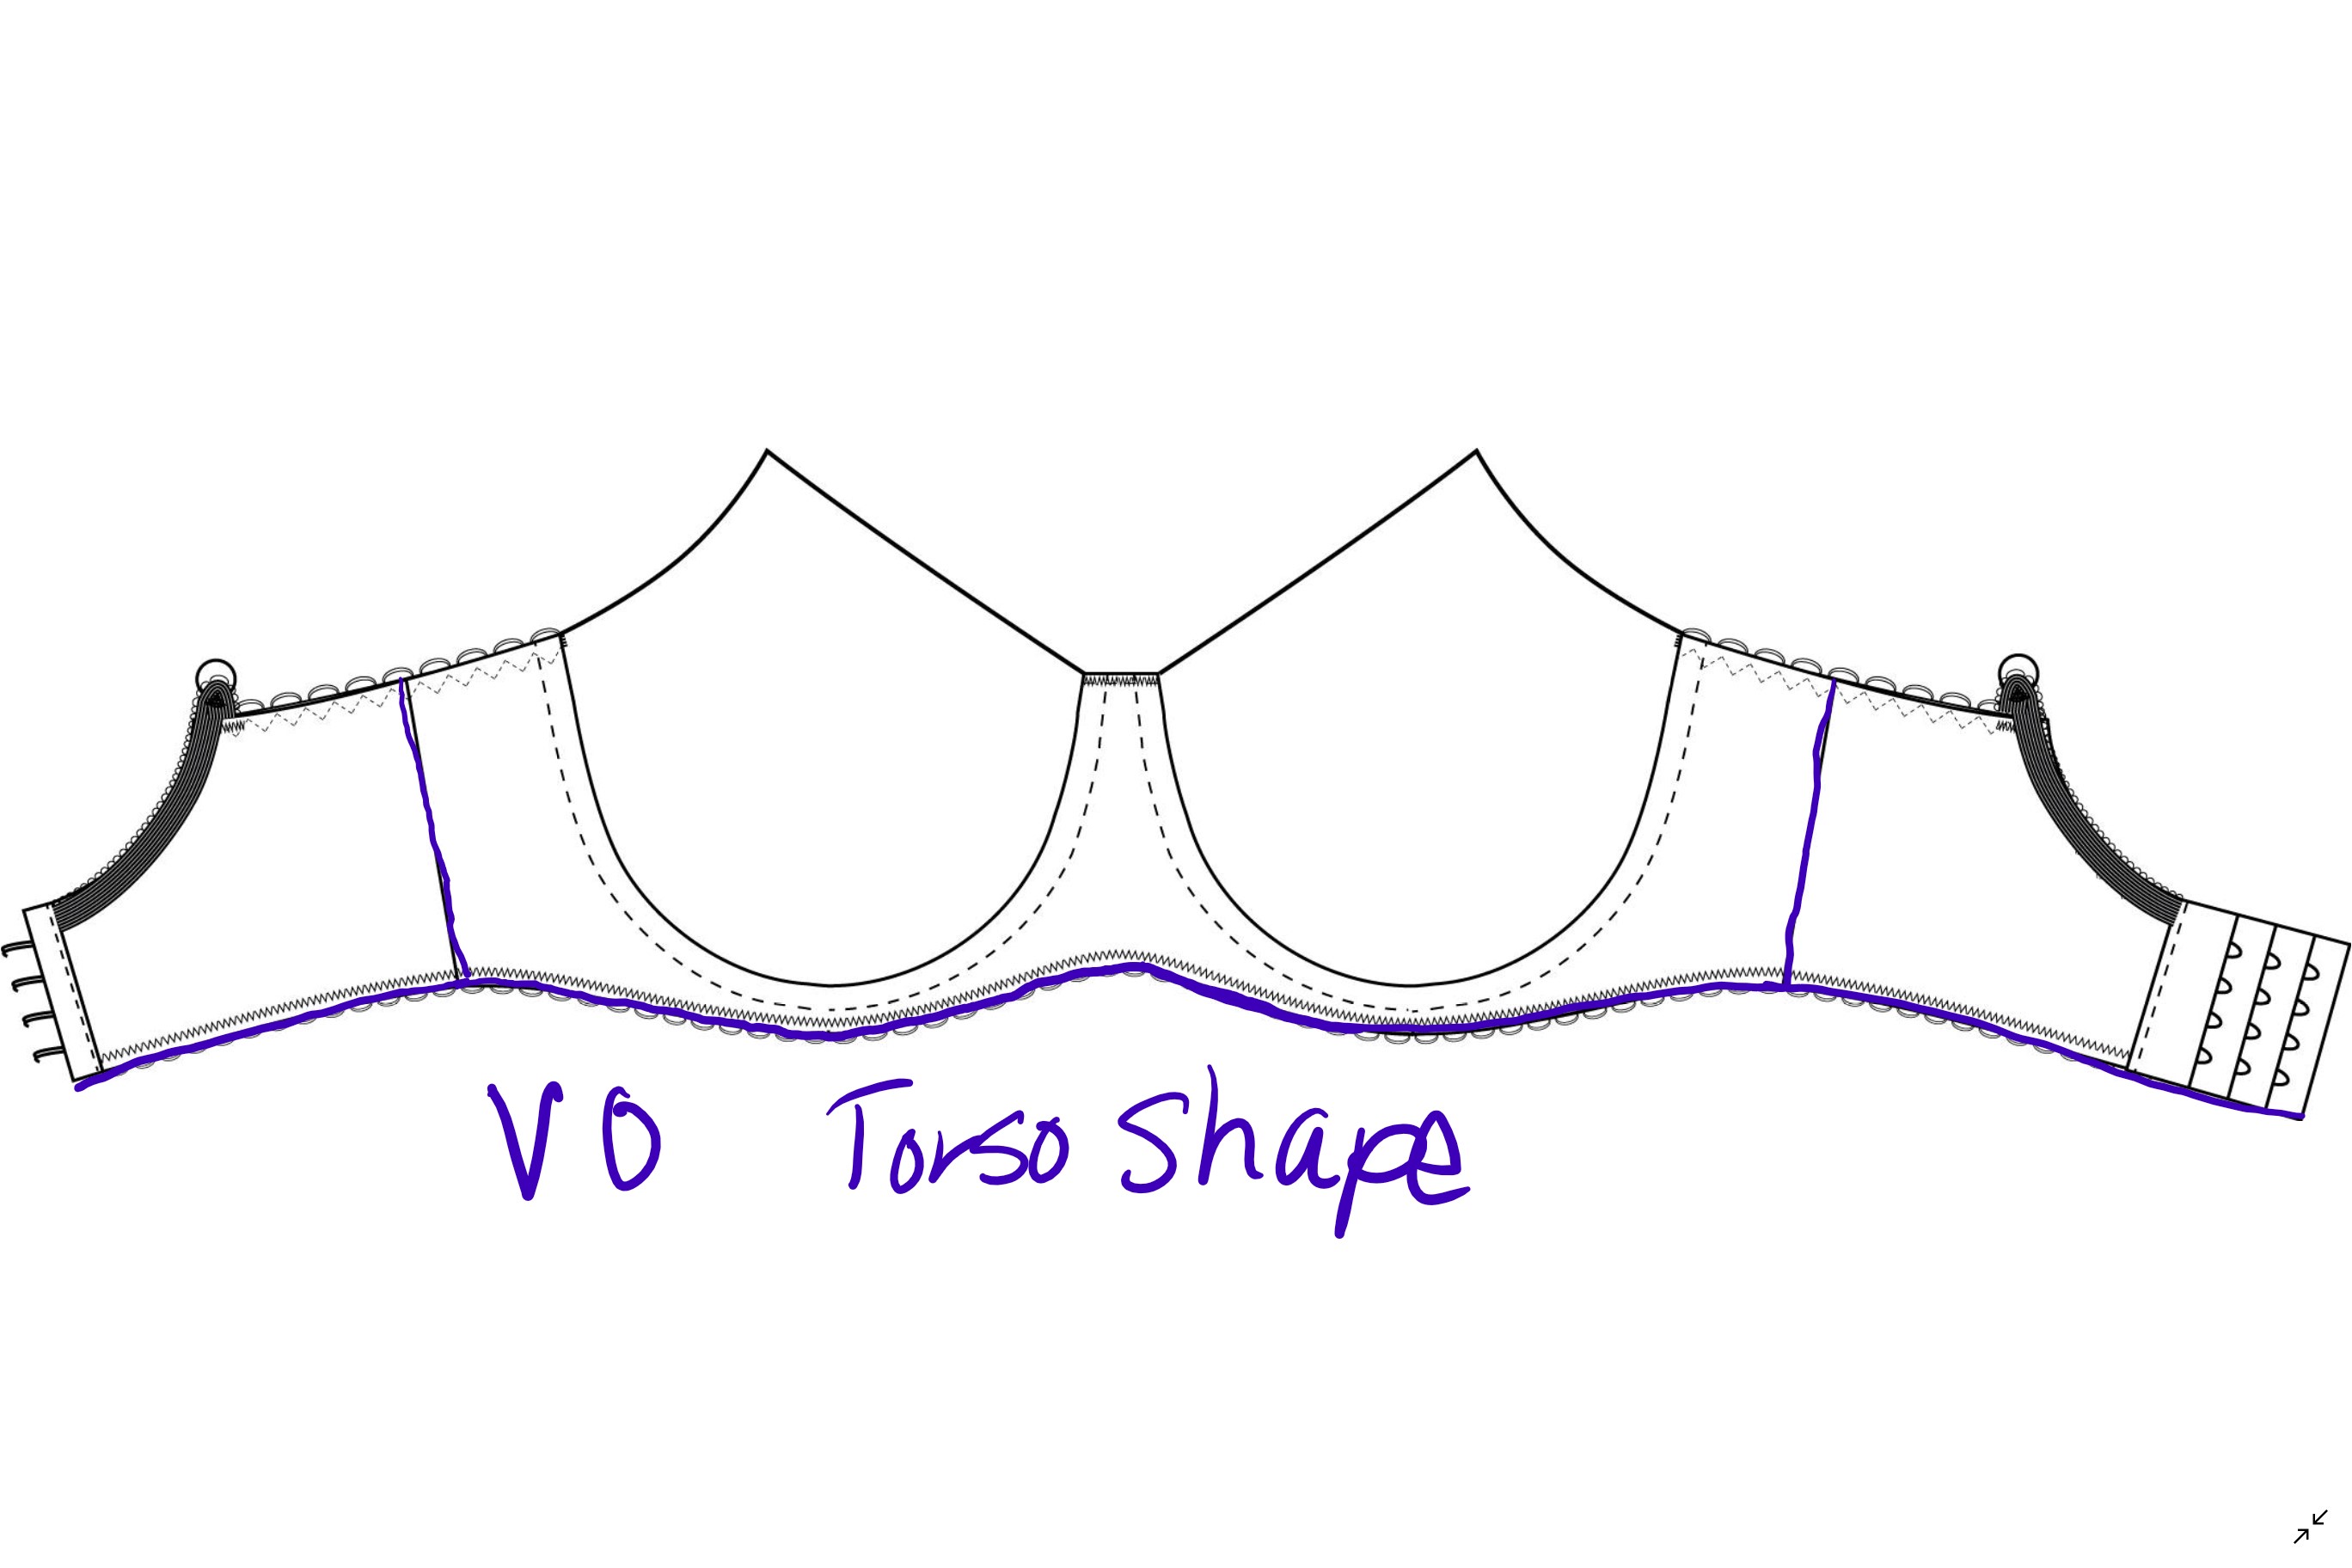
Forgive my scribbling to illustrate this. If someone has the same overbust and underbust then there is zero difference between the measurements and in the Support for Bare Essentials Facebook Group, we call it a V0 torso shape and the band would be shaped like this.
By contrast, if a person has an overbust of 40 and an underbust of 34, then they have a 6 inch difference (V6 torso shape) and the band would be shaped something like this.
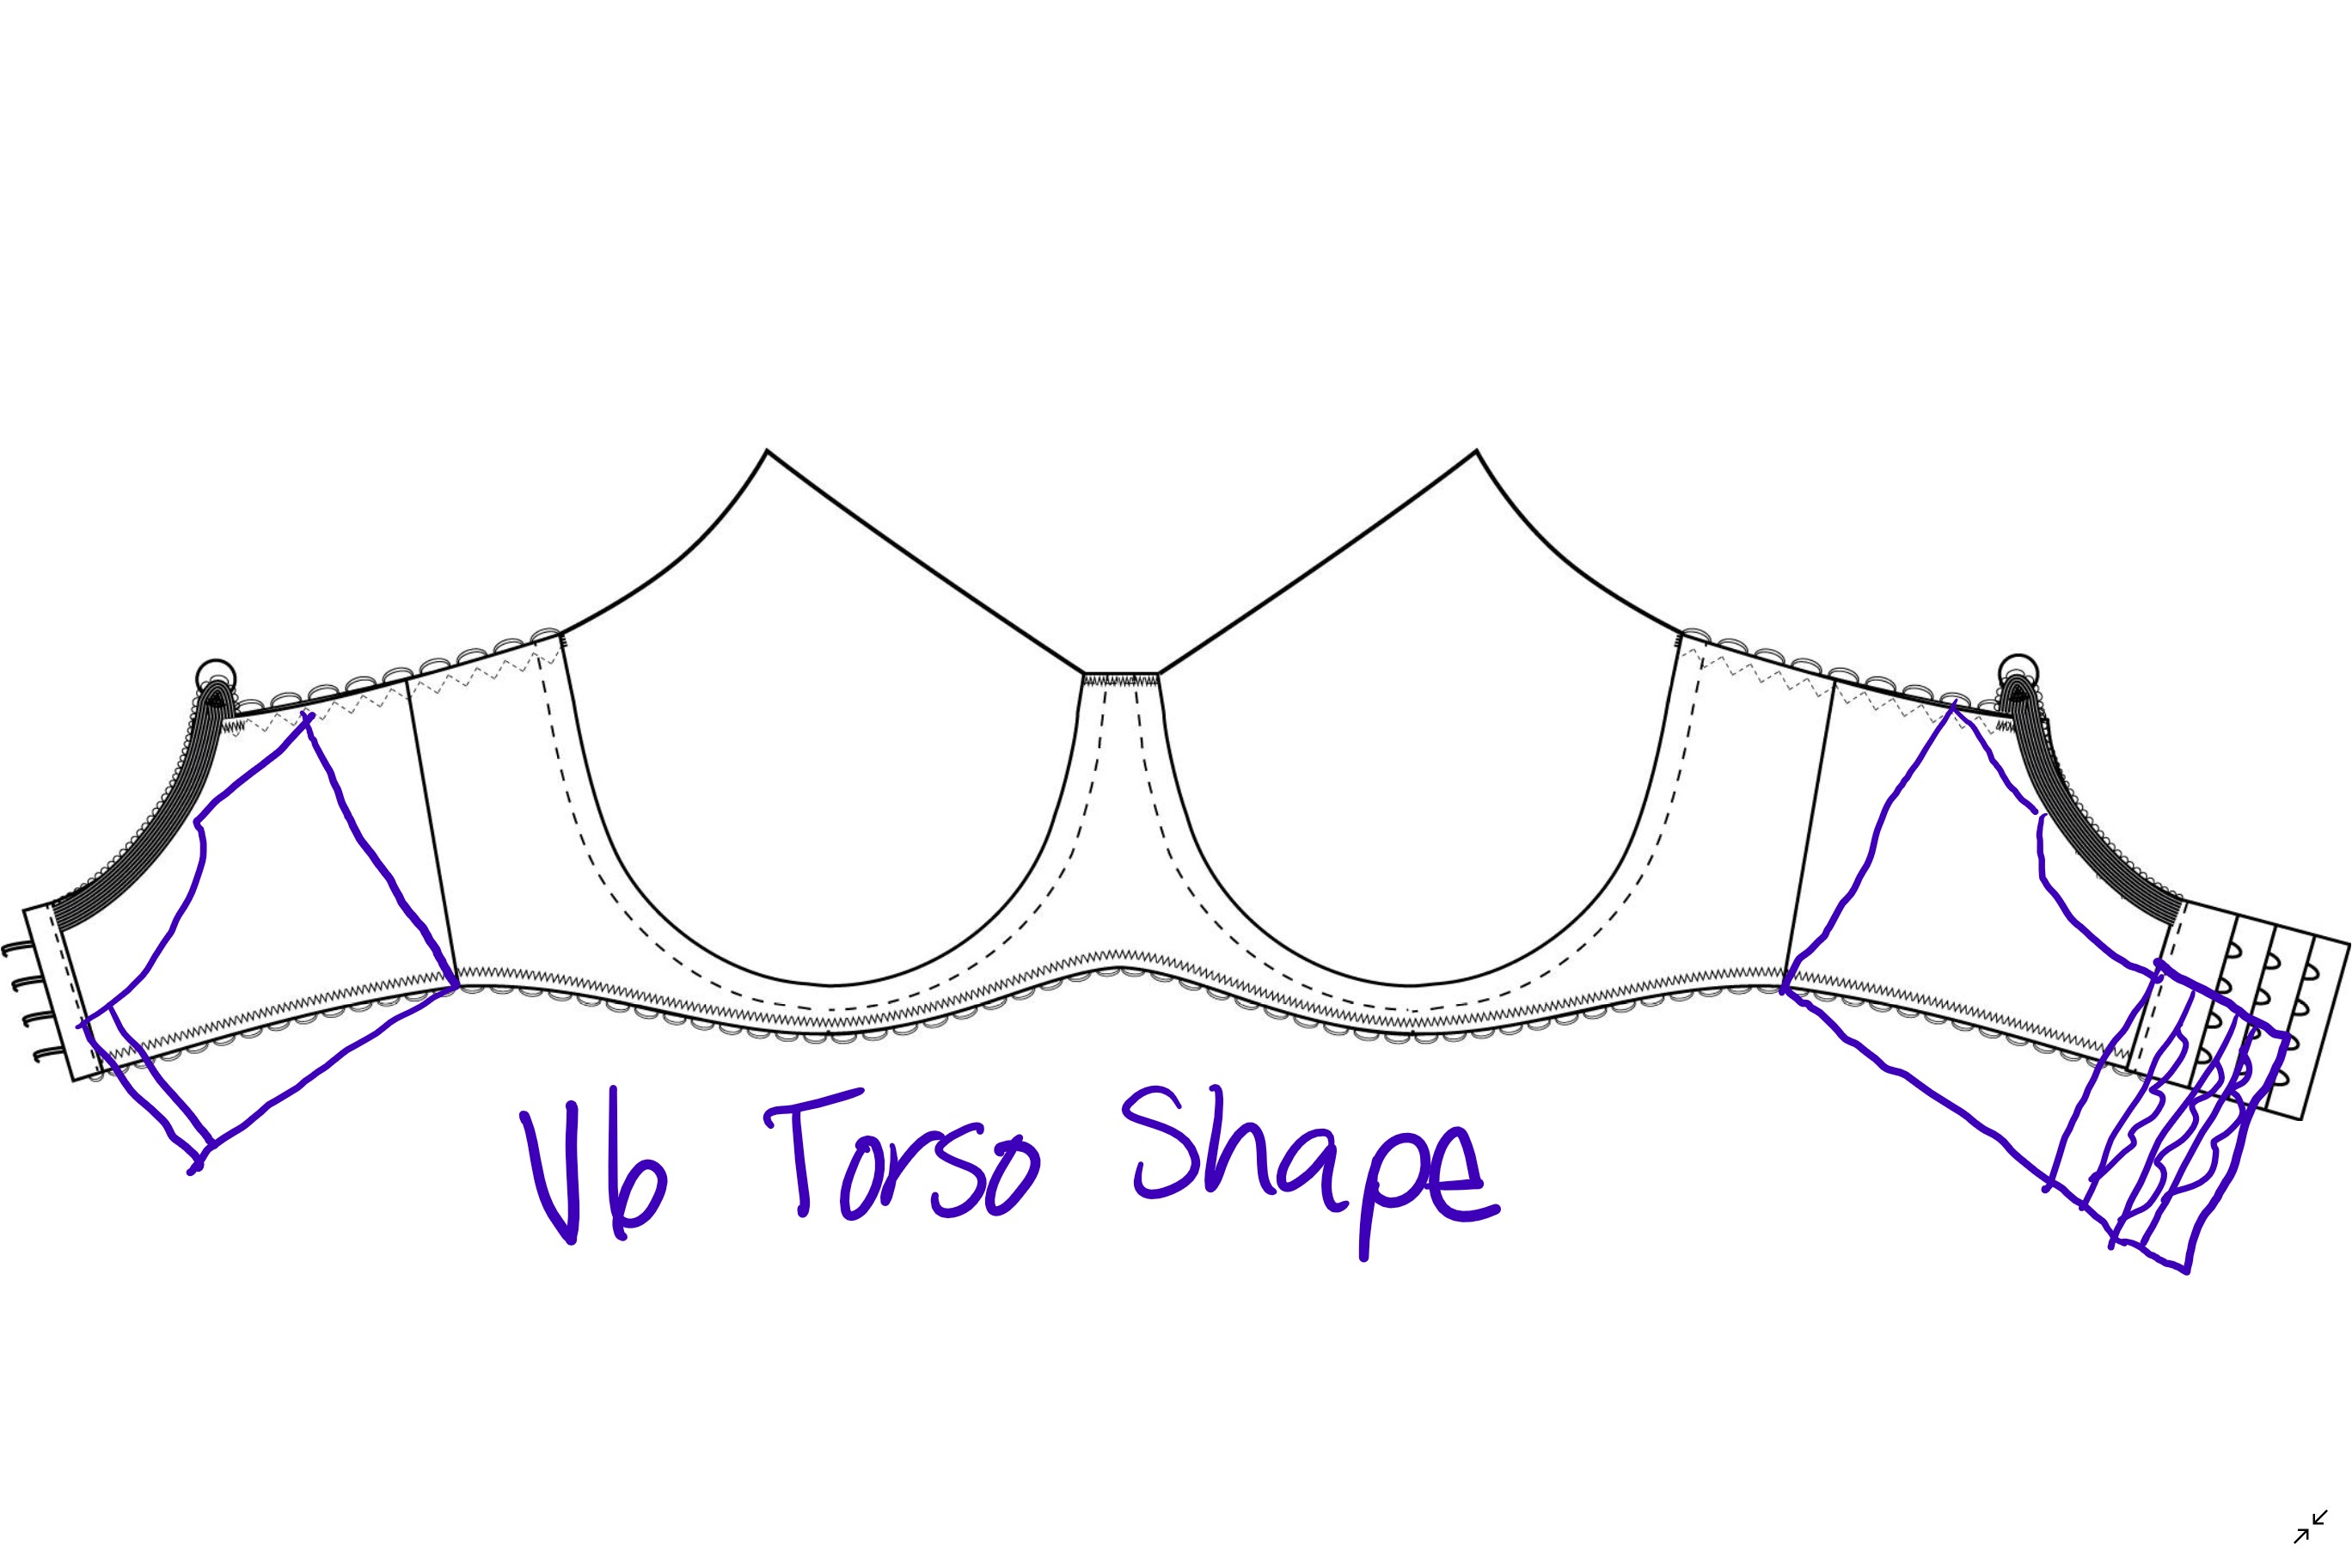
This is already something that sets sewing apart from ready to wear. Bras from the store are typically drafted with a V4 torso shape (because that’s average) and many of the people sewing their own bras are altering their side seams to reflect this.
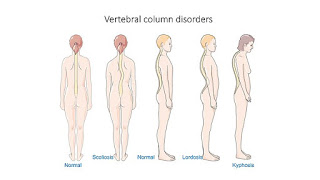
The next thing about bodies that we need to discuss is the curvature of the spine. If you have a person that has side seams that are very straight (like the rectangle silhouette from above) but a very curved spine, like the 2 figures in the vertebral column disorders, or pronounced shoulders because of muscles from being athletic, you may need to have shaping in the back band called the downward hike. Think about any garments you have either worn or sewn … Do garments fit better with back darts for shaping? In your garments, do your back darts extend up past the level of your armpits? Then a downward hike might be more appropriate for you.
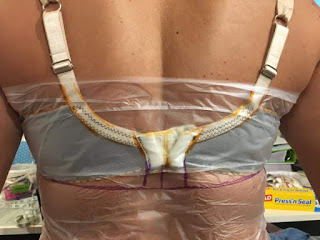
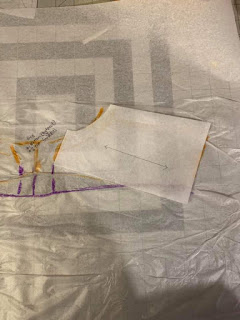
Bramaker Christine Stoodley (who can be found here on instagram or here on Facebook) tested various aspects of band fit and it felt like the center of her band was riding up. She used Press and Seal to test whether or not she needed the downward hike. The resulting pattern piece shows how a wedge of space added to the top band can tilt the hooks and eyes downward. This alteration can’t always be solved at the side seam because sometimes that isn’t where the curve of the body is located. In the end, her band fit needed adjustment at the bridge (which is why it comes first in the order of operations), and if you are going to attempt a downward hike, it may take several tries to get the stretch of the fabric in the right place for the bra to sit correctly.
Assembling the Fitting Band
Based on everything I’ve mentioned about the band, we aren’t going to assemble the band like we were making a bra, we’re going to add extra seam allowances and add the elastics to each piece as a separate item and only at the end are we going to attach them. Featured in these photos is the Eve Pattern but this could be done to any pattern on the market.
For the front band piece, even if the pattern says to have a front fold … ignore it. We’re going to add an inch seam allowance to the front of the bridge and also an inch of seam allowance to the side seam. I didn’t do it in these photos, but I recommend adding an additional ¼ inch allowance to the neckline so you have enough space for the foot of a regular home sewing machine in the seam allowance for basting cups on without having to fight with the channeling. I would also draw in all the stitch lines as a point of reference. You’ll need to be able to measure from the original lines to any altered lines for altering the pattern to match.

For the back band piece, we’re going to split the band and add 2 inches to the back where I have cut the pattern in two. We will baste a tuck here, and if the band is too tight when it’s tried on, this can be let out to add length. Also, this area could be used to create a downward hike for anyone who has extreme spine curvature. Then also we’re adding one inch to the side seam so that the angle of the side seam could be changed if the curve of your sides is different than the pattern.
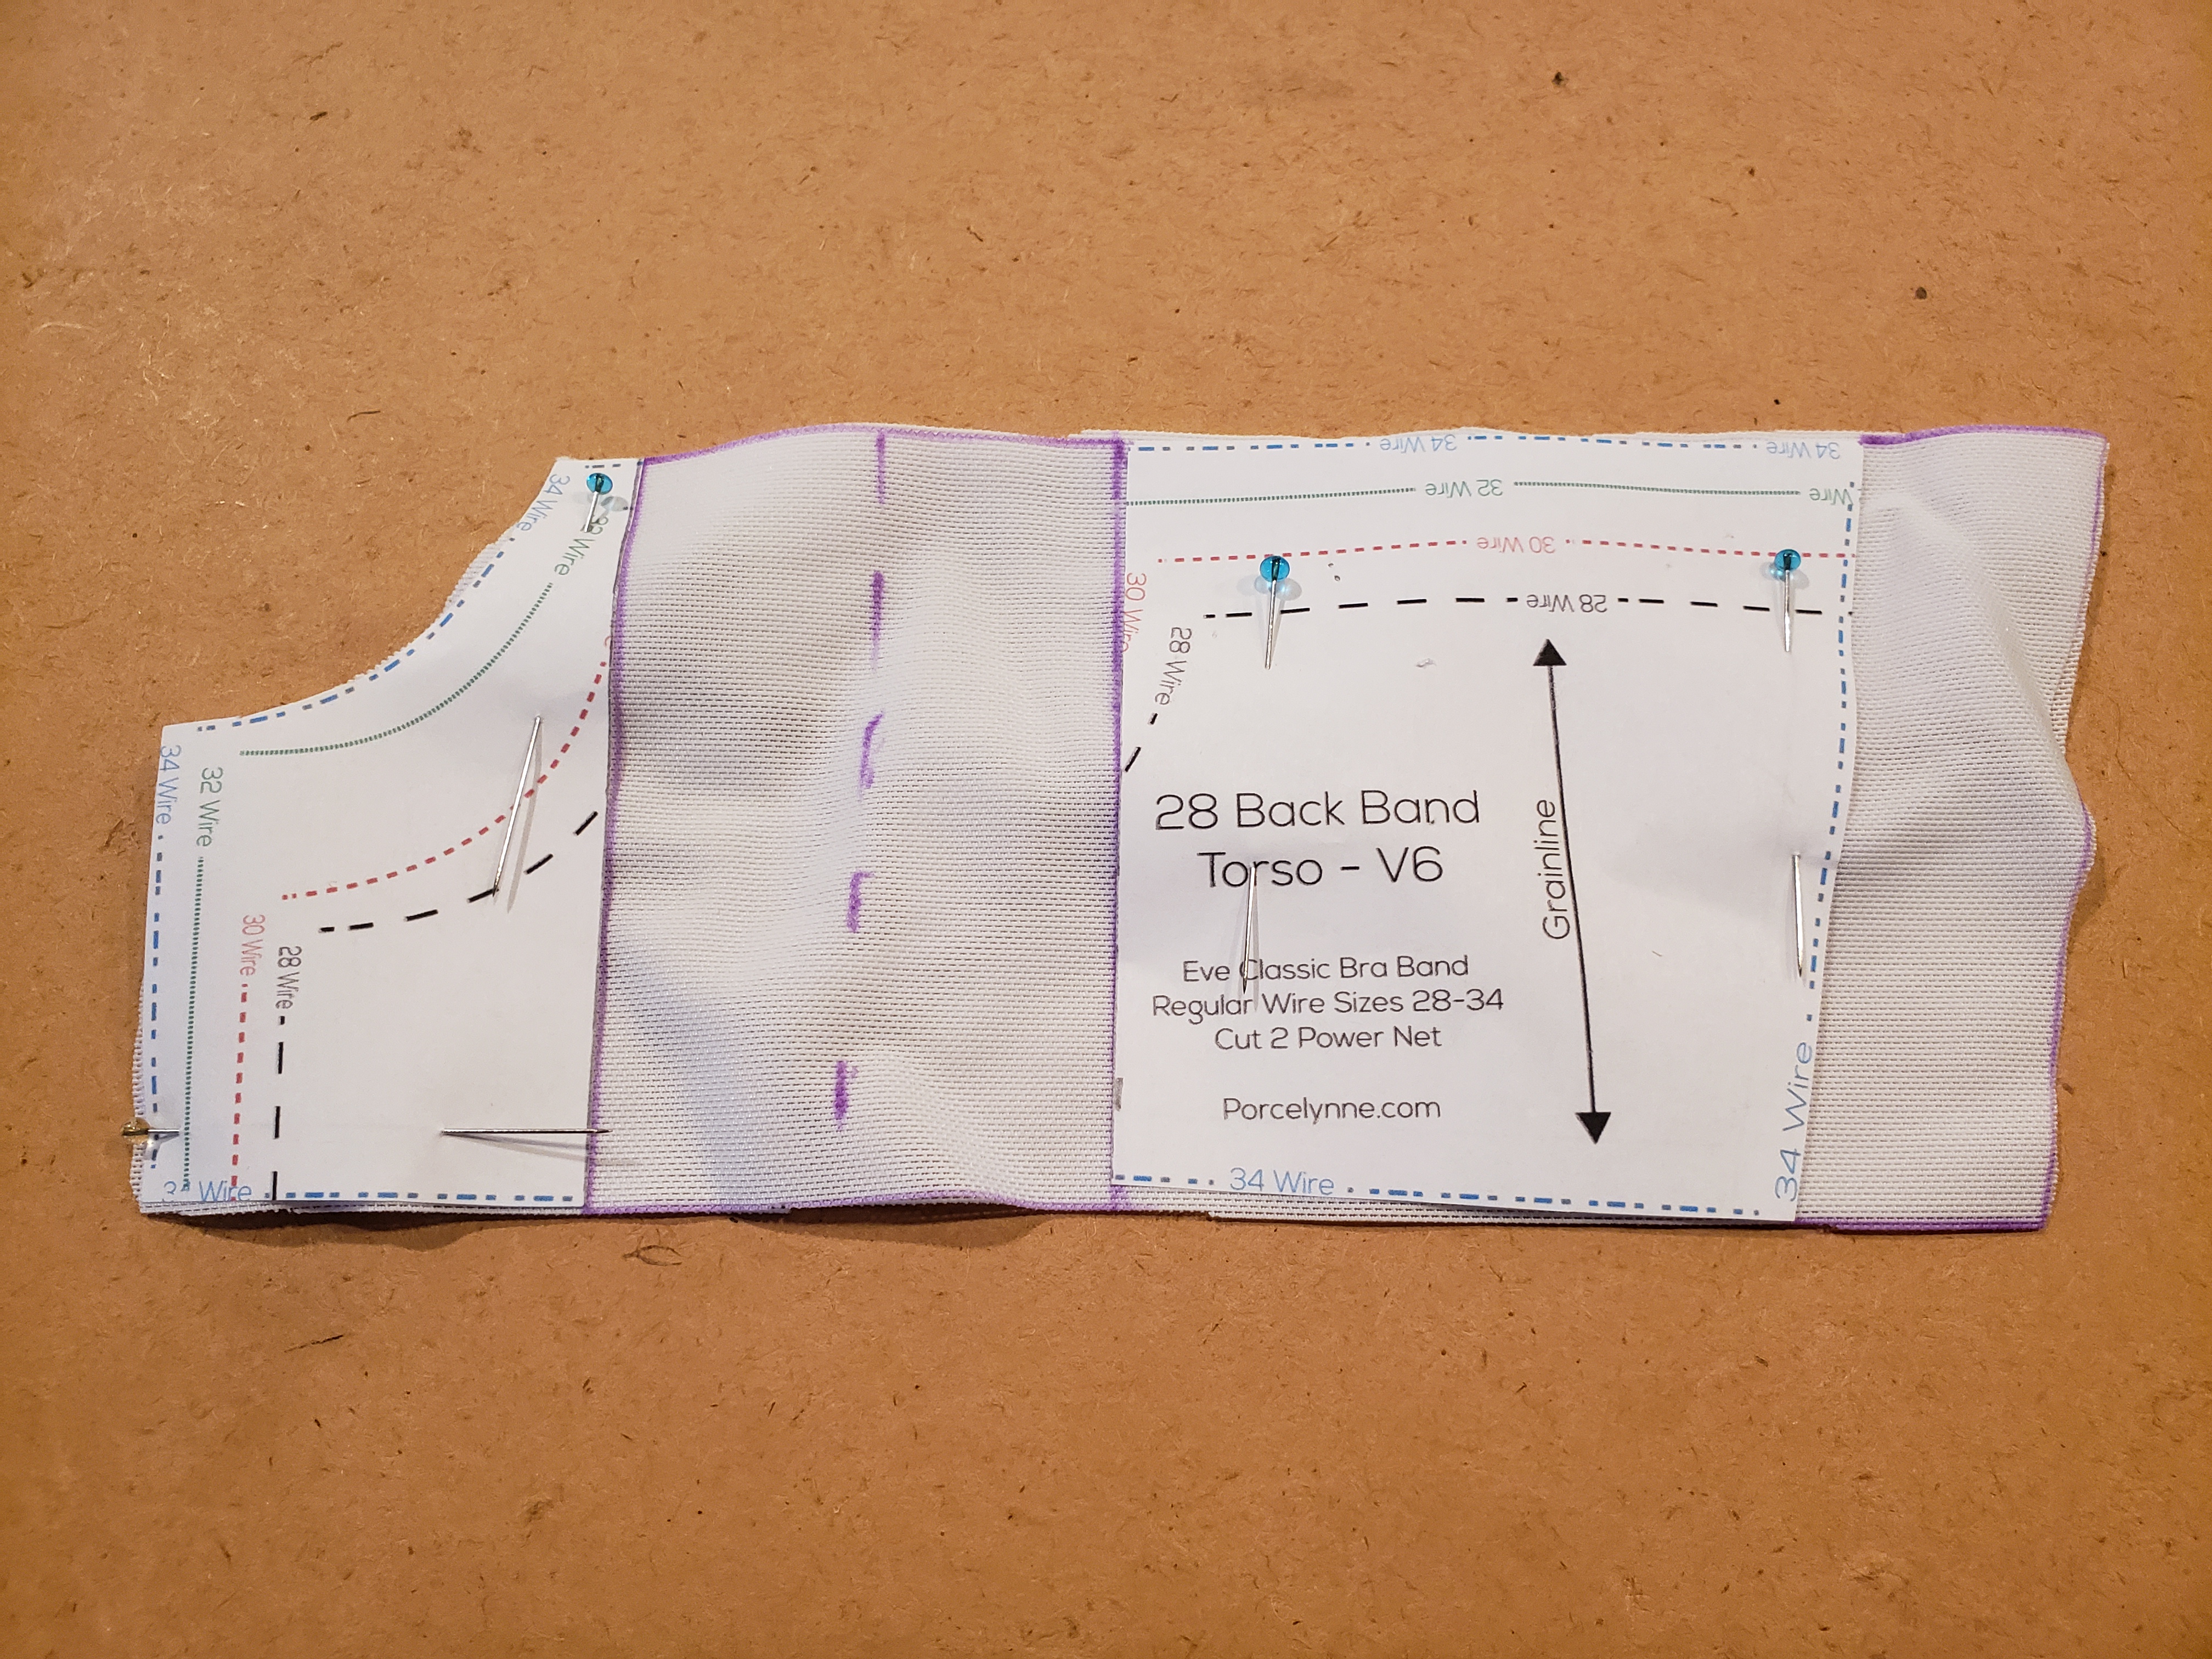
The next thing we’re going to do is finish each piece of the band completely without sewing the 4 sections together until the end. Apply top band elastic, bottom band elastic to each section and add the hook and eyes to the back.
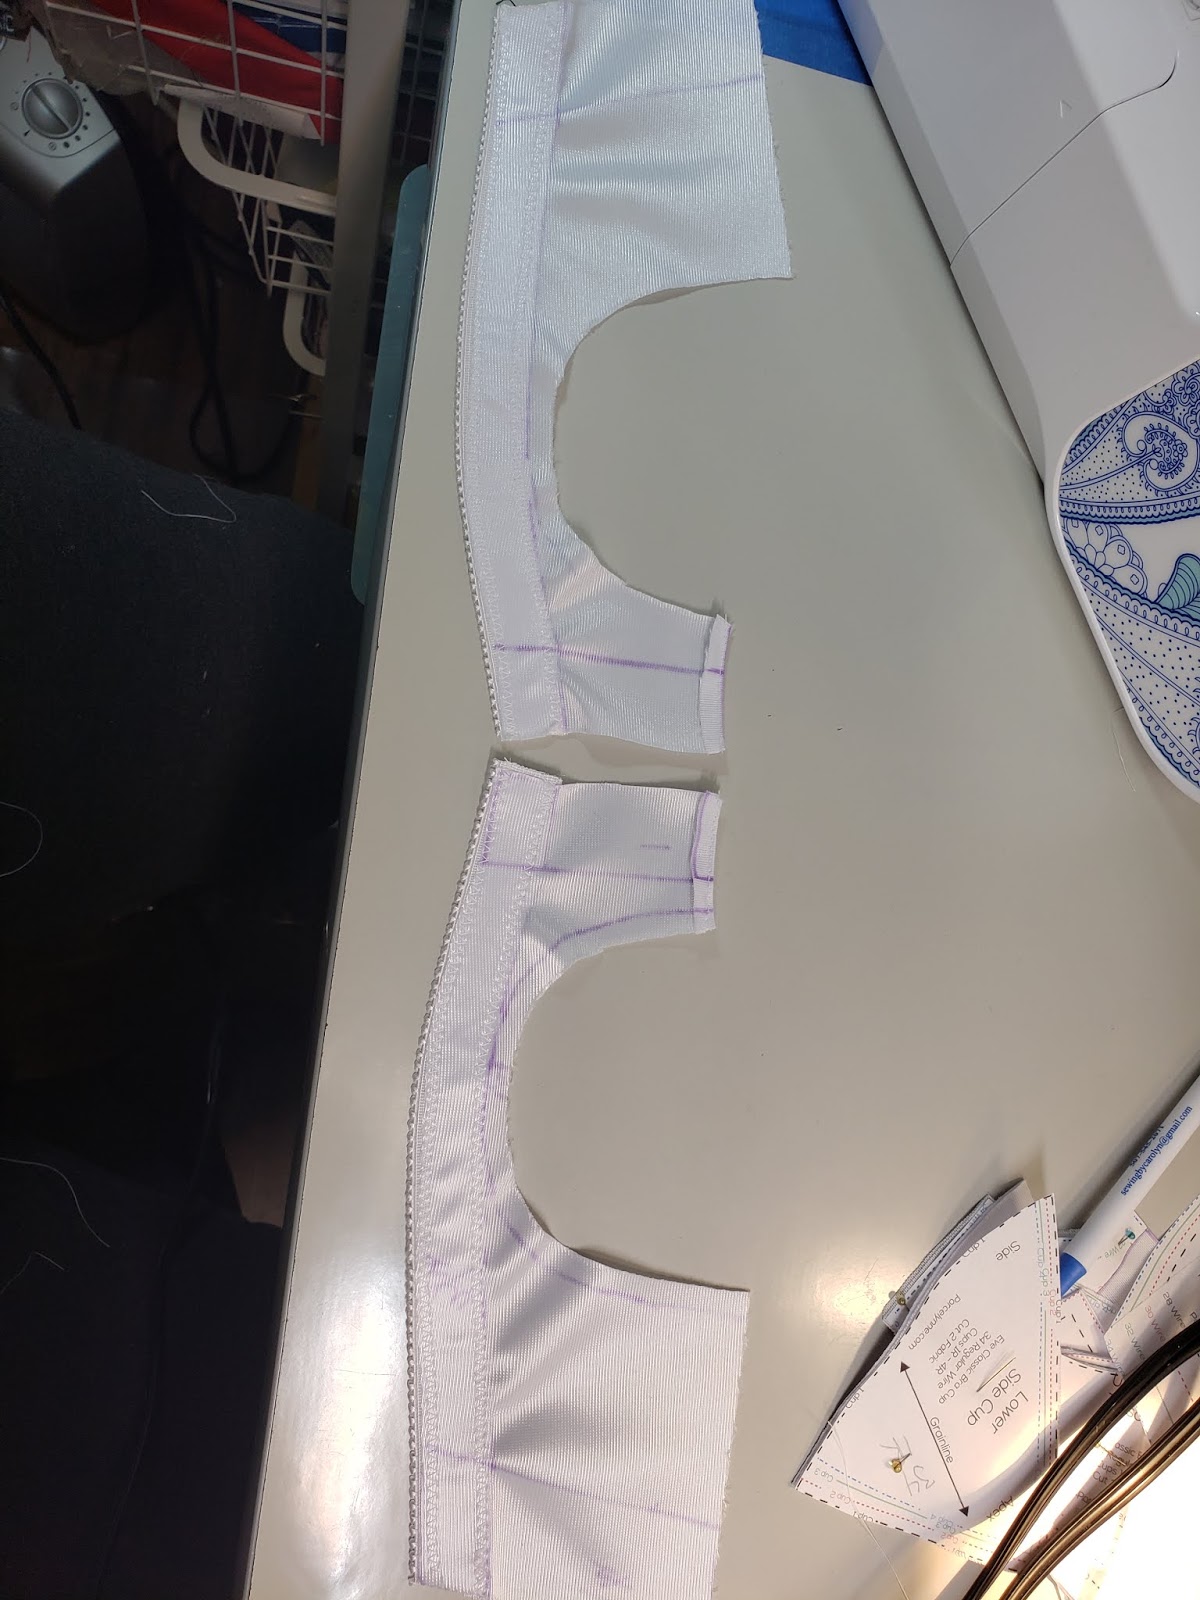
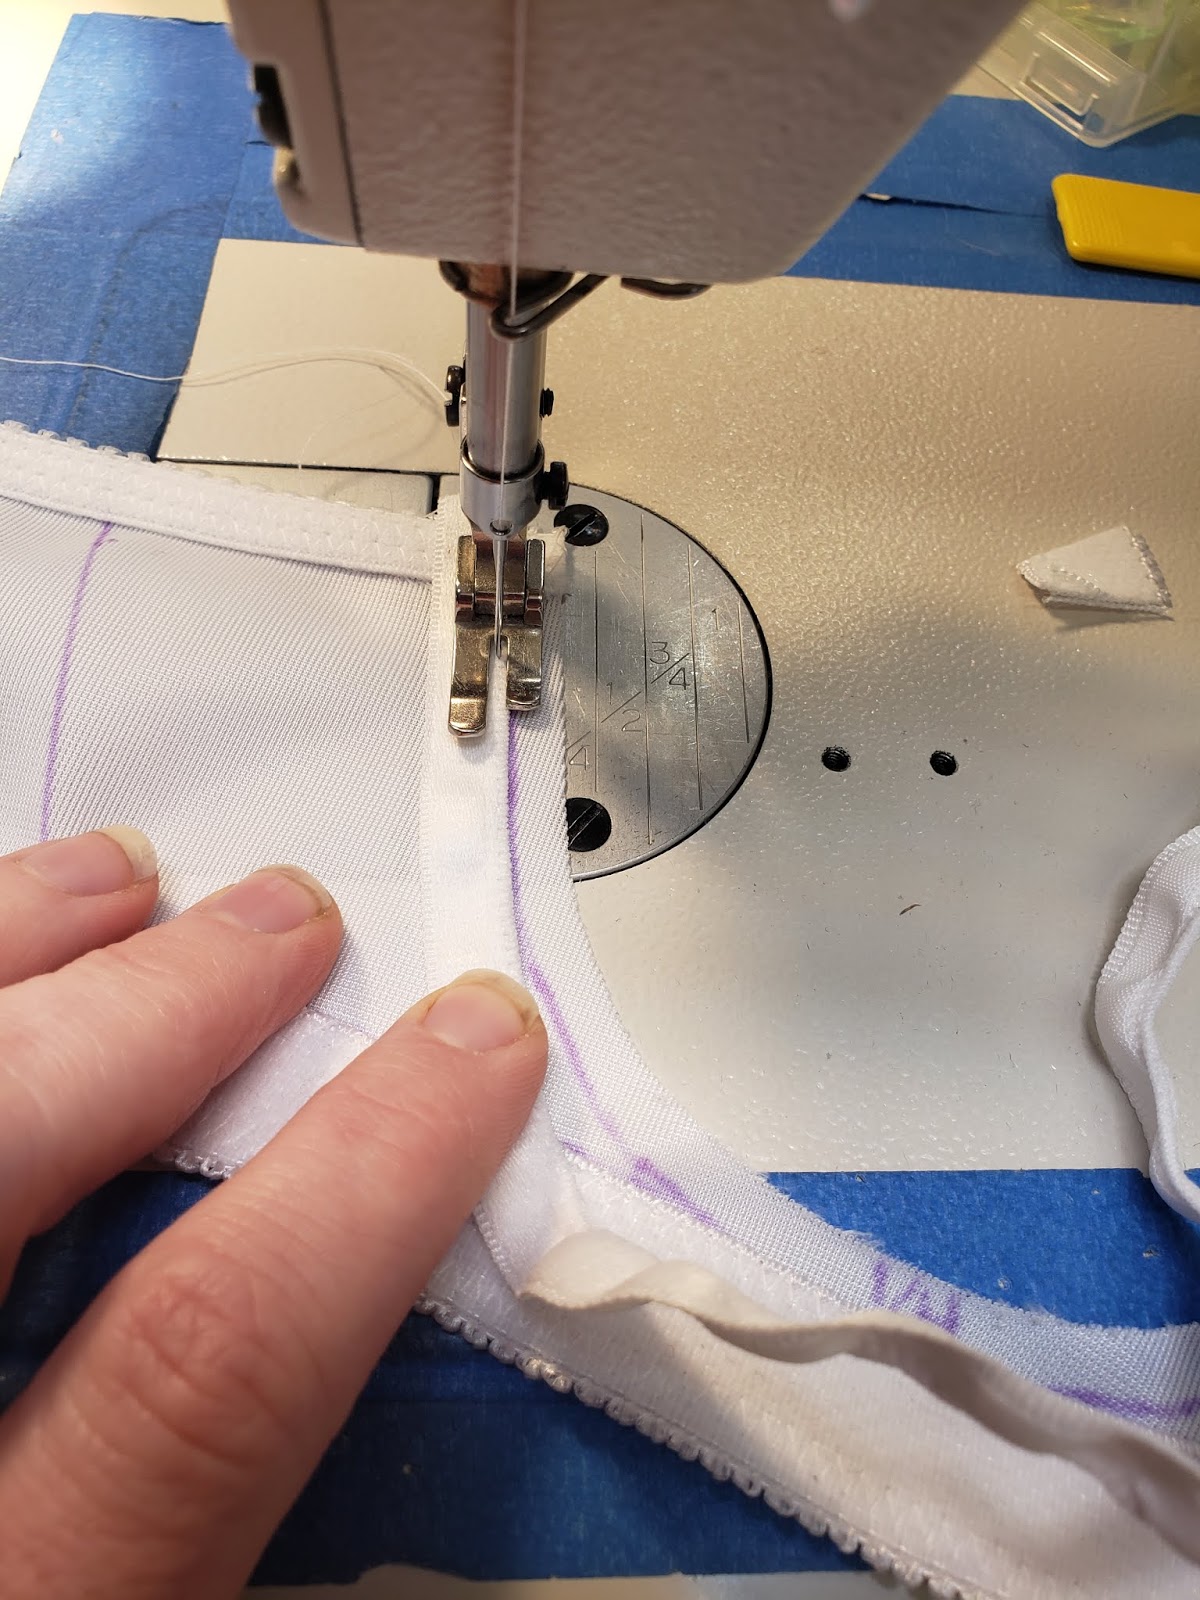
The channeling for the wire is topstitched onto the band flat so that it is located where it would go in a final bra, but it is not sewn the way you would if you were actually constructing a bra for daily use. The best way to line up the channelling in the correct place is to draw the line of where the seam allowance is and then topstitch the channelling along that line.
Finish the back band pieces by adding top band elastic, bottom band elastic, and the hooks and eyes. Then place a line of basting to temporarily shorten the back band. This basting should be done so that the extra fabric sticks AWAY from the body. If it’s next to the body, it distorts the fit and this is not made for normal wear, so we aren’t worried about the fact that it’s sticking away from the body.
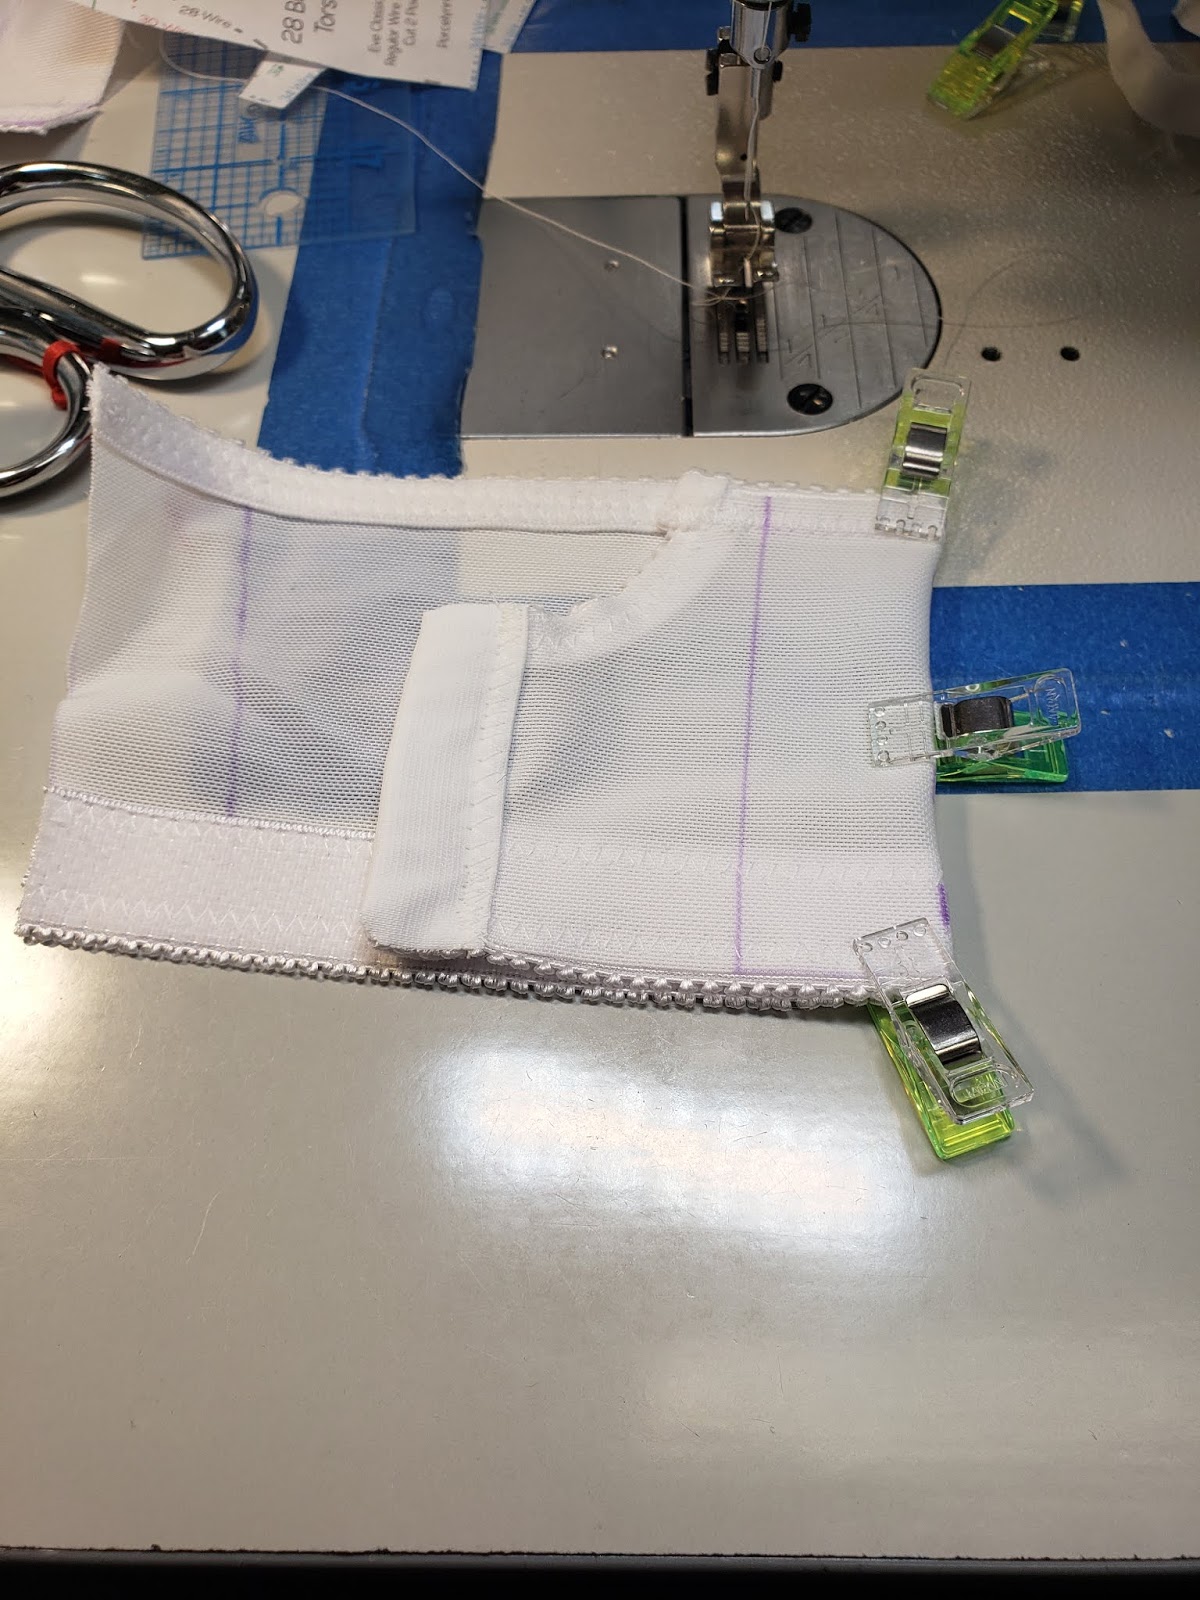
Baste the back onto the front by having all that extra seam allowance sticking away from the body there too. Finally, baste the center front together, again with the seam allowance facing away from the body.
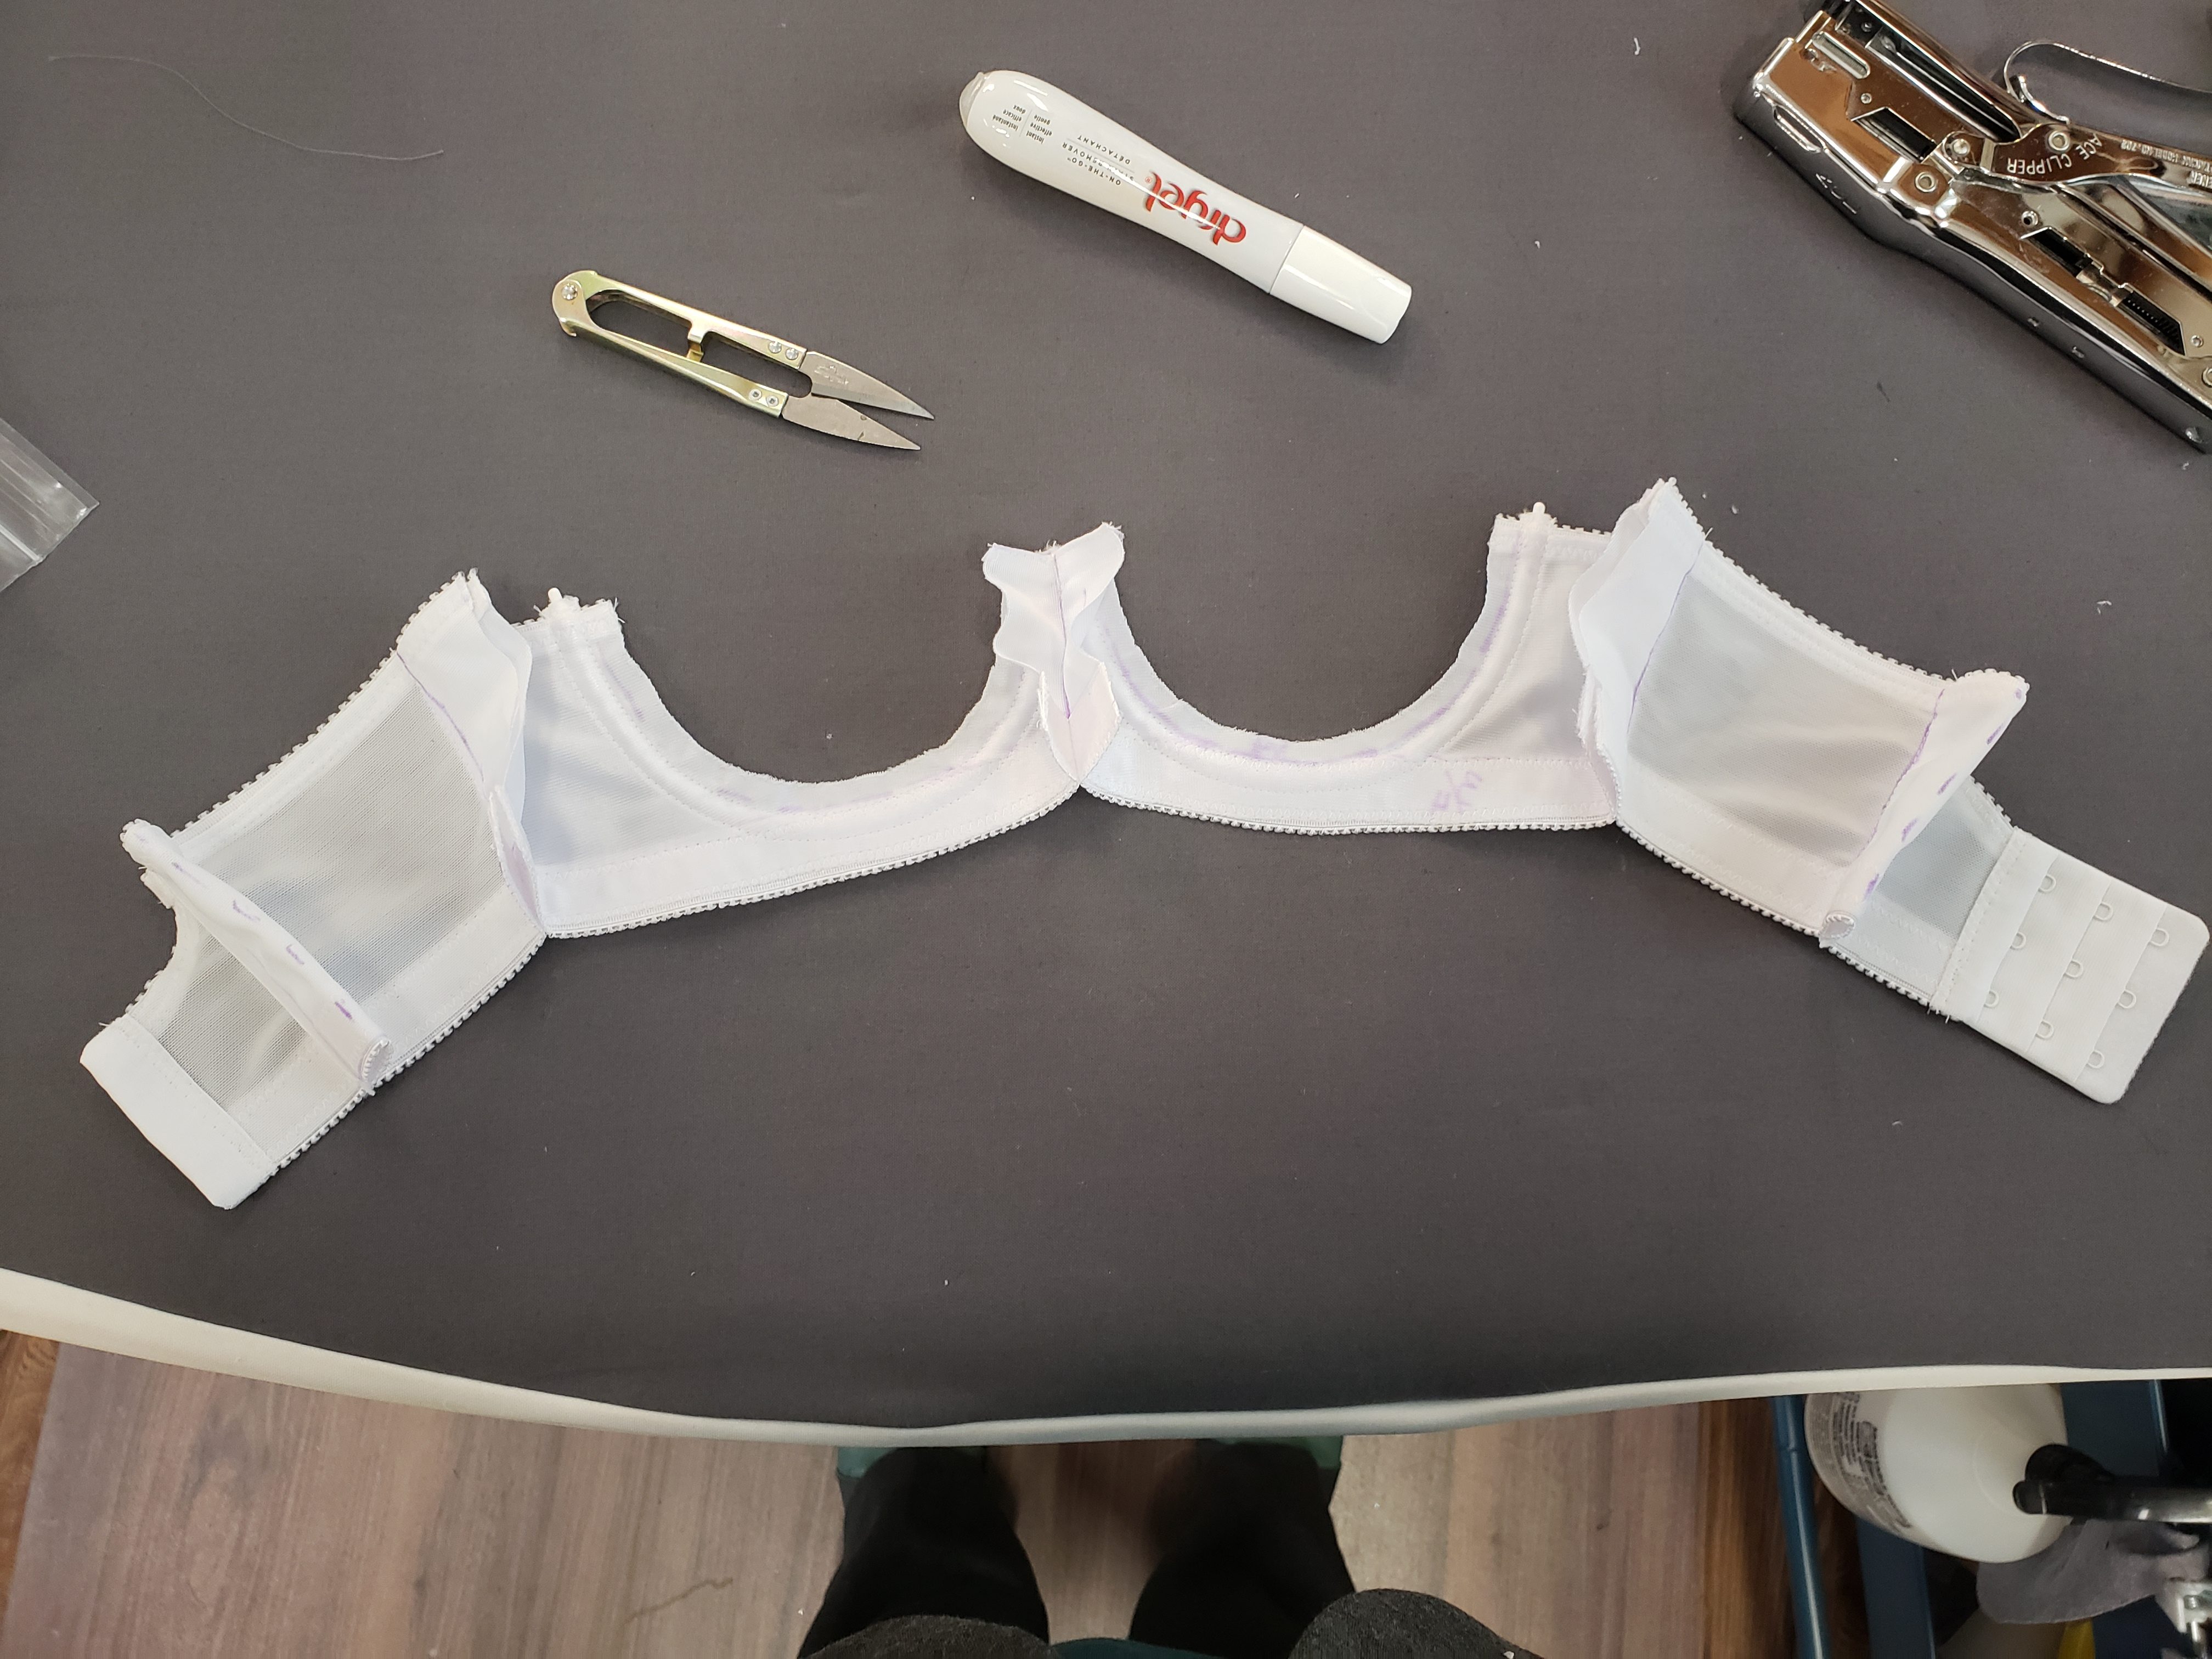
So the inside of the band that is facing the body should be all smooth like this.
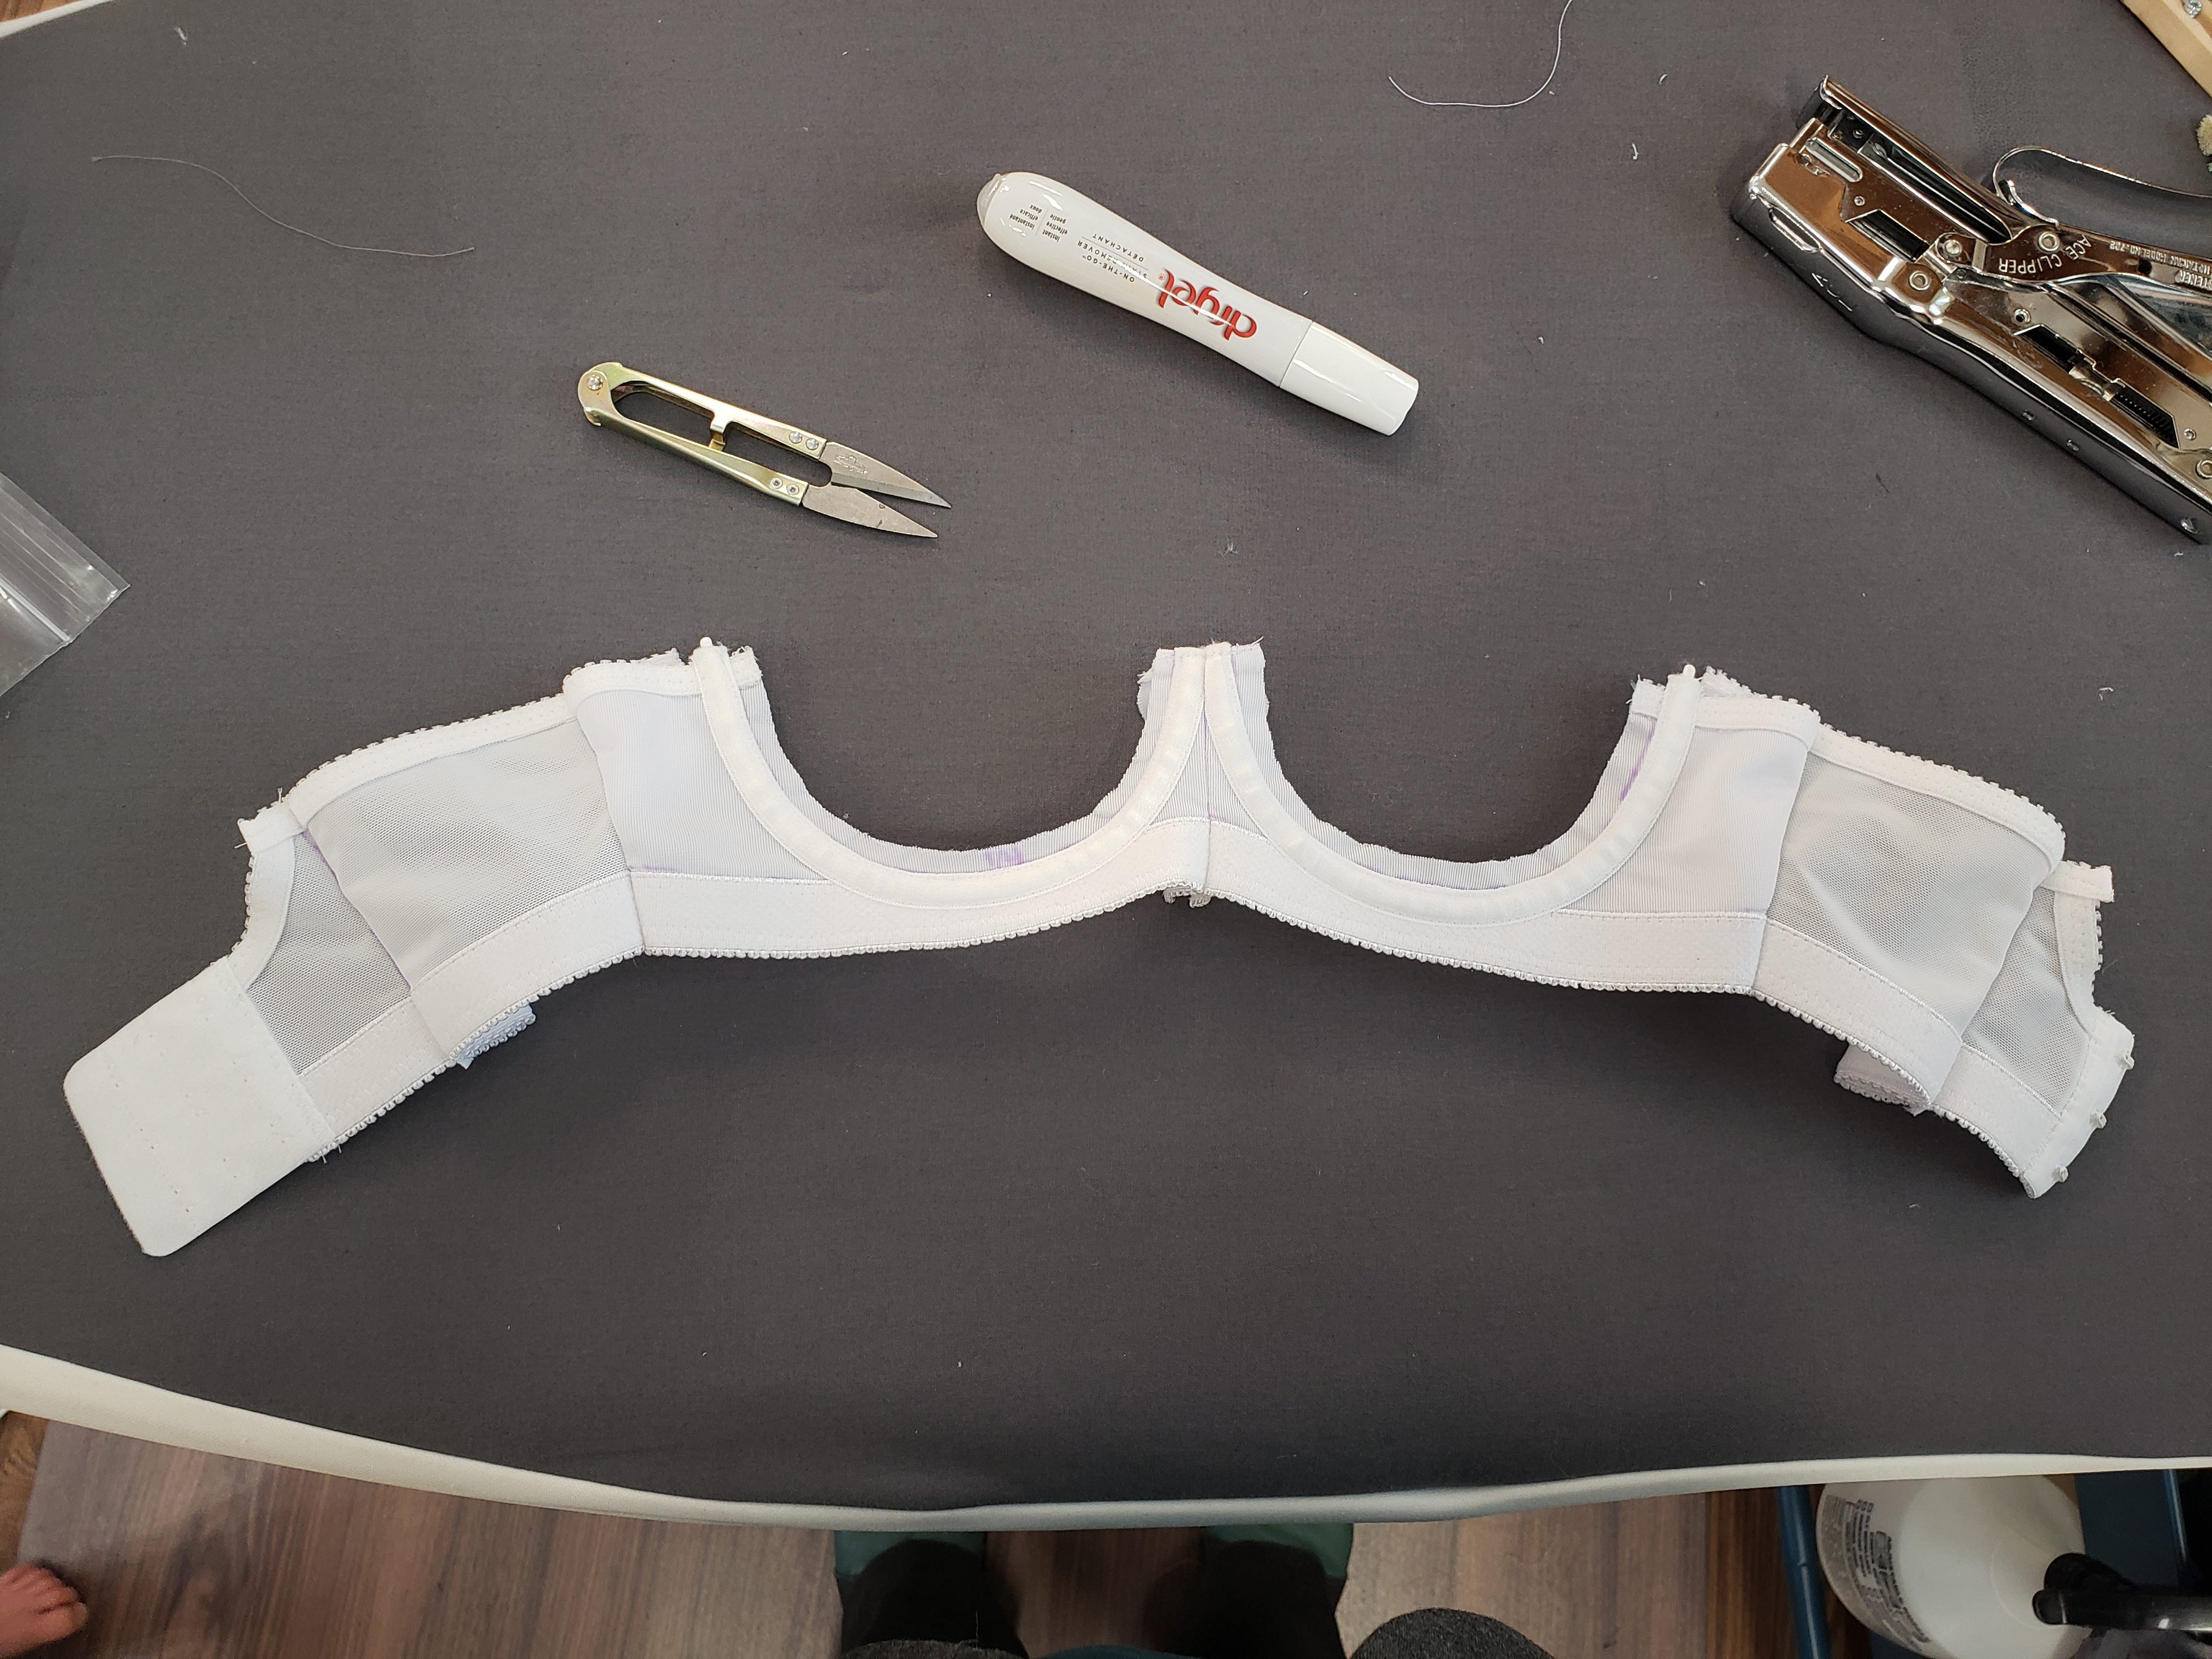
Band Alterations
Now that you have the band assembled, try on the band without cups in it and see how it fits! You may need to add twill tape to the center front and the side where the wire is, so that you have something there for attaching the strap.
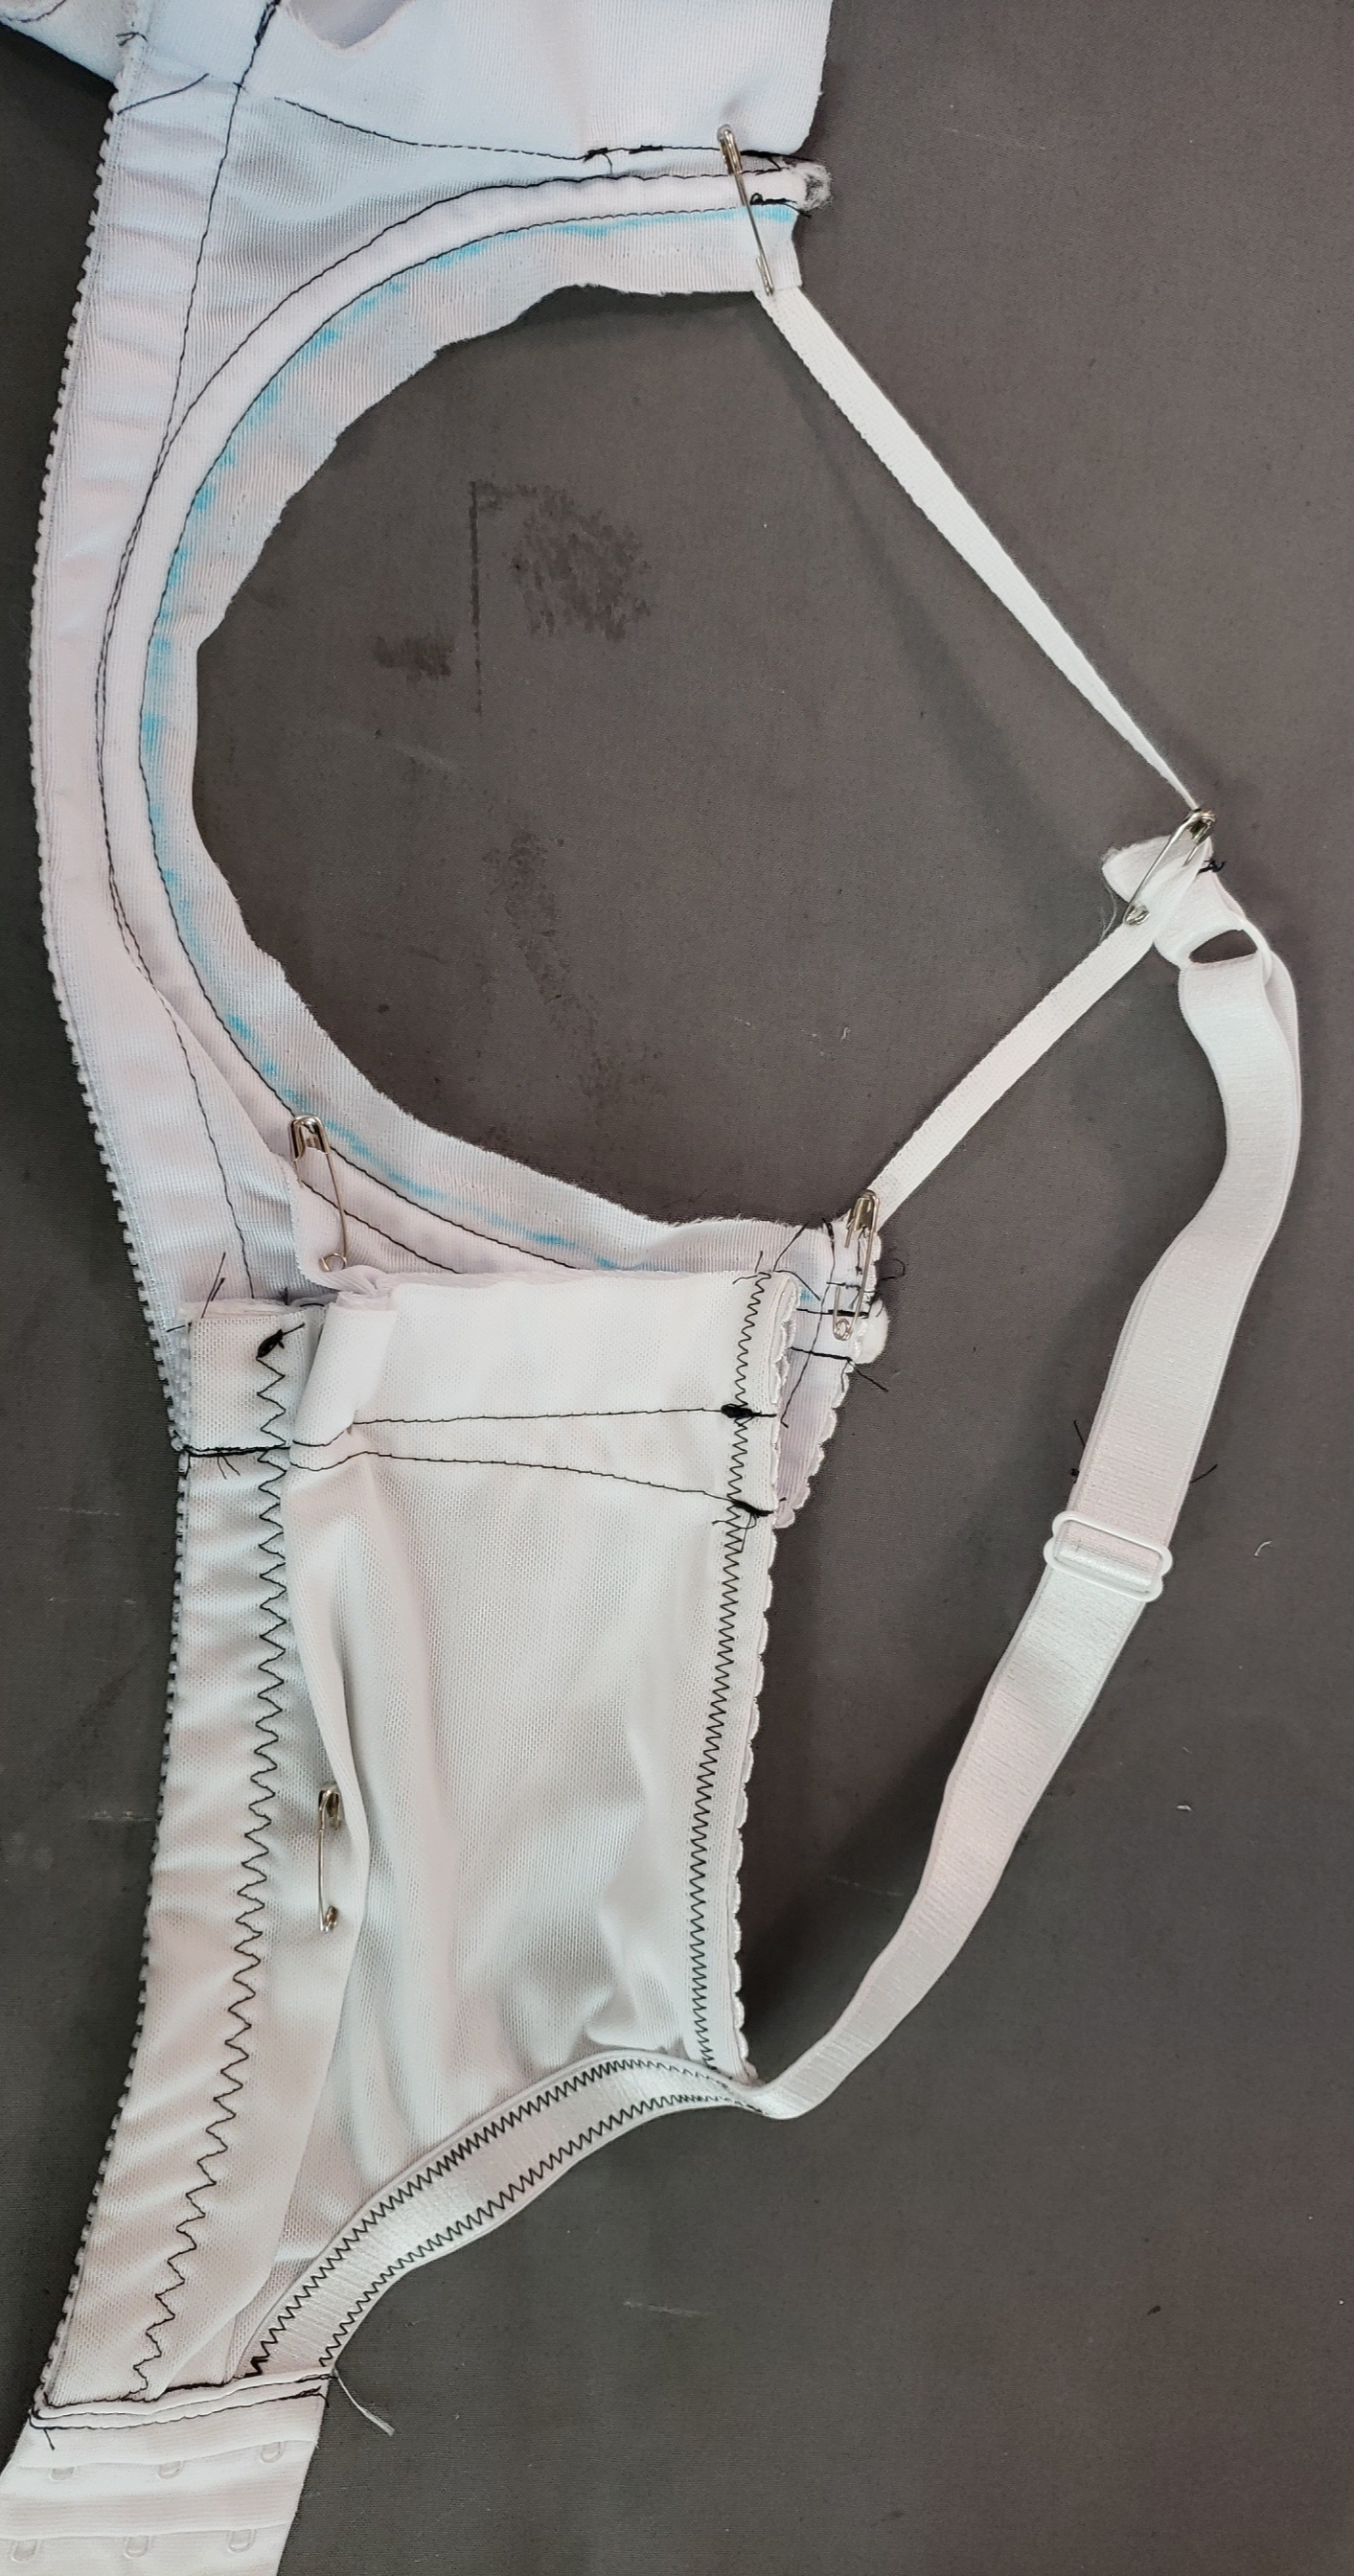
This is my fitting band and as you can see, I had a top band that was too large and saggy. I quickly threw it under the sewing machine and took the band in at the top, but didn’t change the bottom band at all.
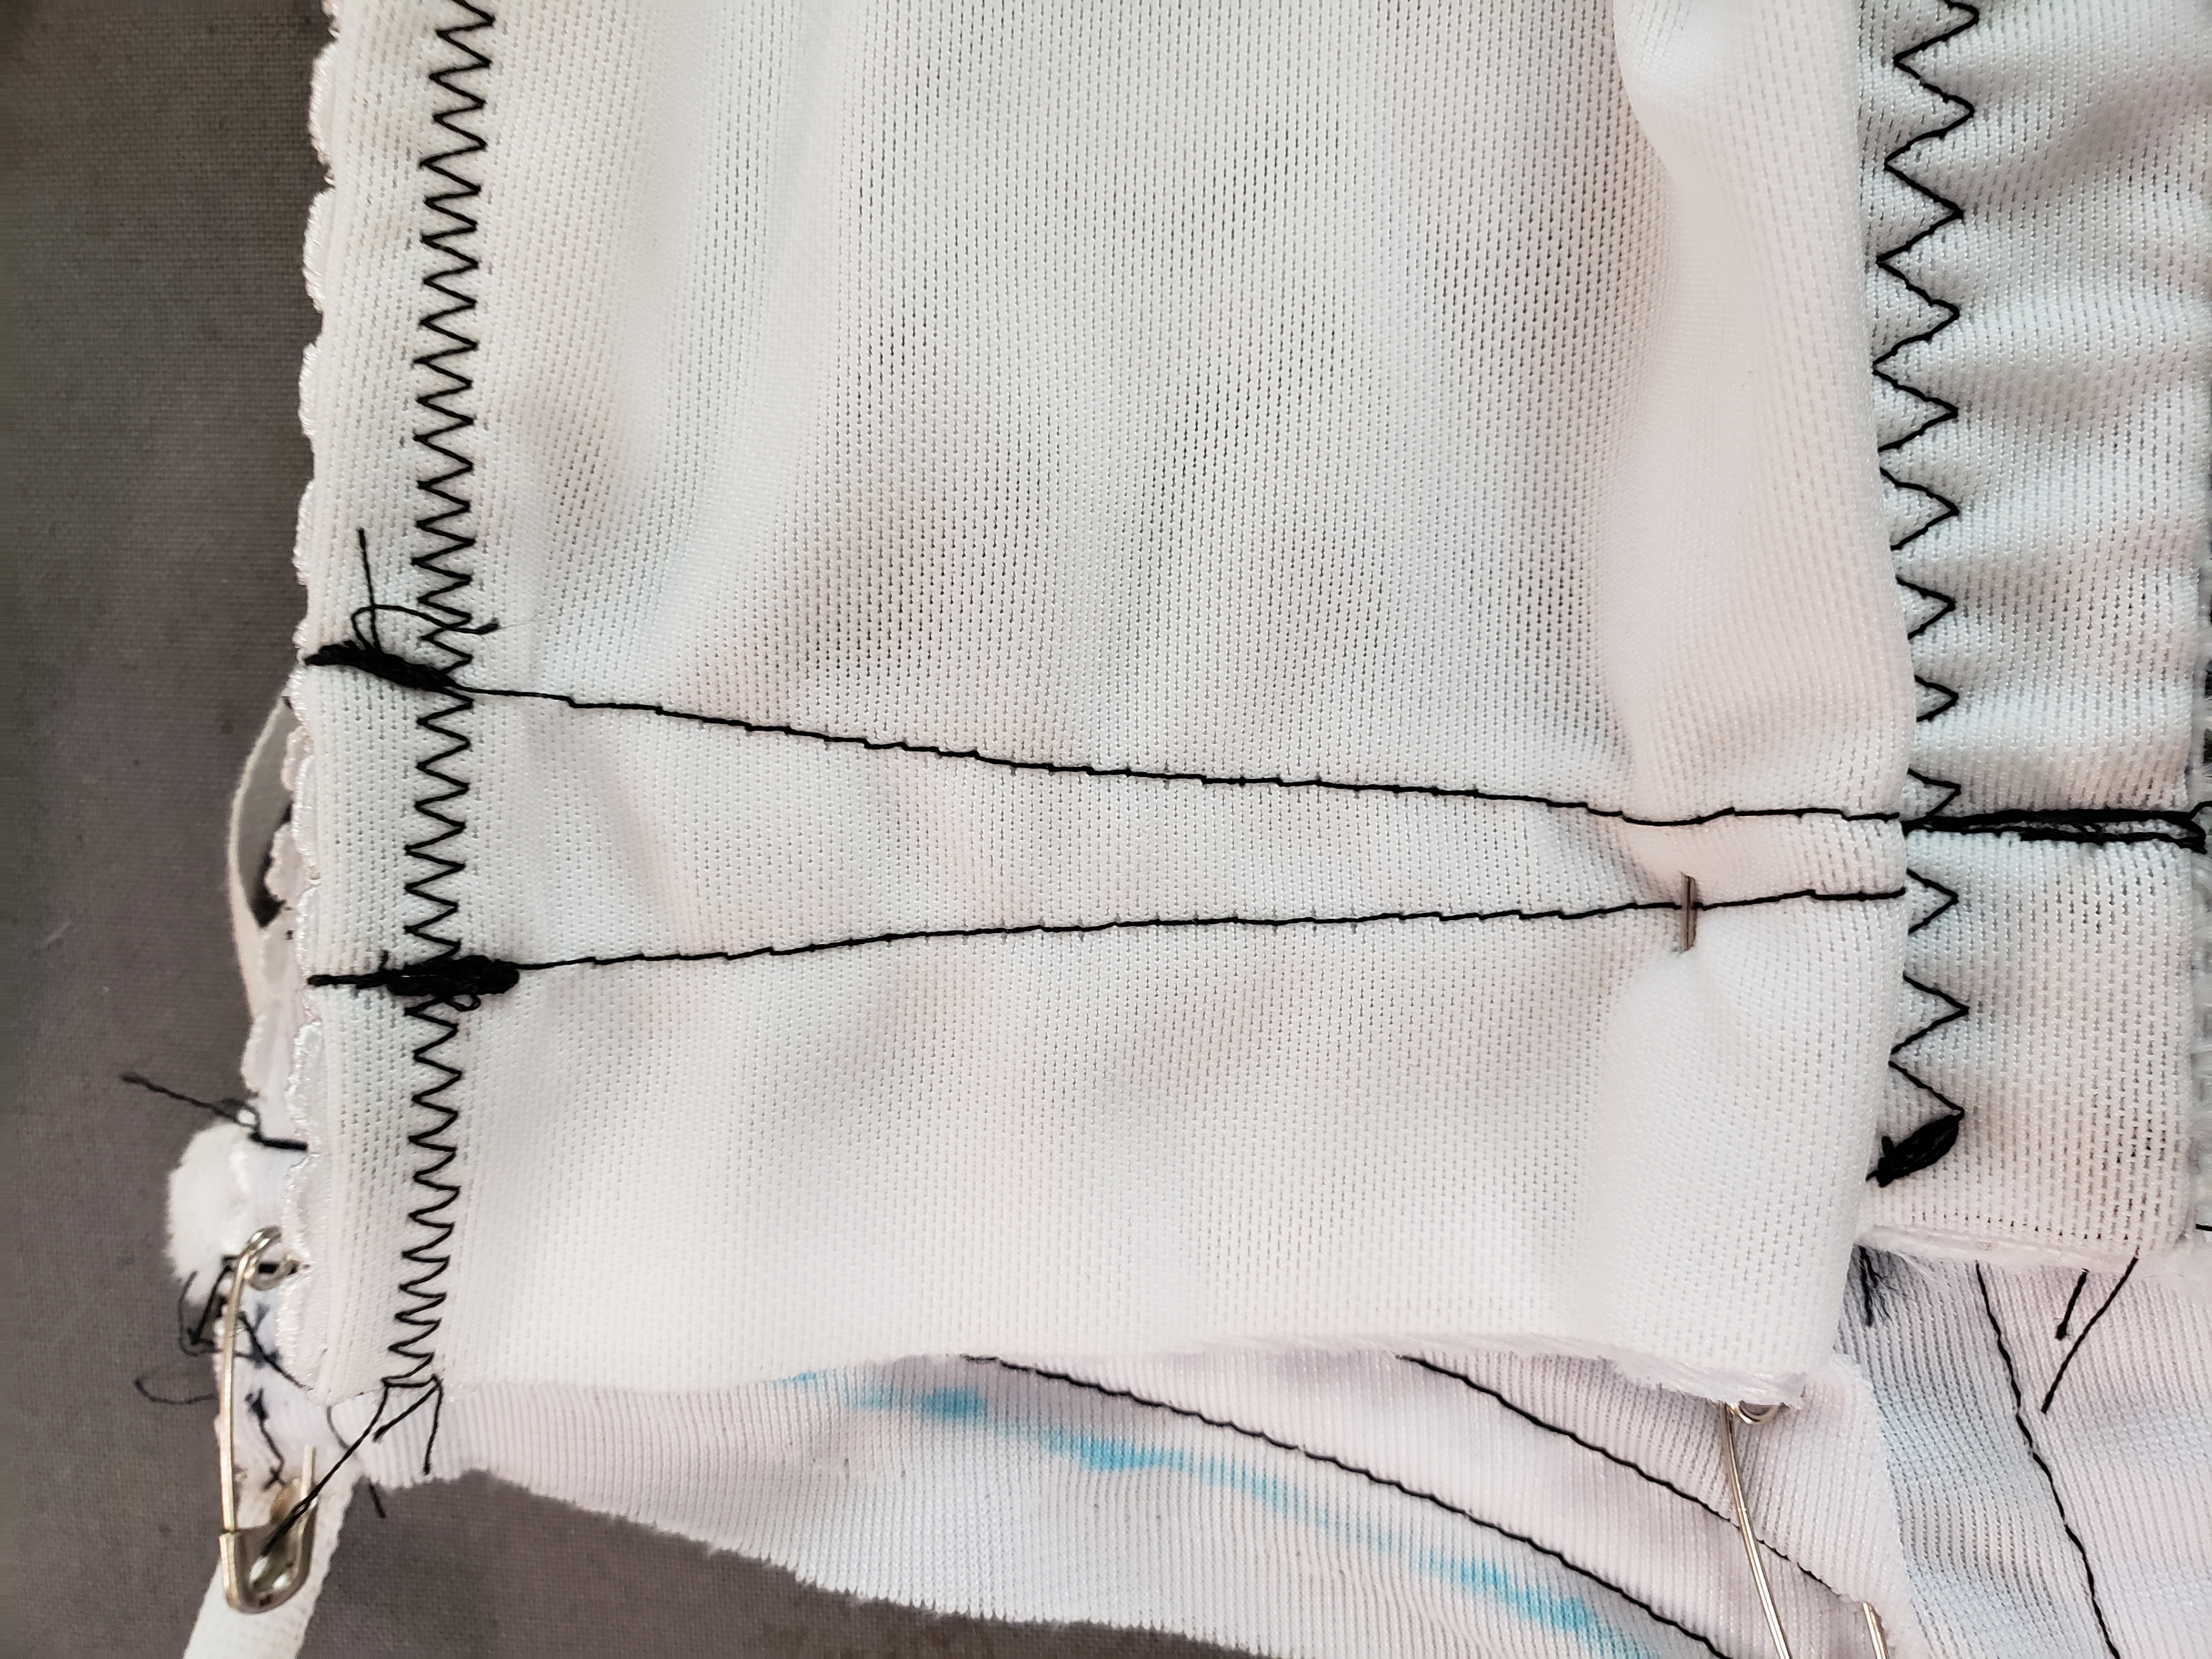
The next alteration I made was to the shape of the bottom band. The crease in the side of my body was causing the band to ride up and fold about how I have it pinned in this photo.
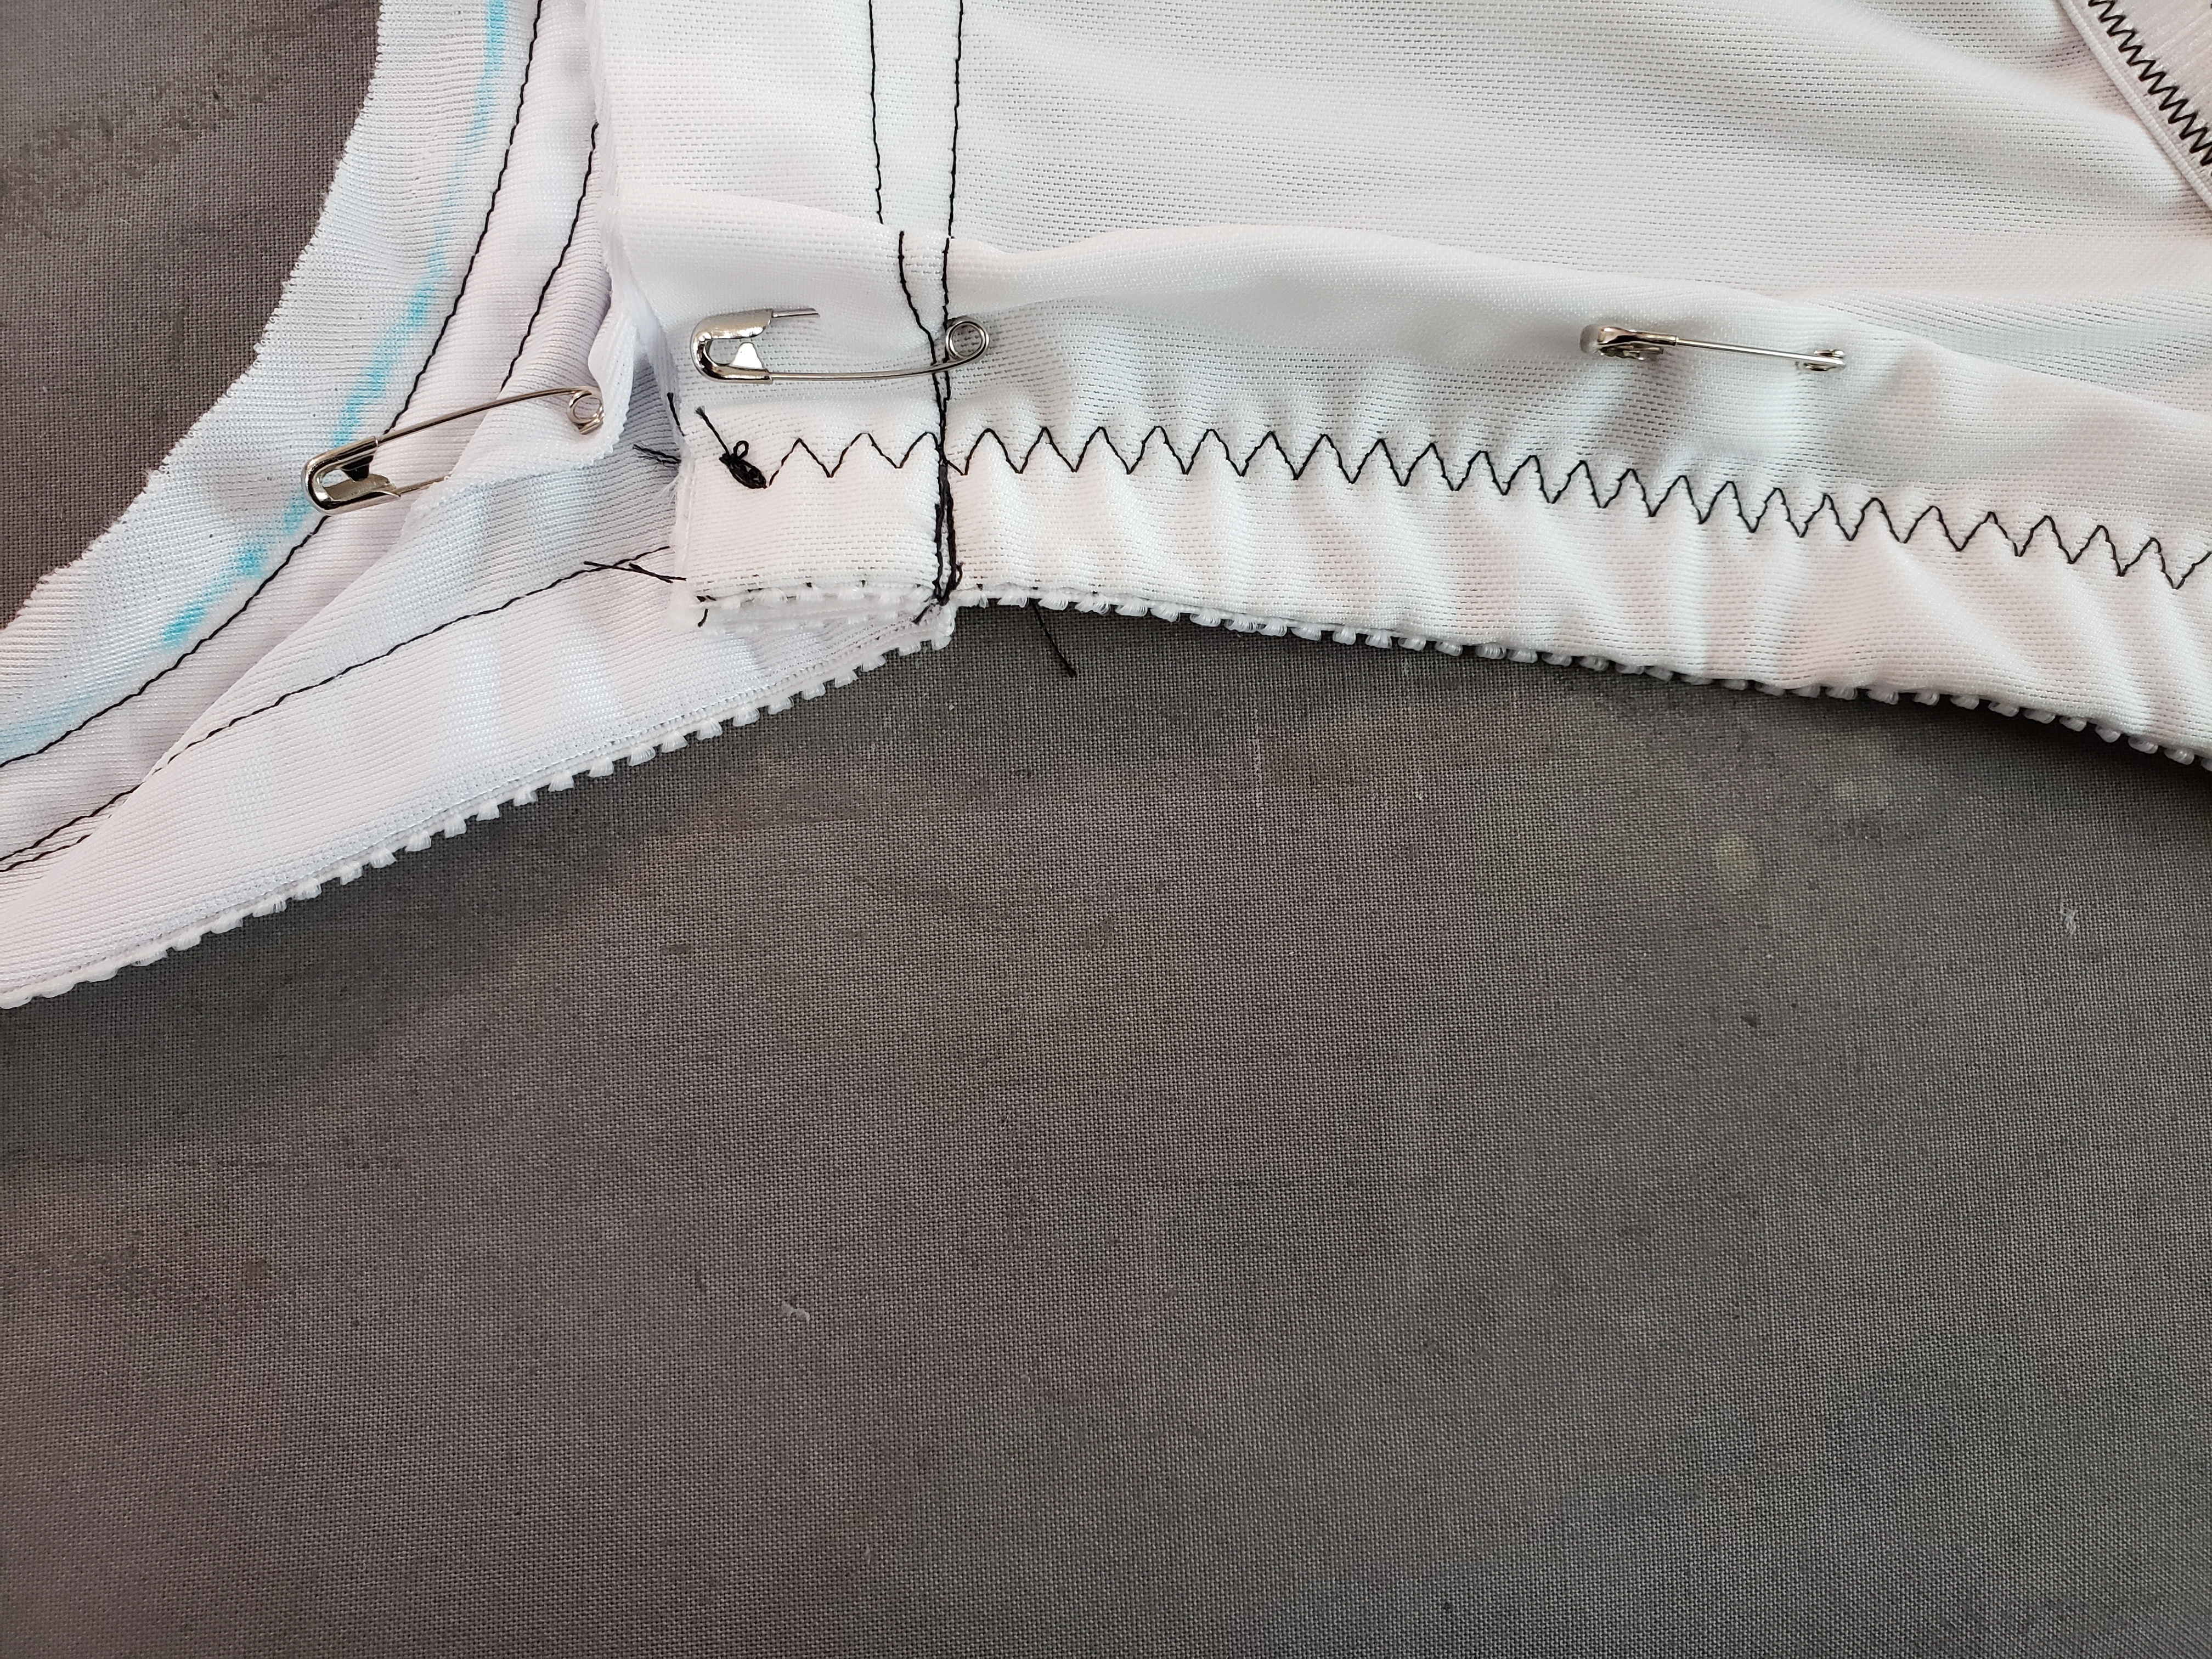
I took those 2 alterations and drew the changes into my band. I drew the new shape of the bottom of the band to match my pins and changed the side seam on the pattern to reflect the new angle from taking in the side seam.
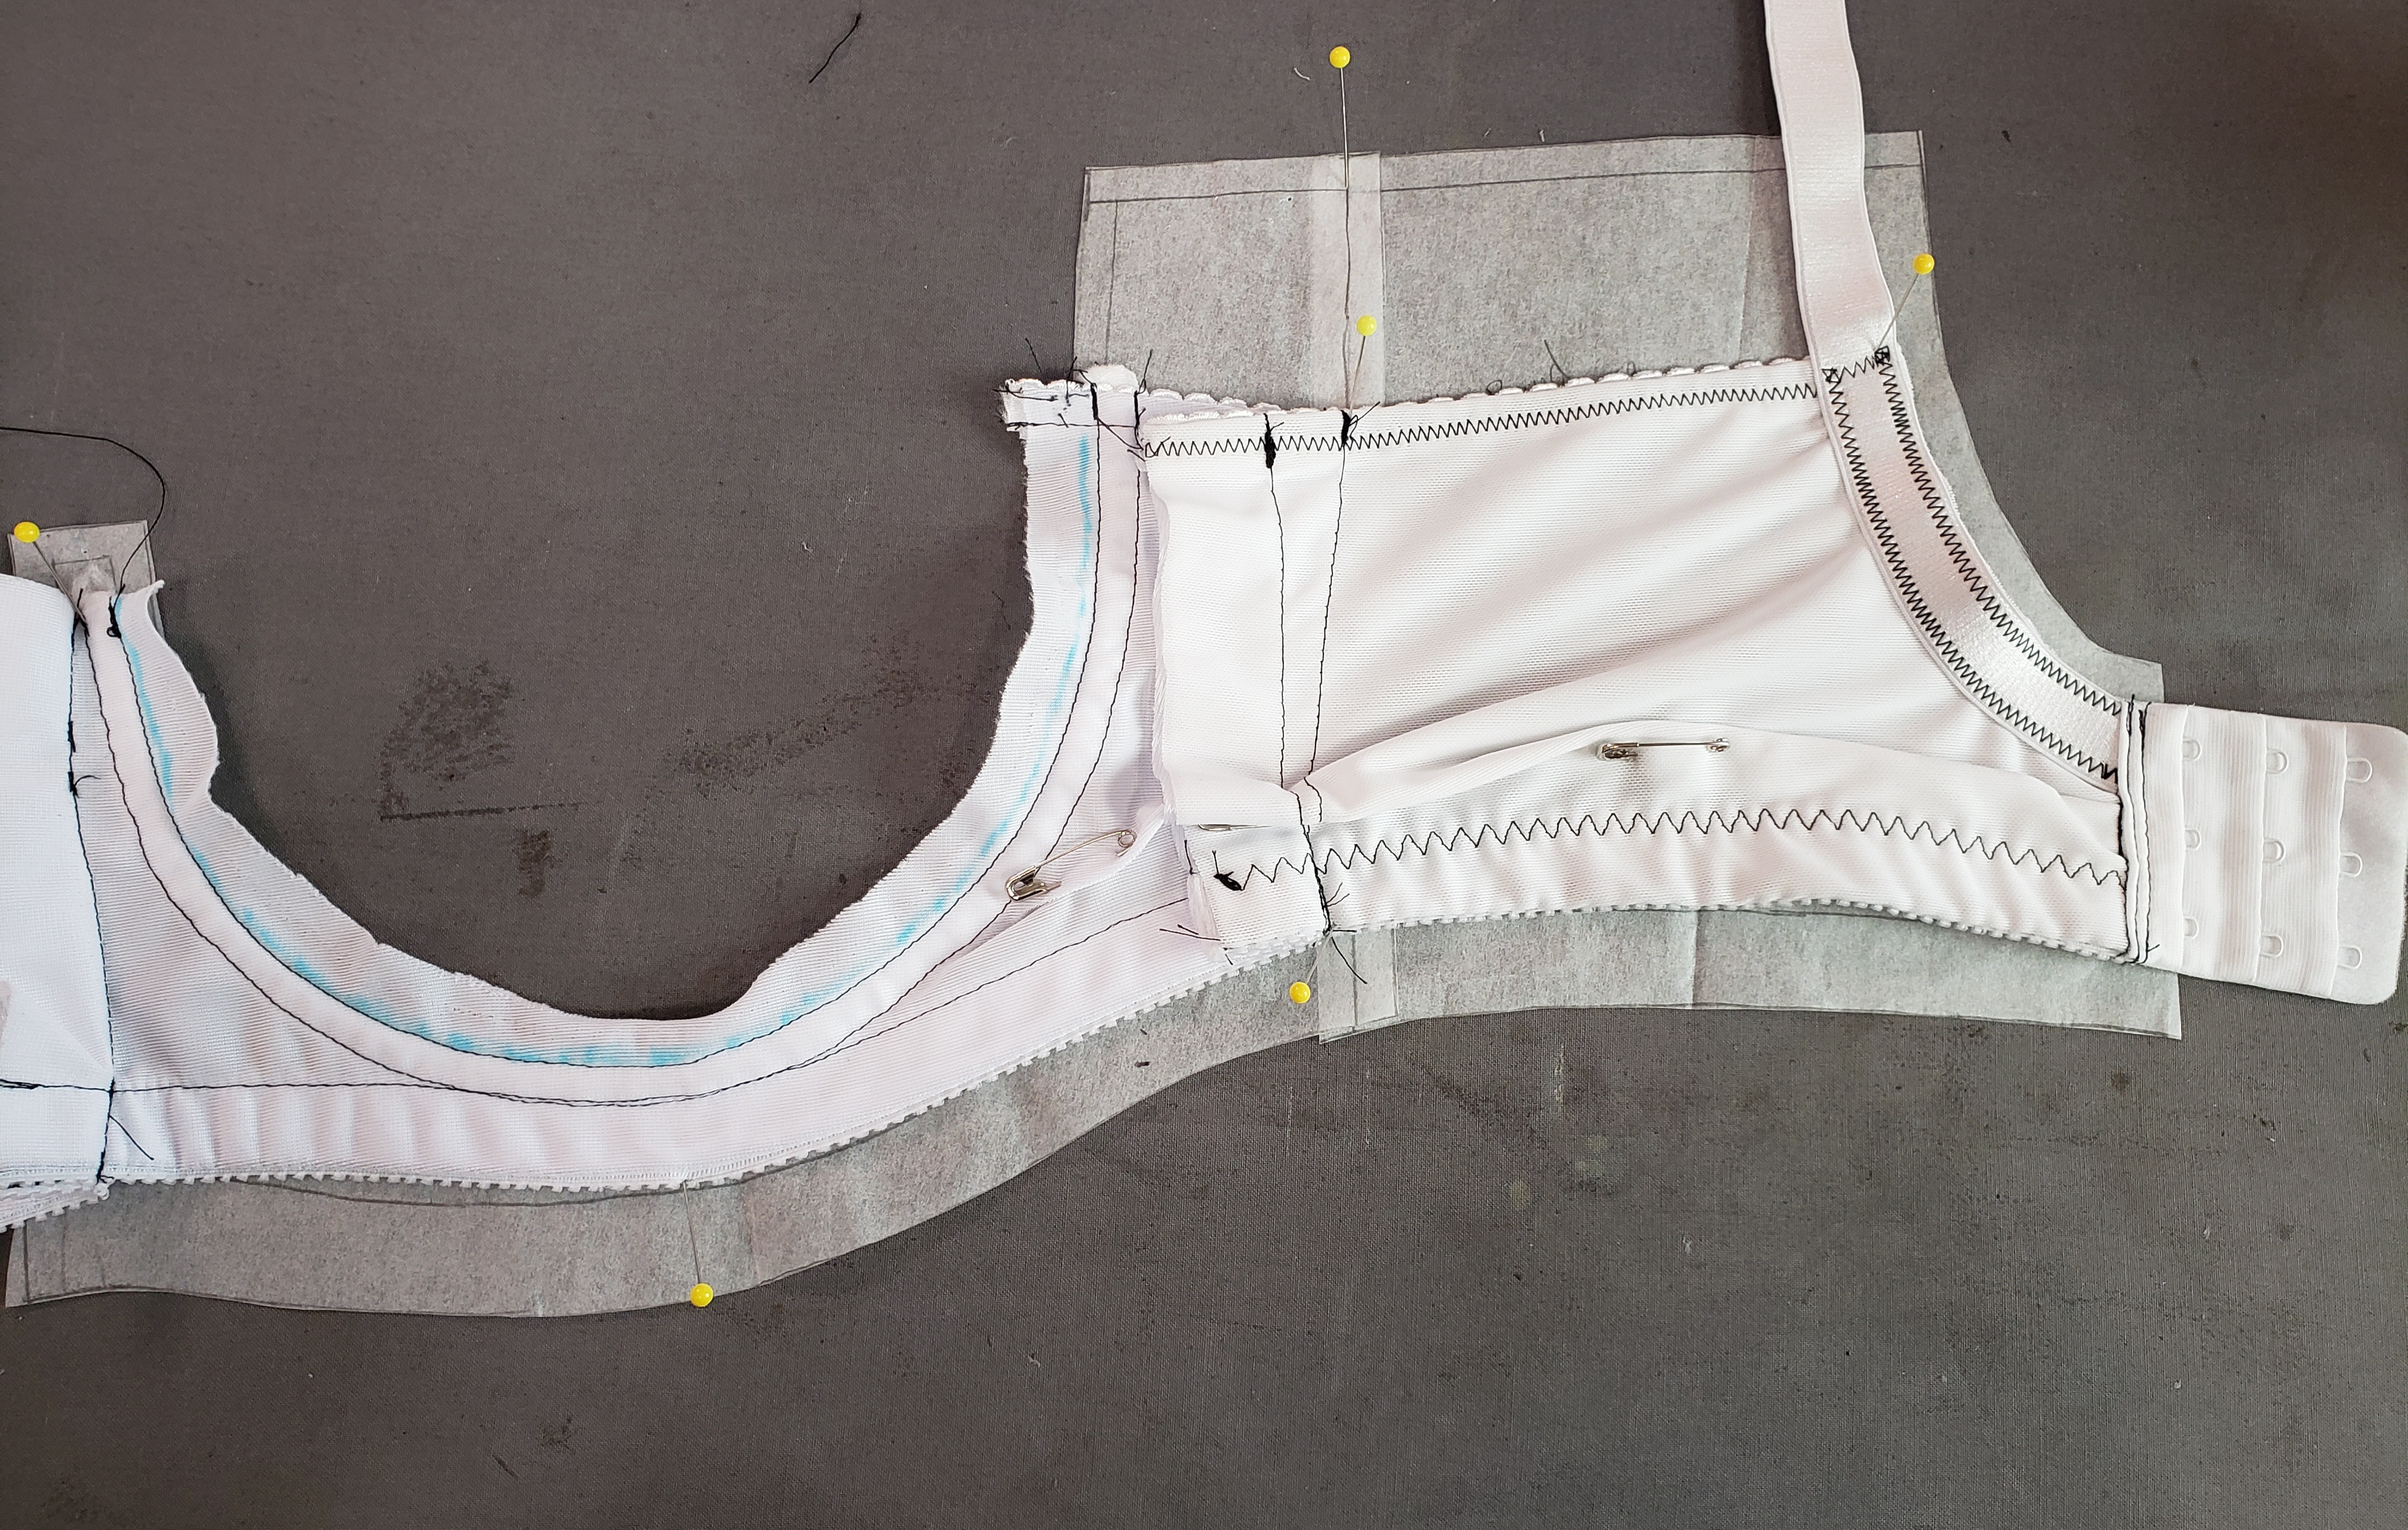
The other alteration I made to my personal band is to put a couple subtle curves in the center front of the band. My sternum is quite curved at the bottom creating a hollow in the middle of the band and then my belly protrudes out in my underbust, so I have it curved out at the very bottom, below the hollow.
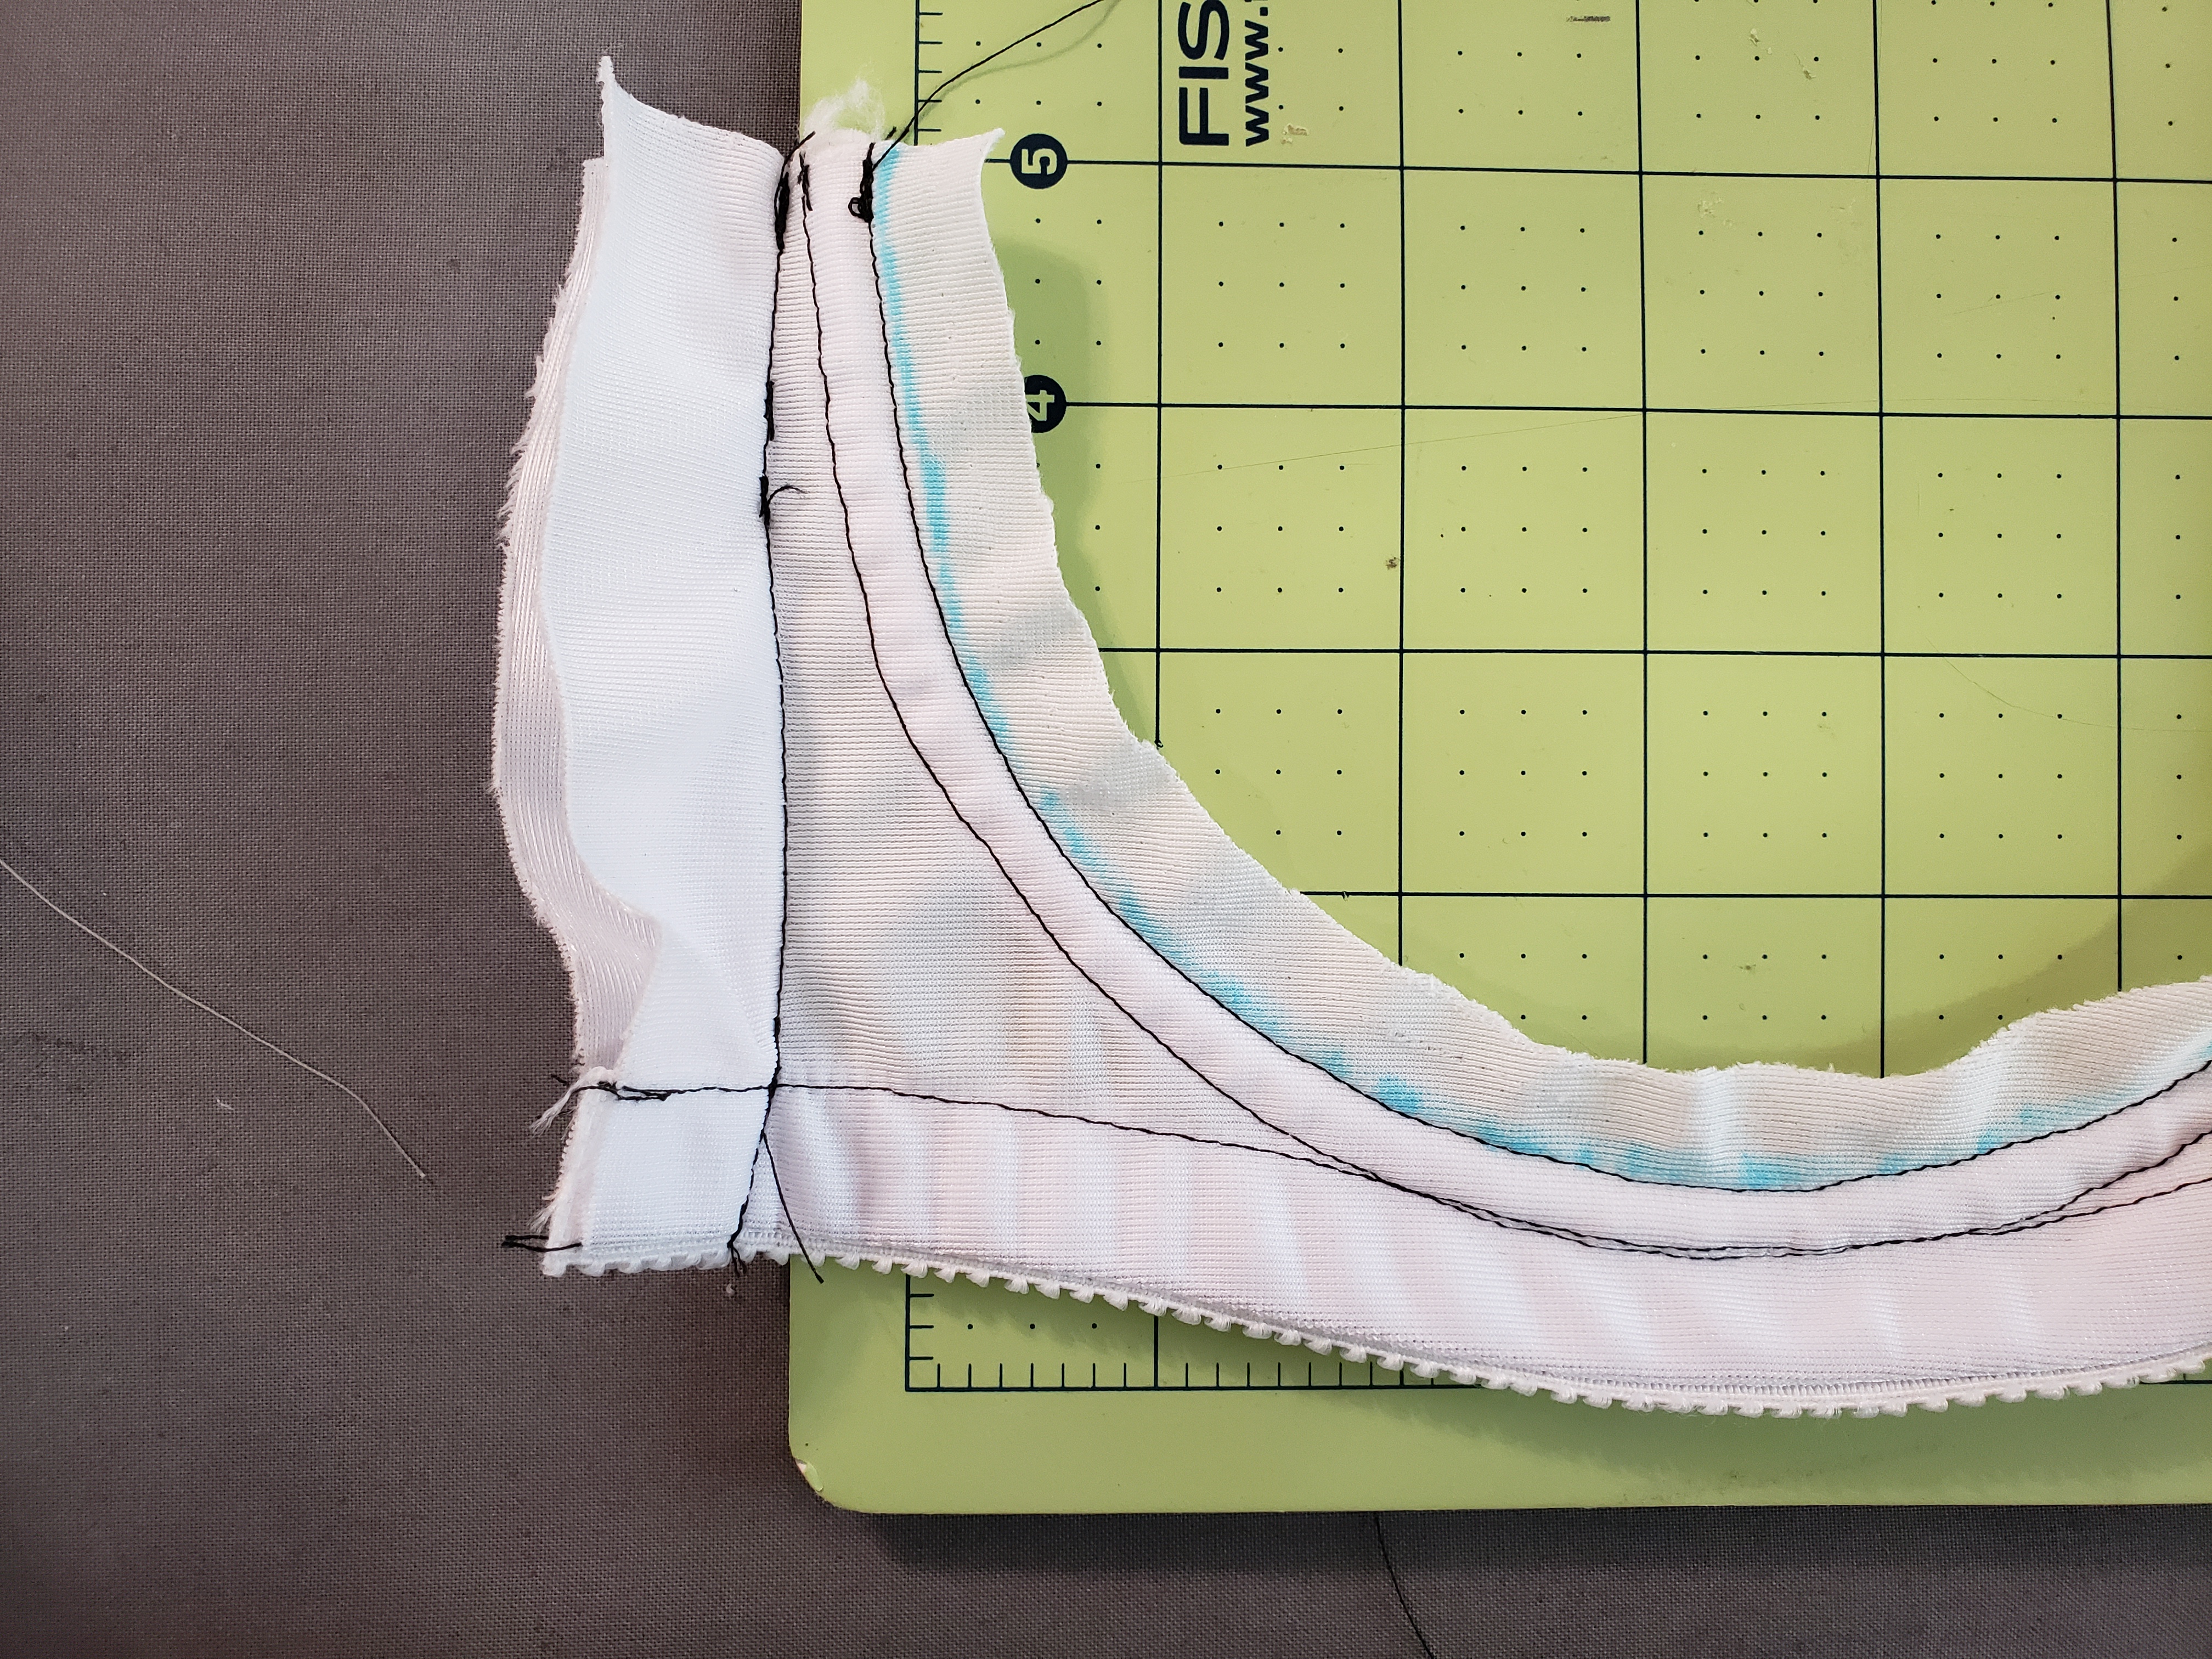
Now that I’ve shown you the alterations to my own band, here’s how simple it is to make changes to your own.
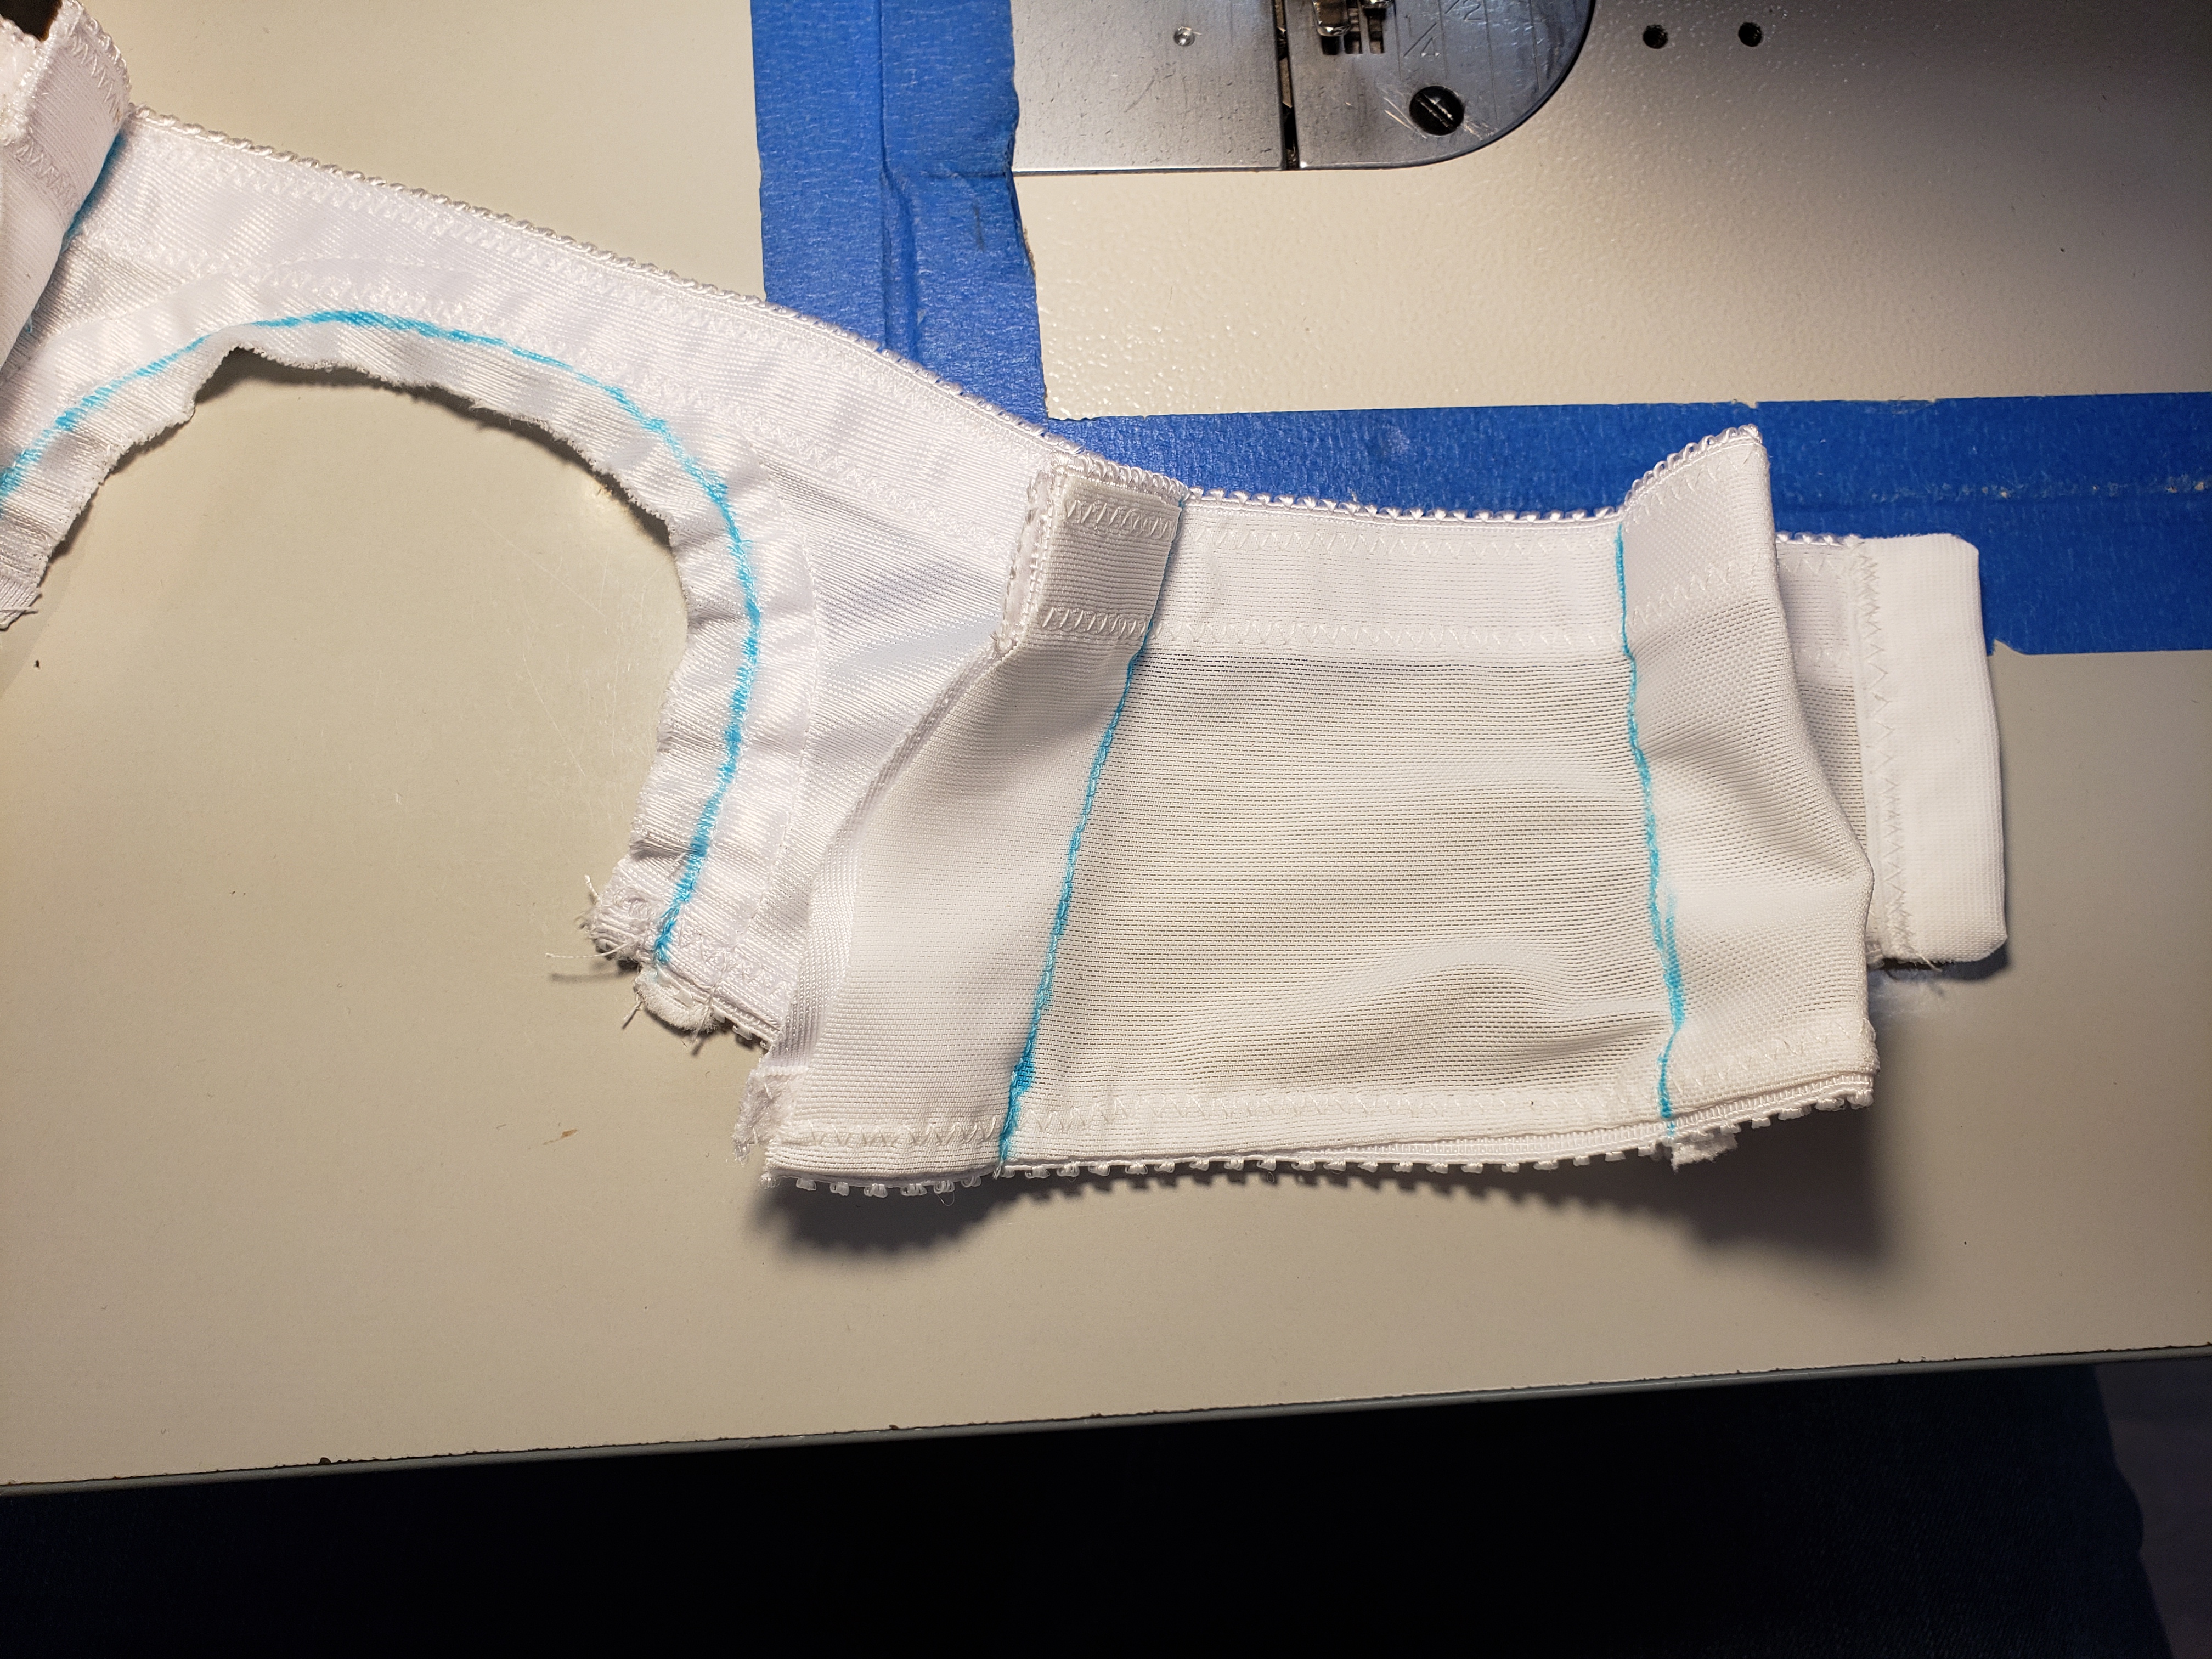
Start in the center front and really assess whether or not your wires are in your breast root crease and if your bridge is shaped the right way for the space between your breasts. I didn’t catch a picture of stitching this, but the blue lines were the original stitching and here you can see the inside of the bra where I’ve let out the bridge to make it wider.
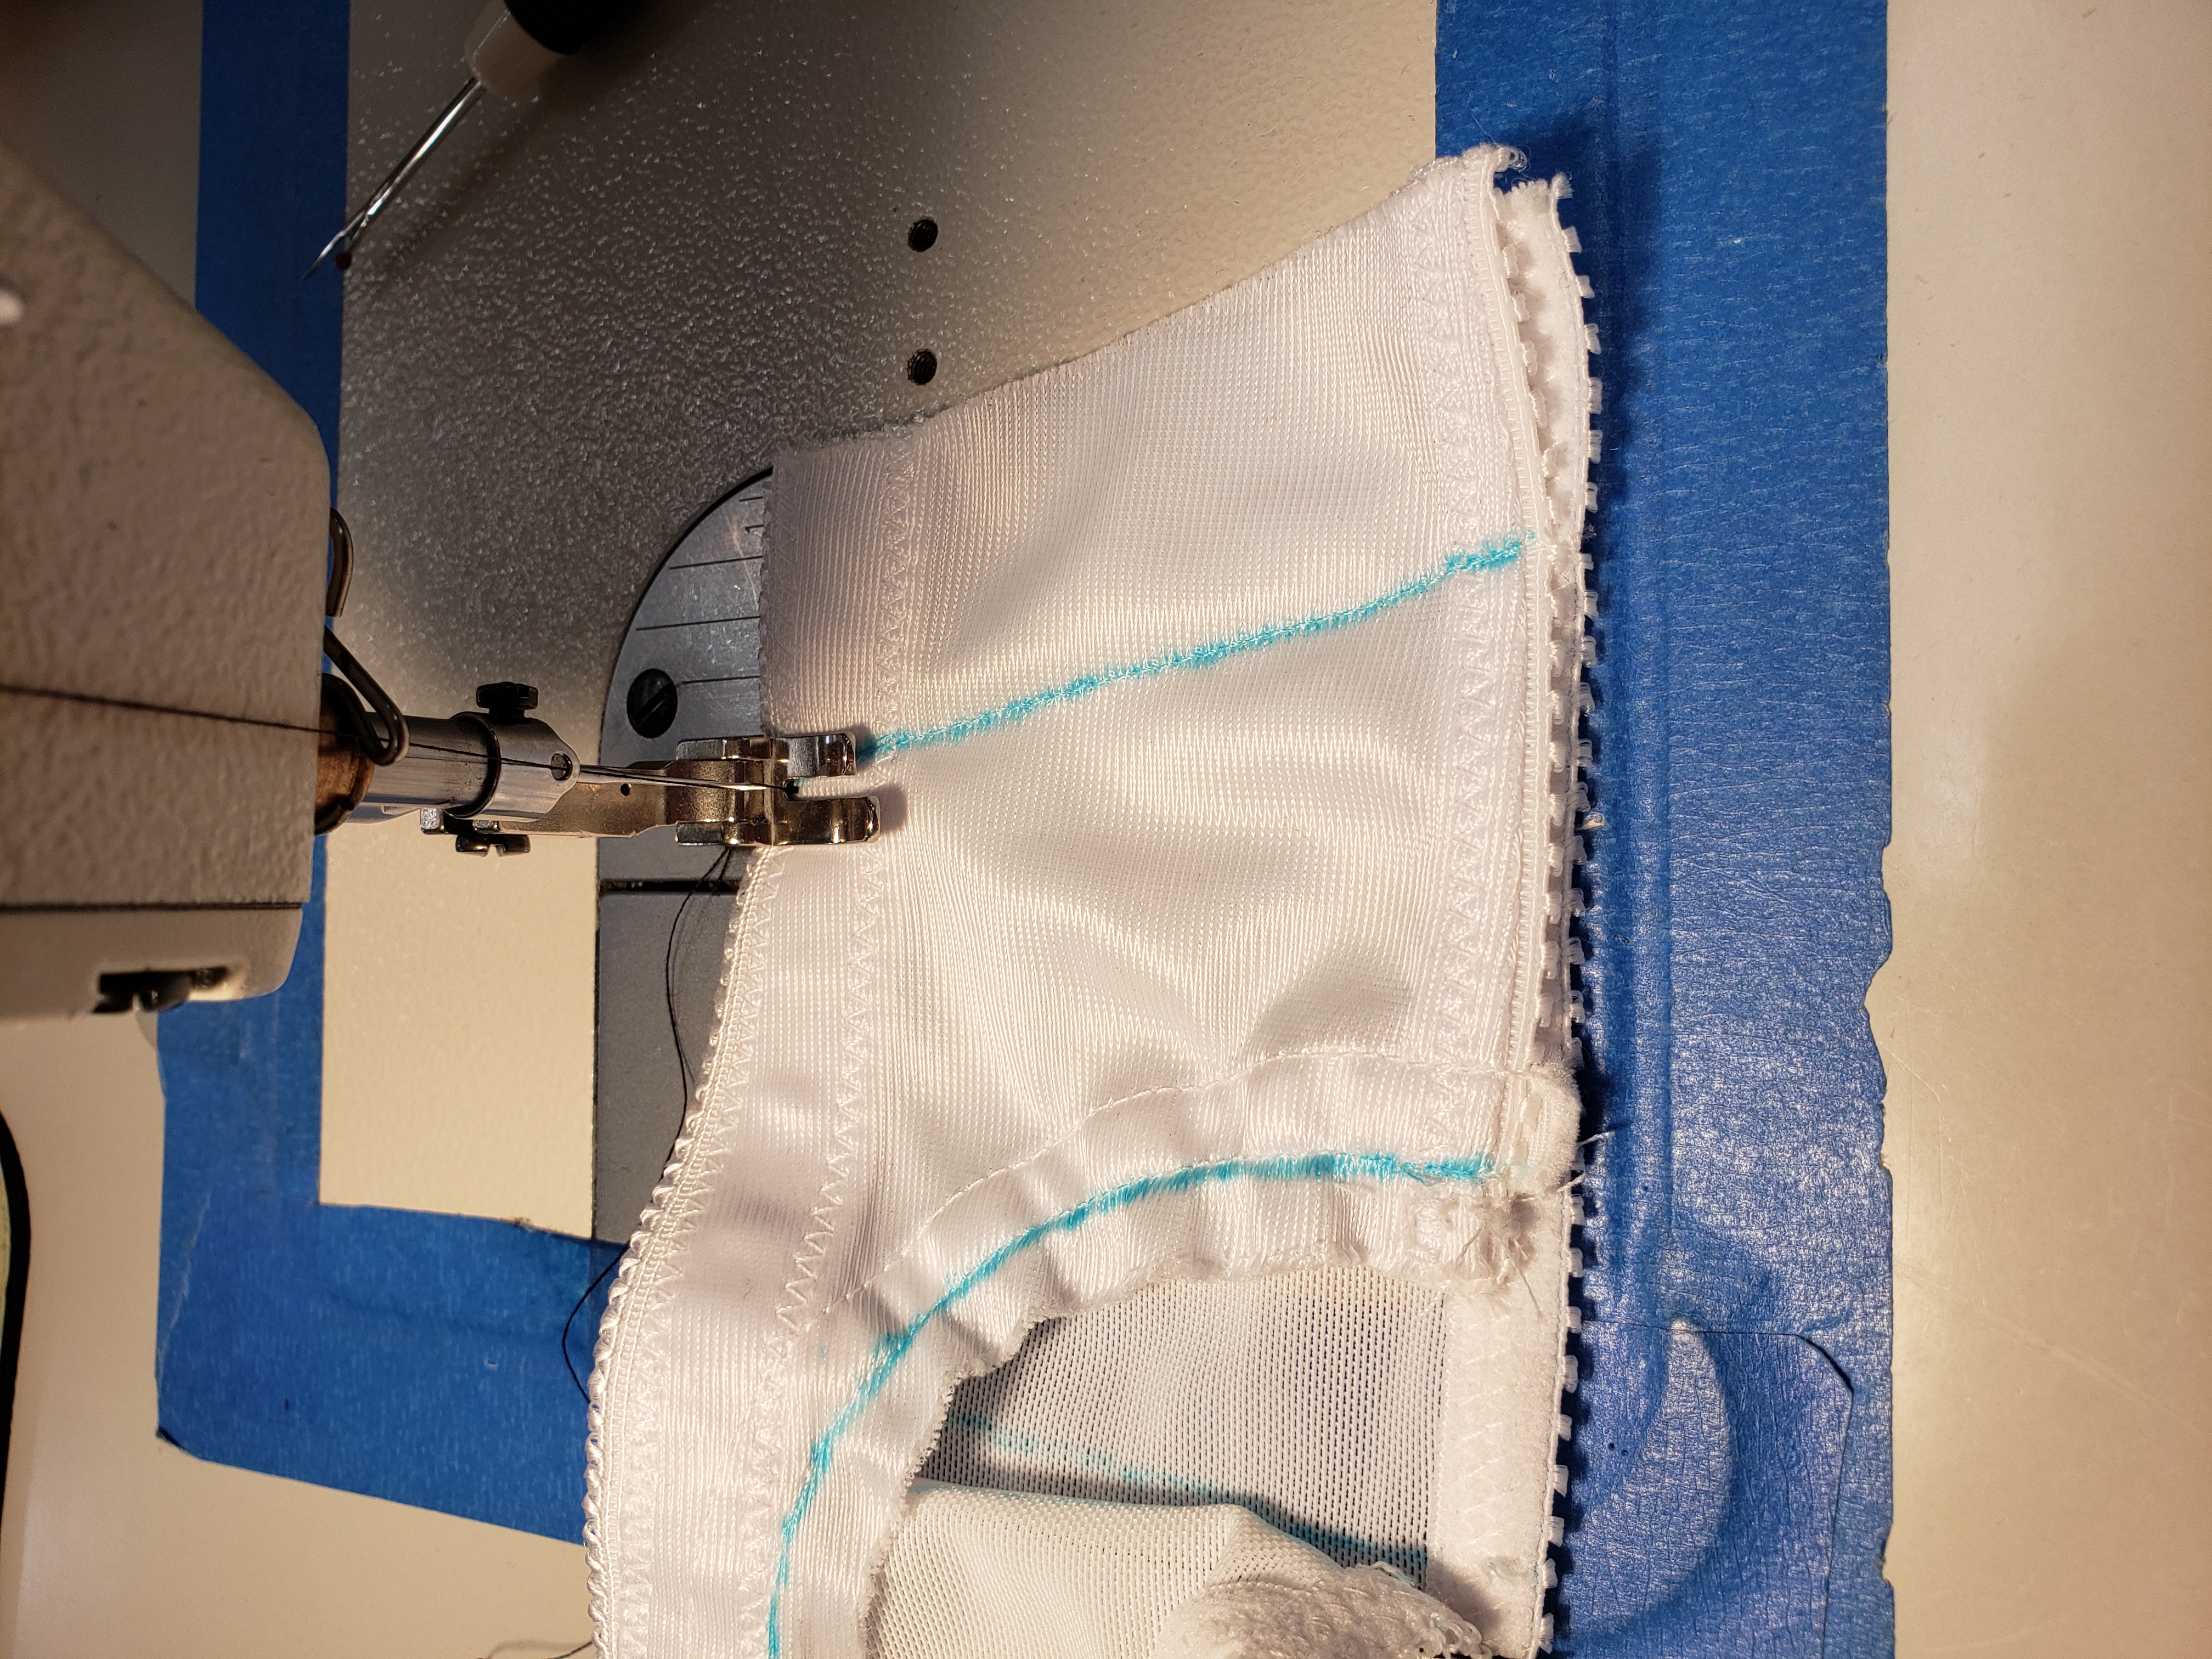
If your bottom band feels like it has a good circumference, but the top of your band seems to be too loose, then you just do a quick baste up the side seam to change the angle.
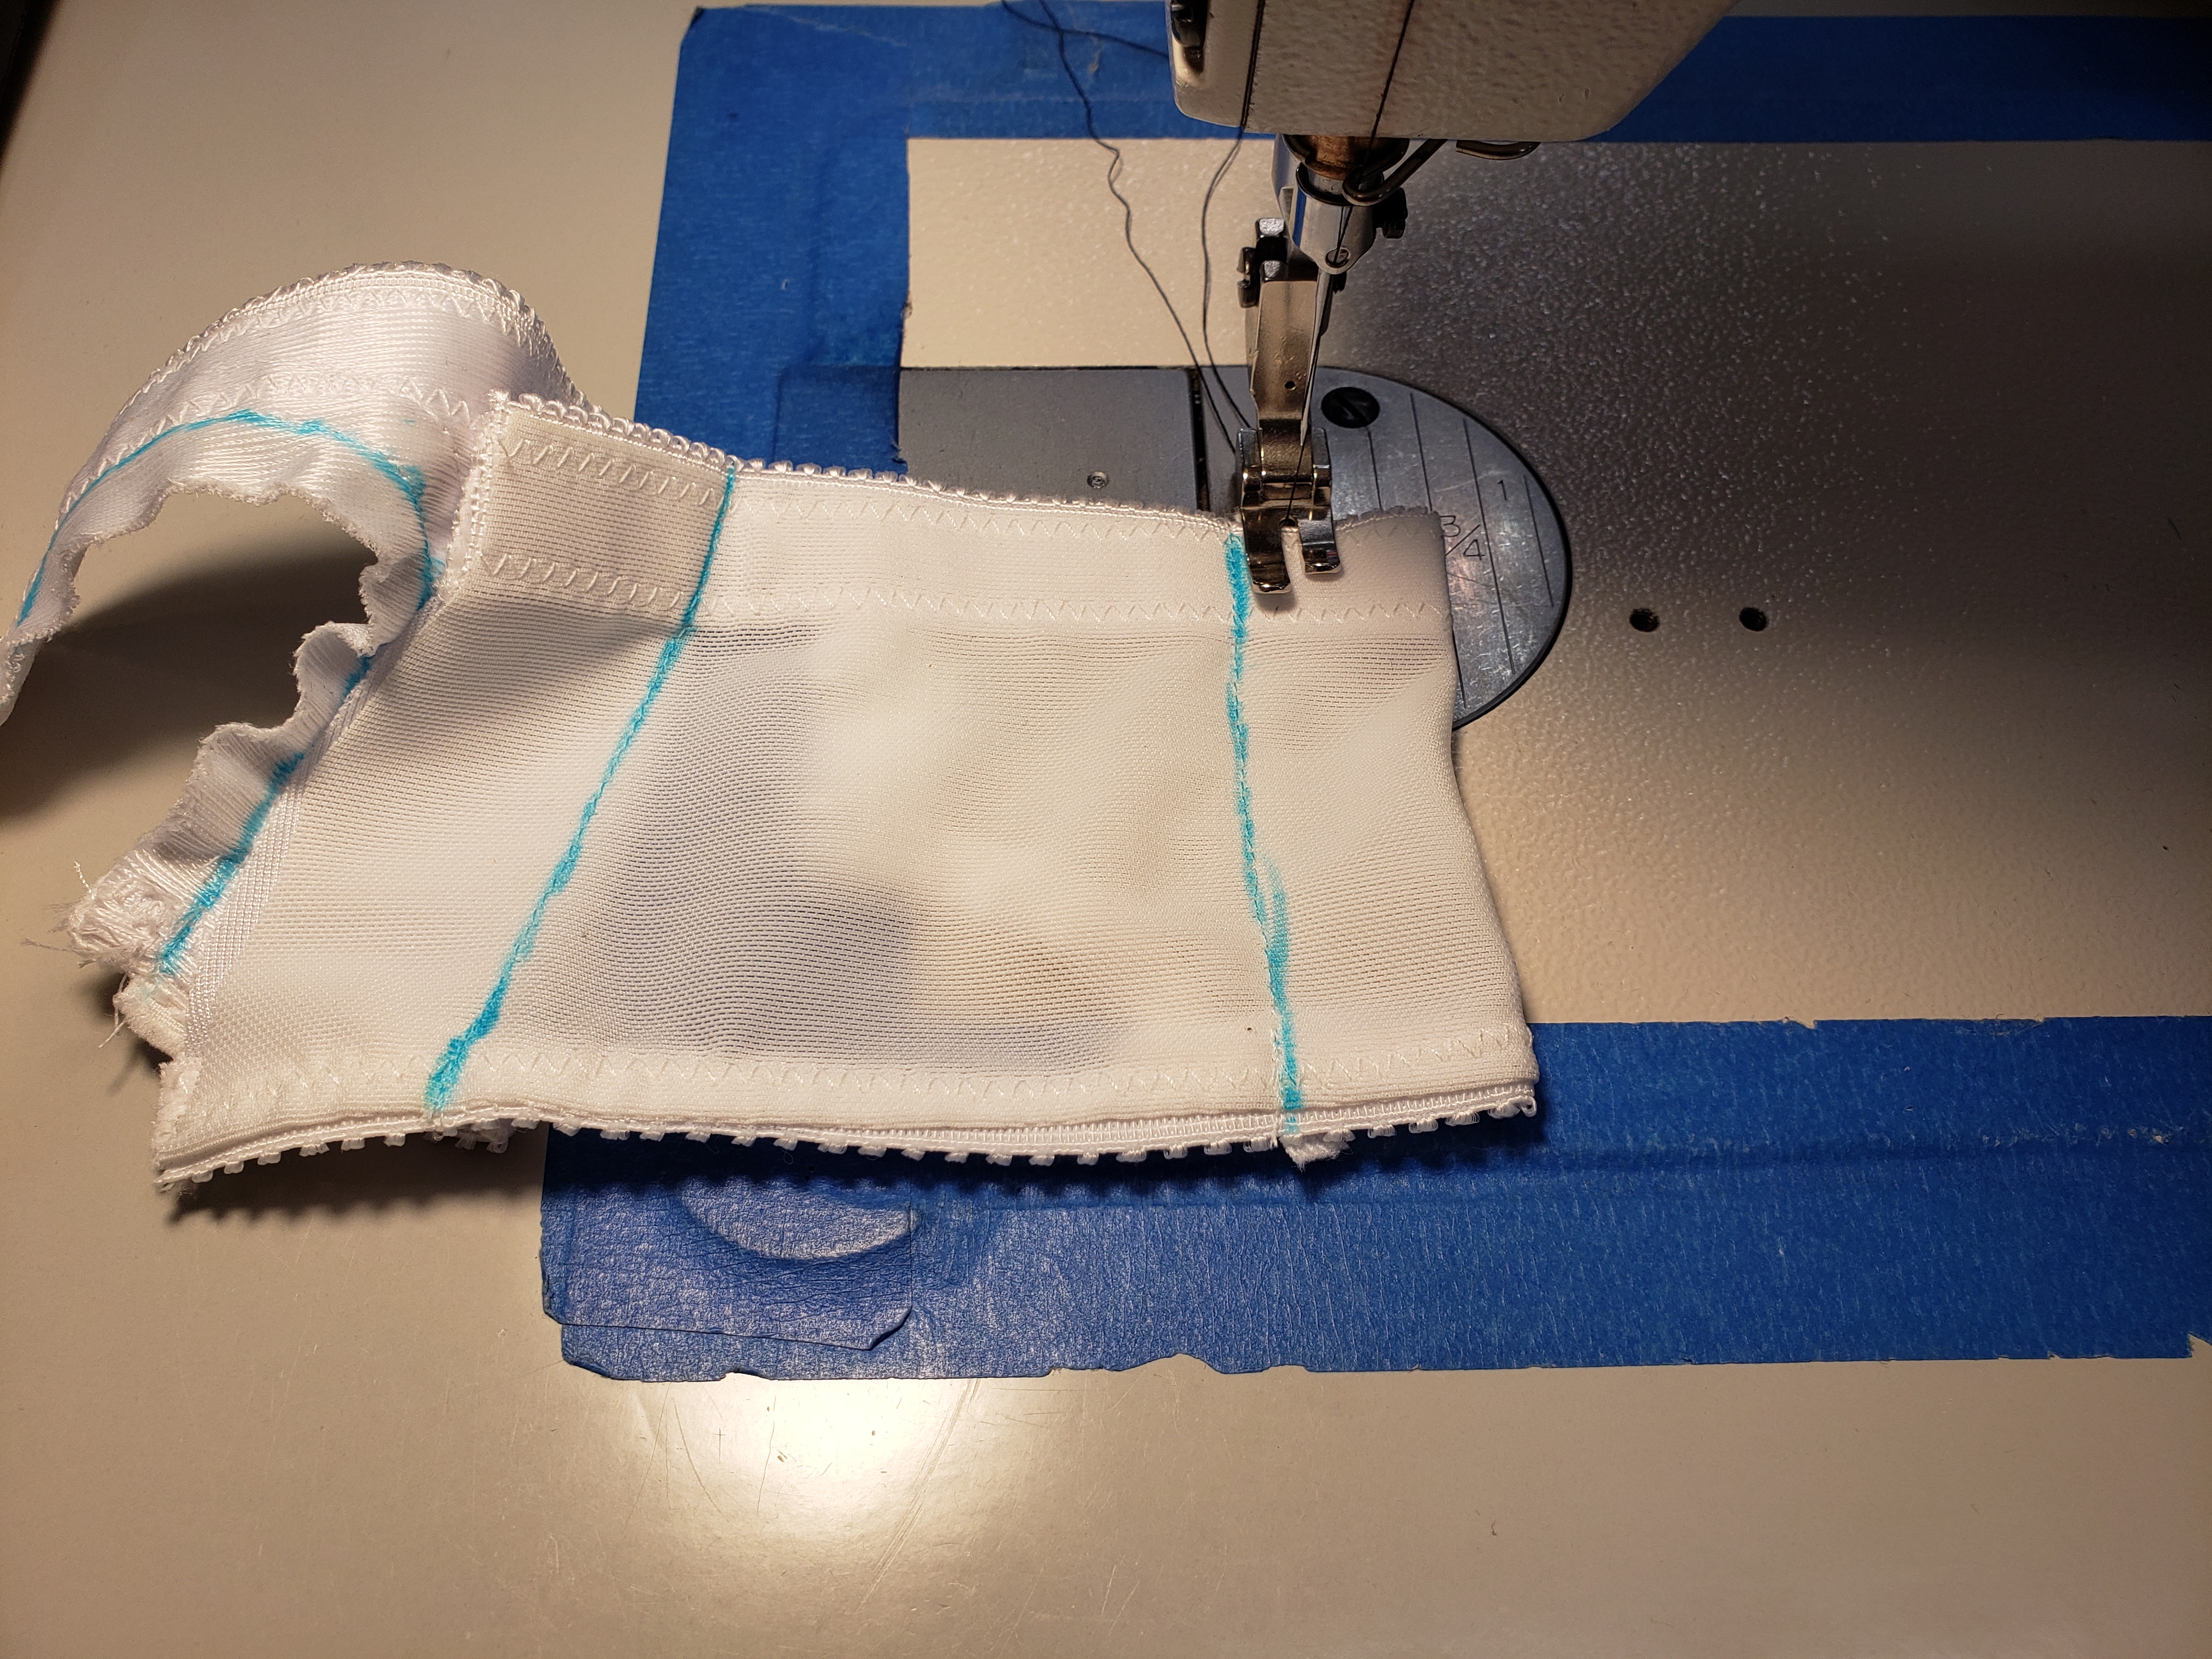
If the band is too tight and you need to let it out, you can change that in the extra that we put in the back band. I would strongly suggest that you not add an angle here unless you have extreme shaping to your spine or shoulder blades that are protruding. Mostly I recommend having this area for being able to lengthen or shorten the band for testing fit. Since this isn’t a garment to be worn, it *shouldn’t wear out.
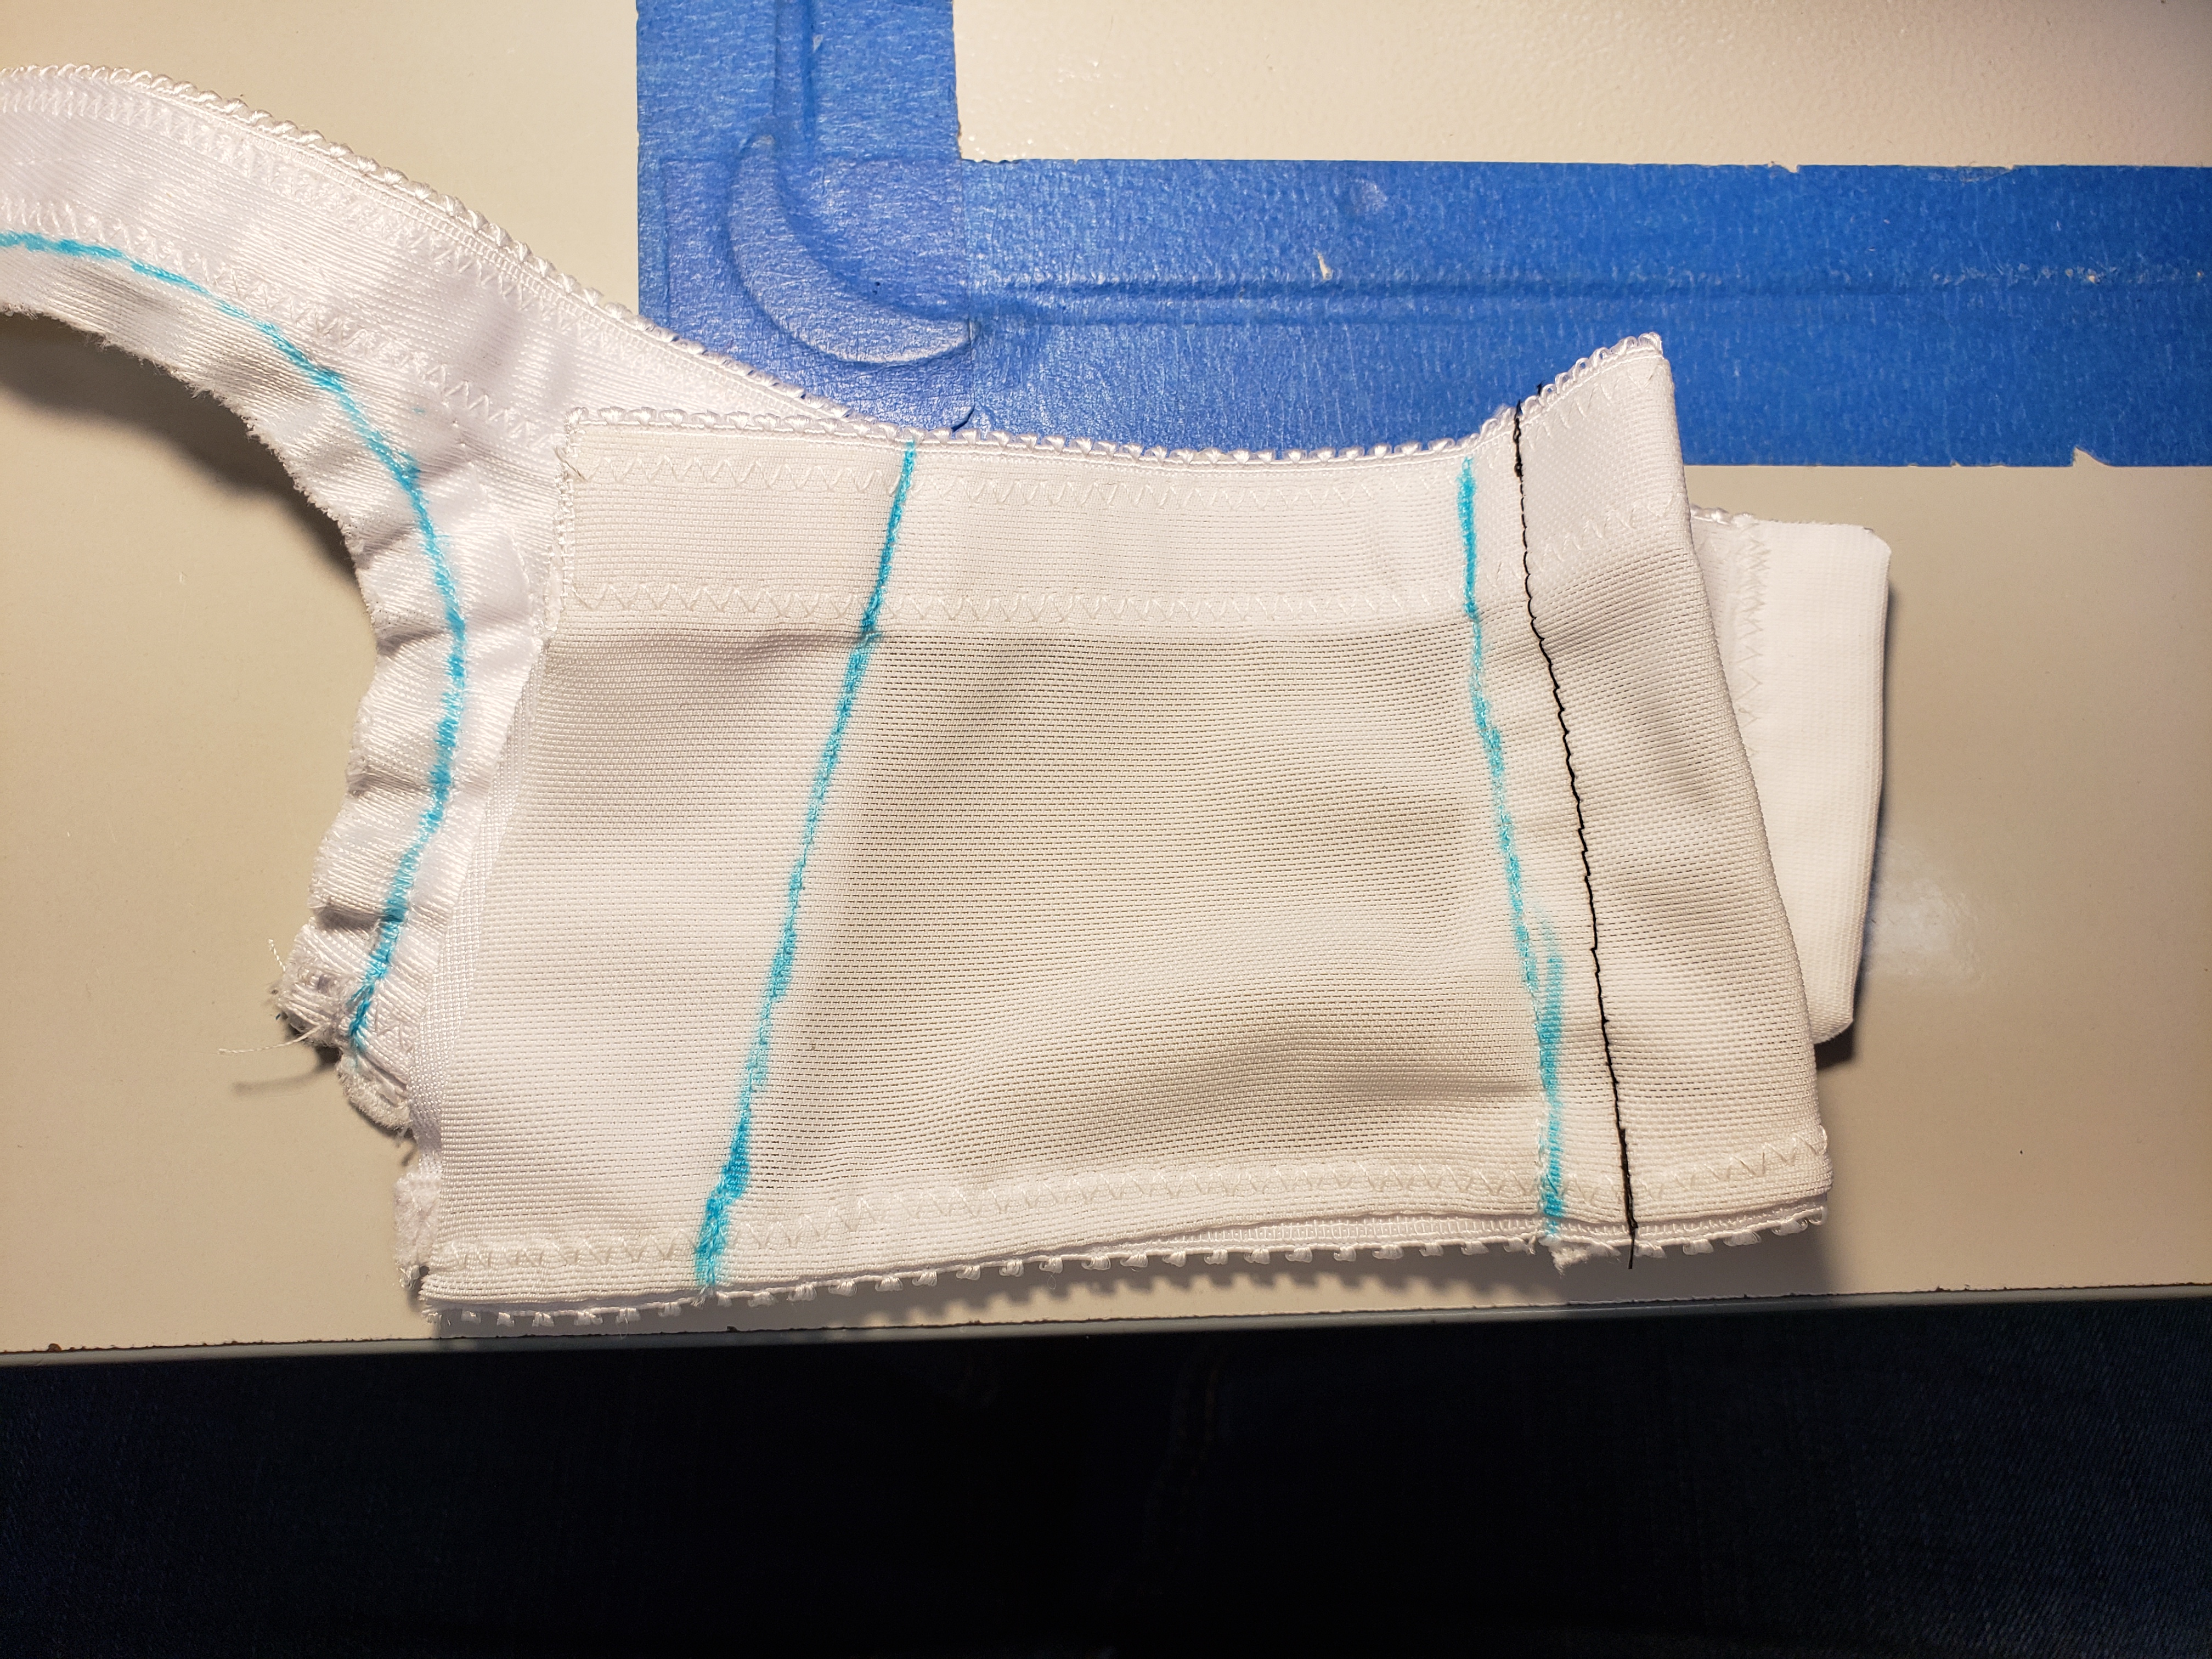
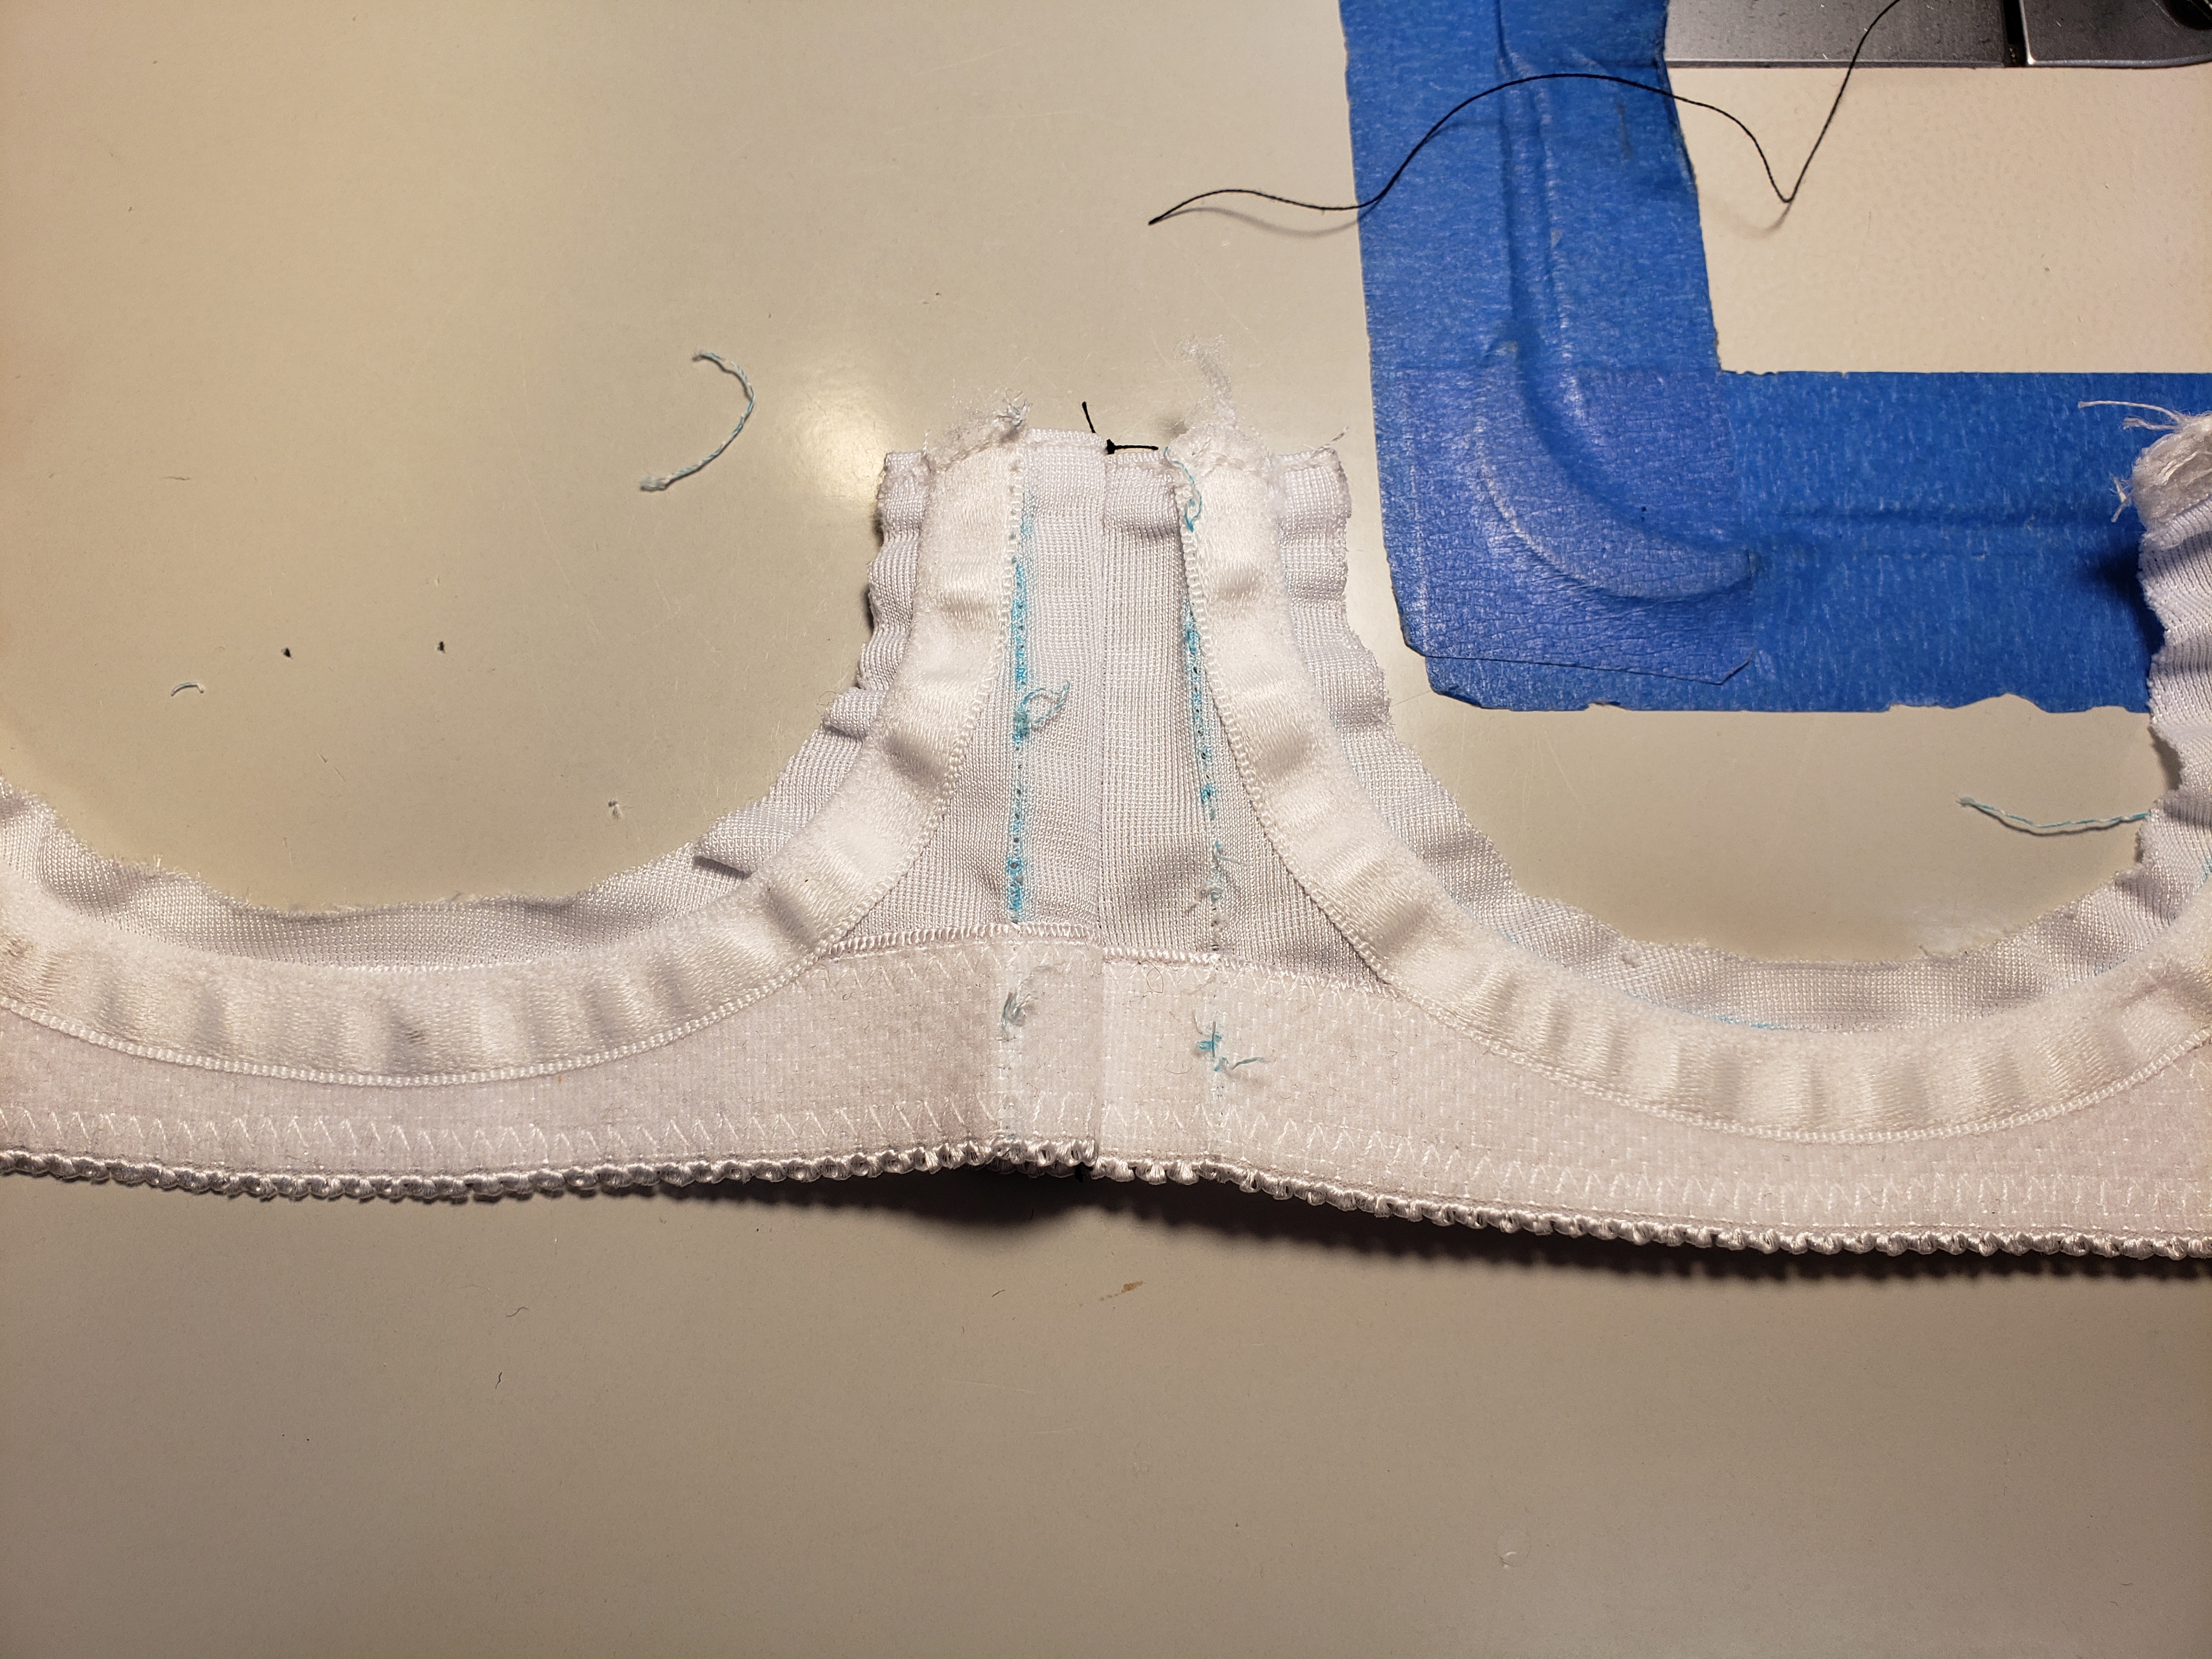
Here’s the inside of the band and you can see how I completed that stitch, took out the stitching on the blue line and now the band is wider in that location.
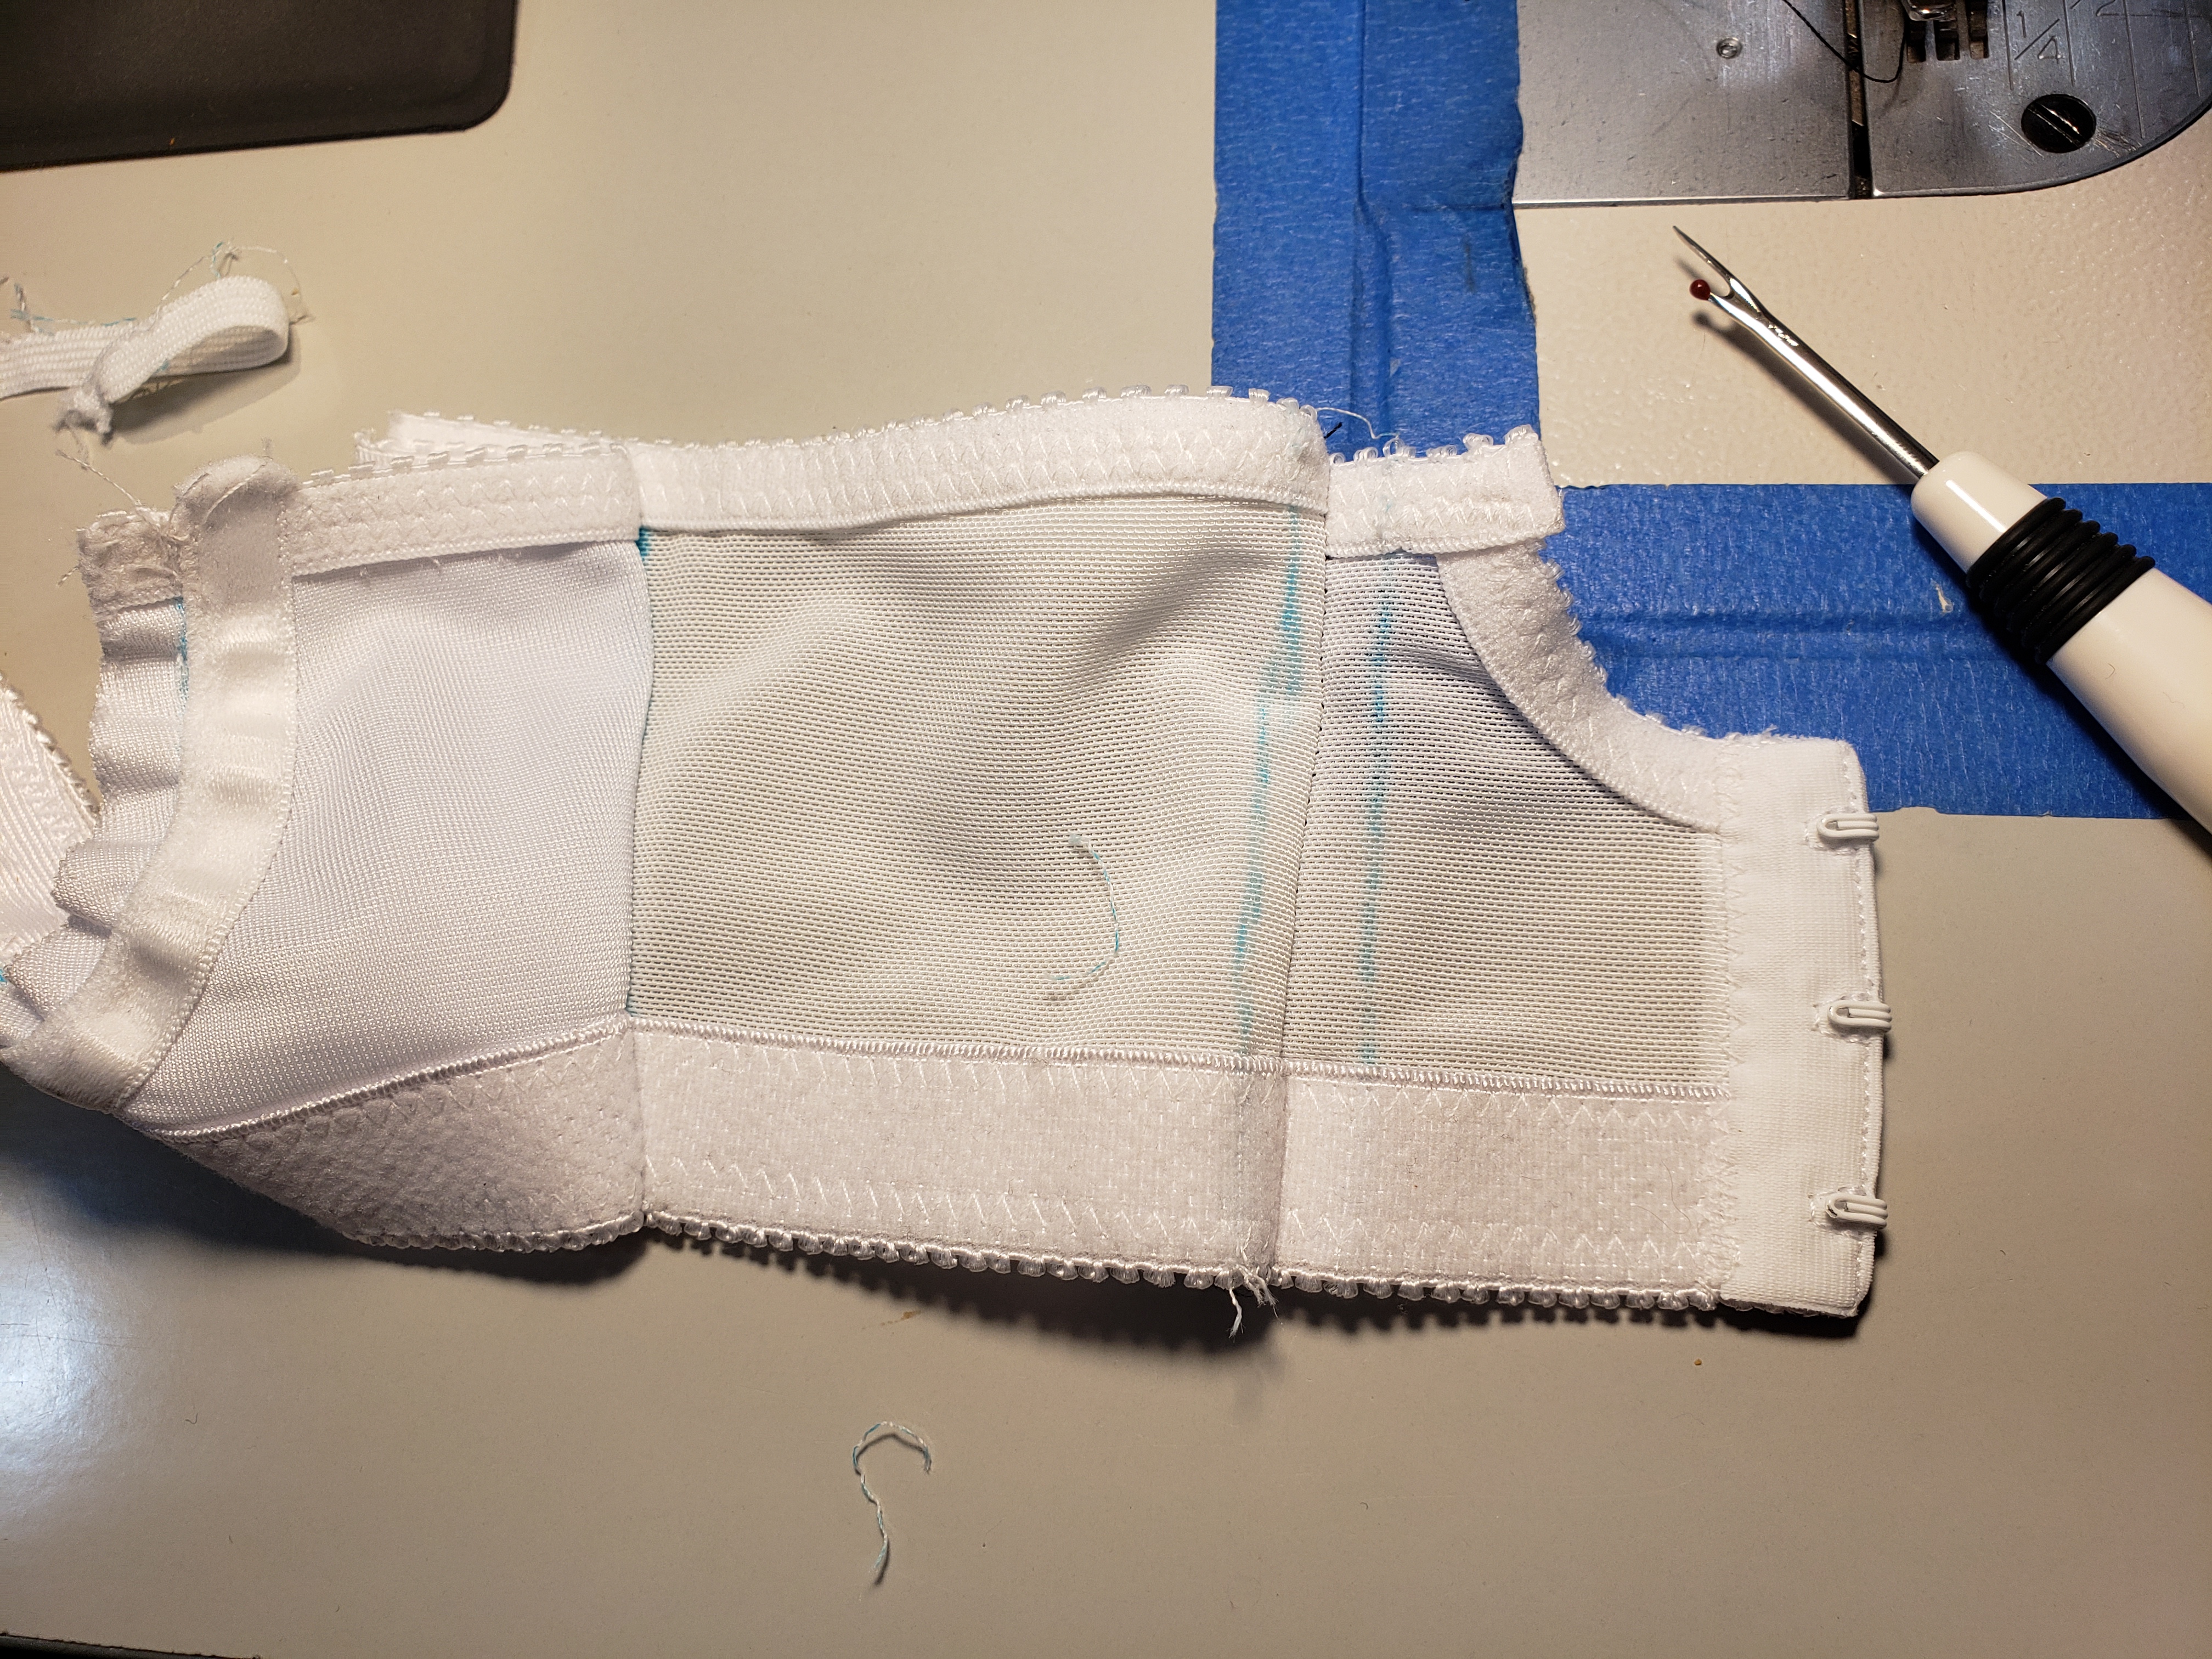
The back band changes basted in black. You can see how there’s several inches of adjustability here by the time you have the side seam and the area in back for lengthening/shortening the band.
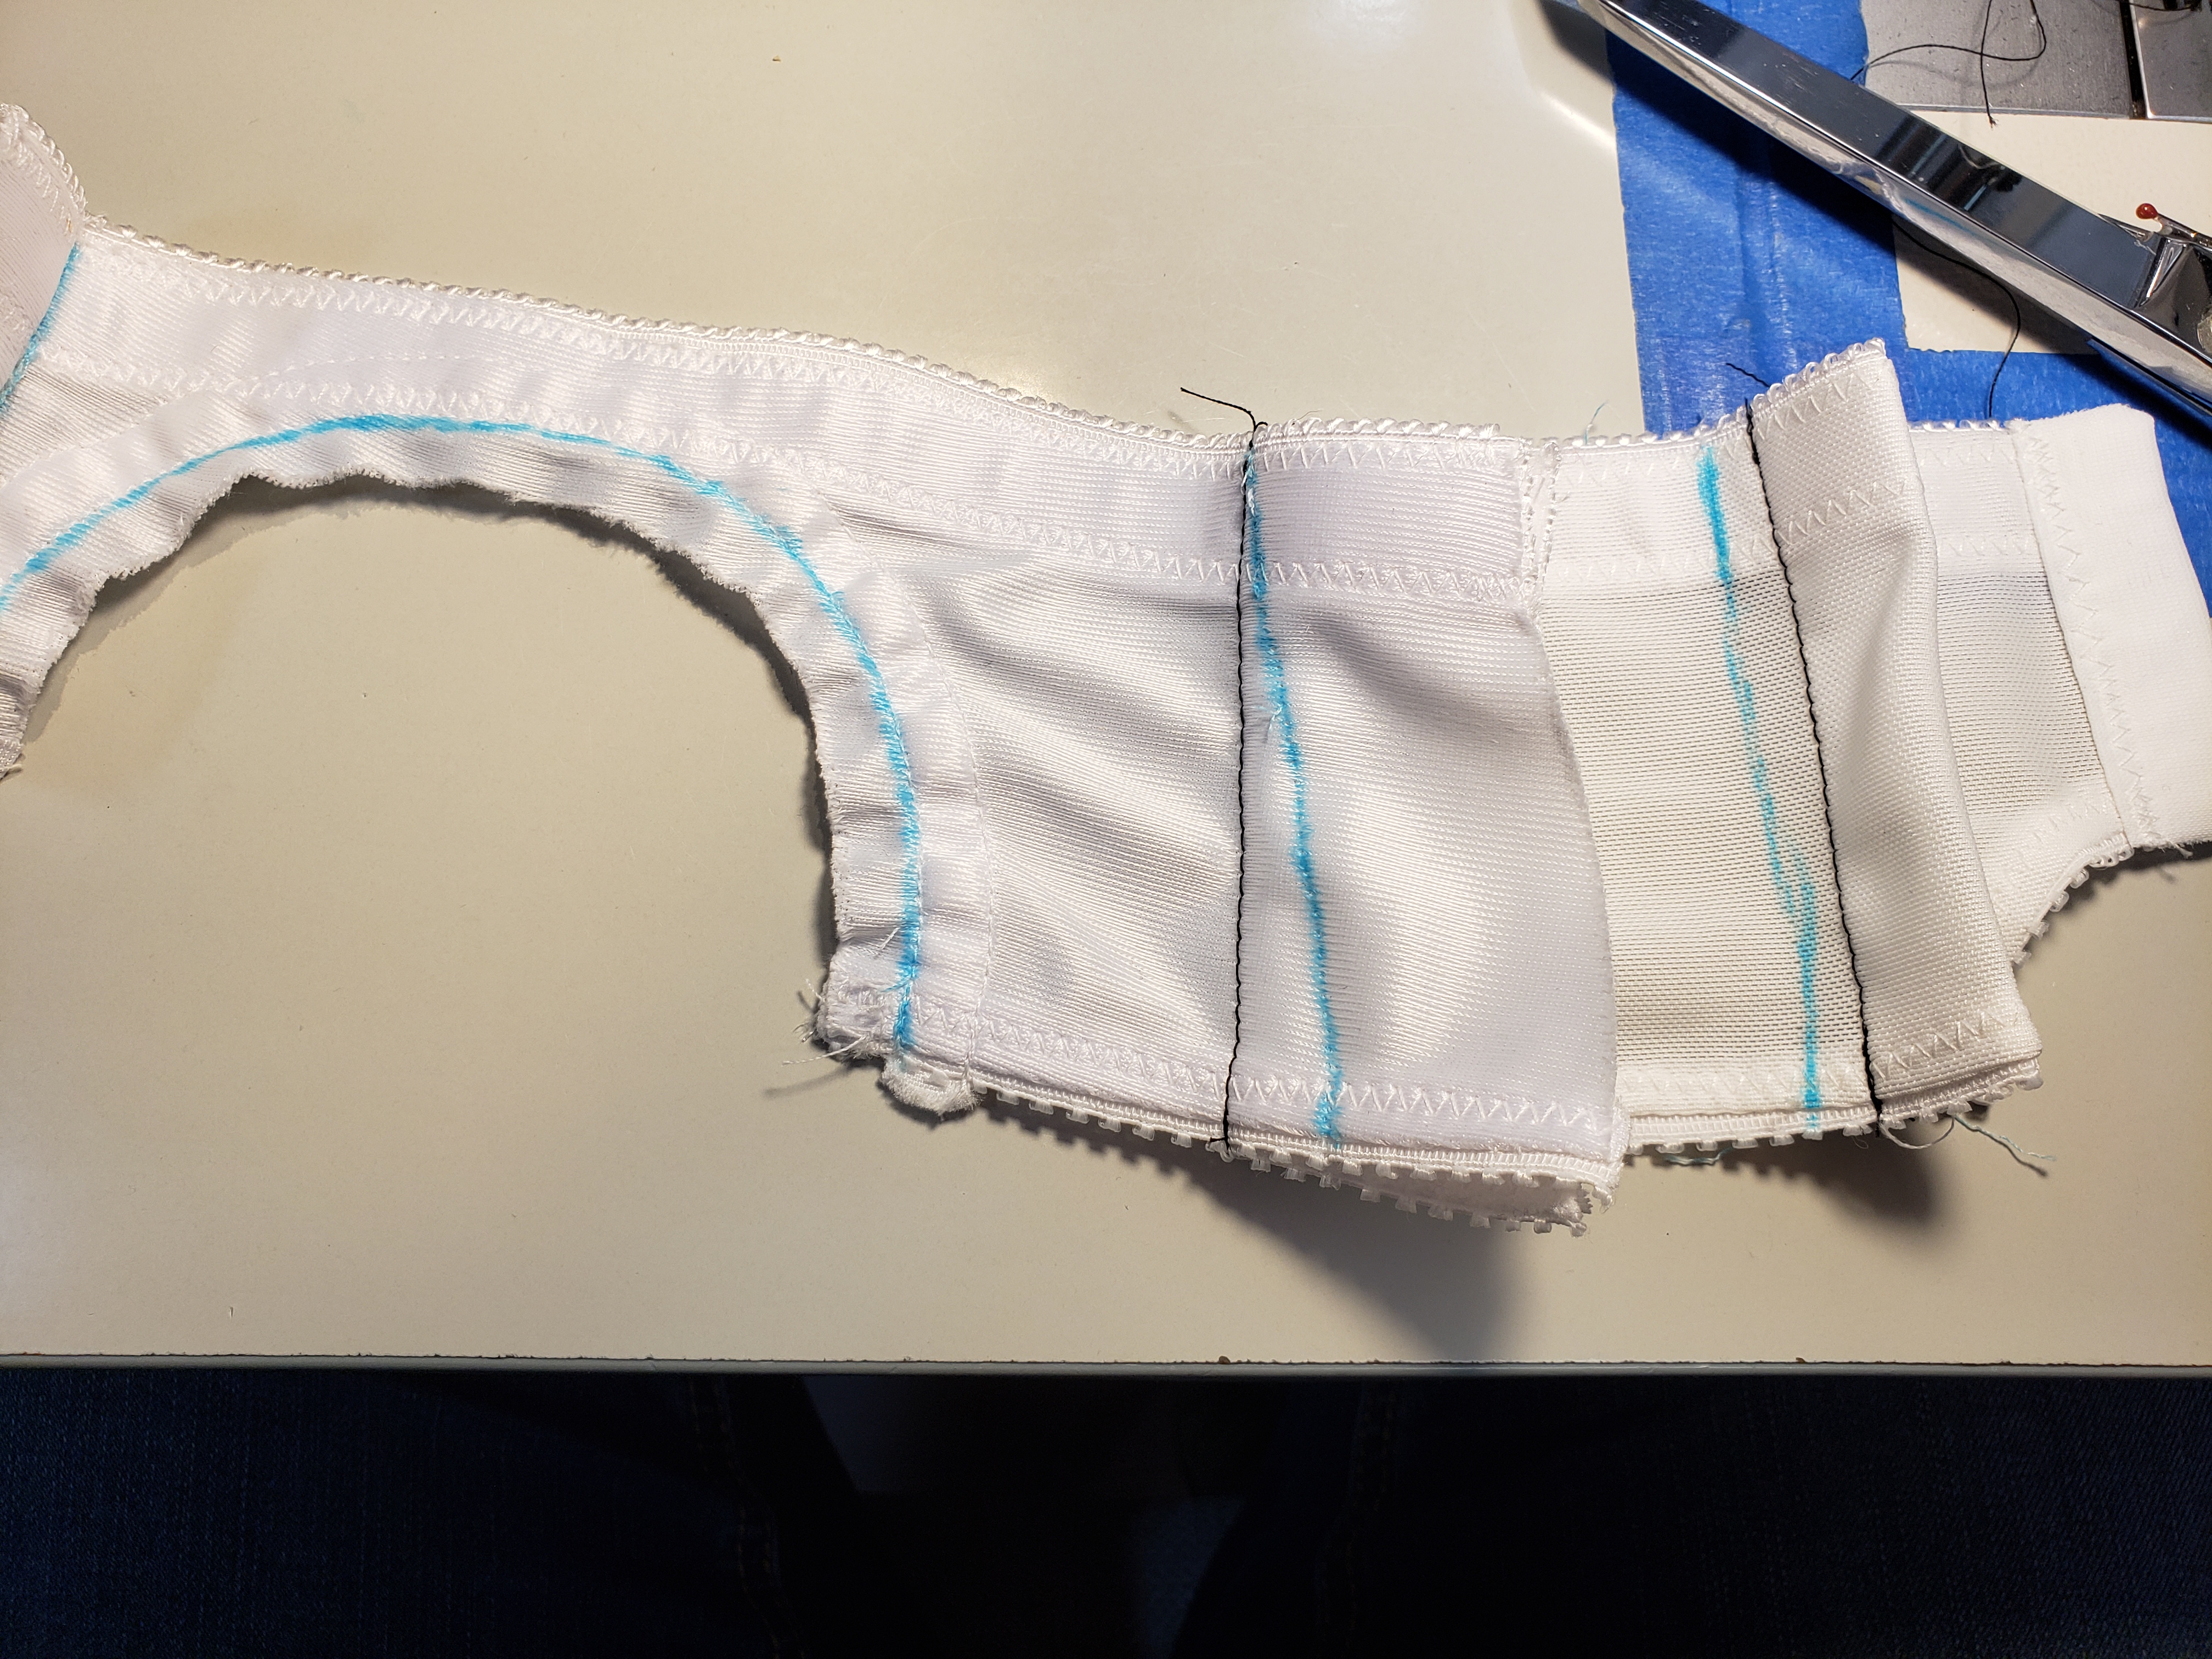
One final note on assembly: If you need to go with a larger wire at some point, you could remove the channelling and just stitch it where the new diameter of wire would go. Forgive my poor graphic design, but something like this could be done. If you need to go with a smaller wire than what you originally chose, I would probably make new fronts and reuse the backs.
.png?v=1625164938)
Closing thoughts:
It’s very easy to be overwhelmed by the whole process and try because you’ve got analysis paralysis. The goal of these posts is to make it less scary and help you break it down into small steps, making any pattern attainable because now you know how to work through it. Don’t get too hung up on which pattern, or what alterations you might need … (👙 jump in, the water is warm 🏖) there’s lots of people to help, from the Facebook Groups Sew Busty Community or Support for Bare Essentials (if you’re using the Eve Pattern from Porcelynne).
Look for the next post on fitting cups July 13!

Kristen is a Professional Sewist since 2010 in her family biz, Sewing by Carolyn, doing mostly clothing alterations, mostly wedding gowns and other formalwear. She like to say she became a Certified drafter in the Bare Essentials Method almost by accident. She just wanted a pattern that fit her friend and there is no pattern that’s shaped like her… And down the rabbit hole she went. 🐰

