
Full Bust Adjustment Guide | Bodysuit FBA
Jump to: Choosing a Base Size | Performing the FBA | Reducing the Waist
Giant FBA: Let’s Review
This post is part of a series on “giant” full bust adjustments — adjustments for sewists who need to add more than 2-3″ to their garments. The series is a response to the fact that almost every FBA tutorial out there assumes you’re only adding a couple inches to your bodices, but for many of us, that’s just not true.
I, for example, need to add 7-9″ to most patterns.
Other posts in this series include:
- Giant FBA for a dartless knit bodice
- Giant FBA on a woven bodice
- Giant FBA on a cowl neckline
- Giant FBA on the Named Clothing Kielo (adding an armscye dart)
- Giant FBA on a raglan top
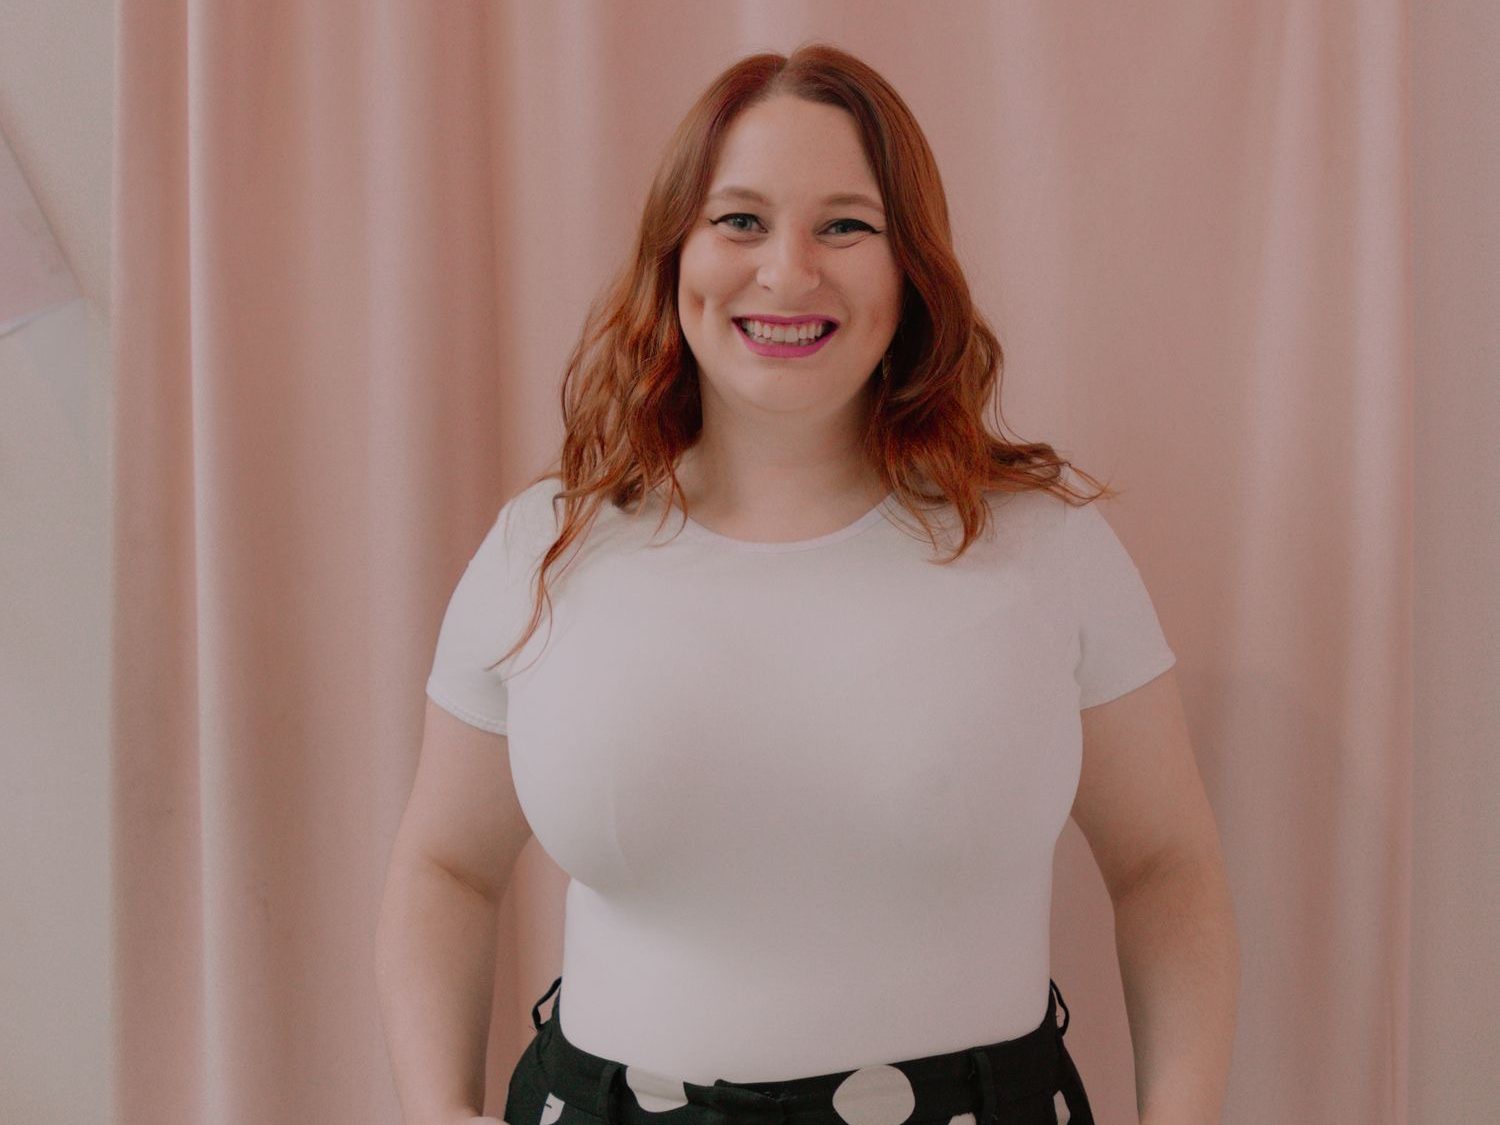
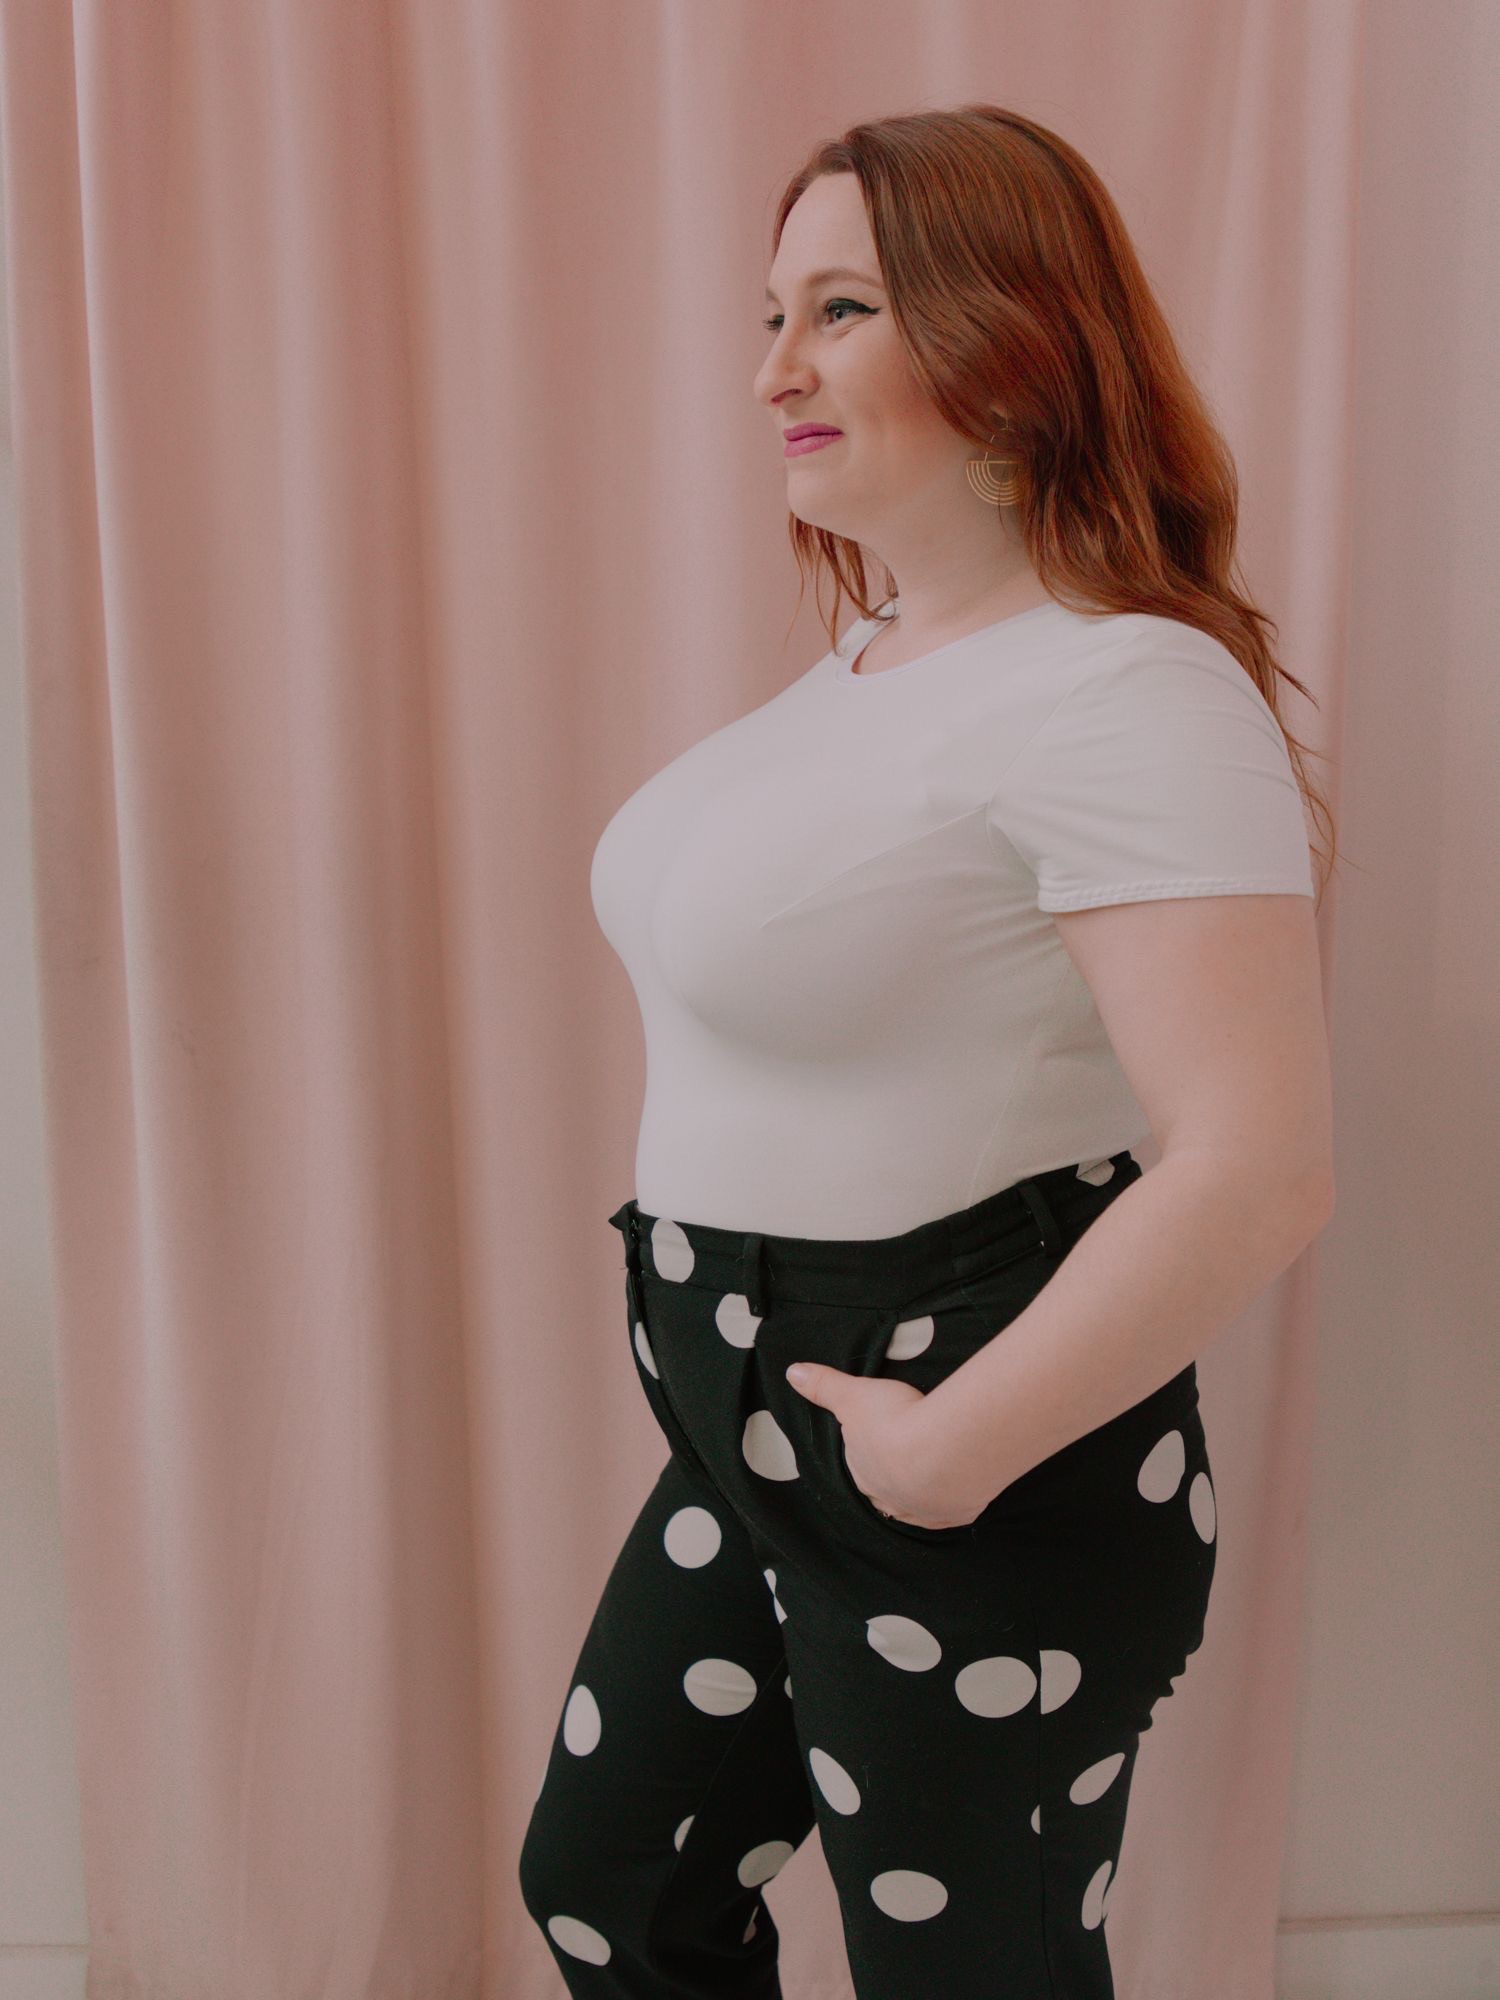
Most patterns are drafted for a garment B cup (a 2″ difference between high and full bust; different from bra cup size!), but this pattern — the Nathalie Bodysuit from Untitled Thoughts — includes both a B cup and DD cup (5″ difference between high and full bust) draft. But I currently need a J garment cup — a 10″ difference.
getting started
Choosing a base size
If you’ve read my previous FBA posts, you can skip this step and head straight to the FBA steps. If not, buckle up for some important info on measuring!
Start with your high bust measurement, measured braless.
Measuring the high bust without a bra captures as little breast tissue as possible, which gives us a more accurate look at your skeletal frame, which is really what we’re trying to measure. Again, the high bust measurement is a proxy for your skeletal frame.
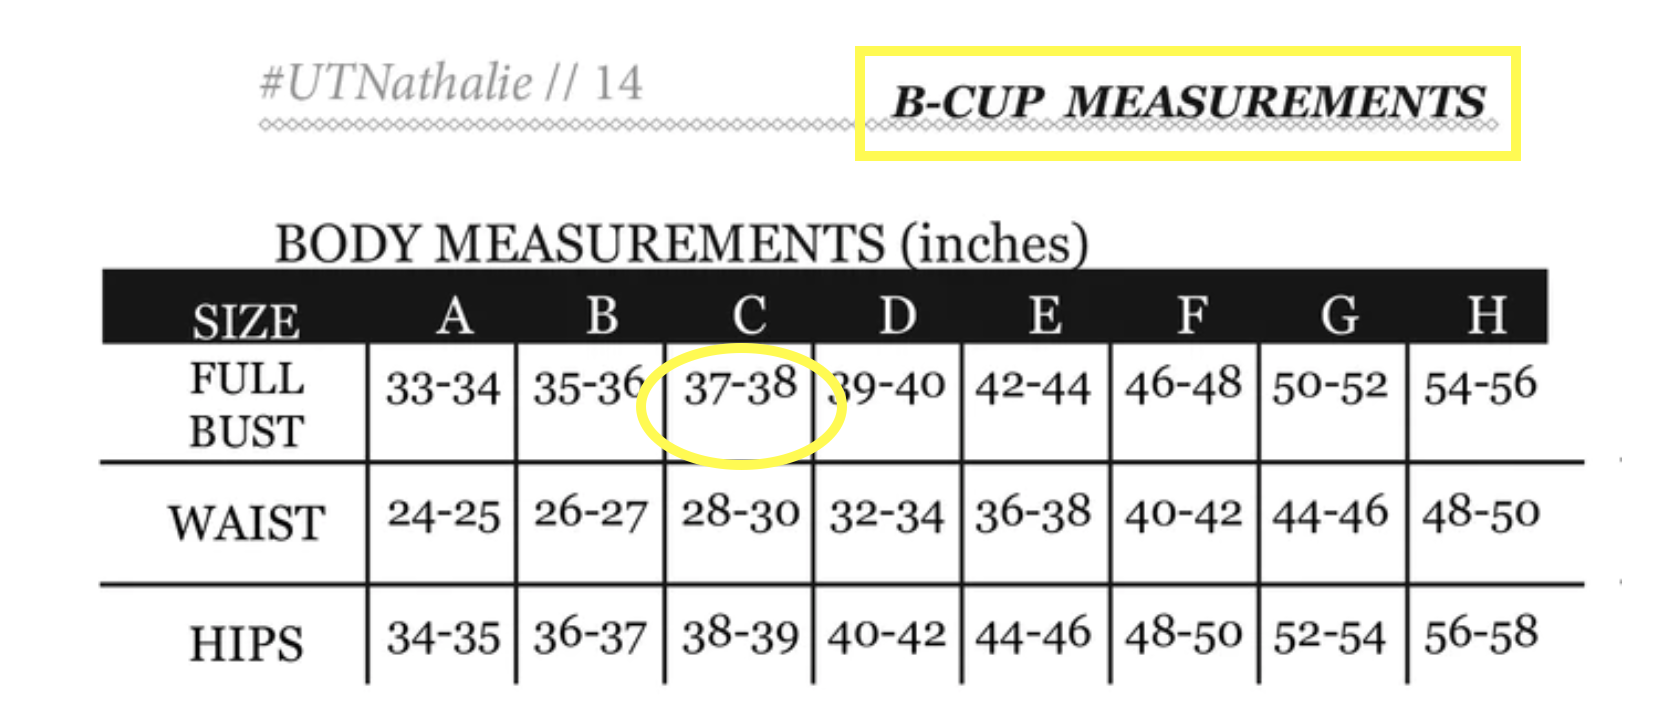
Since we’re going to start with the DD draft on the Nathalie, add 5″ to your high bust measurement, since a DD means the full bust of the pattern is designed to be 5″ larger than the high bust. For me, my naked high bust measures about 35.5″, so my +5 measurement is 40.5″.
Select your size based on the bust measurement that corresponds to this +5 measurement. For me, that means choosing a size B.

Now, here’s the thing. I made a bit of a mistake when I chose my size, and I used the B cup size chart to choose my size. Instead of adding 5″ to my high bust measurement, I added 2″, since a garment B cup means a full bust that is 2″ larger than the high bust. My +2 measurement was 37.5, so I chose the B cup base size that corresponded, which is a size C. I did still use the DD draft to actually perform my FBA, I just used the size C base size instead of the size B that I perhaps should have used.
how many inches to add?
If you’ve used one of my knit FBA tutorials before, you’ll know that I take into account stretch percentage when determining how many inches to add during a full bust adjustment. I start by looking at the finished garment measurements.
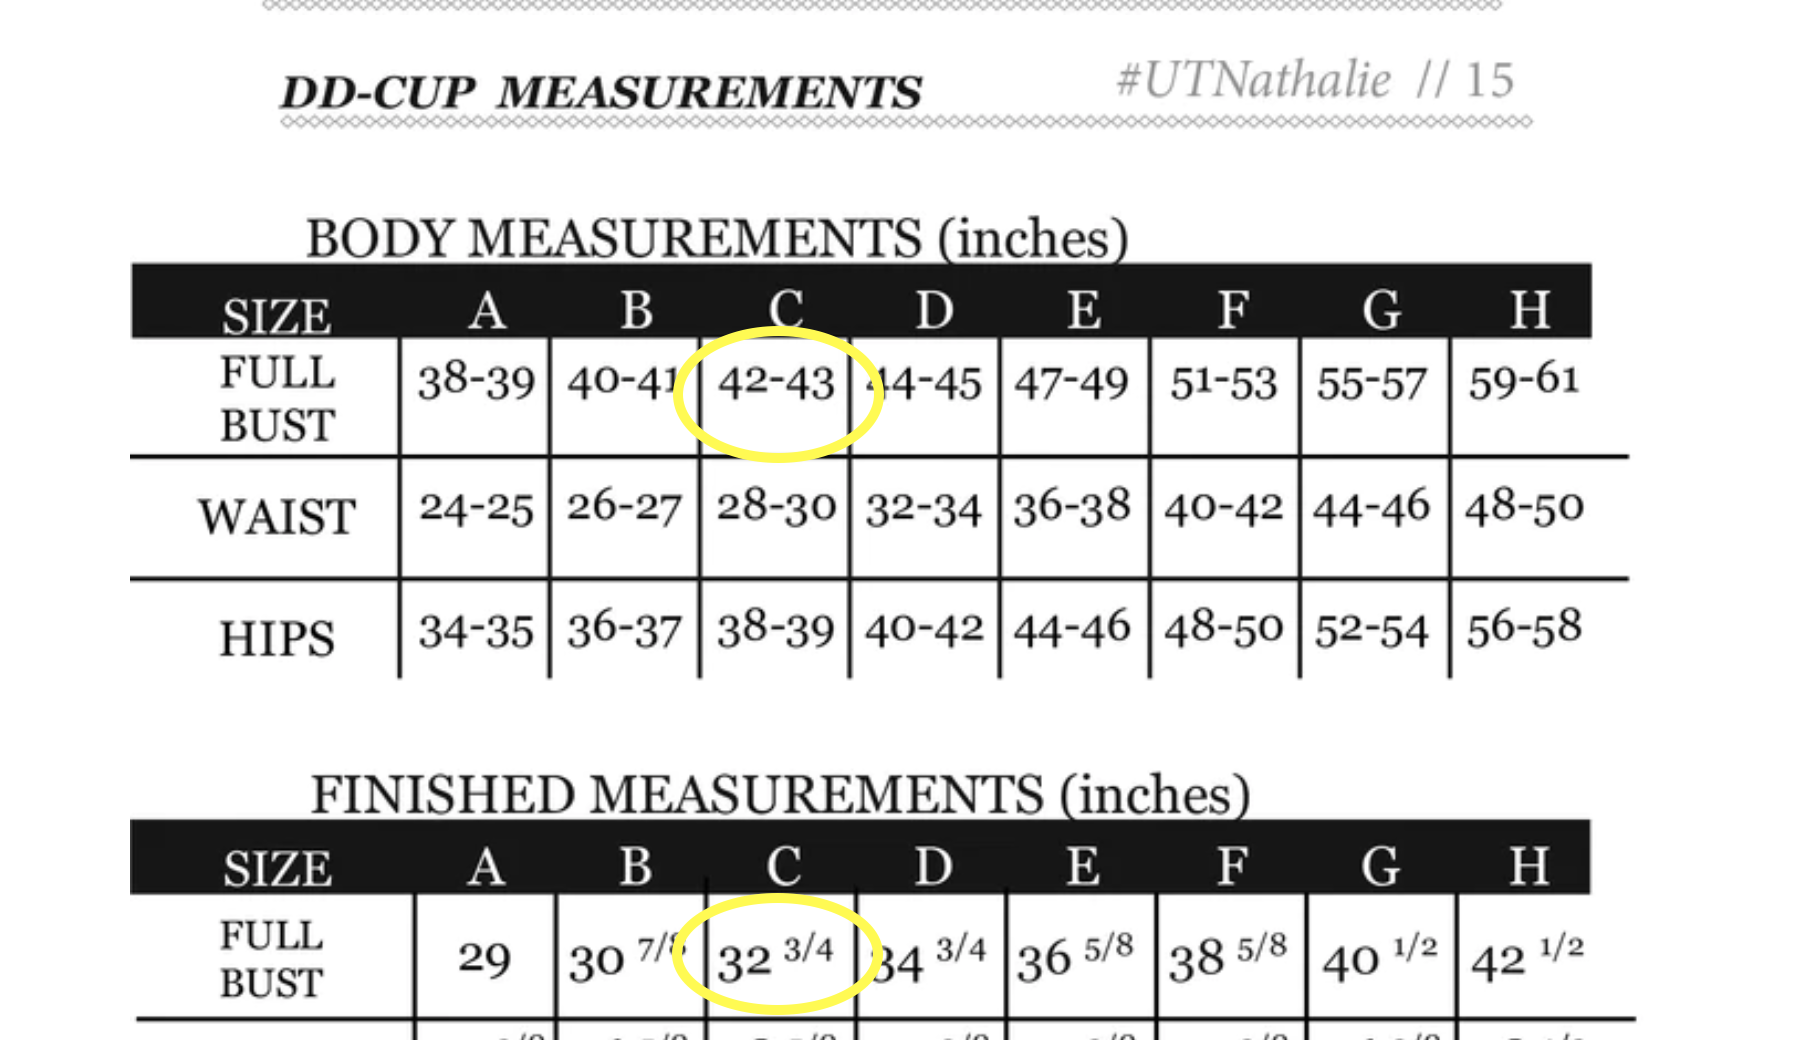
For the size C that I made, the finished full bust in the DD garment cup draft is 32.75″. It is drafted for a maximum 43″ bust. As a percentage, this means the finished measurement is 76.2% of the body measurement (or about 24% negative ease!).
I want to maintain this percentage, so I need to find 76.2% of my own full bust measurement — 45″. So I’ll multiply 45 x 0.762, giving me 34.27″ as my needed finished garment measurement. I’m going to round this to 34.25″ for simplicity.
Once I find my needed finished garment measurement, the rest is simple subtraction: I take my needed finished garment measurement (34.25″) minus the pattern’s finished garment bust measurement in base size C (32.75″), giving me a difference 1.5″. This means I need to add a total of 1.5″ to this pattern at the bust, or .75″ on each side.
You can see my math in this pic:
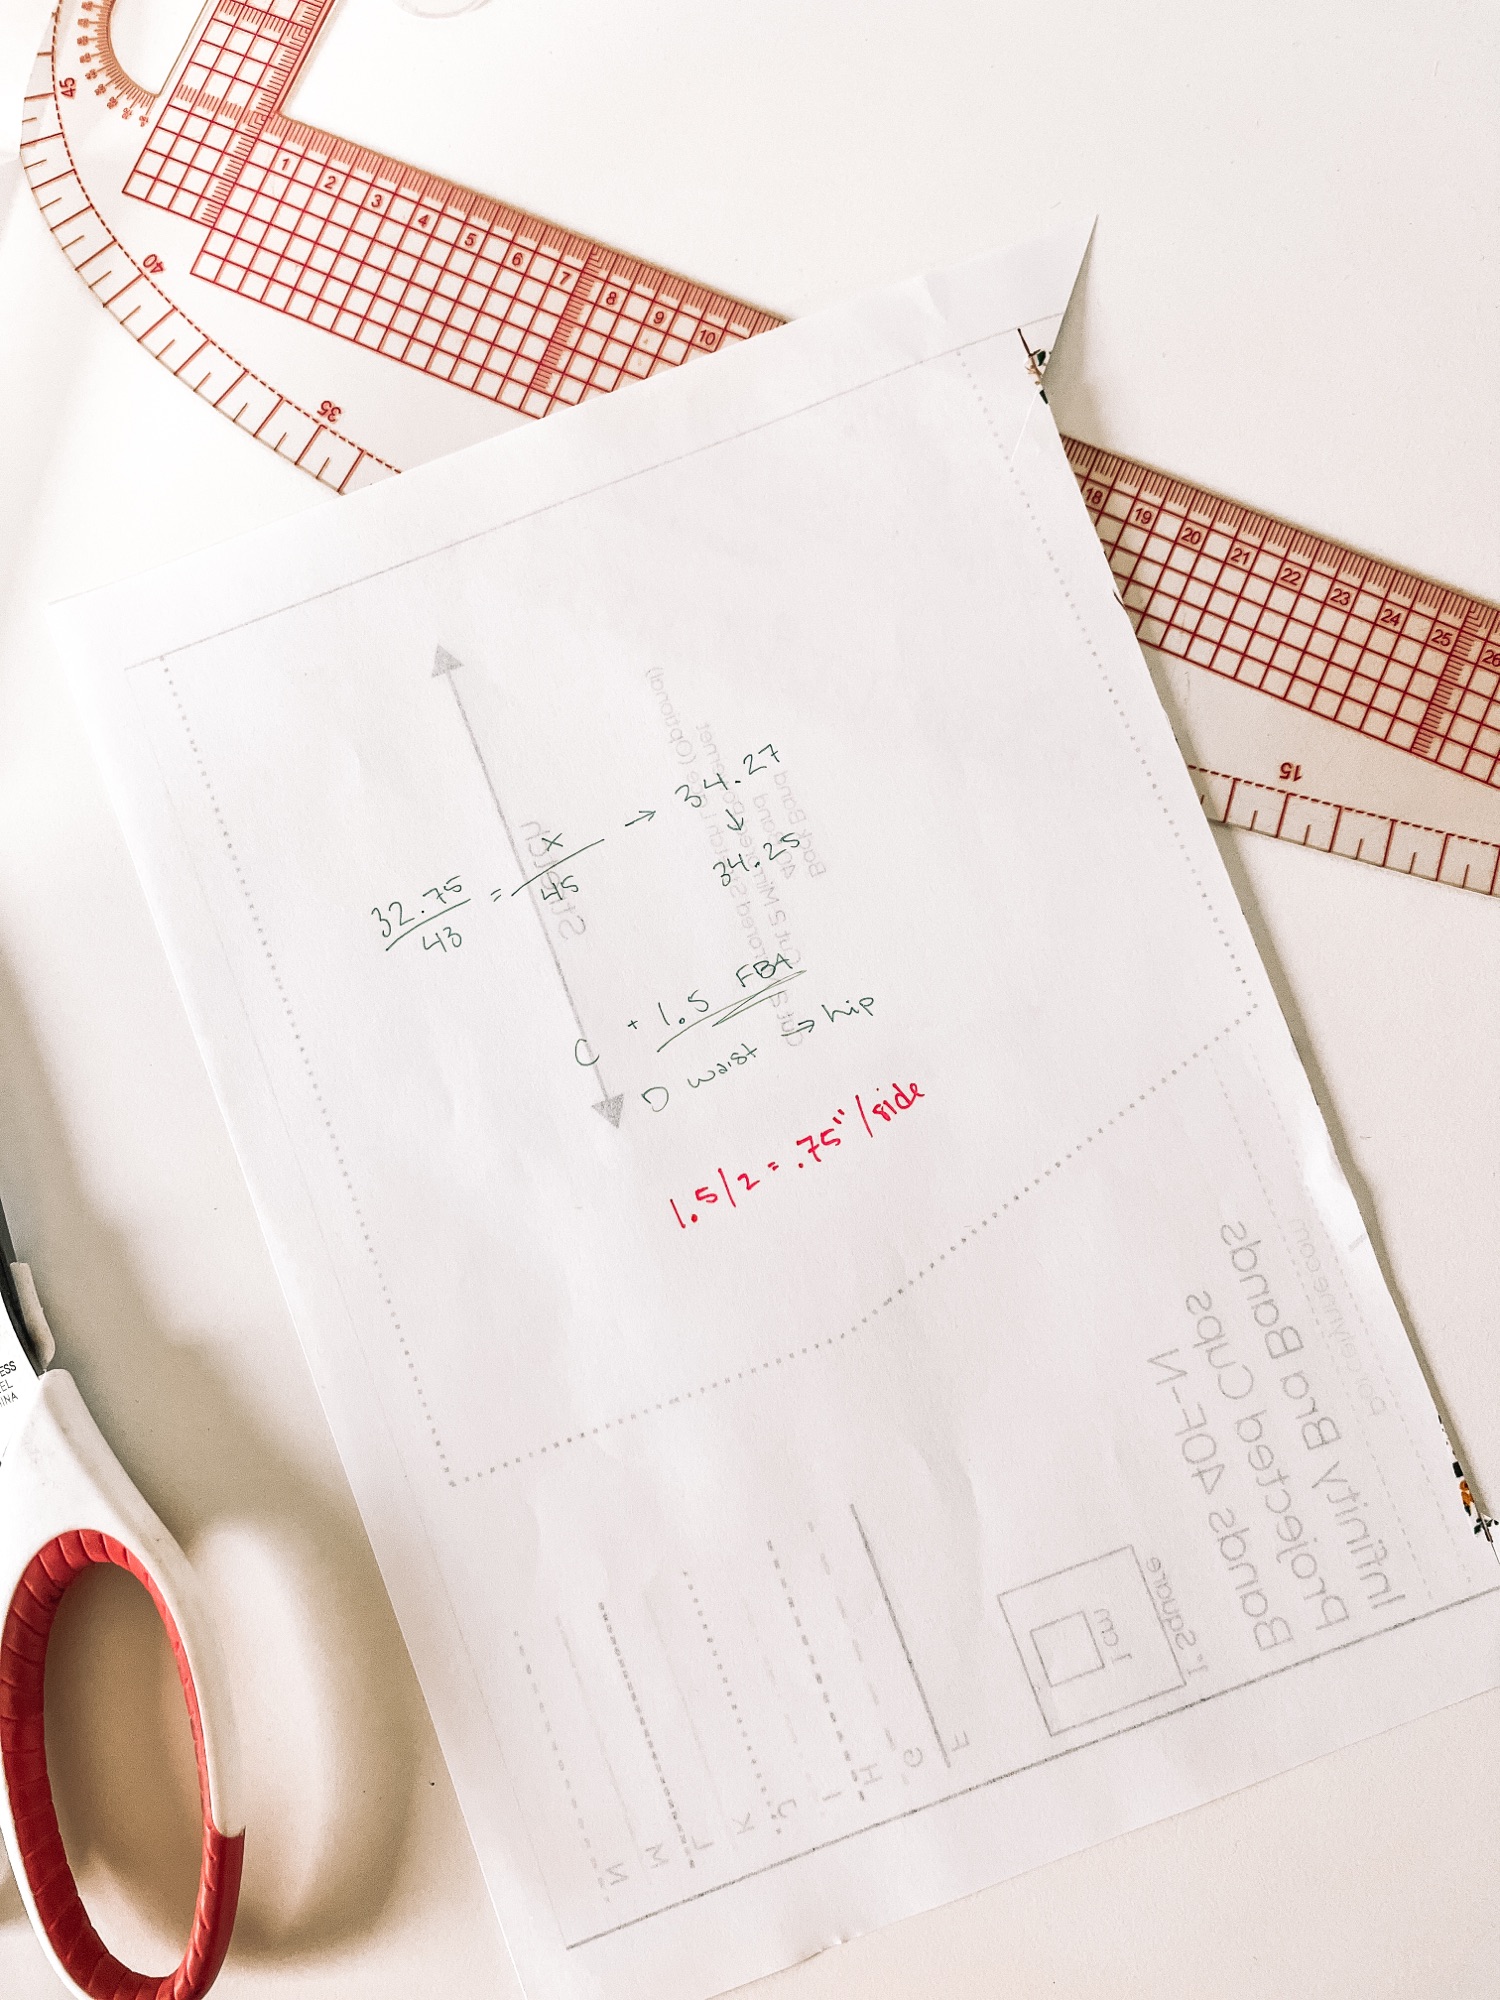
If I used “traditional” FBA math on this, I’d be adding 2″, so this method does make a difference!
Performing the FBA
Find your apex & Draw FBA Lines
My first step in this FBA was to separate the bodice from the lower part of the pattern by cutting along the waistline, which coincides with the lengthen/shorten line. We’ll remarry these two parts later, don’t worry!
Then, I needed to find my apex. For knit patterns, I like to find my apex one of two ways: either compare a well-fitting knit pattern with similar stretch percentages to the pattern I’m working with (which is what I did in this instance), or using a knit garment with similar stretch percentages for that comparison. You can see how I do this comparison in this post.
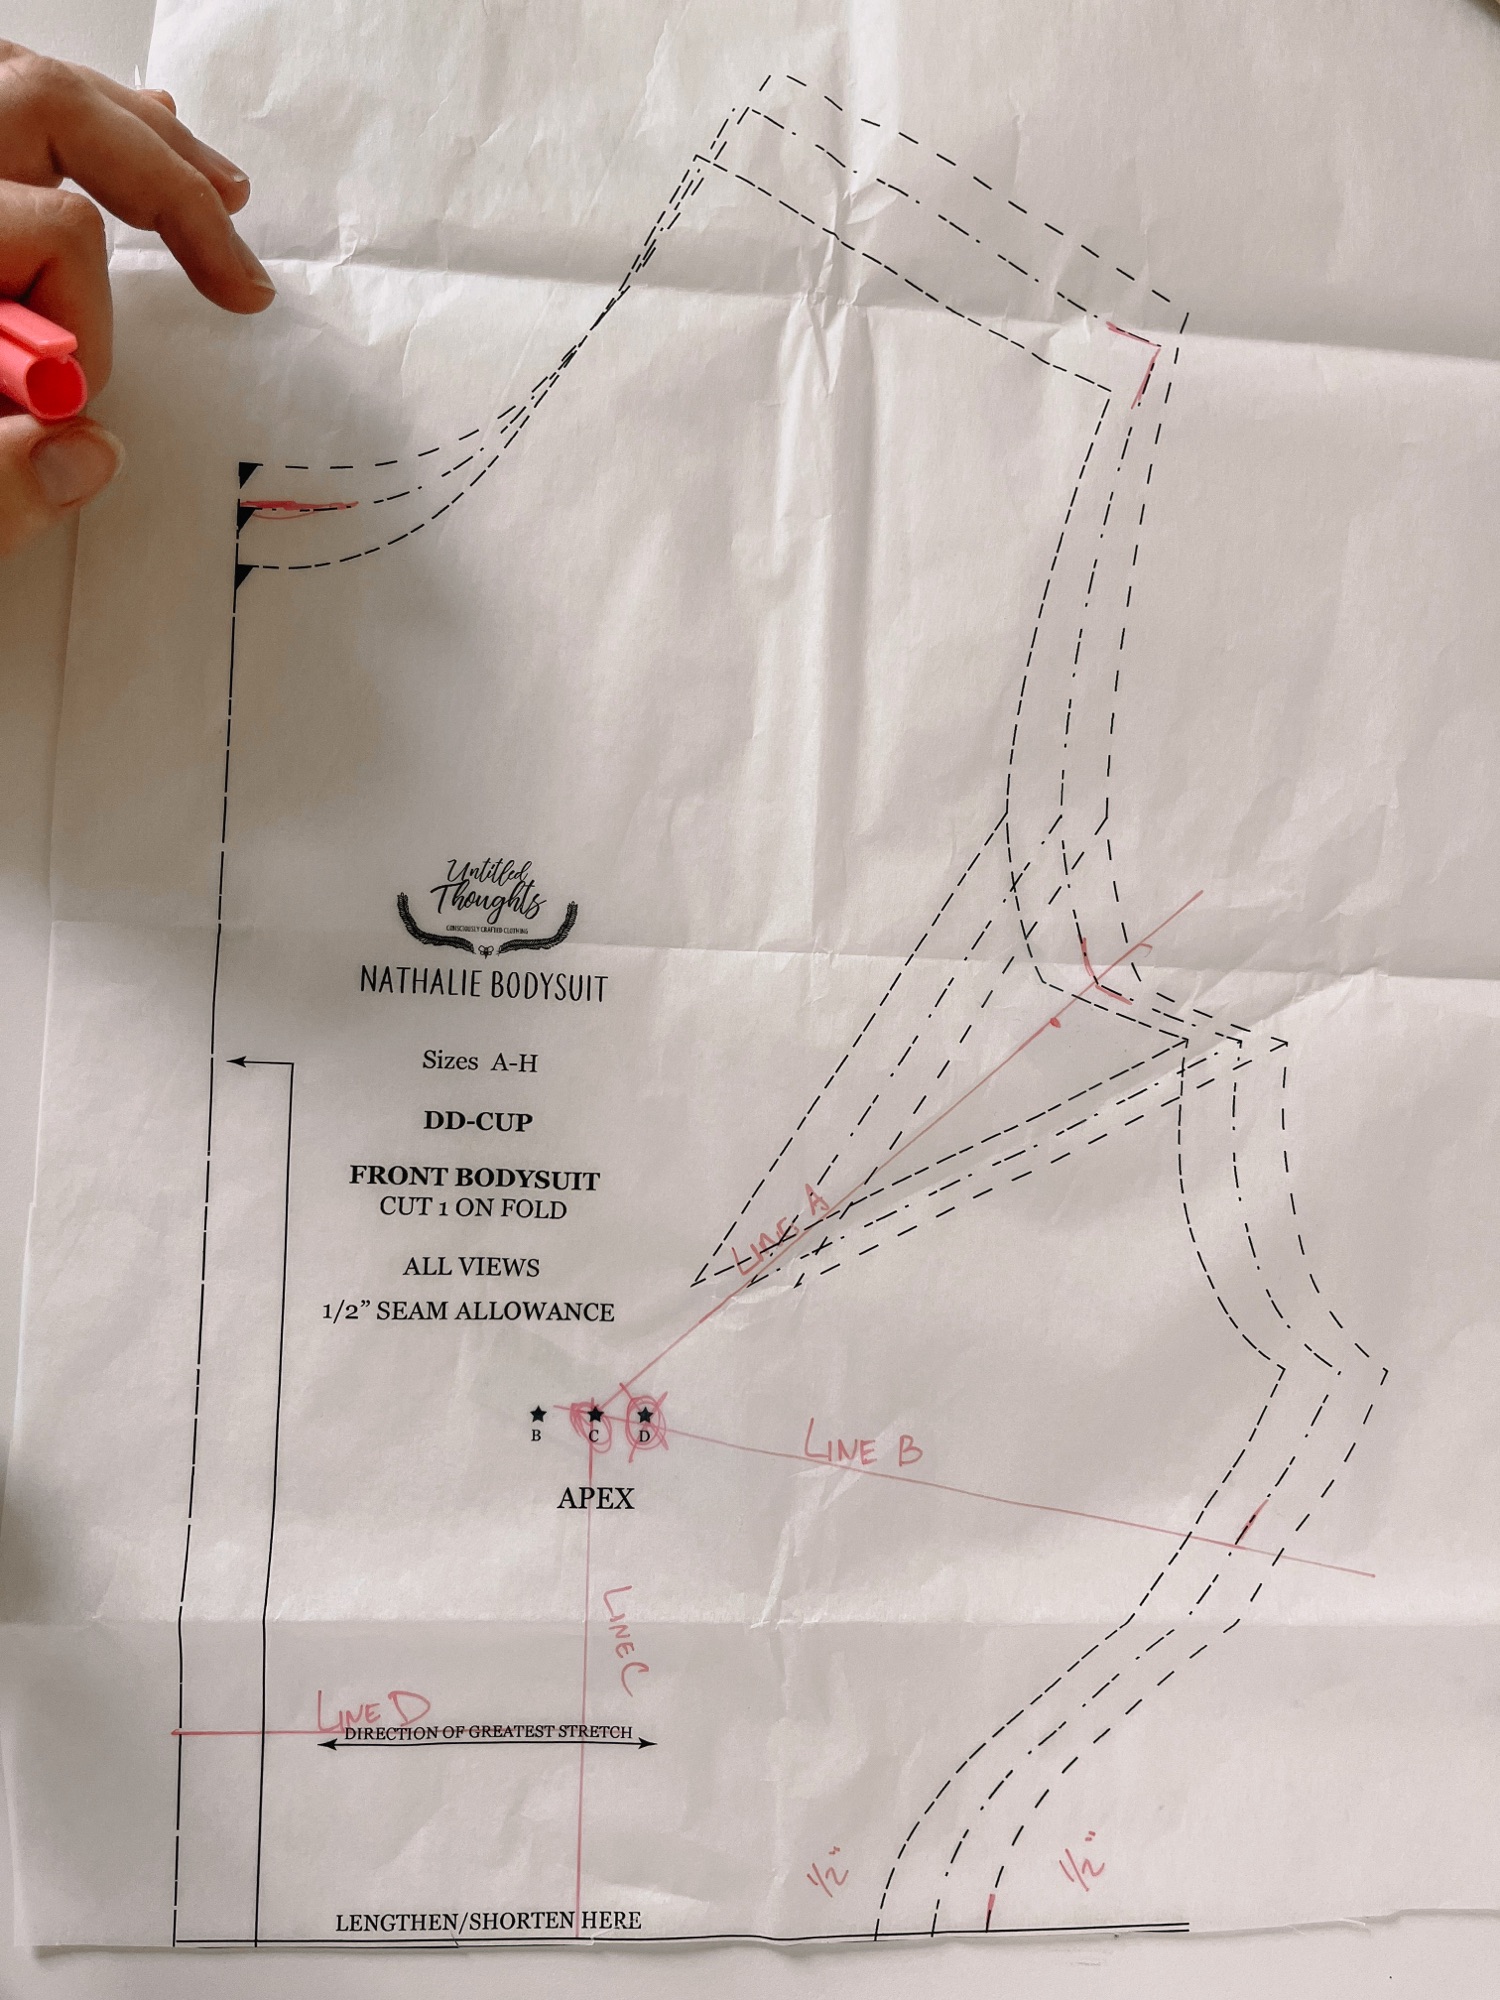
As you can see, I didn’t end up moving the apex at all on this pattern.
Once you’ve identified your apex, we’re going to draw some lines:
- Line A from apex to the center of the armscye dart
- Line B from apex to the side seam
- Line C from apex to waistline
- Line D from Line C to center front
I didn’t do a Y-FBA on this one, because I’m really not needing to add much.
cutting and spreading the lines
Start by marking your seam allowances on Lines A and B, then reinforce these seam allowance points as well as your apex with a piece of tape.
Then, on a scrap piece of paper, draw two parallel lines, distanced from one another by the amount you need to add per side. As you recall, for me this was 3/4″ (.75″) per side.
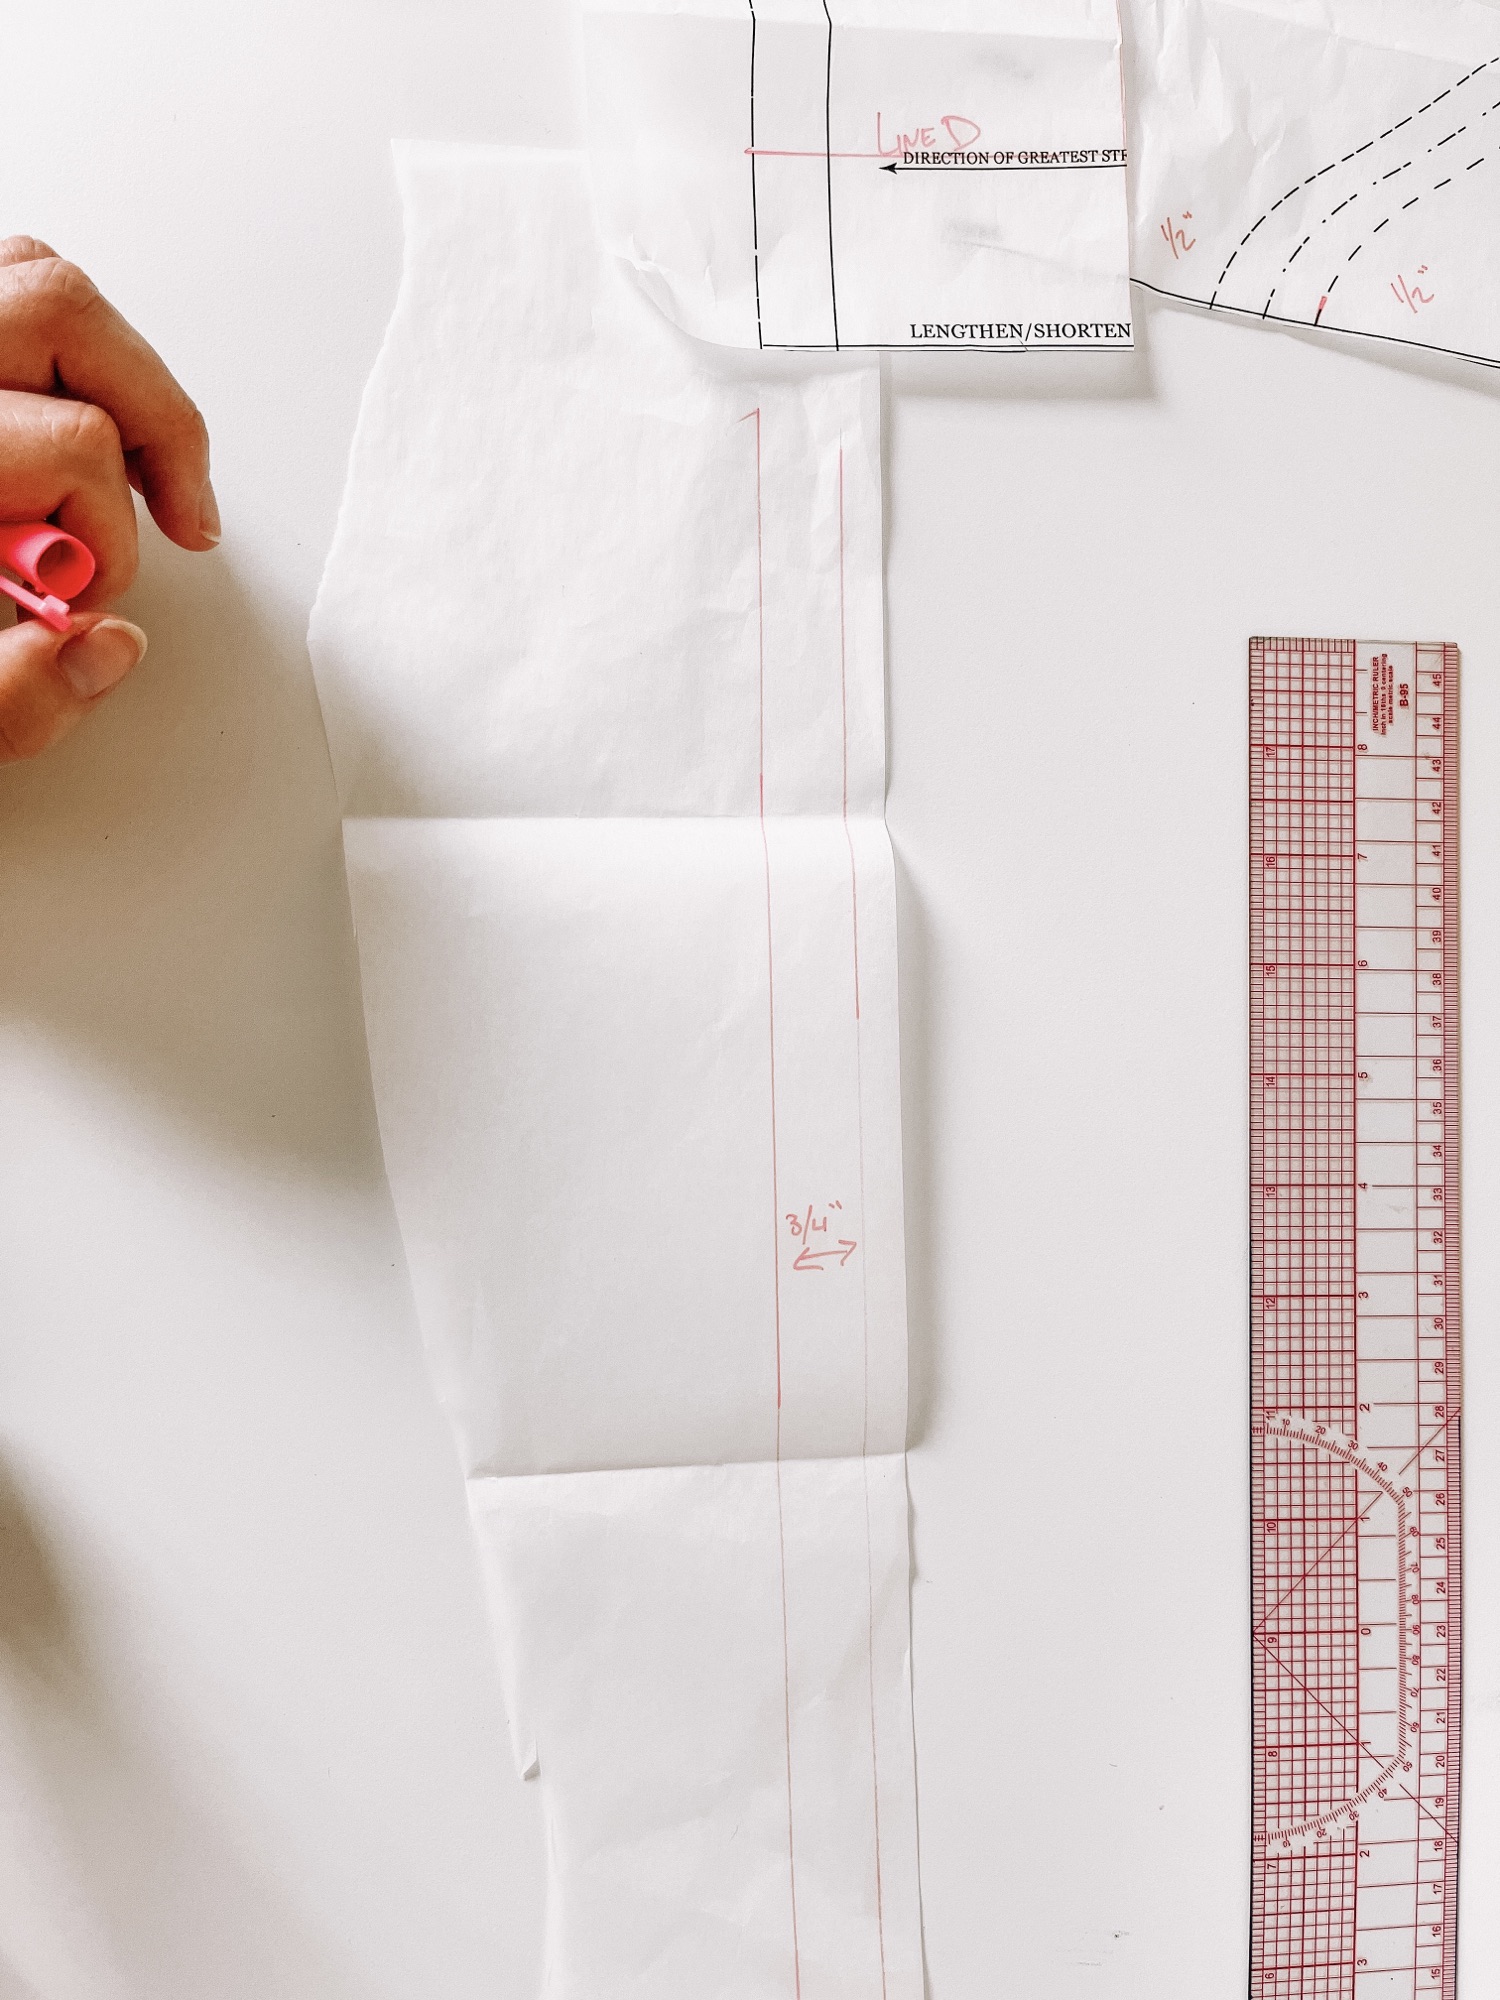
Now, cut along Line C from the waistline to the apex, then along Line A from the apex to — but not through — the seam allowance markings. Then, cut along Line B from the armscye to but not through the apex. Finally, cut along Line A and Line B from the armscye and side seam to but not through the seam allowance marking.
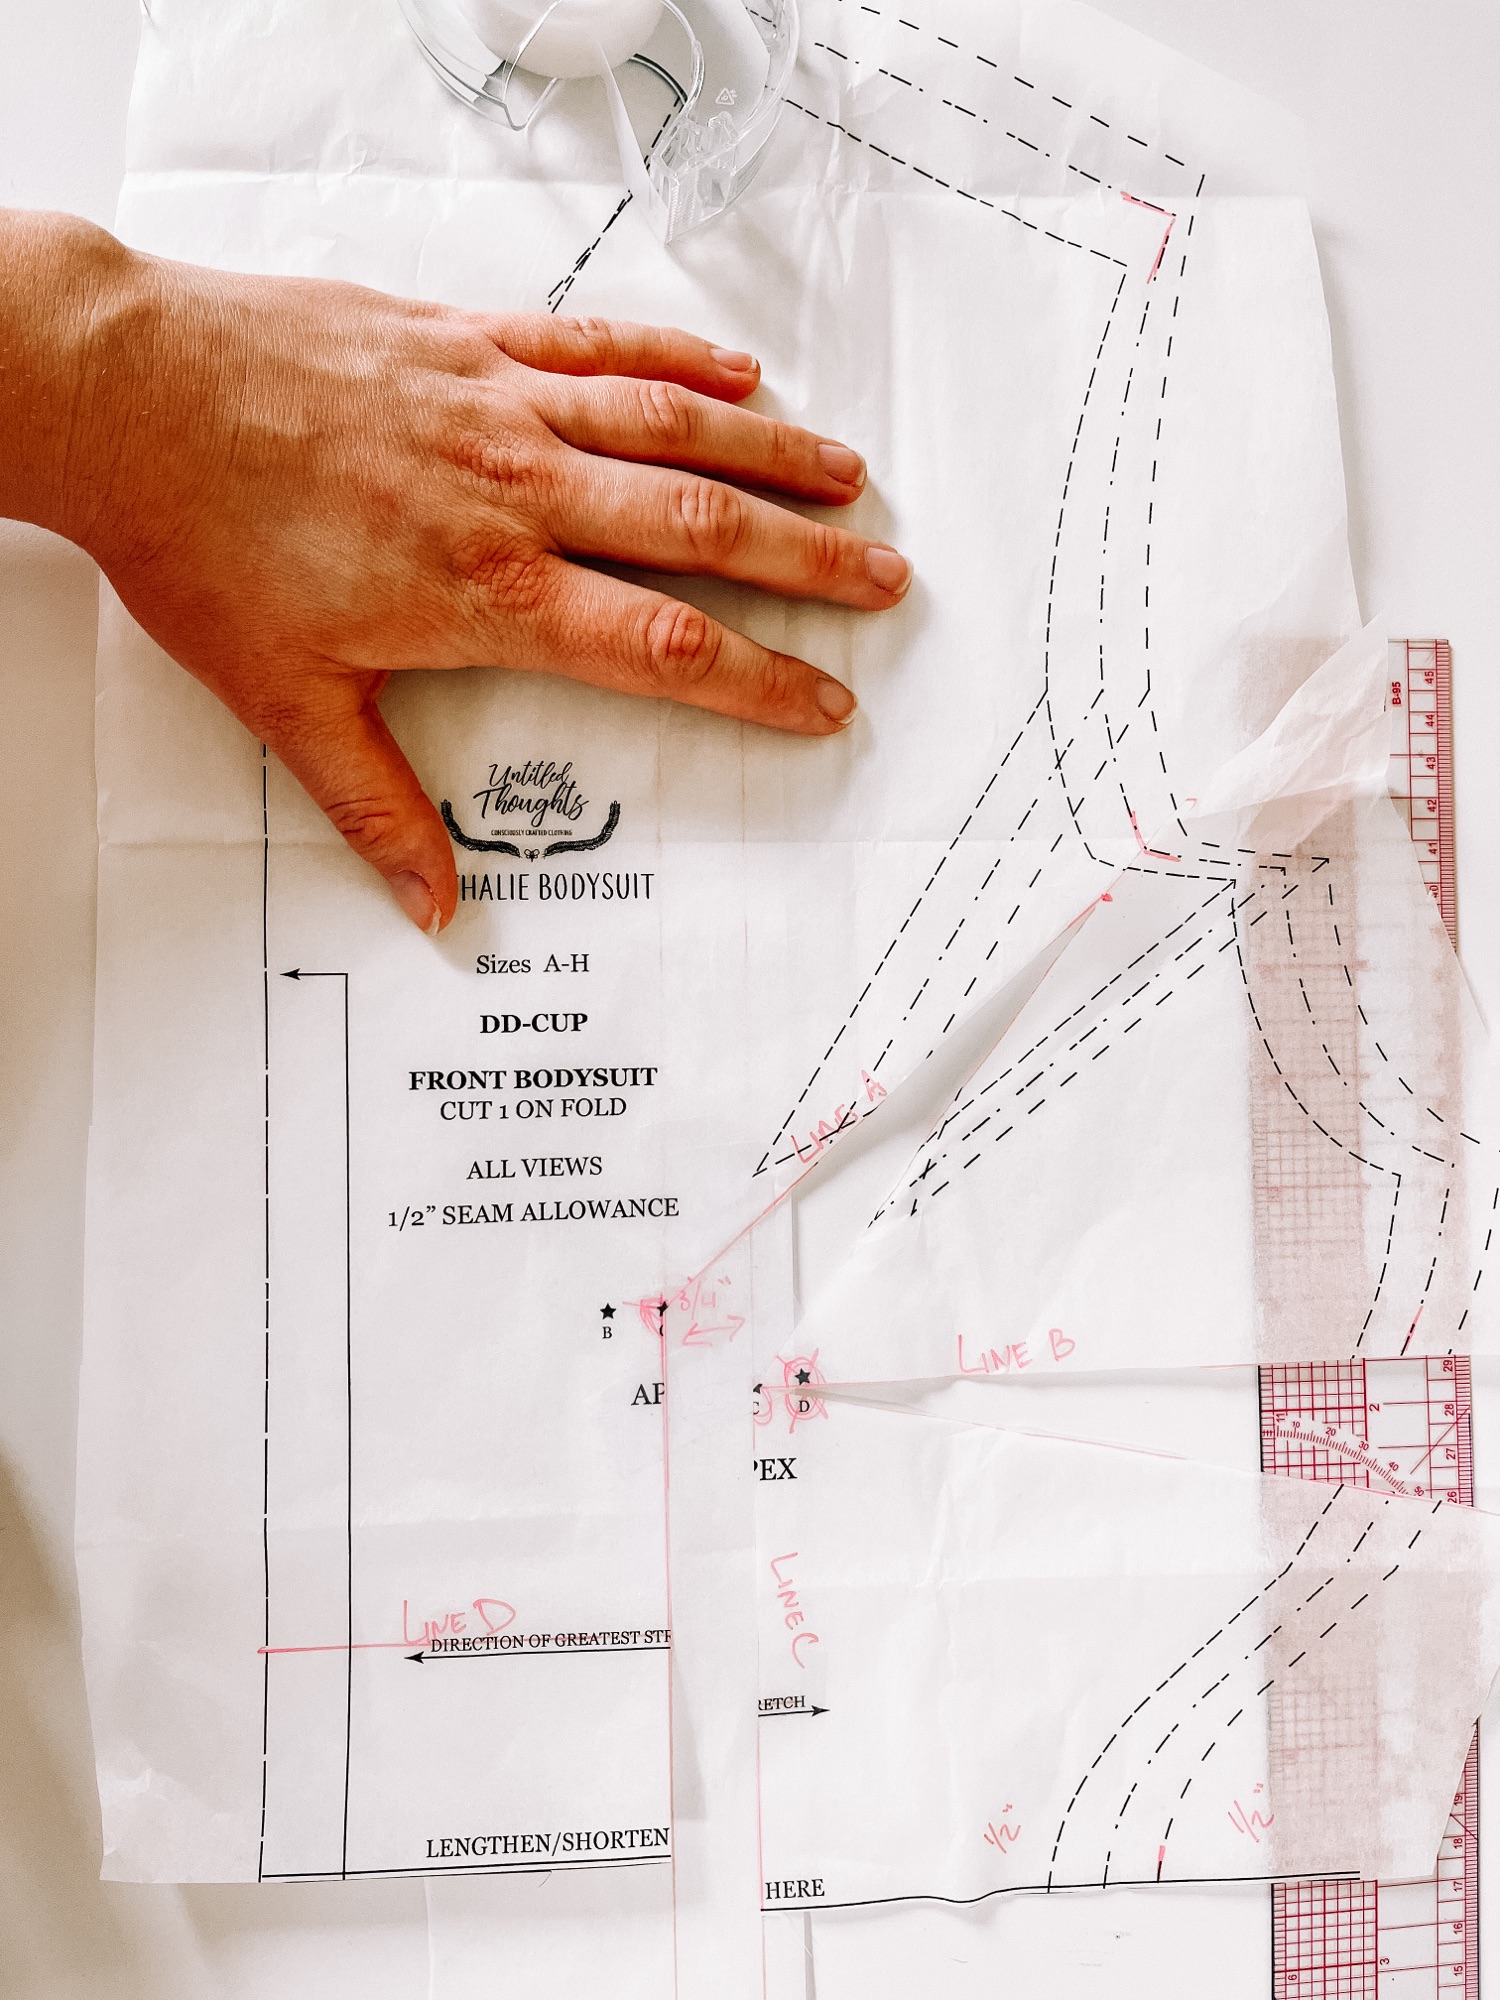
Tape down your pattern piece to your parallel lines, lining up each side of your cut Line C with the lines on this scrap paper. When spreading your pattern, you want to pull down and out, so that the upper part of your pattern remains flat.
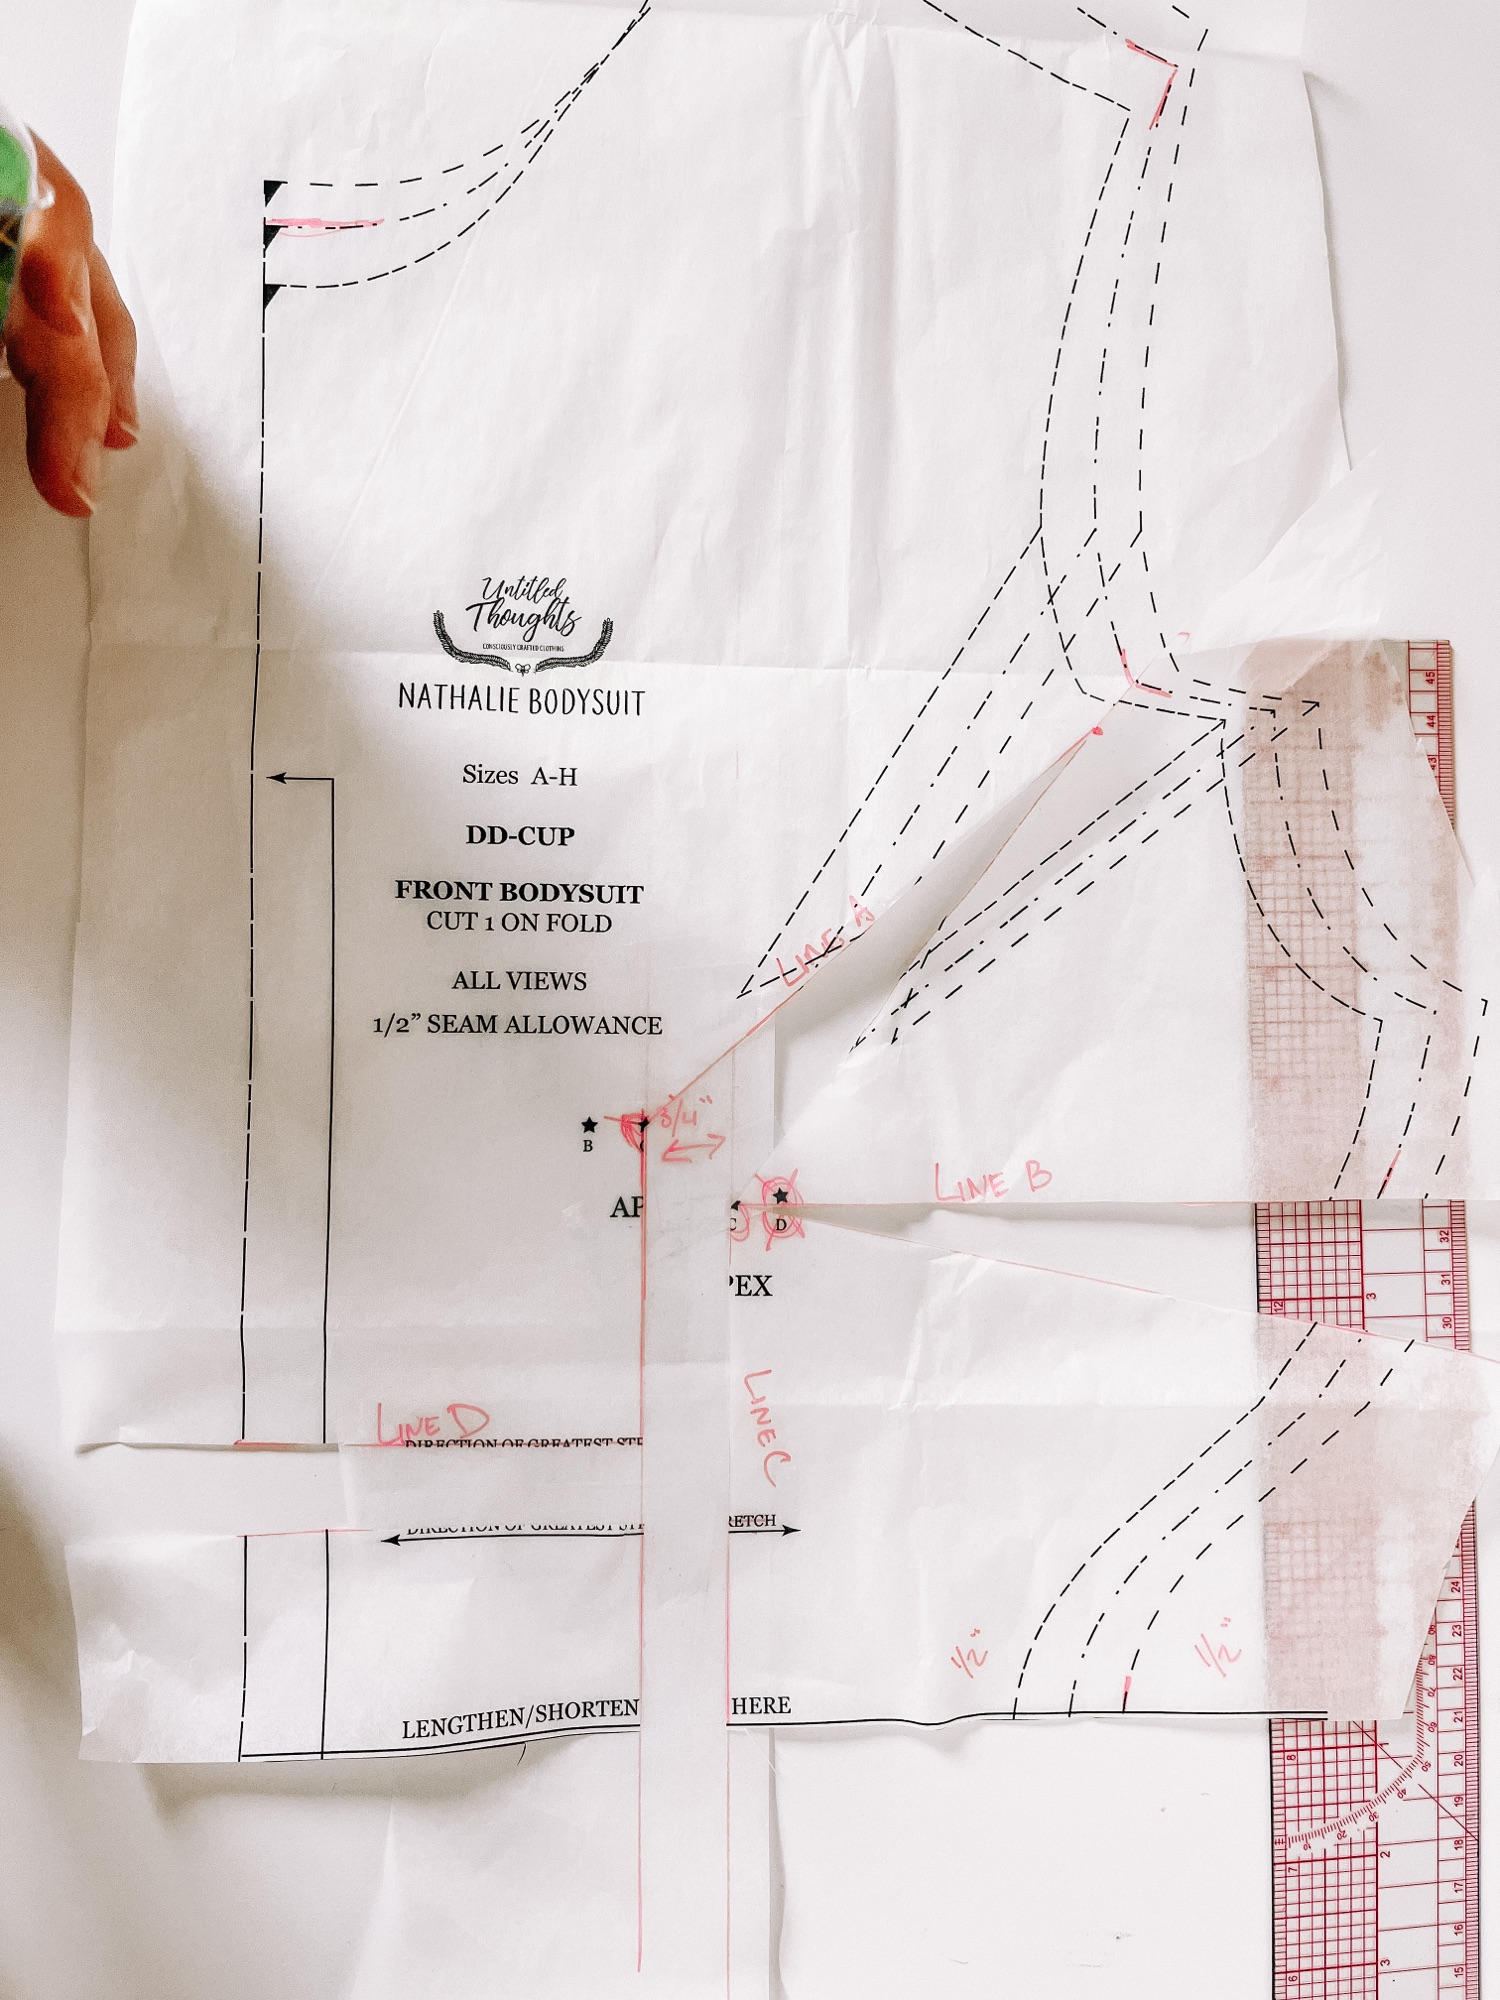
You’ll notice that this creates an uneven waistline. We fix this by cutting along line D and pulling that lower corner to be even with the rest of the waistline.
Rotating the dart
You’ll notice that we ended up with a waist dart. We need to rotate this waist dart back into the armscye dart. (Note, we could have performed the initial FBA in such a way that we would have widened the armscye dart and not added a waist dart, but I find doing this in two steps to result in a cleaner finish.)
First, measure the width of the side dart, and mark the middle. Draw a line from that center point to the apex. We’ll call this Line E.
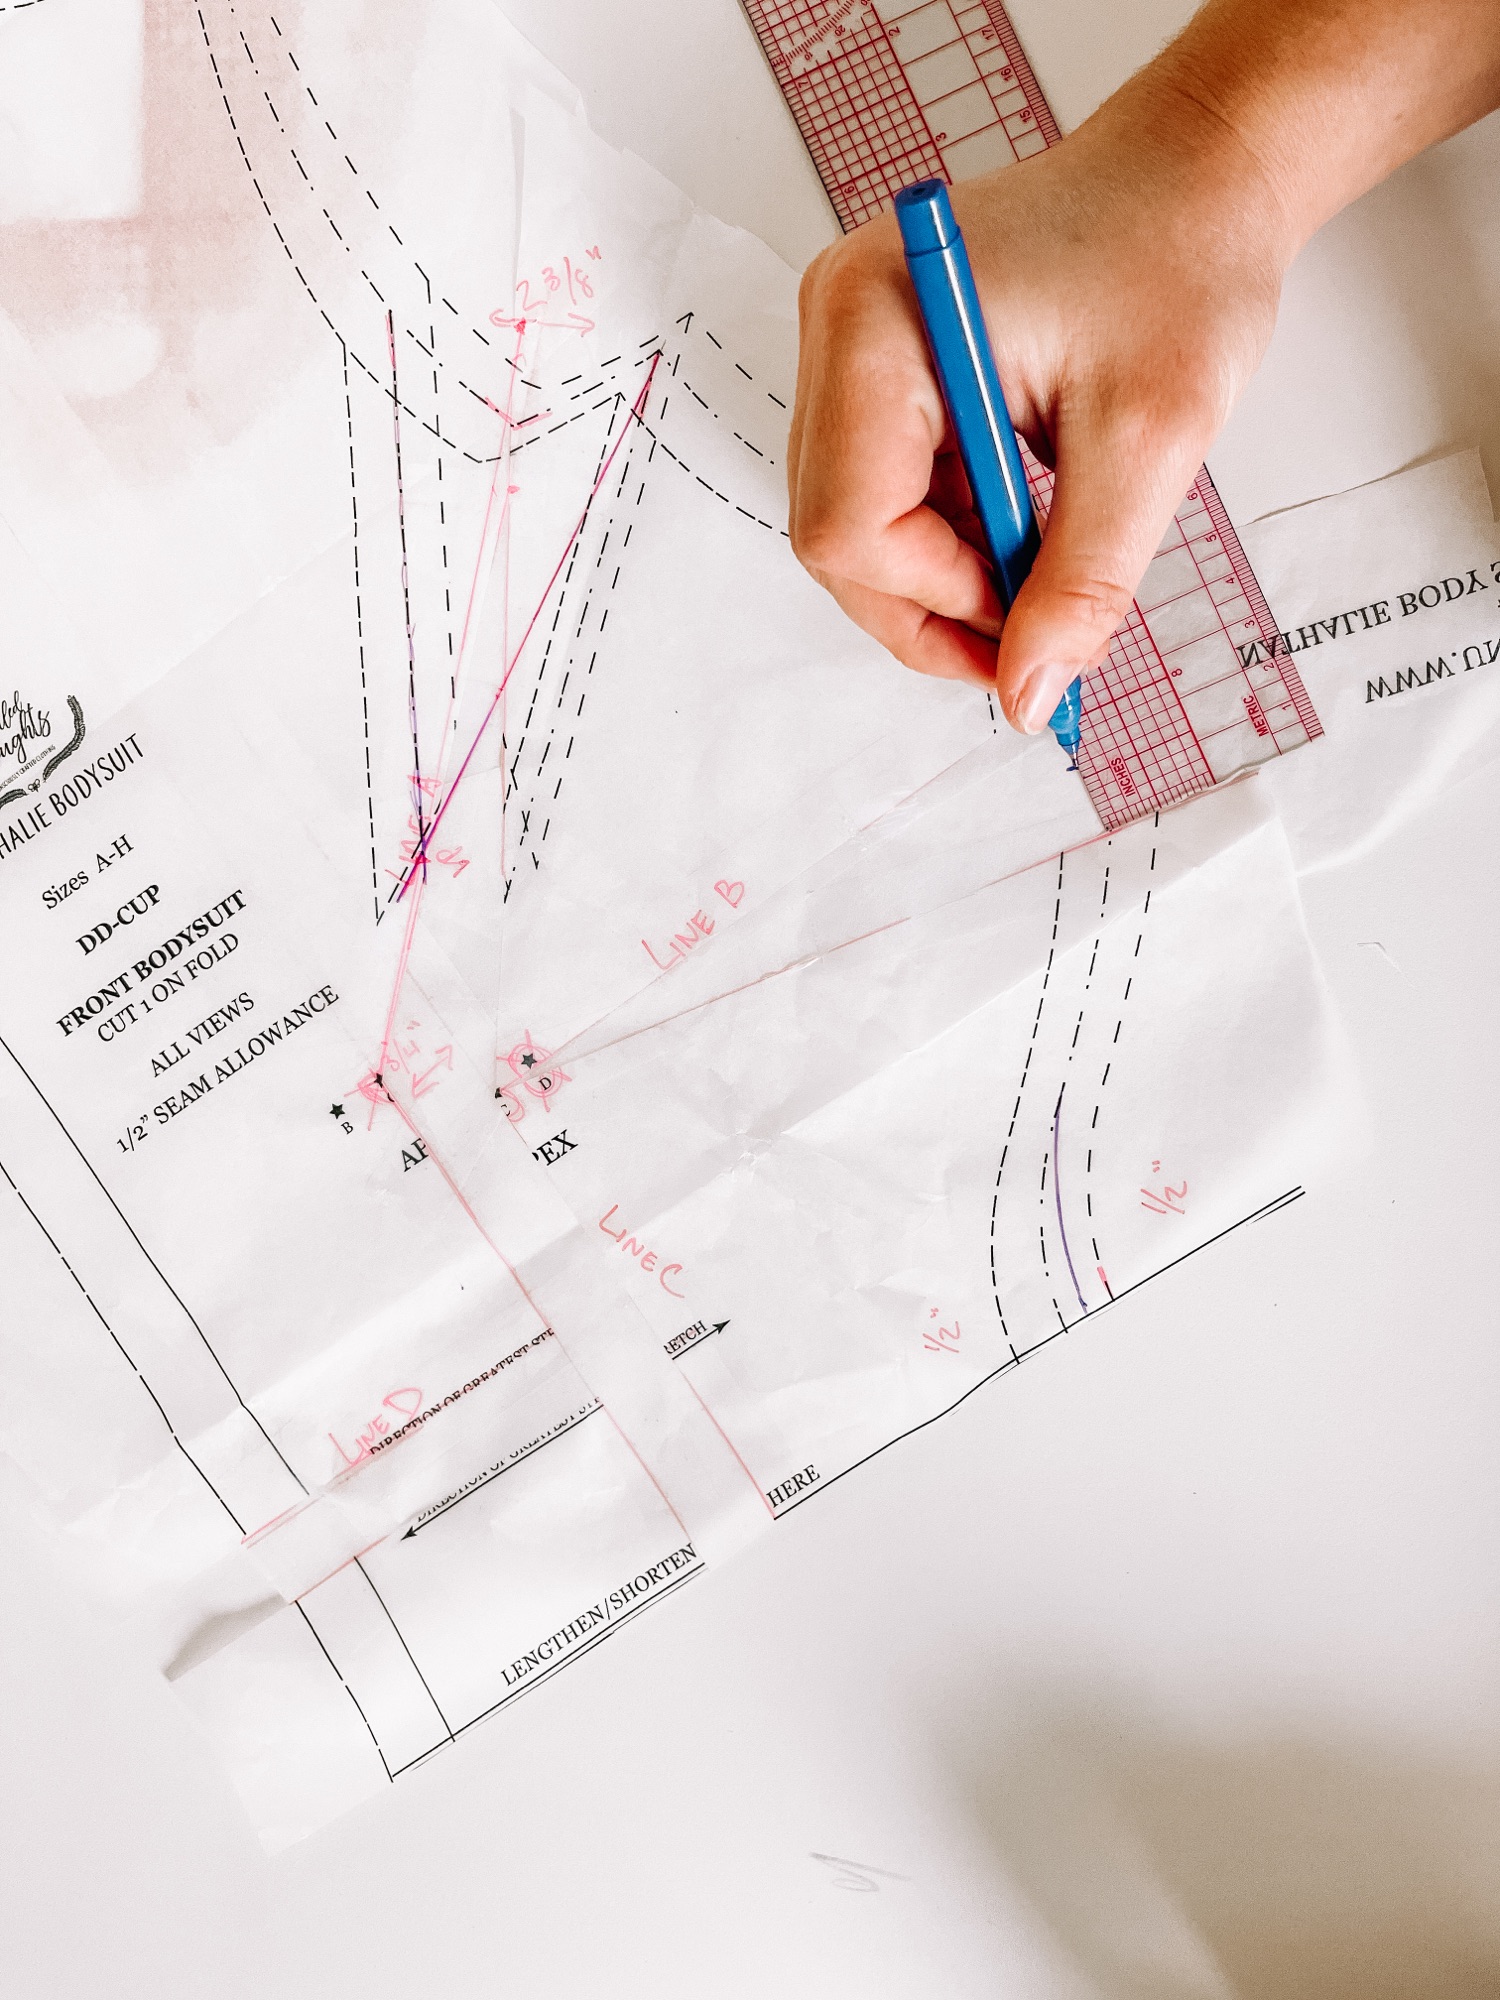
Now, once again reinforce your apex with tape, then cut along Line E from the side seam to, but not through, the apex. Then, similarly cut along Line A (which hasn’t moved!) to, but not through, the apex.
These cuts create a hinge point at your apex. Close the side dart, which will naturally enlargen the armscye dart.
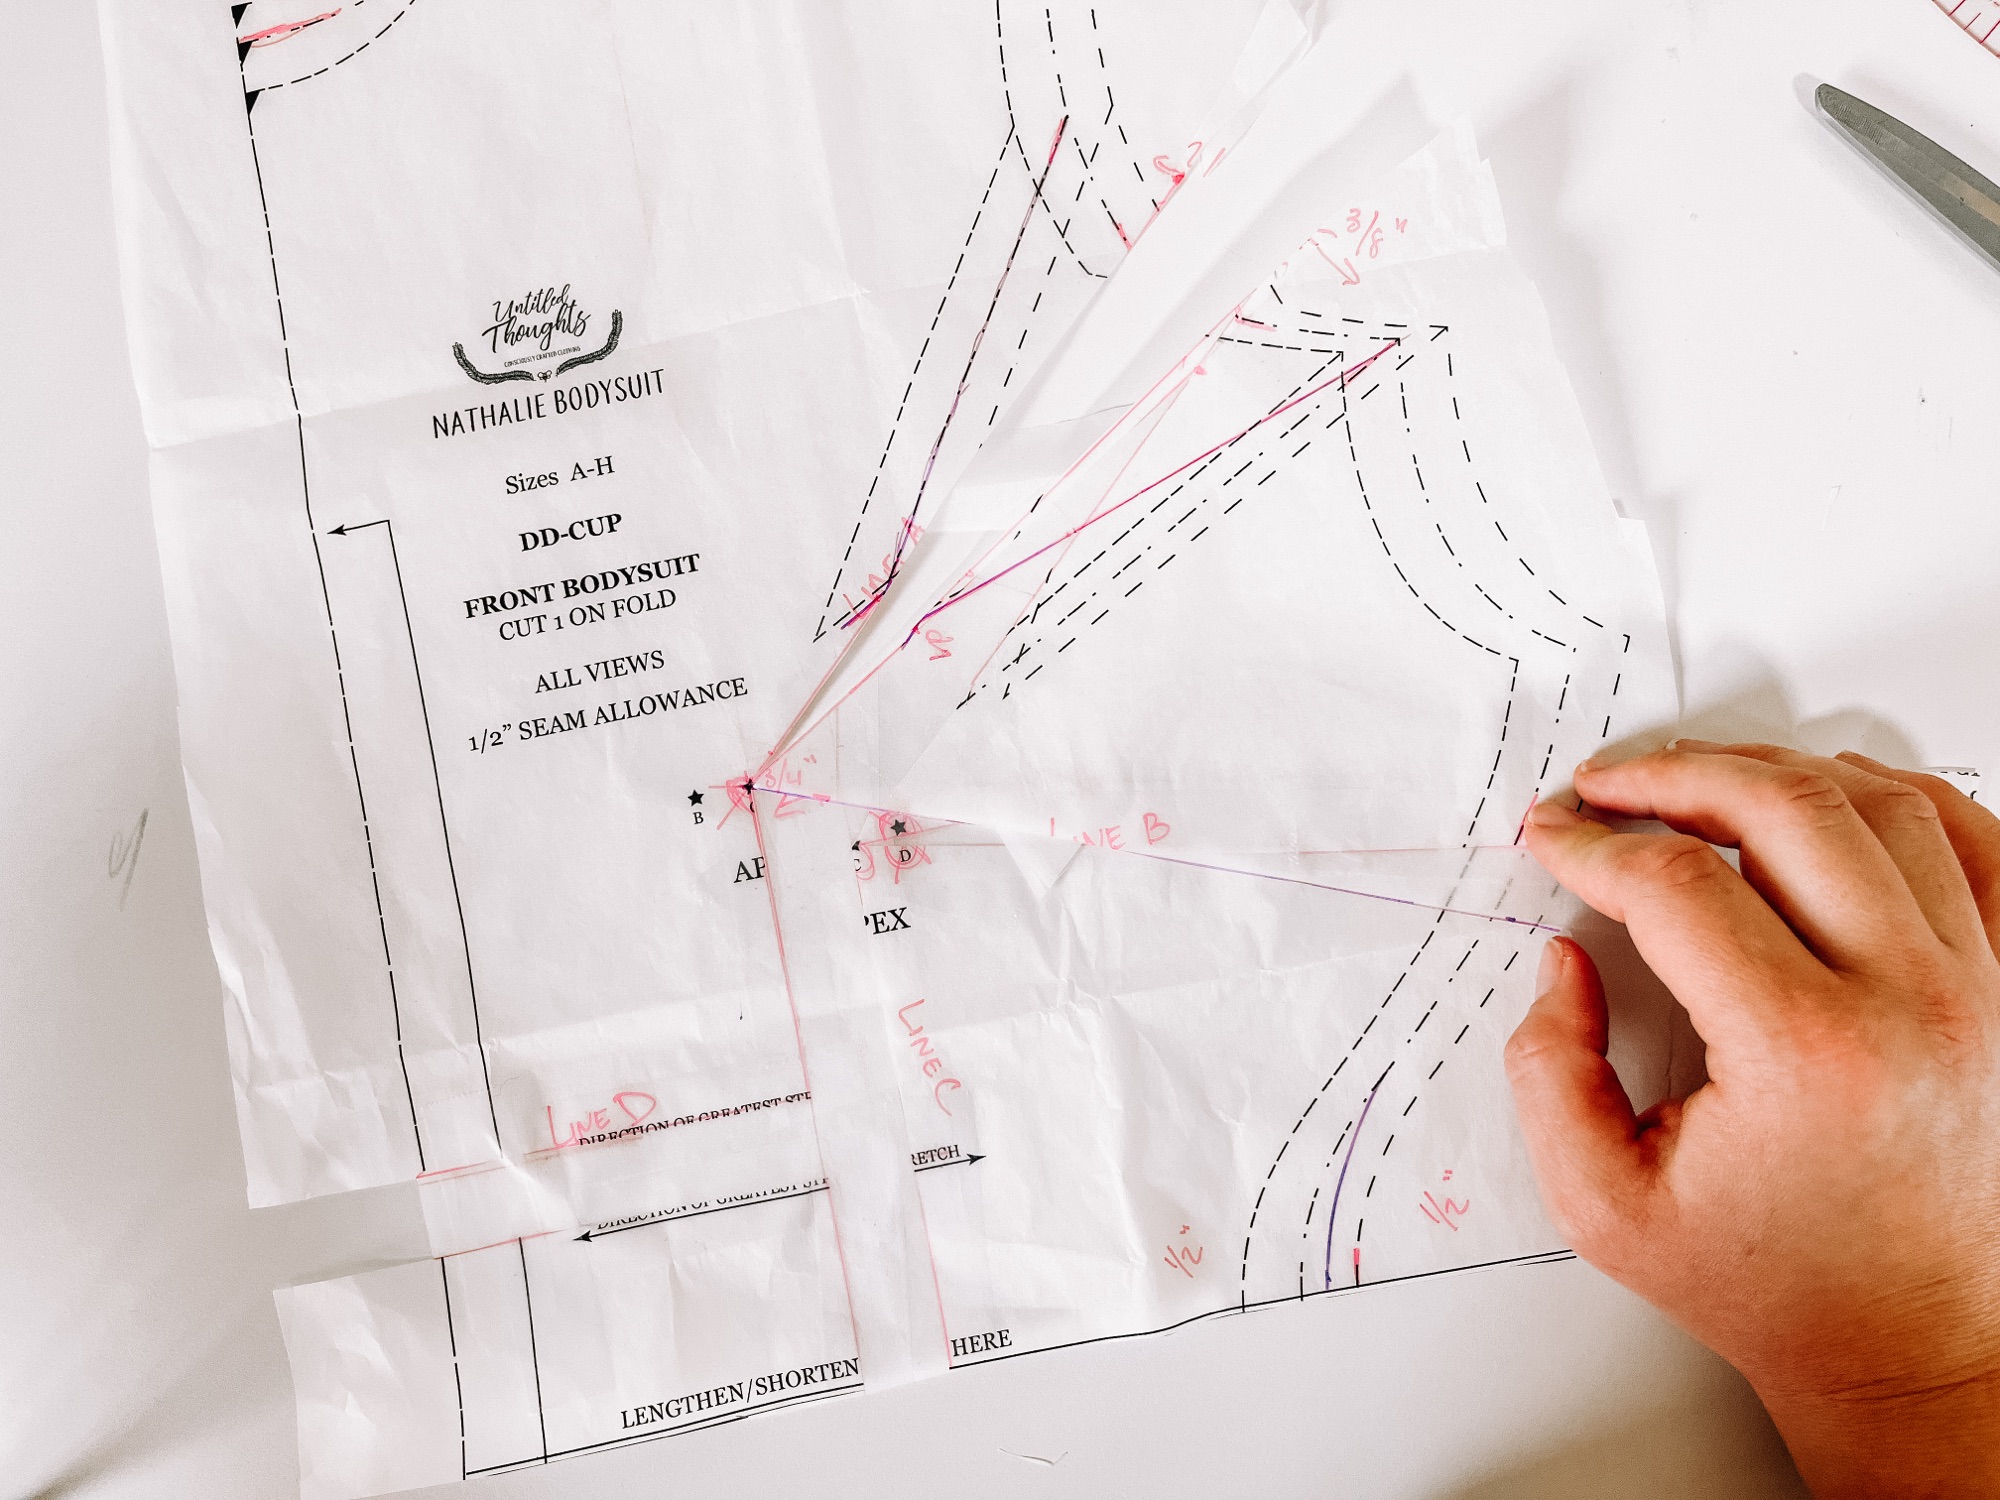
Drawing your new dart
Let’s make that armscye dart look better, shall we? Start by finding the center of the dart, width-wise, and marking this point:
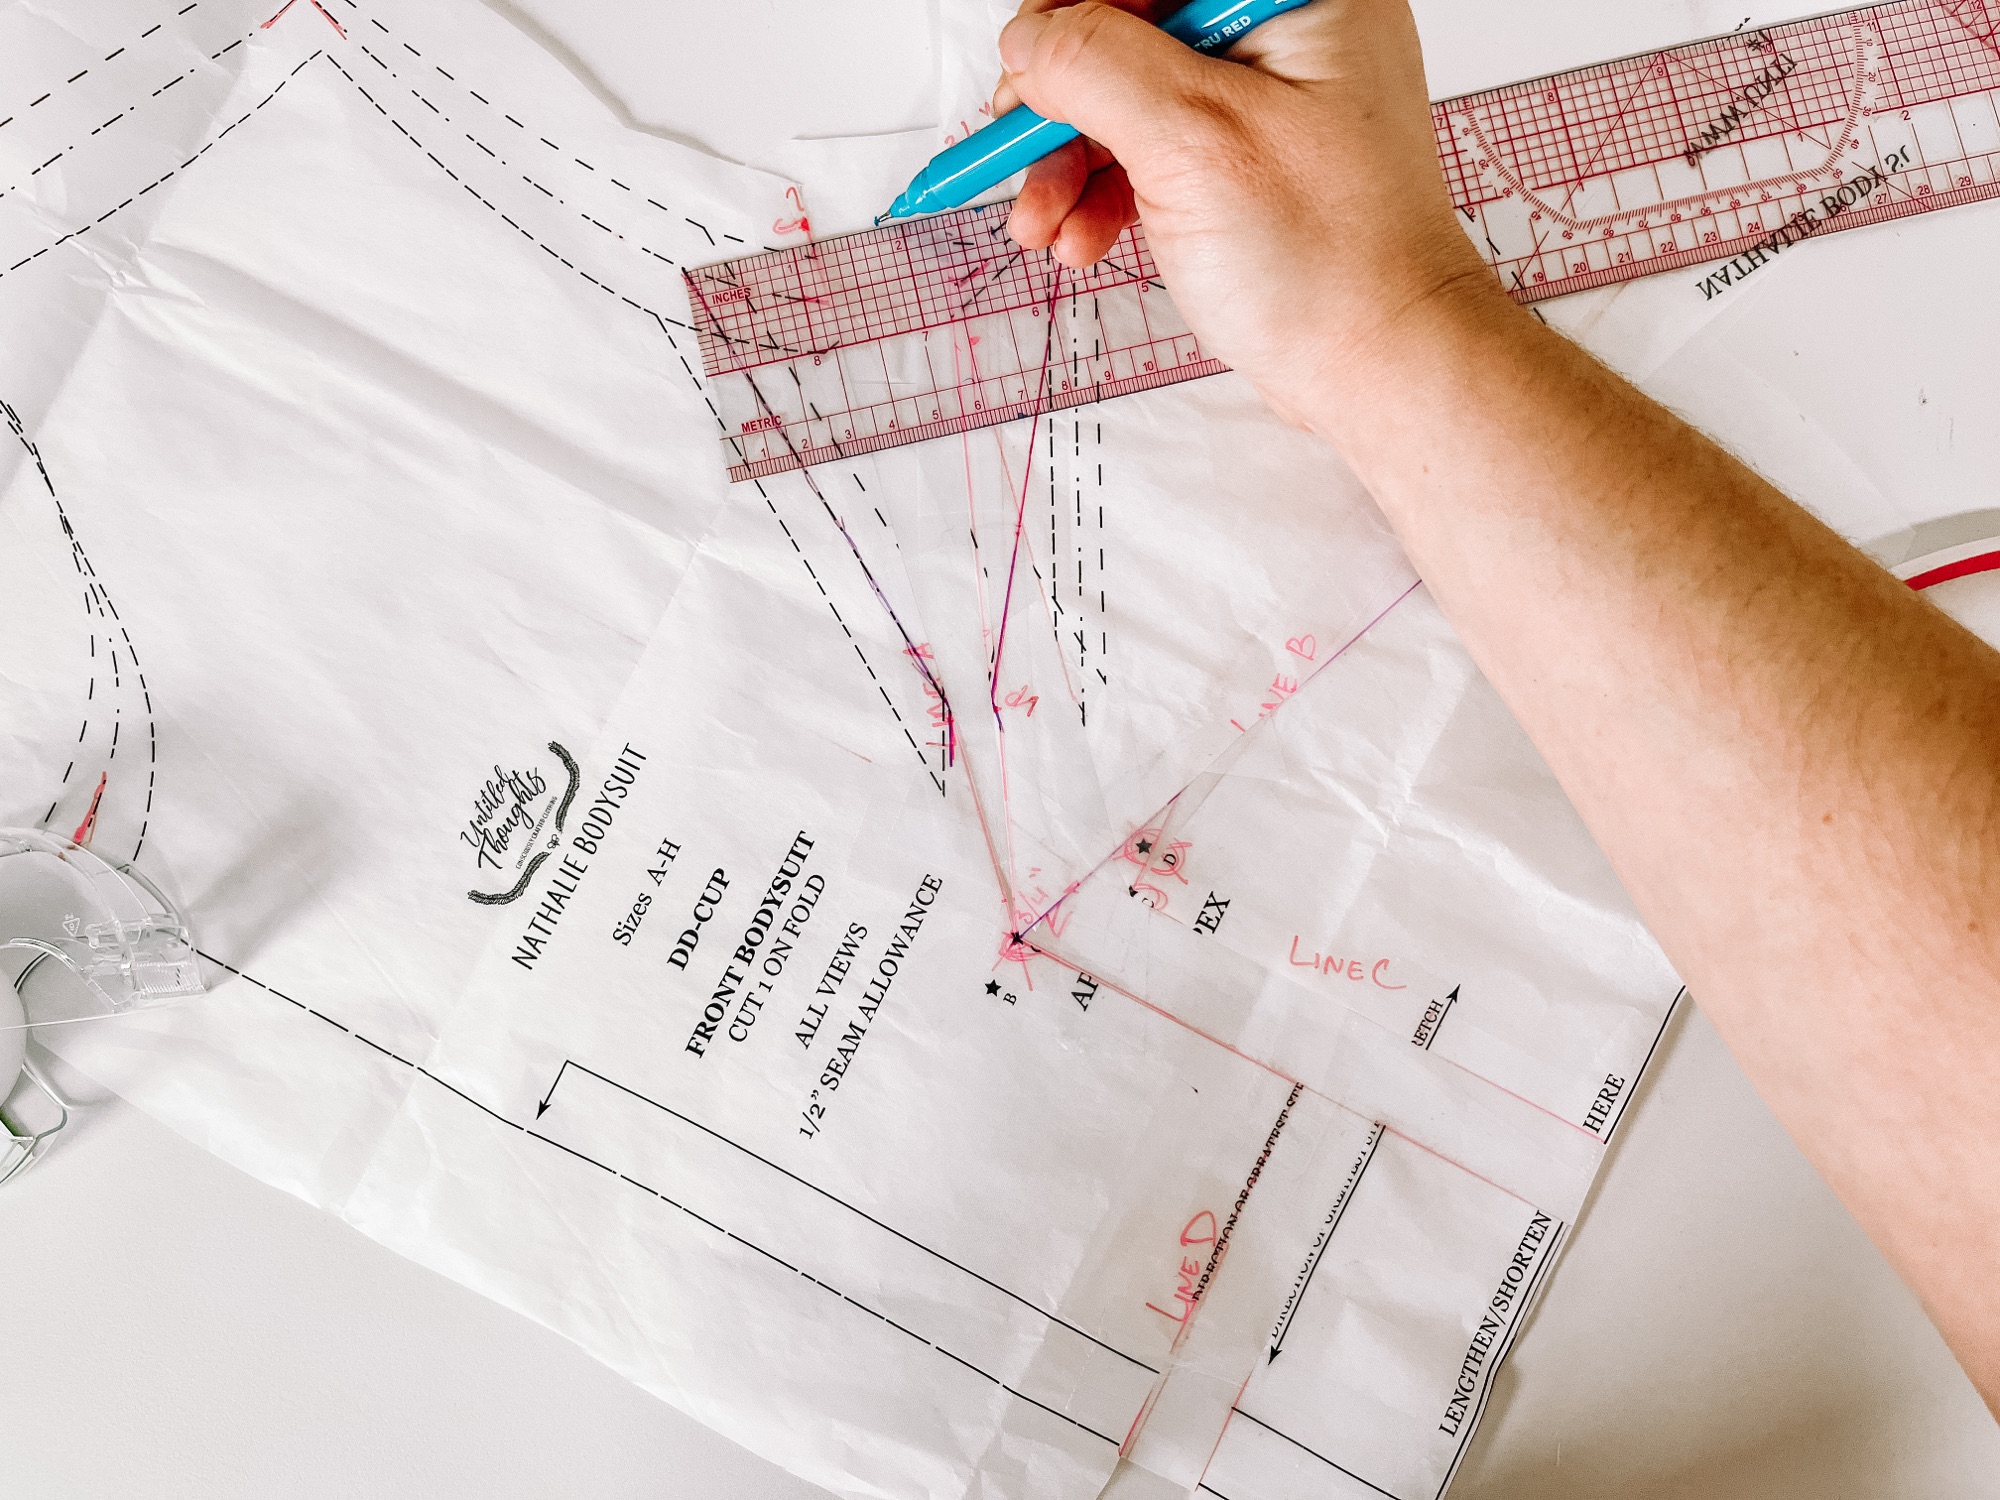
Then, draw a line from this center mark on the dart to the apex.
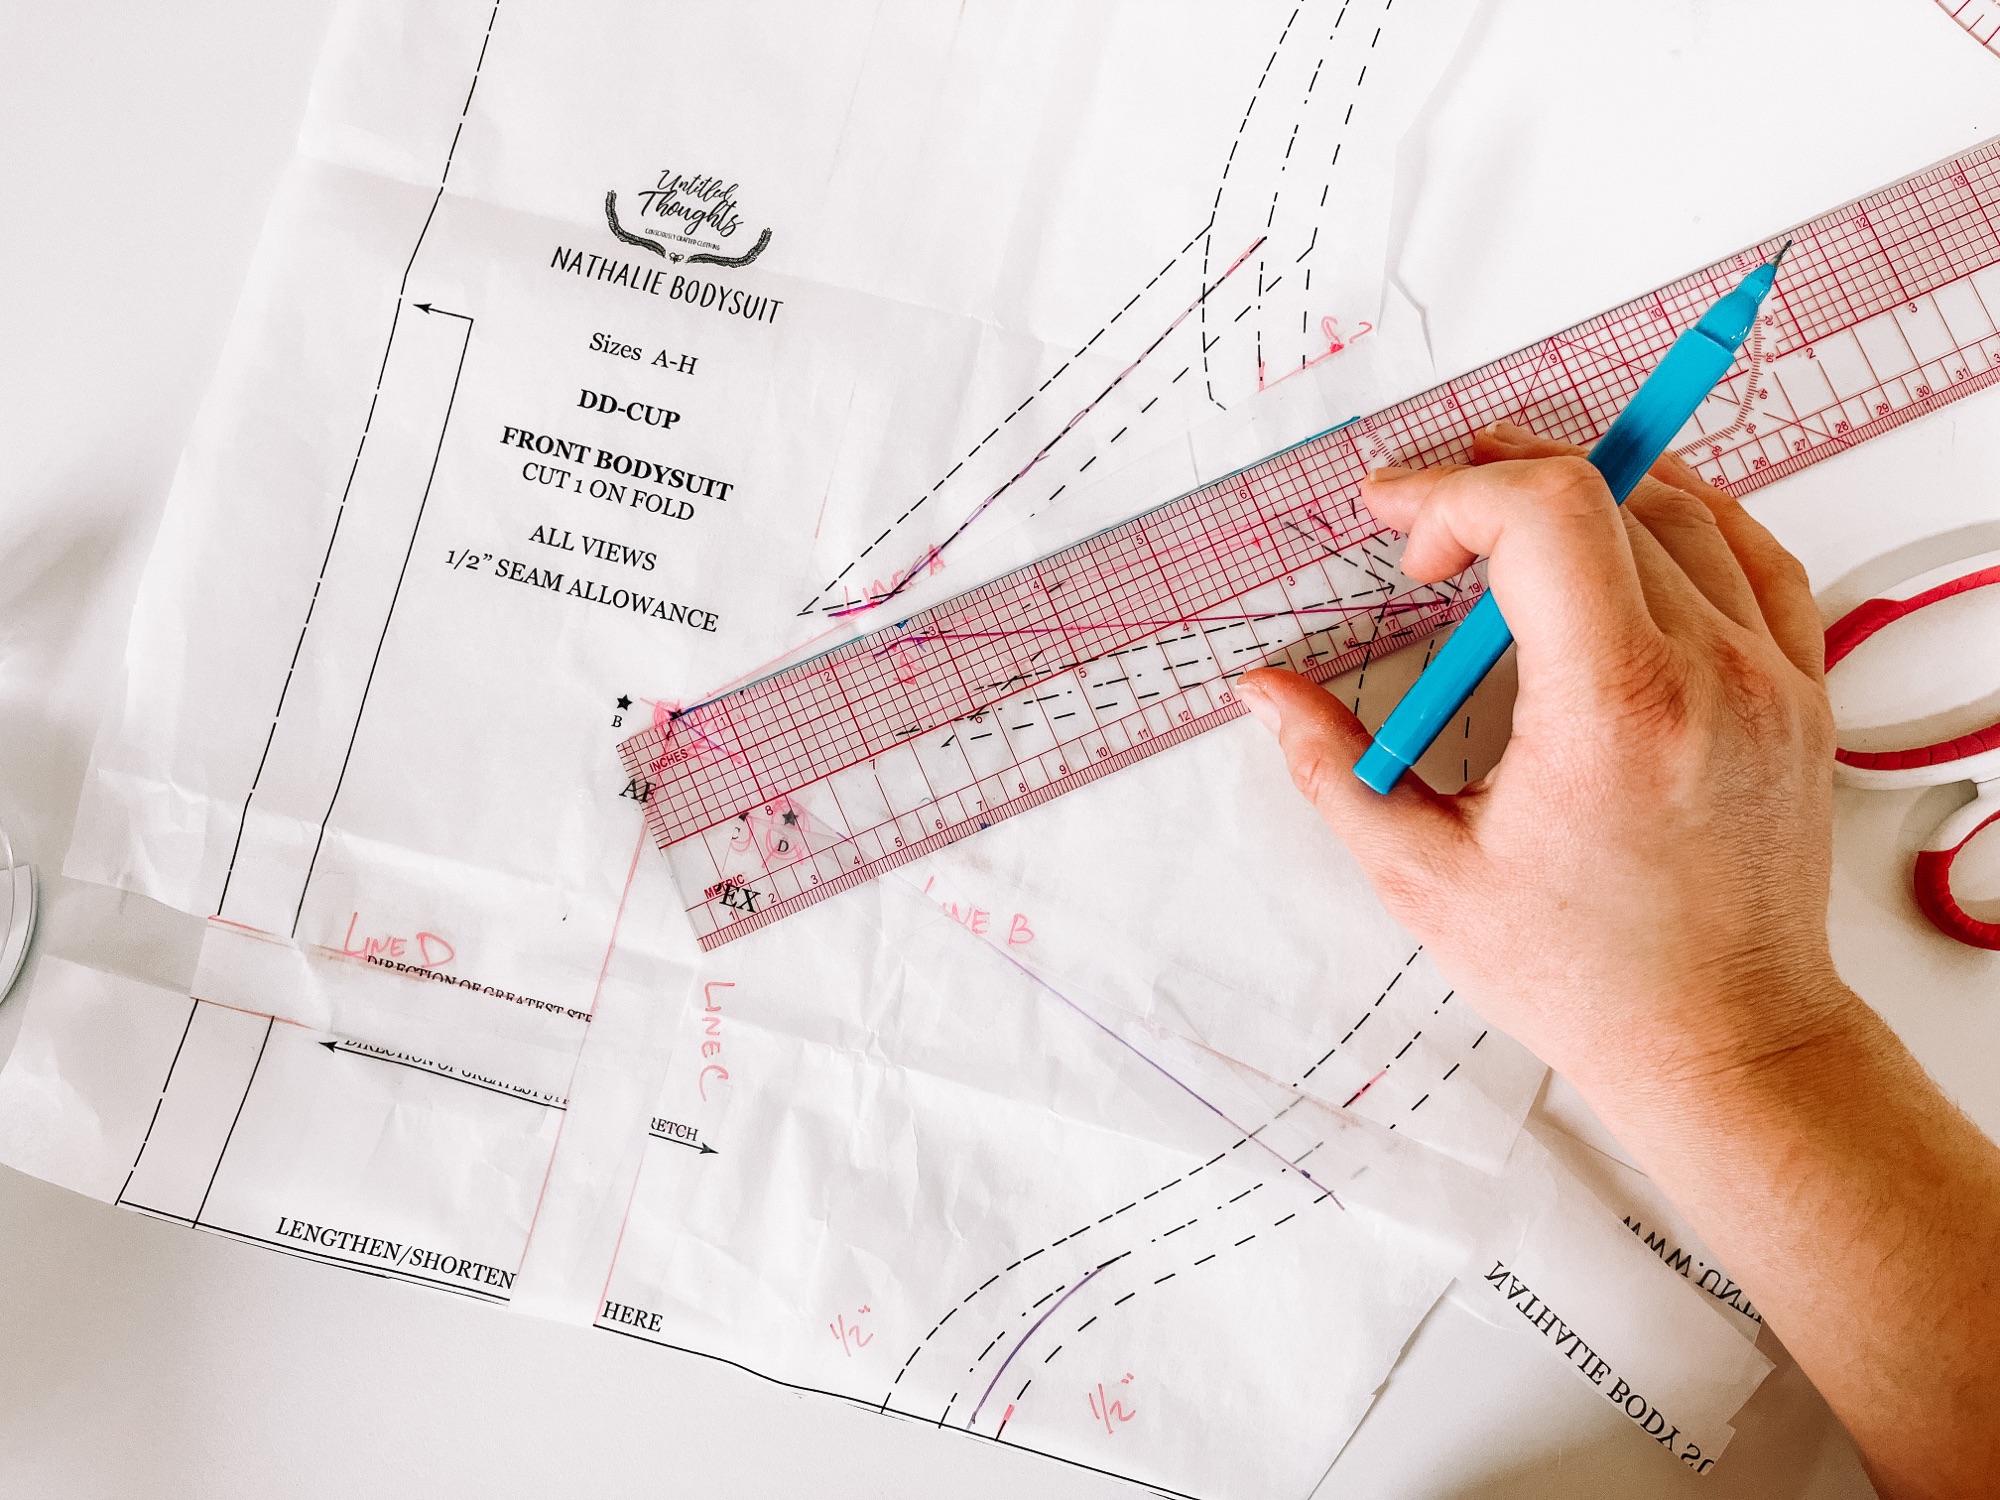
You’re now going to mark a point on this line a certain number of inches from your apex for your dart vanishing point, depending on your garment cup size. Here’s my rule of thumb to start, but everyone has their preferences about vanishing points, so go with what you like! (I honestly prefer 2″ for knit patterns for myself.)
| I+ garment cup | 9″+ (22.85 cm+) full/high bust difference | 2.5″ (6.35 cm) |
| G-H garment cup | 7-8″ (17.8-20.3 cm) full/high bust difference | 2″ (5 cm) |
| DD/E-F garment cup | 5-6″ (12.7-15.2 cm) full/high bust difference | 1.5″ (3.8 cm) |
| D garment cup or smaller | 4″ or less (10.2 cm) full/high bust difference | 1″ (2.5 cm) |
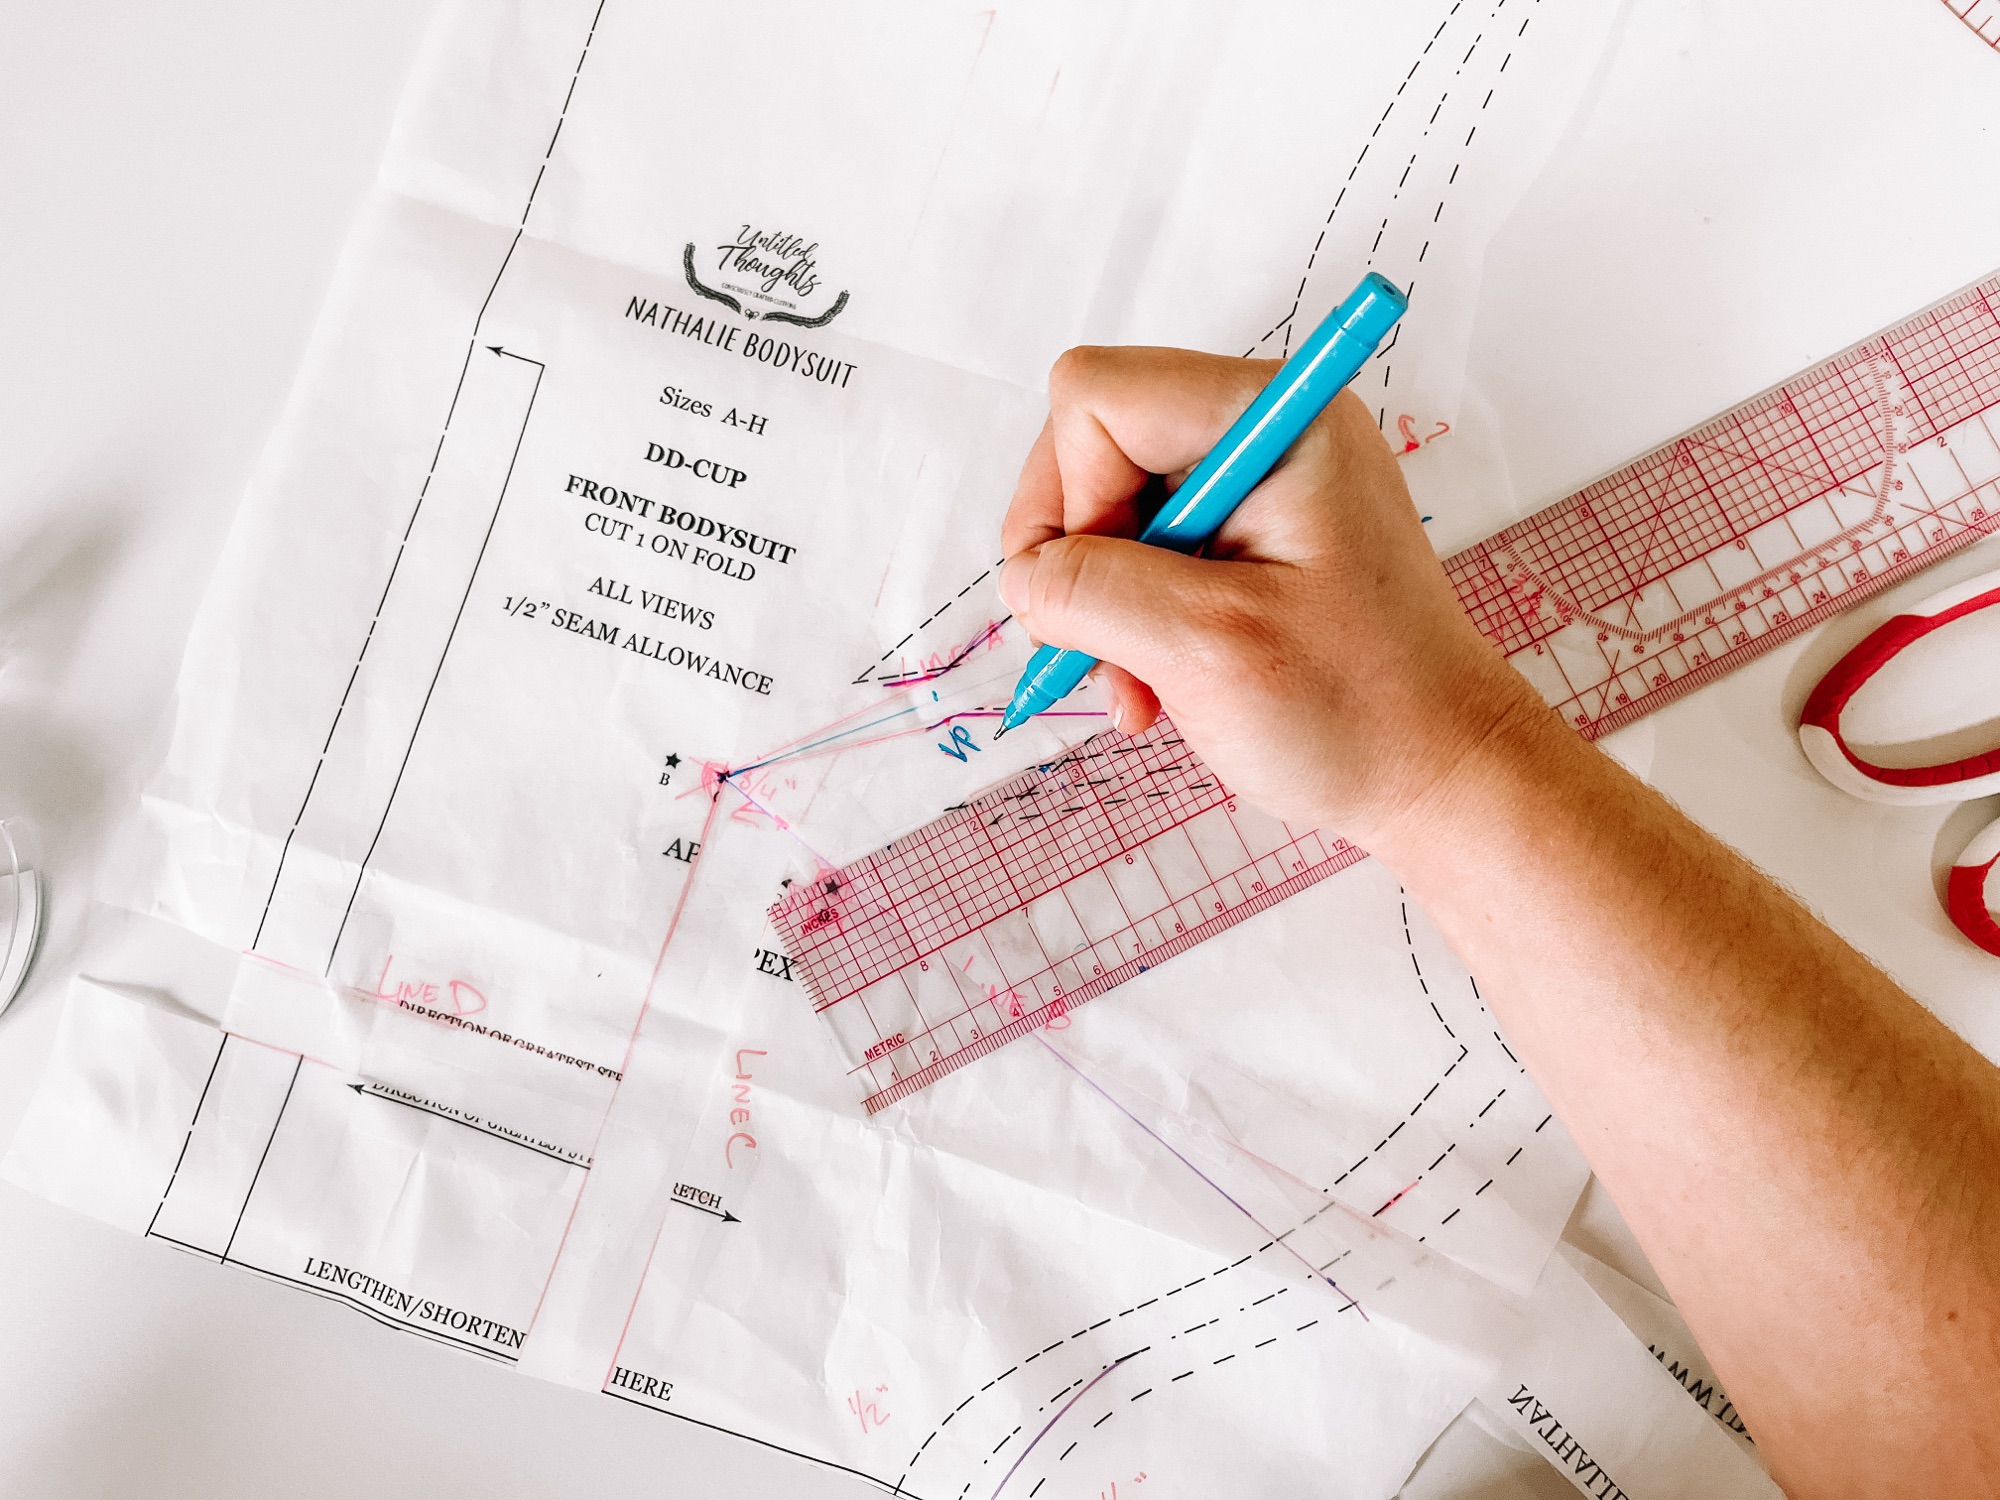
So I made my mark 2″ back from the apex. This will be my vanishing point, or where the dart will actually end.
Finally, we must connect this vanishing point to the dart legs.
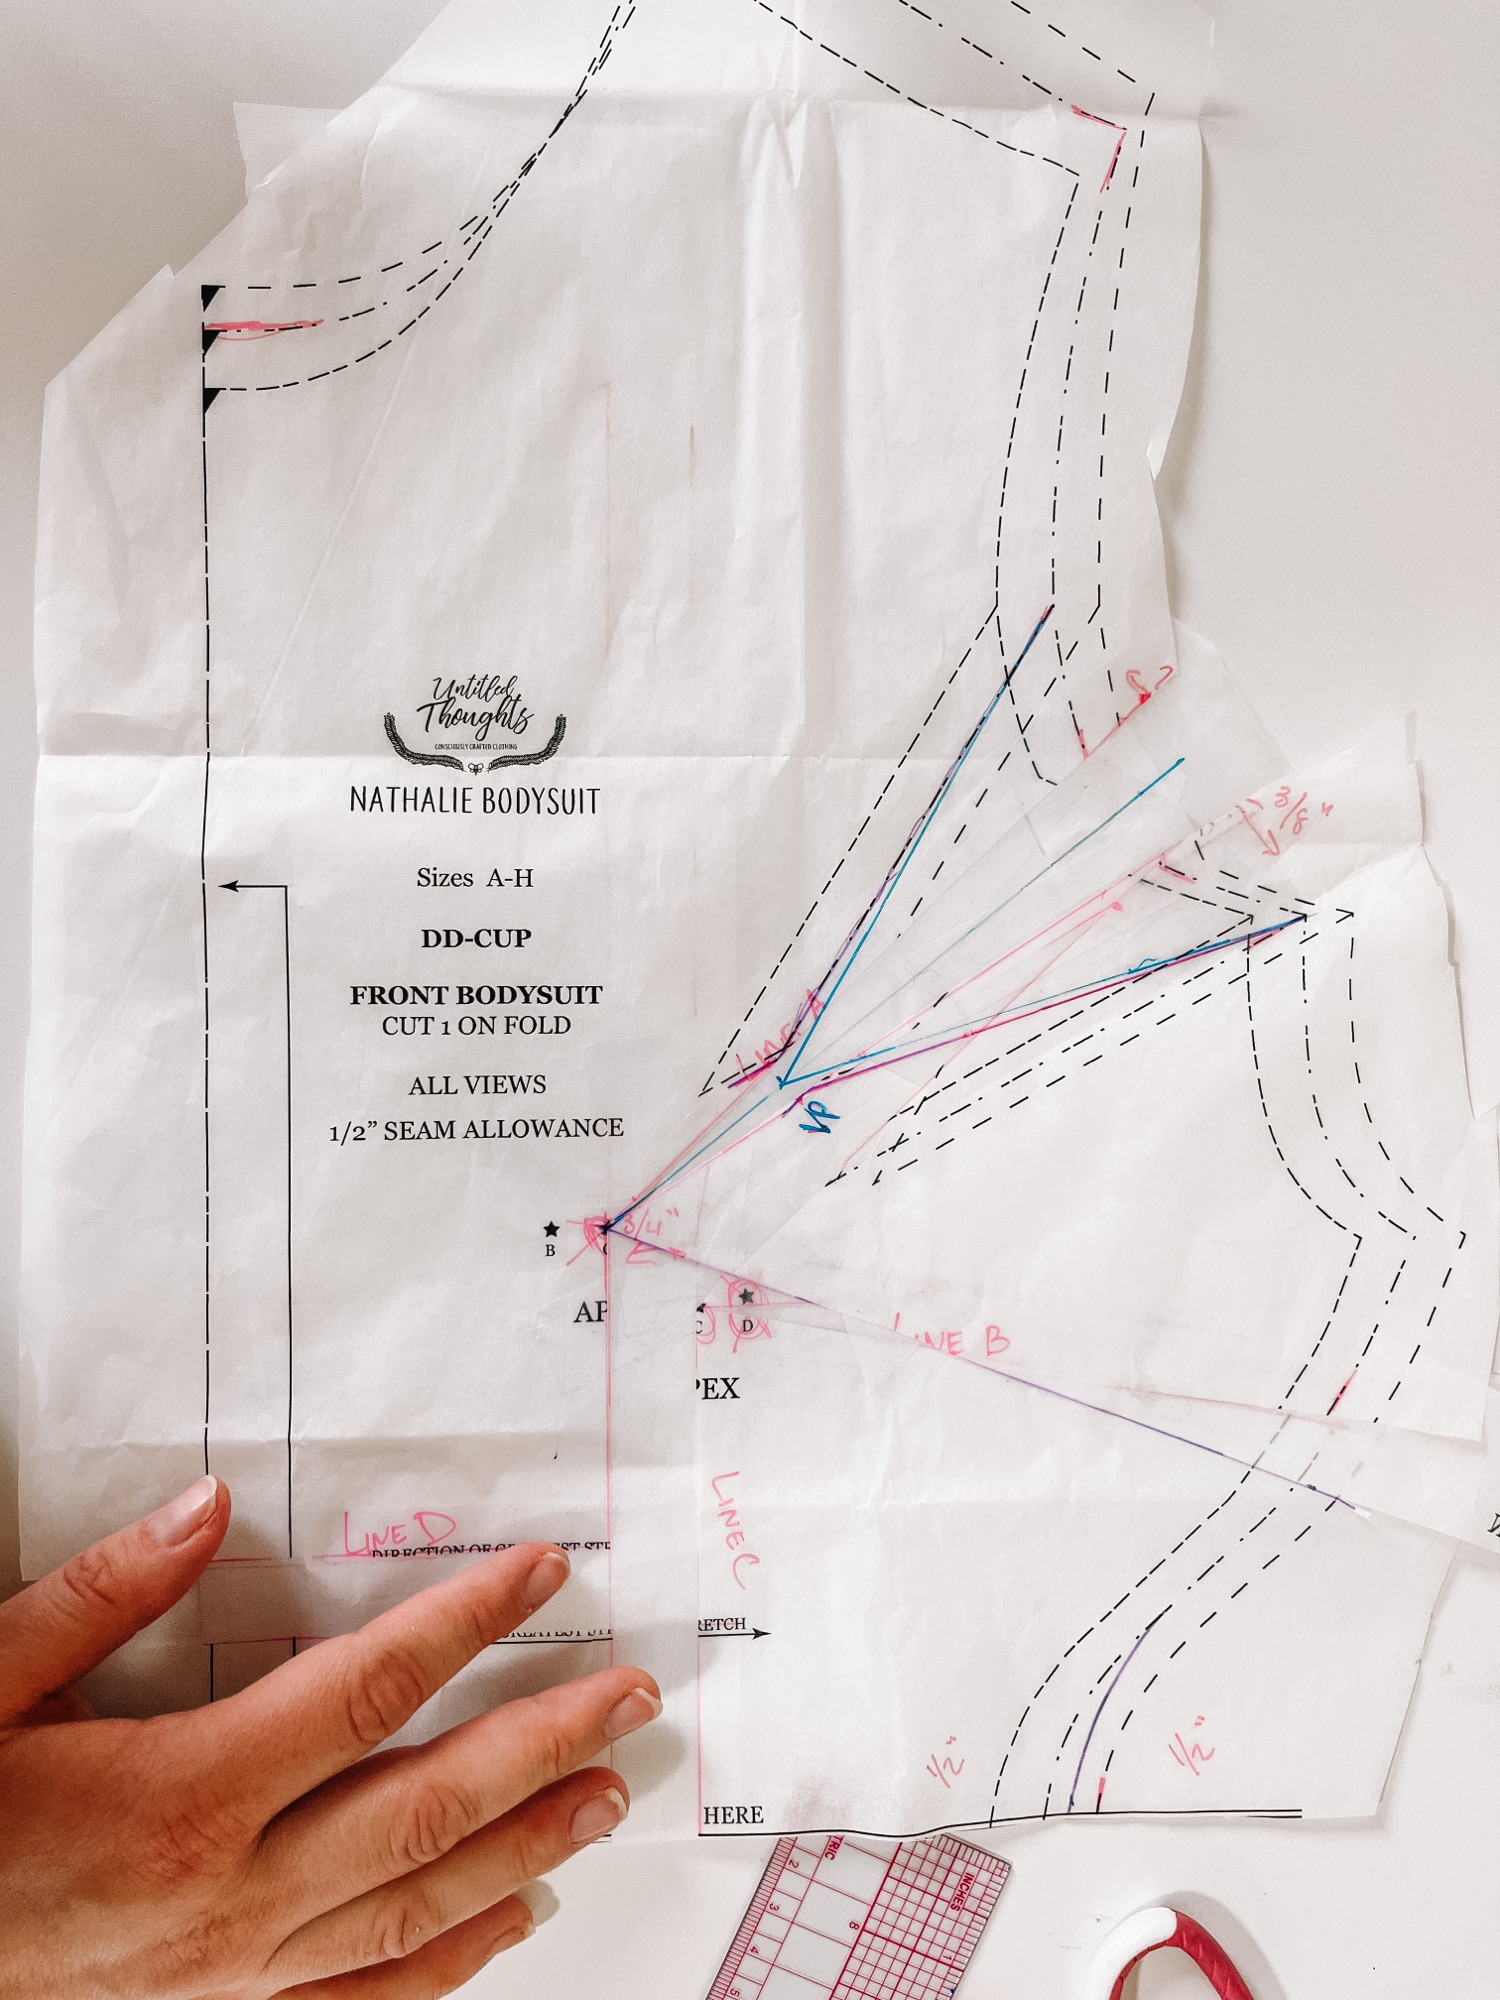
We’re next going to true this dart. As shown in the below video, I like to fold it closed, then use washi tape to hold it while I cut along the side seam. Once unfolded, the resulting dart should be perfect!
Reducing the waist
The next step is to reduce the waist so we can re-join the top of the bodysuit pattern with the bottom. For me, I needed a size D at the waist, so I wanted to take advantage of some of the additional width I had added to the waist through my FBA.
I started by taping the top of the pattern piece back onto the bottom. This showed me exactly where my waist needed to contour to! I marked this spot.
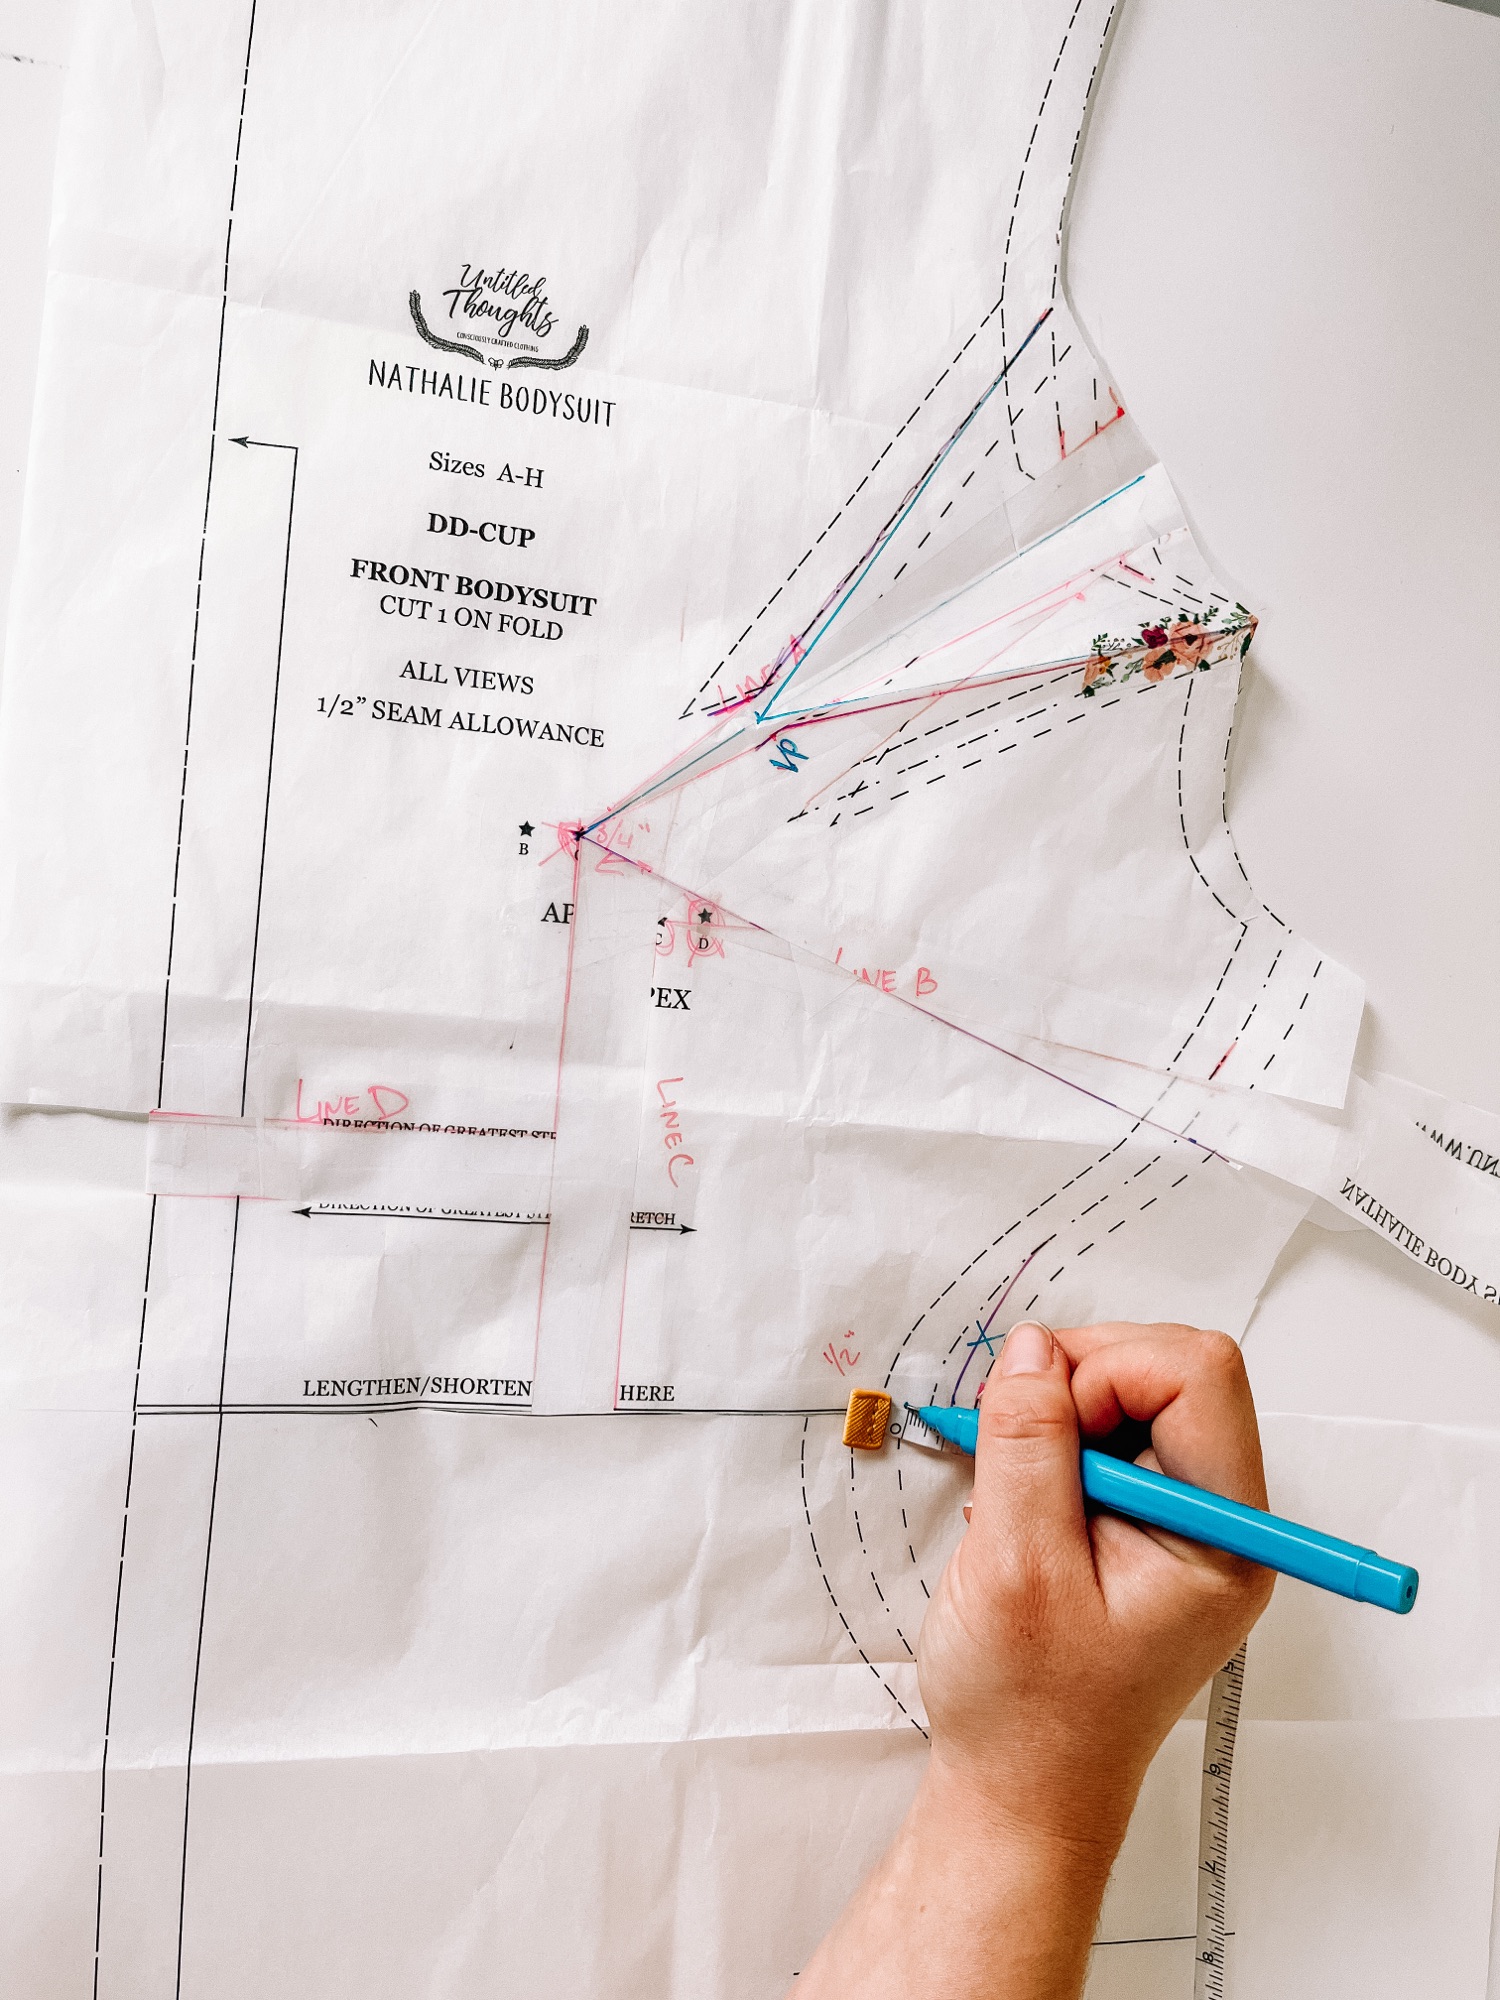
Then, using my French curve, I trued the side seam for the size C (the size I did my FBA on) to this marking.
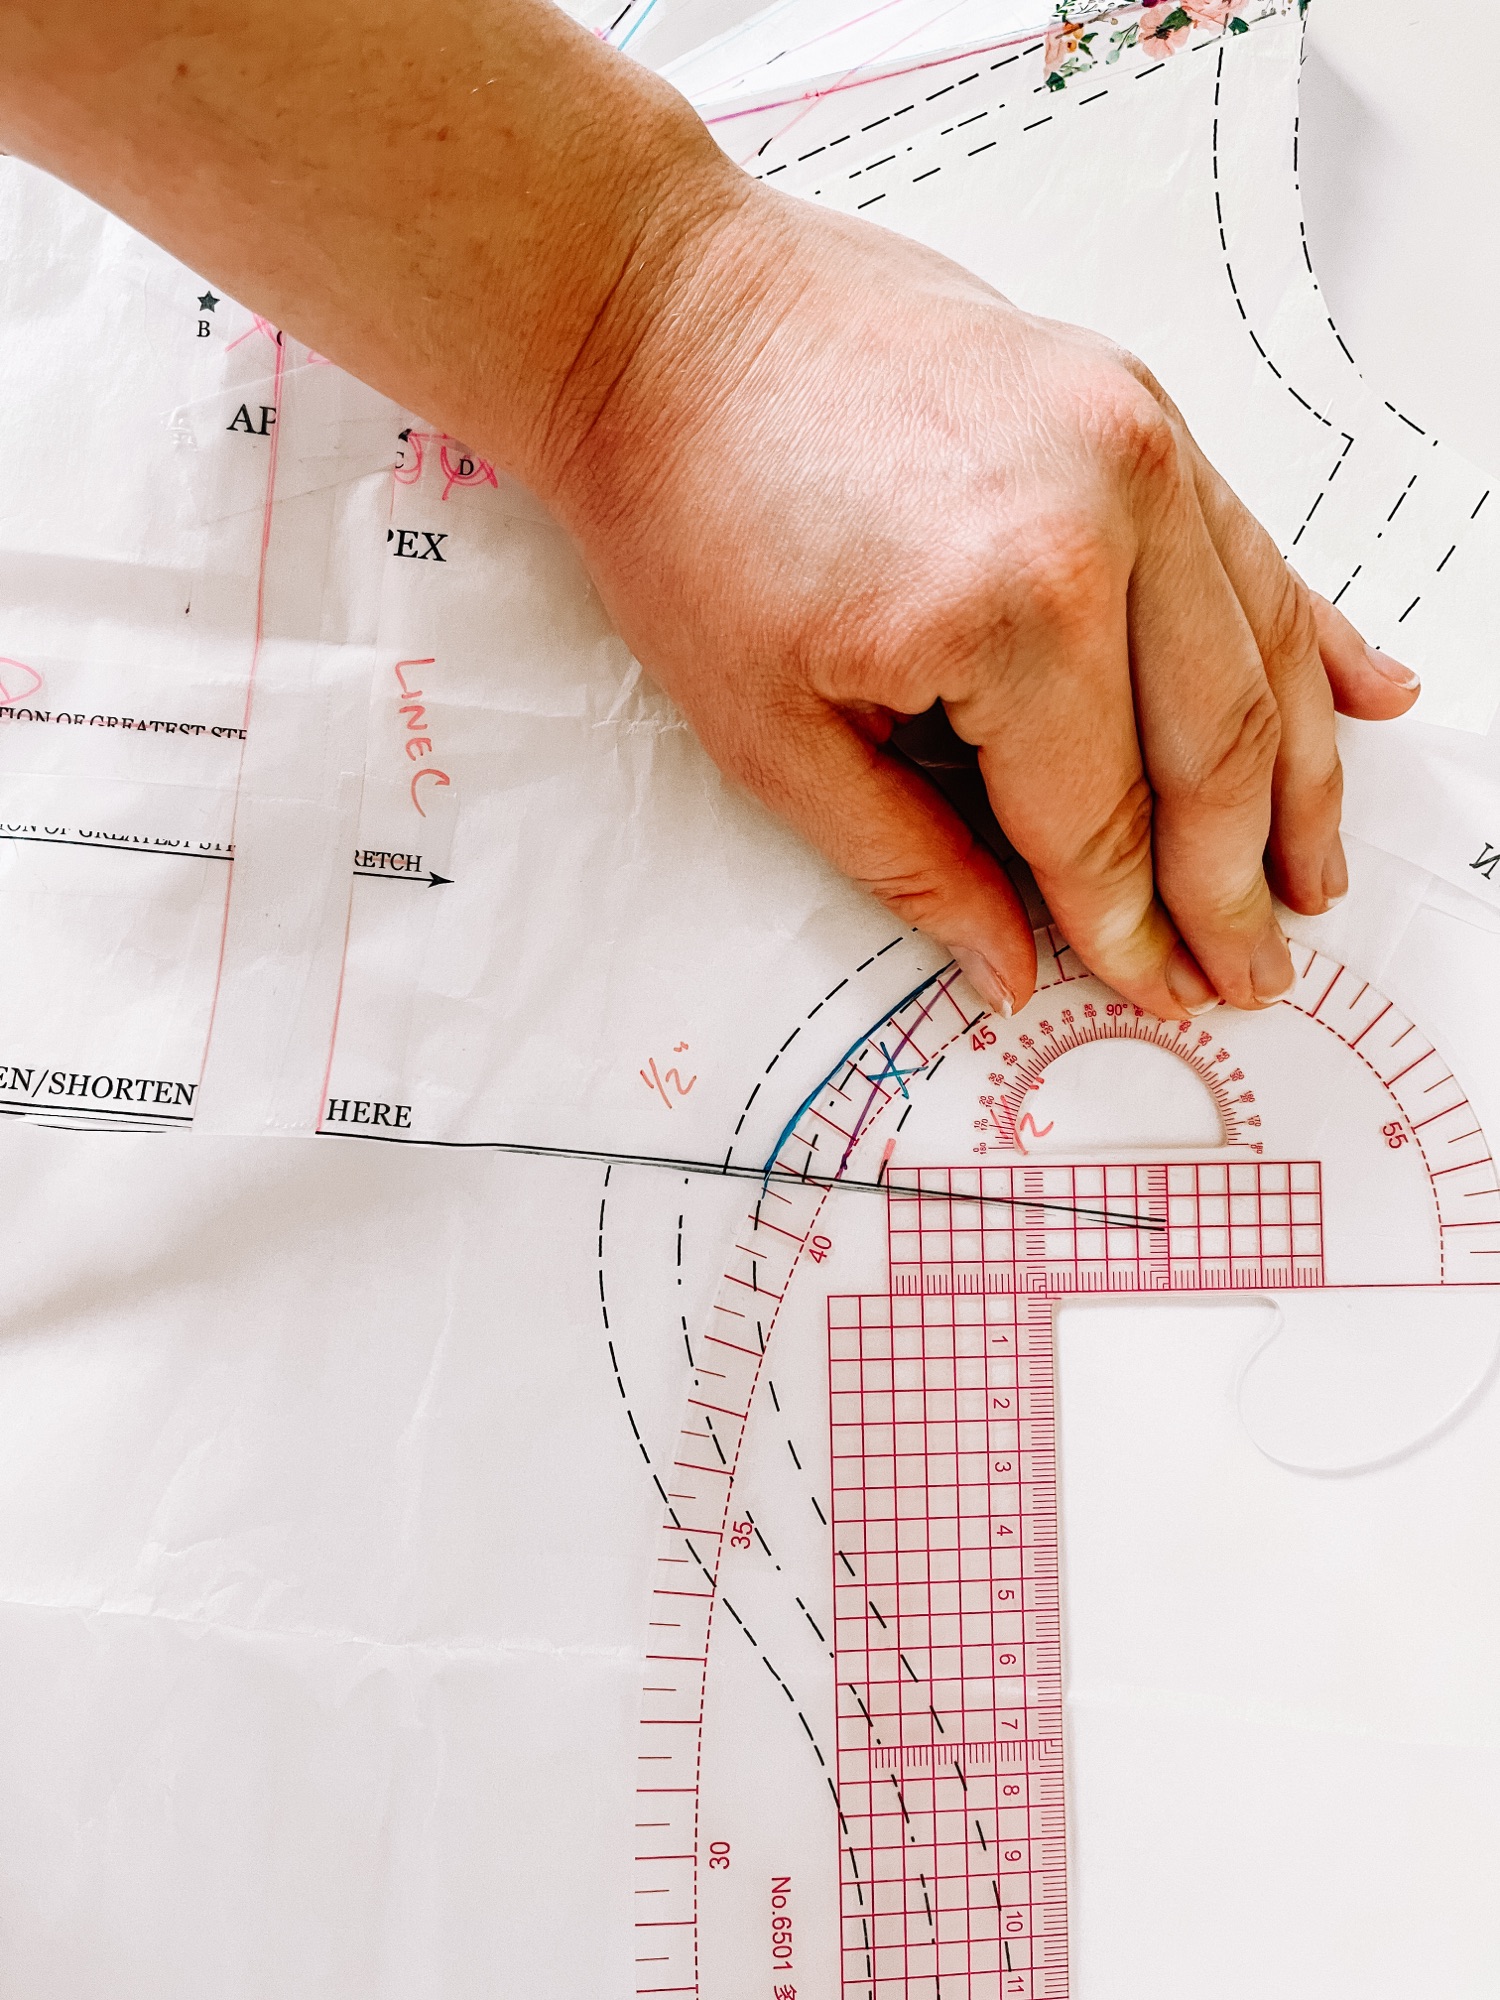
And we’re done! Now, just sew this pattern according to the instructions.


Kathy
January 13, 2024Wouldn’t this also require making a change to the sleeve pattern?
sewbustycommunity
January 13, 2024Not at all! The armscye remains unchanged in circumference once the larger dart is sewn!
Annie Stewart
September 6, 2024Thanks so much for alerting me to your blog! I spend hours trying to sort the bust area but so far not been entirely satisfied! Only been sewing for a few months following a massive gap!
Lindsie
September 11, 2024I’m so glad you found us! <3