
Full Bust Adjustment Guide | Giant FBA on the Named Clothing Kielo (AKA: making a giant armscye dart!)
Tackling a Giant fba
This post is part of a series on “giant” full bust adjustments — adjustments for sewists who need to add more than 2-3″ to their garments. The series is a response to the fact that almost every FBA tutorial out there assumes you’re only adding a couple inches to your bodices, but for many of us, that’s just not true.
I, for example, need to add 7-9″ to most patterns.
Other posts in this series include:
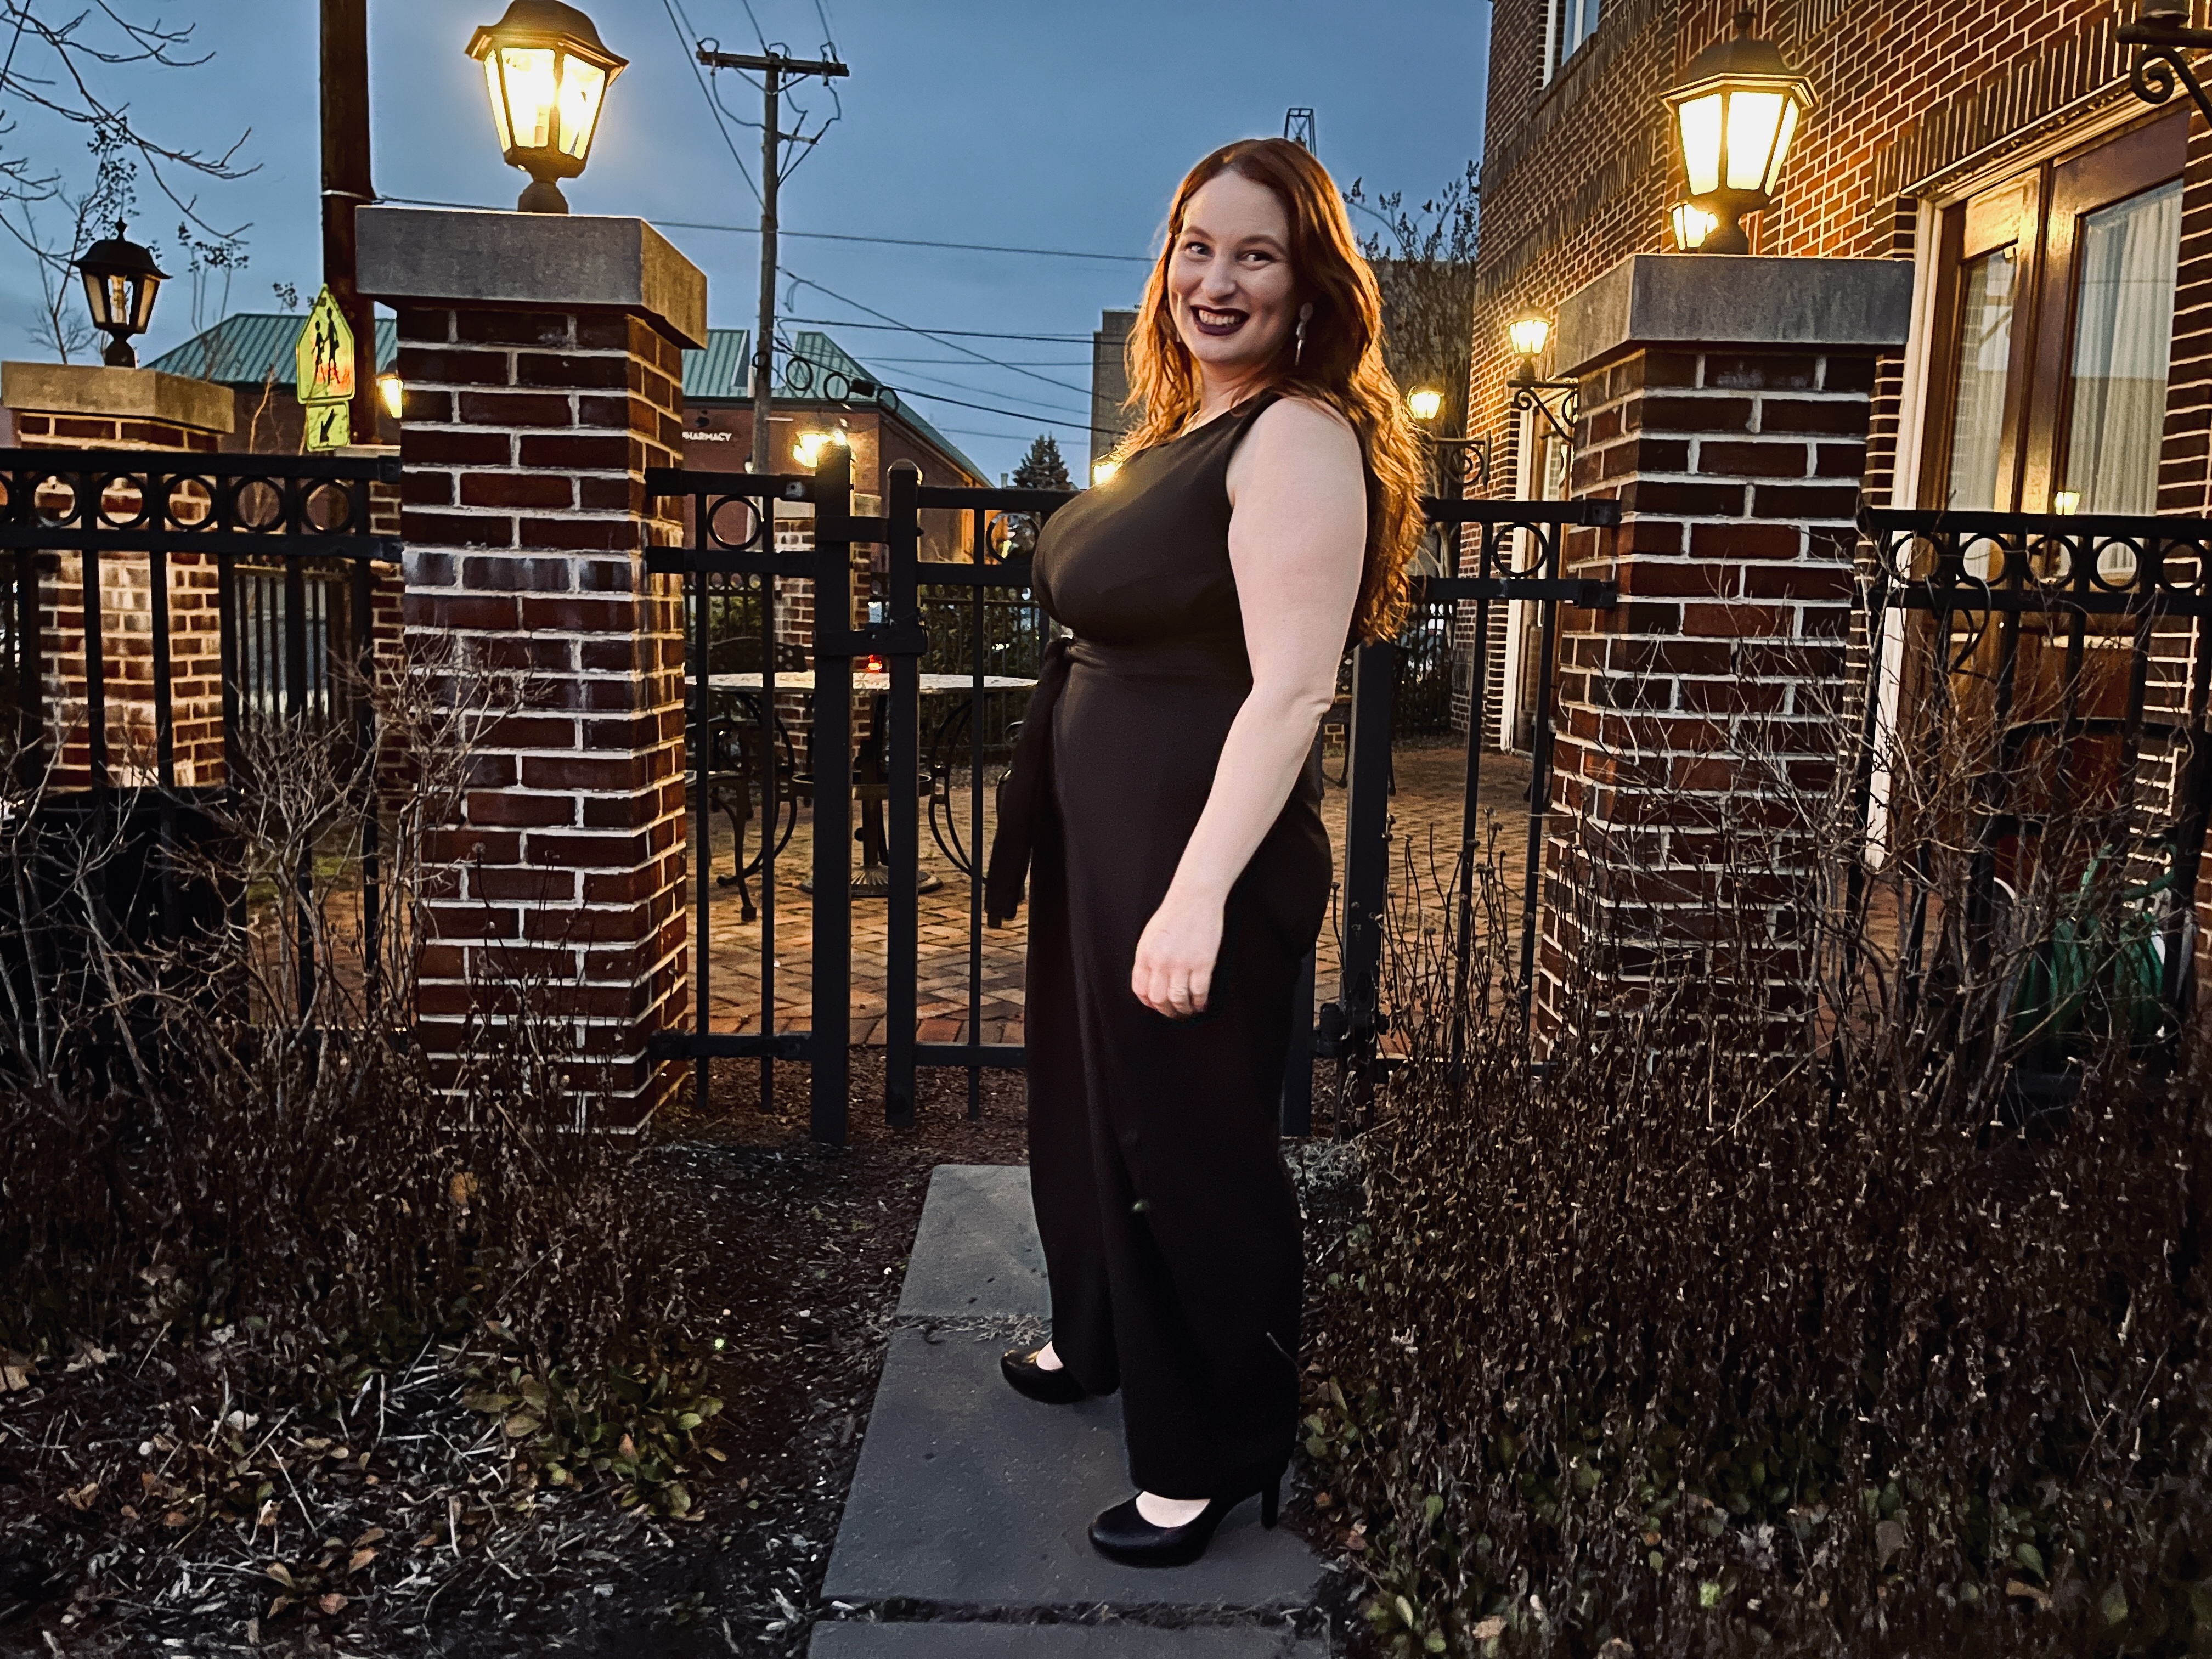
While most patterns are drafted for a garment B cup (a 2″ difference between high and full bust; different from bra cup size!), I wear a M garment cup — 11′ difference between high and full bust — when my boobs are full of milk.
Today, we’re tackling the ever-popular Kielo dress and jumpsuit pattern from Named Clothing. We’re going to stick that dart right in the armscye, so this tutorial could also be used in other cases where you’d like to create or adjust an armscye dart.
What about this pattern
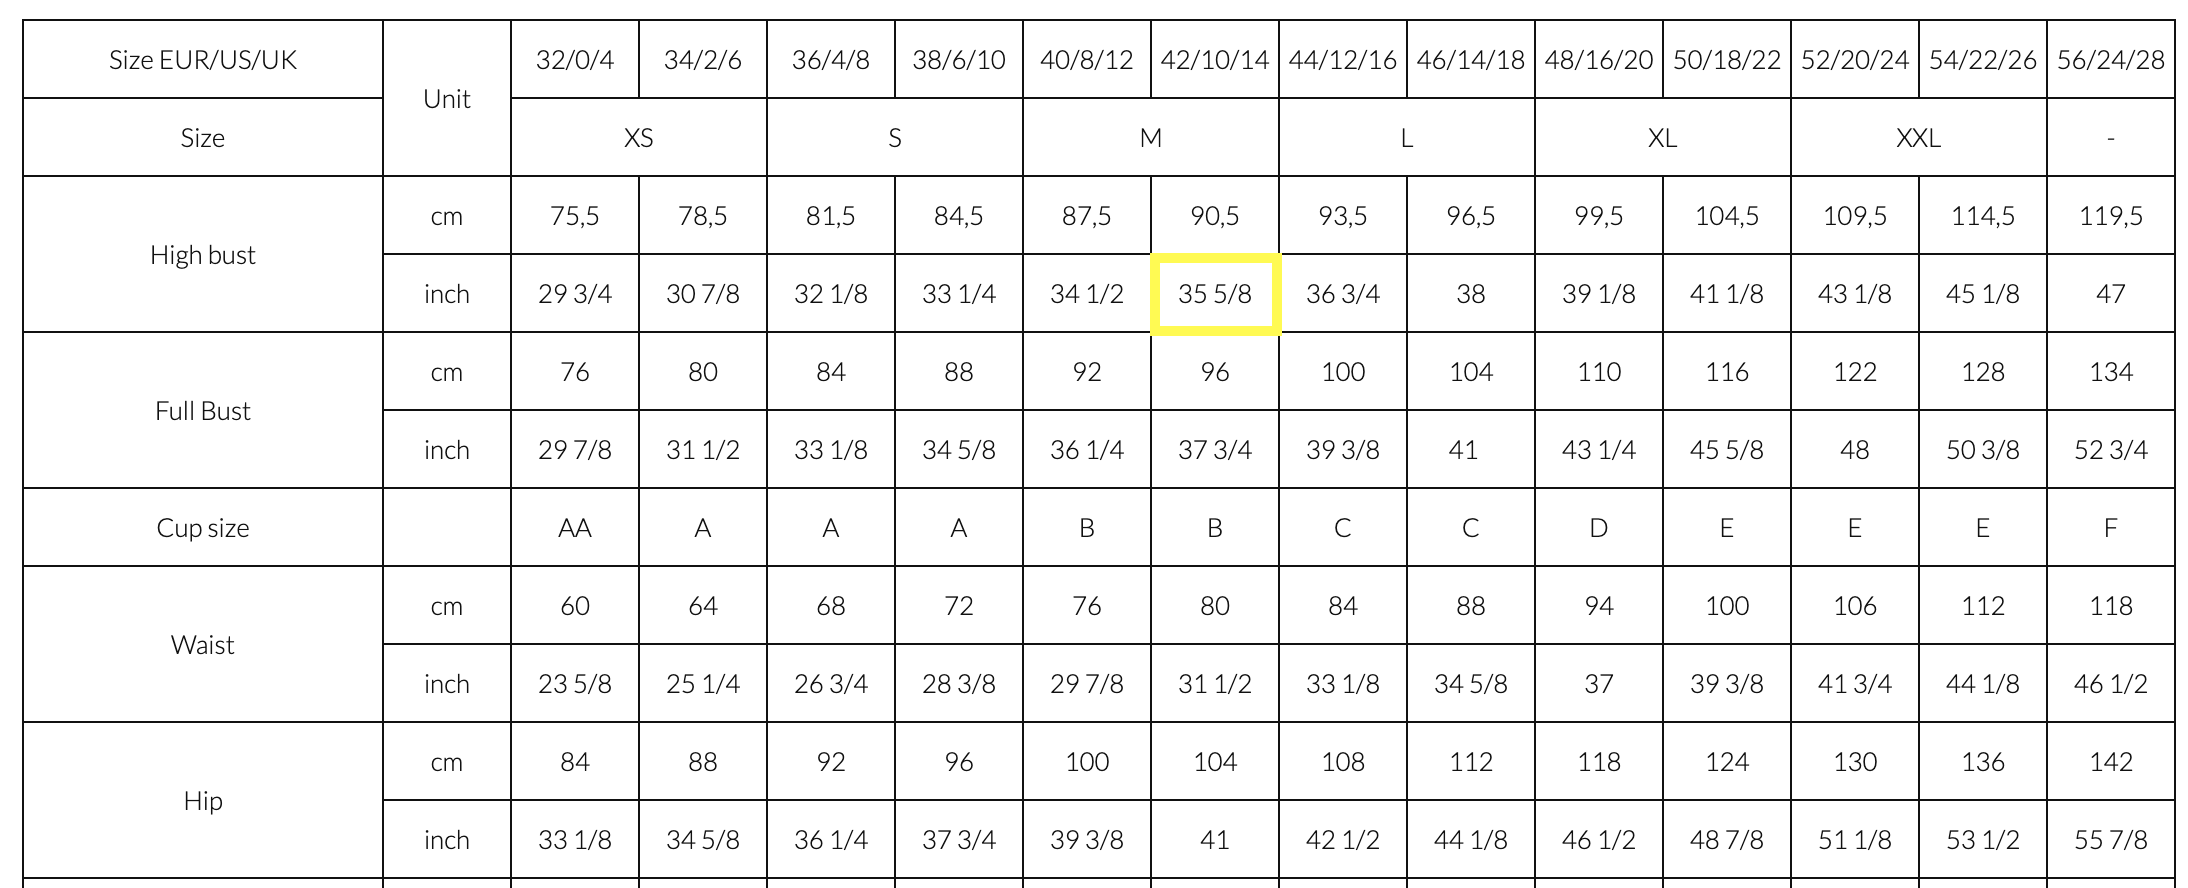
The Kielo is drafted for increasing cup sizes as the base size goes up, whereby the size 32 pattern is drafted for a garment AA cup (0″ difference between high and full bust) and the size 56 is drafted for an almost-garment F cup (5.75″ difference). My base size of 42 — chosen by my high bust measurement of 35.5″ — is drafted for a 2″ difference, or a standard garment B cup.
To its credit, Named has two fantastic tutorials for doing a full bust adjustment on the Kielo on its website, a darted and a no-dart tutorial. The no-dart tutorial will work very well if you just need to add a couple of inches, and the darted tutorial will work for slightly larger adjustments. The darted tutorial is actually what I based this blog on, with some tweaks for the mega busty.
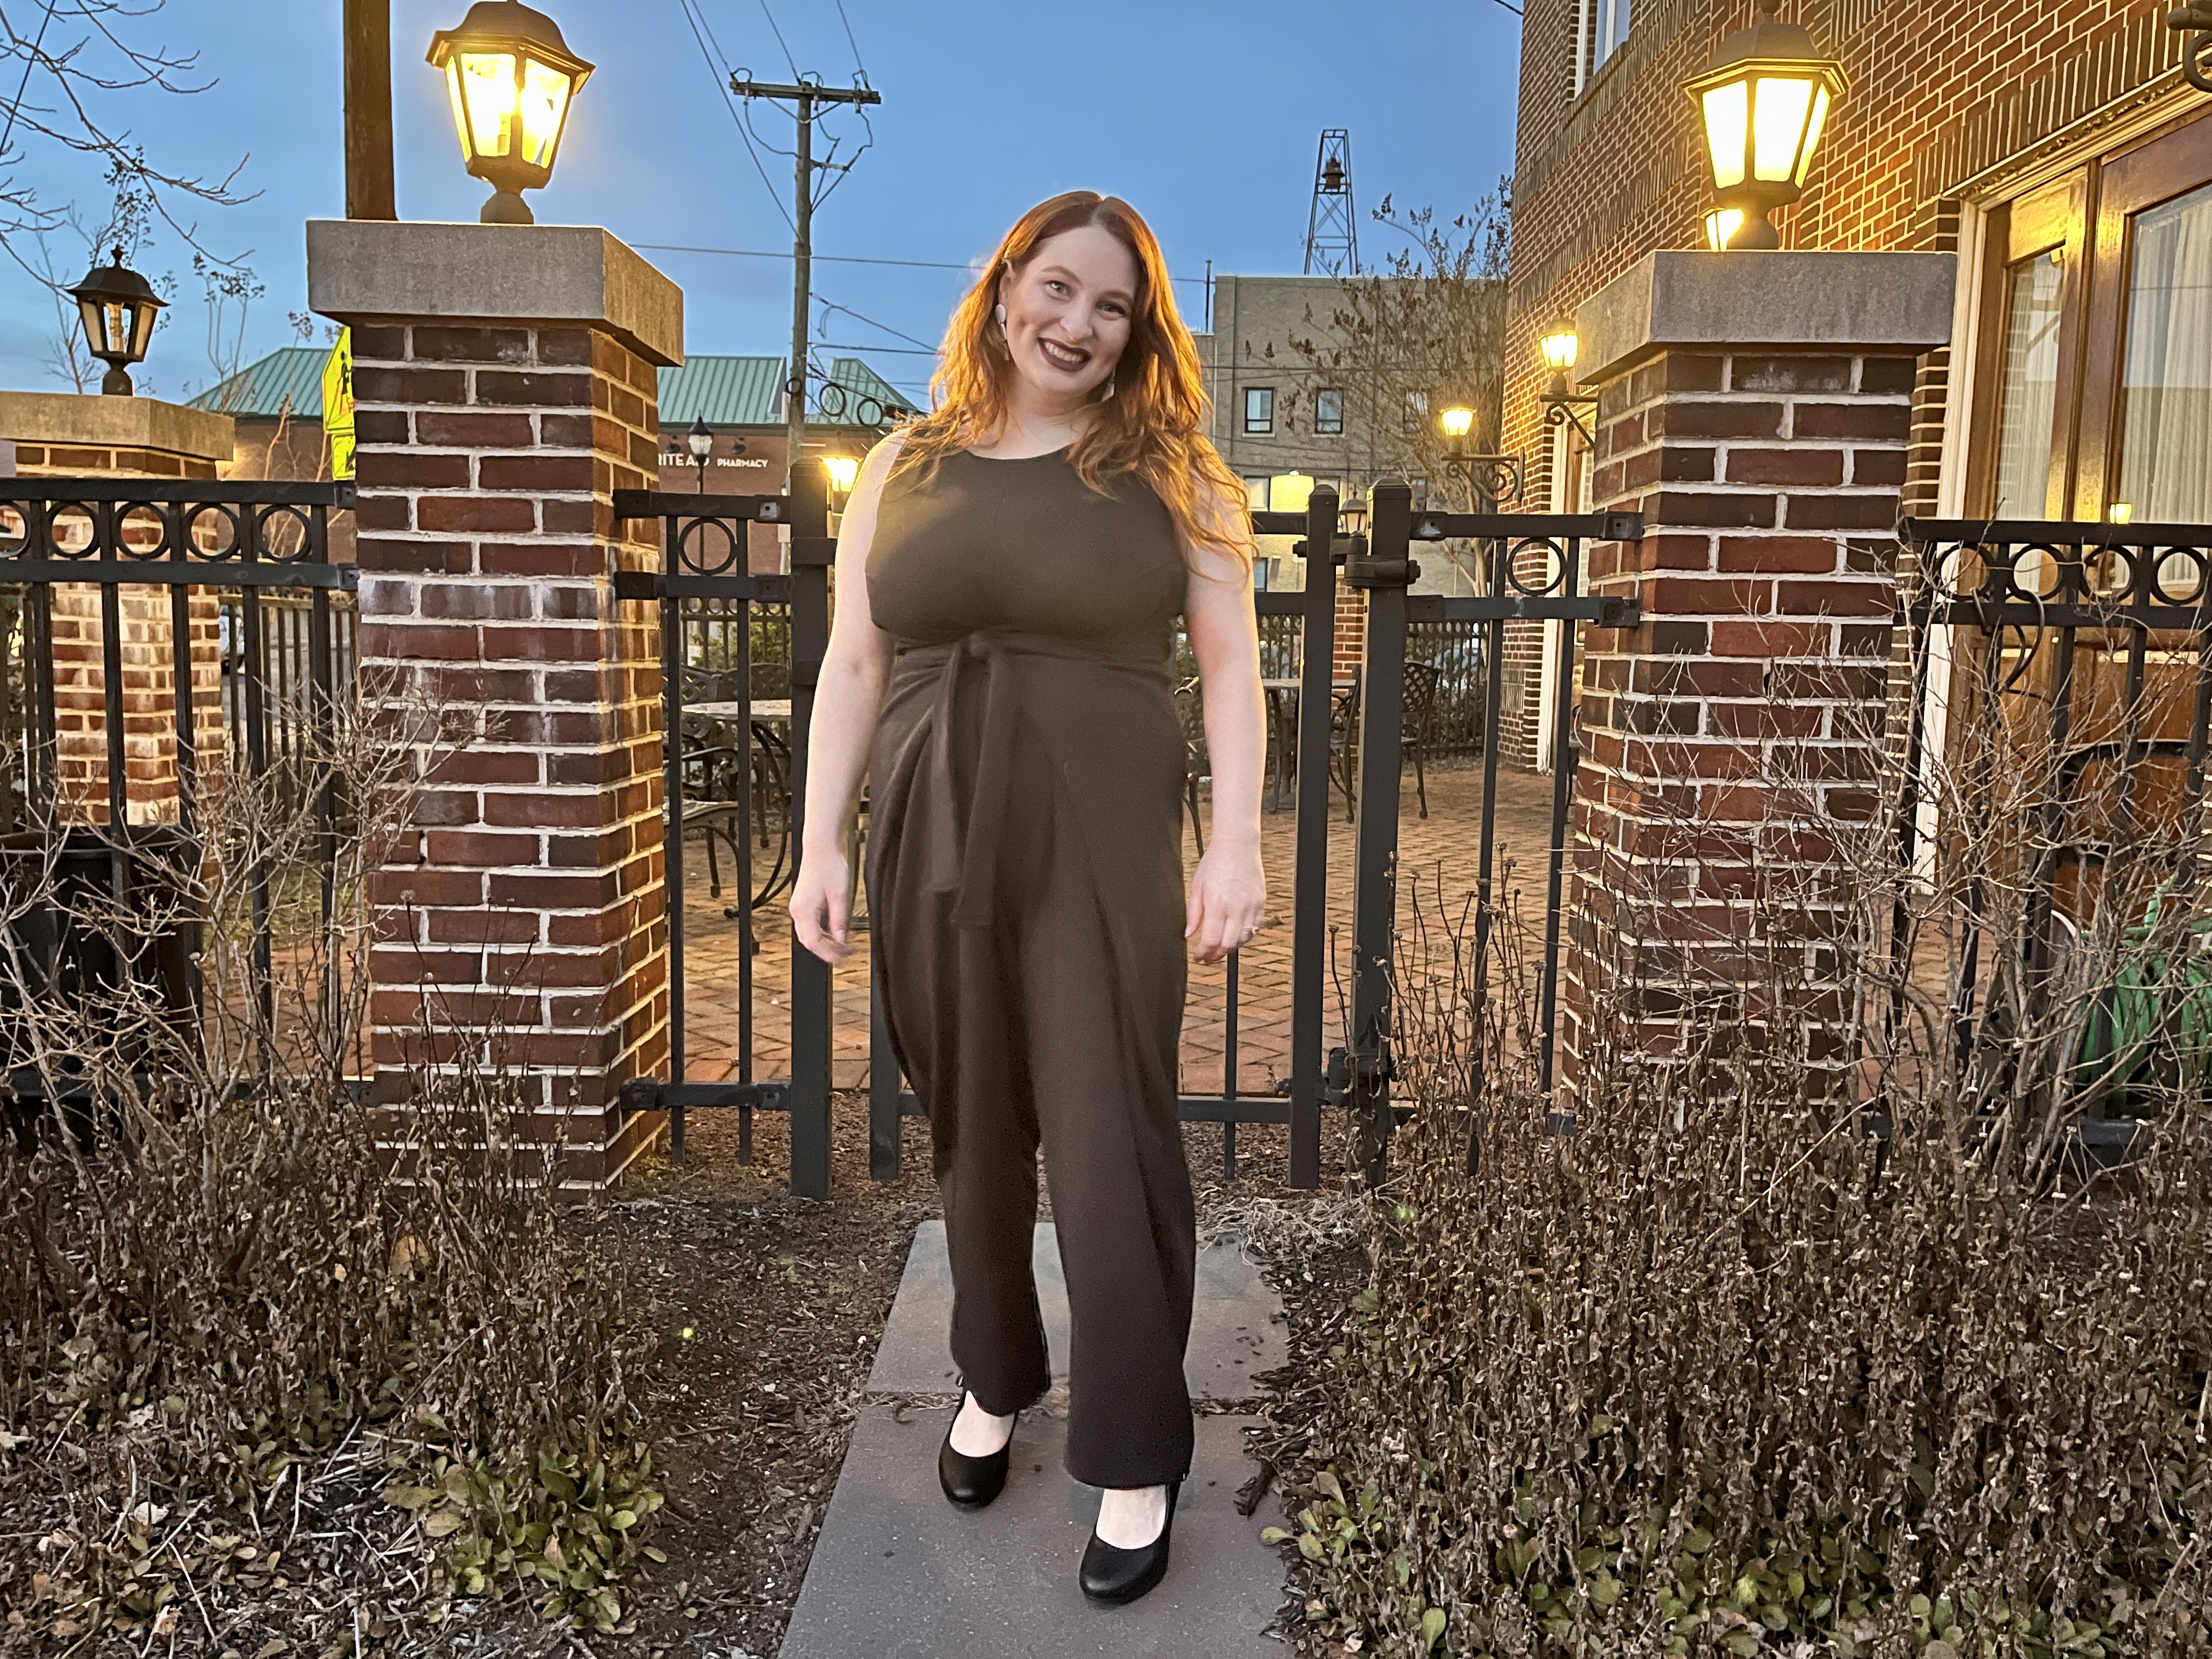
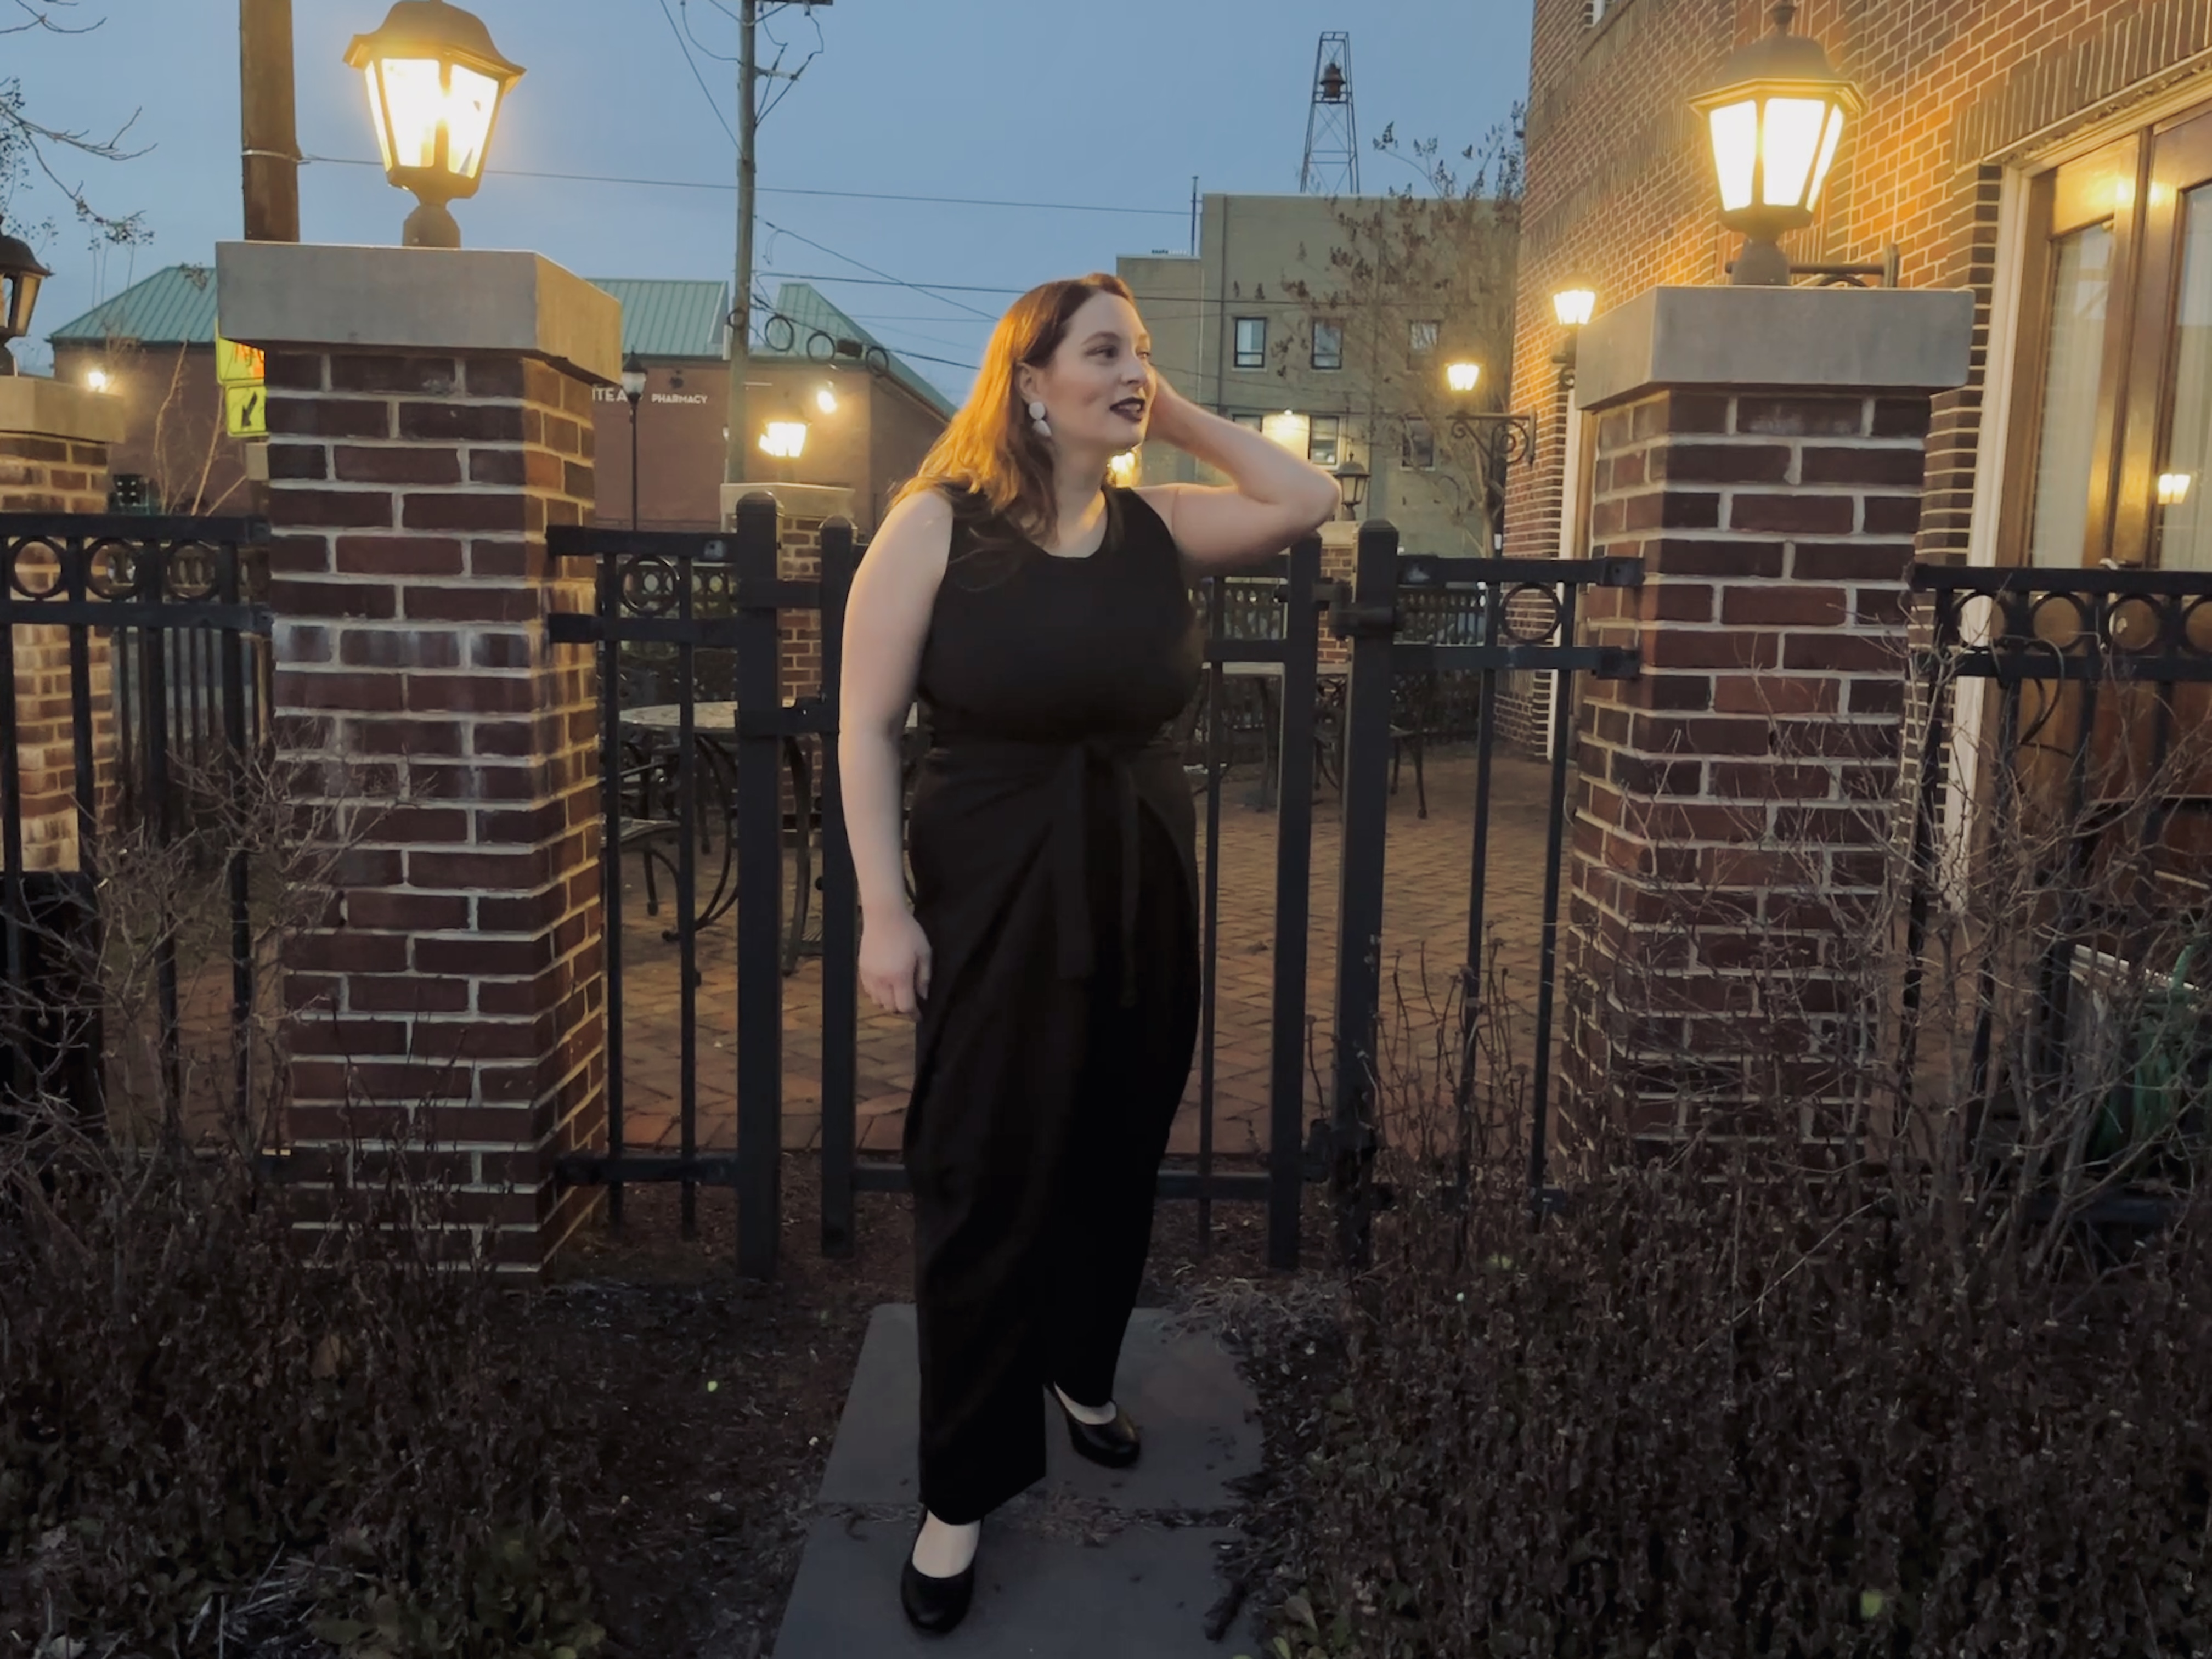
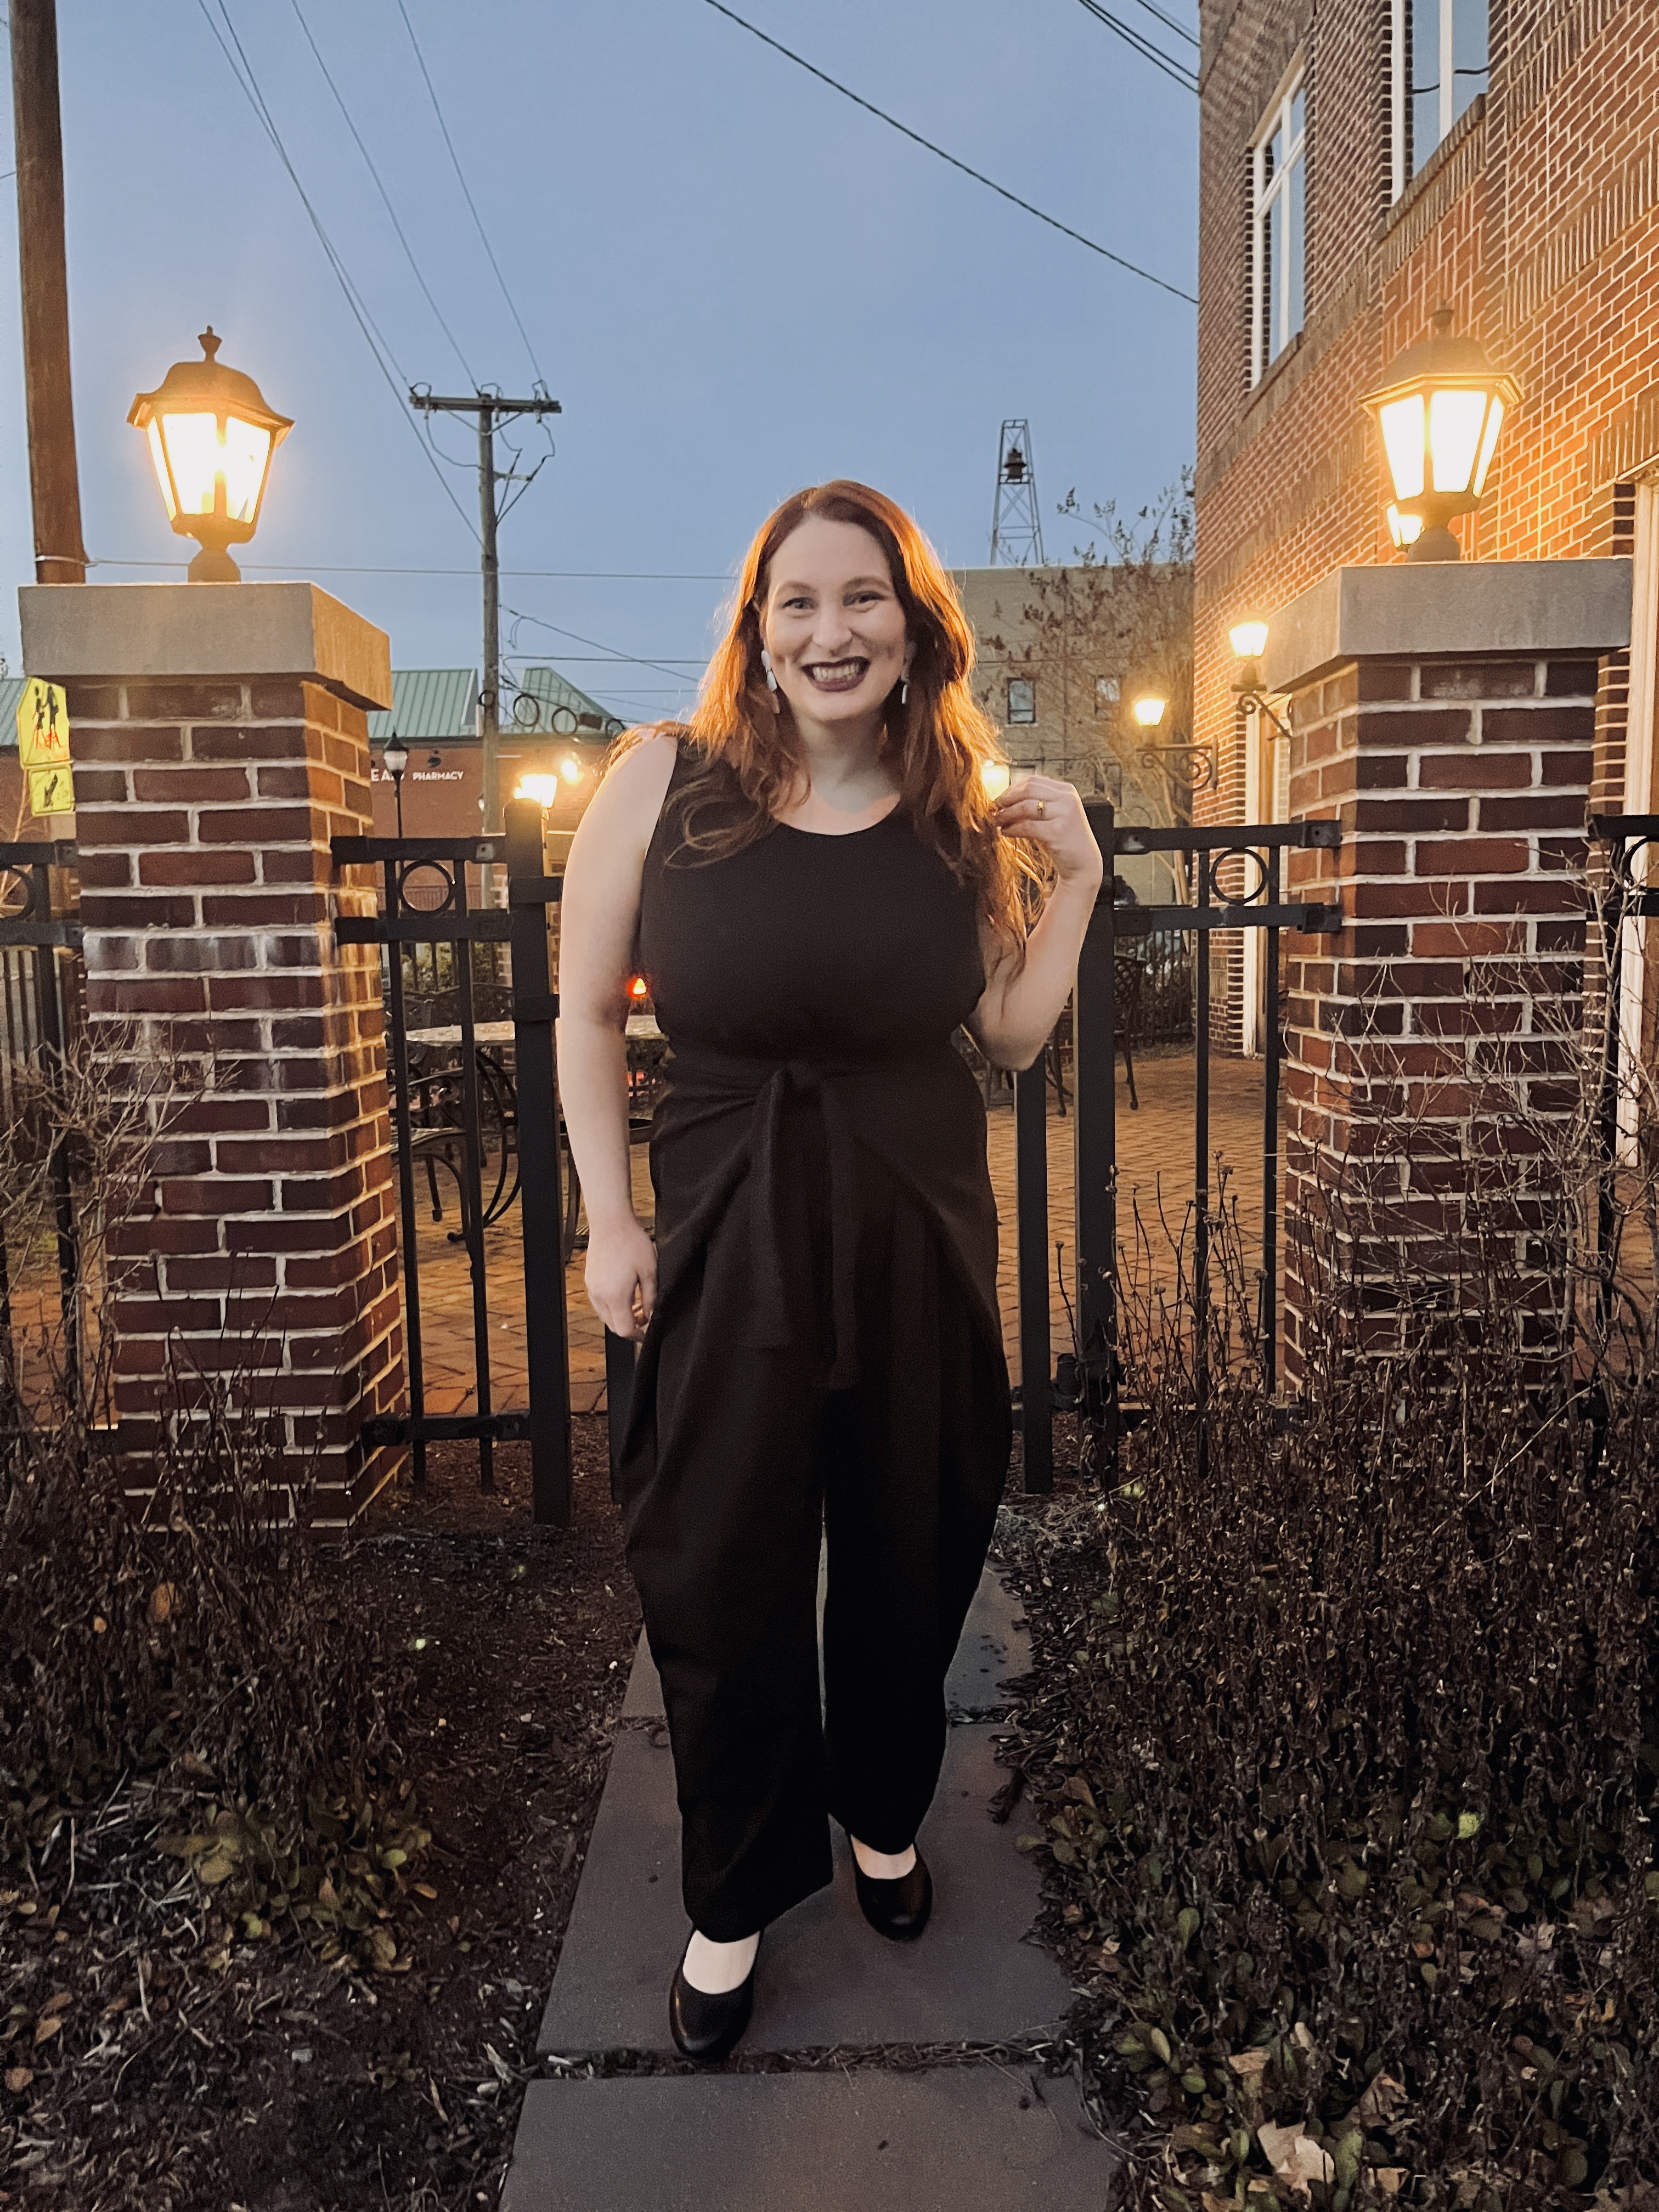
This pattern comes with a jumpsuit or dress option, but y’all know I can’t pass up a good jumpsuit! This giant full bust adjustment tutorial will work for either option.
getting started
Choosing a base size
If you’ve read my previous FBA posts, you can skip this step. If not, hang tight because this is important.
Start with your high bust measurement, measured braless.
Measuring the high bust without a bra captures as little breast tissue as possible, which gives us a more accurate look at your skeletal frame, which is really what we’re trying to measure. Again, the high bust measurement is a proxy for your skeletal frame.
Select your size based upon this high bust measurement. My naked high bust measures about 35.5″, so I chose to start with a base size 42.
how many inches to add?
Normally, on knit garments, I do some fancy math to come up with a percentage full bust adjustment. This is because I want to preserve the intended percentage of negative ease.
Well, despite being a knit garment, the Kielo is actually designed with positive ease, meaning the garment is slightly larger than the body wearing it. Thus, I treated it as a non-stretch garment, and the math was simple.
Simply take your full bust measurement and subtract from it the full bust measurement your base size is drafted for. For me, the size 42 is drafted for a 37.75″ bust, while my bust is 46″. Here’s my math:
46 – 37.75 = 8.25
For my own simplicity, so I wouldn’t have to be working in eighth inches, I rounded this up to 8.5, giving me a total of 4.25″ to add on each side.
Performing the FBA
Marking your apex and drawing lines
The Kielo has an apex marked on the pattern, but you want to ensure this apex matches your own. Some people do this after their FBA because they move their apex slightly during the FBA, but I don’t move my apex during my adjustment process, so I prefer to identify my apex at the beginning.
I measured from neck/shoulder point to my apex, and from center front to my apex on my body, and then I found that point on my Kielo pattern. My apex turned out to be several inches higher than the pattern’s apex.
Now, the most accurate way to move the apex is to cut out the apex area, physically move it, then smooth the side seams, as seen on this Cashmerette tutorial. But given the way the Kielo is designed and the amount of ease created by the “flaps” under the arms, I wasn’t too worried about fudging it, while I was worried that if I moved the apex the traditional way, the flaps that become the waist ties would end up weird. So again, I fudged it by simply marking my true apex on the pattern.
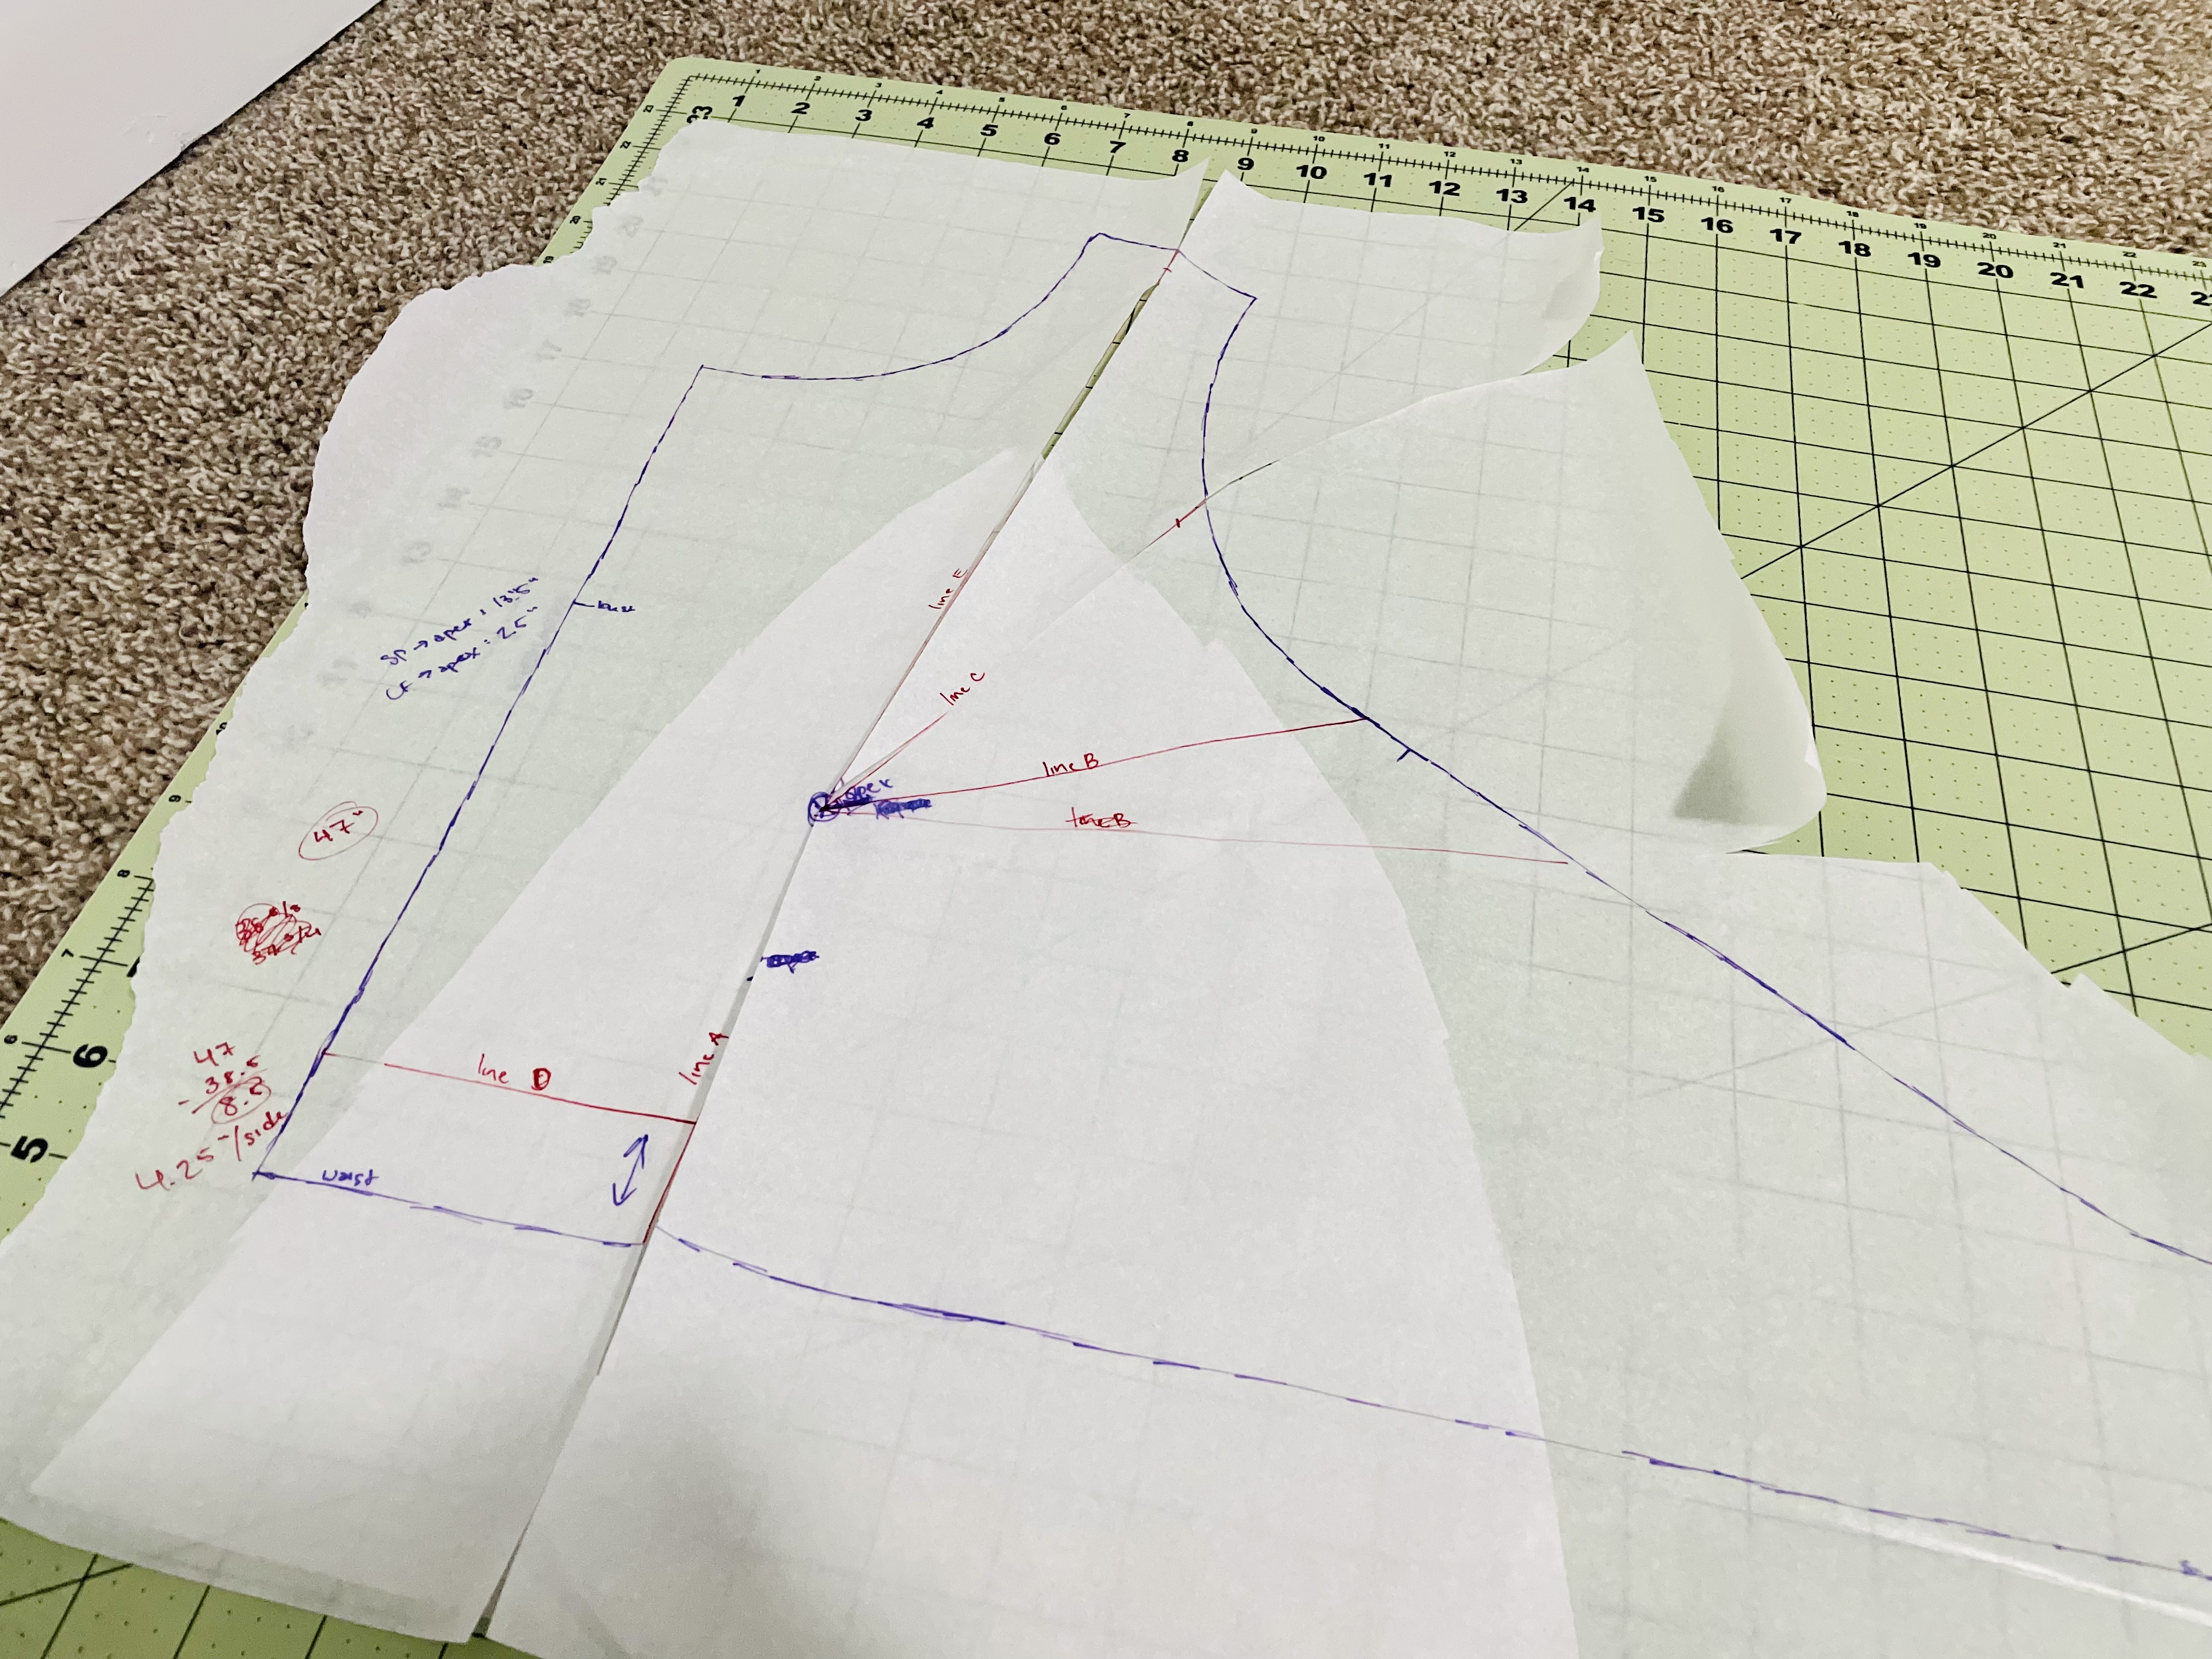
Once you’ve identified your apex, the next step should be familiar. We’re going to draw some lines, and we’re going to tackle this as a Y FBA:
- Line A from apex to the hem, parallel to the grainline
- Line B from apex to the lower armscye; on the Kielo, we’re going to create an armscye dart, so this must be above the armscye notch — I originally drew this line too low, below the armscye notch, and had to move it up to avoid distorting the pattern. Please disregard the scribbled out line B
- Line C from apex to 1/3 to 1/2 way up the armscye
- Line D from Line A to the other side
- Line E from apex to midway through the shoulder seam
If you want more detail on where to draw these lines, you can reference this post, which goes over the same lines, step by step!
cutting and spreading the lines
We’re almost ready to cut, but first we need to mark our seam allowance at the armscye on Lines B and C and the shoulder point on Line E. I also like to reinforce all of these points, as well as the apex, with some tape.
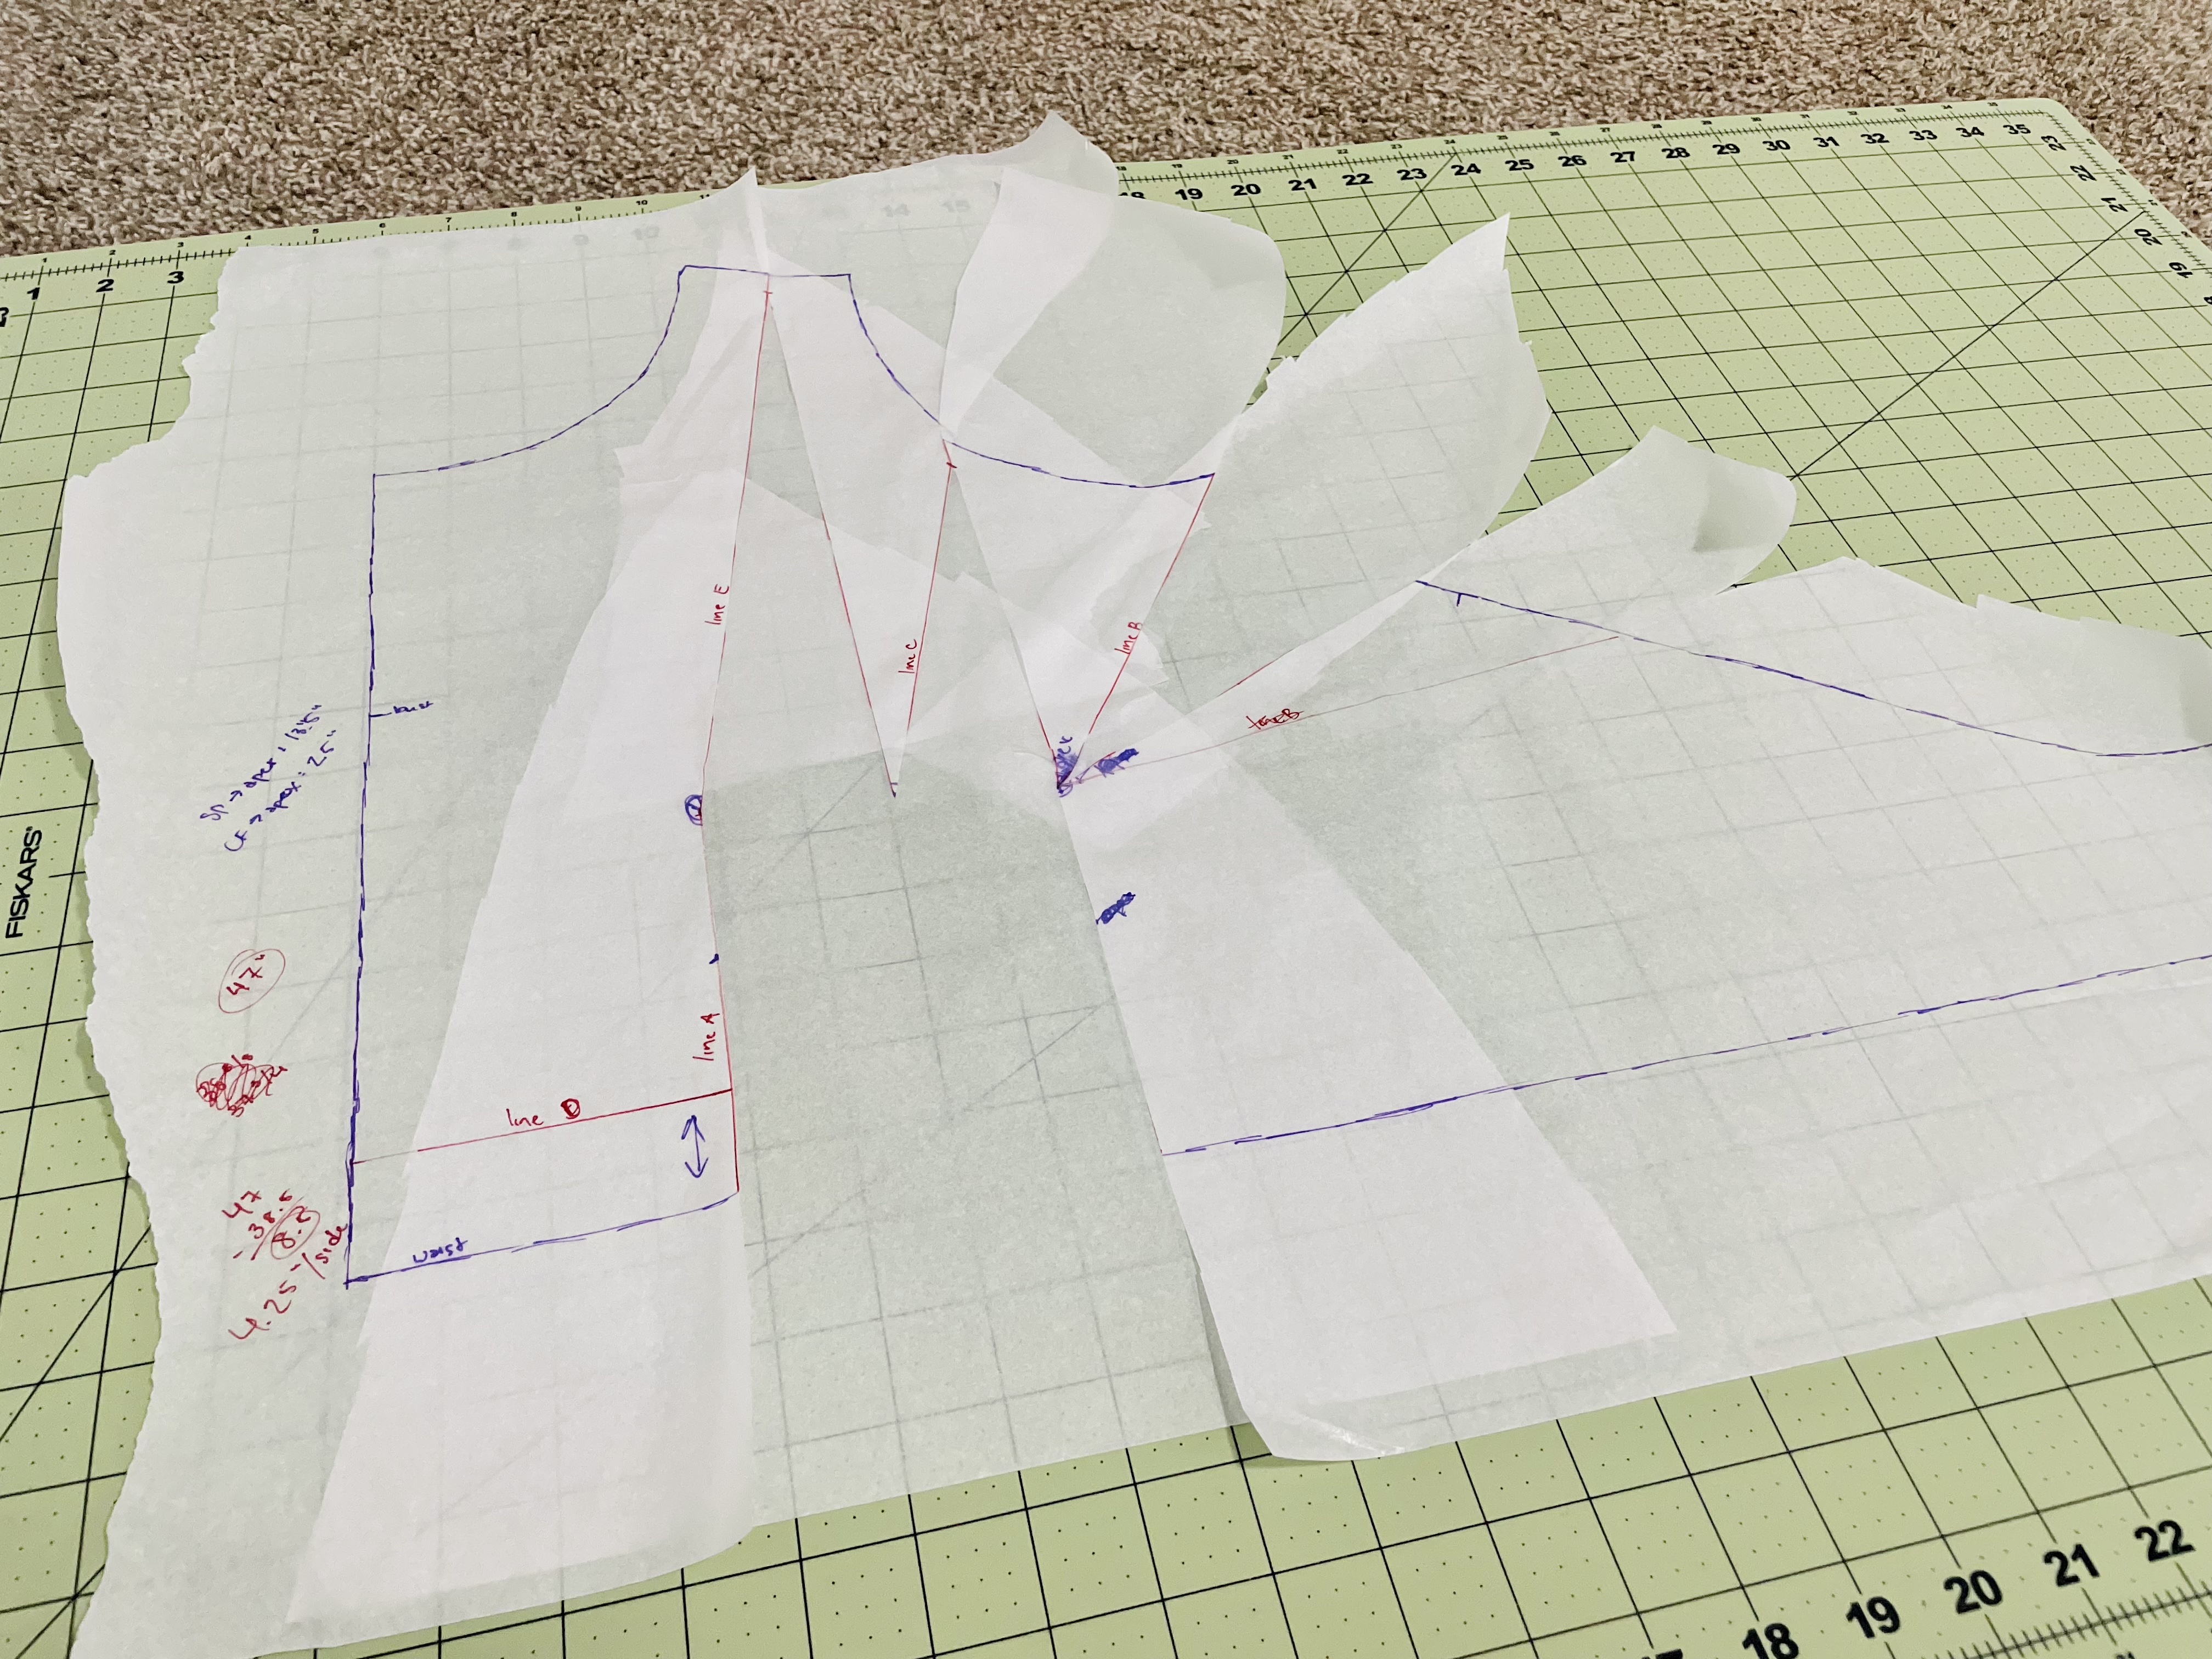
Now, cut along Line A from the hem to the apex, then along Line C and Line E from the apex to — but not through — the seam allowance markings. Then, cut along Line B from the armscye to but not through the apex. Finally, cut along Line C and Line E from the armscye and shoulder seam, respectively, to but not through the seam allowance marking.
Our next step is to add those inches that we determined earlier. If you recall, I determined I needed to add 8.5″ to the full bust of my pattern, which means I need to add 4.25″ per side.
Grab a scrap piece of paper, and draw two straight lines, up and down, the same number of inches apart as you need to add per side — so 4.25″ for me.
Tape down your pattern piece, lining up each side of your cut Line A with the lines on this scrap paper. When spreading your pattern, you want to pull down and out, so that the upper part of your pattern remains flat.
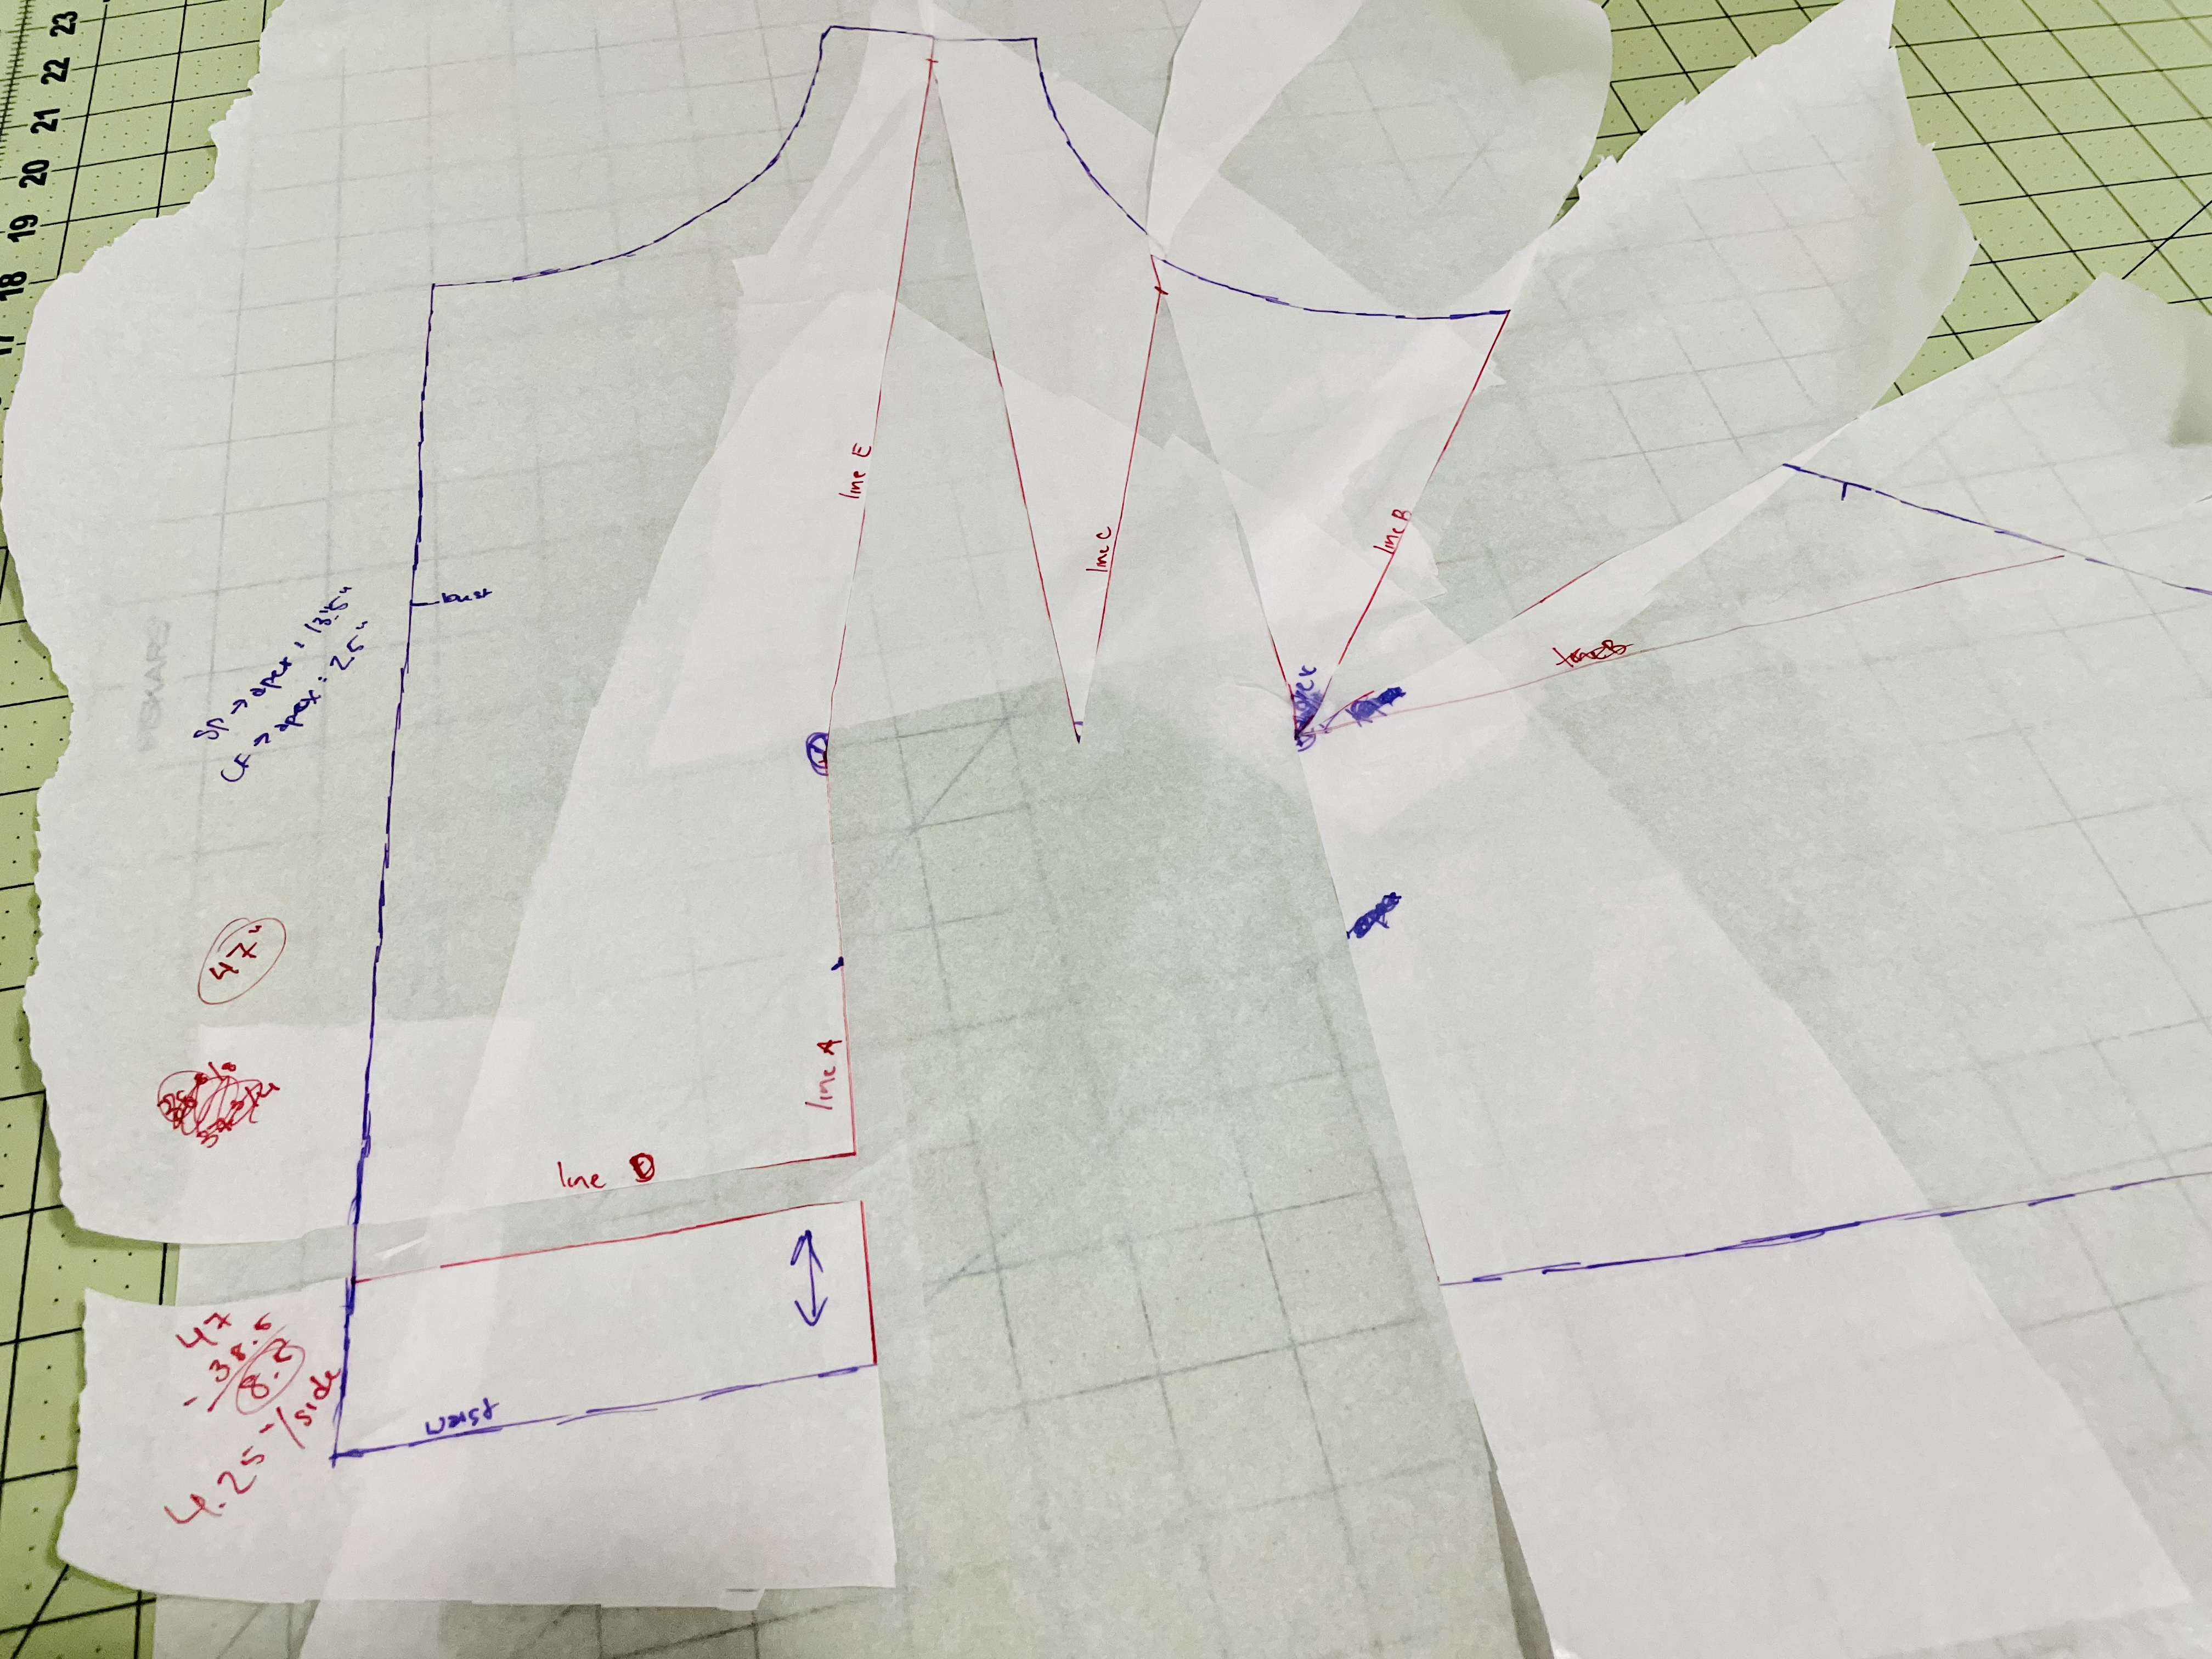
You’ll notice that this creates an uneven hem. To fix this, we’ll cut along Line D and pull that lower corner down to be even with the other side of our pattern, like so:
Redraw your foldline and true up your hem.
Drawing your new dart
Since we did such a large adjustment, we’re going to keep the dart we created. We need to determine where our dart legs are going to go.
I start by finding the center point of my dart by measuring the total width of the dart and marking the middle.
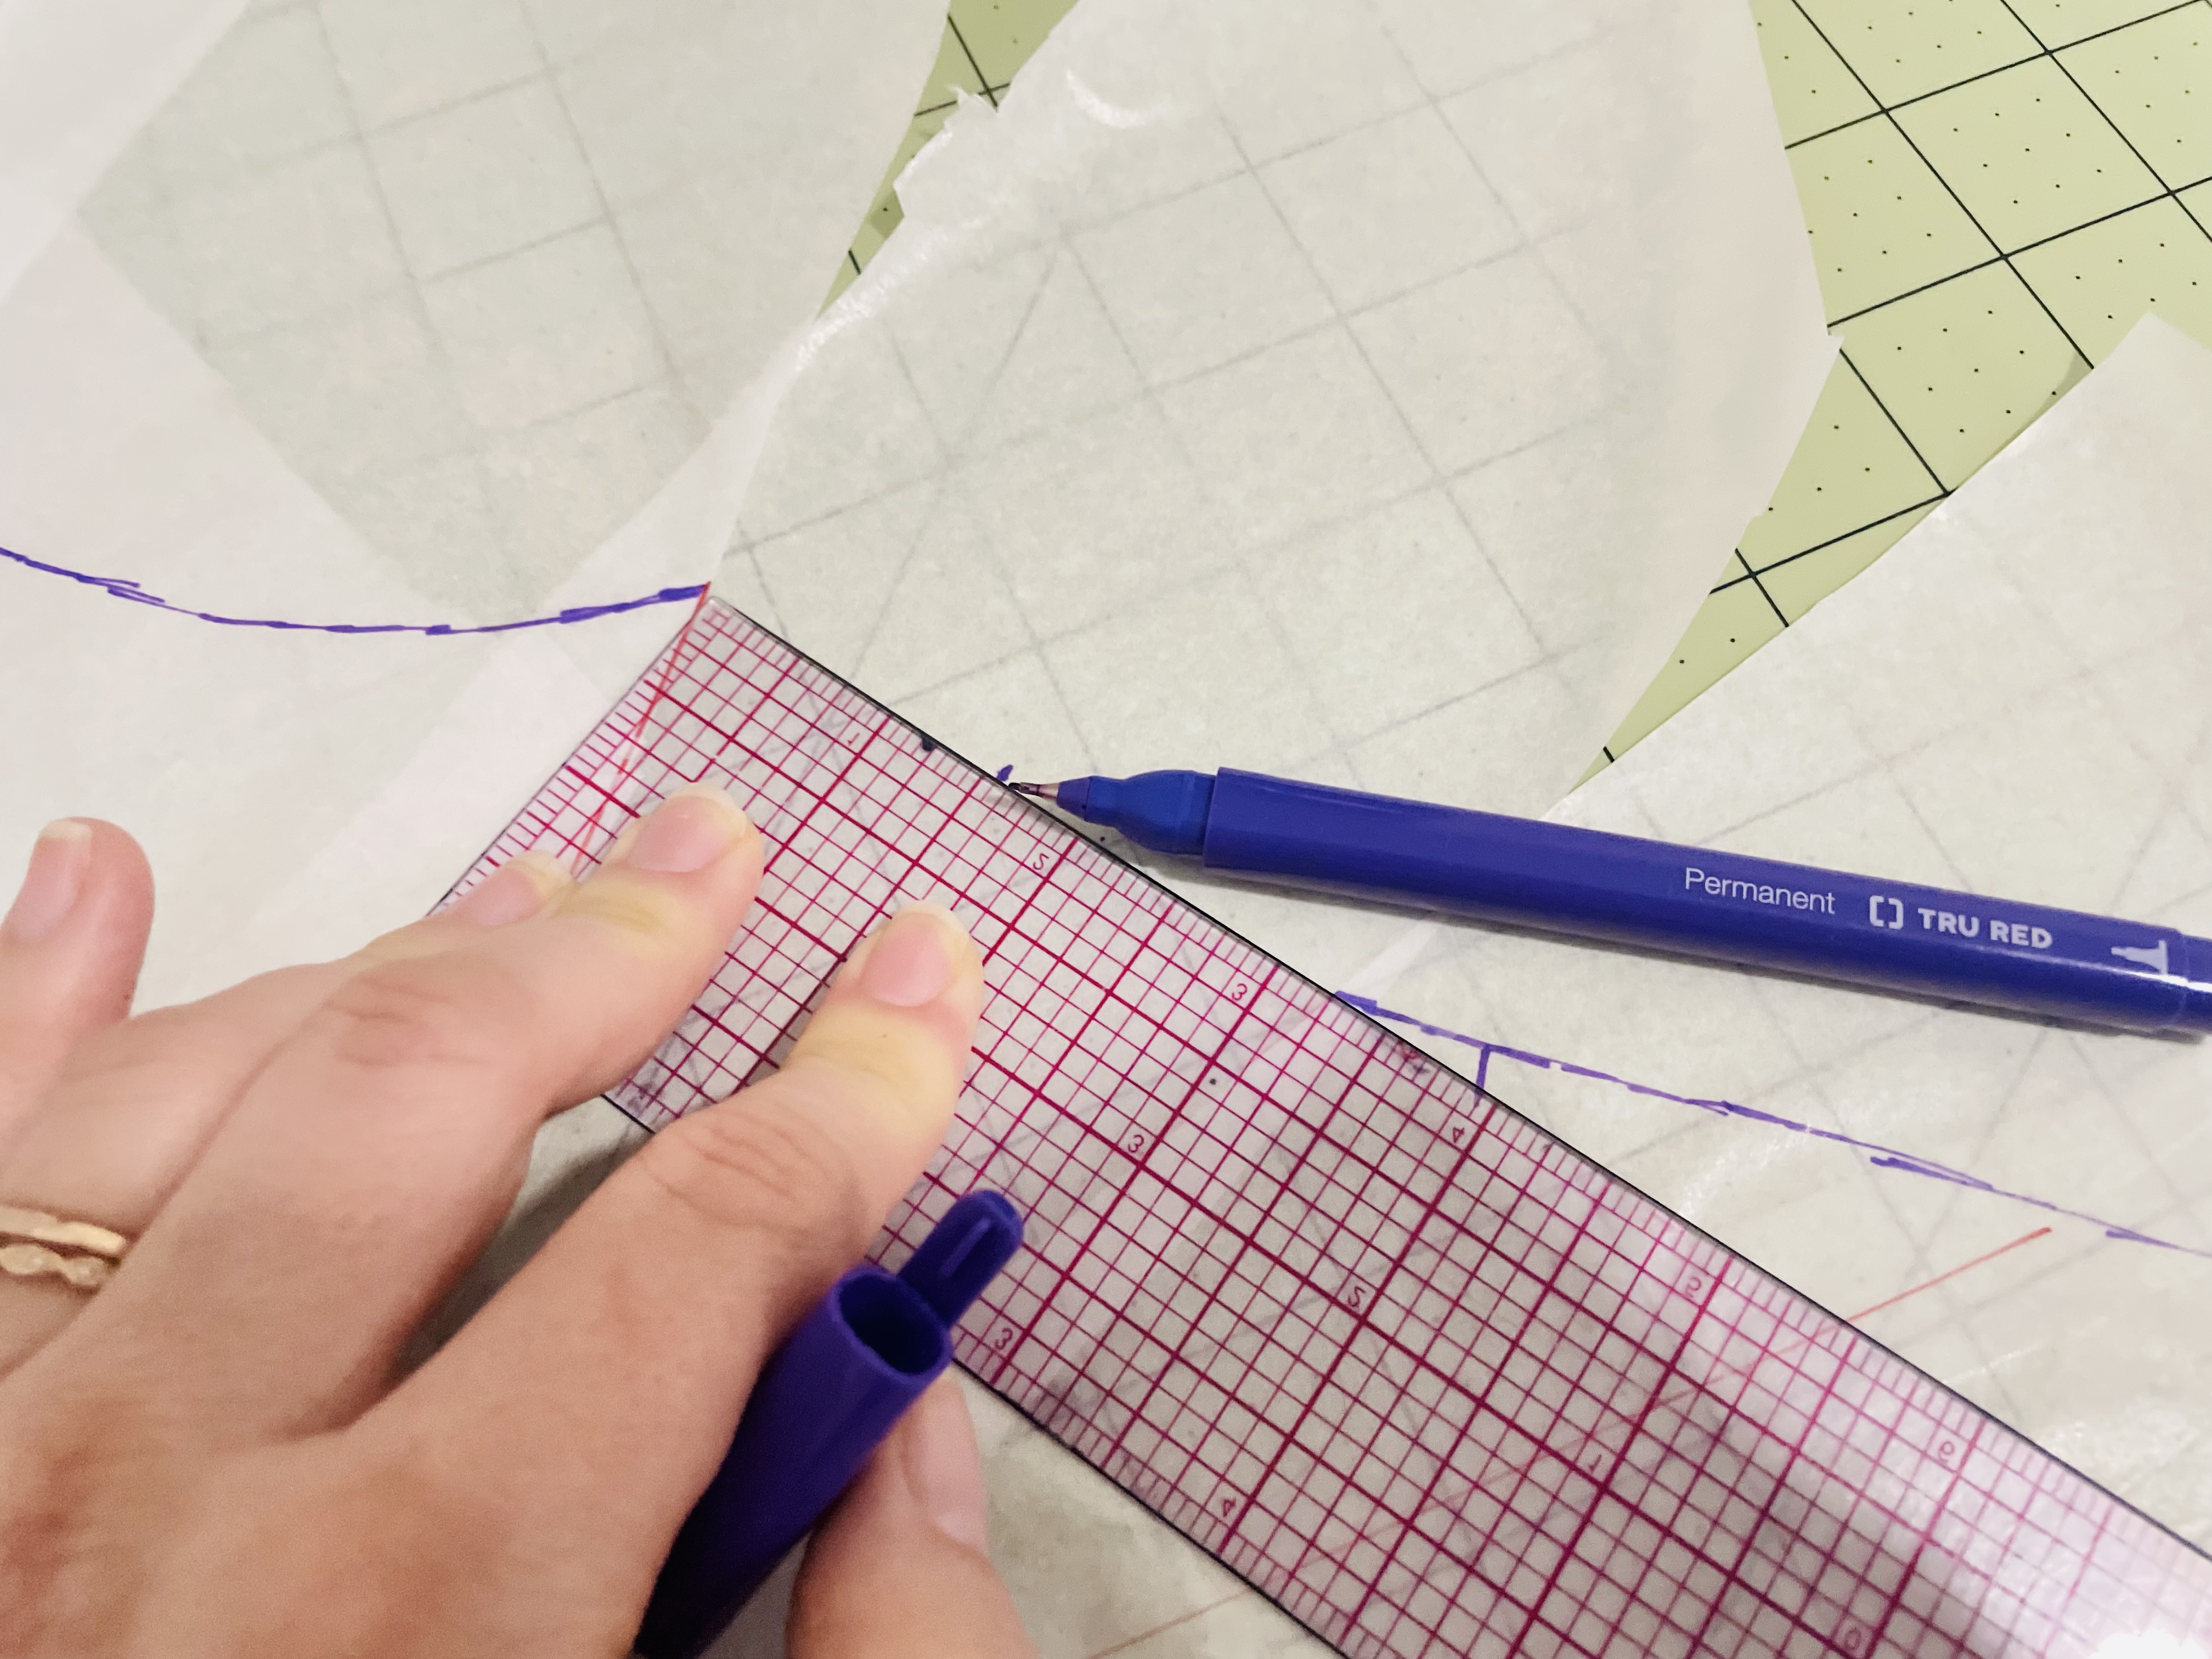
Now, draw a line from this center mark on the dart to the apex.
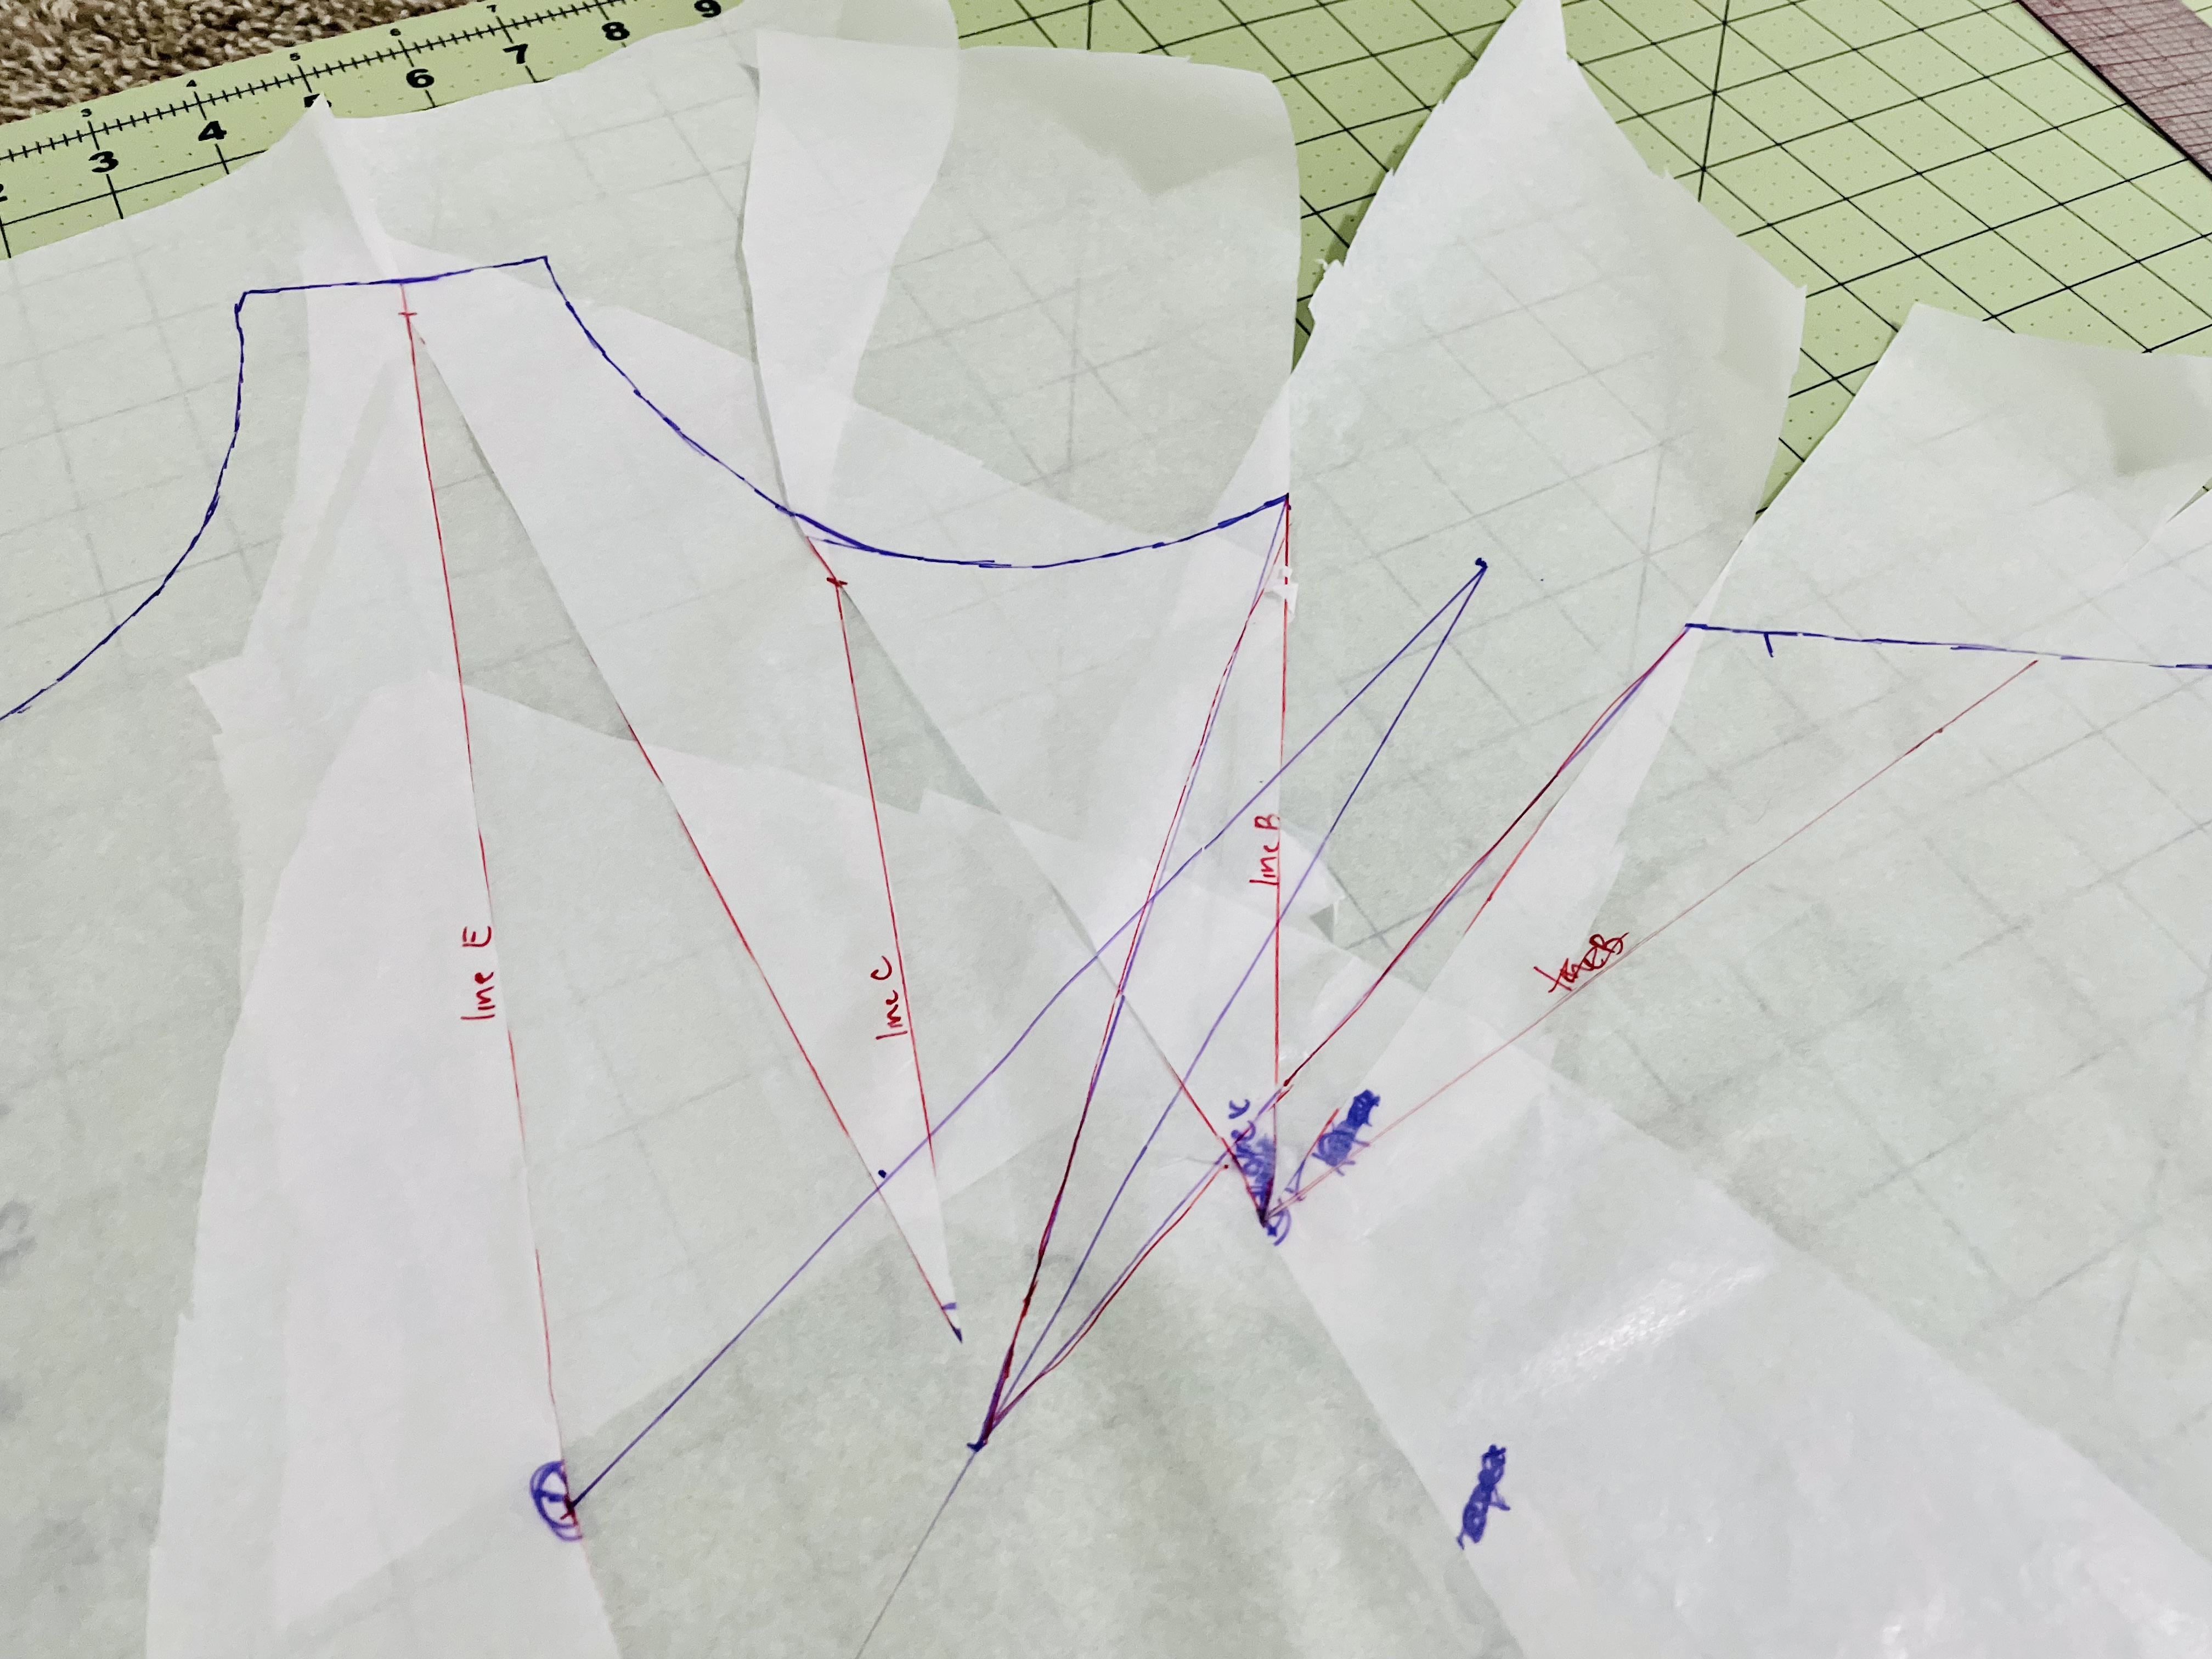
(As you can see in this picture, I did this whole process pointing to the wrong (original) apex at first (mom brain!) and I had to re-do it pointing to the correct (higher) apex. Just do it to your correct apex!)
You’re now going to mark a point on this line a certain number of inches from your apex for your dart vanishing point, depending on your garment cups size. Here’s my rule of thumb to start, but everyone has their preferences about vanishing points, so go with what you like!
| I+ garment cup | 9″+ (22.85 cm+) full/high bust difference | 2.5″ (6.35 cm) |
| G-H garment cup | 7-8″ (17.8-20.3 cm) full/high bust difference | 2″ (5 cm) |
| DD/E-F garment cup | 5-6″ (12.7-15.2 cm) full/high bust difference | 1.5″ (3.8 cm) |
| D garment cup or smaller | 4″ or less (10.2 cm) full/high bust difference | 1″ (2.5 cm) |
So I made my mark 2.5″ back from the apex. This will be my vanishing point, or where the dart will actually end. You usually don’t want the dart ending too close to your apex, because this will make your bust look verrrrry pointy. (If pointy is the look you’re going for, then make your vanishing point closer to your apex!)
Now, you’re just going to connect this vanishing point to your dart leg ends. This is your finished dart!
Truing the Armscye Curve
Your armscye will look wonky at this point, so we need to fold our dart as if it’s been sewn. I like to have my bulk go upward versus downward, as most patterns call for, as I find this results in a smoother look for larger cup sizes. But the direction in which you fold your dart is up to you.
We’ve essentially created an armscye dart, so use your French curve or eyeball a nice curved armscye.

During this step, you’ll also want to smooth the curve along your armscye at
reducing the waist and truing lines
I added 4.25″ to the waist while I was adding width to my bust, so it’s necessary to go back and reduce this back down. I didn’t actually need to reduce the full 4.25″ per side, however, because I actually needed a size 46 waist — two sizes bigger than my upper bust base size. So I really only needed to reduce my waist by 5.5″ total, so 2.25″ per side.
I did this by taking my pant pattern, which had been cut to a size 46, and lining it up to the bodice pattern at the center front. This showed me where I needed the curve to go. Make sure to also move your notch to your new side seam.

Altering the front facing
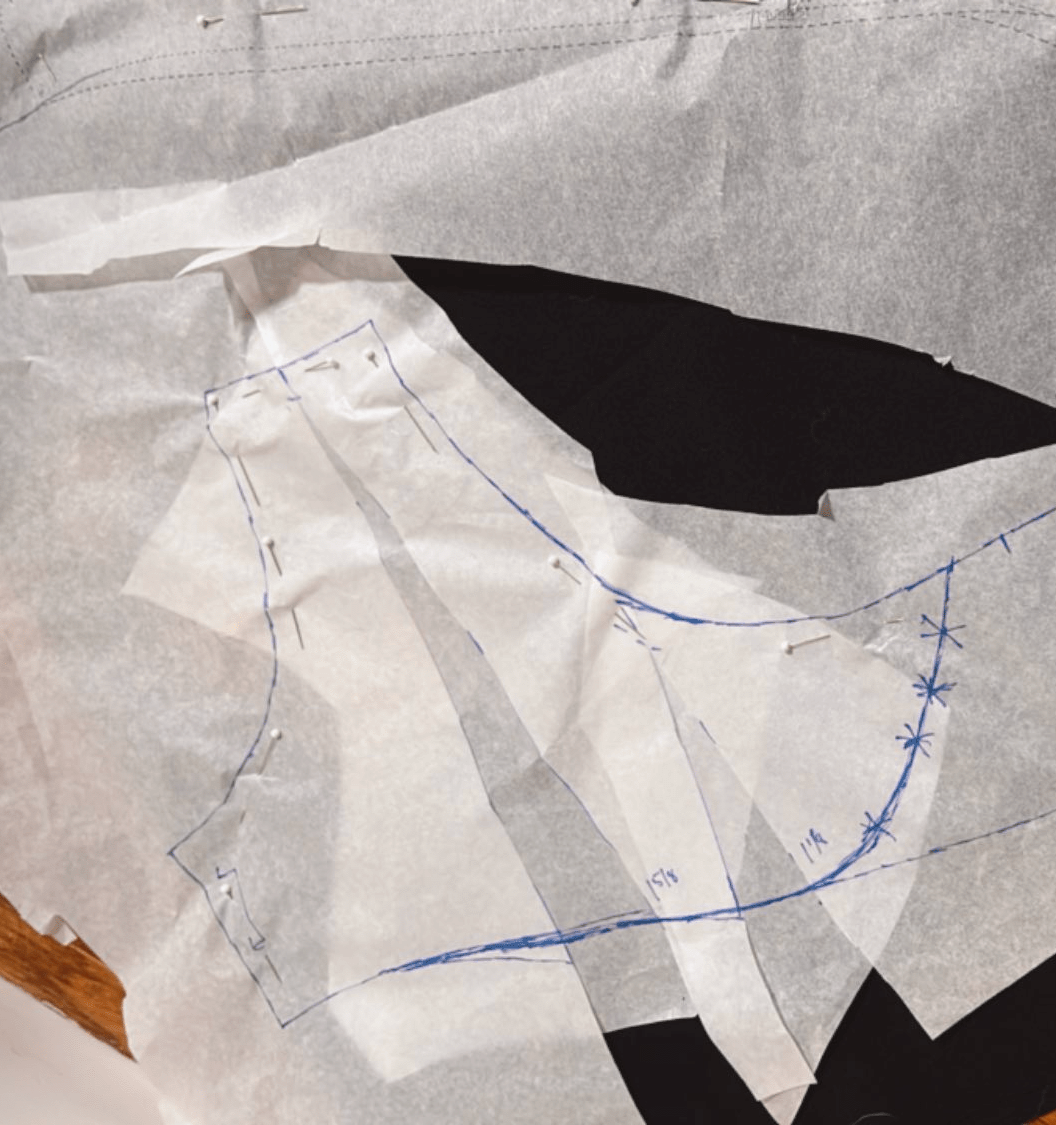
The last step is to alter the facing to account for the additional space that was added along lines E and C. (The added space along line B is accounted for in the dart.)
I did this by placing my facing pattern over my bodice pattern and slashing and spreading along the same lines. You can see that I toyed with the idea of shortening the width of the facing to end before the armscye dart, but ultimately decided not to do this (love those X’s along drawn lines lol).
Sewing it up!
Now, you can attach your bodice to your front pant or skirt piece and cut out your pattern normally! You’ll then begin the sewing process by sewing the darts before following the pattern instructions for the remainder of the construction.
The only difference in construction you may face is that the side seam front may need to be eased to the side seam back, since it will likely be slightly longer from our reducing the side seam. (Remember the hypotenuse is always longer than the other sides of the triangle!) Since the Kielo calls for stretch fabric, this shouldn’t be too tough.


Wanda
February 28, 2023It is very difficult to see 5he dart in the black jumpsuit. Do you have a photo in a fabric where the effect can be seen,.please?
sewbustycommunity
February 28, 2023I didn’t sew this up in any other fabric, so I don’t have pics of the dart on another fabric, but here are some close ups where I think the dart is pretty clear https://imgur.com/a/yfoig2j