Community Blog | Fitting Fancy Fronts: Full Bust Adjustment for Midriff + Princess Seam Top – Tia Dress and Peplum with Karey
Sew Busty has been doing an excellent introductory series on getting started on sewing for big busts, including introduction to doing Full Bust Adjustments (FBAs). While doing my two posts on doing an FBA on a wrap dress or top for Sew Busty, it occurred to me that because being able to do an FBA for various styles of garments is such an essential skill for busty sewers, it would be good for more experienced sewers who want to extend themselves, to do a series of posts on doing FBAs for less common or more challenging styles, for which standard FBAs won’t work.
Also, while Sew Busty has developed an extensive database of designers who provide patterns for a range of cup sizes, only a handful go up to my cup size. While of those that do have larger cup sizes, some only provide them for larger base sizes. In order to have a full choice of styles to sew, I had to develop skills in doing FBAs. Other members of the Sew Busty community are in the same boat, and learning to do a wider variety of FBAs will expand your sewing options.
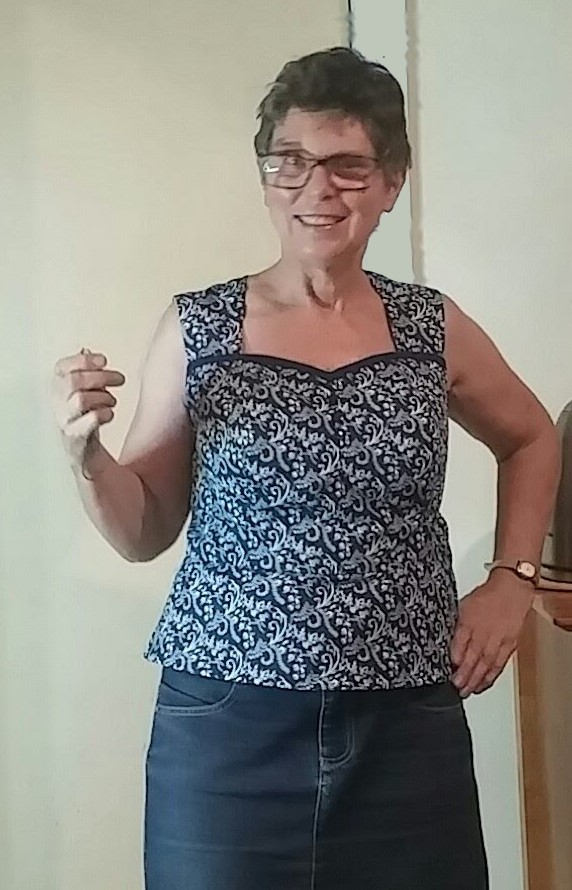
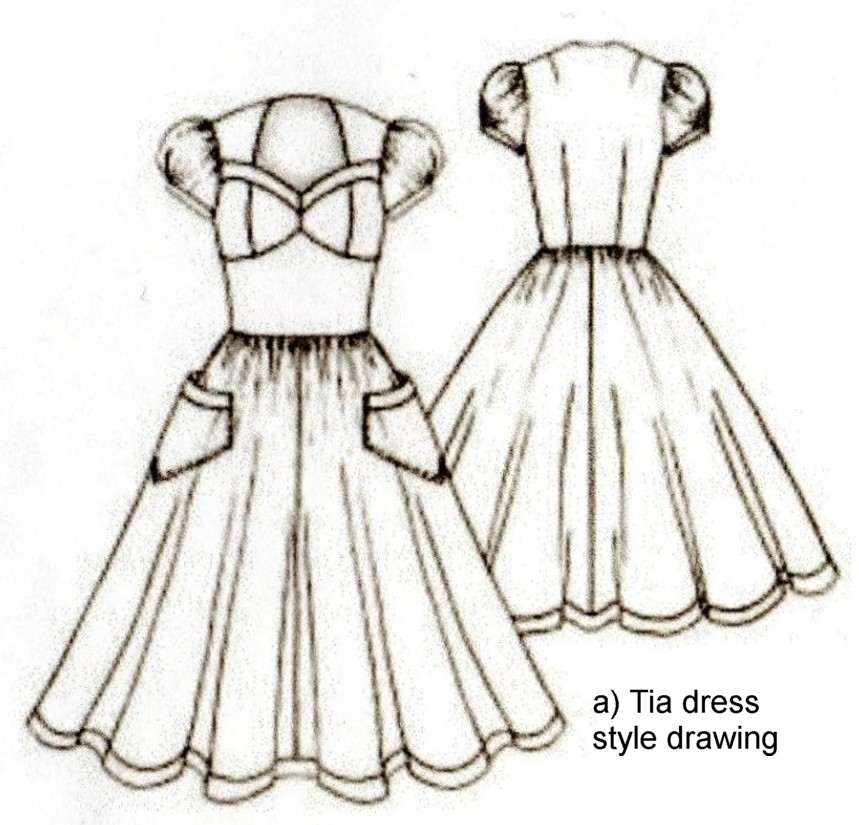
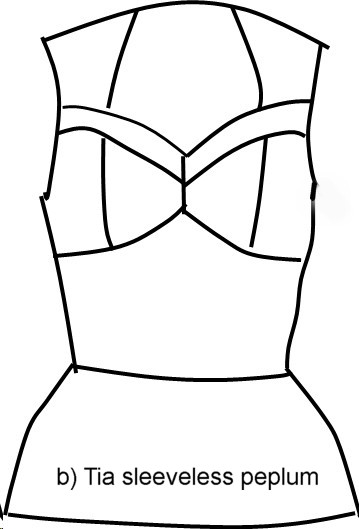
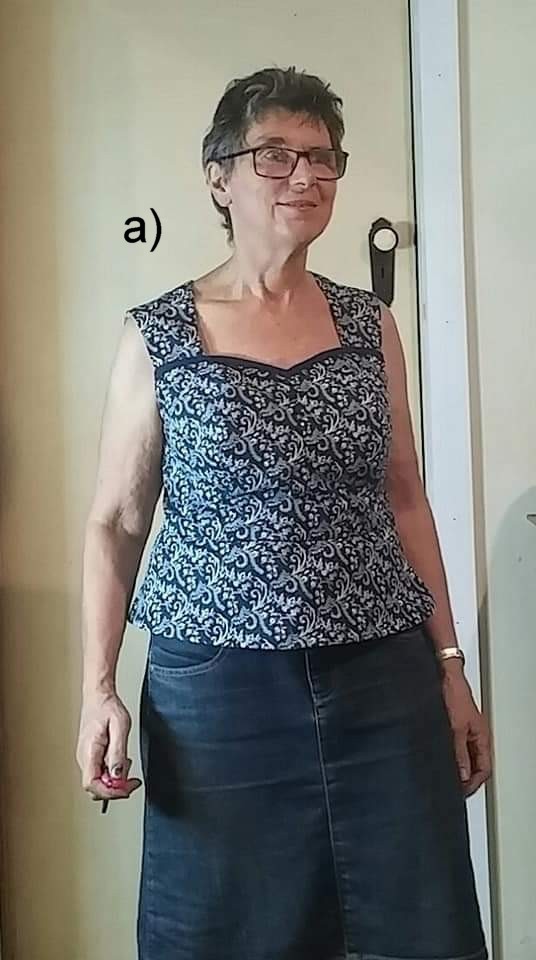
This post includes the details of the tutorial for the FBA Laura Nash, Sew Chic Patterns, provided for the vintage inspired LN1312 Tia Dress (Figure 2a) in her Craftsy Class: Sew Vintage: The Flirty Day Dress. This dress has a princess seam bust section, and a separate midriff section attached to a skirt. To save fabric while testing the fit, I hacked the dress into a sleeveless peplum top – Figure 2b). I provide a simple skirt hack for drafting your own peplum below.
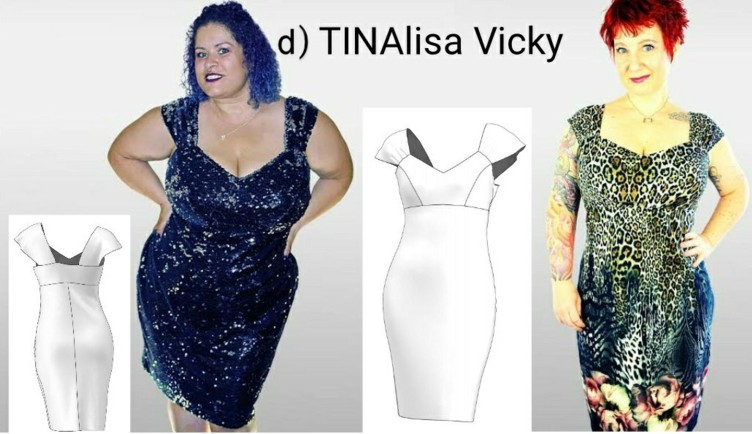
While this tutorial was developed specifically for the Tia dress, there are many dresses with similar bodices. The recently released TINAlisa jersey Vicky dress (Figure 2d) does not have the midriff section, but does have the princess seam bust section. This is one of the first designs TINAlisa has released with a large bust front, but the designer, Martina Blasius, also always includes an FBA instructions for the specific design (see Note* below), and all designs include seamlines that make large bust fitting easier.
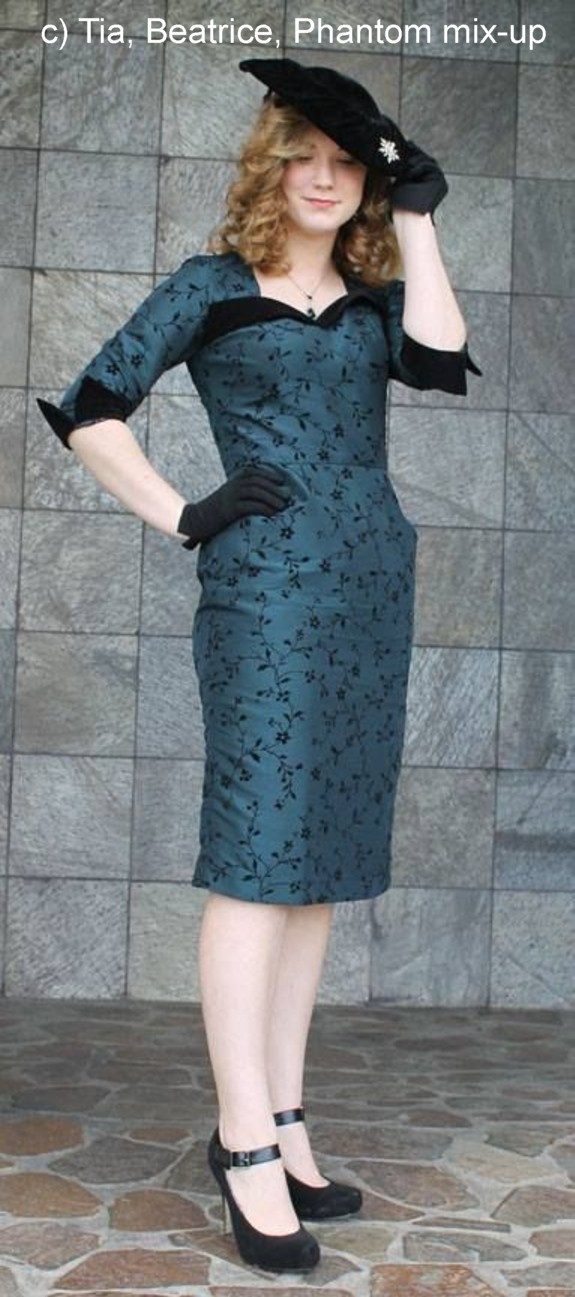
Before I retired, I had planned to copy a Mix-It-Up hack by one of the Craftsy participants, which combined three of Sew Chic’s designs: the Tia bodice, the Beatrice sleeve and skirt, and the Phantom sleeve cuff (shown in Figure 2c)), but I don’t often have the need for such formal dresses anymore. Many other patterns have midriff panels, which may need to be adjusted if you do an FBA, and the Tia FBA instructions can also be used for any princess seam FBA. I think it is a much simpler adjustment than the one most tutorials provide.
Figure 2: Style examples of princess seam bust with midriff panel: a) Tia dress; b) Tia Midriff; c) Tia, Beatrice, & Phantom mix-up; e) TINAlisa Vicky
SewBusty has tutorials on the two main ways of determining the cup size you need, one is primarily used for sewing clothes, and the other used to be the main way to measure for bra cups, but some pattern companies mix it up, including Cashmerette.
While the Tia pattern doesn’t include cup sizes, the FBA tutorial specific to this style of bodice provides instructions for (sewing cup) A (cup reduction) to DD cup – calculated by subtracting high bust (HB) measurement from full bust (FB) measurement. Cashmerette, on the other hand. uses bra cup sizes.

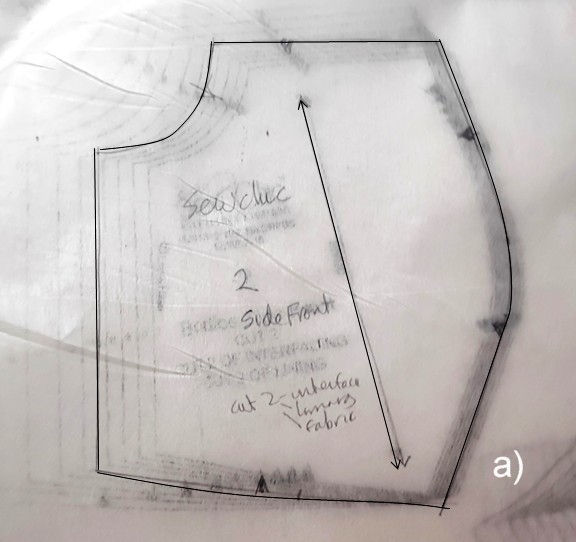
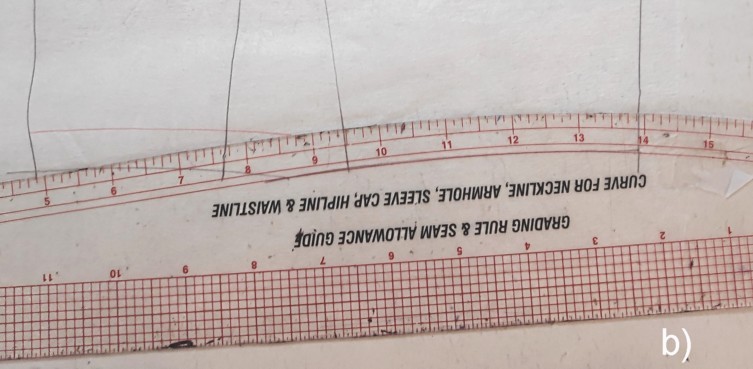
Because the Craftsy class materials didn’t go up to my cup size, Laura of Sew Chic provided details for the adjustments I needed, and information for going up additional cup sizes. Unfortunately, that information was provided in the questions feature on a platform that got closed and sold on. So while the class is still available on the new platform, and the Sew Chic FBA tutorial is also available on their website, the information about doing a bigger FBA is only in my class notes, hence my wanting to share it here. Before making any adjustments to a pattern, follow the steps in Figures 4a) and b), and make changes to traced pattern, not original.
Figure 4: a) trace pattern pieces; and, b) mark every seam allowances (5/8″ for Tia) on each piece. I trace onto non-woven tracing Vilene, which is partly transparent, cheap, strong, flexible, and drapes like fabric, so is excellent for tissue fitting and adjusting the pattern..
*Note: all pattern adjustments are made from sewing lines not from cutting lines, hence the necessity to mark all the seam allowances (SA). It also allows for accurate pinning for tissue fitting.
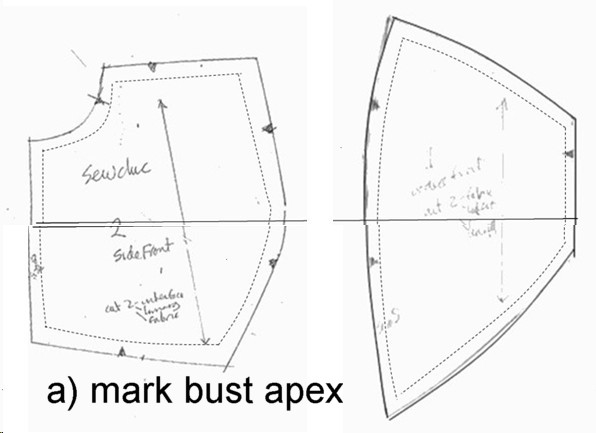
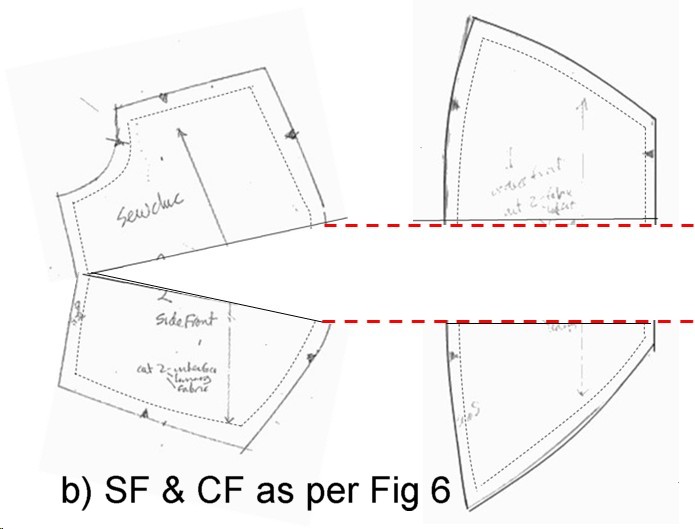
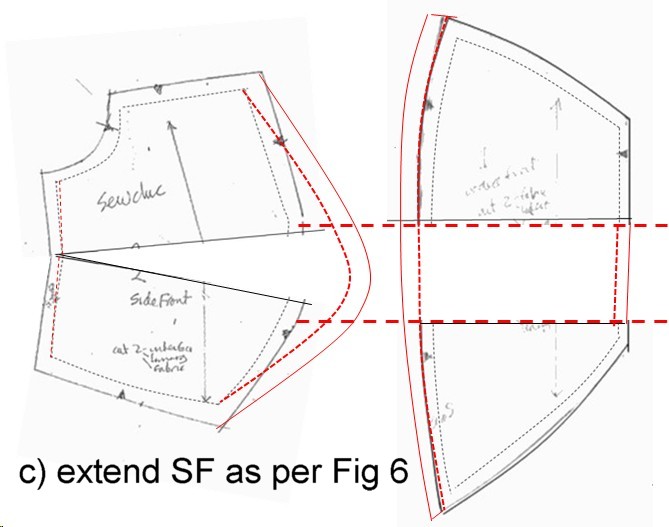
Figure 5 shows the steps for making the FBA.
a) Mark a line through the bust apex at the point of greatest width on the pattern (a). You will need to adjust actual bust apex, and possibly find tune extension curve in tissue fit and muslin.
b) Spread the Side Front (SF), hinging at the side seam sewing line, and opening in a wedge at the bust apex, as per the amount specified in column 2 in Figure 6. Spread the Centre Front (CF) by the amount specified in column 4 in Figure 6. Note that as cup size increases, so does the amount the CF is spread increases by more than the SF increases per cup size.
c) Extend the curve of the apex on the SF by the amount specified in column 3 in Figure 6.
Figure 5: FBA illustrations
Figure 6 provides the amounts of spread and extending for SF and CF for a woven dress. The instructions for the FBA for the TINAlisa Vicky dress are almost identical, except amount of spread is for knit dress. See Note* below for details.
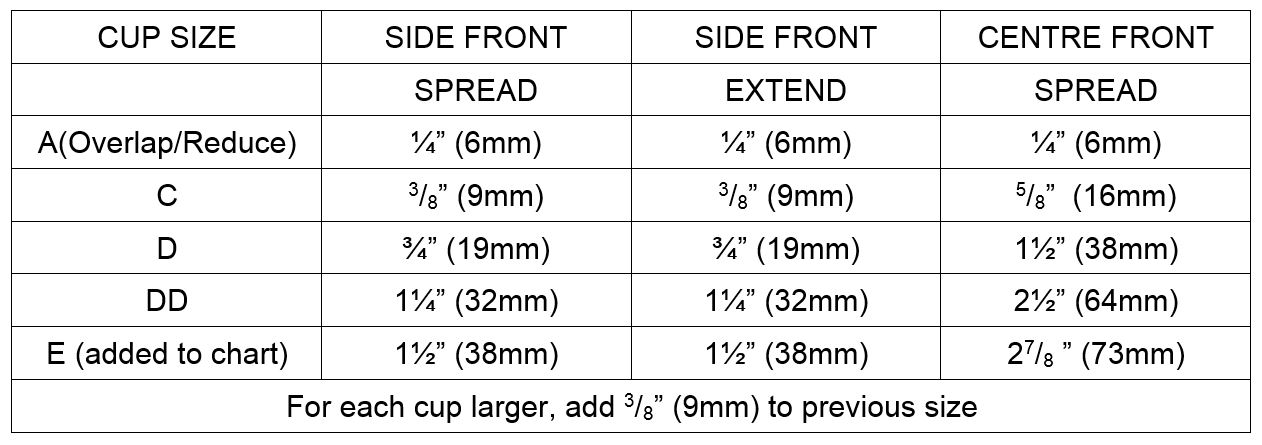
*Note: the amount the CF is spread/reduced is the same for the A cup, but for C to E the amount the CF is spread increases with each size. There is no B cup on the chart because the pattern was drafted for B cup.
Although the chart does not have any extension on the CF on the seam over the apex, I had to extend my CF apex seam by about the width of the seam allowance. This is just one of the things that tends not to extrapolate smoothly as you go beyond a DD cup. I have my suspicions that this is one of the reasons designers limit their cup sizes to DD because bigger than that creates distinct design and fitting issues. This is just one of the reasons for tissue fitting and making a muslin if you have to adjust for larger cup sizes, as we are getting in the realm of ‘honking great darts’.
Finally, you need to ‘walk’ the apex seamline of the SF along the apex seam of the CF. Threads Magazine has an excellent tutorial, if you don’t know how to do this, including a video. See ‘How to Walk the Seamline’. This ensures the princess seam on SF and CF match. If they are not the same size, adjust how much you spread the CF, then walk again to recheck and mark notches on both pieces.
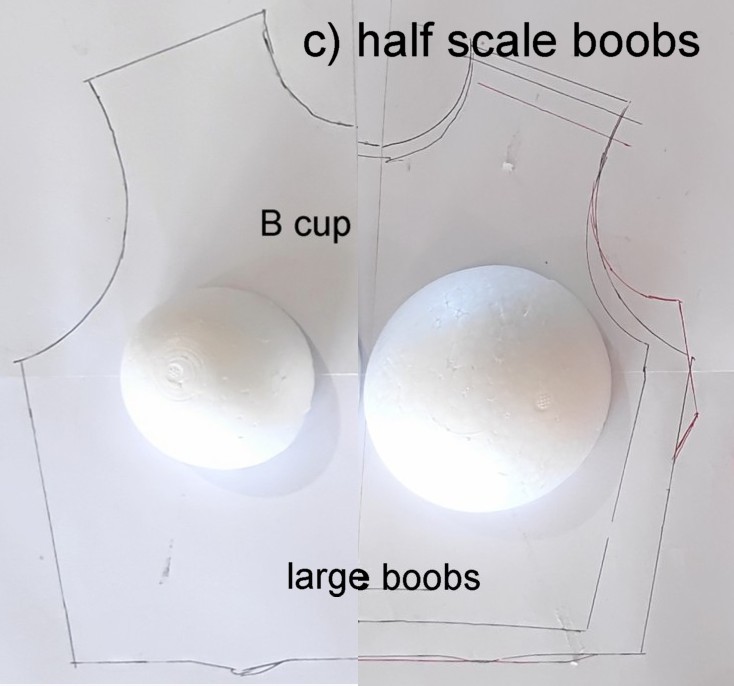
Before I show you my fitting steps, I want to show you the scale test I did using my scale b-cup and FBA bodices, fitted over scale boobs. I found this test allowed me to distinguish the fitting adjustments that were specific to doing an FBA on this bodice, and additional adjustments due to specificity of my particular body proportions, separately from those due to my cup size.
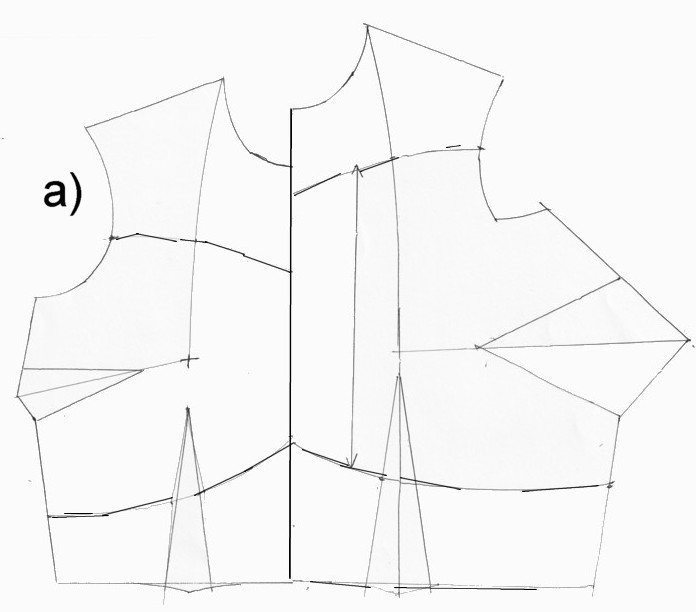
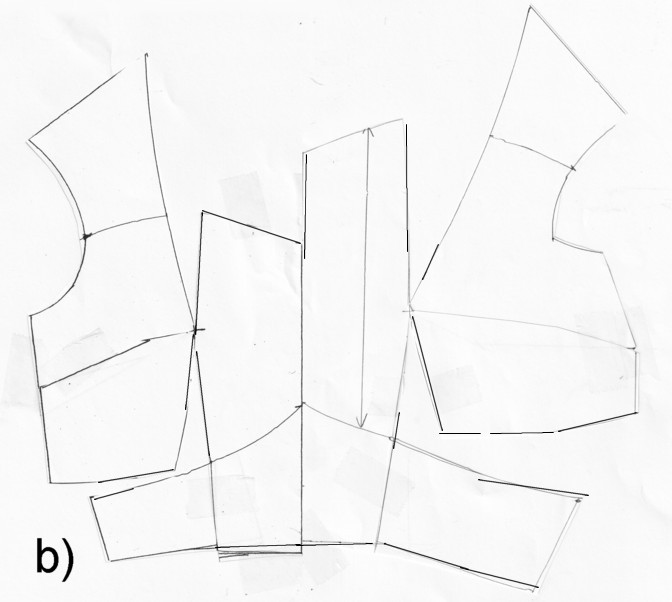
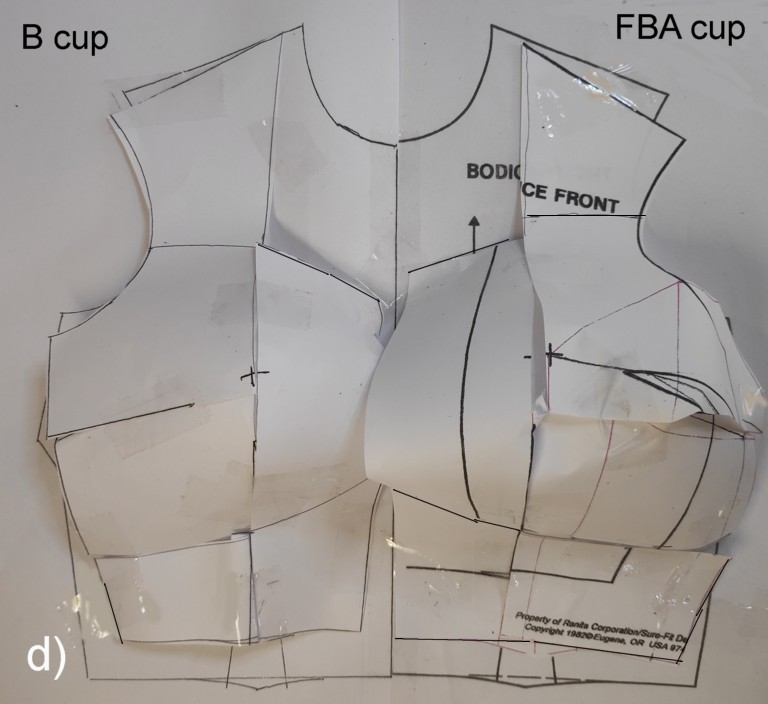
Figure 7 shows how a facsimile of the Tia bodice (b) (namely princess seam and midriff section) can be obtained from a sloper transformation (a). c) juxtaposes my scale B-cup and FBA boobs, while d) shows the scale ‘Tia’ bodice looks folded over the scale boobs. This order reflects narrative convenience rather than construction order. I actually placed my unmarked B-cup and FBA slopers over the scale boobs in order to mark the UB and above bust seam locations, and then marked up and cut the seam lines.
Figure 7: drafting facsimile of Tia bodice from B-cup and FBA scale bodice slopers
a) bodice cup lines marked on B-cup sloper (left) & FBA sloper (right) b) Side & midriff darts closed, UB and princess seams opened & side darts transferred to them. c) scale B-cup boobs (left), FBA boobs (right) d) cut out B-cup & FBA bodice halves (from b) taped and placed over scale boobs in c).
What I discovered was that, apart from the FBA, adjustments I made to the pattern during tissue fit and muslin were not directly attributable to the FBA. Although some may be common for those needing an FBA. For example, I deliberately kept the apex of the large half scale boob at the same height, in order to minimise the number of variables I changed. But in terms of real boobs, while there are some high sitting large ones, they are more inclined to sit lower than smaller boobs, as gravity works its magic.
So although 7d) shows the height of the midriff the same for both B-cup and large boobs, that is more a product of the test set up design, than based on any reflection of reality.
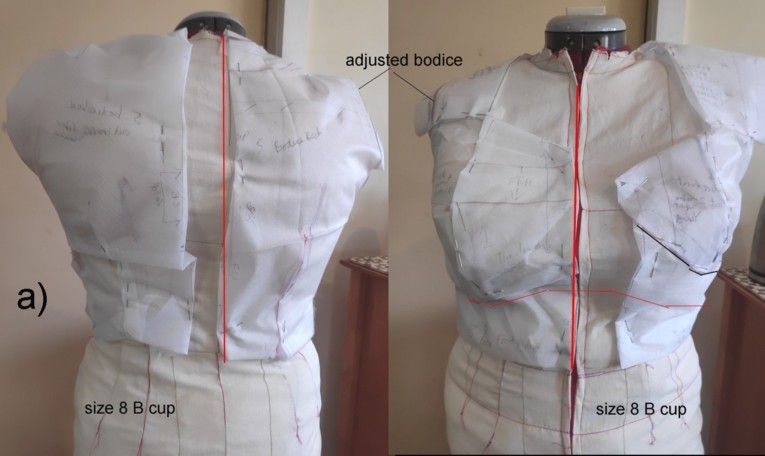
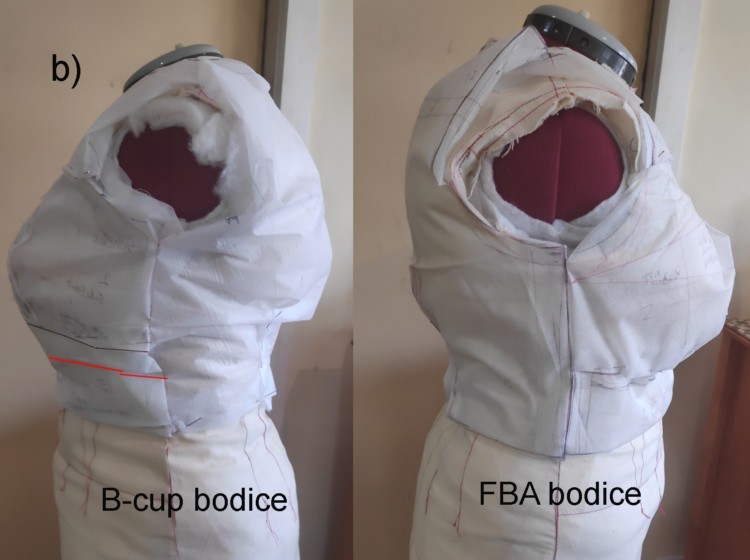
Figure 8: tissue fit comparing size 8 B-cup bodice with adjusted bodice
a) size 8: back and waist too narrow; FBA bodice, with wide back adjustment & waist graded out
b) B-cup excess back length, UB seam too high on bust; FBA bodice, waist shortened
My tissue fit and muslin confirmed I needed to grade out at waist, do large back adjustment, shorten midriff, and lower bustline, as well as do FBA.
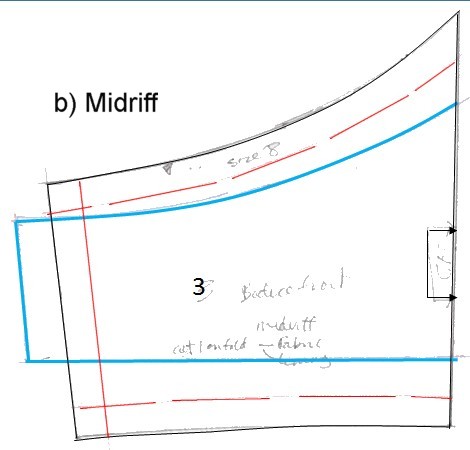
Whereas the midriff on the B-cup and large bust are the same height in 7d) of the half scale model, I had to drastically shorten the midriff as shown in the tissue fit in 8a).
Figure 9: a) fine tuning muslin; b) Front midriff, black size 8, blue adjusted midriff, graded out & shortened c)Tia size chart, with my sizes marked
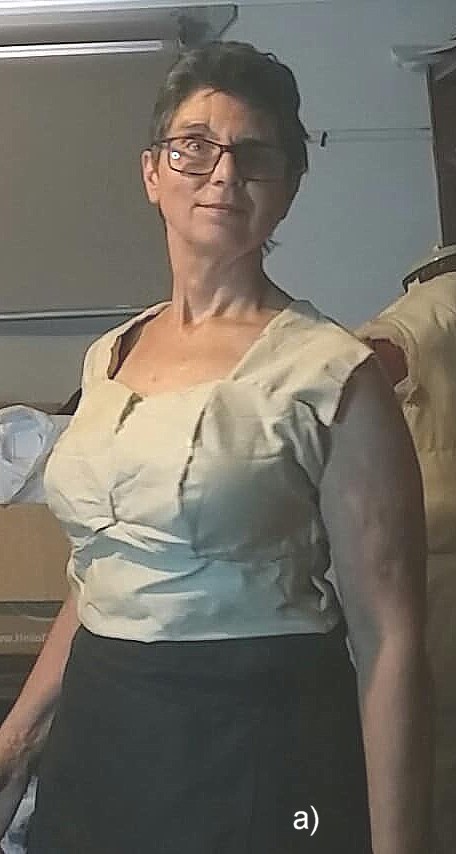
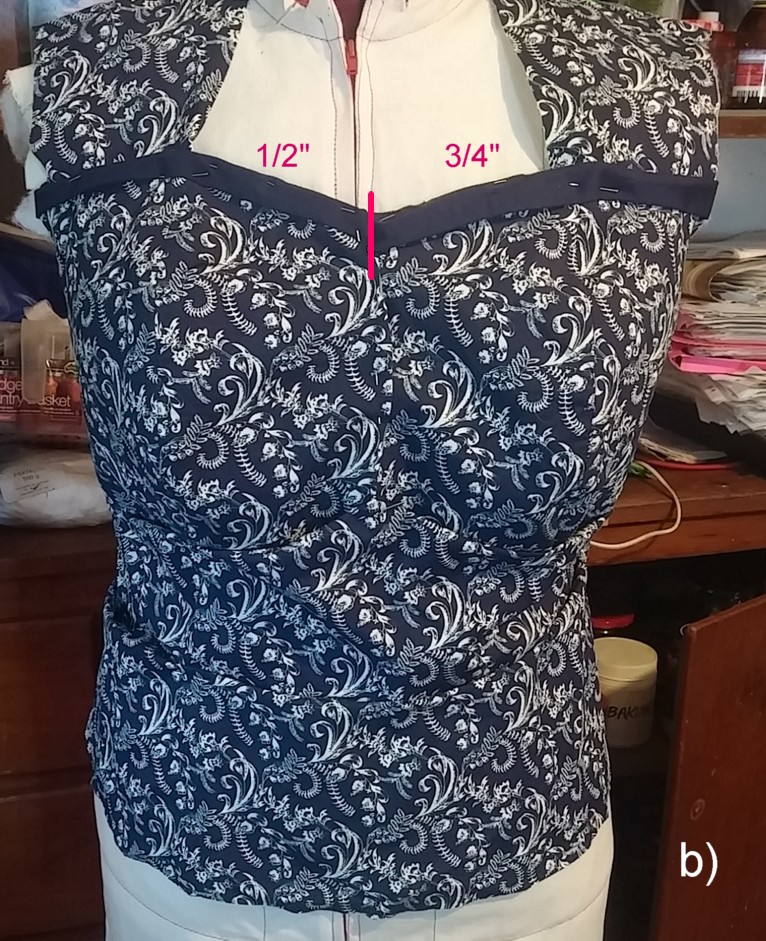
While I traced size 8 and did an E cup FBA, I also needed to shorten the back and midriff, as I am 5’2”, rather than the 5’6” the Tia pattern is drafted for. My large bust and short stature meant the 1” to 1¼” neckline trim looked too large. A large FBA often means design lines and proportions on a garment no longer work, and need some adjustment. I trialled ¾” and ½” trim on the Sew Chic Facebook group, and I agreed with the consensus that the narrower trim looked better.
Figure 10: a) final dress; b) comparing ½” trim on left with ¾” trim on right
Bonus Peplum hack
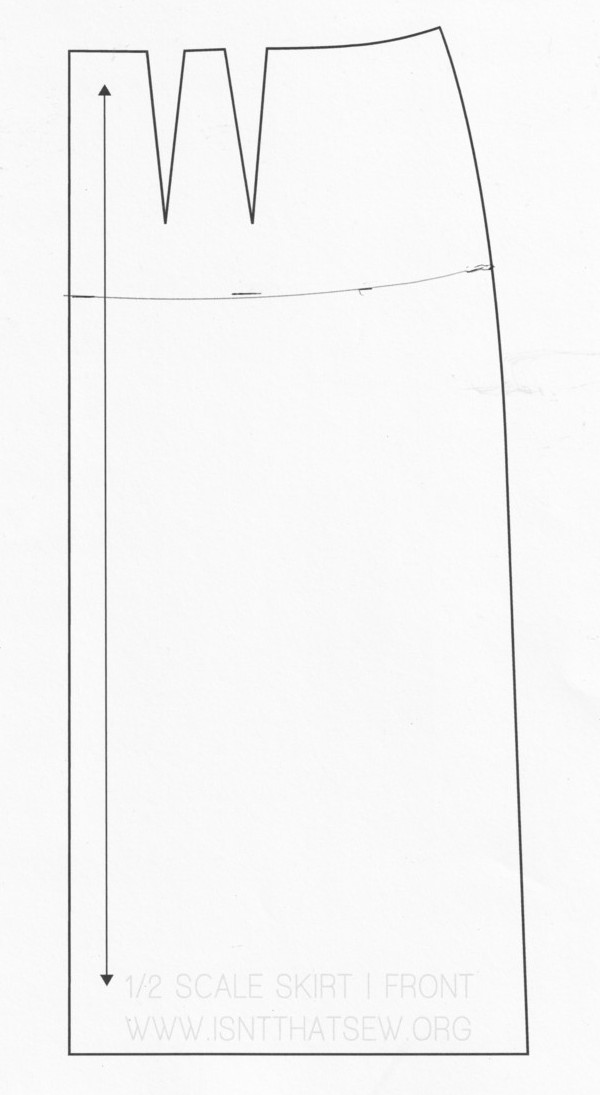
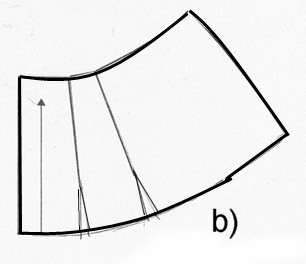
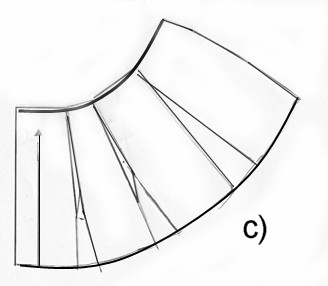
Peplums are commonly drafted as a full or half circle, but my square hips don’t really suit either the circle skirt on this dress, or as a peplum. Instead I drafted my peplum from a straight skirt that fit. Folding out the darts and spreading along the hipline.
If you prefer a full peplum you can slash the skirt from hem to waistline and spread the hem more. If a peplum top comes with a more full skirt than you prefer, you can reverse the process, slash from ham to waist, and overlap at the hemline.
Figure 11 slash and spread peplum
a) straight skirt cut at peplum length b) darts folded out, and hem spread c) extra slashes opened out. Reverse to reduce peplum spread.
Note*: TINAlisa Vicky Pattern
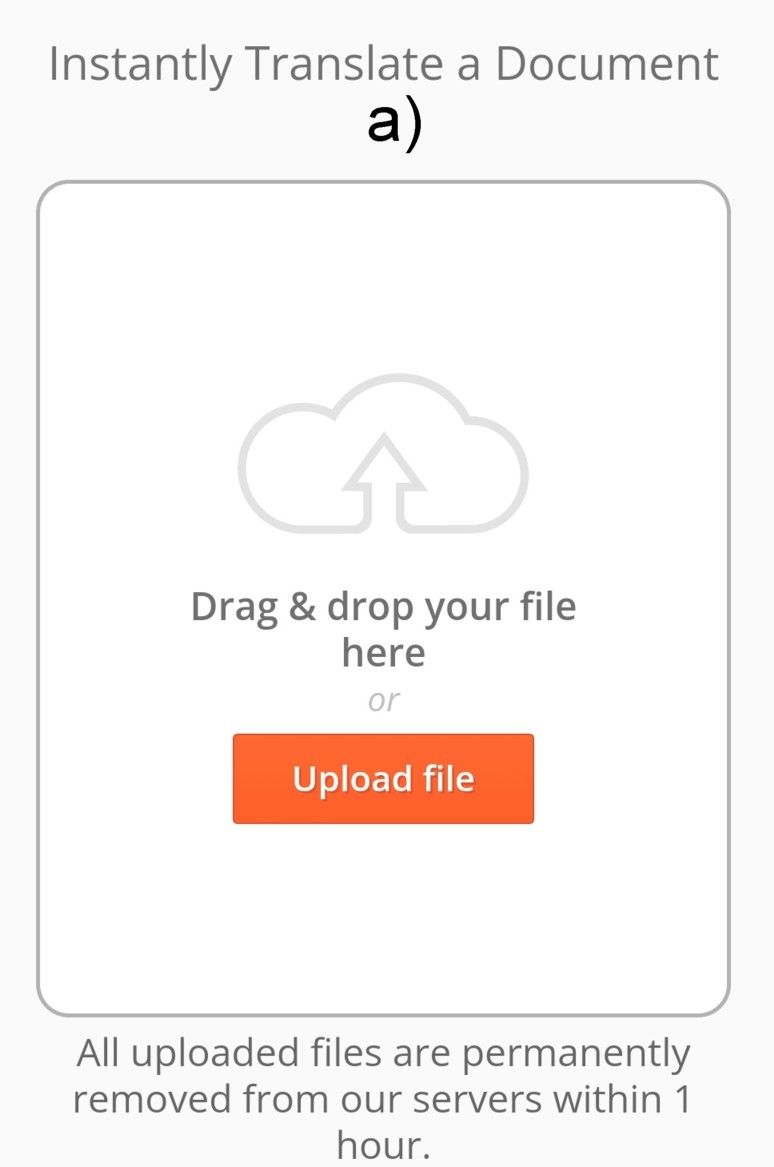
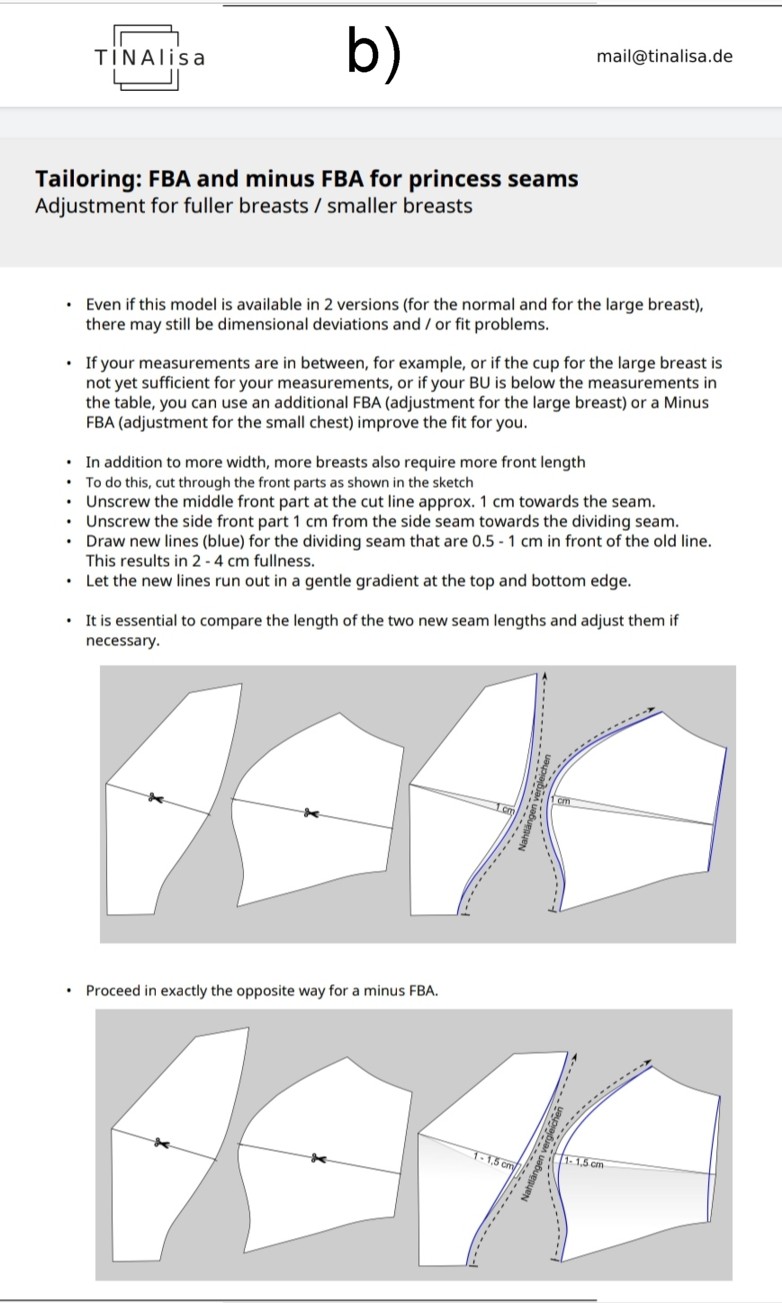
TINAlisa patterns are in German and don’t have seam allowances included (common in European patterns), but don’t let that put you off. You can upload the instruction pdf file to this Free Online Translator site (screenshot shown in Figure 12a), which will translate the text to English (or whatever language you prefer) while preserving format and images (Figure 12b). For the large busted, it is easier to do an FBA without seam allowances, as they have to be removed from patterns that include them before you do the FBA anyway.
Figure 12: a) screenshot of document upload box (you may need to scroll down to find it);
b) sample translated document: Vicky FBA instructions
My next blogpost will feature a TINAlisa FBA for a more complex bodice.

Karey Harrison is a feminist philosopher of science and linguistics, environmentalist, retired academic, home baker, sewist, gardener. Karey also wrote the guest blogpost: #AllButtsWelcome: Unmentionables: Crotch Variation in Pantie Fitting. You can catch Karey on instagram @kareylea and see Karey’s academic profile here.

