
FBA Guide + Amelie Dress Sew Along Week B | Full Bust Adjustment on Non-Traditional Darts (Double Underarm Dart Version)
For August and September at Sew Busty, we’re doing a button challenge! Post a make that features buttons on instagram with #sewbustychallenge by September 30 for a chance to win a prize!
As part of that challenge, we’re doing a sew along for the Untitled Thoughts Amelie Dress – a cute little number that features buttons down the back of the skirt, as well as an open (but bra-friendly!) back. (Check out the picture of the dress on today’s post, as I accidentally earlier shared a picture of the non-bra friendly! For the full sew along, including bonus content, click here!

This week, I’m pleased to welcome Brittani of Untitled Thoughts back to the blog to talk us through doing a full-bust adjustment on the Amelie! Without further ado, here’s Brittani:
Hello Sew Busty Community! Brittani here from Untitled Thoughts. I am so excited to be writing up this guest blog post for the Sew Busty blog, especially seeing as I have been meaning to whip up a tutorial on this very subject: Performing an FBA on the Amelie!
Performing a Full Bust Adjustment (FBA) on a garment can already feel intimidating. Throw a Center Front waist dart into the mix and it can feel downright paralyzing!
Have no fear! Adjusting your Center Front Darted pattern to fit your unique and beautiful shape is relatively simple and utilizes many of the same techniques as working on a normal FBA.This post will be fully dedicated to the act of making your alterations on a Center Front Dart specific pattern, in this case, the Amelie Dress.
Let’s Get Started!
You will want to begin this process by first tracing off your front bodice pattern along with any important markings on your pattern such as:
- Grainline
- Darts
- Apex Point
- Notches
- Lengthen/Shorten Lines
- Size + View
I will be dividing this tutorial up into two groups: Single Dart and Double Dart. Depending on what size you are making of the Amelie + which Cup option you have chosen, you will notice that there is either a single under arm dart or a double underarm dart. Each of these needs to be worked on slightly differently, which is why I have divided this tutorial into two parts! If you’re looking for the double underarm dart version, click here!
Double Dart FBA
To start, you will draw the following lines on your front bodice pattern piece:
- Directly through the center of your Center Front Dart to your Apex
- Perpendicularly from the Apex down through the Waist
- From your apex to your armhole (You will want to draw your line roughly ⅓ of the way from the under arm seam to prevent distortion in the armscye)
- From your Apex horizontally through the Center Front
- Directly through the center of your Upper Underarm Dart to your Apex
- Directly through the center of your Lower Underarm Dart to your Apex
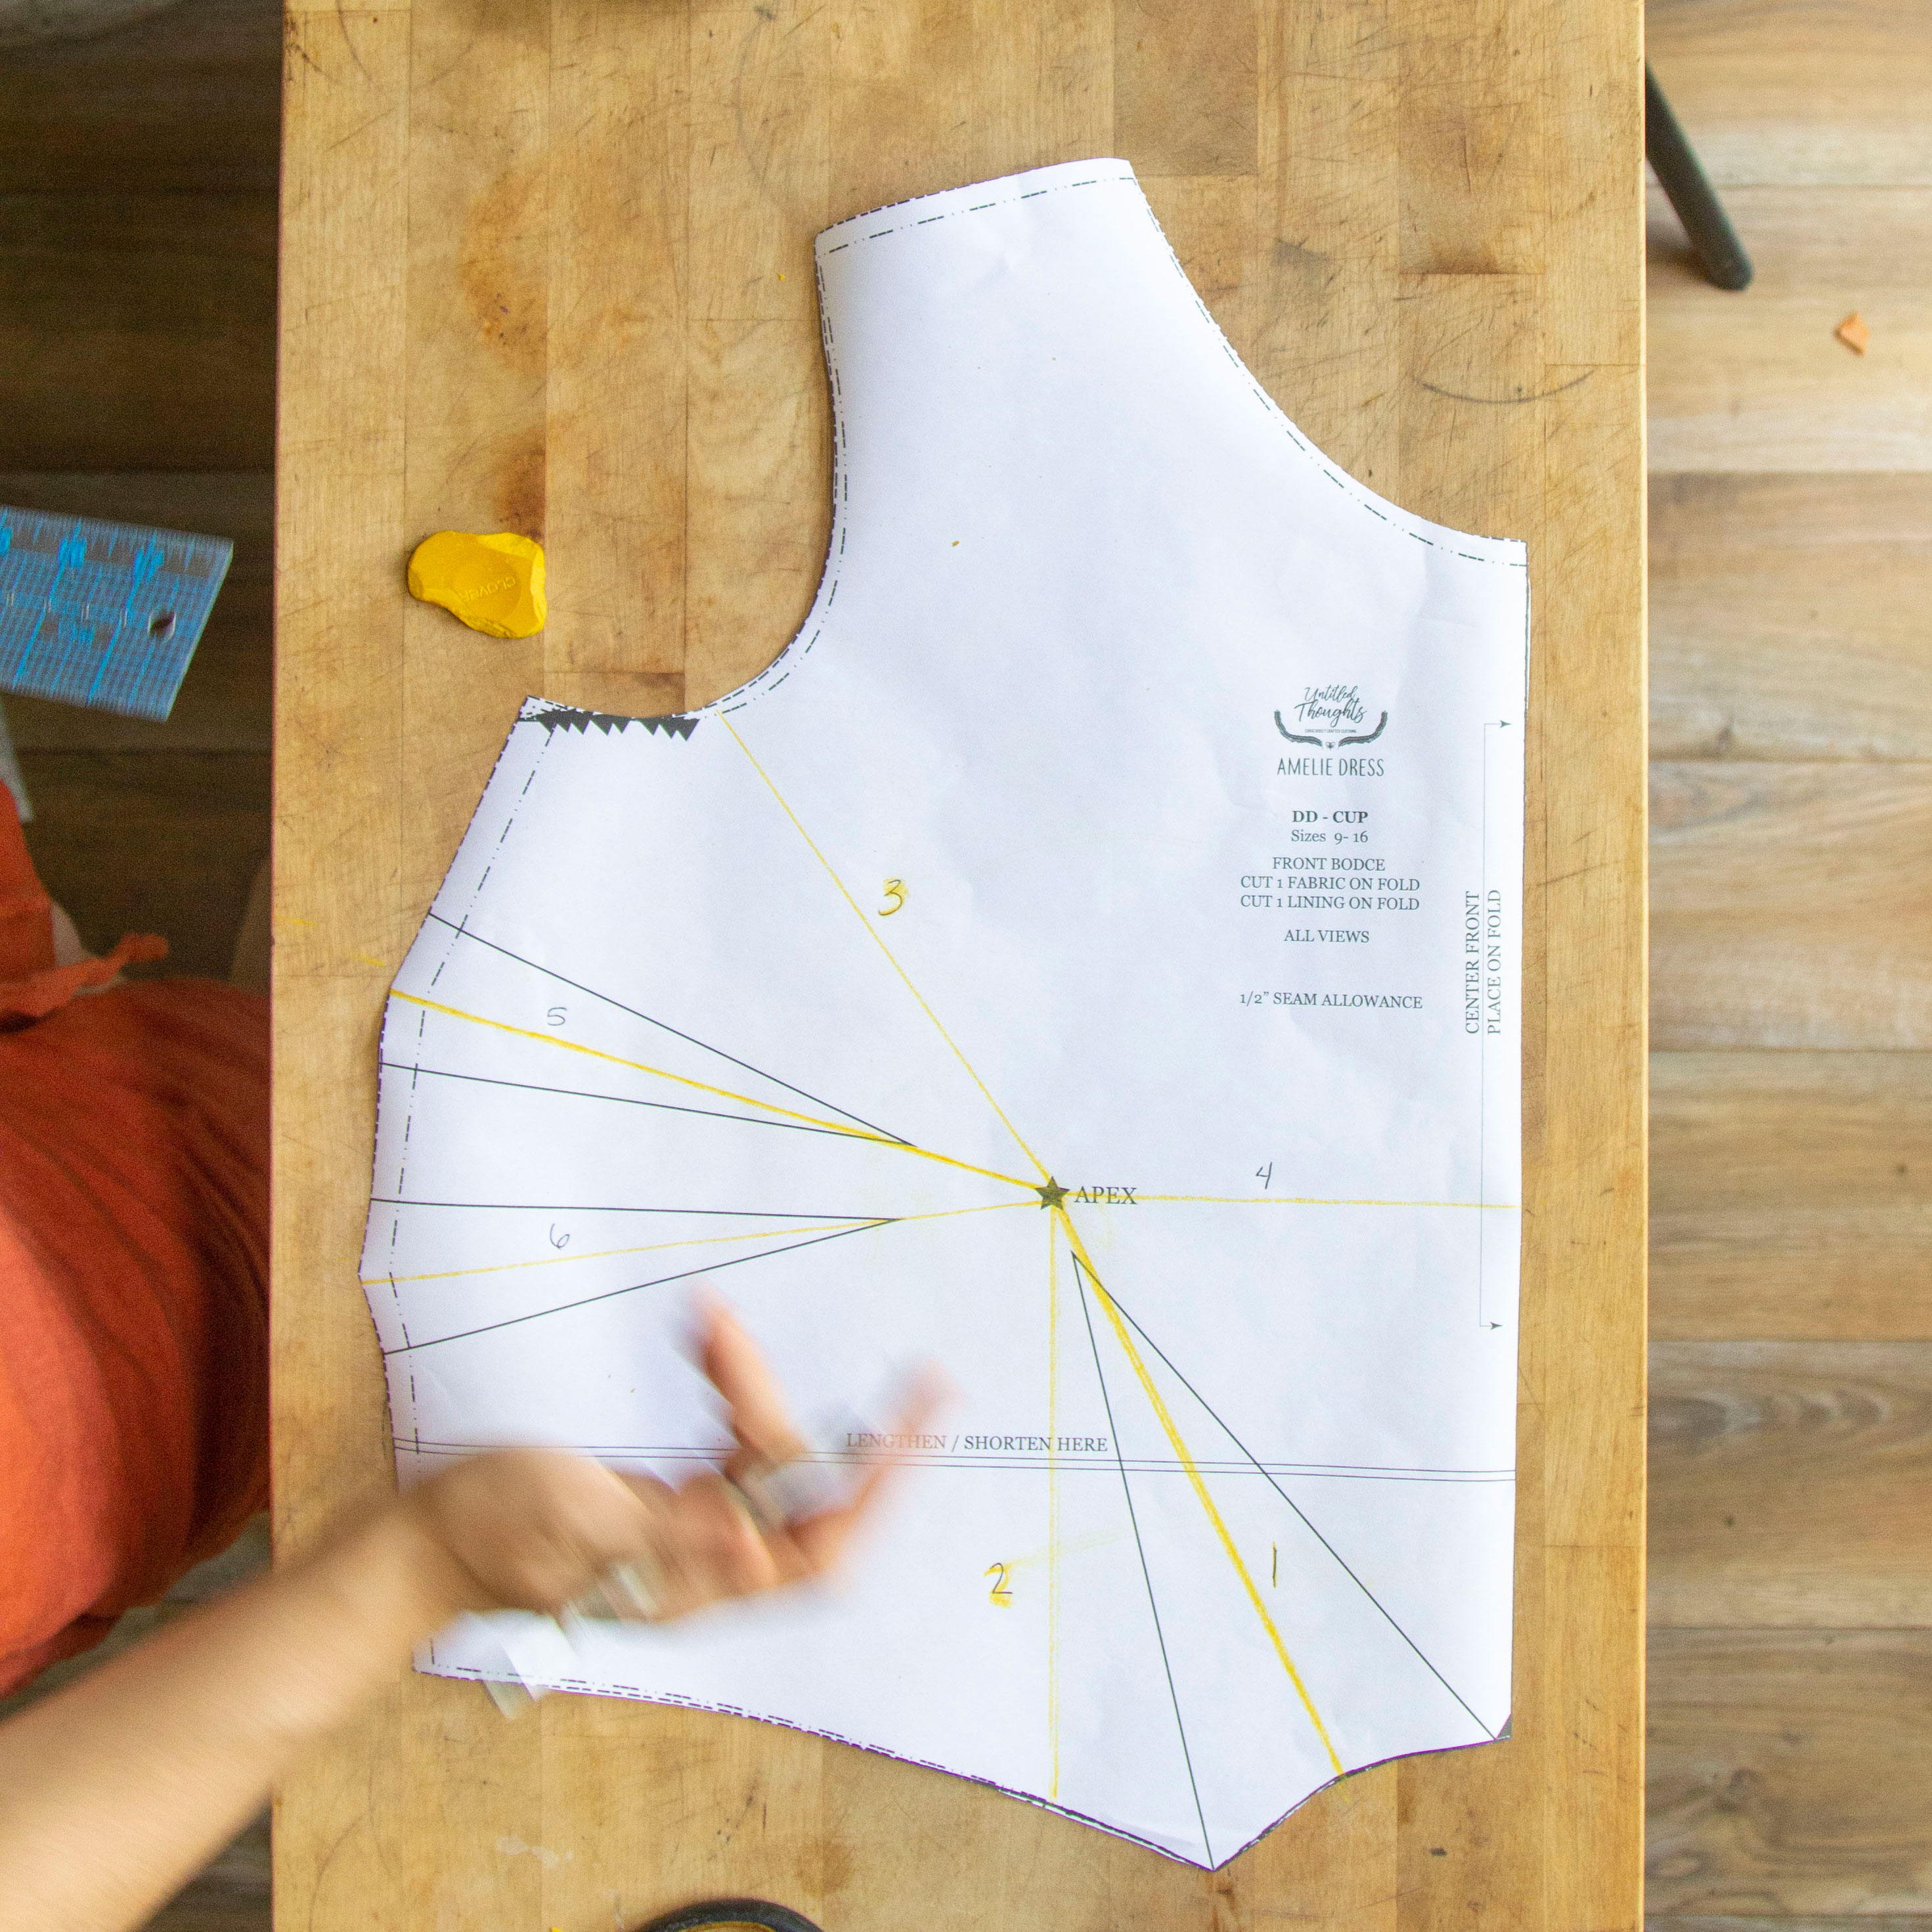
Now that all your lines are in place, let’s get to cutting and hinging our pattern out! There are a few places we will be cutting. It’s important NOT to cut through our entire pattern piece. We want to leave a smidgen of the pattern intact so that we can hinge the pieces around and not accidentally distort the outer pattern edges too much!
The first set of lines you will want to cut through are lines 1 + 3.
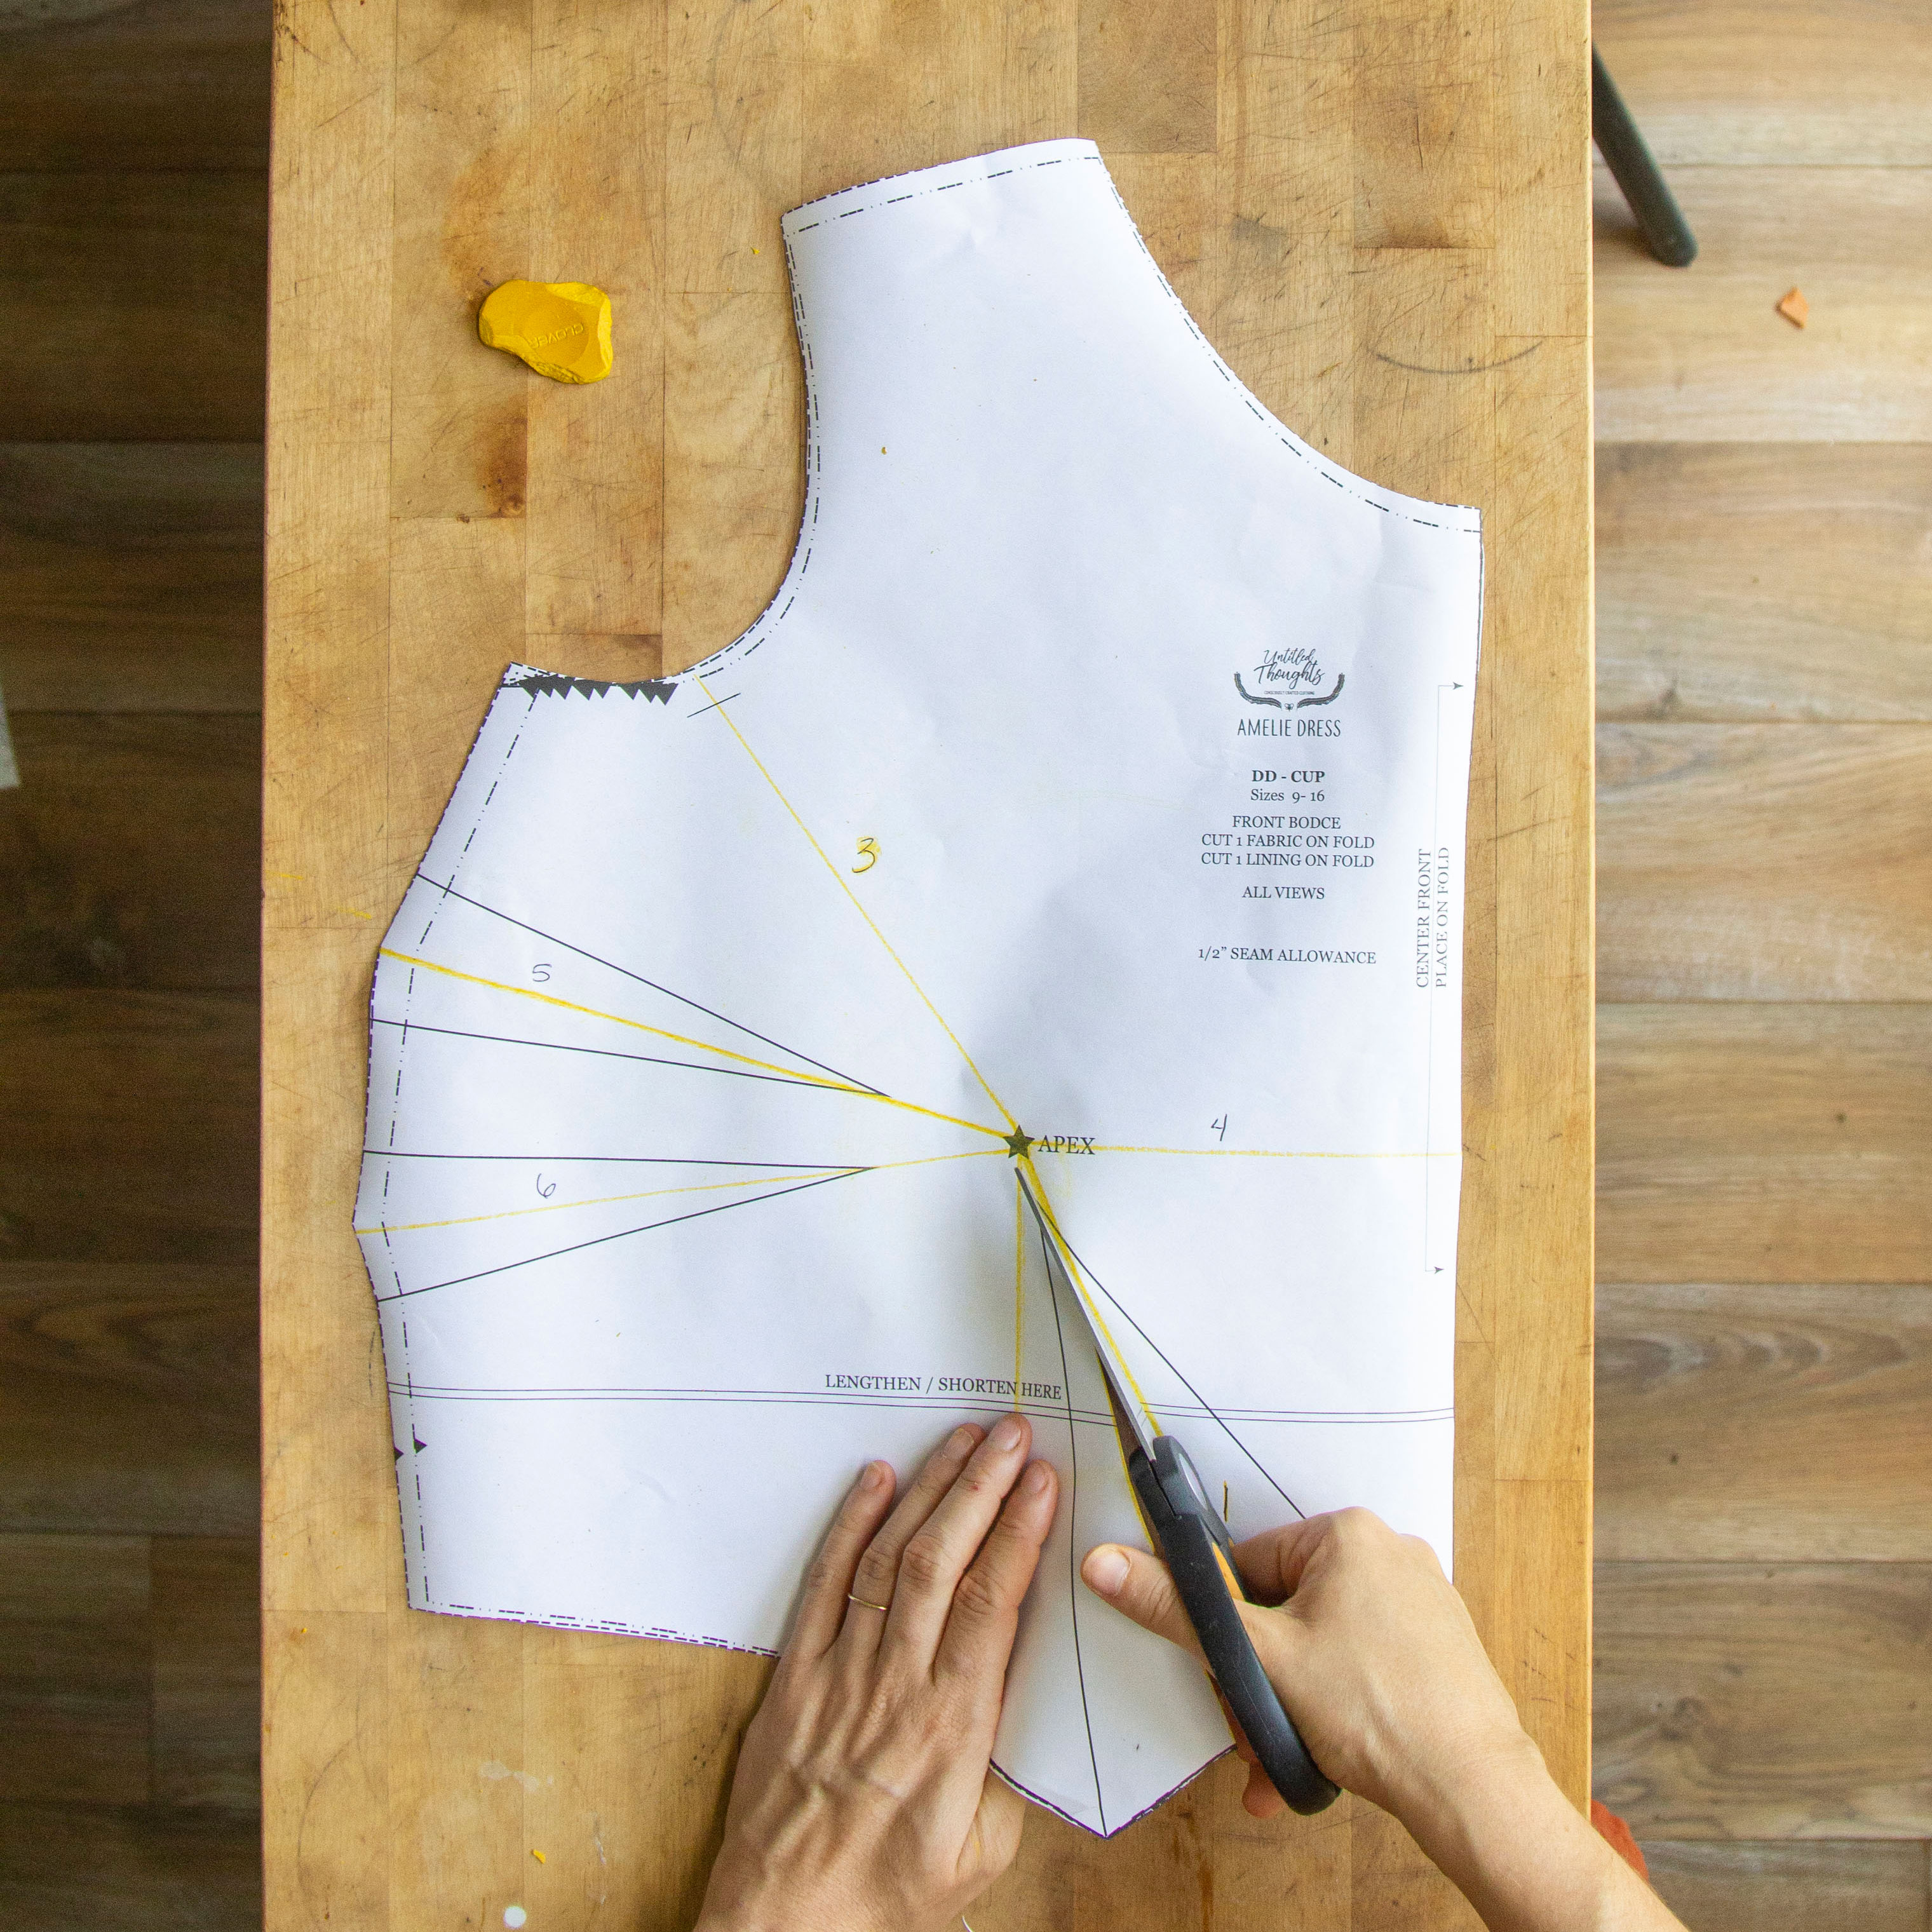
I forgot to mention, we need to mark out our seam allowance right at our armscye where line 3 passes through. This is the point where we will stop cutting to create a hinge!
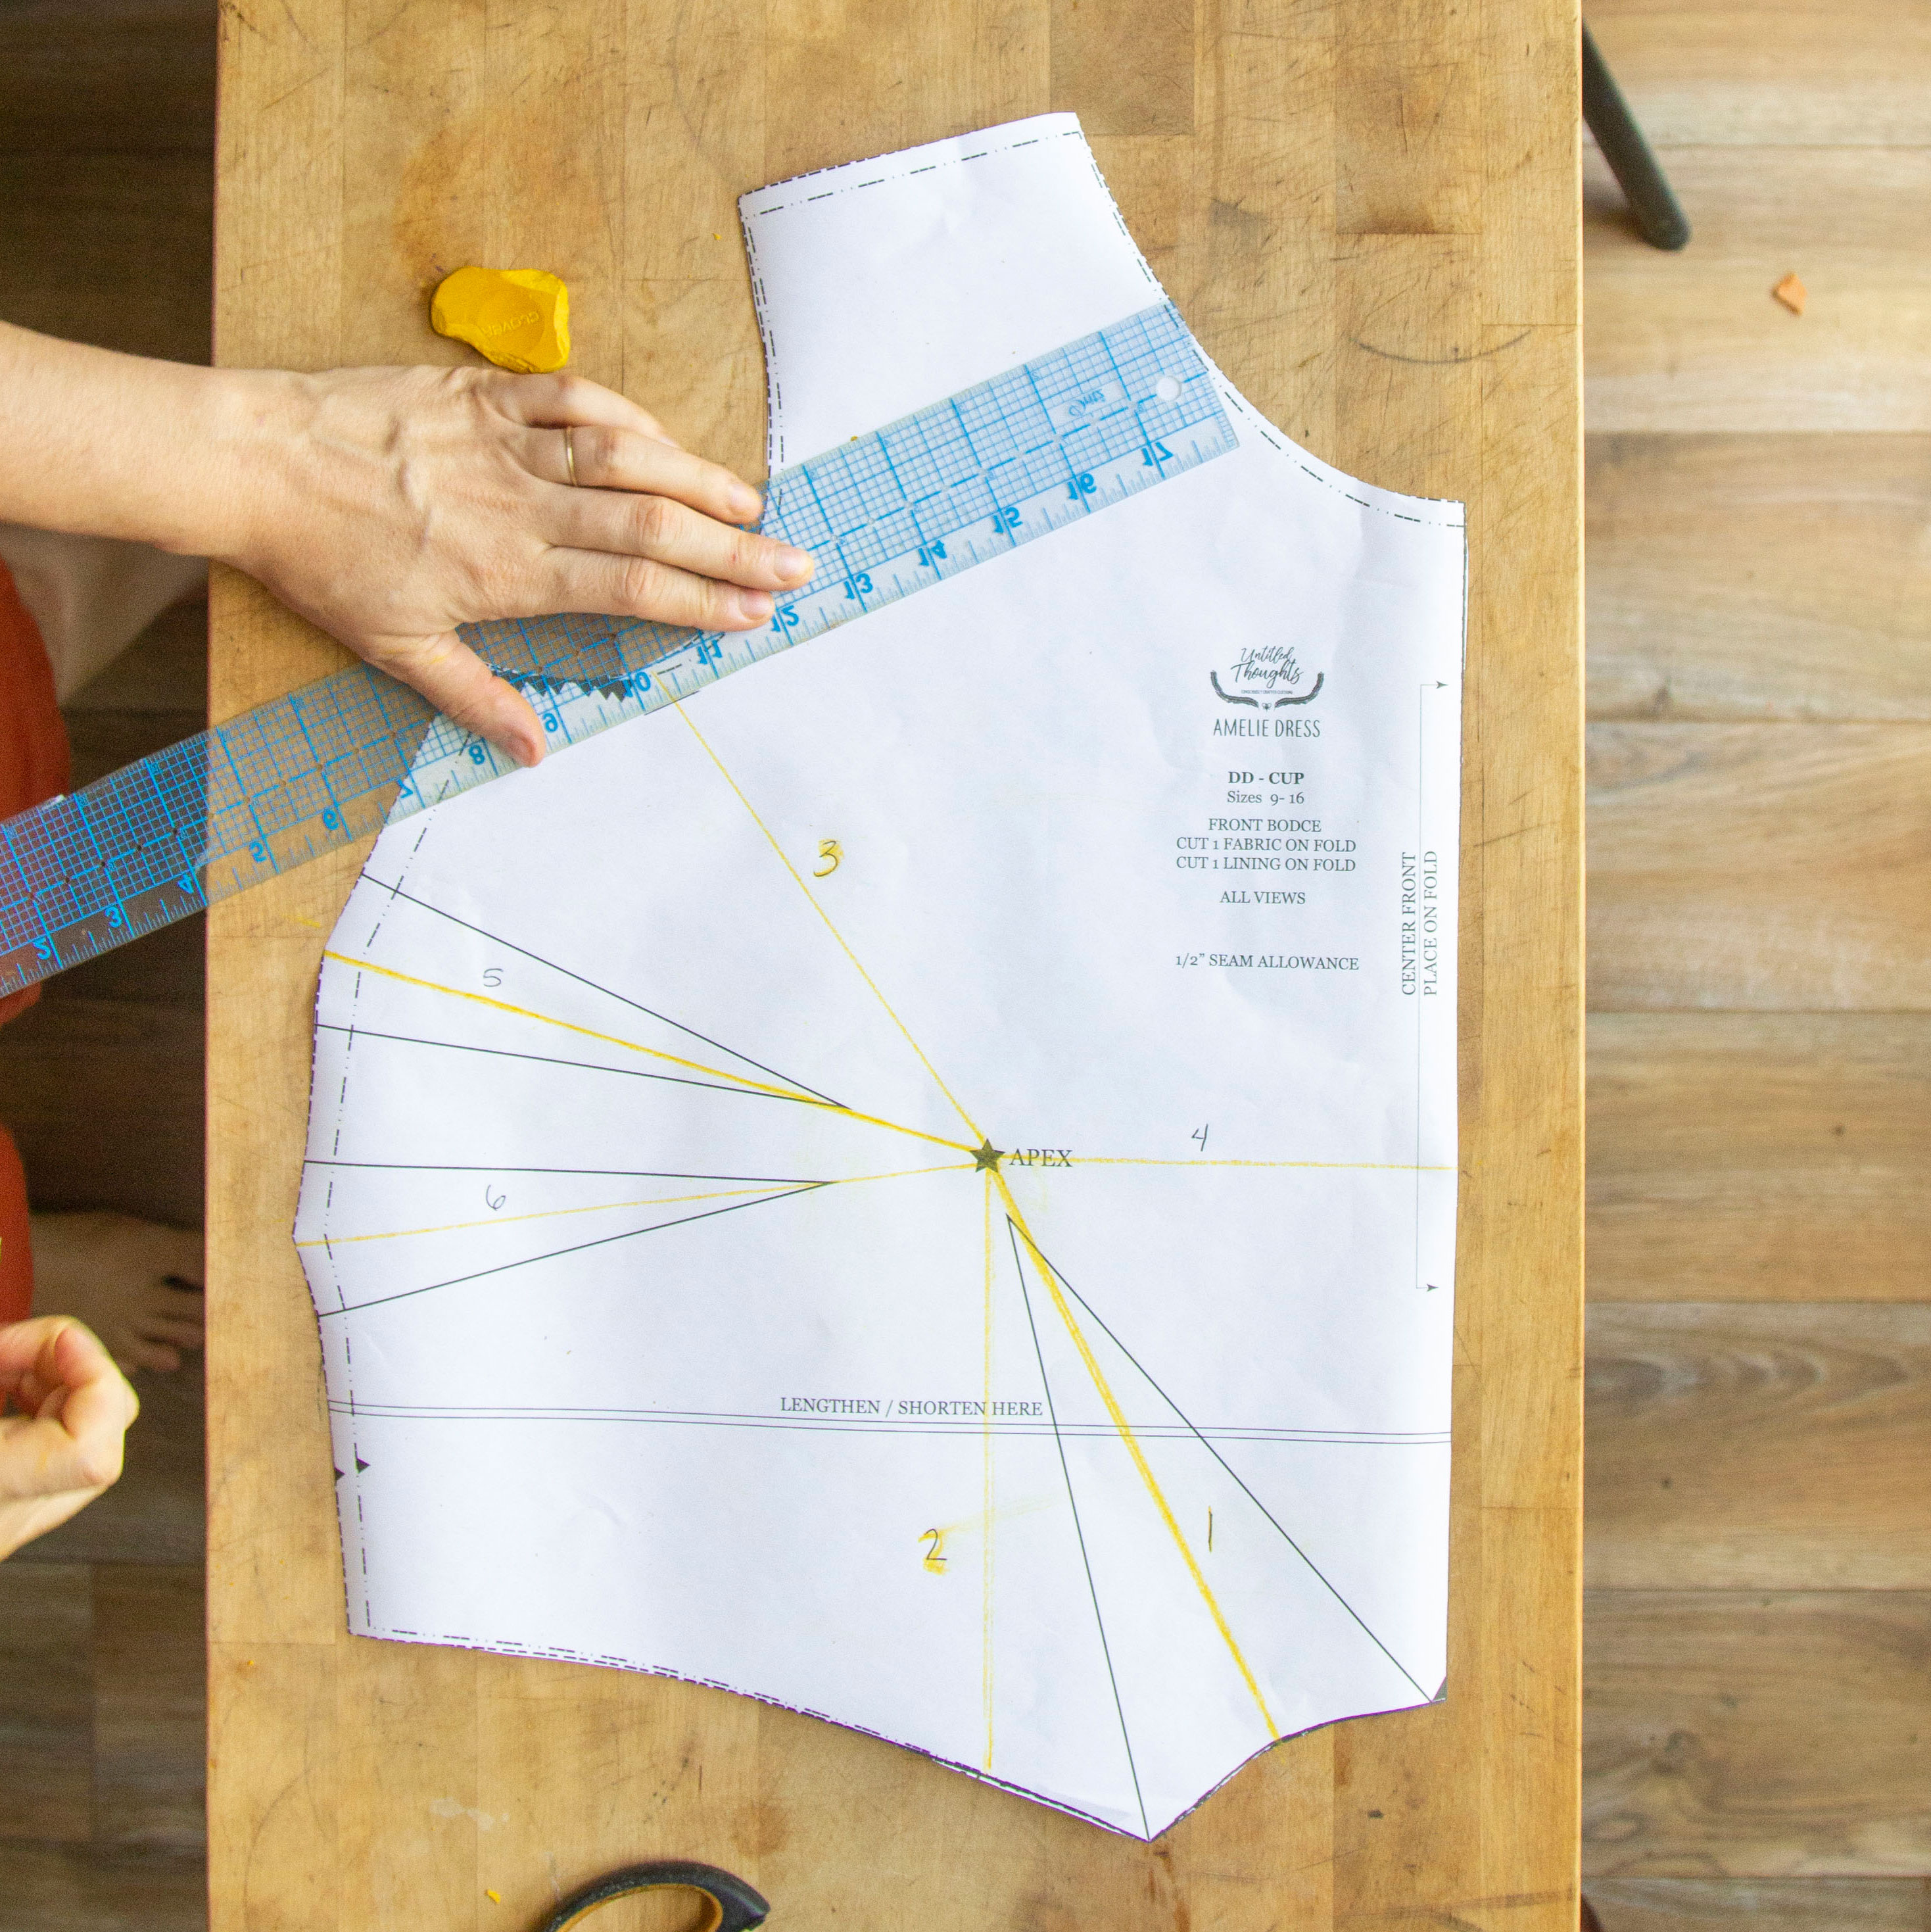
To create a little hinge in your pattern (which allows you to shift your pattern open), snip from your armscye to — not through — the seam allowance mark you just made.
Next, cut line 2, starting from the center of your dart and ending right at the apex point. Be sure you don’t cut your piece completely off – you need to leave the tiniest bit of paper so that you are able to hinge your pattern, rather than having it come apart in puzzle-like pieces.
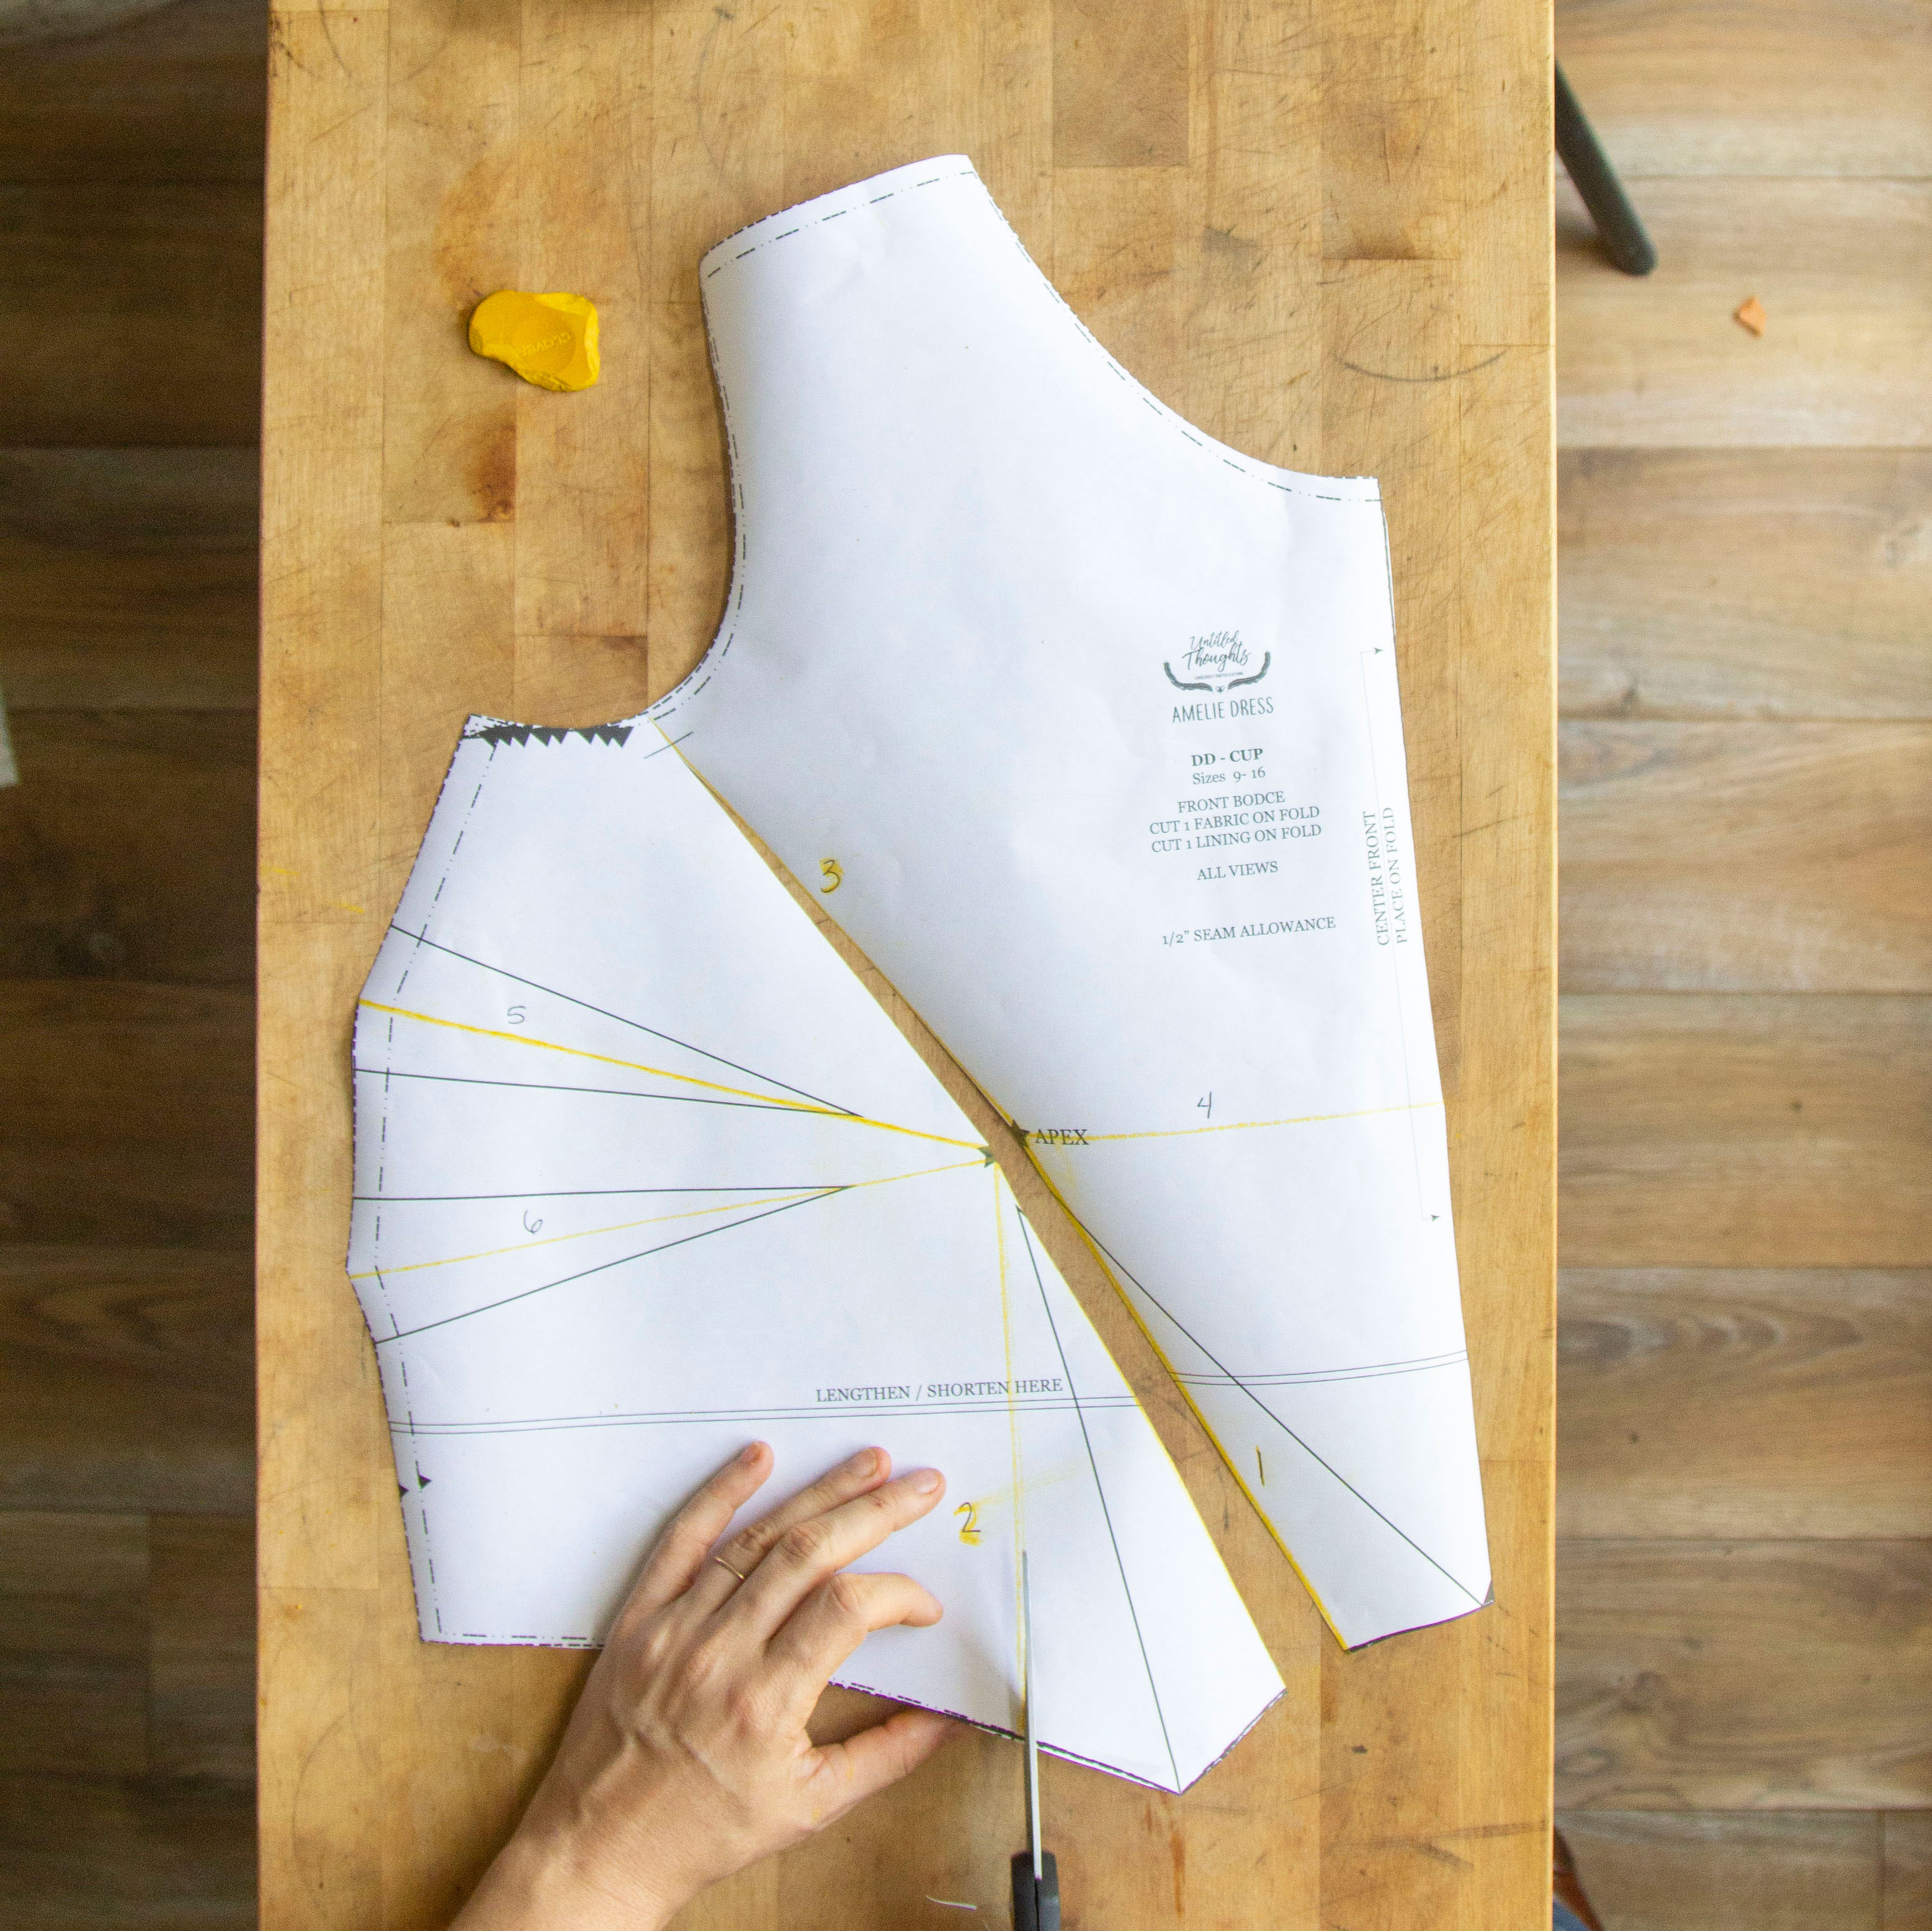
Finally, cut through Line 5 + 6 ending right at the Apex.
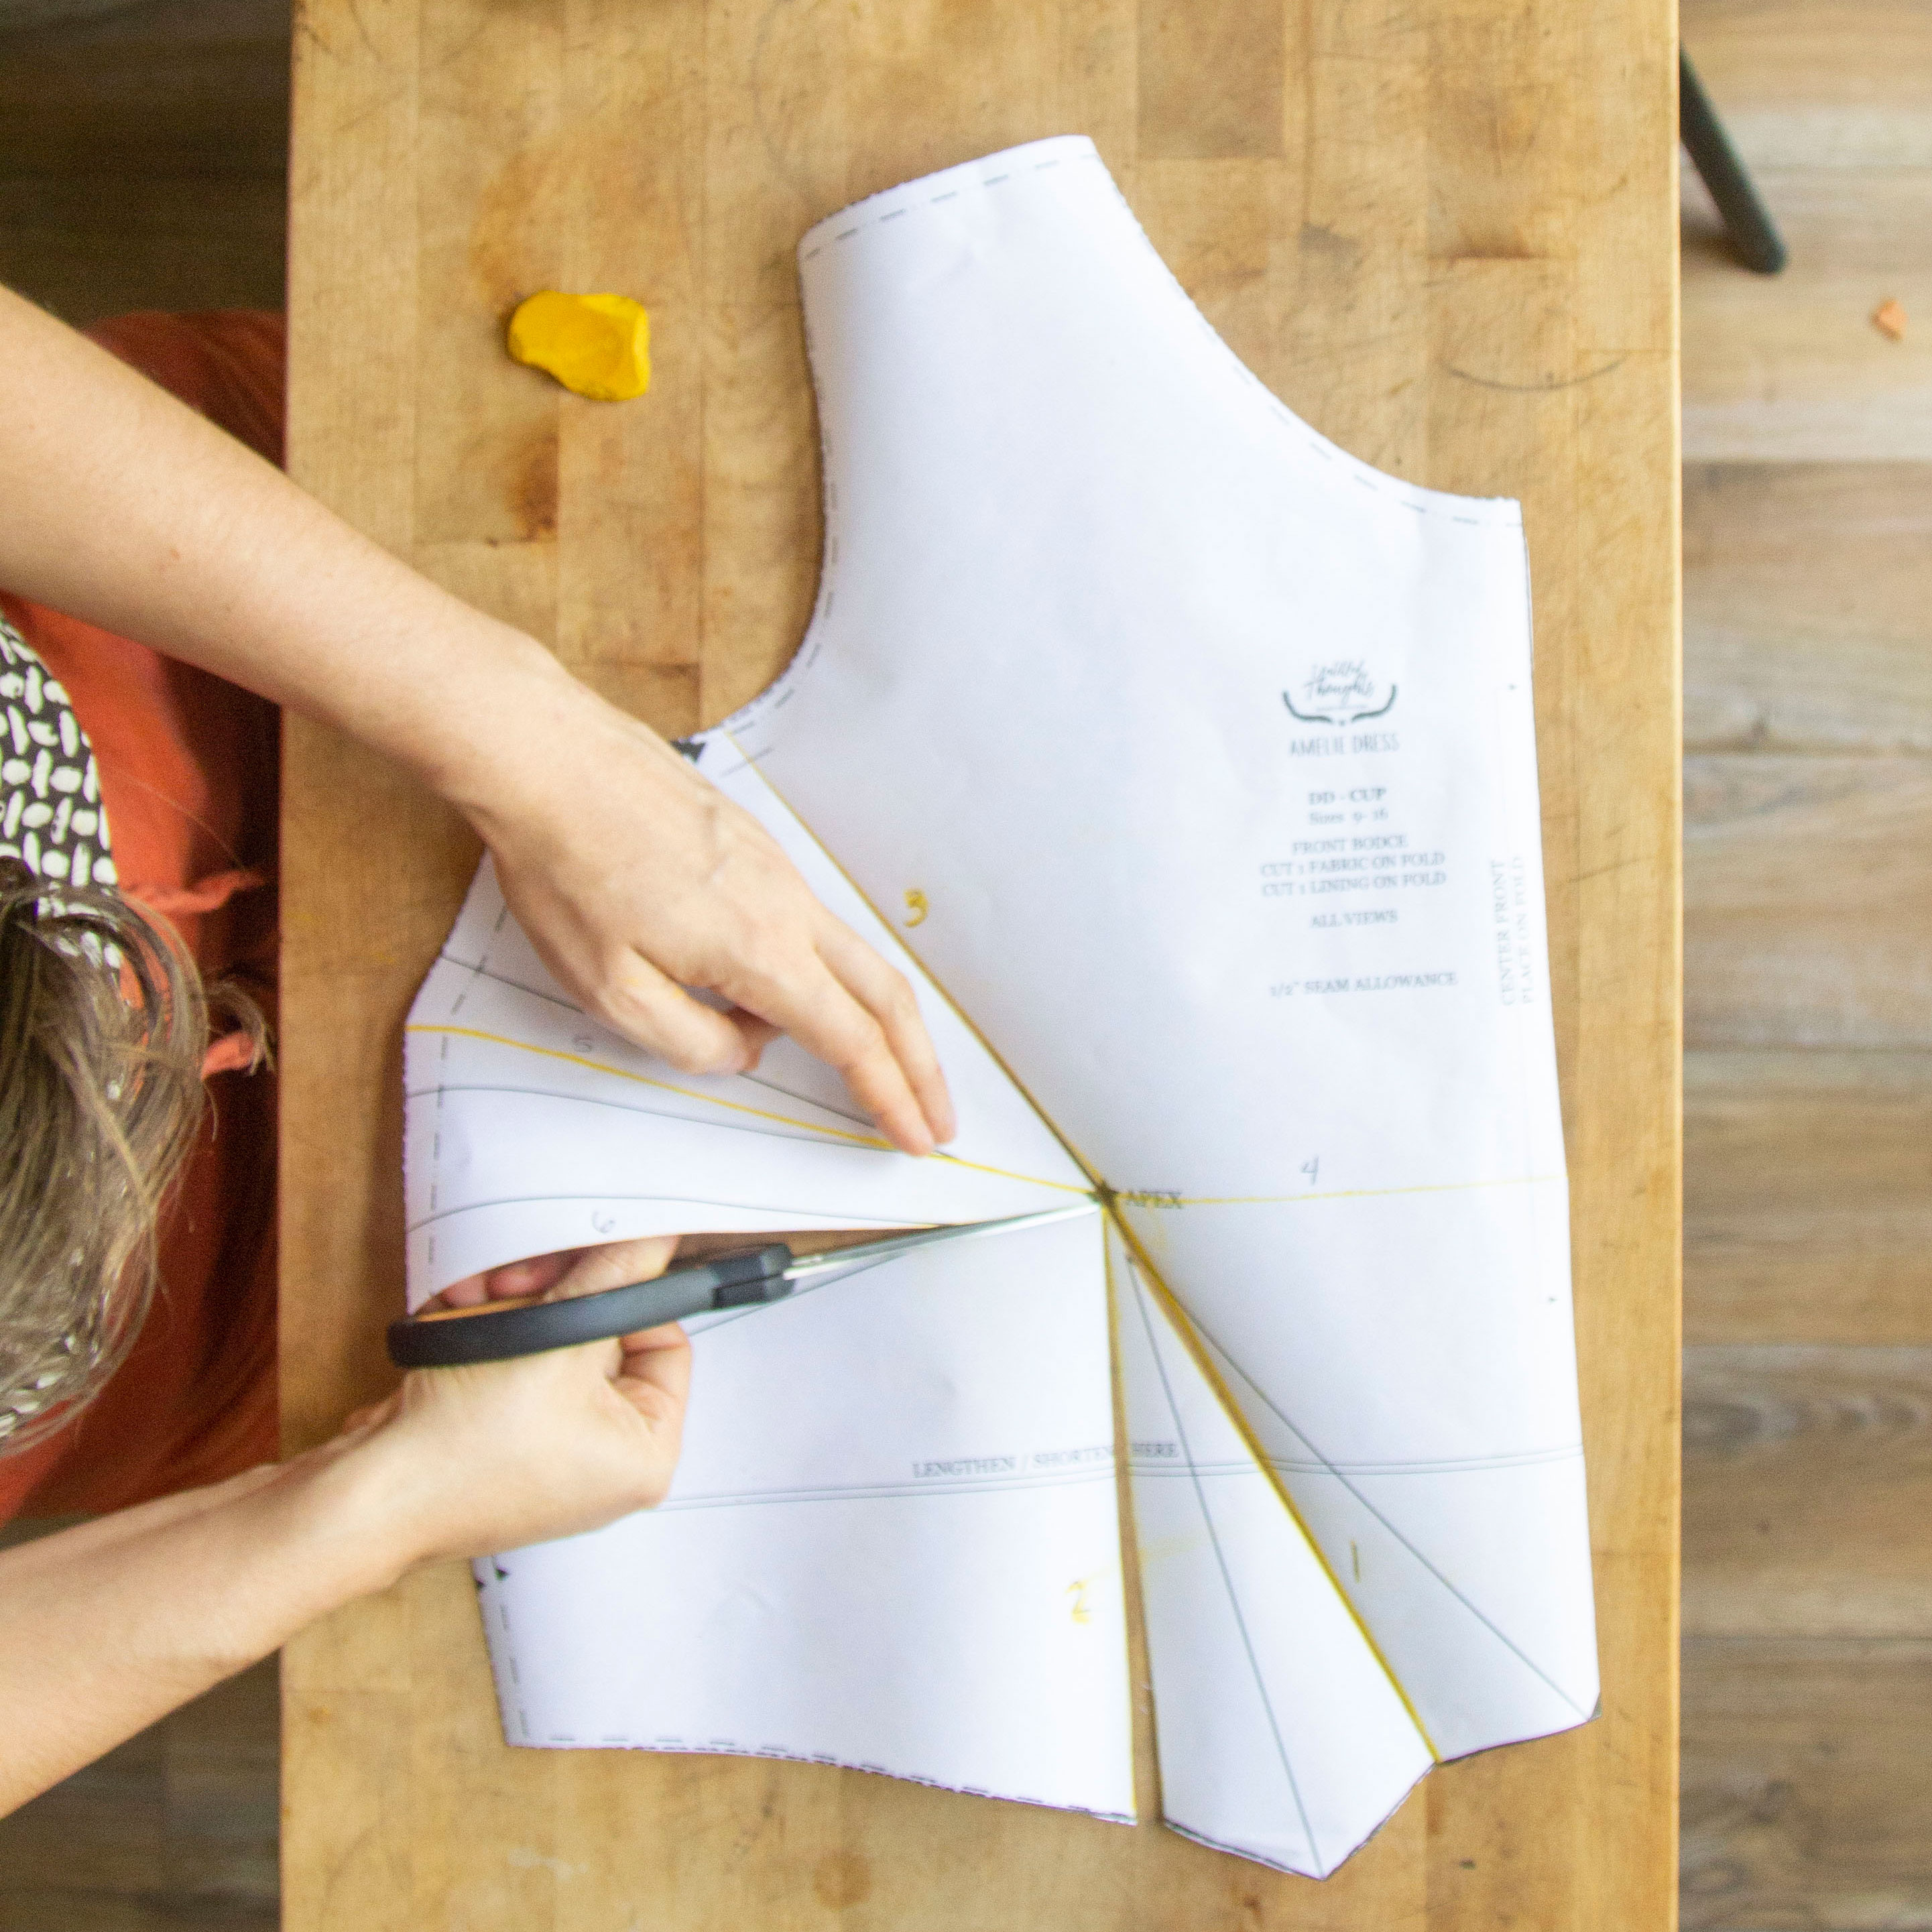
See how I am able to lightly pull my pattern piece and it opens up, yet all the pieces are still intact? This is what we are going for! Don’t worry if you accidentally cut through your pieces (as I have done many times!) Simply tape your pieces back together at the “hinge” point, and try cutting it again. It gets easier with practice!
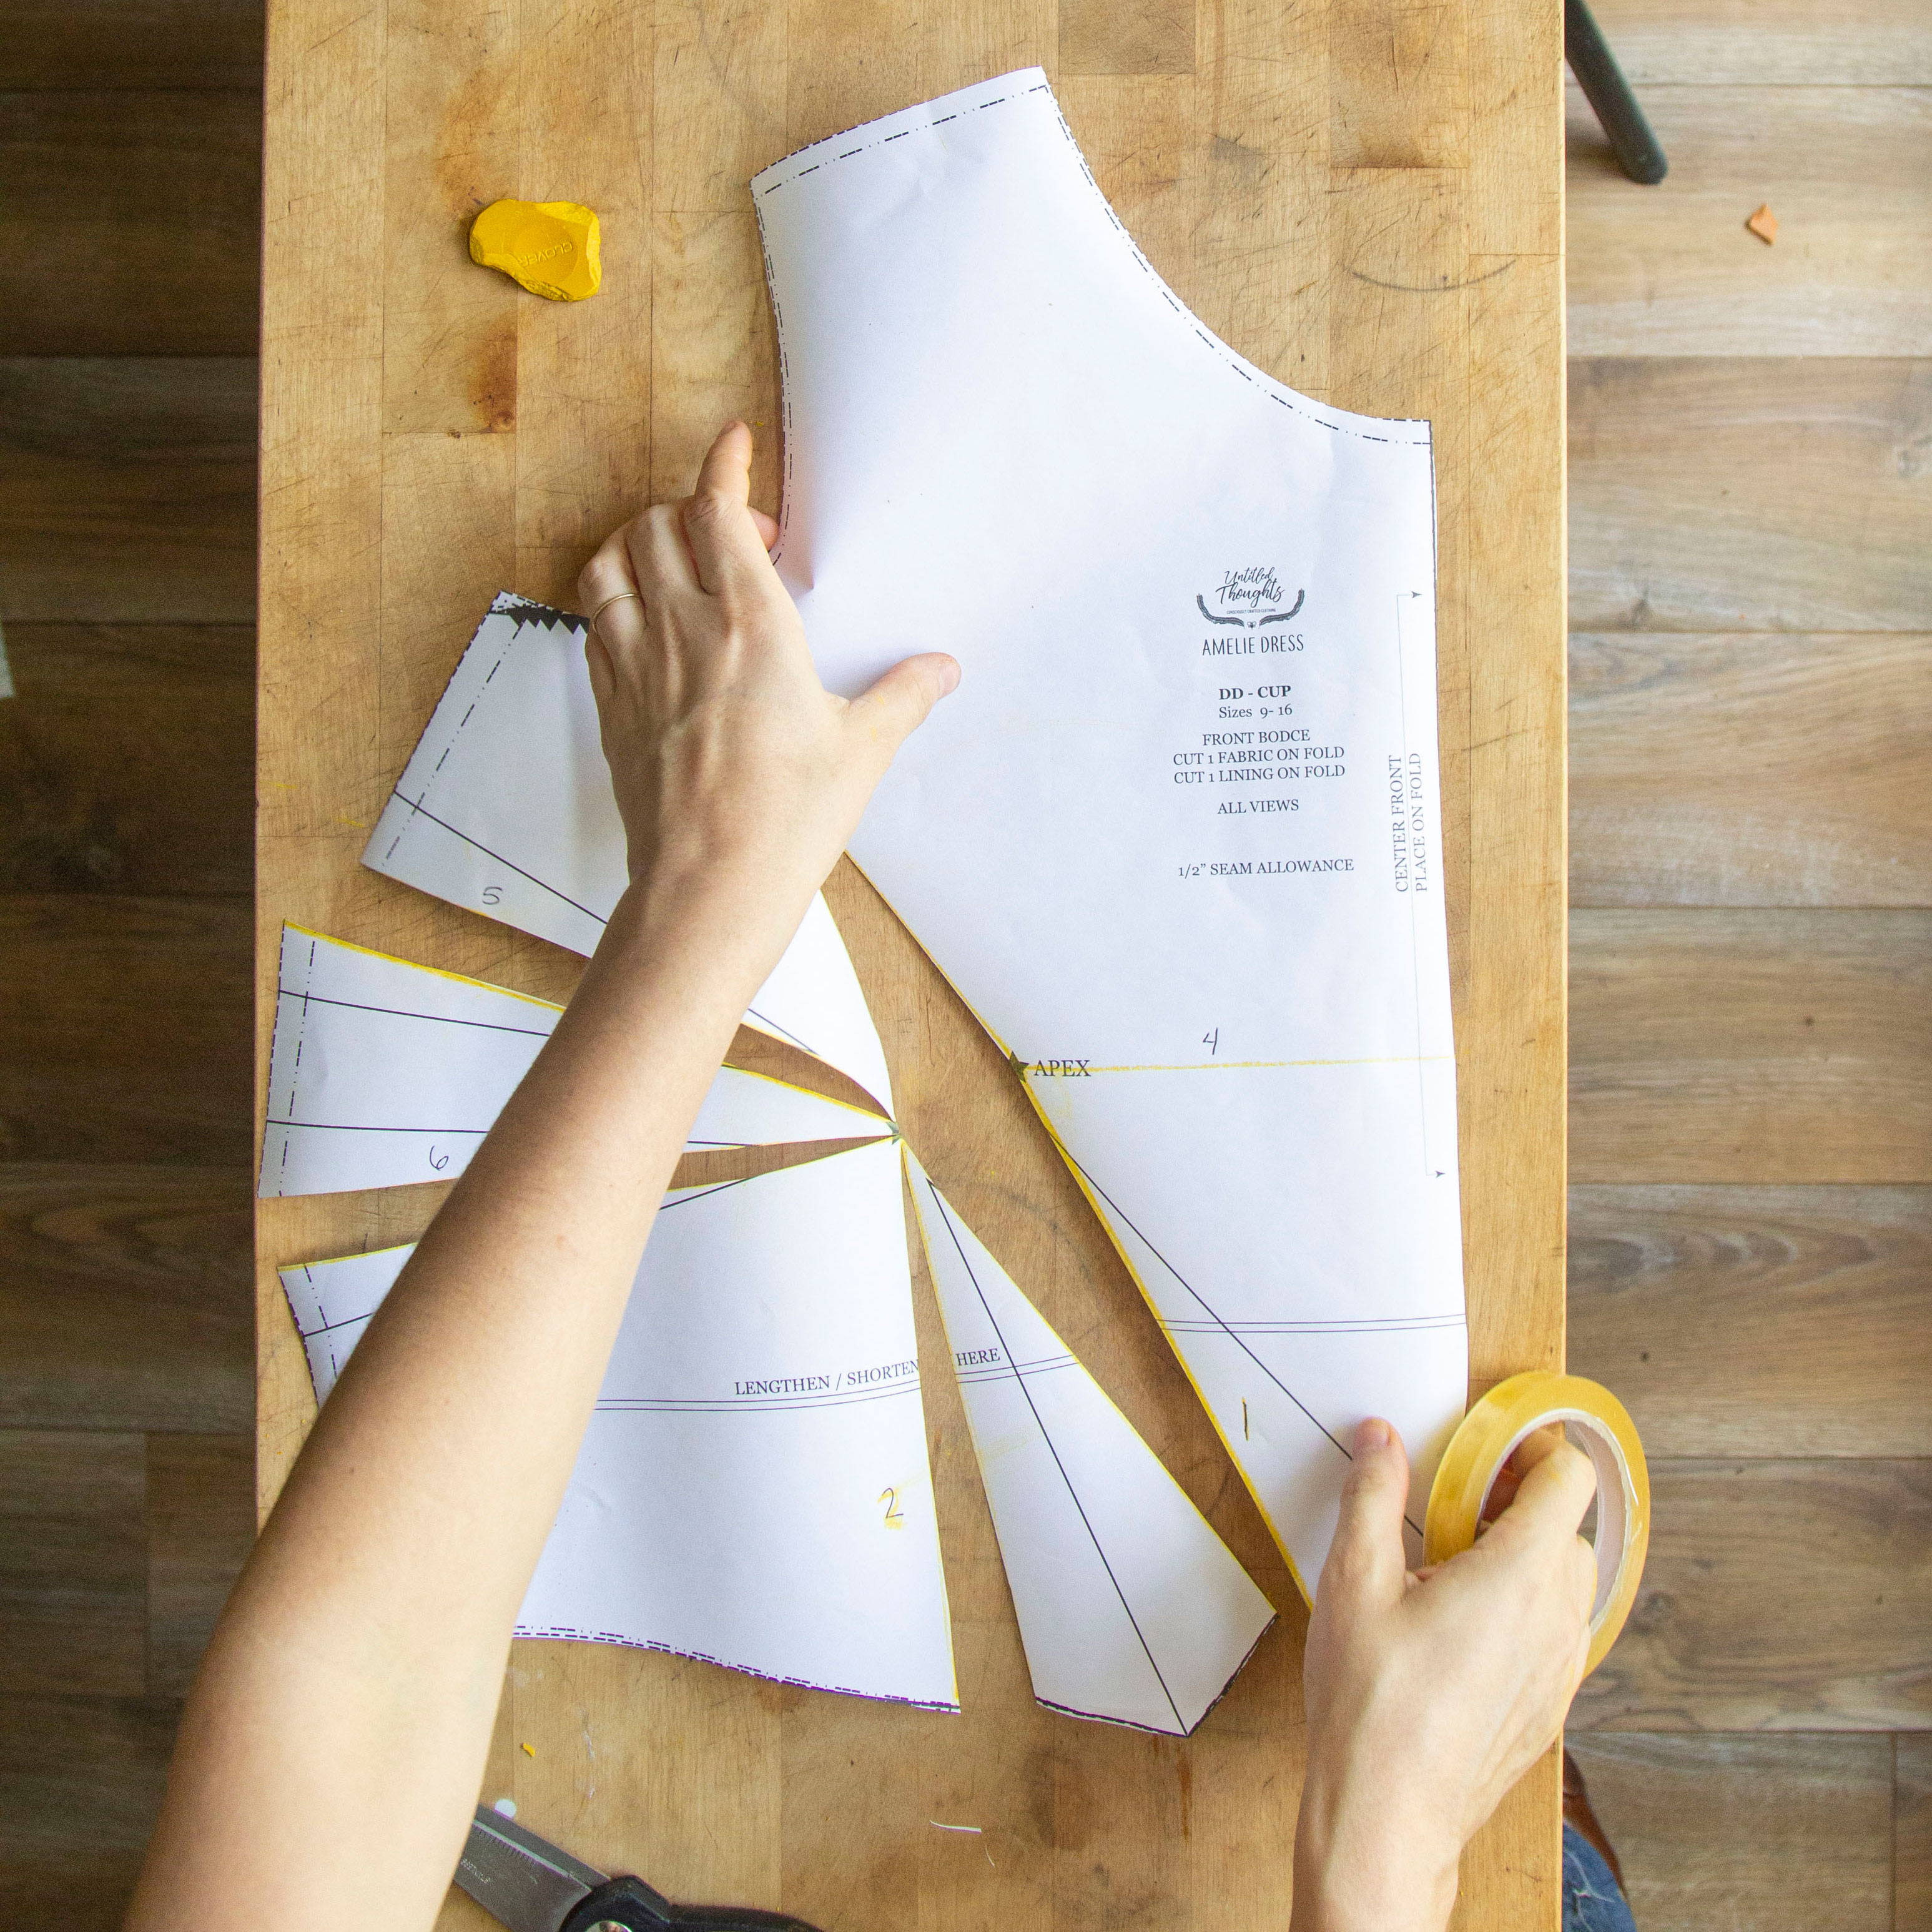
For this next part, you will need some tape, scrap paper, a pen, and the measurement you plan to increase your pattern piece by. I am going to be doing an imaginary FBA of ½” (1,3 cm) for my sample.
With your supplies in hand (and possibly a large cup of tea at the ready!), it’s time to adjust!
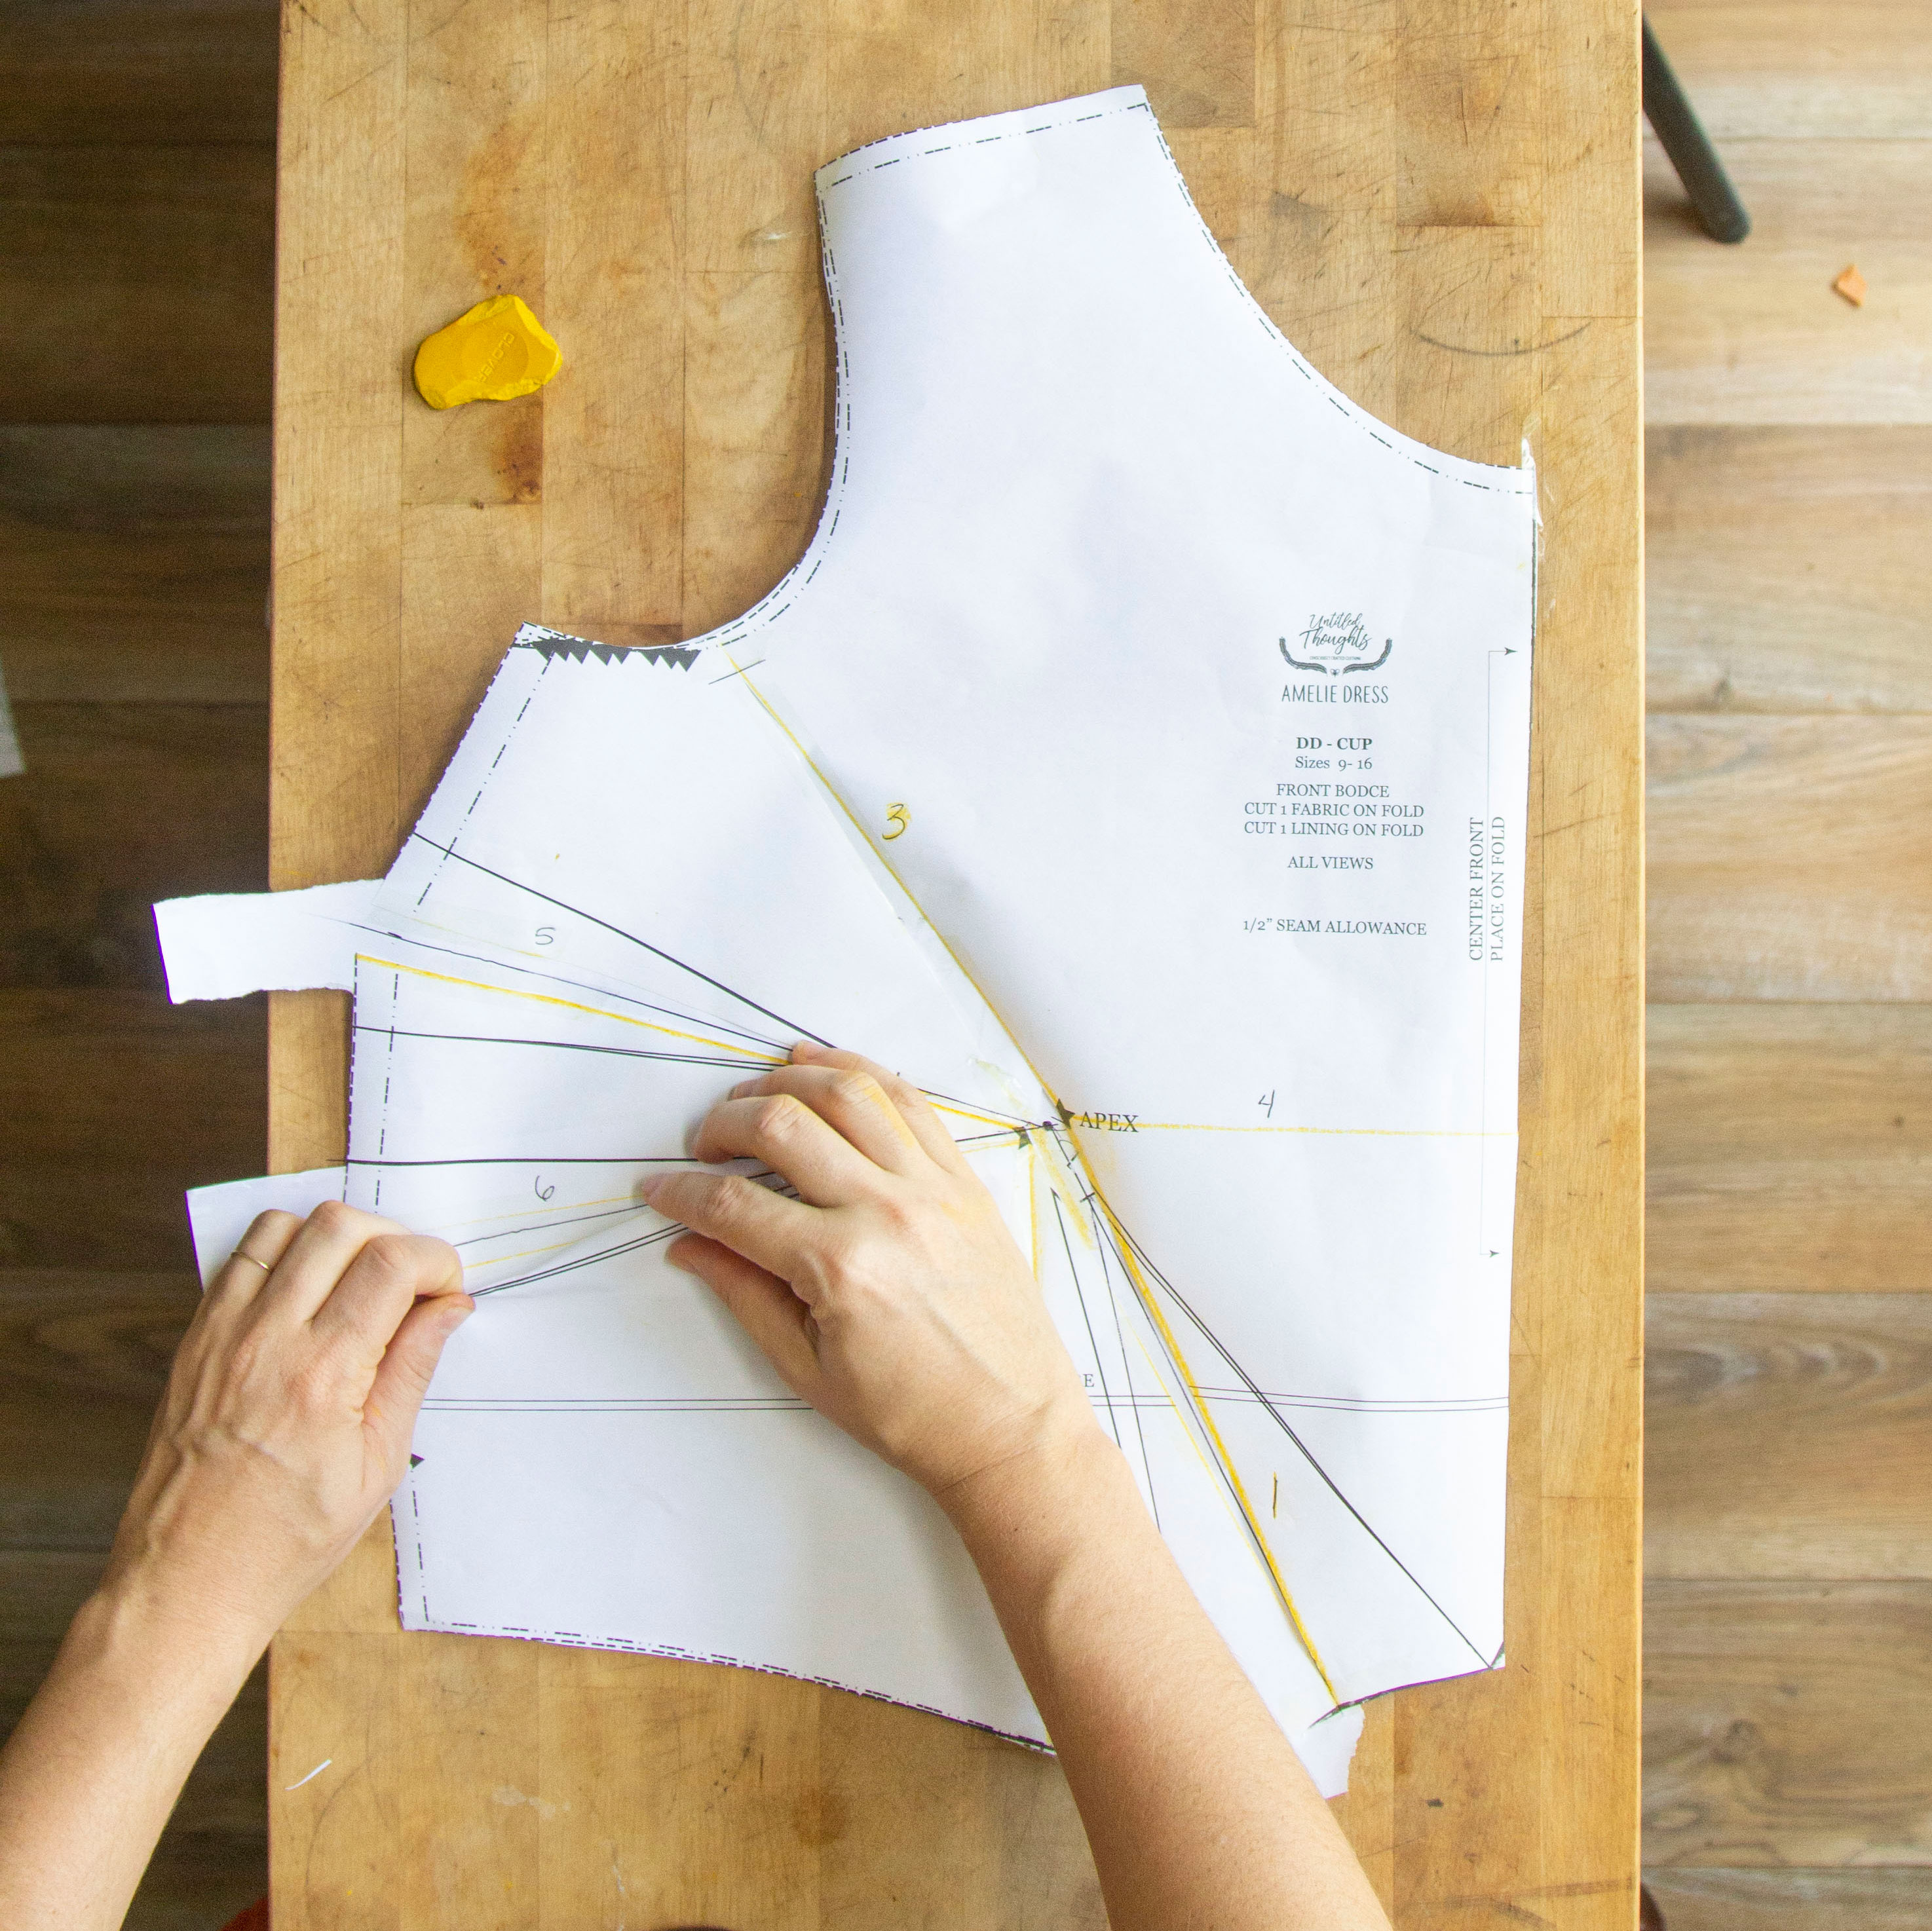
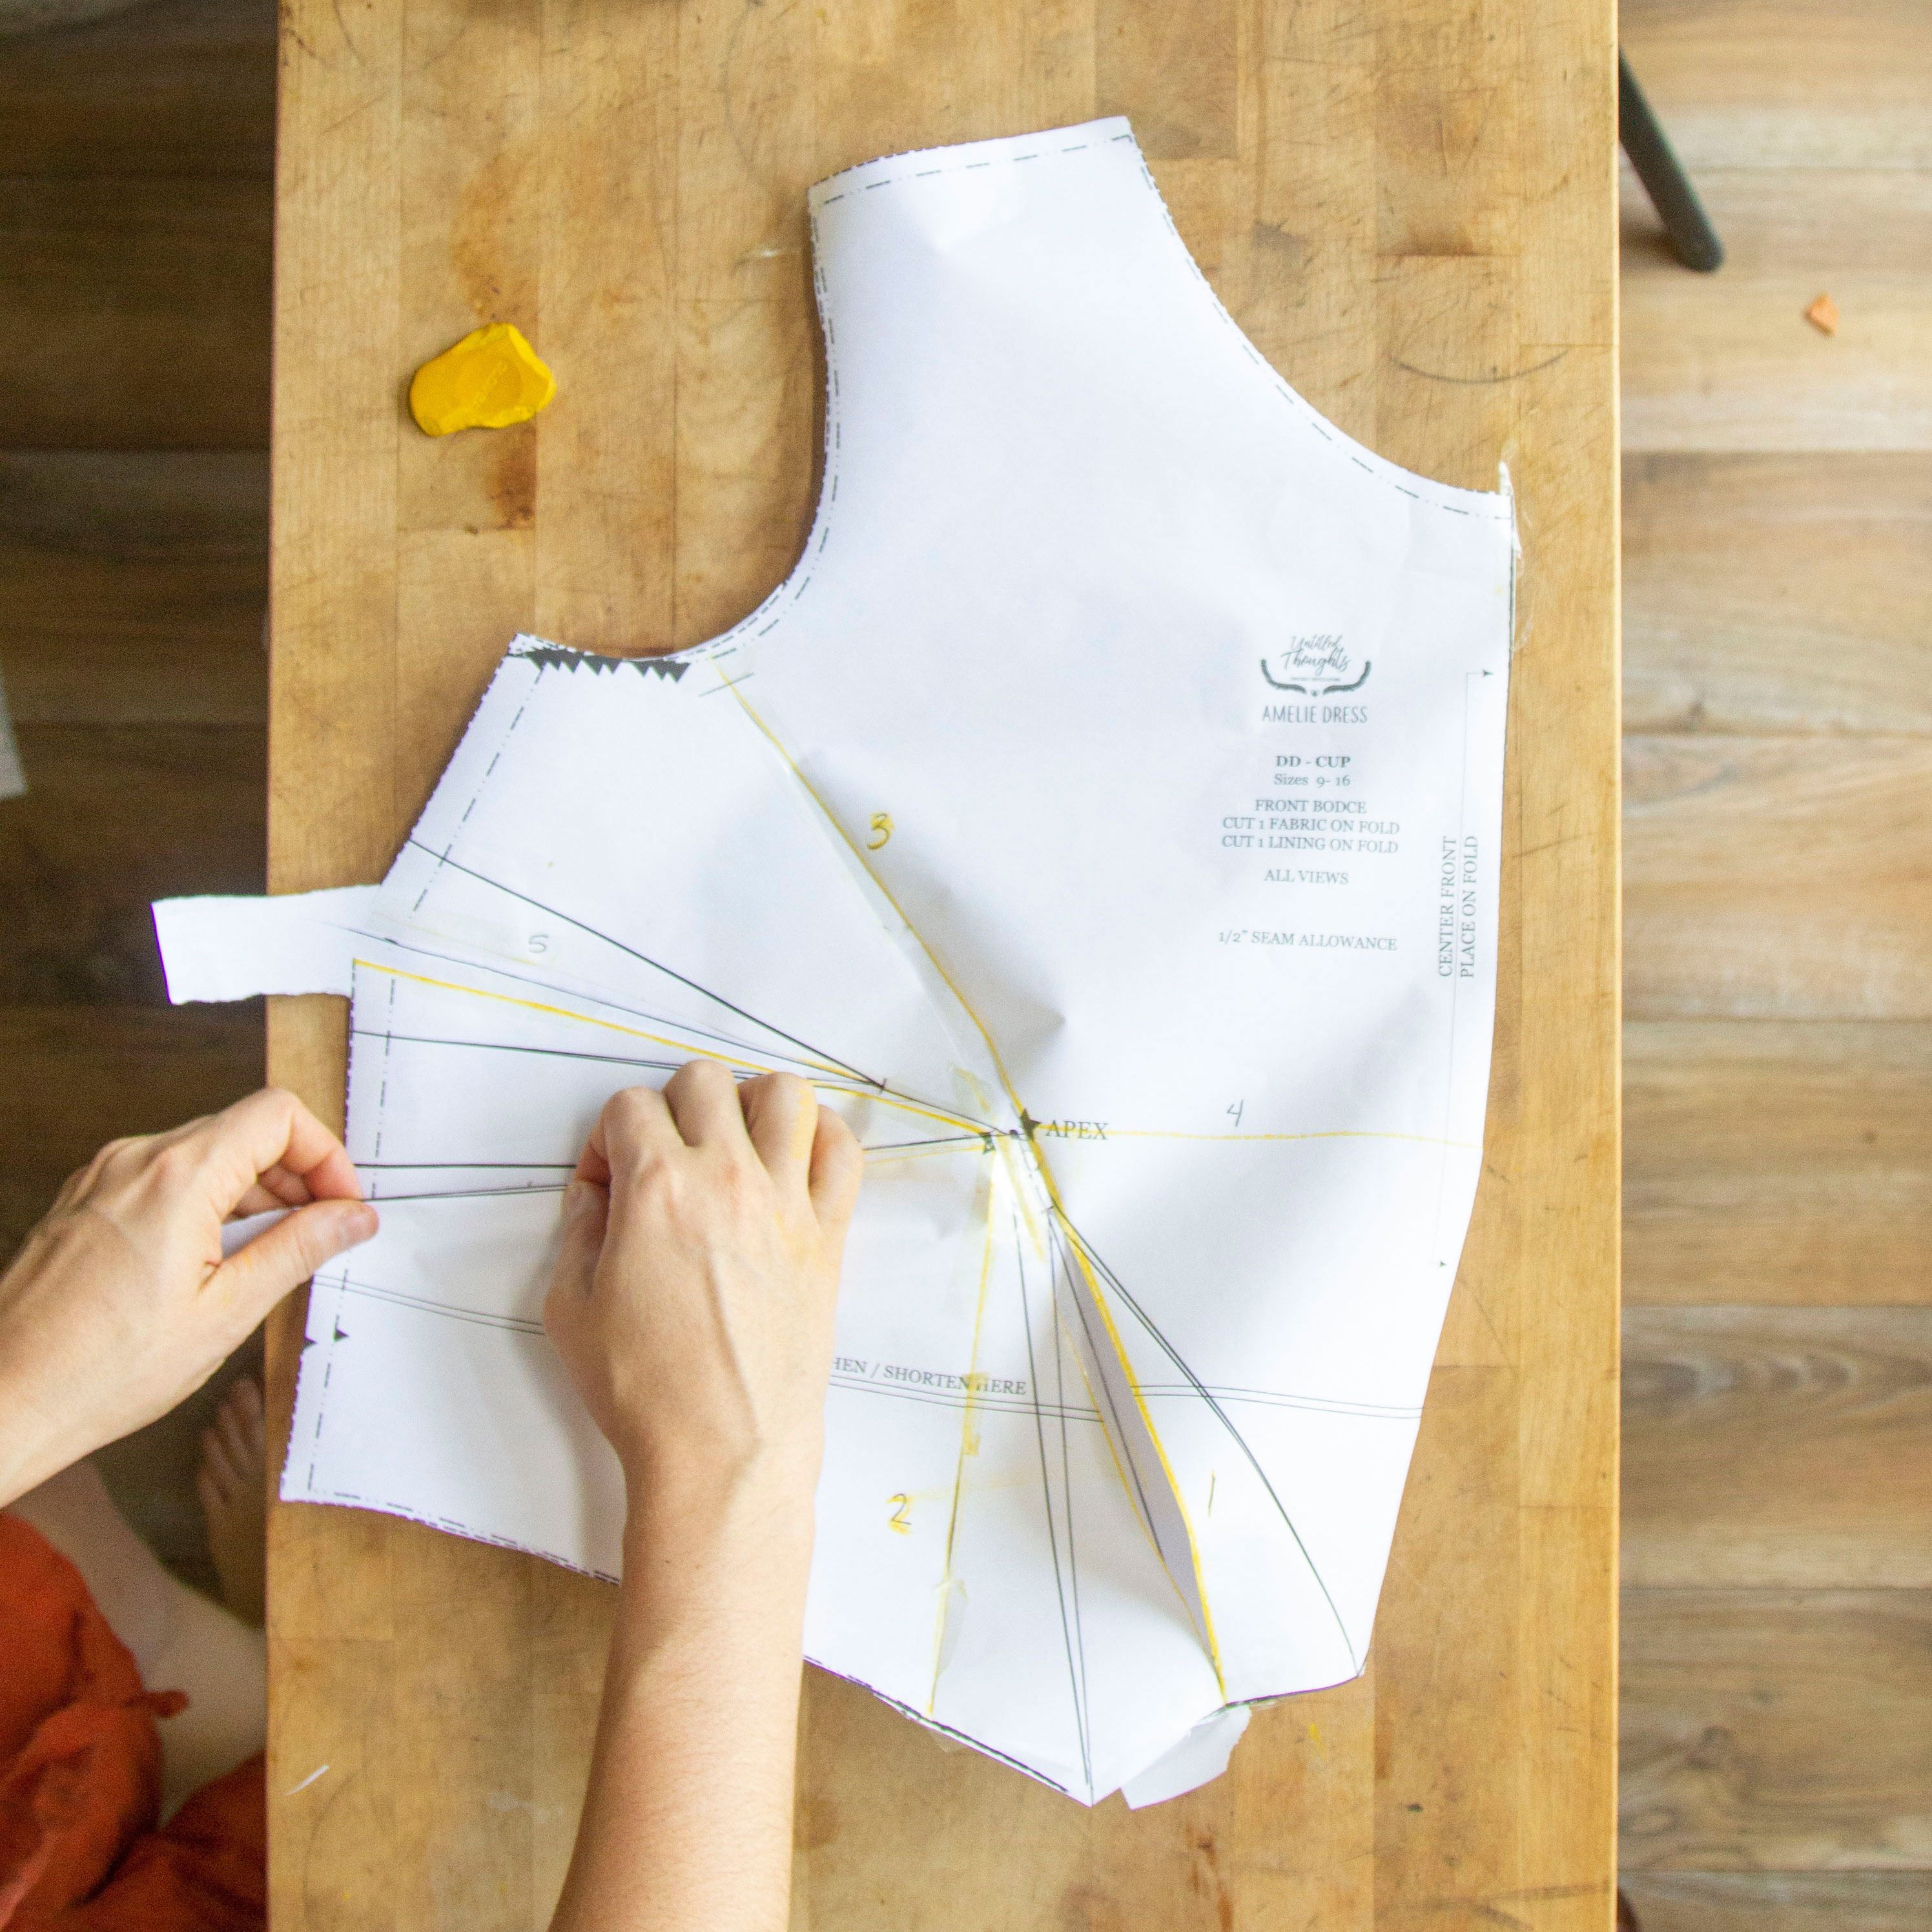
Gently pull the bottom edge of your pattern pieces until they start to spread apart. I like to place my ruler right at my apex point so that when I am sliding my pattern out, I can stop as soon as it reaches the measurement I am aiming for. In this case, ½” (1,3 cm).
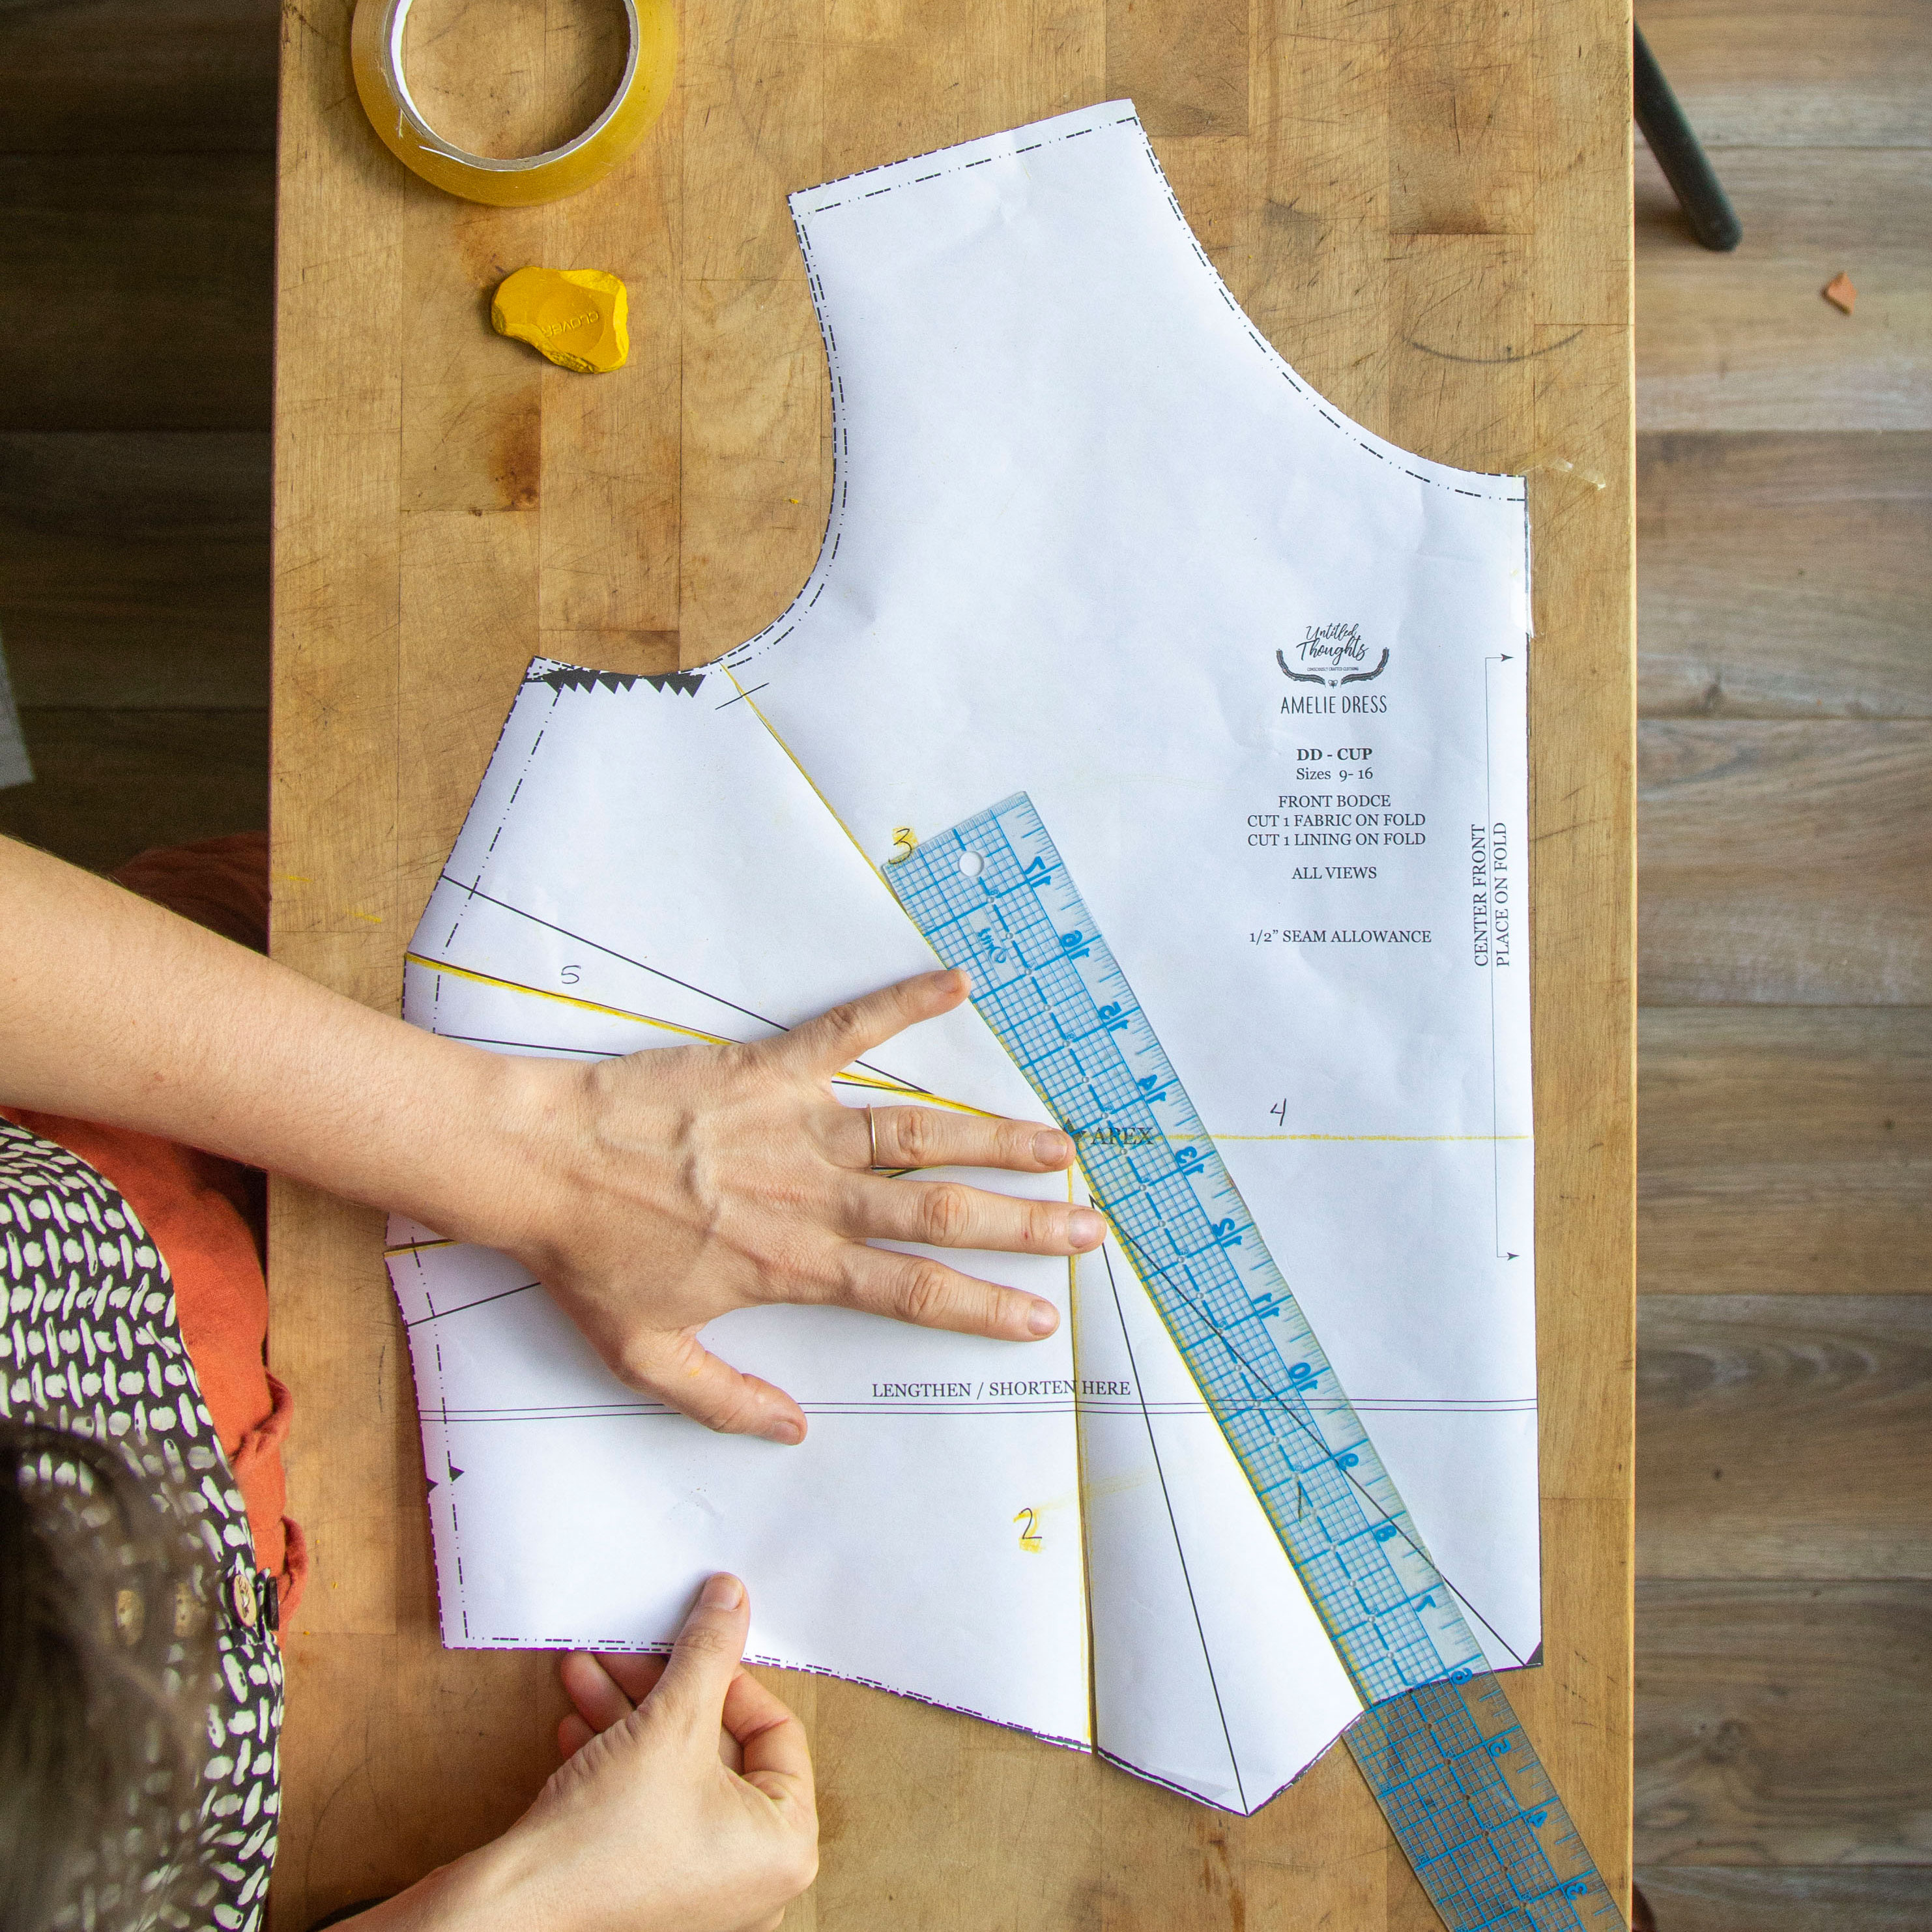

You may have noticed that I didn’t open up my CF dart and instead hinged it near the apex. The reason for this is because when performing an FBA, it is common to wind up with a new dart that becomes too wide compared to its length. When a dart is too wide for its respective length, this drastic change can cause the bust points to be rather… pointy. For some, this is a non-issue, but for many, avoiding a point at the end of our darts is paramount. This is actually why there are two underarm darts in this pattern – they were added to help redistribute the excess fabric after my testers informed me that the bust points were just too pointy.
But what is the right width to length ratio for your dart?
Honestly, the answer to this question depends. It depends on your cup size, the location of the dart, the fabric you are using, and your own personal preferences. I wish that I had a sure fire answer that would work 100% for everyone, but I don’t. (If you know of a general guideline, feel free to share! A quick internet search yields next to nothing regarding the proper ratio to maintain.)
For myself, I go based on gut instinct for the most part. I’ve made a fair share of garments with darts that were too wide (as was the case with the Amelie at first!) and wound up with a dart point that was quite pointy. As my own personal rule, I try to keep all my bust darts less than 4” (10 cm) wide by 6” (15 cm) long.
When in doubt about your bust width to length ratio, the easiest solution is to simply transfer the excess width of your dart into a second dart which you can easily do with the under arm darts if you’d like.
All of that to say, I didn’t widen the CF dart because I know that it is already around 4” (10 cm) wide by 6” (15 cm) long and I don’t want to push those limits further.
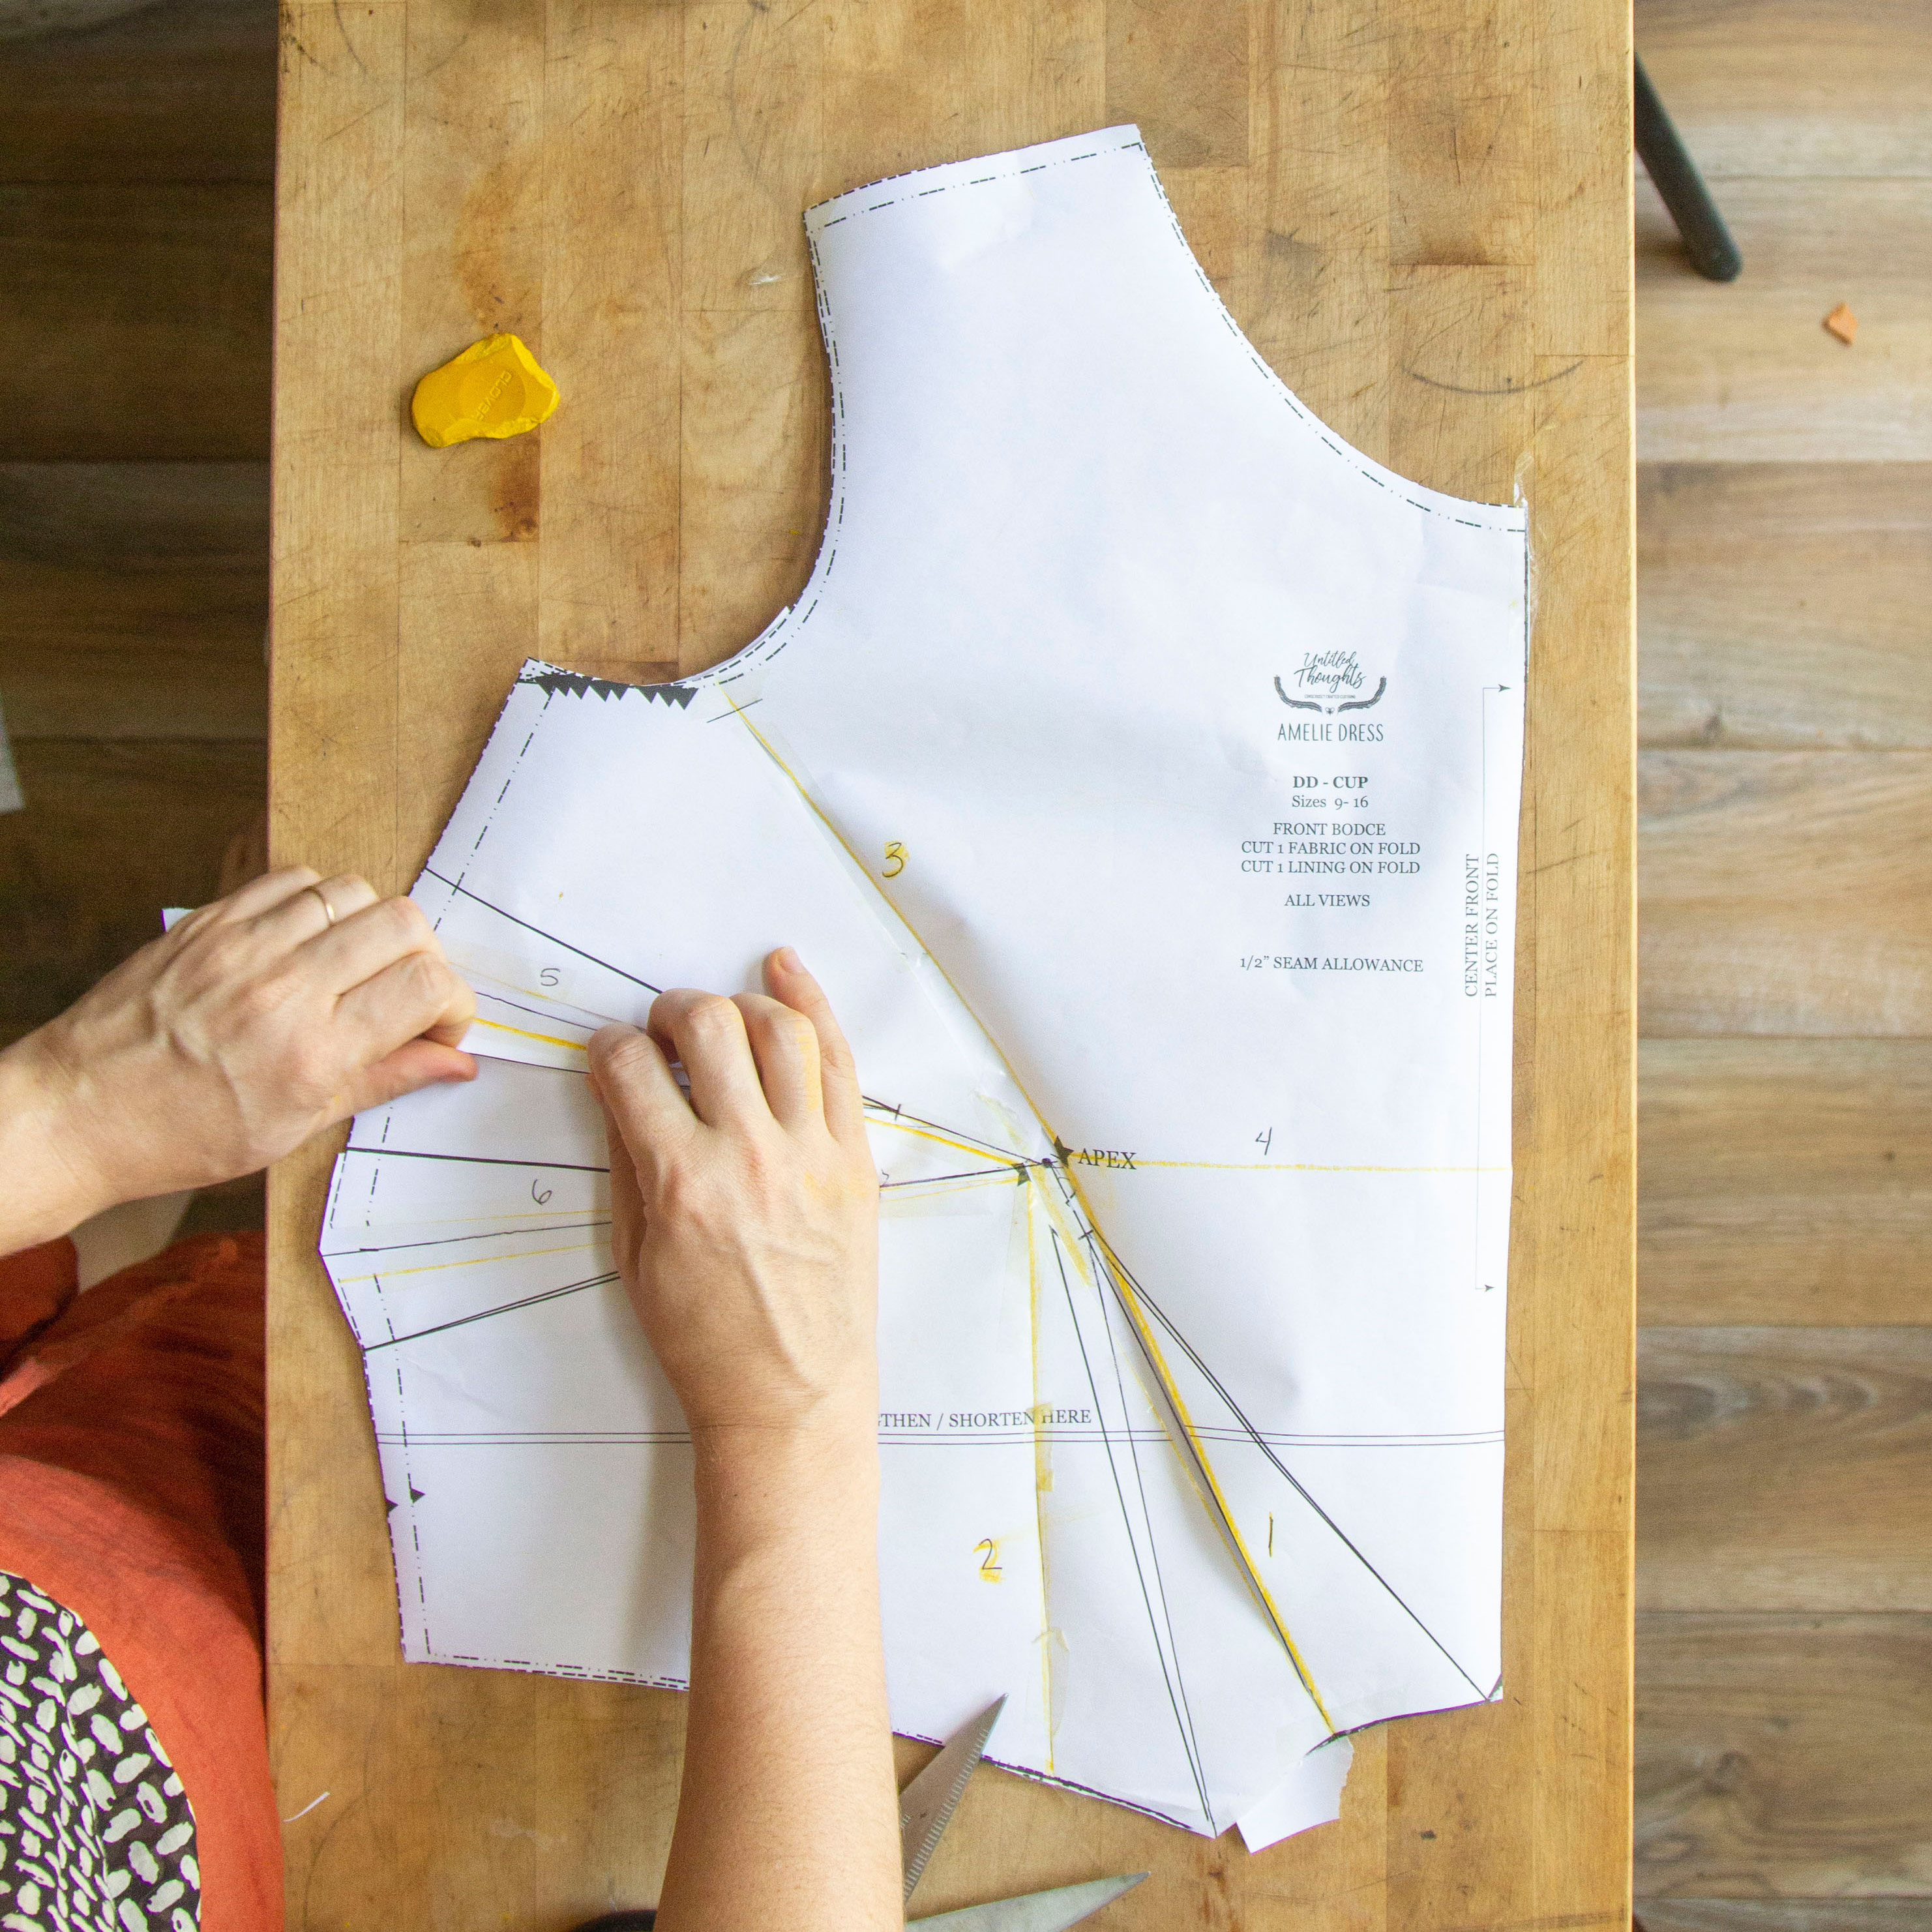
But now there is some excess right at the waist seam that we don’t want there. It’s time to transfer it! To start, make sure that you have taped the bottom of line 1 shut so that it doesn’t try to move on you. Then, gently close line 2 and tape it shut as well.
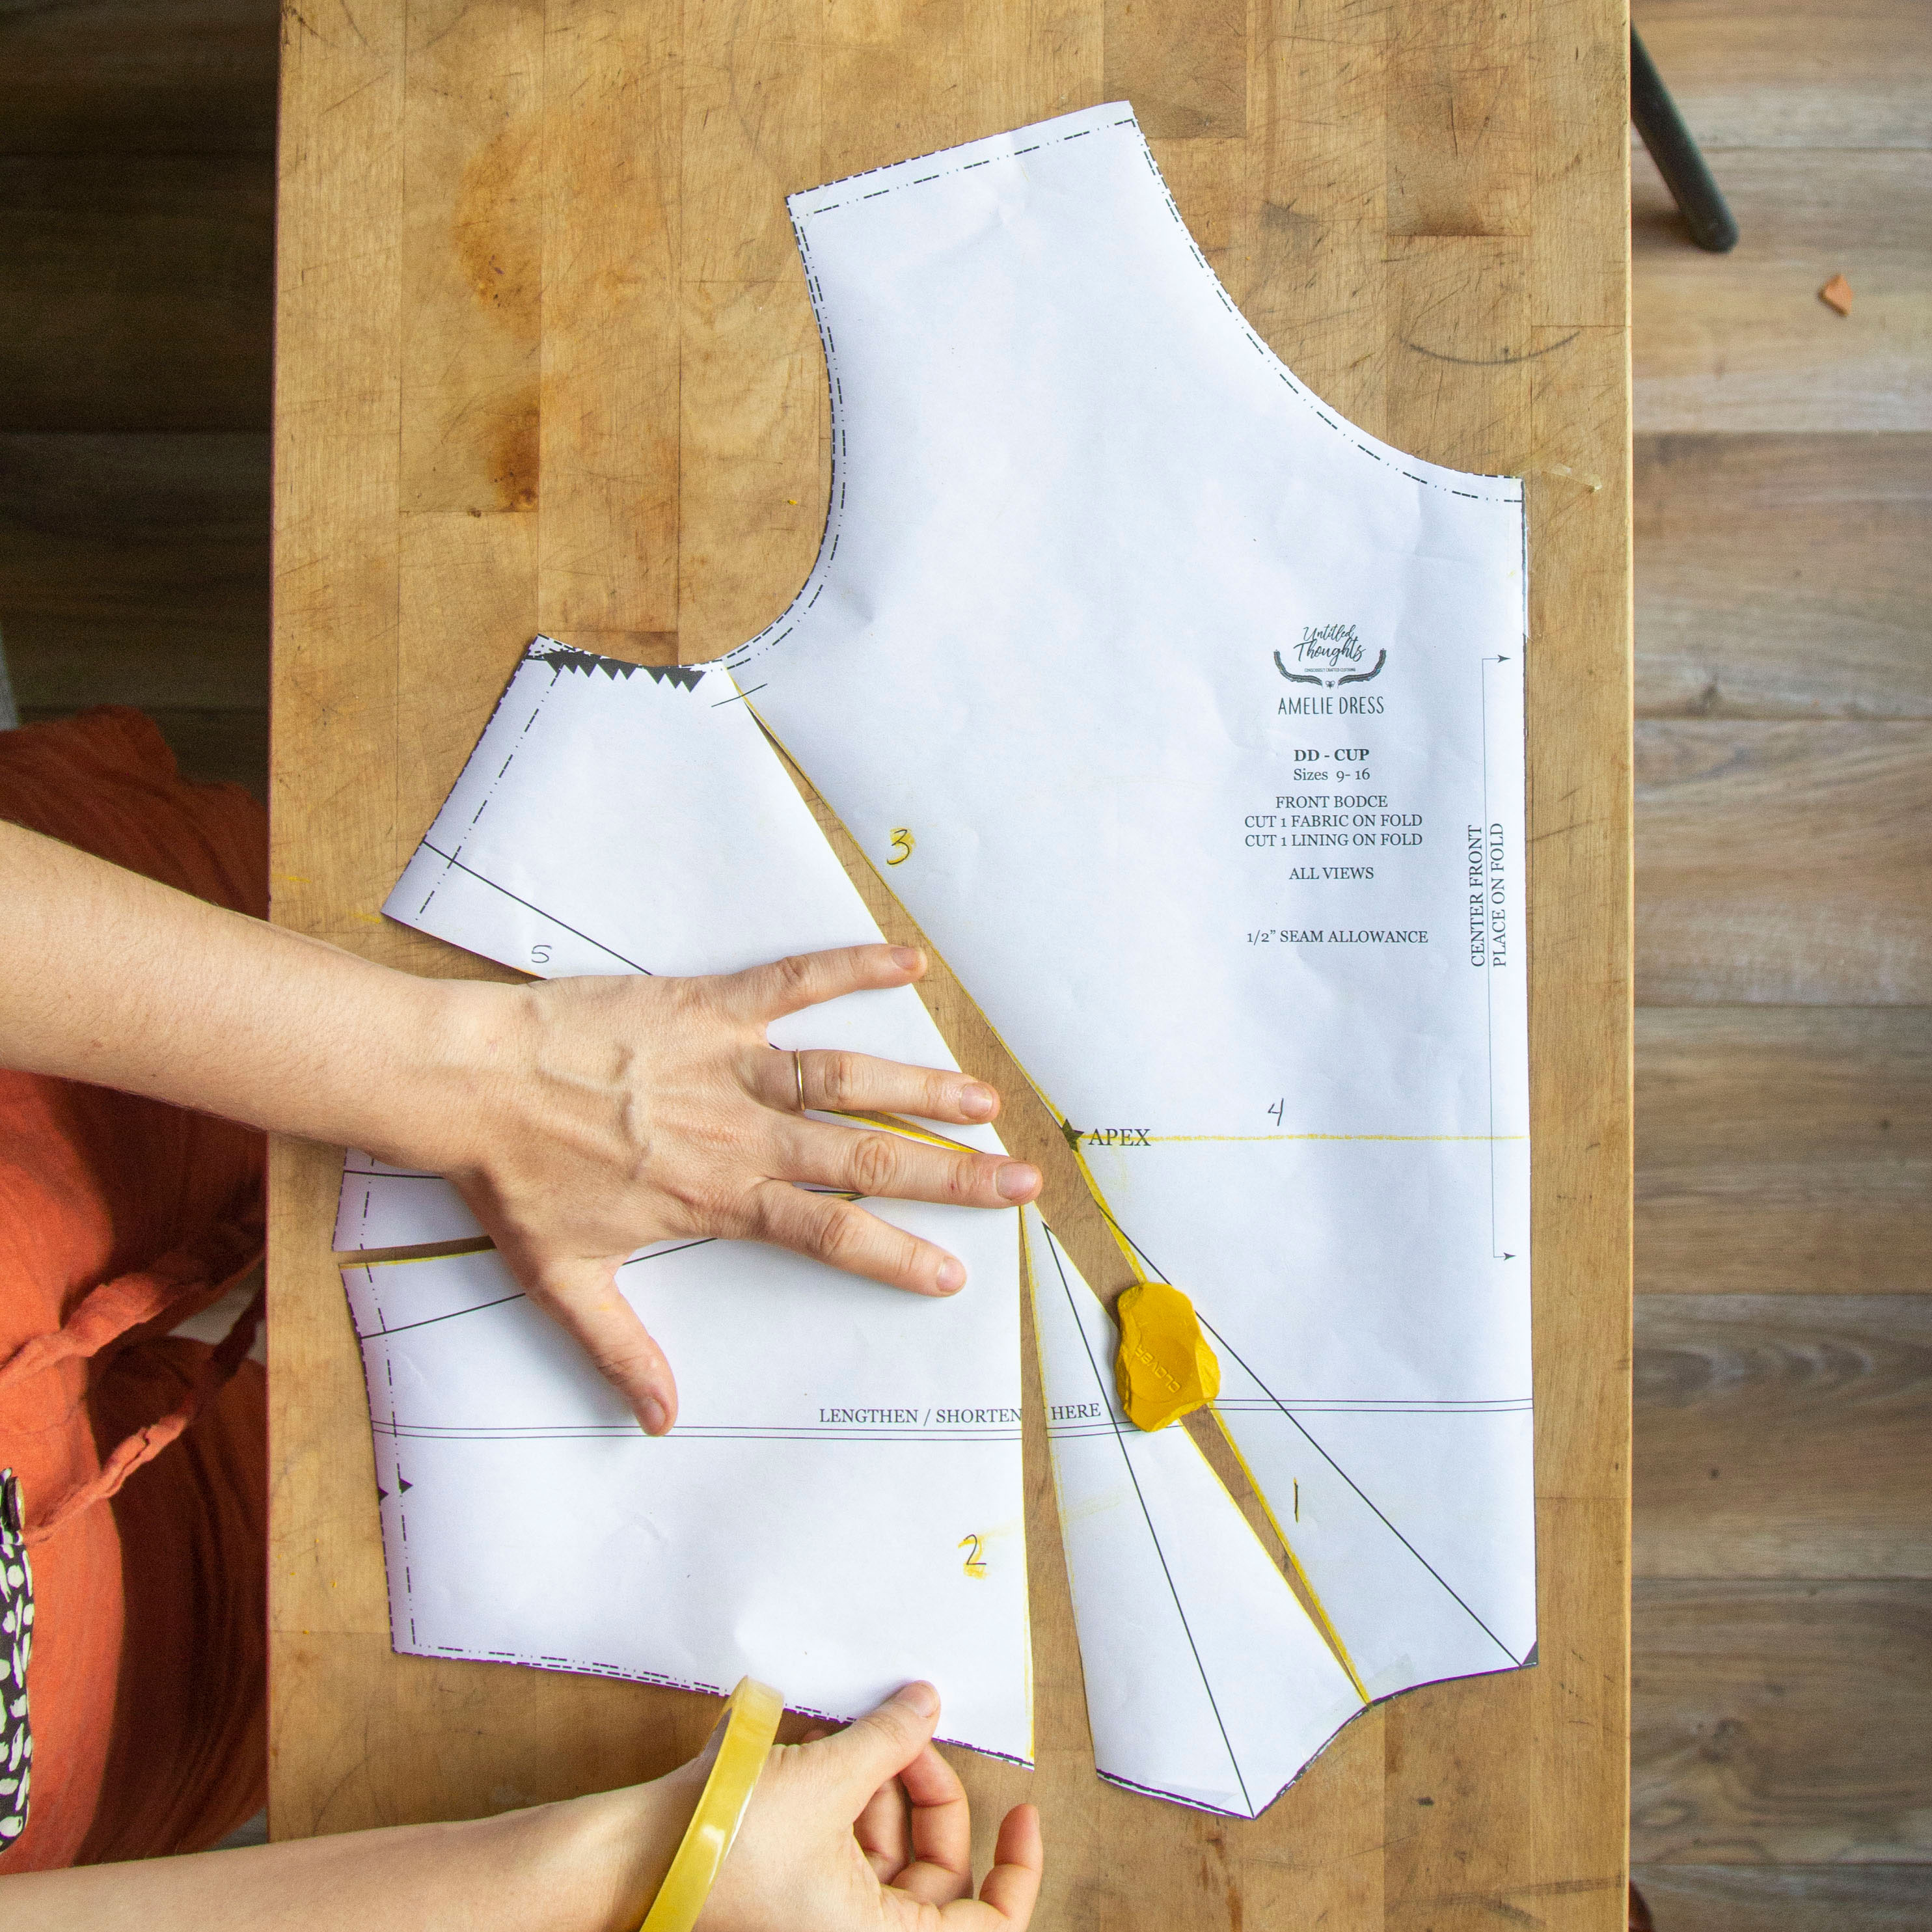
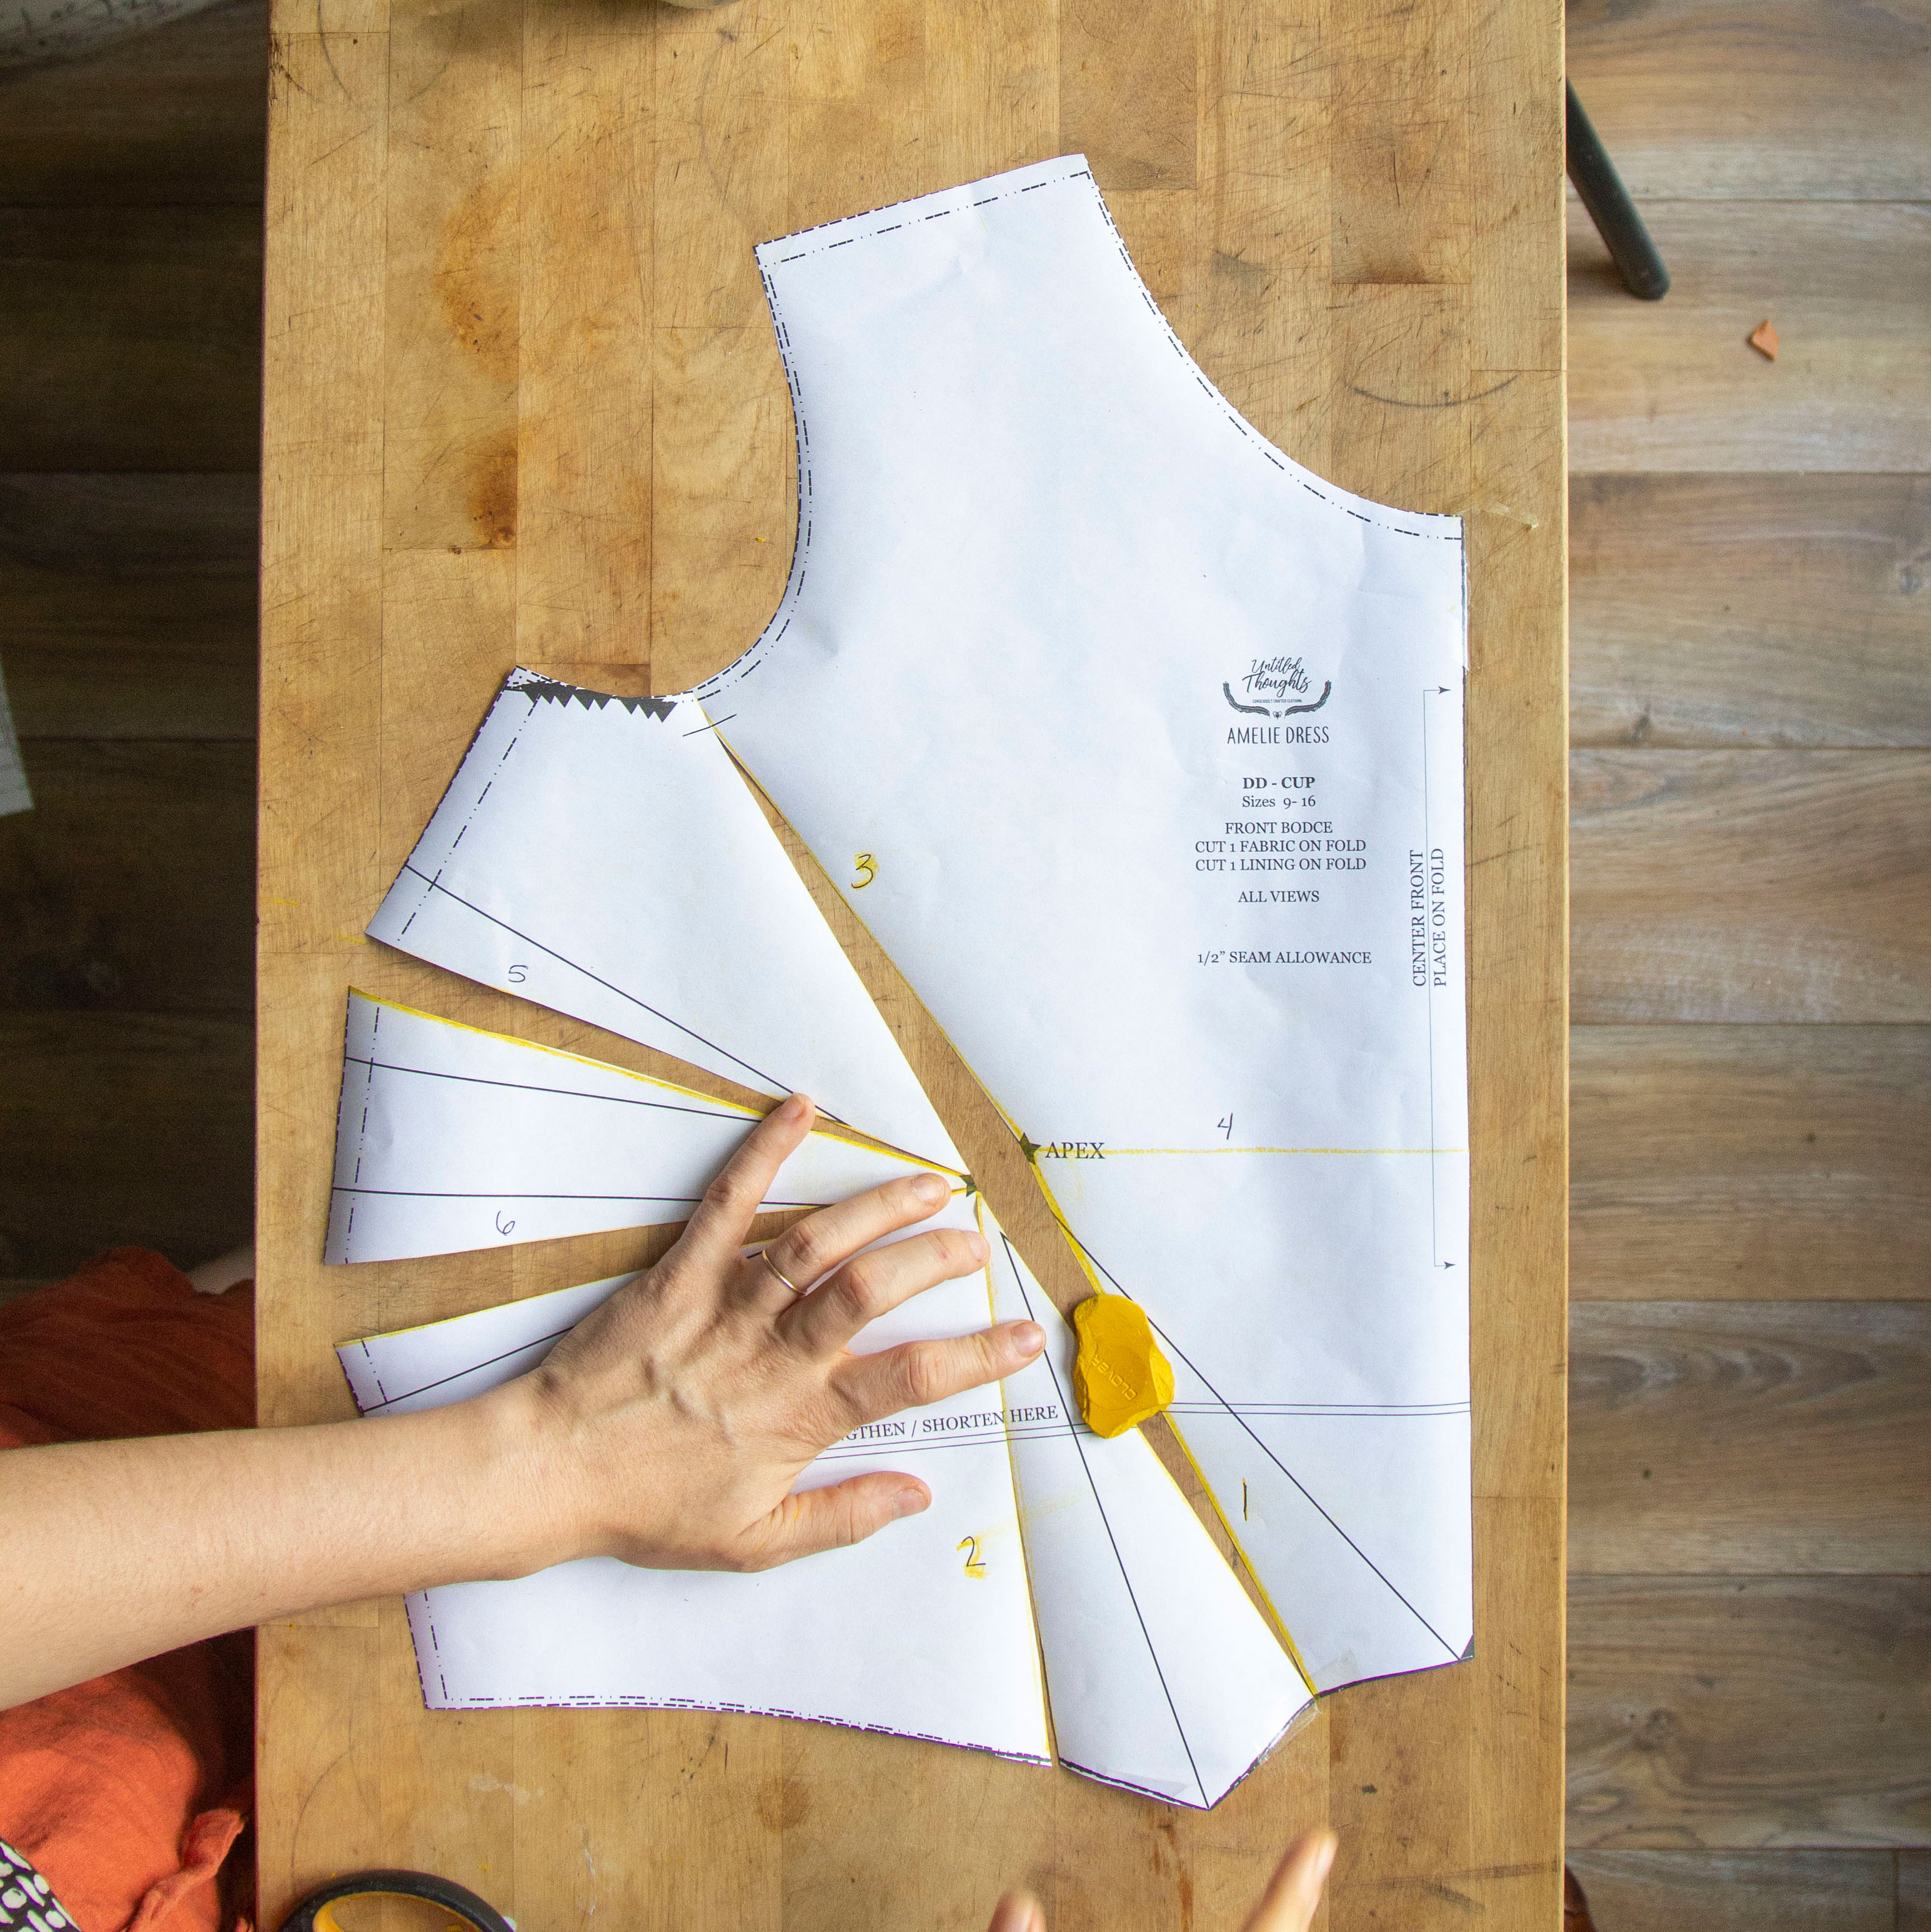
Now all that excess from line 1 + 2 has been transferred into your underarm darts – yay! This is where the fun begins! You can now play around with altering your darts to see what works best for you. You can try eliminating a dart or even transferring one of those darts to a new location – the possibilities are endless!
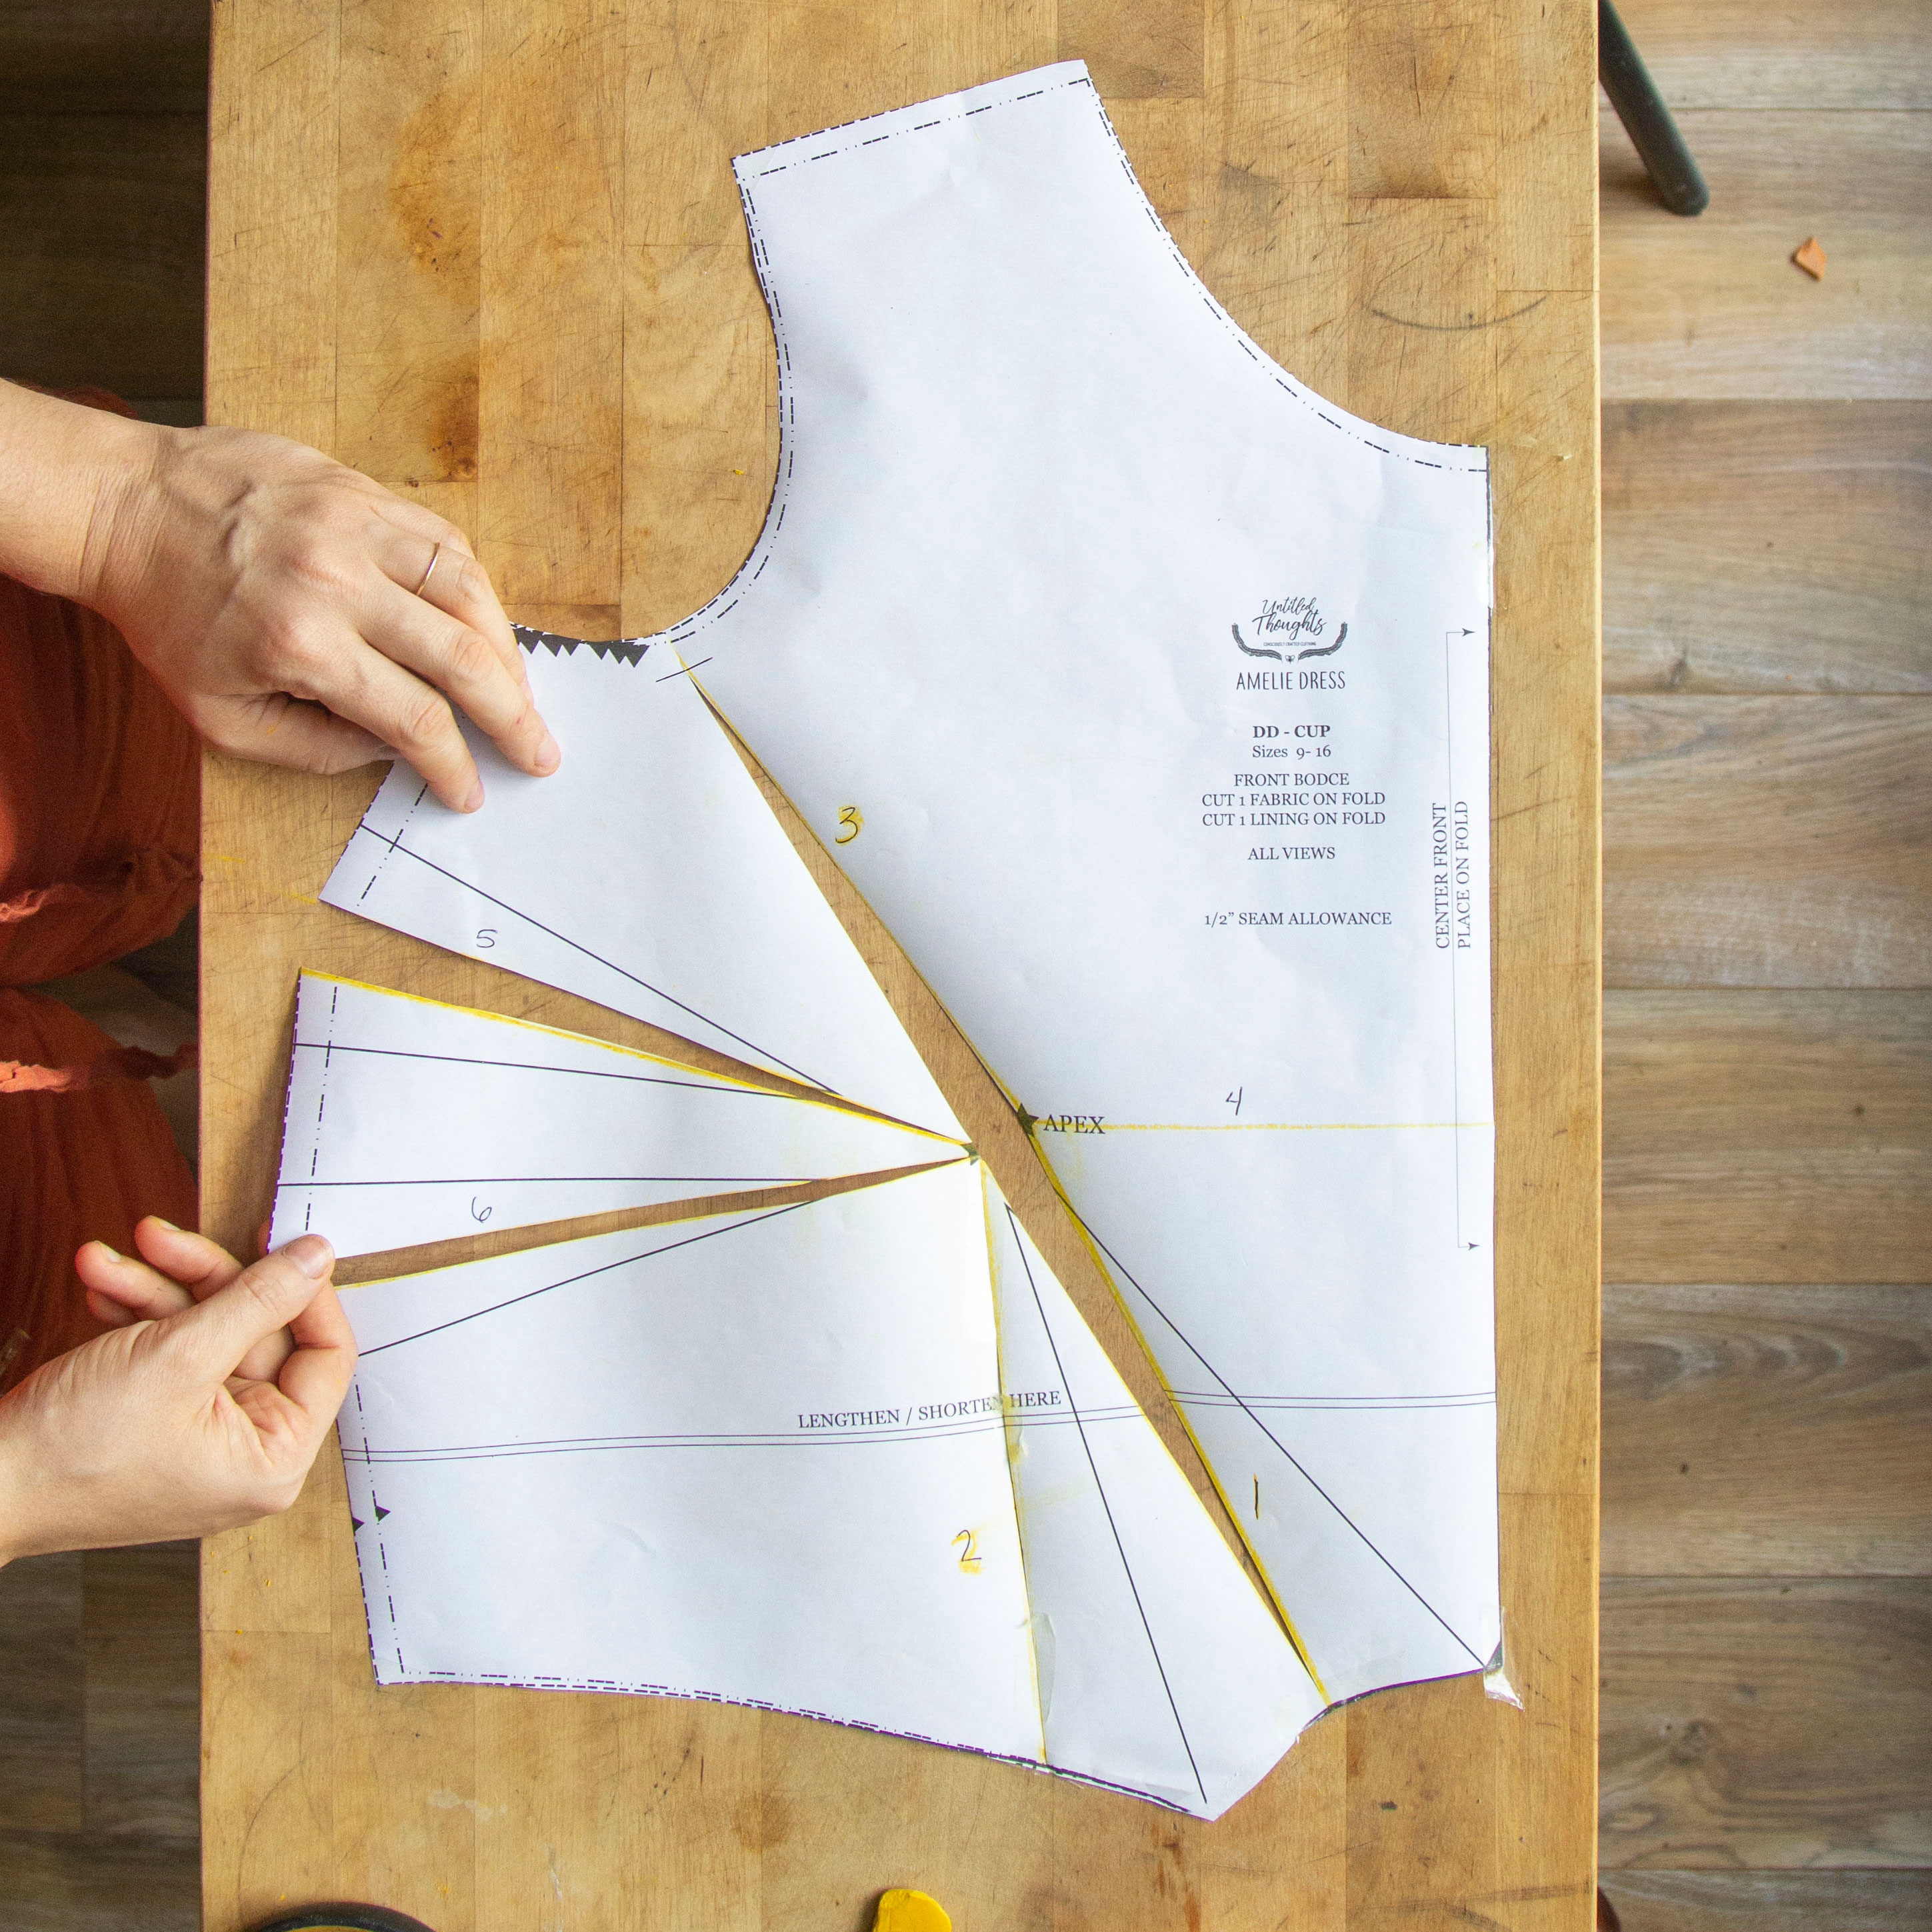
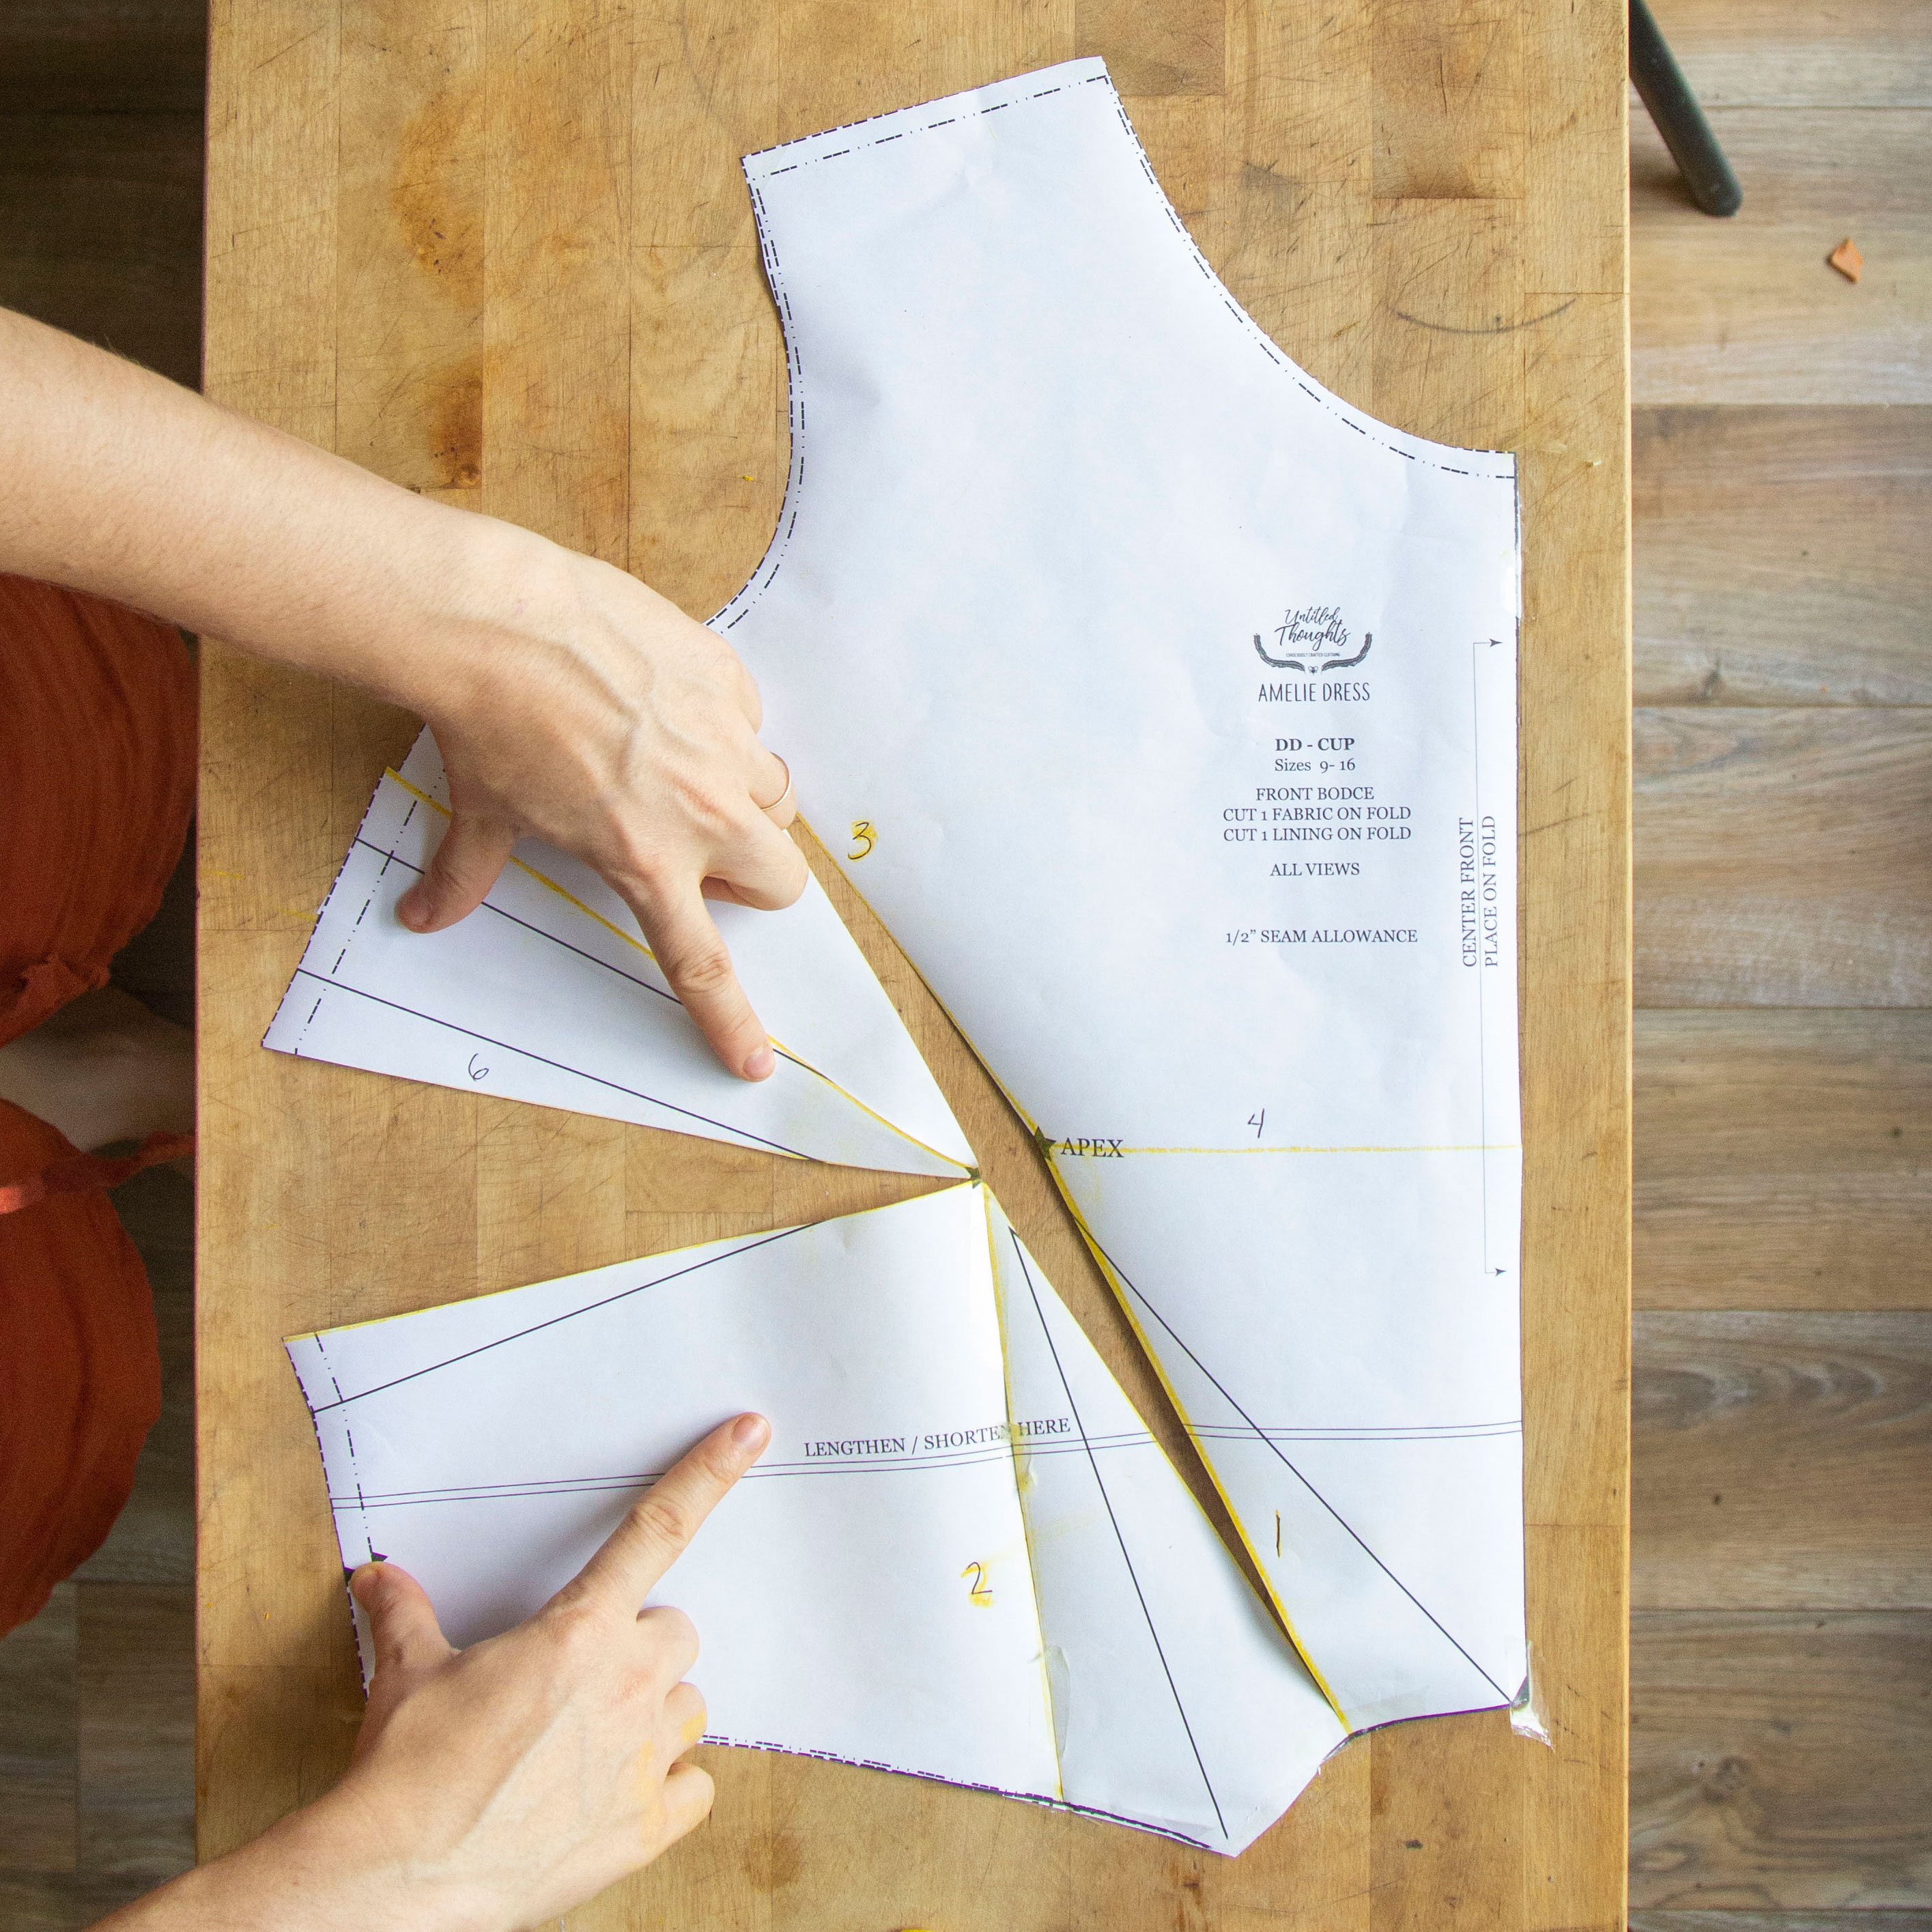
For this tutorial, I am going to stick with simply dispersing the excess evenly between the two darts.
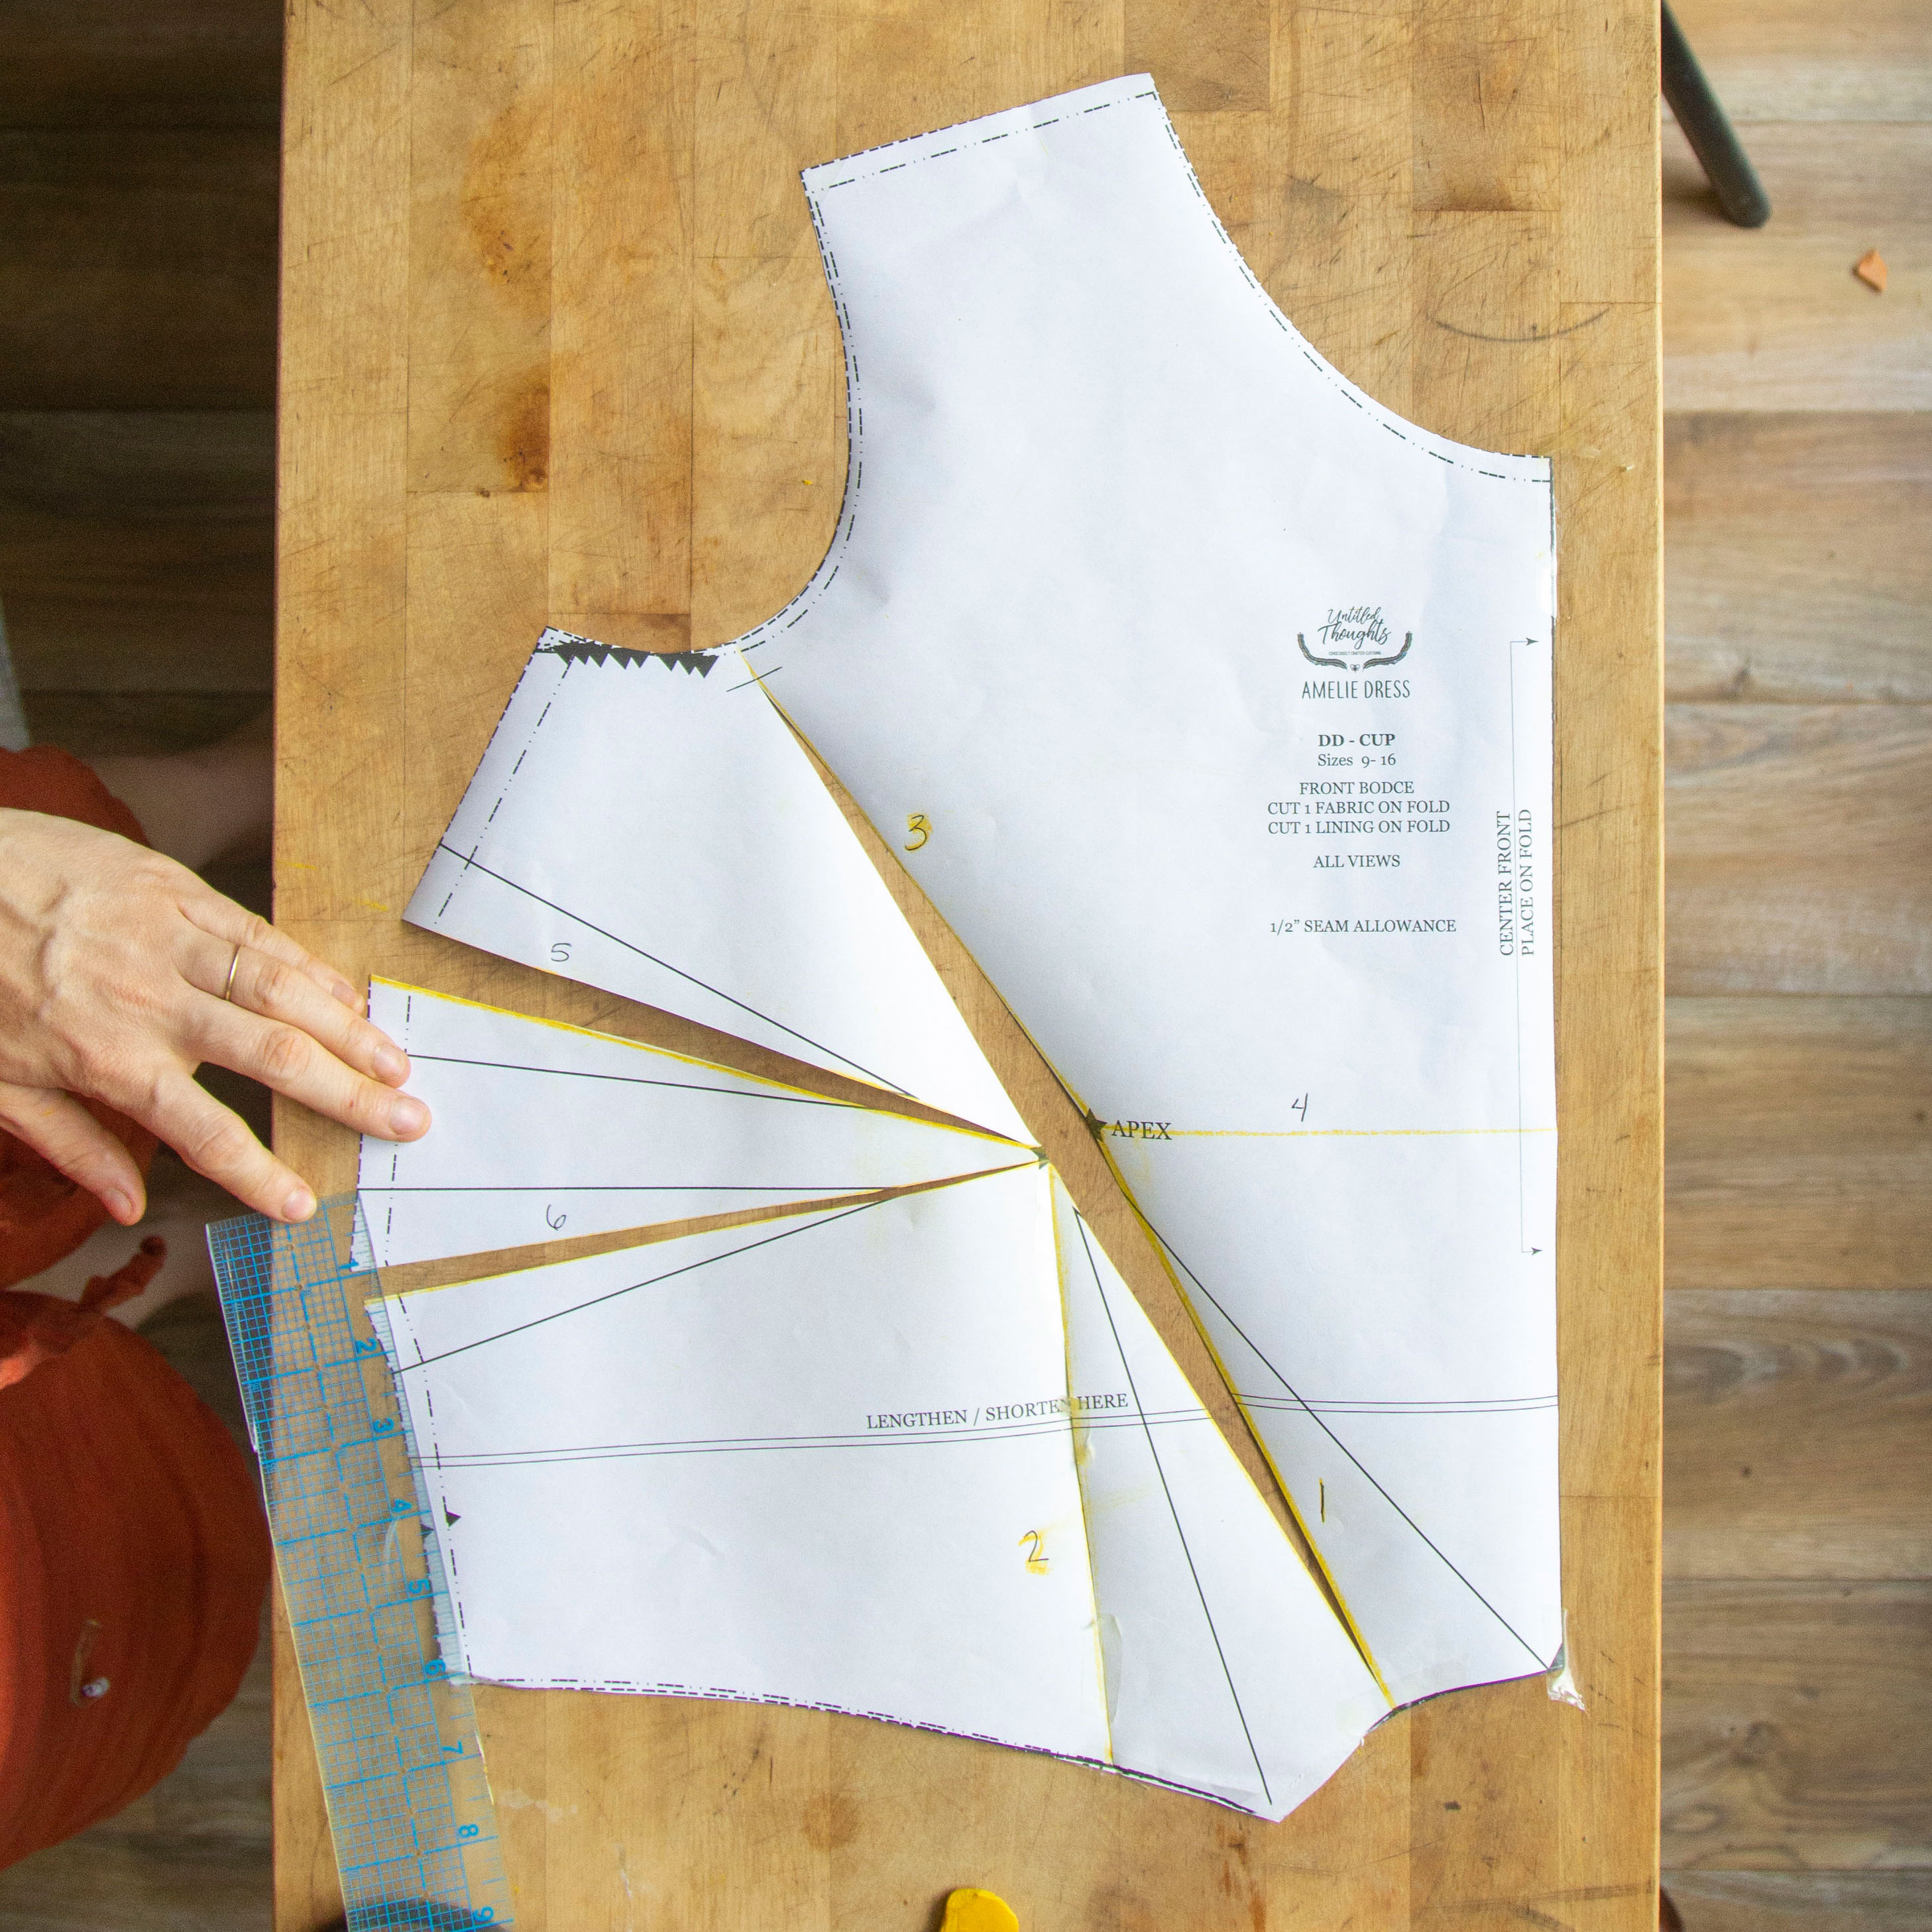
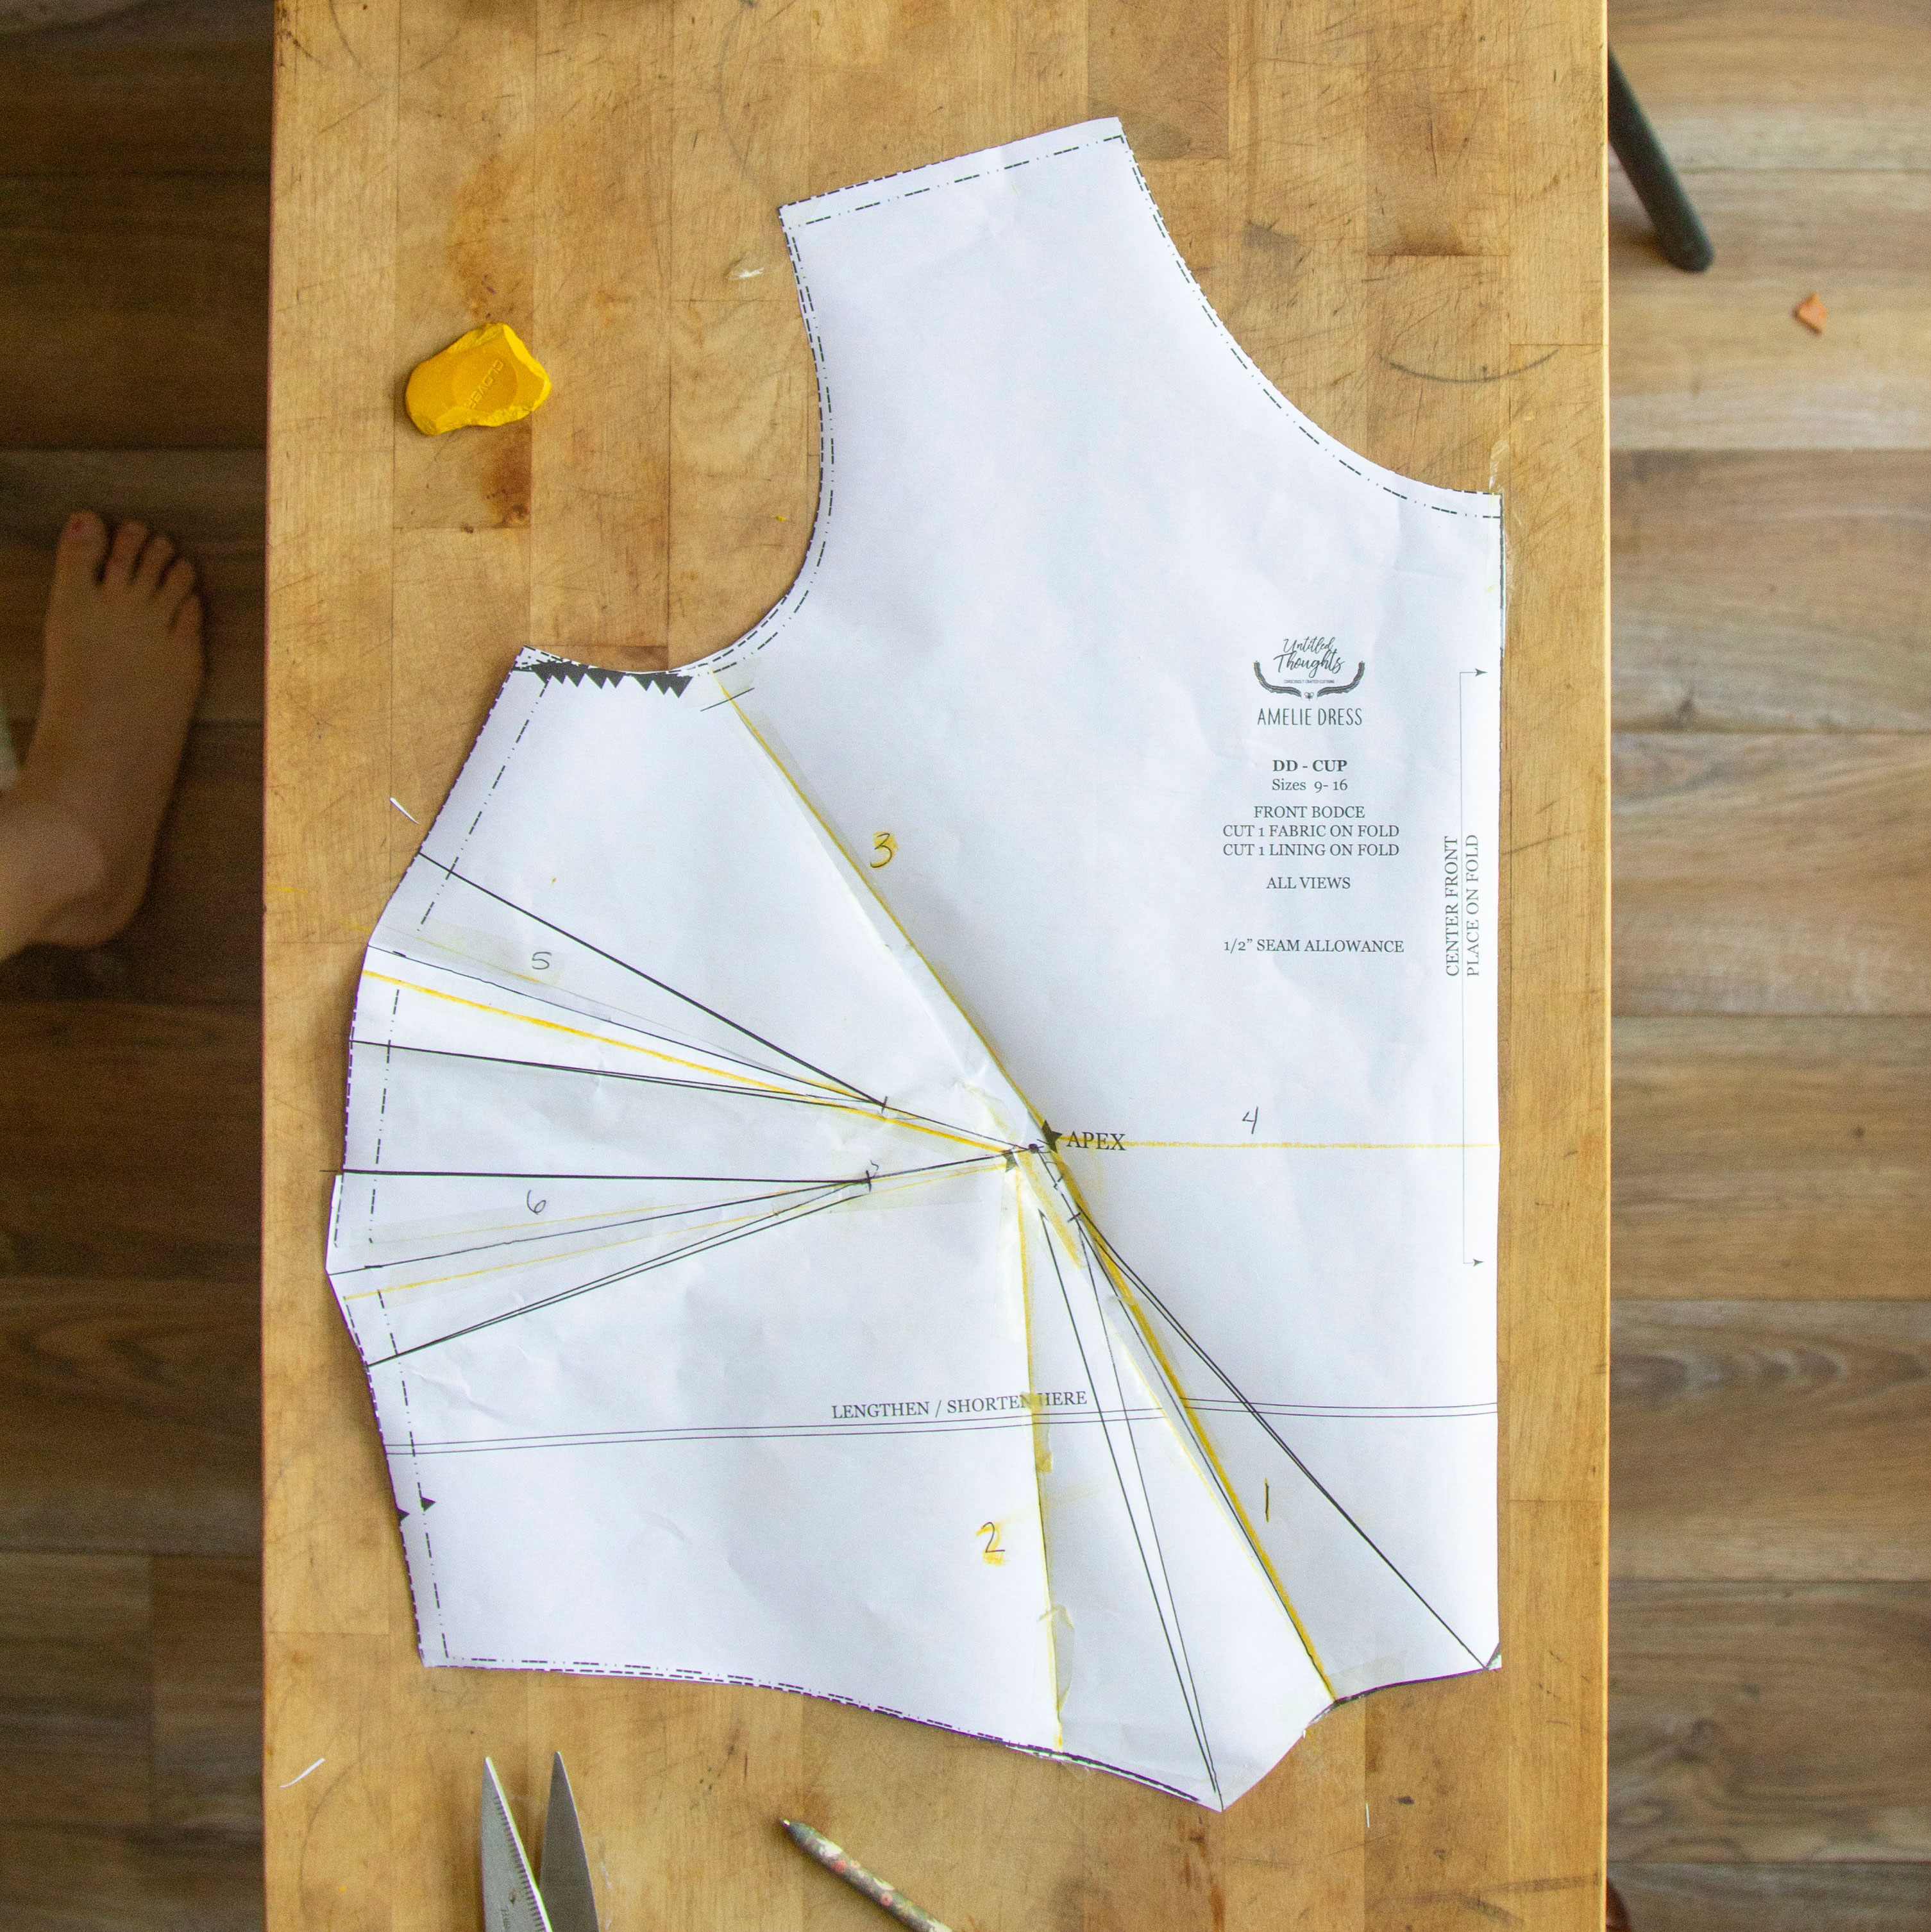
Place a piece of scrap paper under your altered underarm darts and go ahead and tape everything you currently see in front of you down to prevent anything from shifting out of place!
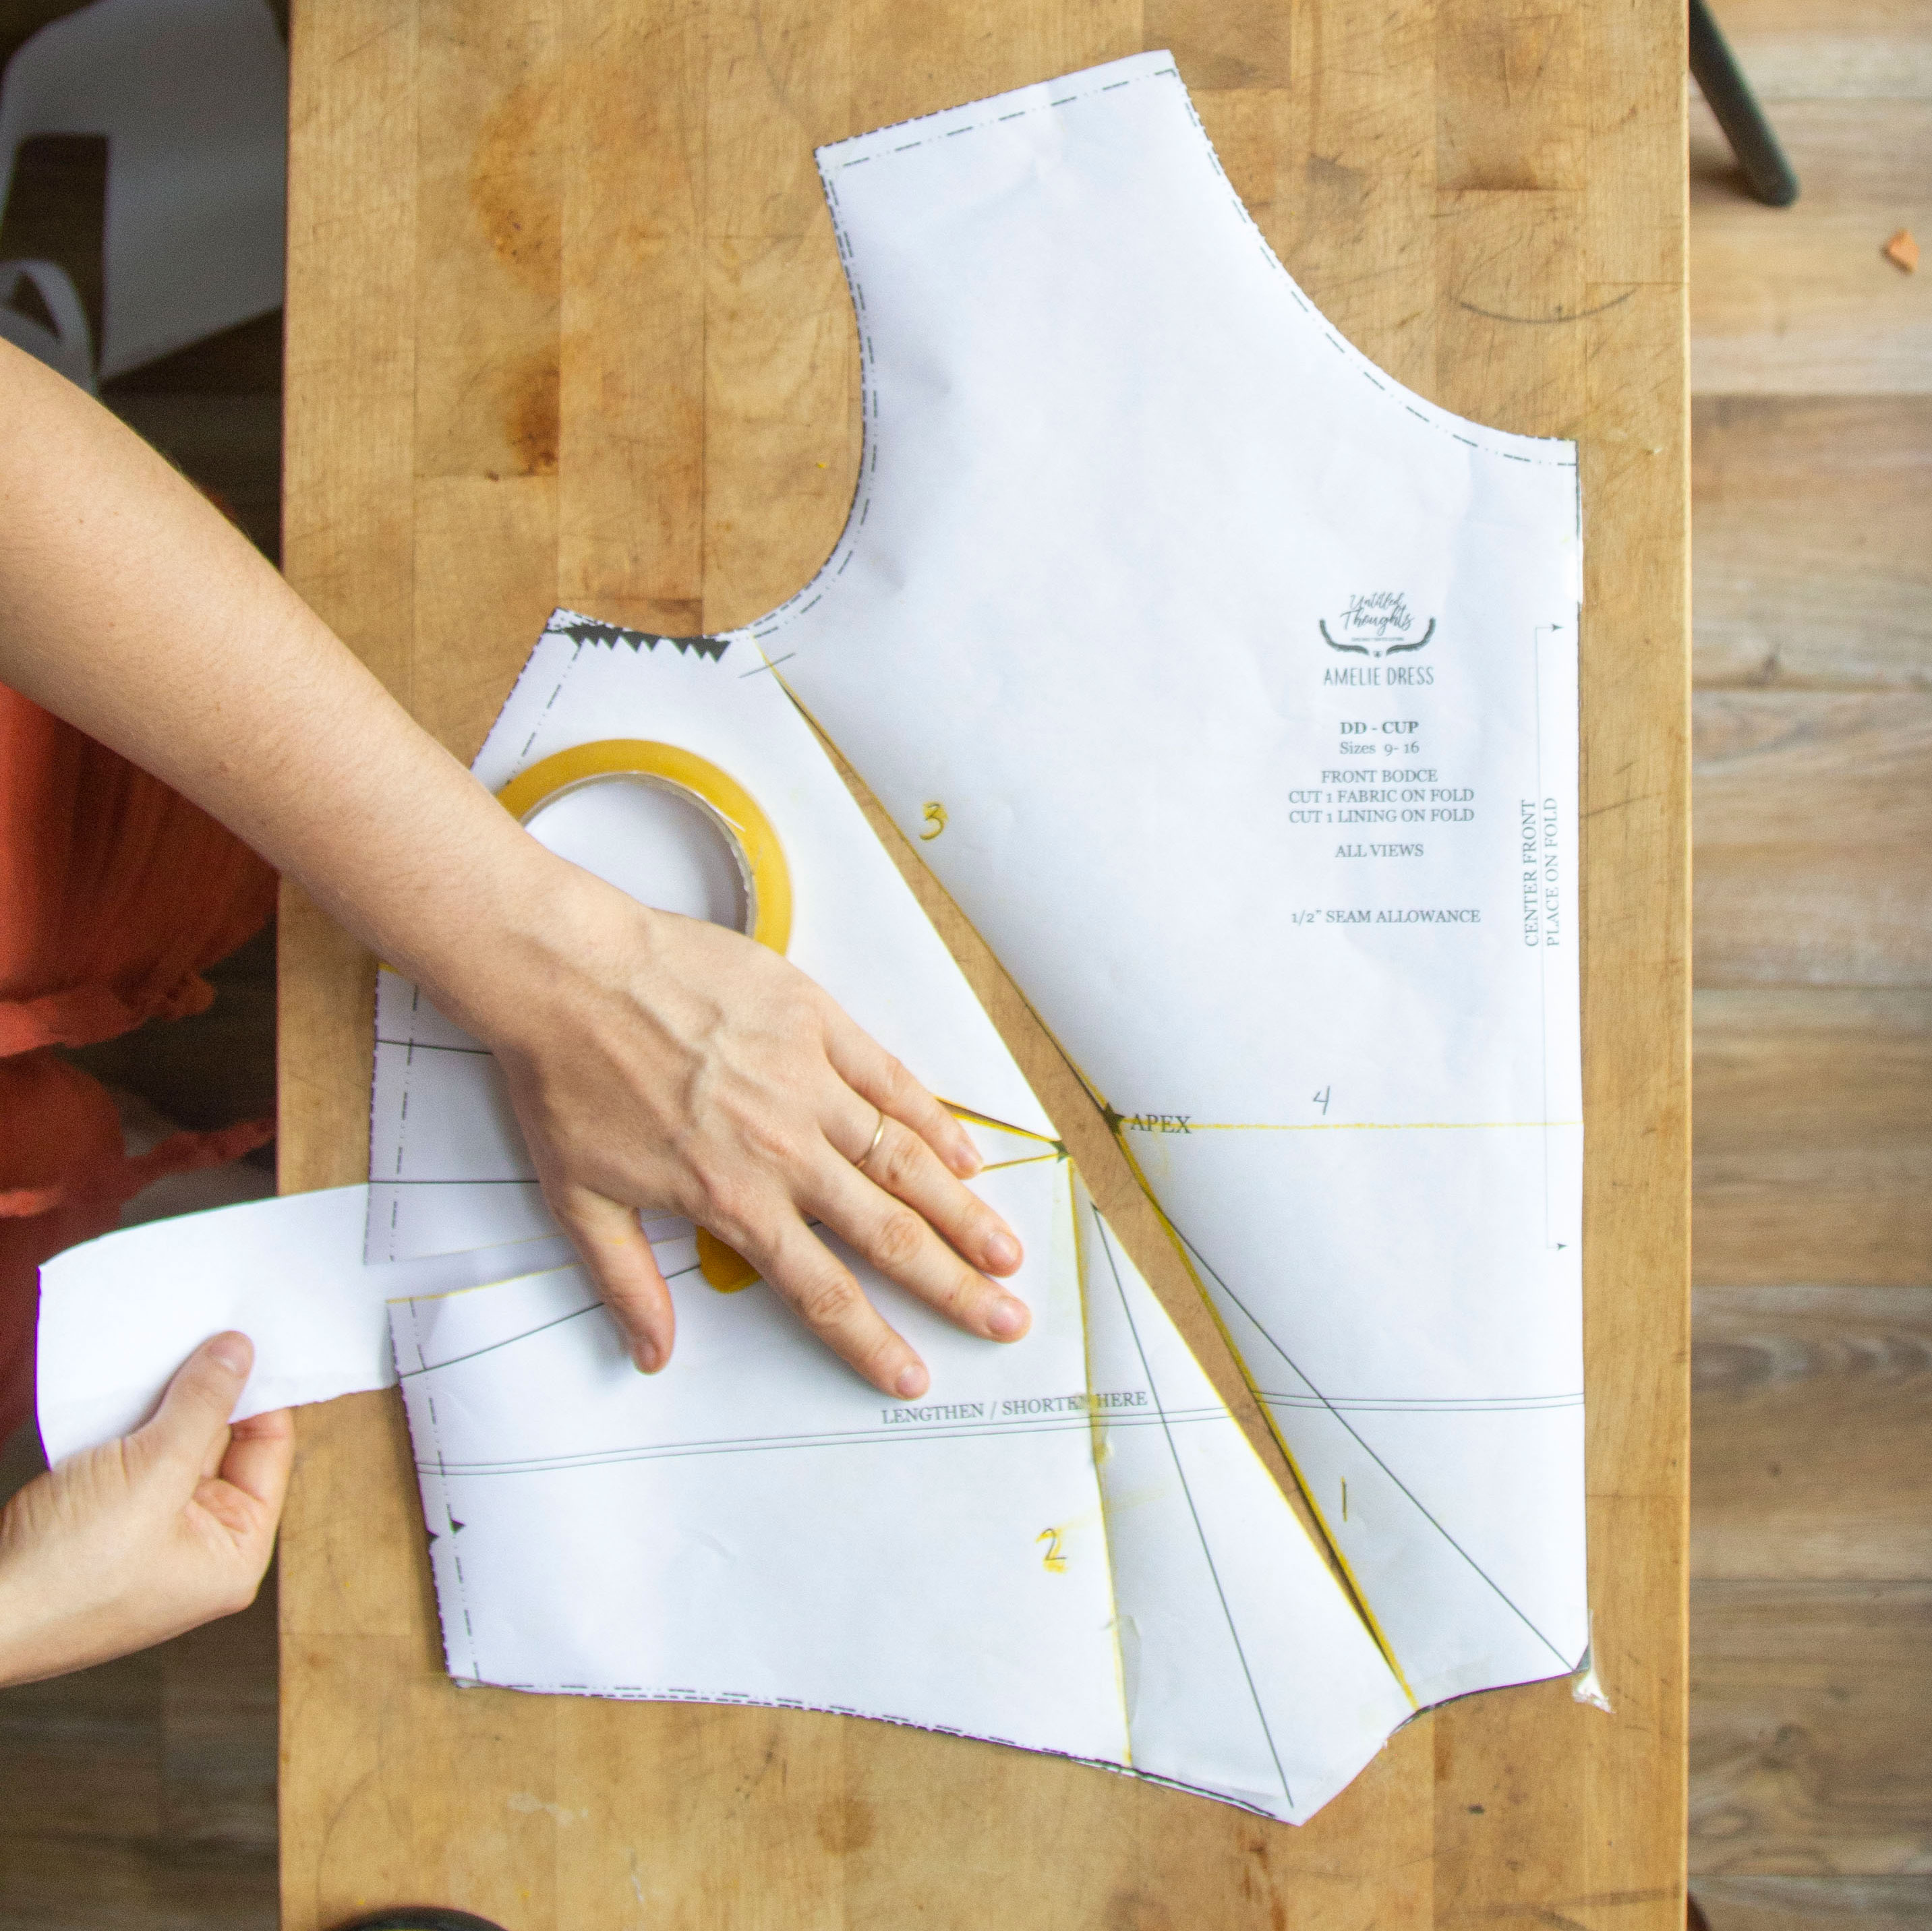
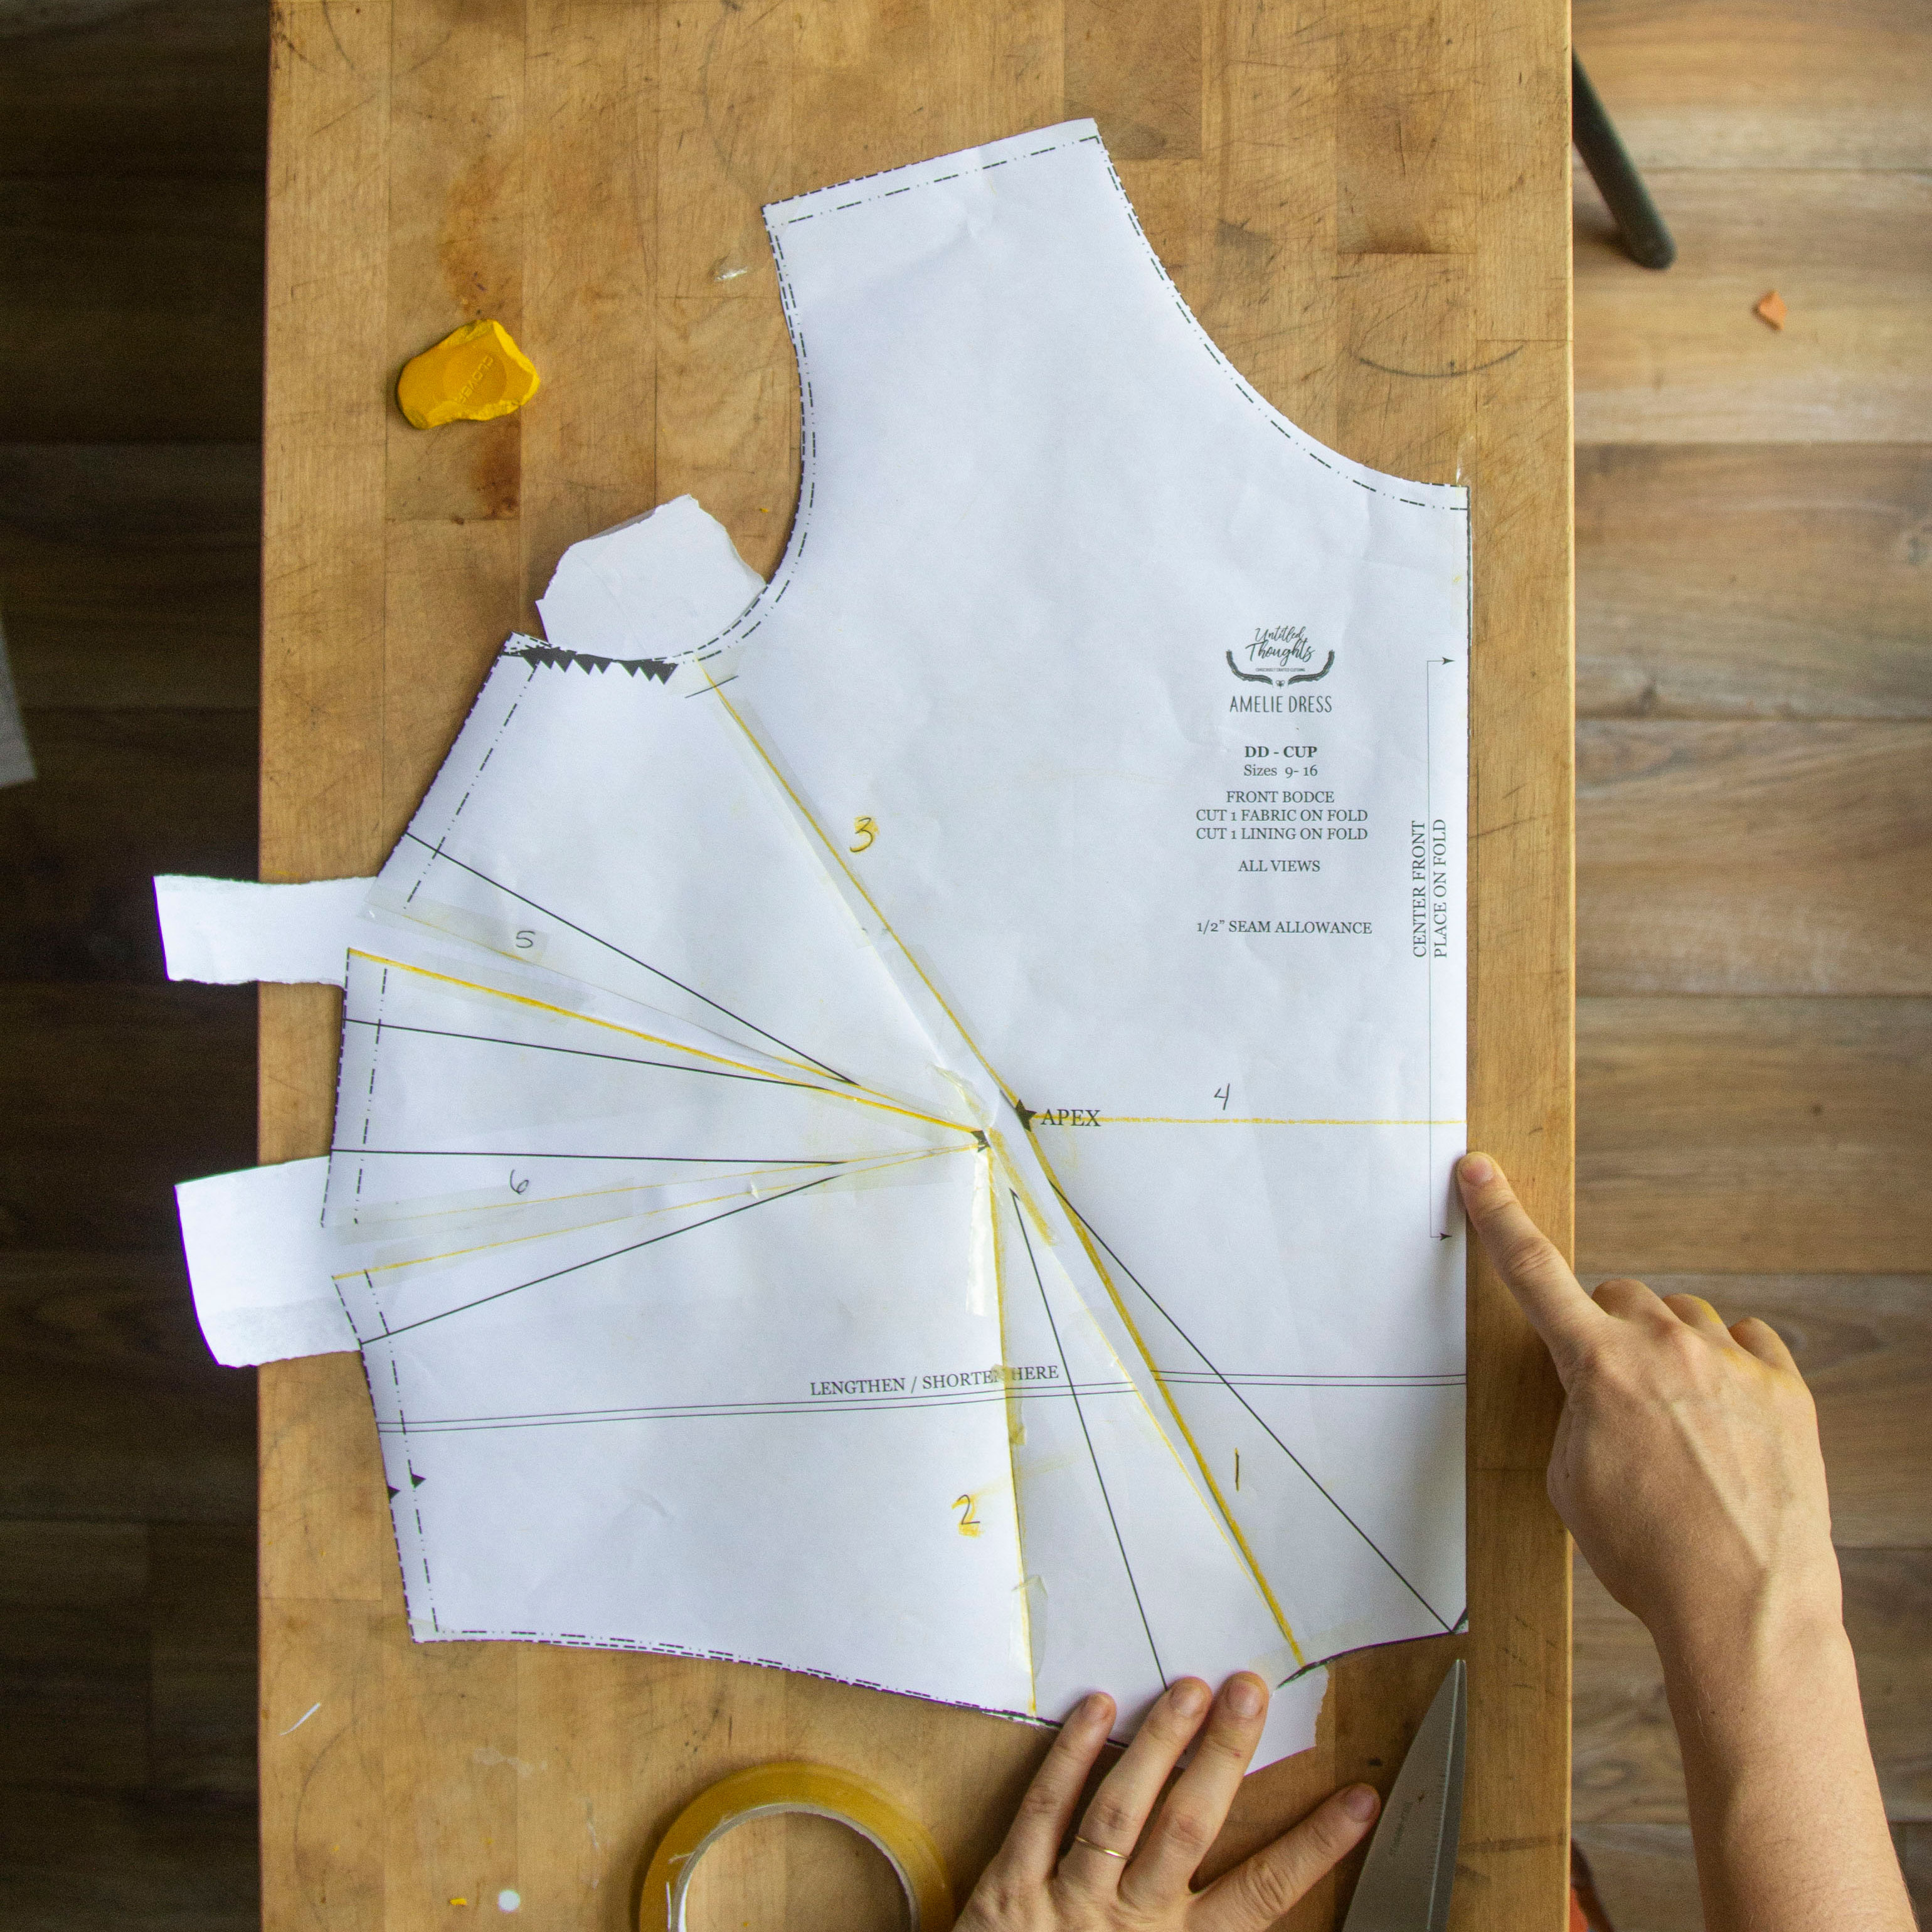
I know that was a LOT of work! You are nearly there, but now would probably be a great time to take a mini break. Feel free to stretch, take a quick walk around your neighborhood, or drink a cool glass of water! When you come back, we will finish this tutorial by truing up your pattern!
Feeling refreshed? Then let’s dive back in and finish this alteration up!
Usually, it is at this point that you would typically be cutting through line 4 and shifting that piece down to match your altered bodice. However, since we have relocated all of the added space normally added to the CF dart into the existing under arm darts, you won’t need to adjust that pattern piece.
To start, you need to draw out your new underarm darts. To do this, first mark your new Apex point. It will be exactly ½ way between where you split your apex in half.
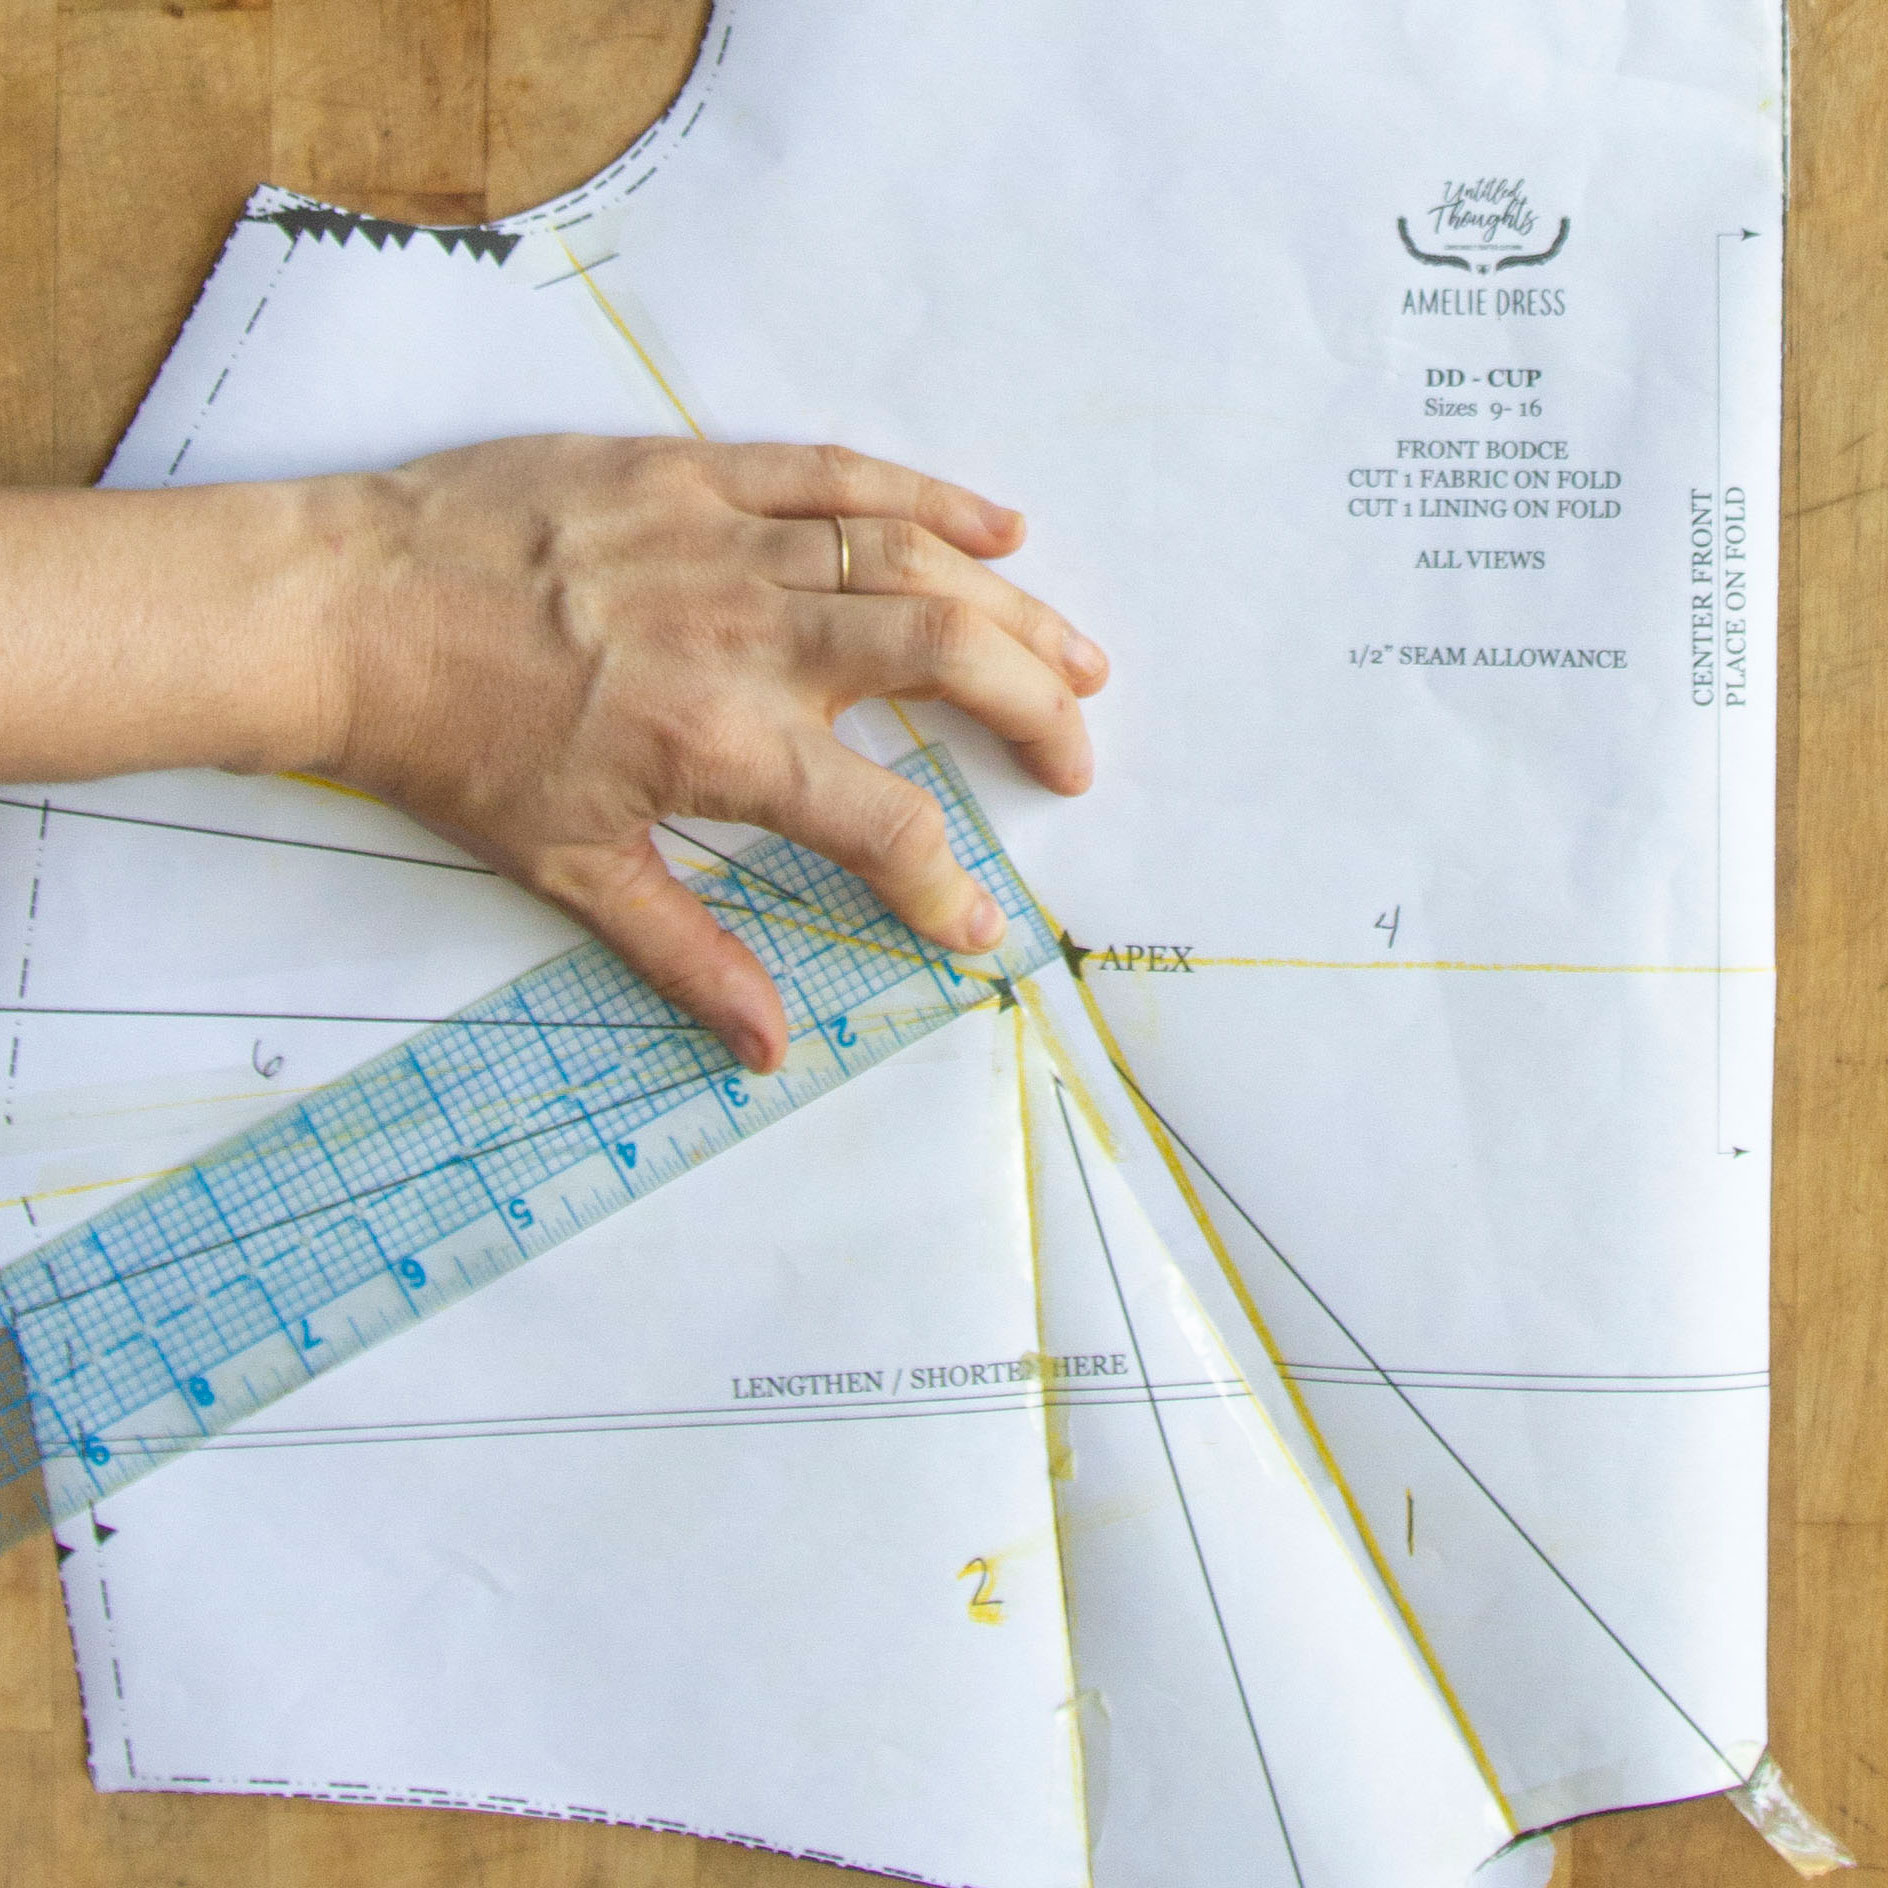
Now, measure out a point approximately 2” (5,1 cm) from your apex point along the centerline of your underarm darts. These are your new dart points.
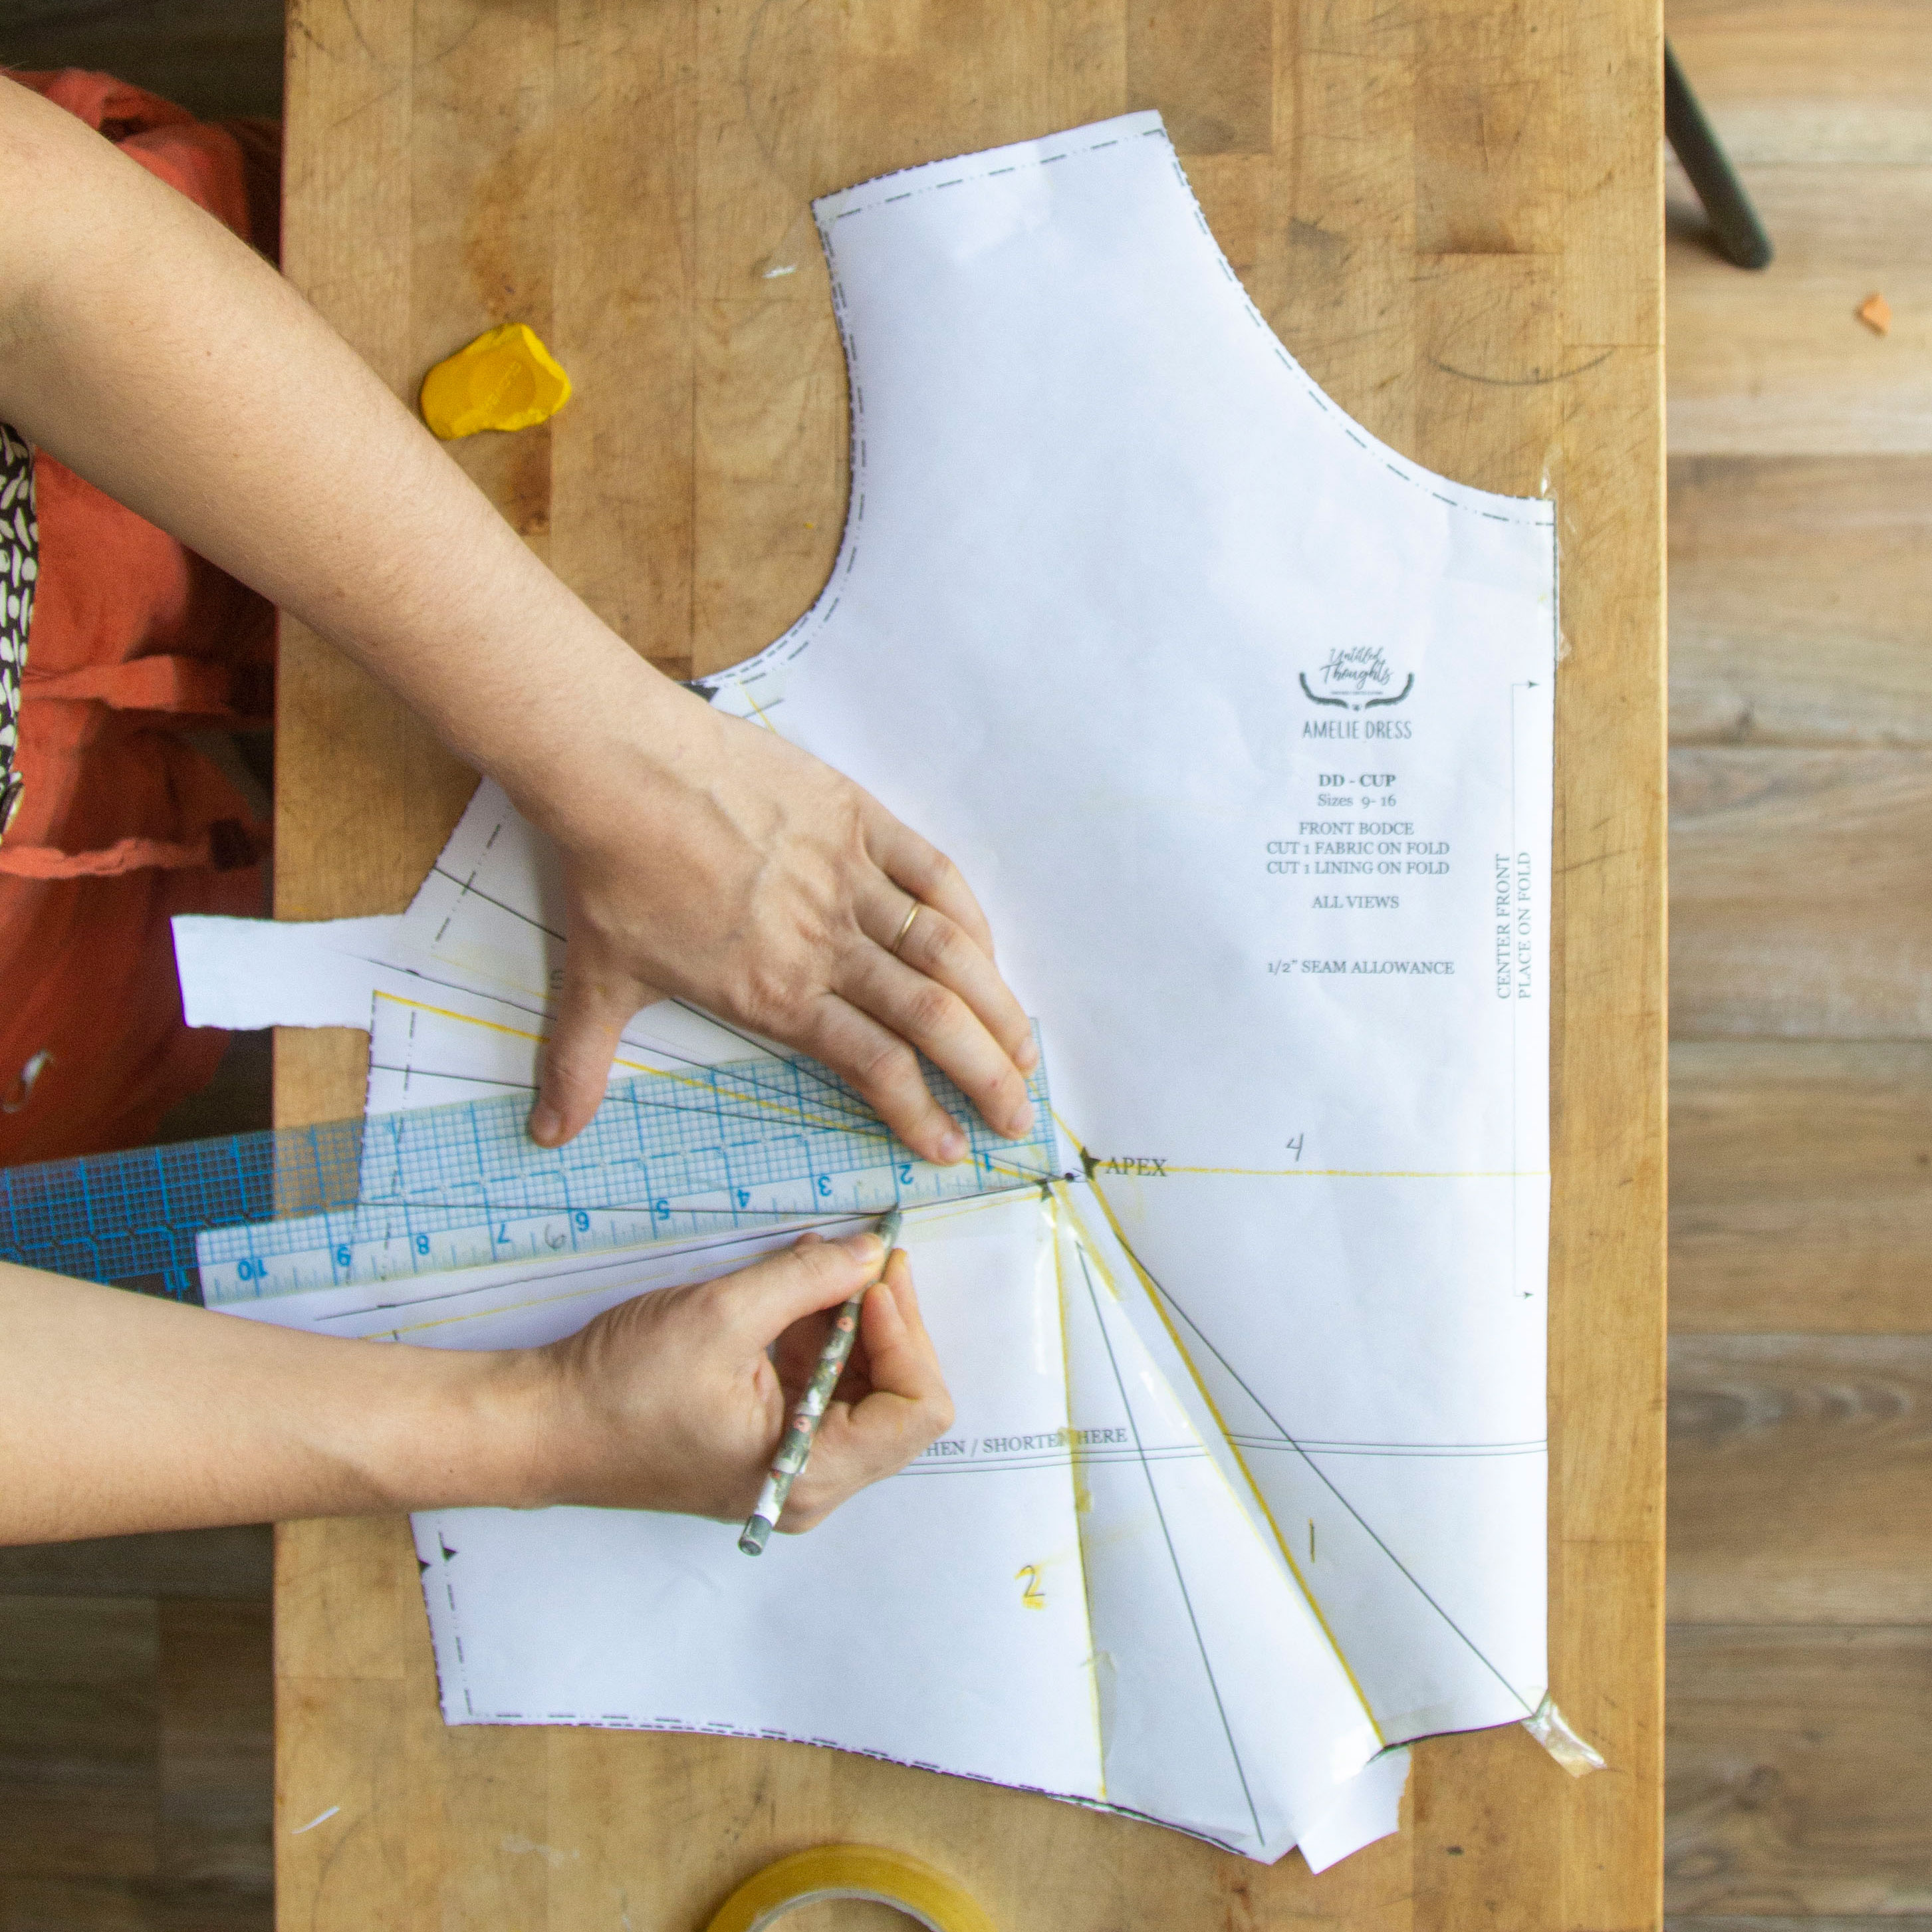
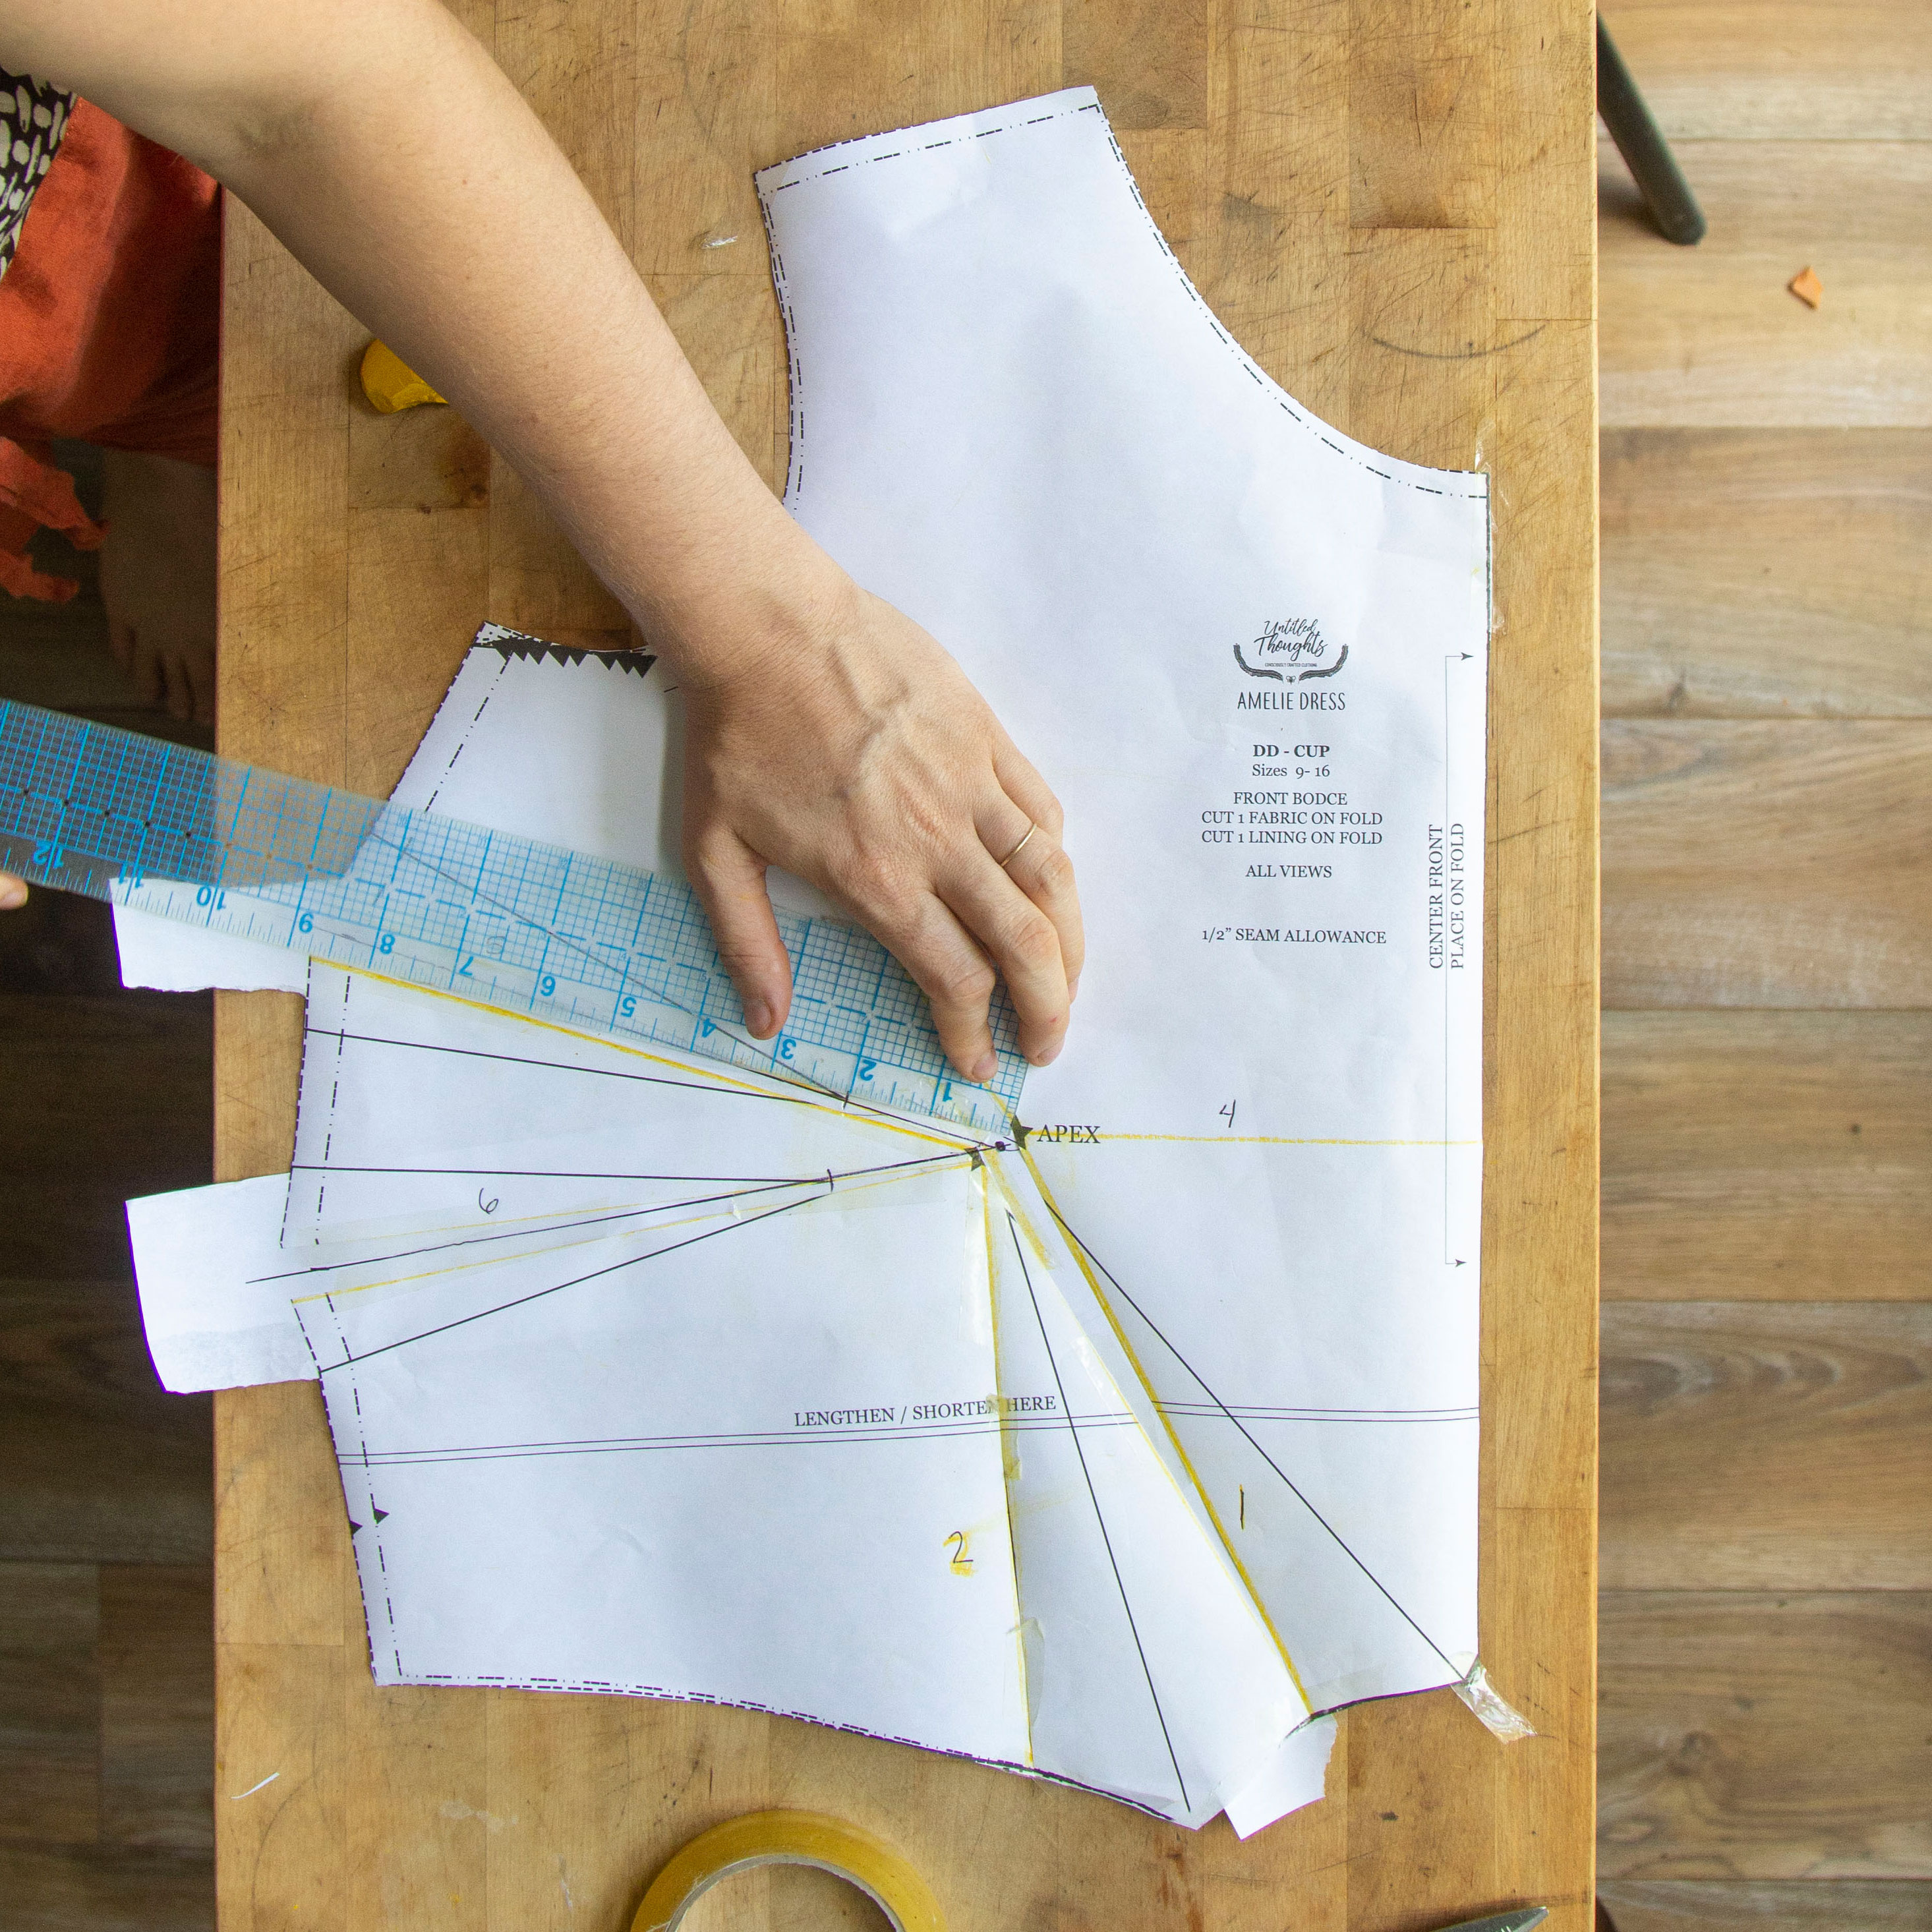
Next, connect your new dart point to the dart legs i.e. where you slashed and spread your paper on your side seam.
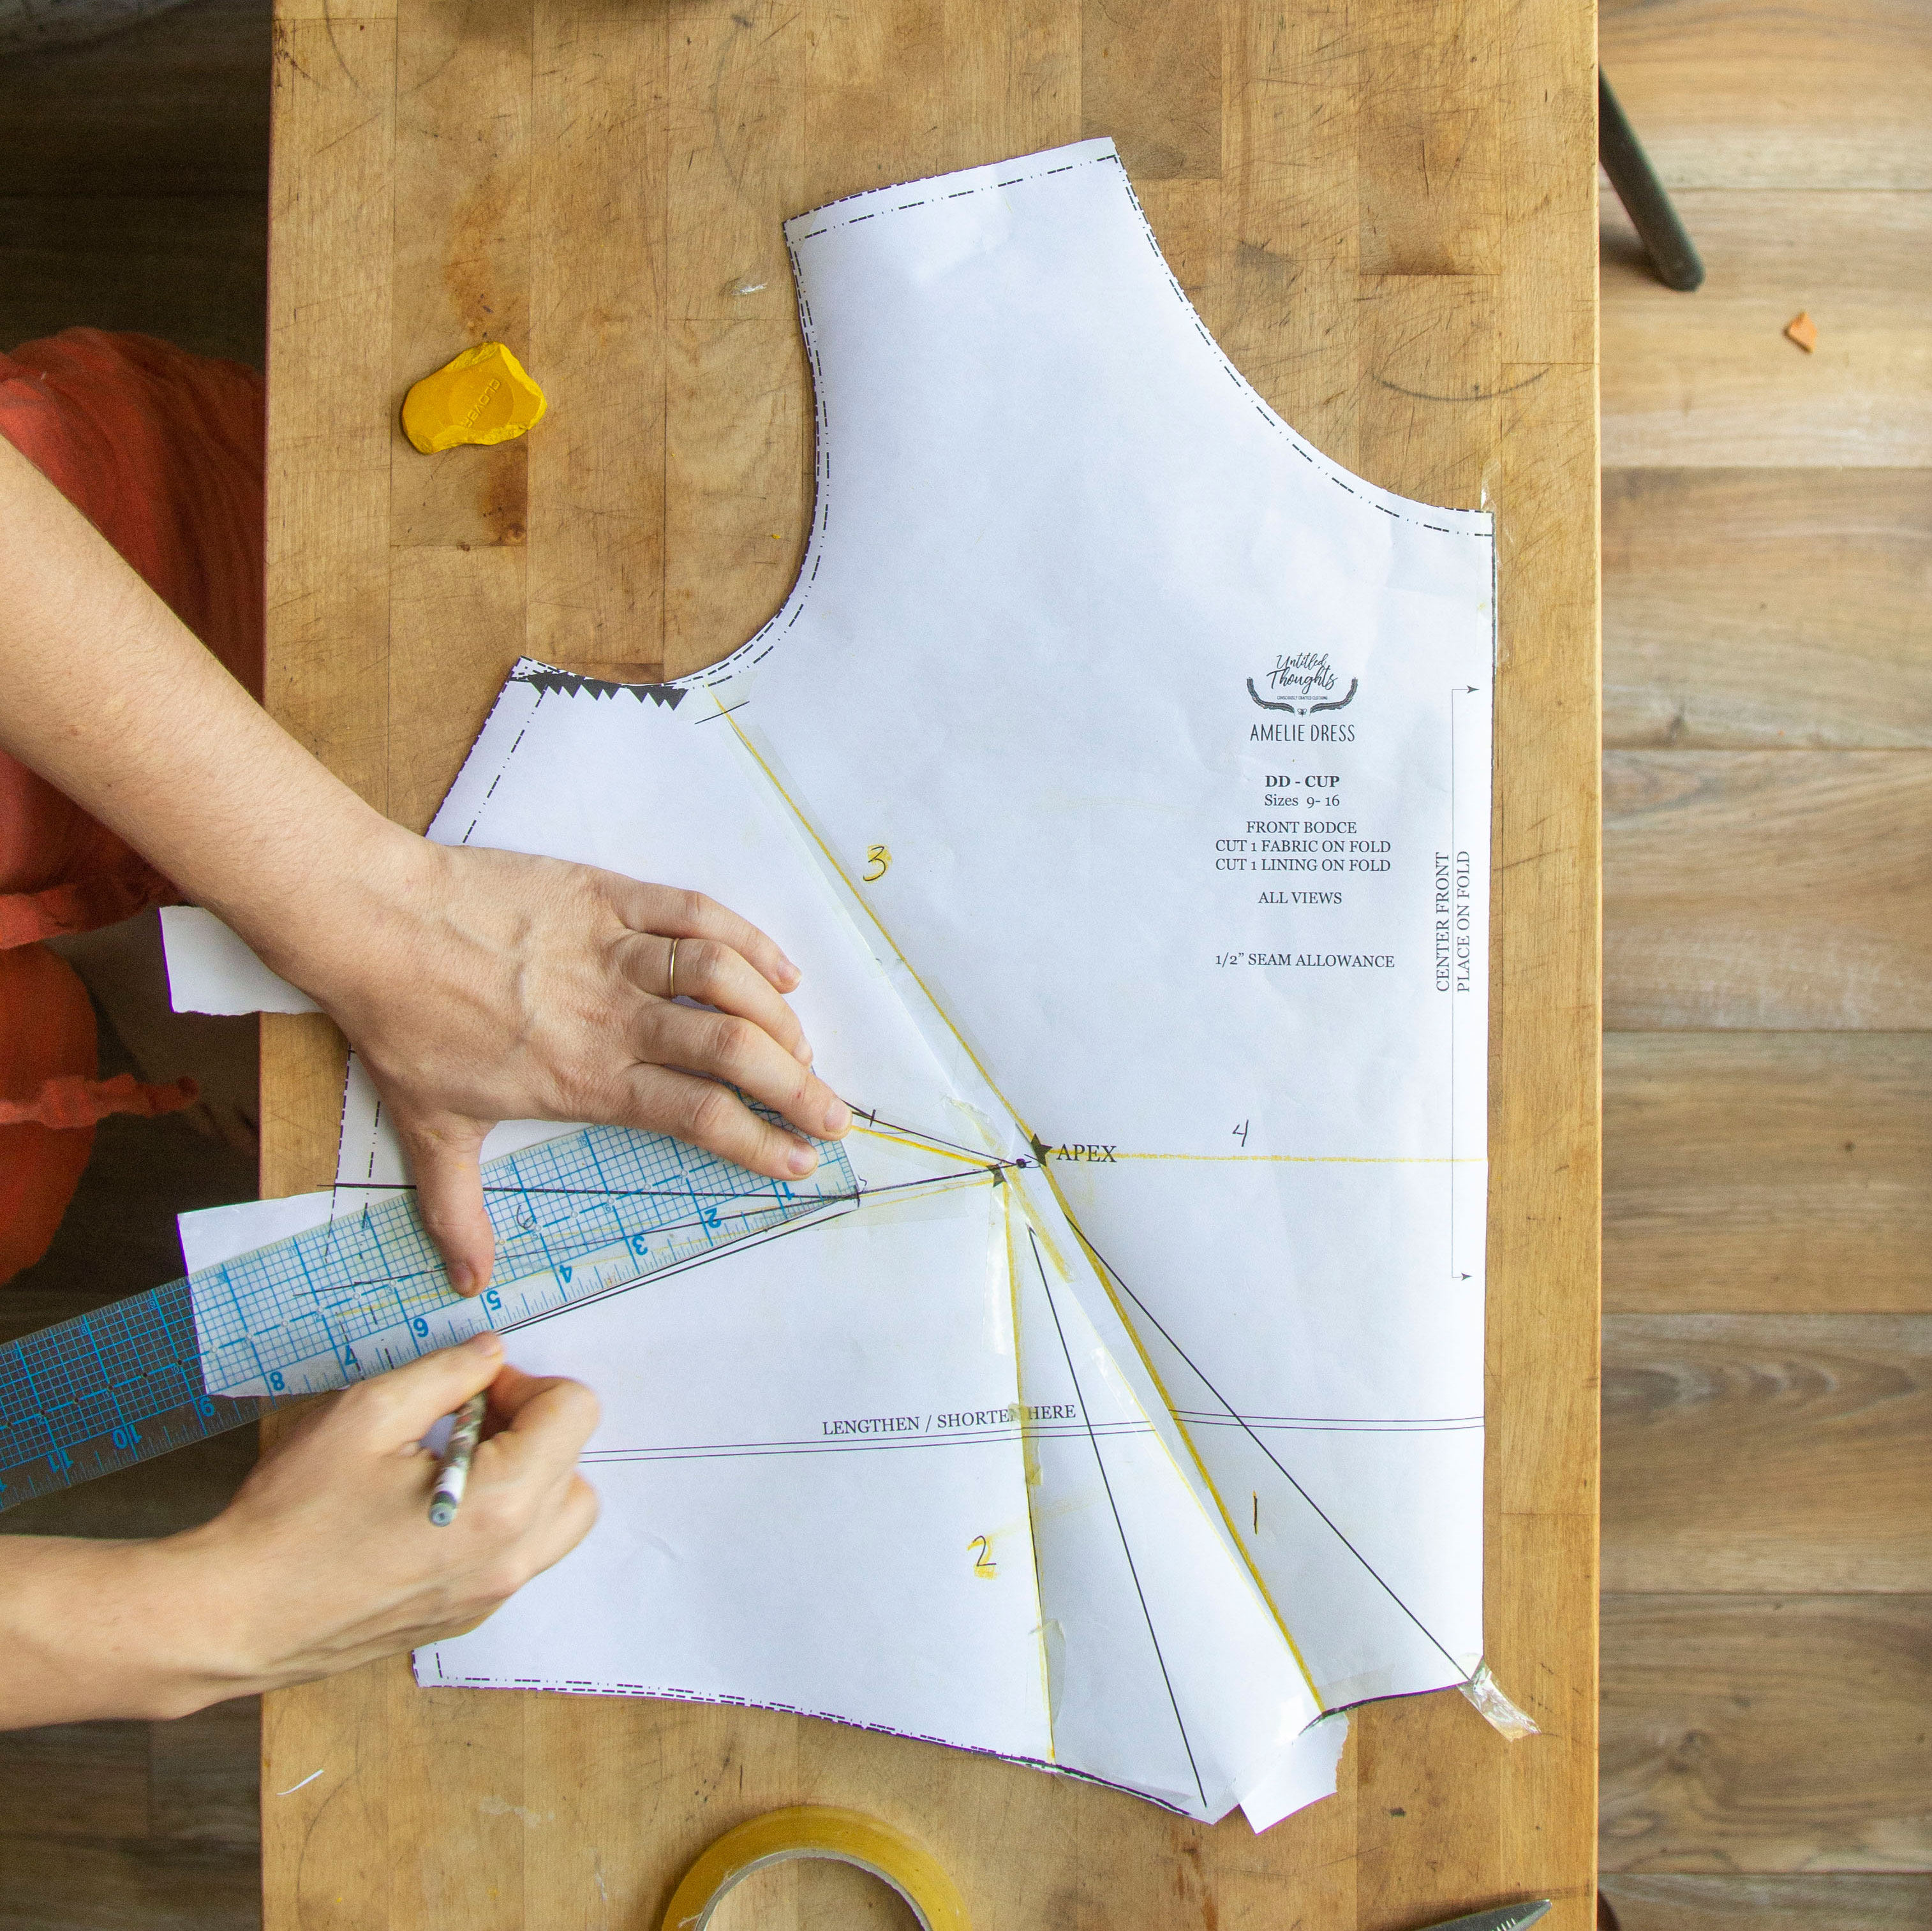
Repeat these same steps with your CF dart, but this time, mark 1” (2,5 cm) from your apex point before connecting your dart legs.
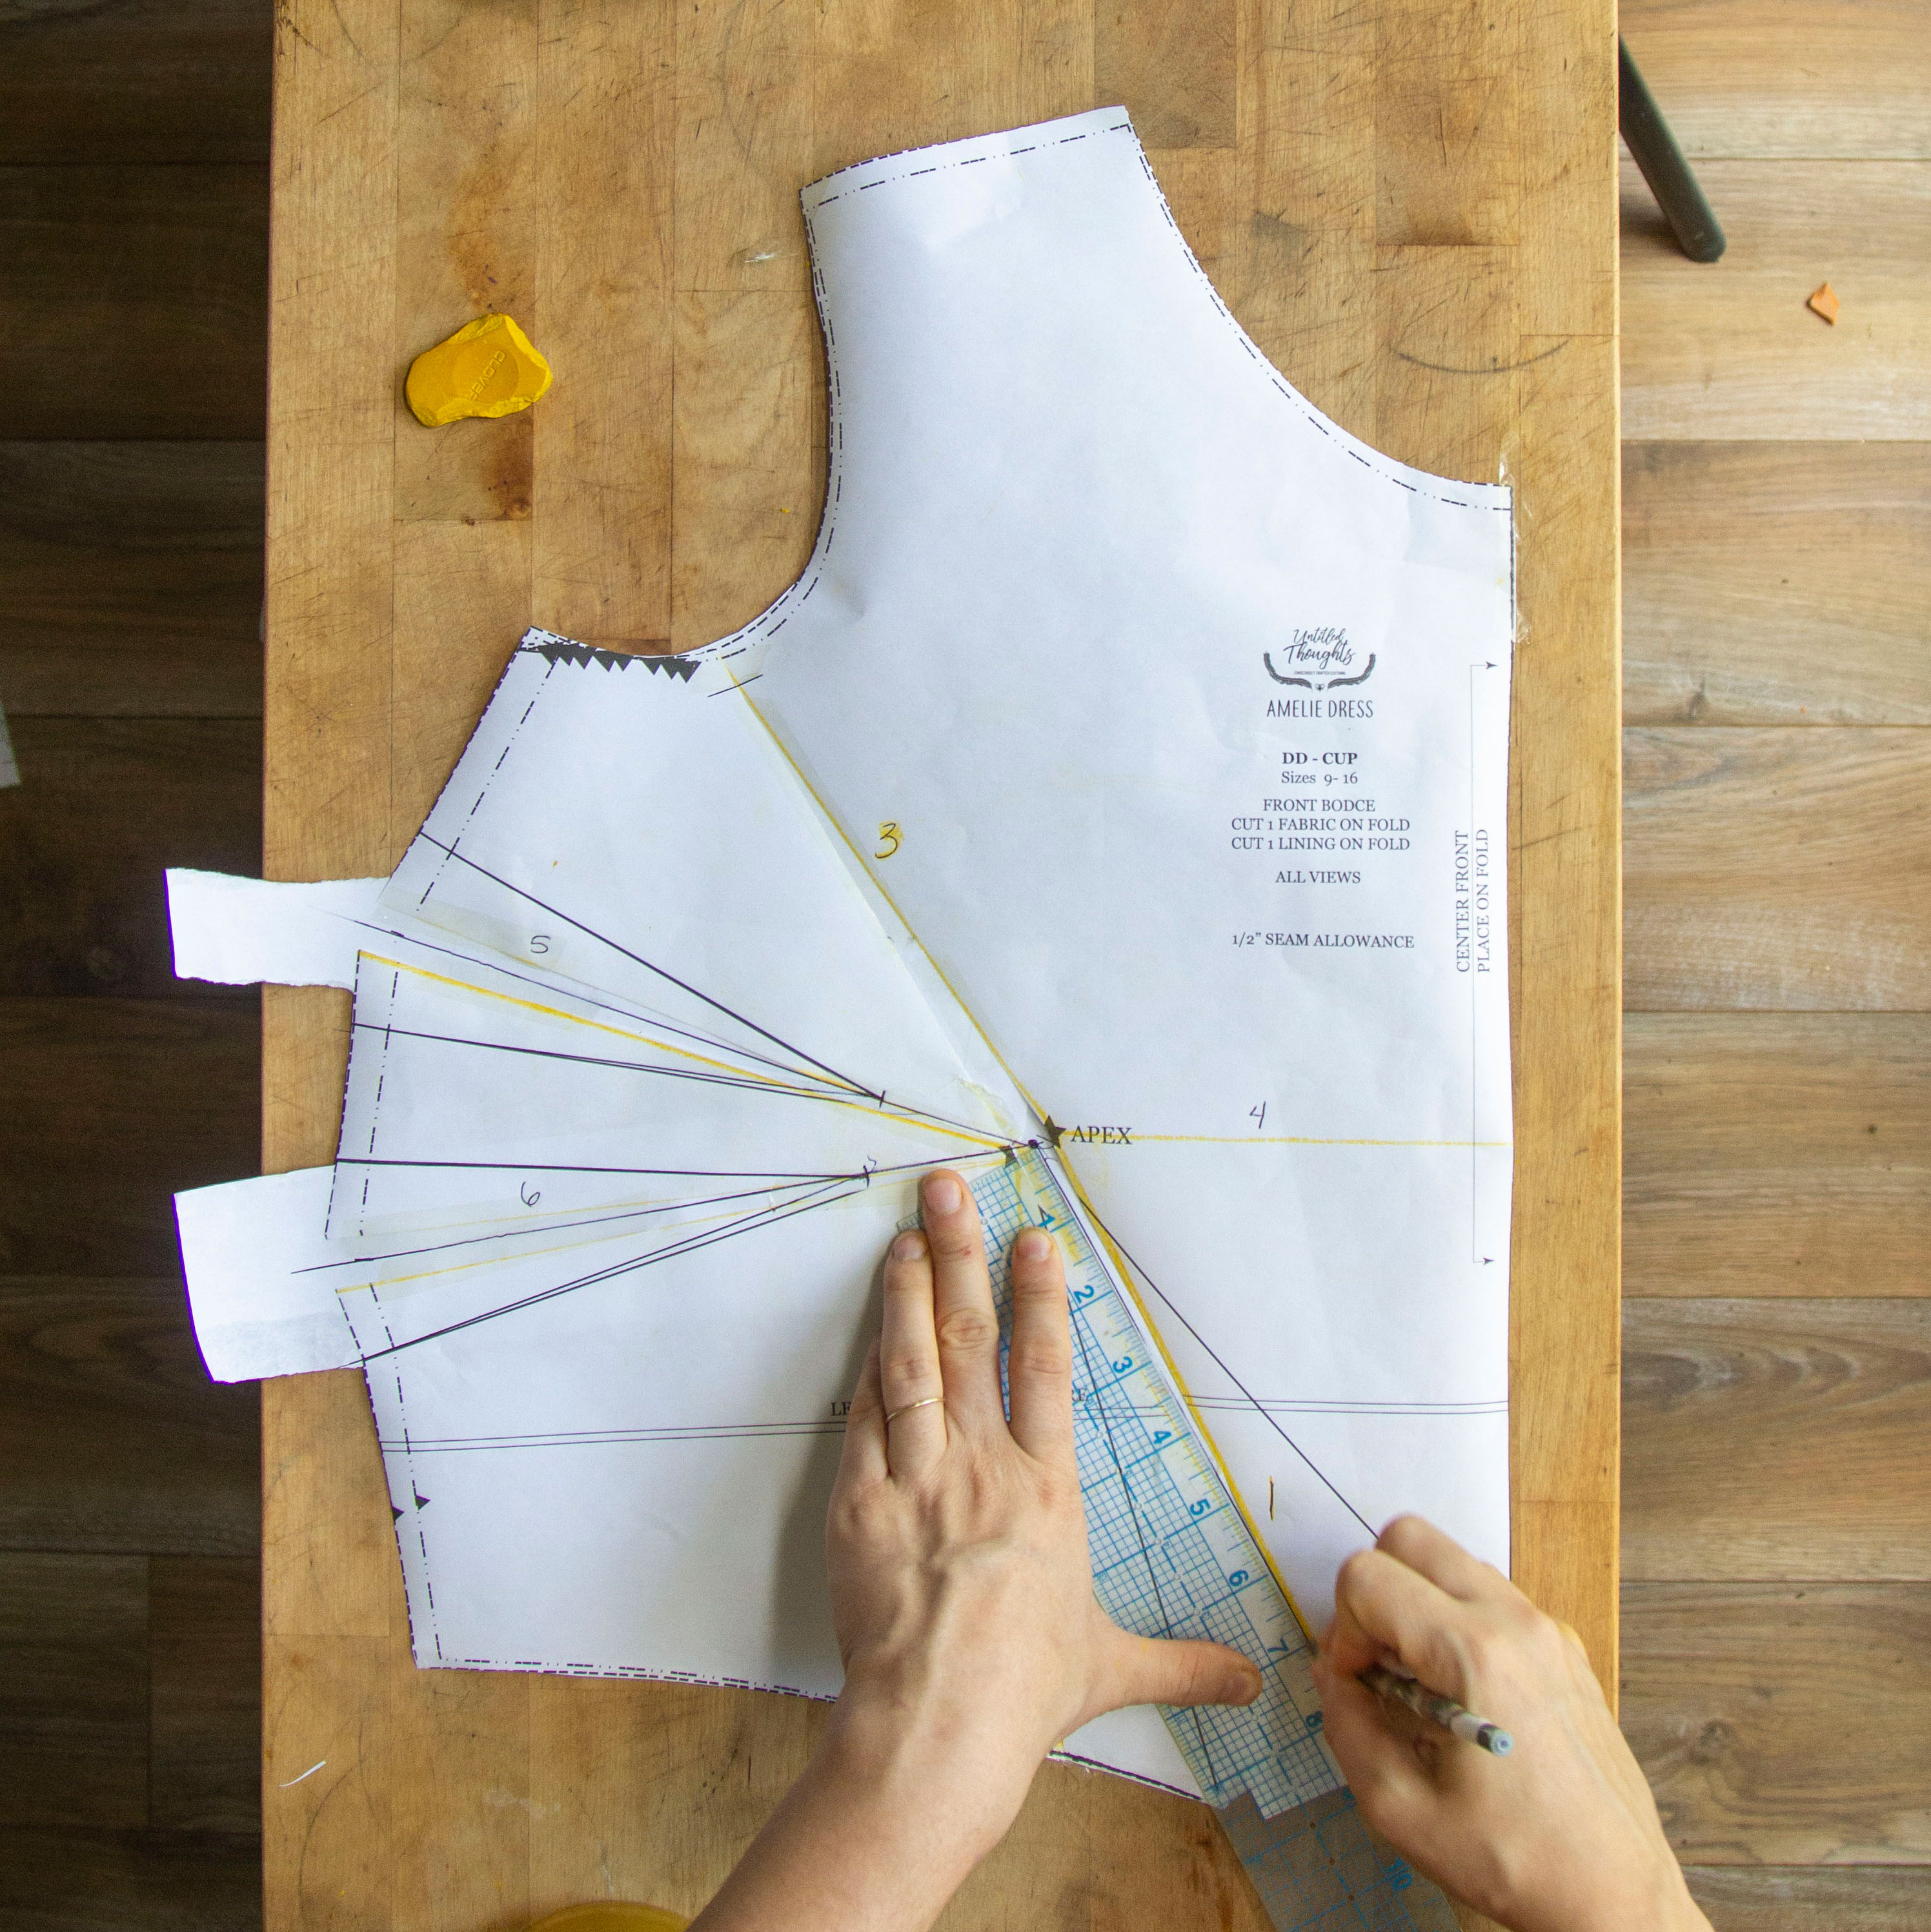
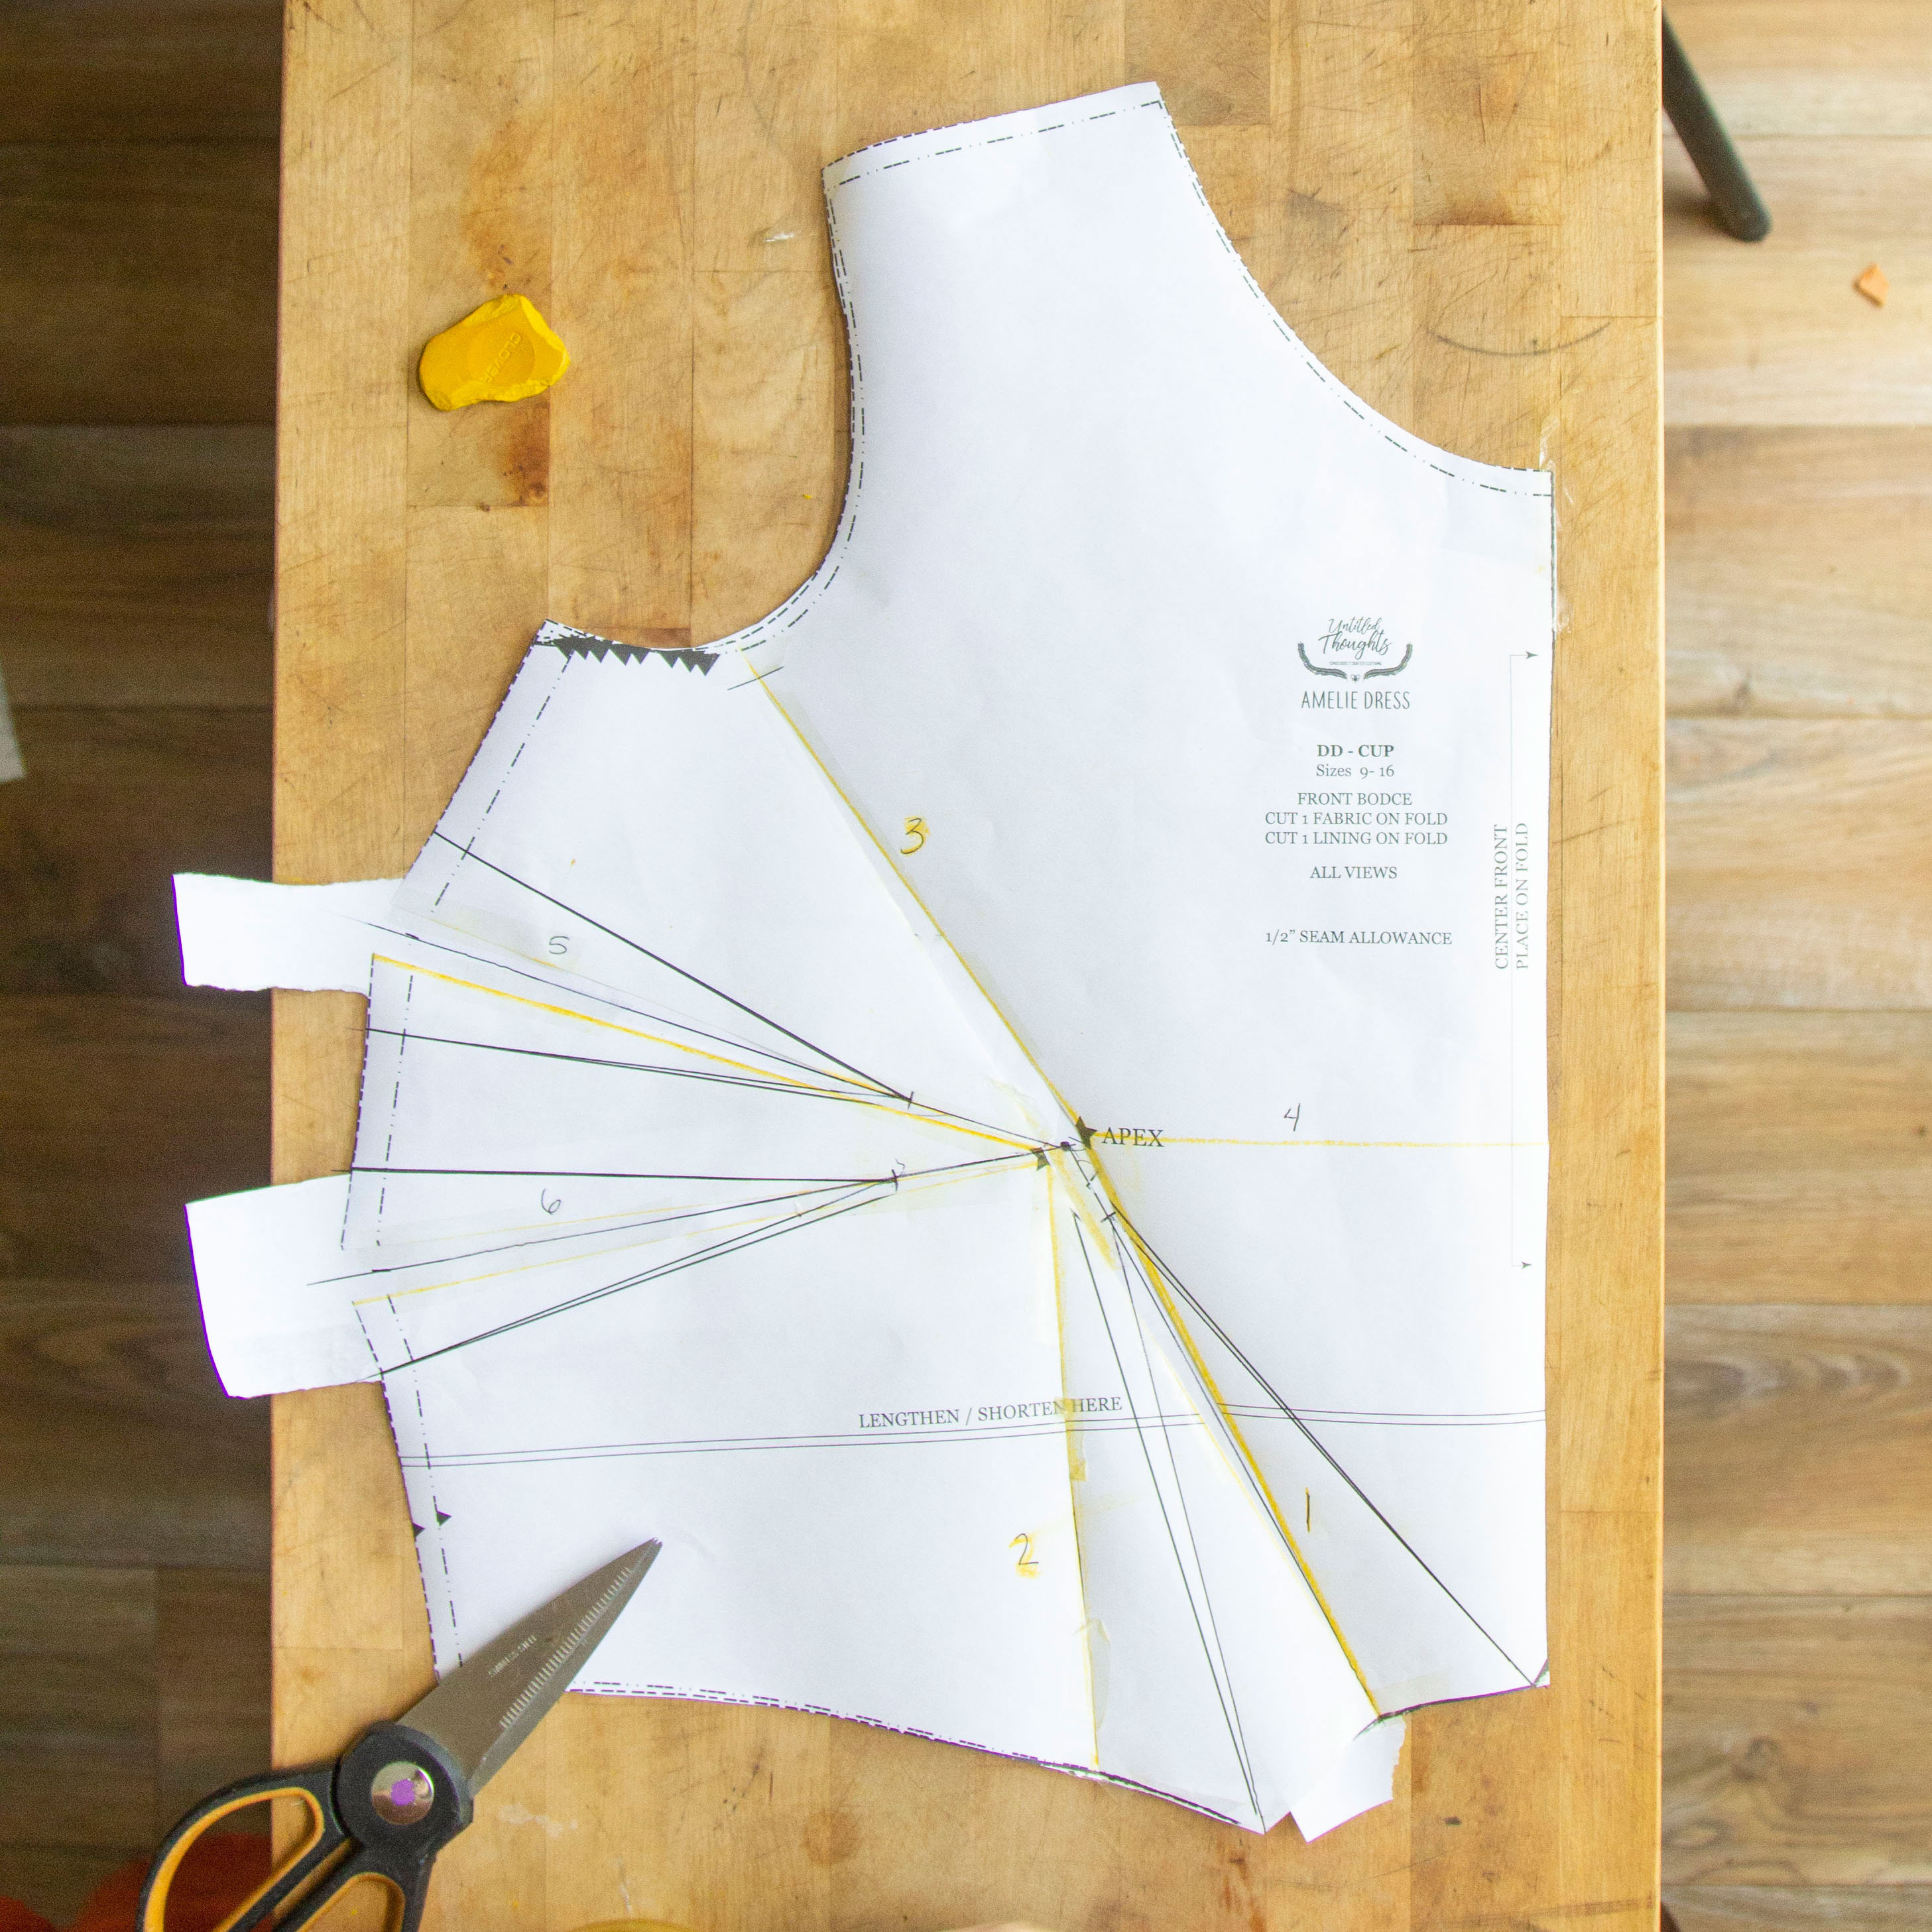
Finally, one-by-one, close your darts temporarily. Cut off the excess paper under your side seam and then open your darts back up.
Hooray! You now have a fully completed Center Front Dart bodice with an FBA perfectly suited to your body! It was a long process but I hope that you found it enjoyable and are excited to have a pattern that more closely fits you!


0 Comments