
Guide to Underwire Bramaking with Kristen | Part 3: Bra Cups
Hello again, Busty Friends!! In Part 1 of this series, I shared the outline listed below, covering an order of operations and covered proper bra wearing, choosing a pattern & the fabrics to match, measuring for size and a discussion on wires. In Part 2, we worked on creating a fitting band that is ADJUSTABLE!
Part 1 – Preparation for Sewing:
- Proper Bra Wearing
- Choosing a Pattern (Method)
- Picking out Fabrics to match your pattern
- Measuring to pick out a size
- Wire Fitting
- Wire Alterations
Part 2 – Bands:
- Band Fitting
- Band Alterations
Part 3 – Cups:
- Cup Fitting
- Cup Alterations
Today is CUP DAY! We’re going to cover how to attach tester cups with seam allowances, so the cup is also adjustable WITHOUT sewing the seam allowances down.
Cups and Breast Shape
Let’s talk a little bit about breast shape and how that impacts the pattern before we jump into tester cups and cup alterations. Some common shapes for breasts are loosely represented in this diagram.

In the first picture, you can see how the red circle at the bottom represents the wire line. The pyramid shape is there to denote how far the breast projects away from the body. The pink lines represent sort of an average breast shape for the size that the wire is at the base, while the turquoise lines represent a very full, rounded fullness. A term that has floated around in the bra-making community is omega, because the overhead view of a very full breast might resemble the Greek letter Ω.
In the second picture, you can see a much shorter pyramid which is representative of someone who may have a wide root, but their projection from the body is rather shallow, otherwise known as low contour.
In the first two photos, you can see that the sections are all uniform in shape, the lines that travel to the apex are symmetrical. Cups that come in size A-F can have more symmetrical shaped lines, meaning there’s not an apex move to them and the pattern pieces are more of a uniform shape. When it comes to the Eve Classic Pattern, the uniform shaped cup are the regular wire cups because it is typical to use a regular wire with a pattern that has more symmetrical pieces.
The third photo, however, is more representative of cups that are G+, and has an apex move to it. You can see that the lines traveling up to the apex are much longer on one side than the other, meaning they are NON-uniform pattern pieces. The Eve Classic Pattern also comes in non uniform cups – they just happen to be sold as Vertical Wire Cups because it is more typical to put vertical wires with non uniform cups.
The beauty about the Eve Classic Pattern is that it is all modular. So, if you use a regular wire, buy the regular band. If you need a non uniform cup, you can buy the vertical wired cup and put it on a regular band. It can be a smidge tricky to know which cup to buy, because there’s SO many options so people can get a truly custom fit. If you have a regular band and a vertical cup, then you’ll buy the cup that comes in the correct length of wireline and then the correct horizontal bust measurement. There’s a calculator that can help with a starting point, but I highly recommend discussing your measurements and your needs with the pattern in Support for Bare Essentials for advice from those who have made it (like Lindsie!).
Editor’s Note: I recommend using your horizontal hemisphere measurement to pick your first Eve cup size, as I described in this post.
Tester Cup Assembly
The cup you’re about to see featured is my own cup pattern which is the Eve Pattern plus some personal changes. First, I raised the top band of the back band and the top part of the armscye of the cup because I have a lot of tissue spillage in that area and needed to contain it. Second, I have enough upper breast fullness that I have moved to splitting my upper cup for the sake of better fit and a more rounded shape, so my pattern probably doesn’t look like any pattern you’ve seen before. I added one inch seam allowances to the vertical and horizontal seams of the cup and ½ inch allowances along the wireline.
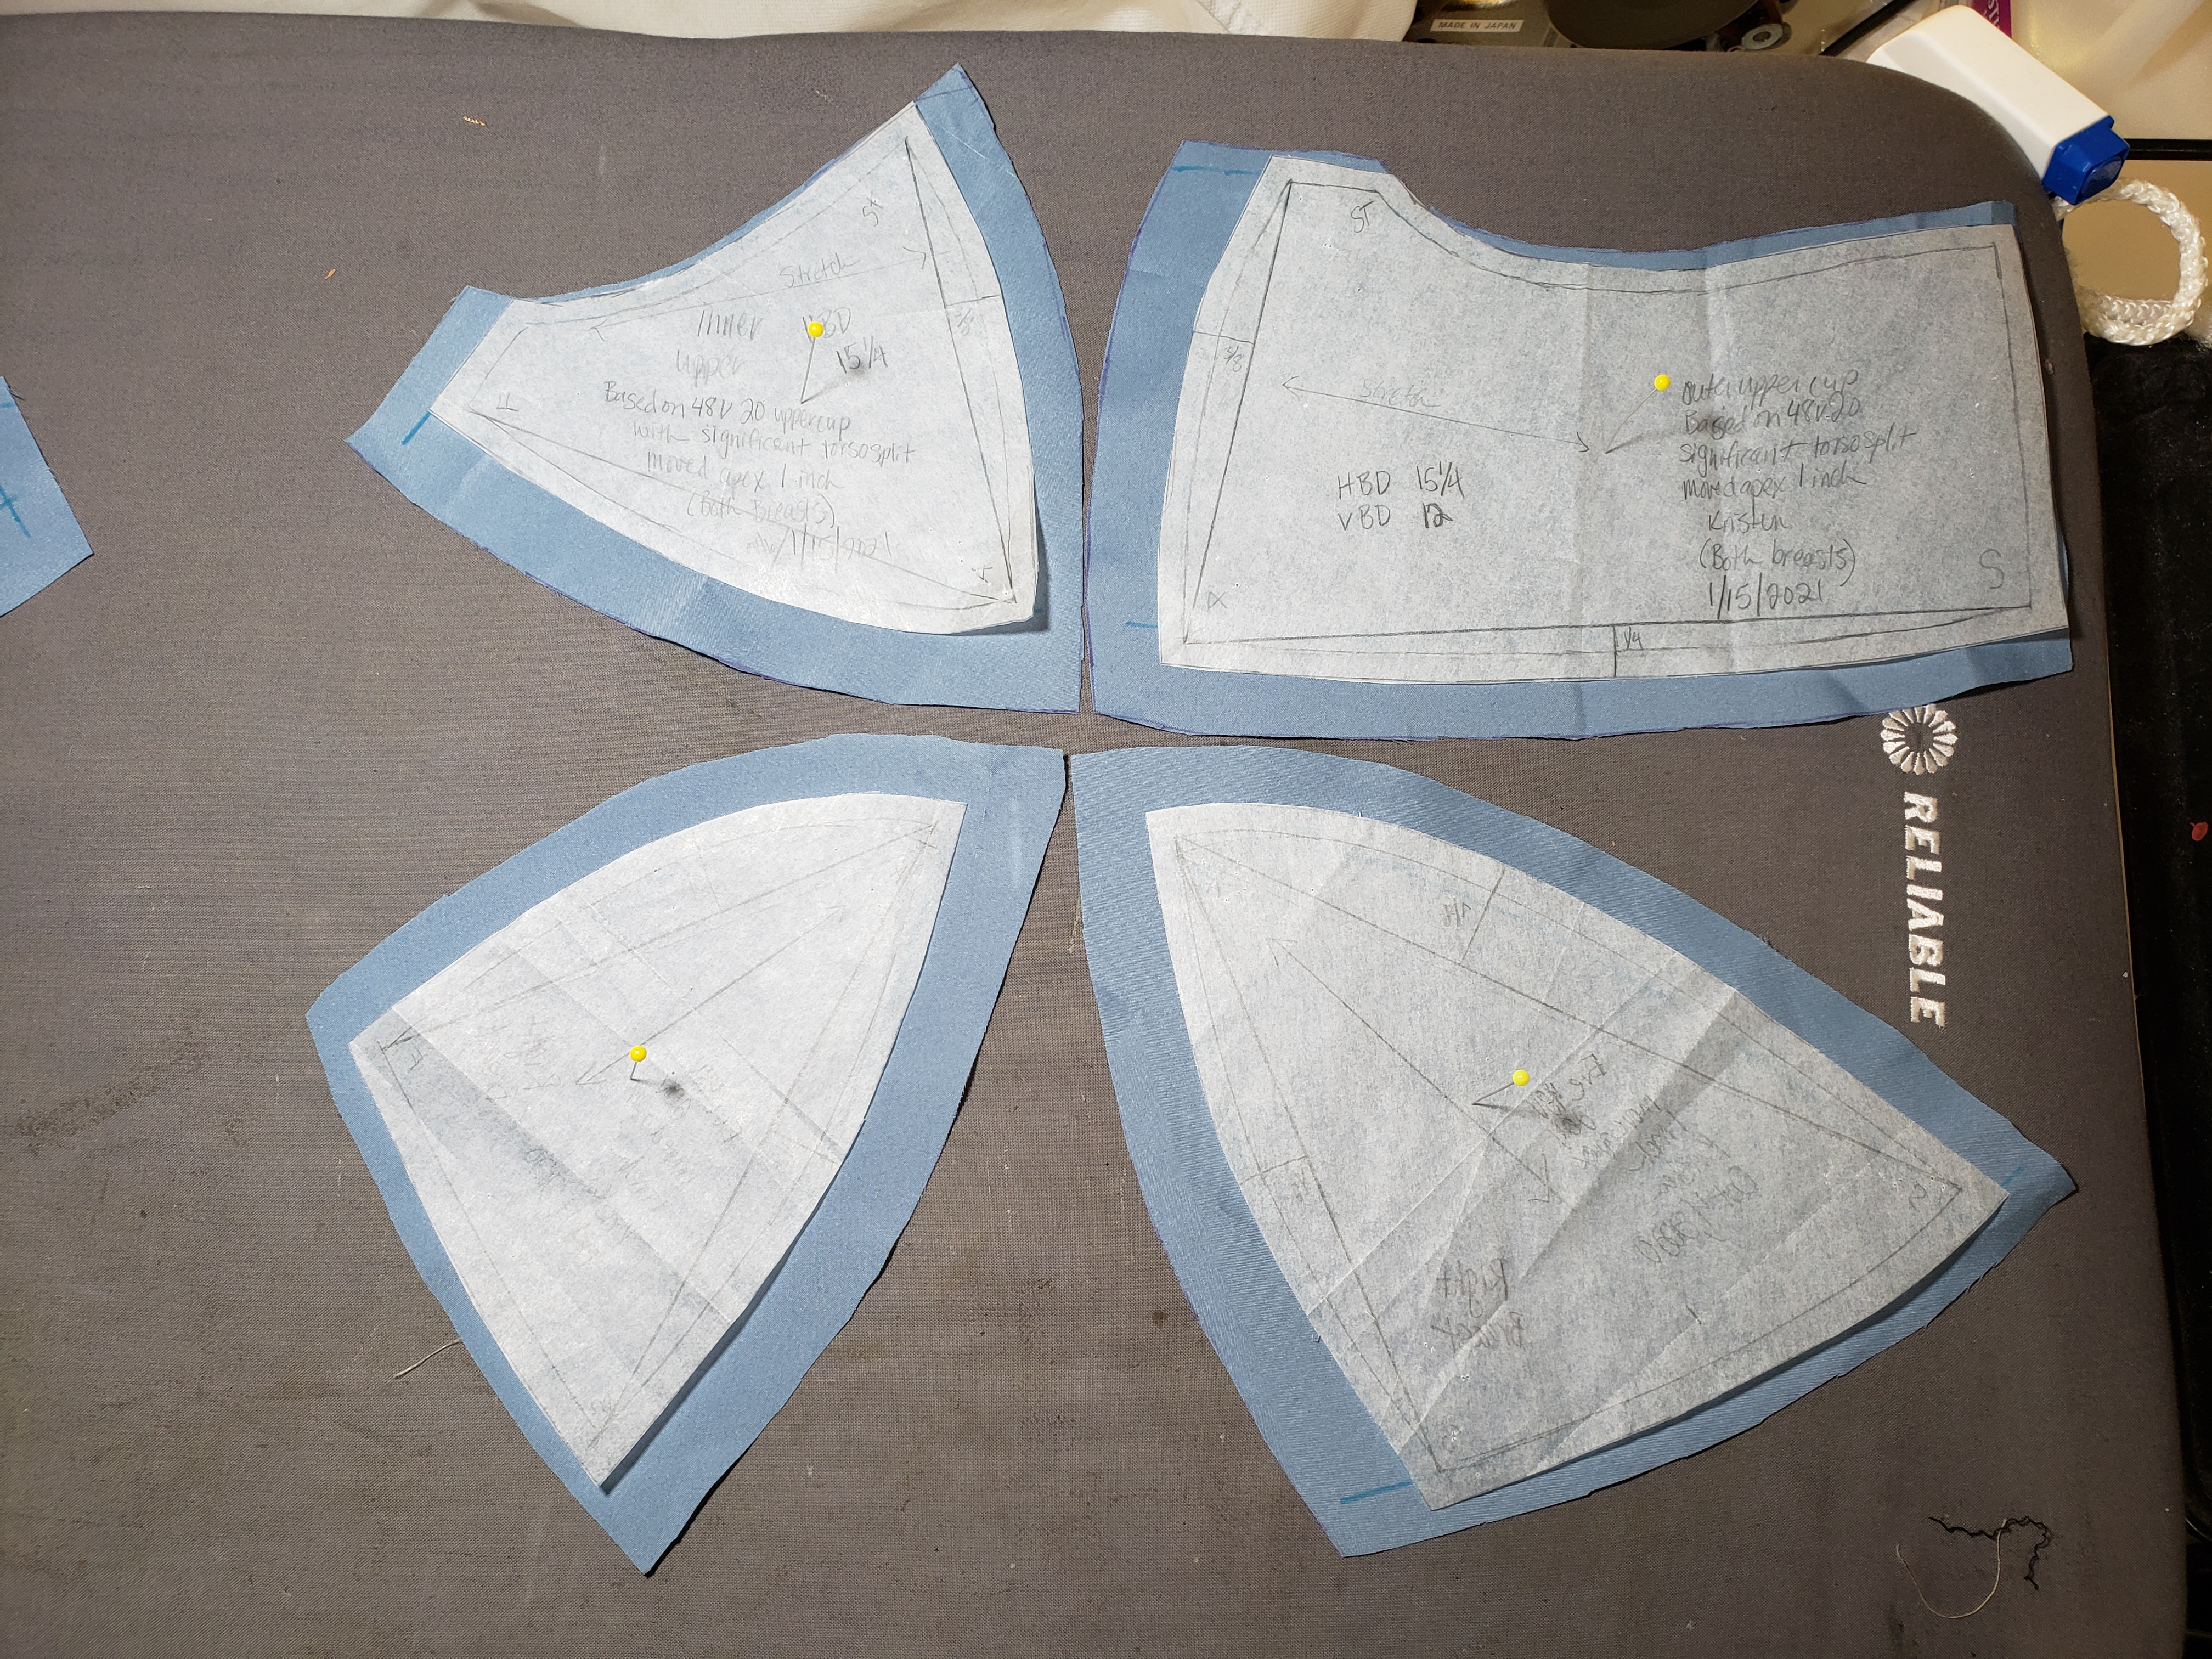
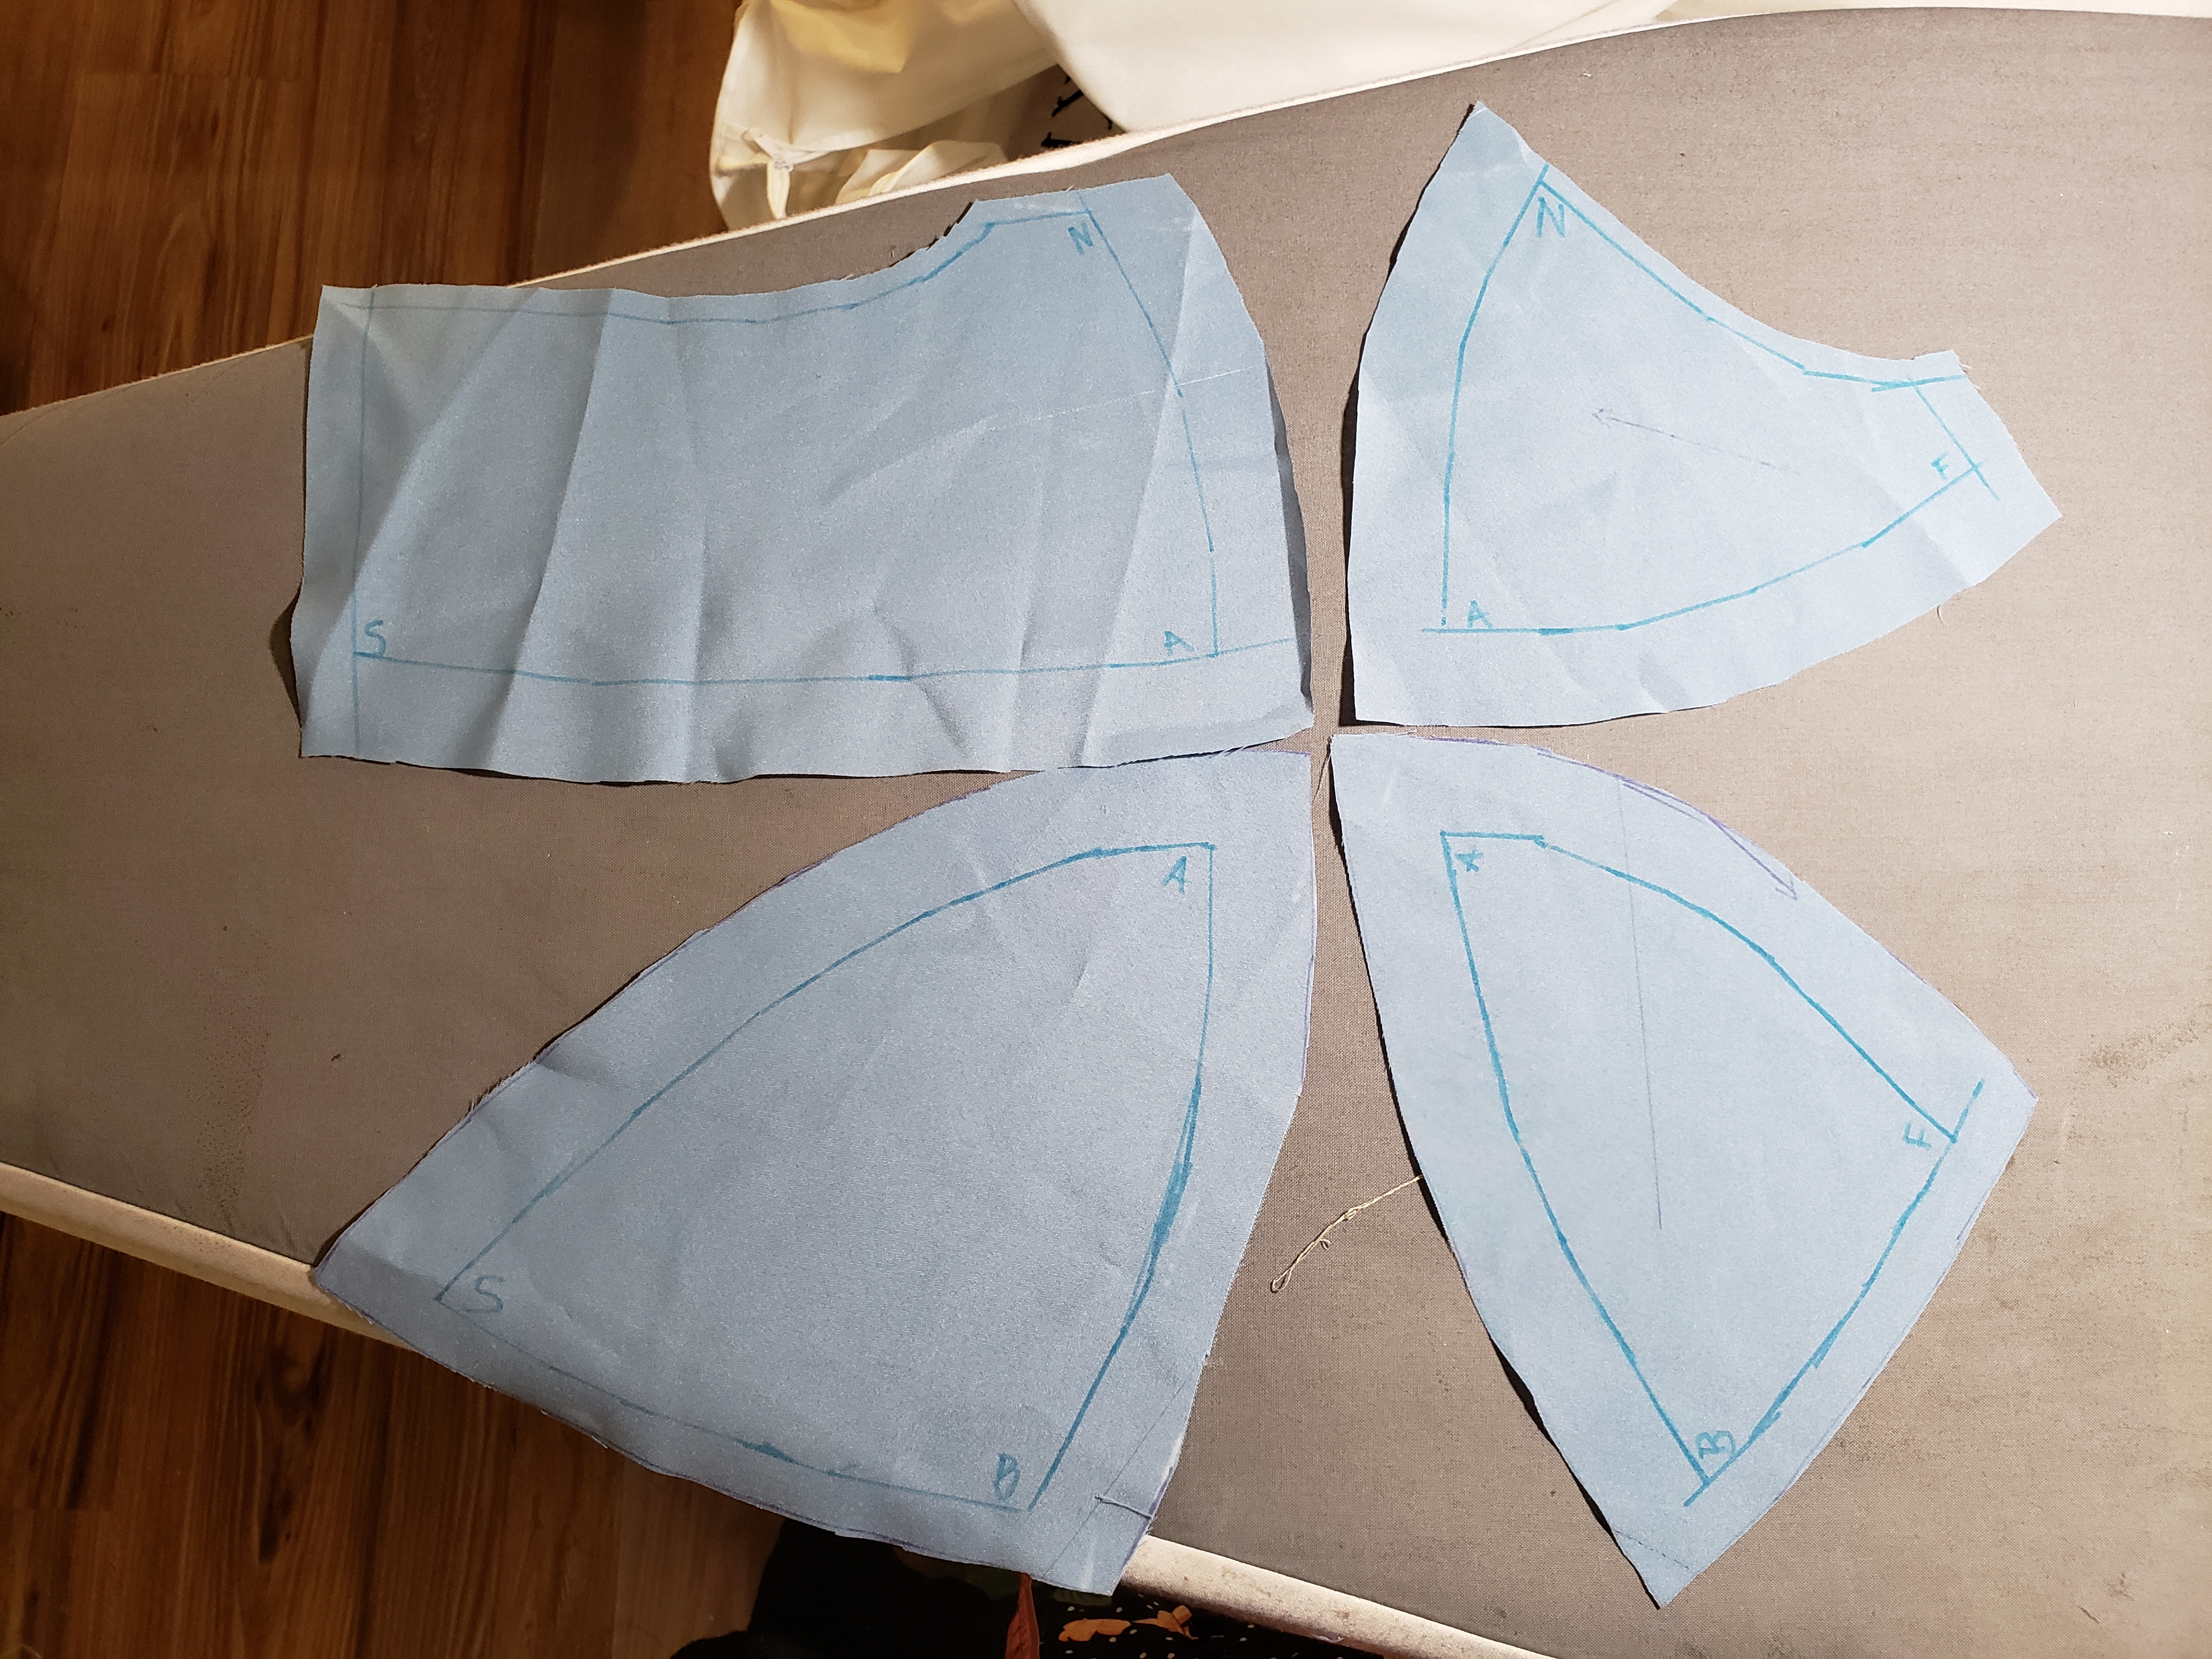
Next, I carefully marked all the corners, so I don’t screw up when I assemble it, and I drew in all the original seam lines for a point of reference to make it easier to transfer the changes back to the pattern.
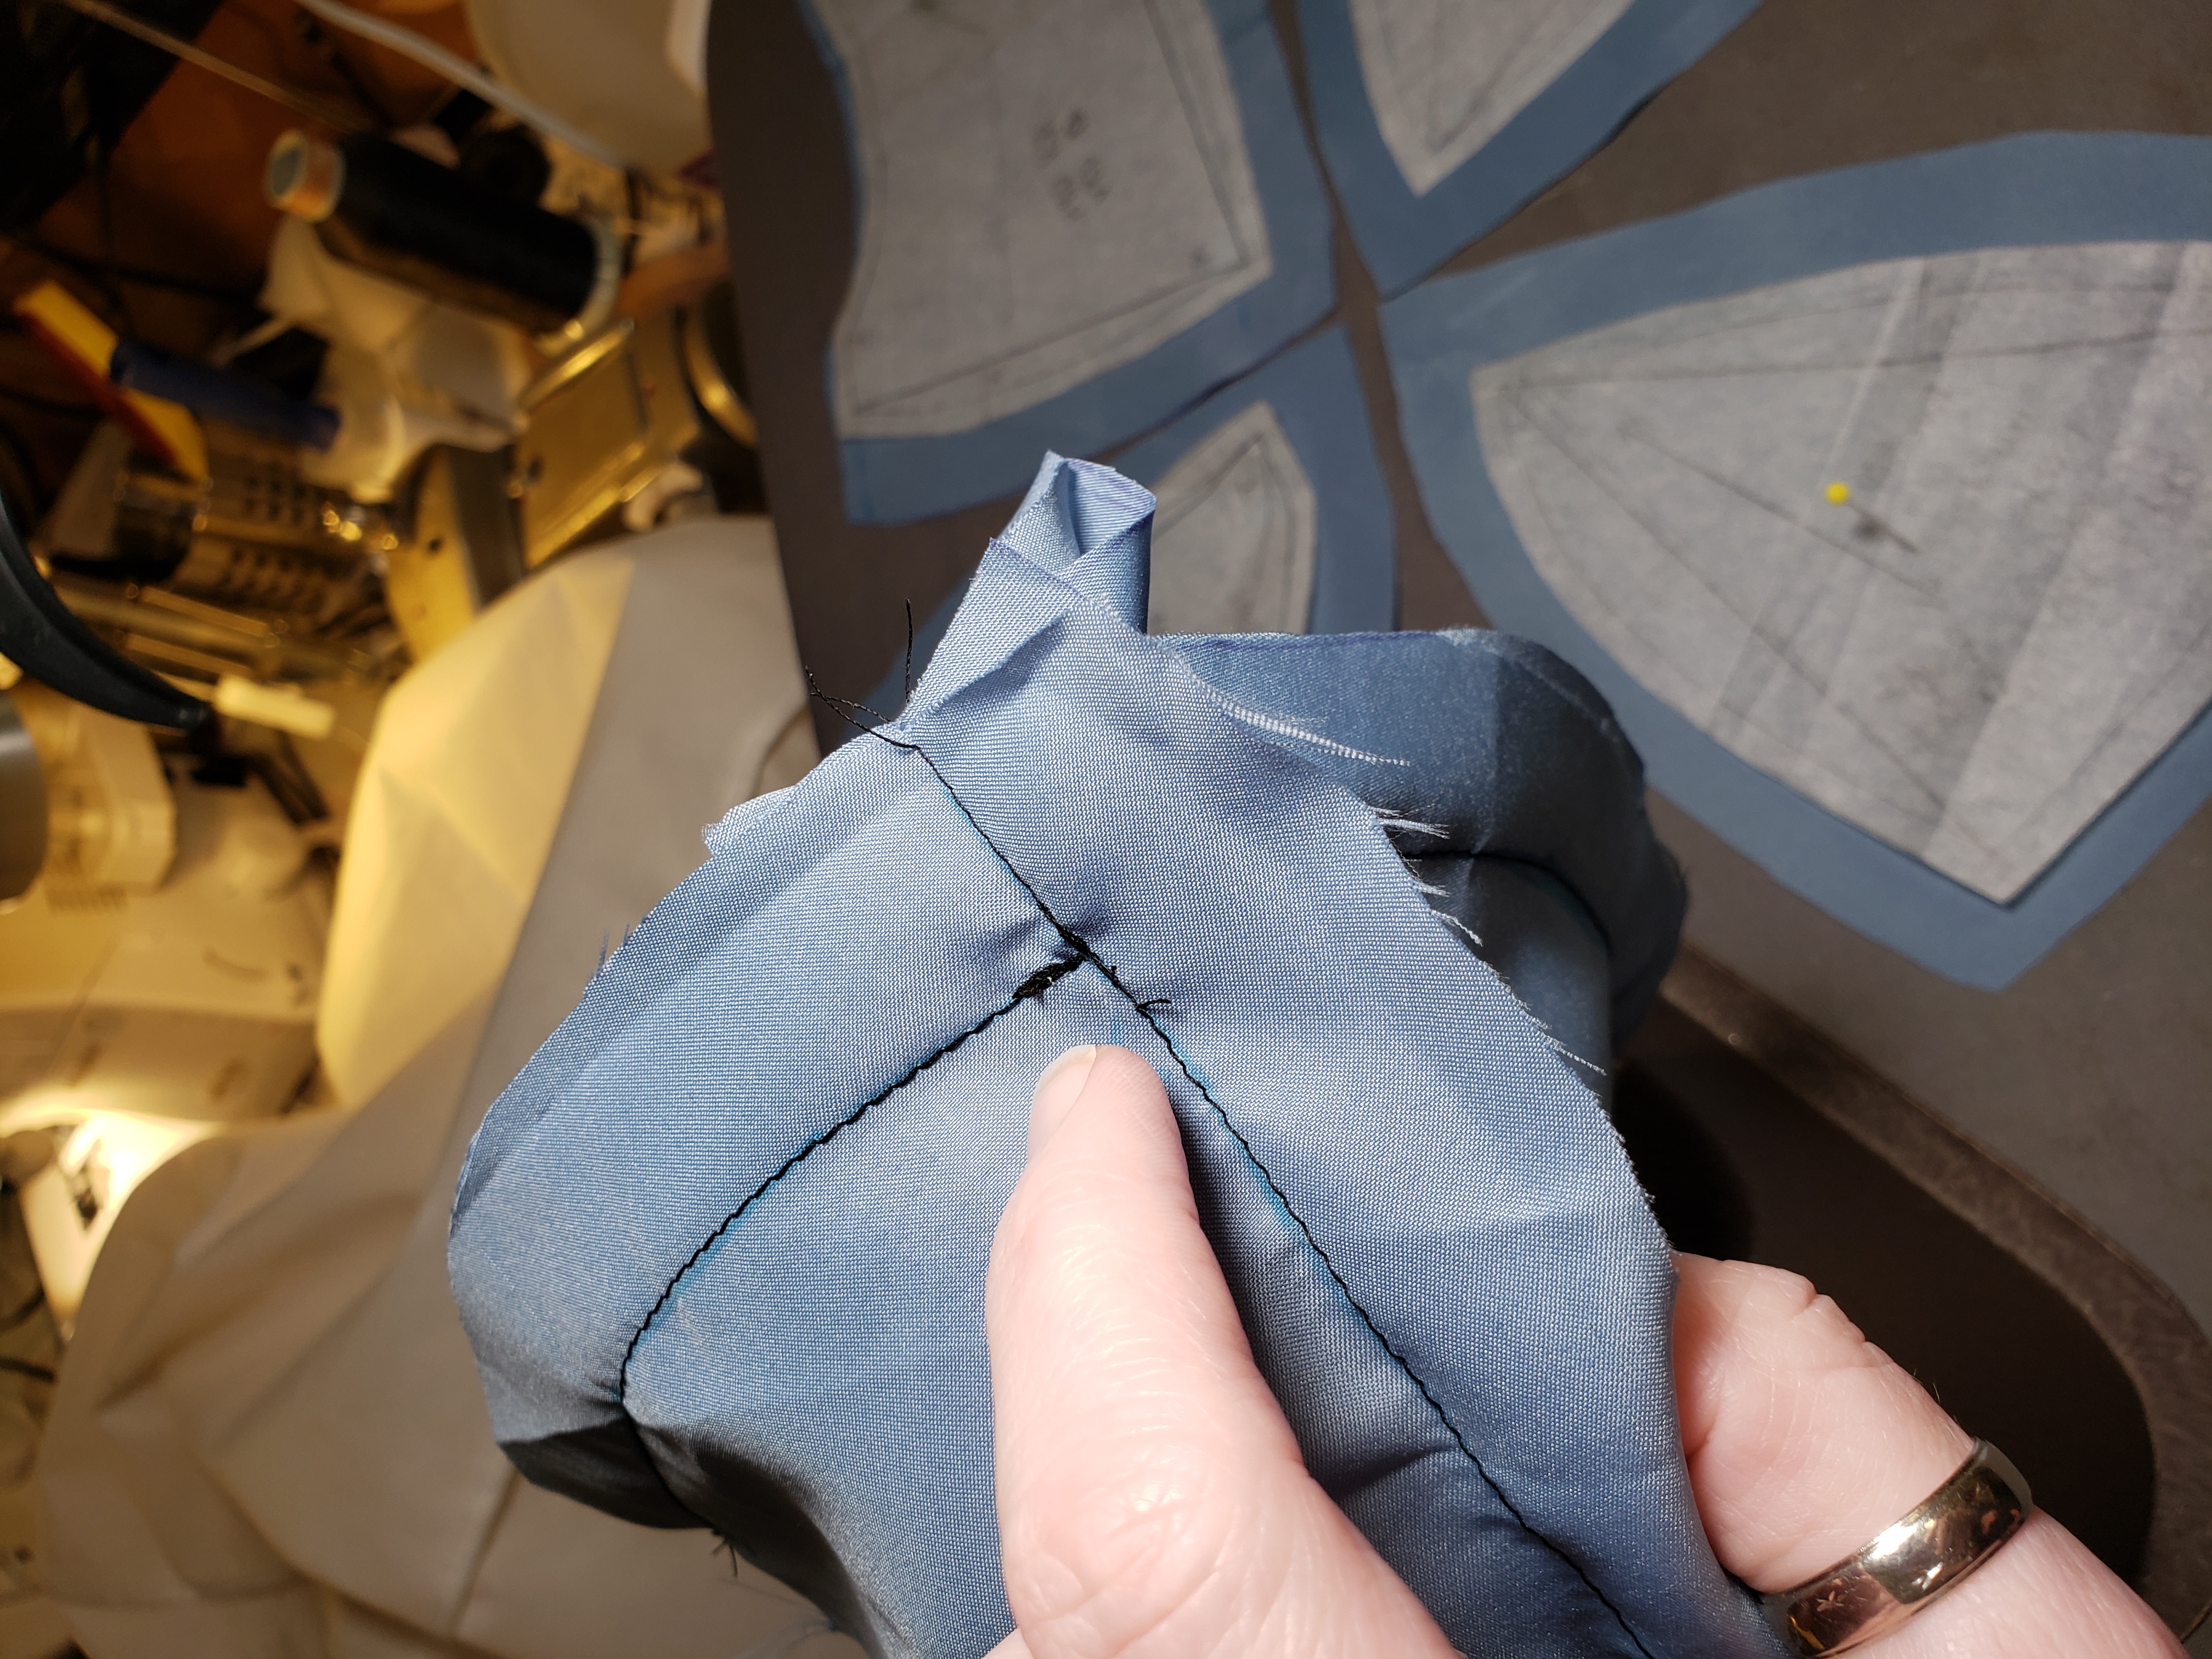
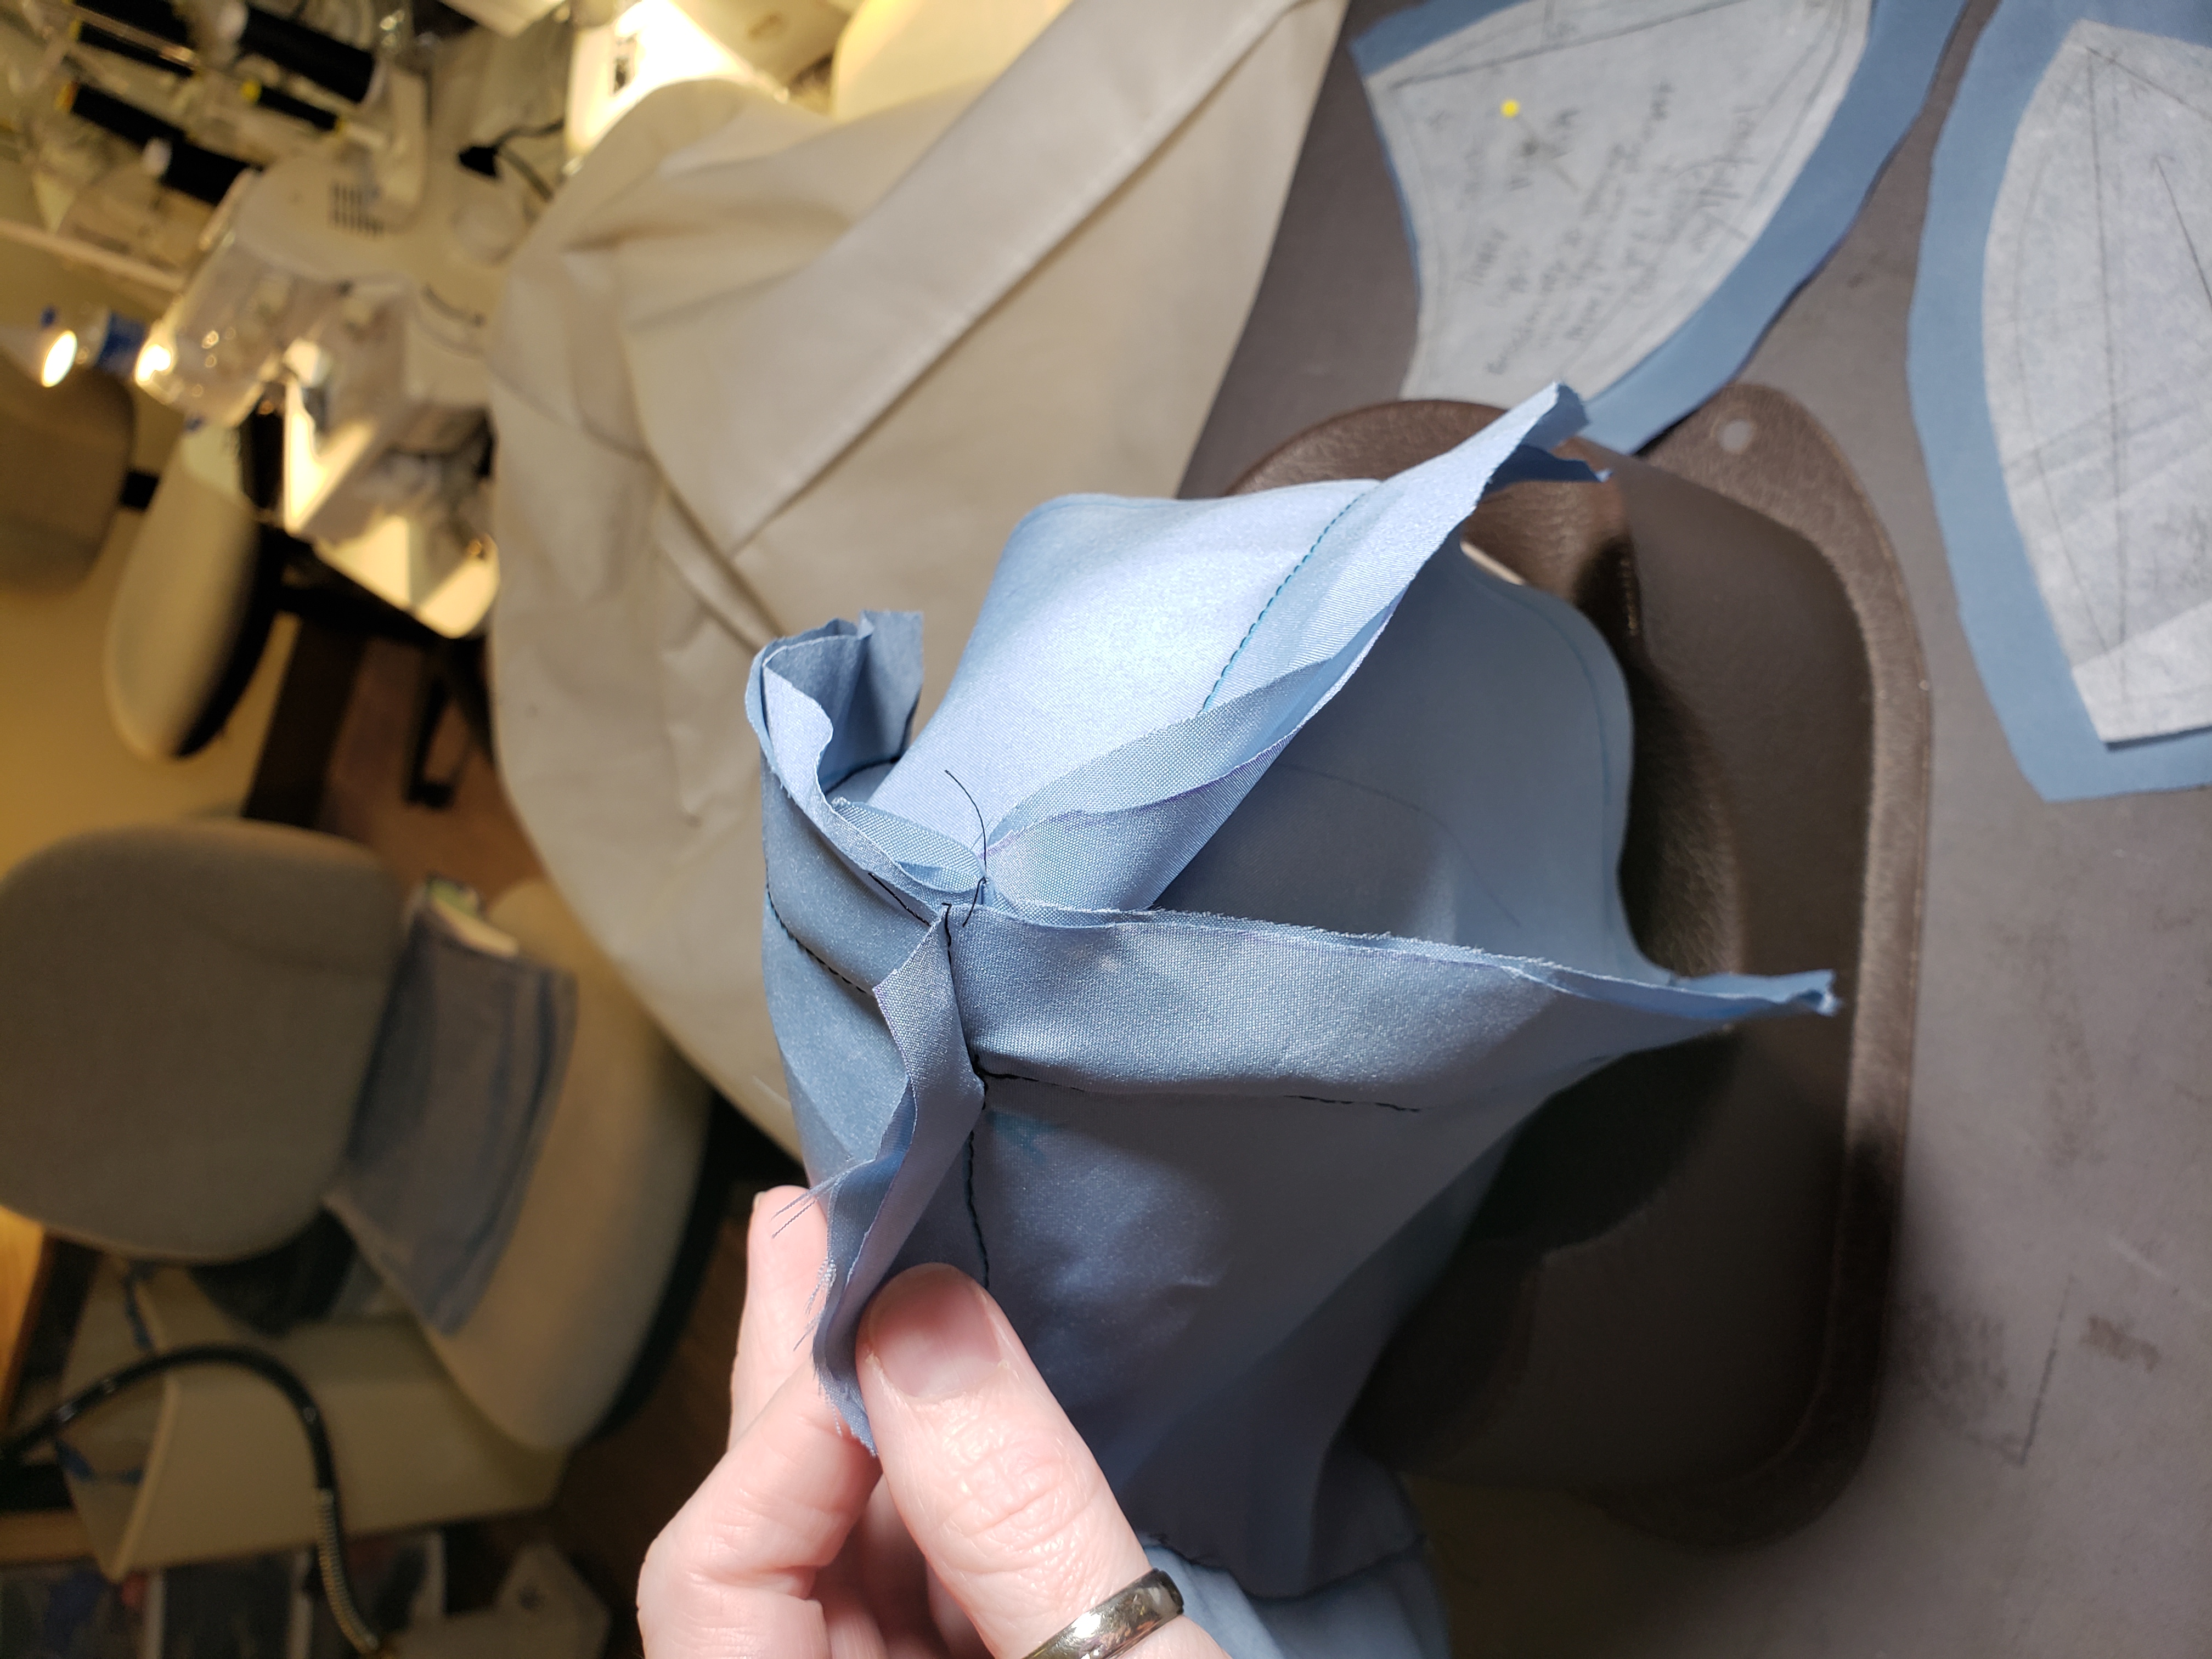
Here’s the part that’s nearly impossible to photograph. Assemble the cup “inside out” meaning all of these seams are going to point away from the body. Also, you aren’t going to stitch any seam allowances down. If you include these big, giant (for bramaking) seam allowances in the assembly, it can GREATLY distort the fit because it pulls the fabric of the cup out of shape.
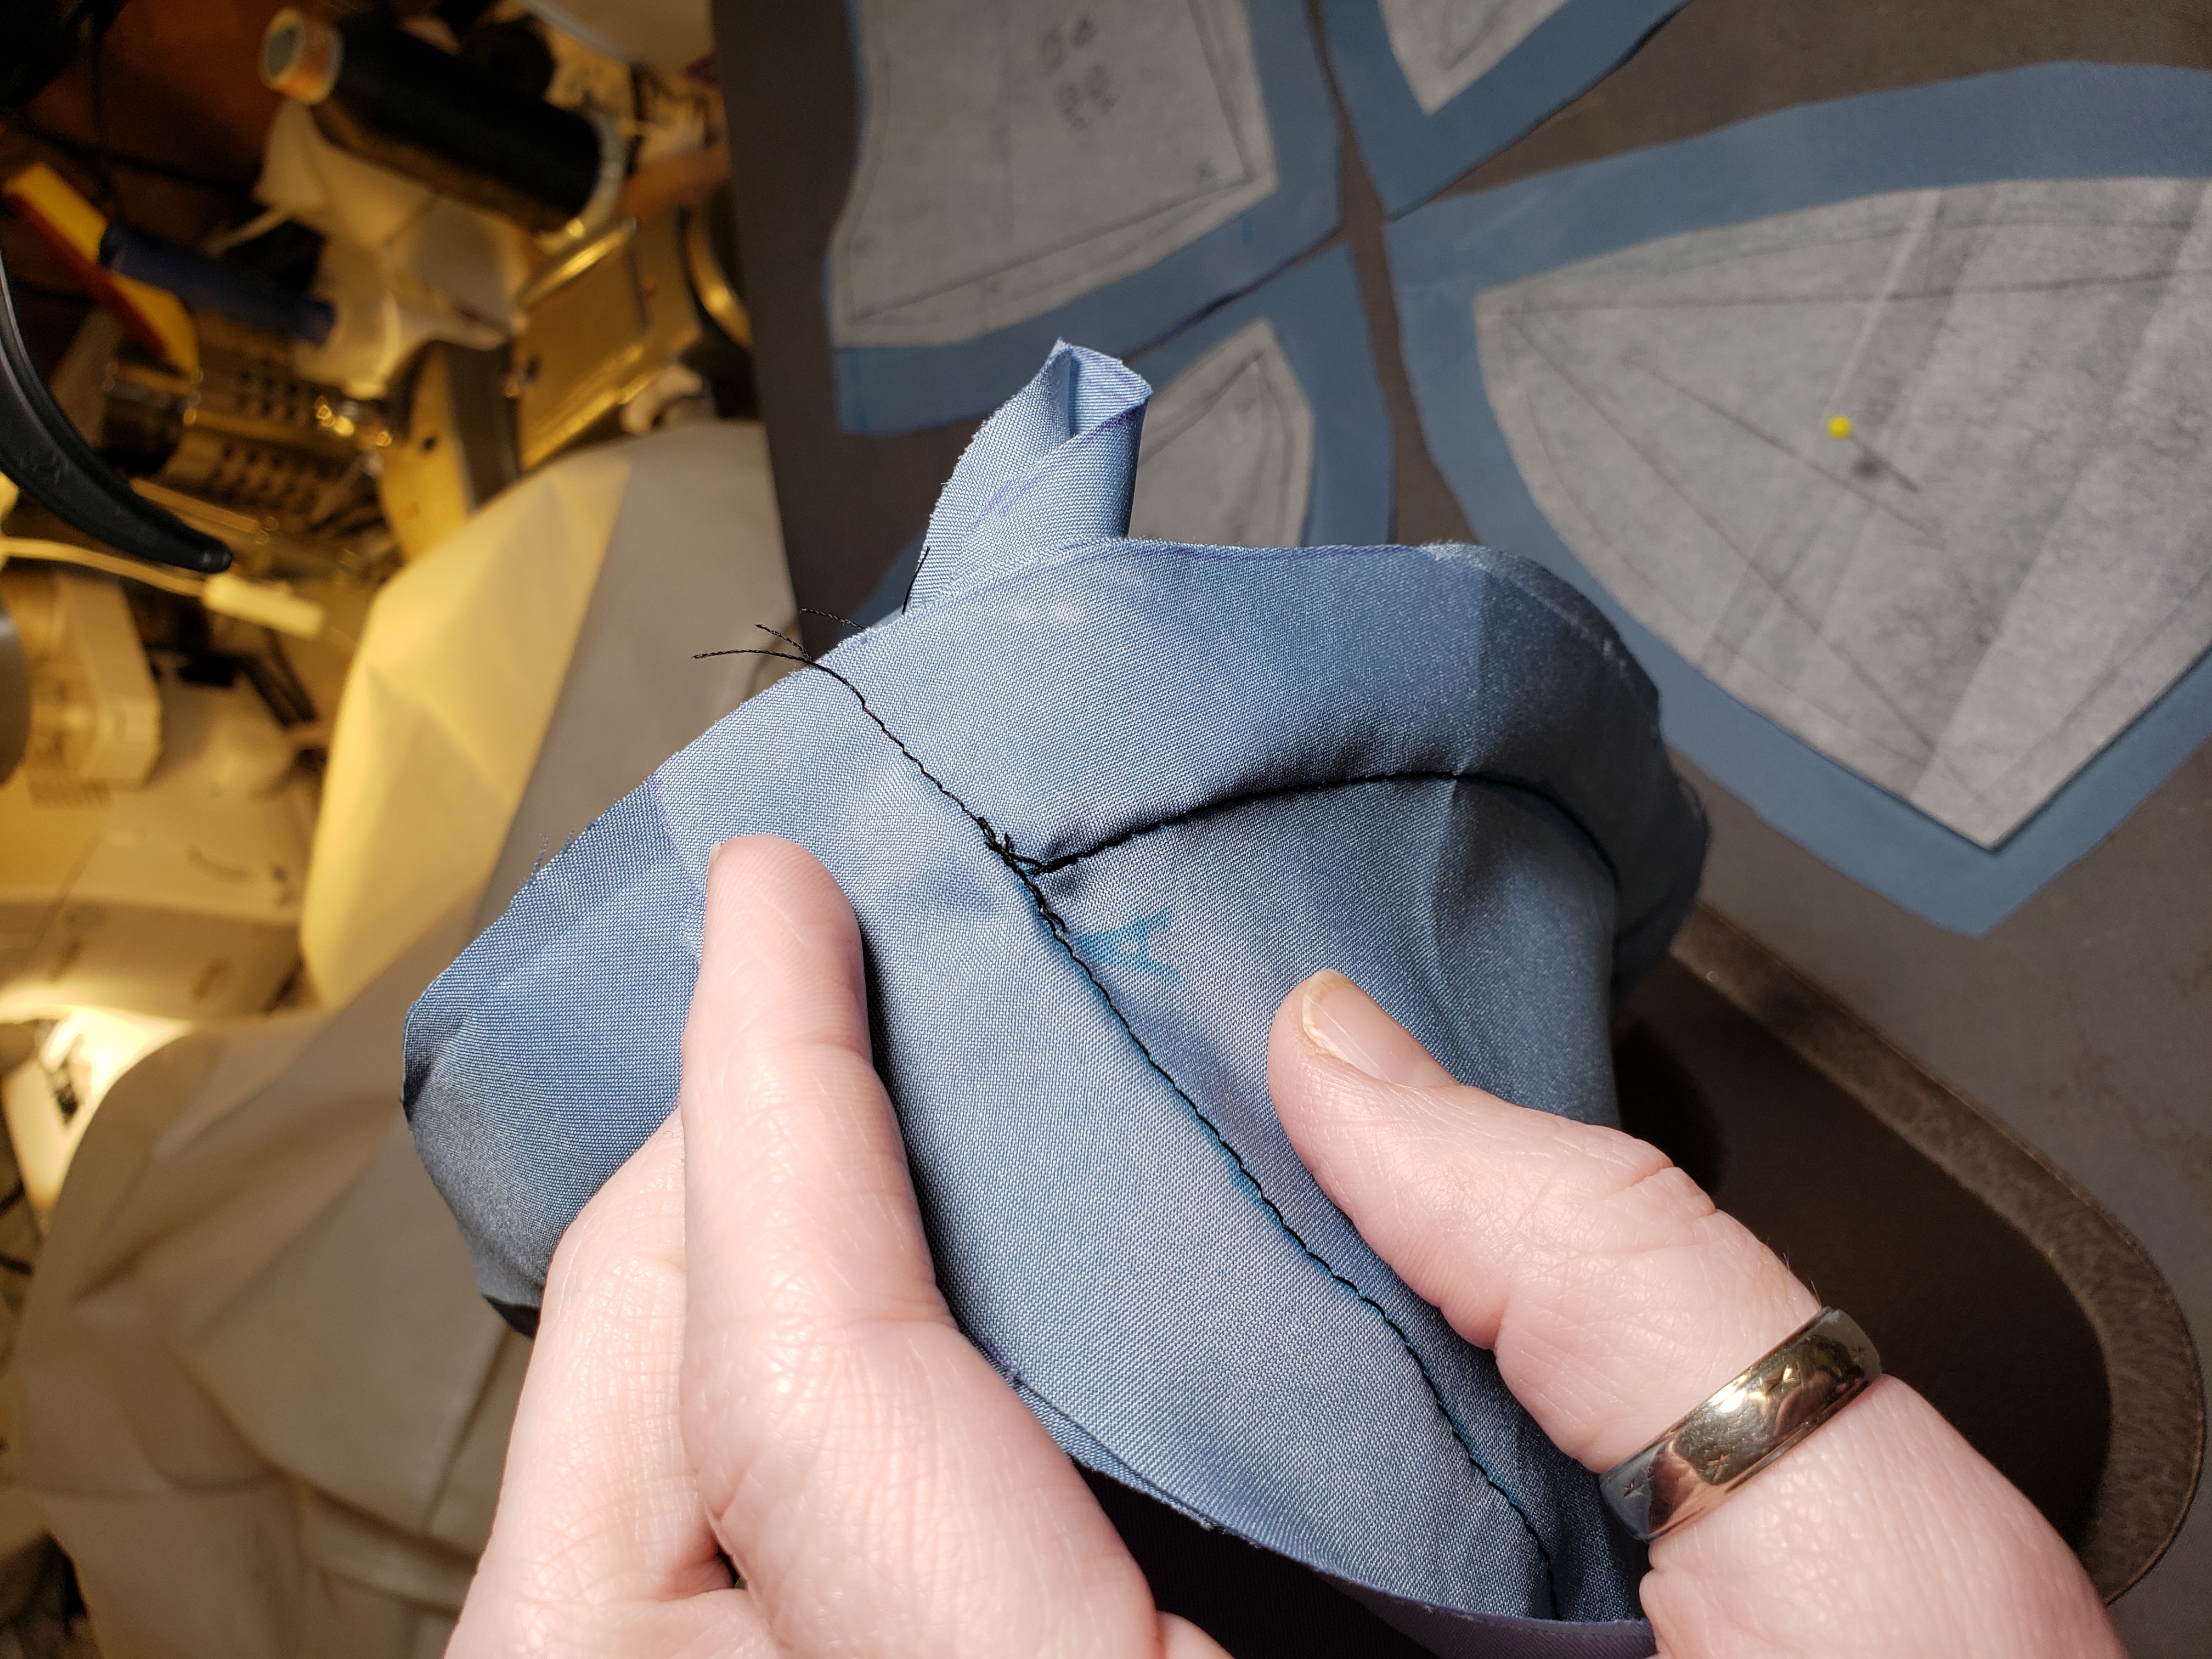
You sew two pieces together, and on a standard 3 piece cup, you would stitch together the vertical seam of the lower cups, then when you go to stitch the horizontal seam, you stitch from the center front to the apex and stop. Then you sew from the side in the armpit to the apex and stop. This keeps the seam allowances free to be changed at the apex. Here you can see I sewed from the top left of the photo to the apex and stopped where my finger is pointing.
Then I flipped over the seam allowance and started at the apex and continued from where my thumb is pointing down towards the right.
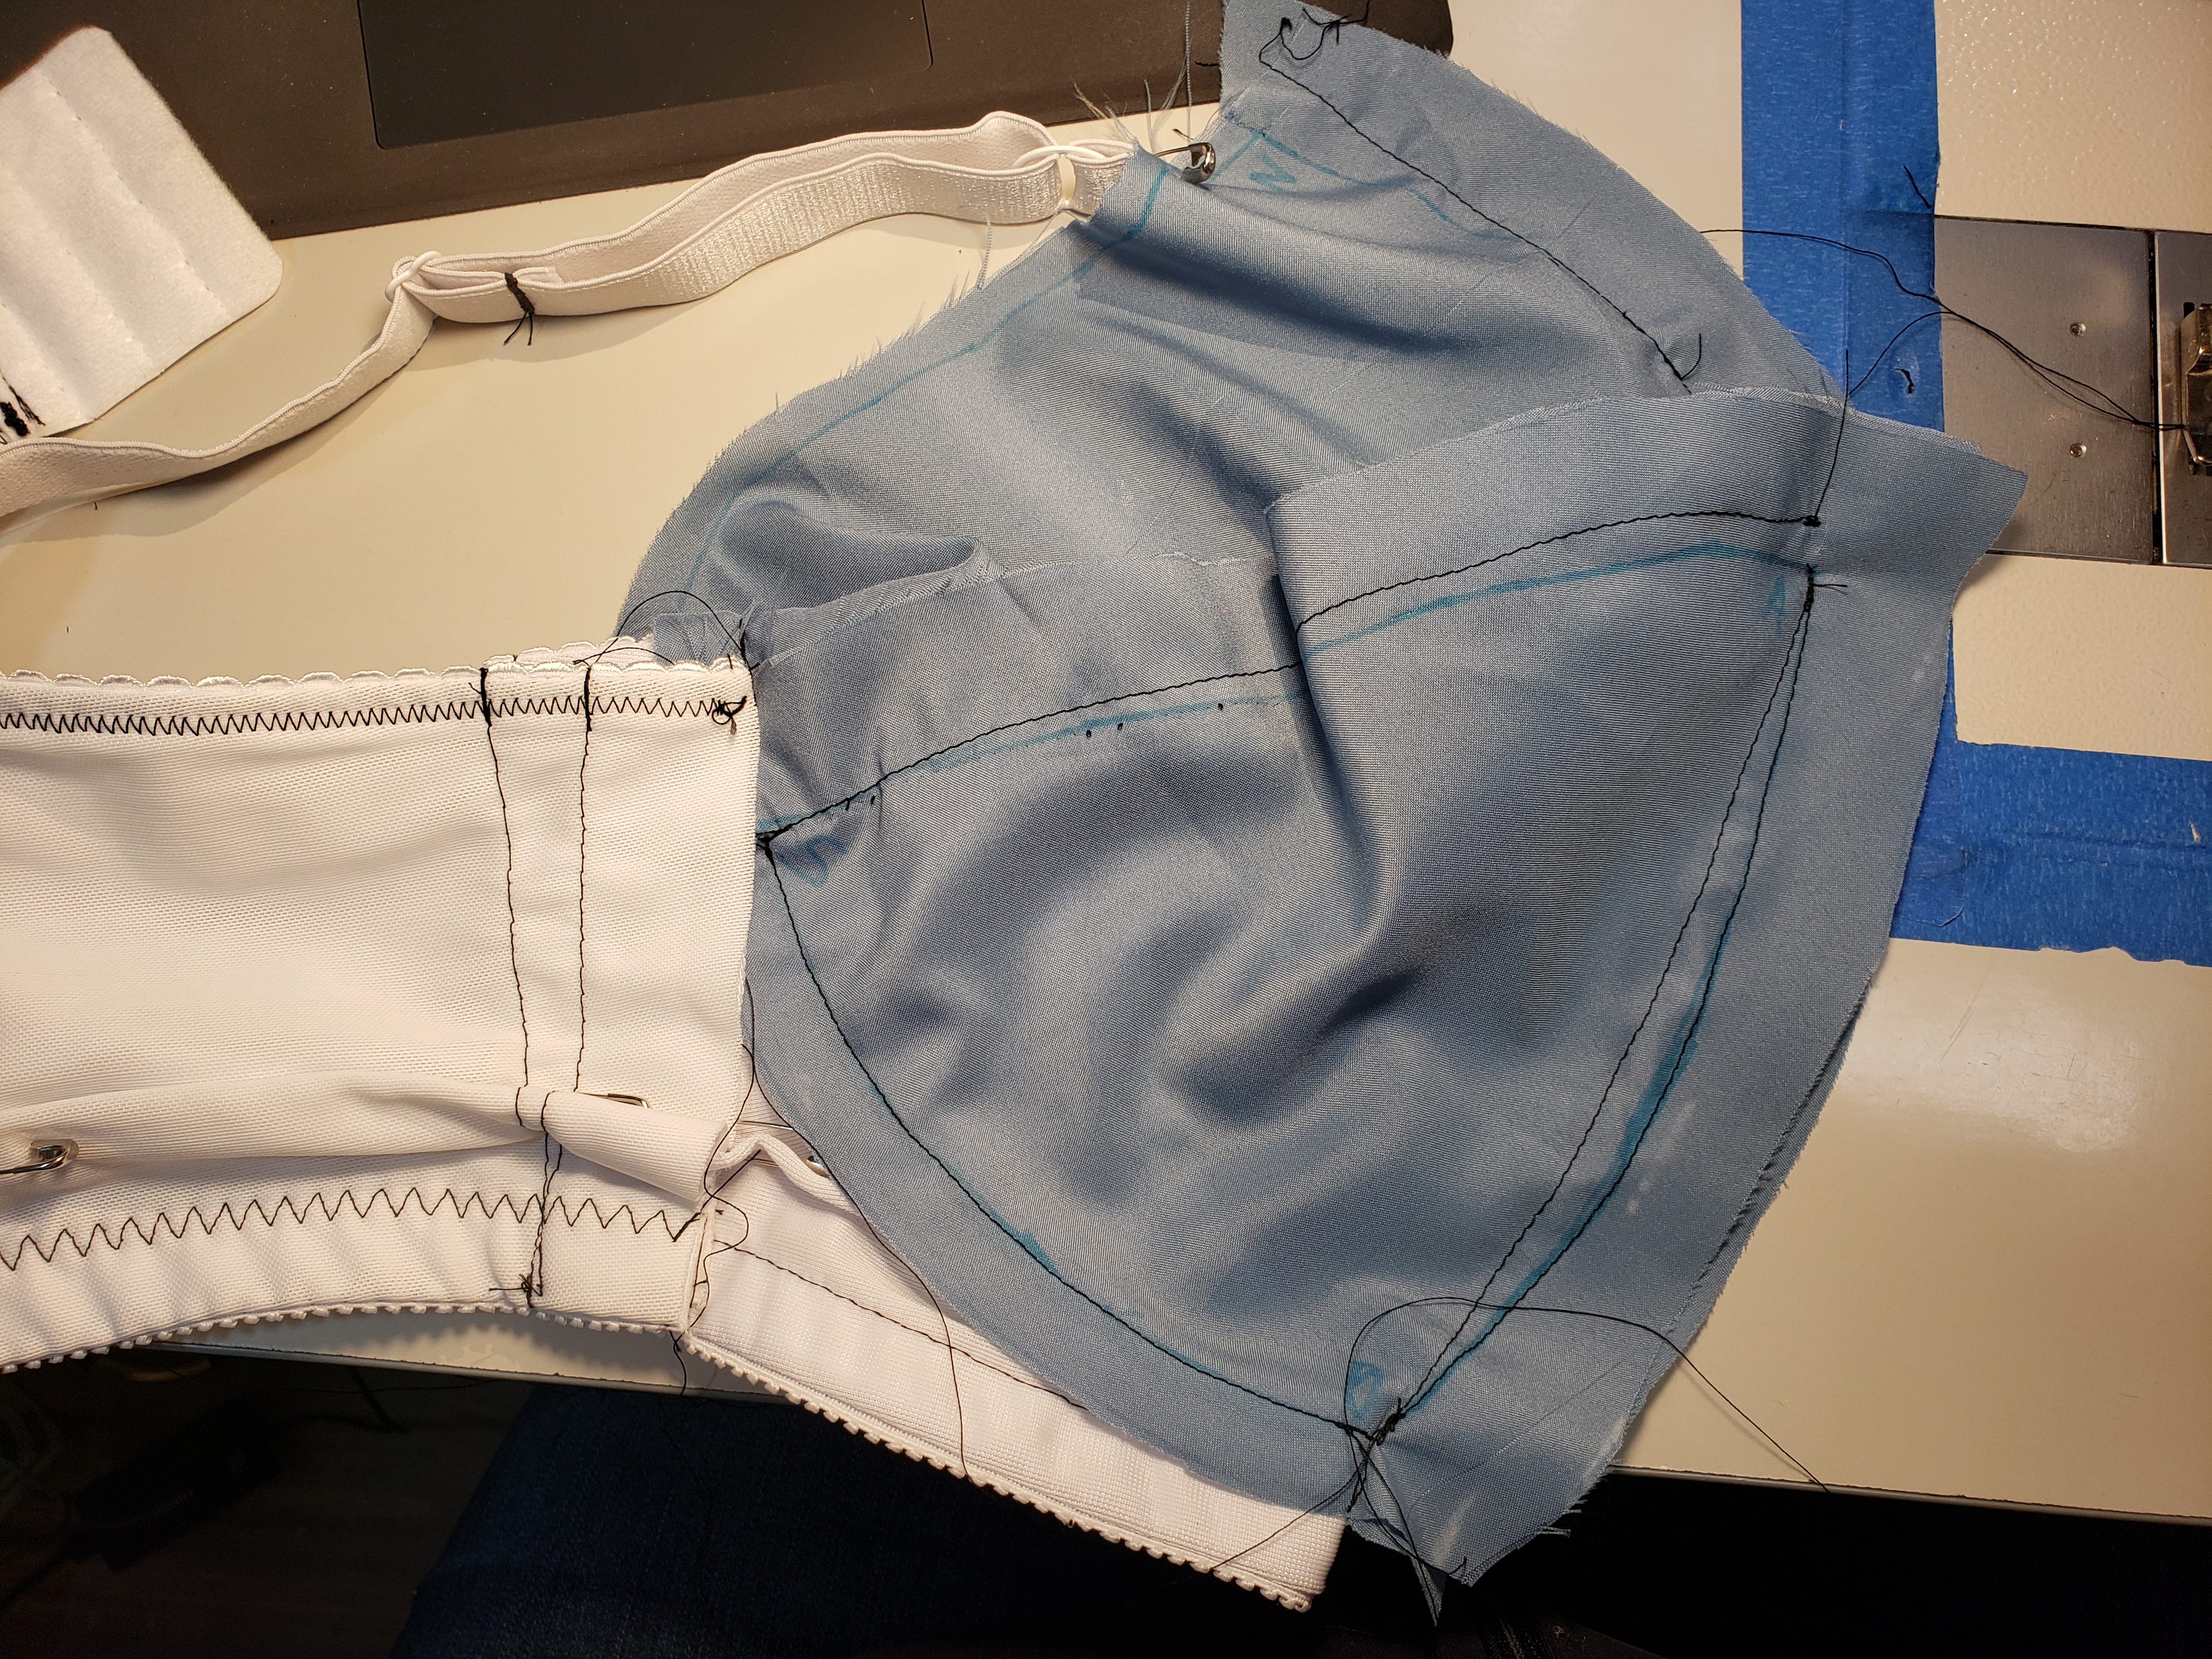
Below, the cup is assembled, but the apex seam allowances not stitched.
Inserting the cup into the band
Now it’s time to assemble the cups into the band WITHOUT STITCHING OVER THE SEAM ALLOWANCES. Got it? Ok! I’ve marked on both the fitting cups and on the band where the stitching line from the pattern is located.
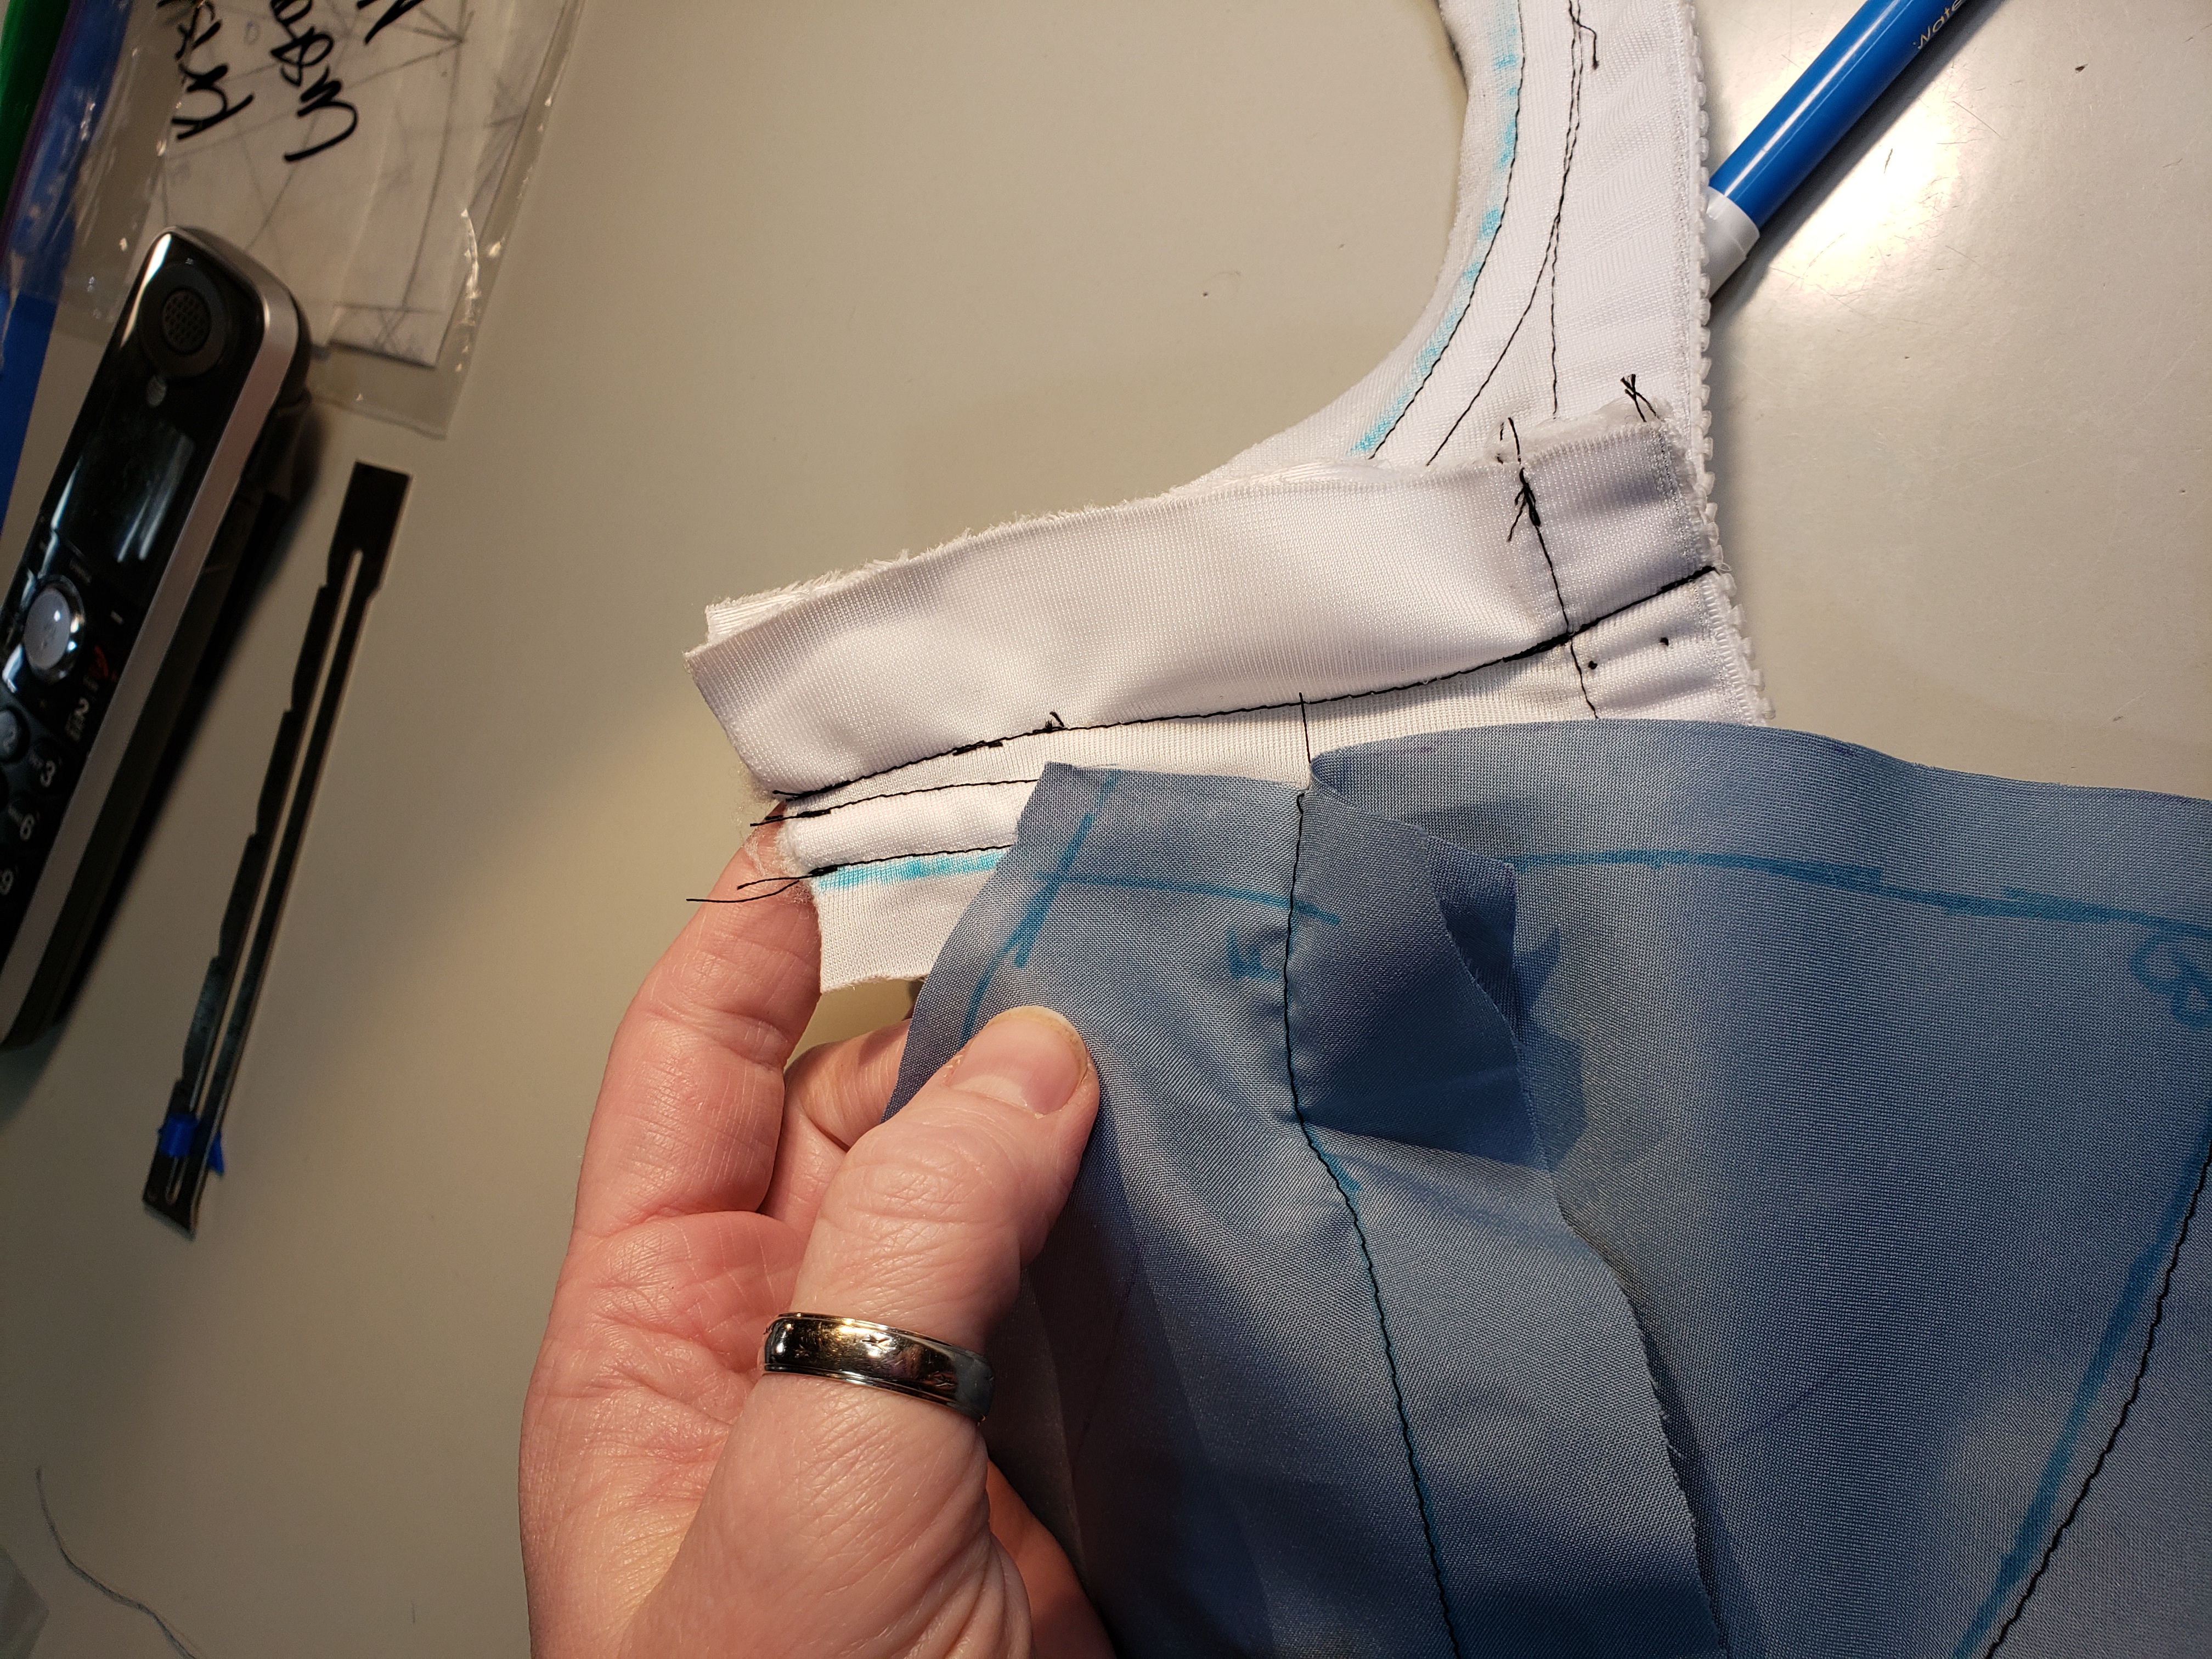
I laid the cup on top of the band so that the blue lines match. You can see where my fingers are manipulating the lines together in the photo.
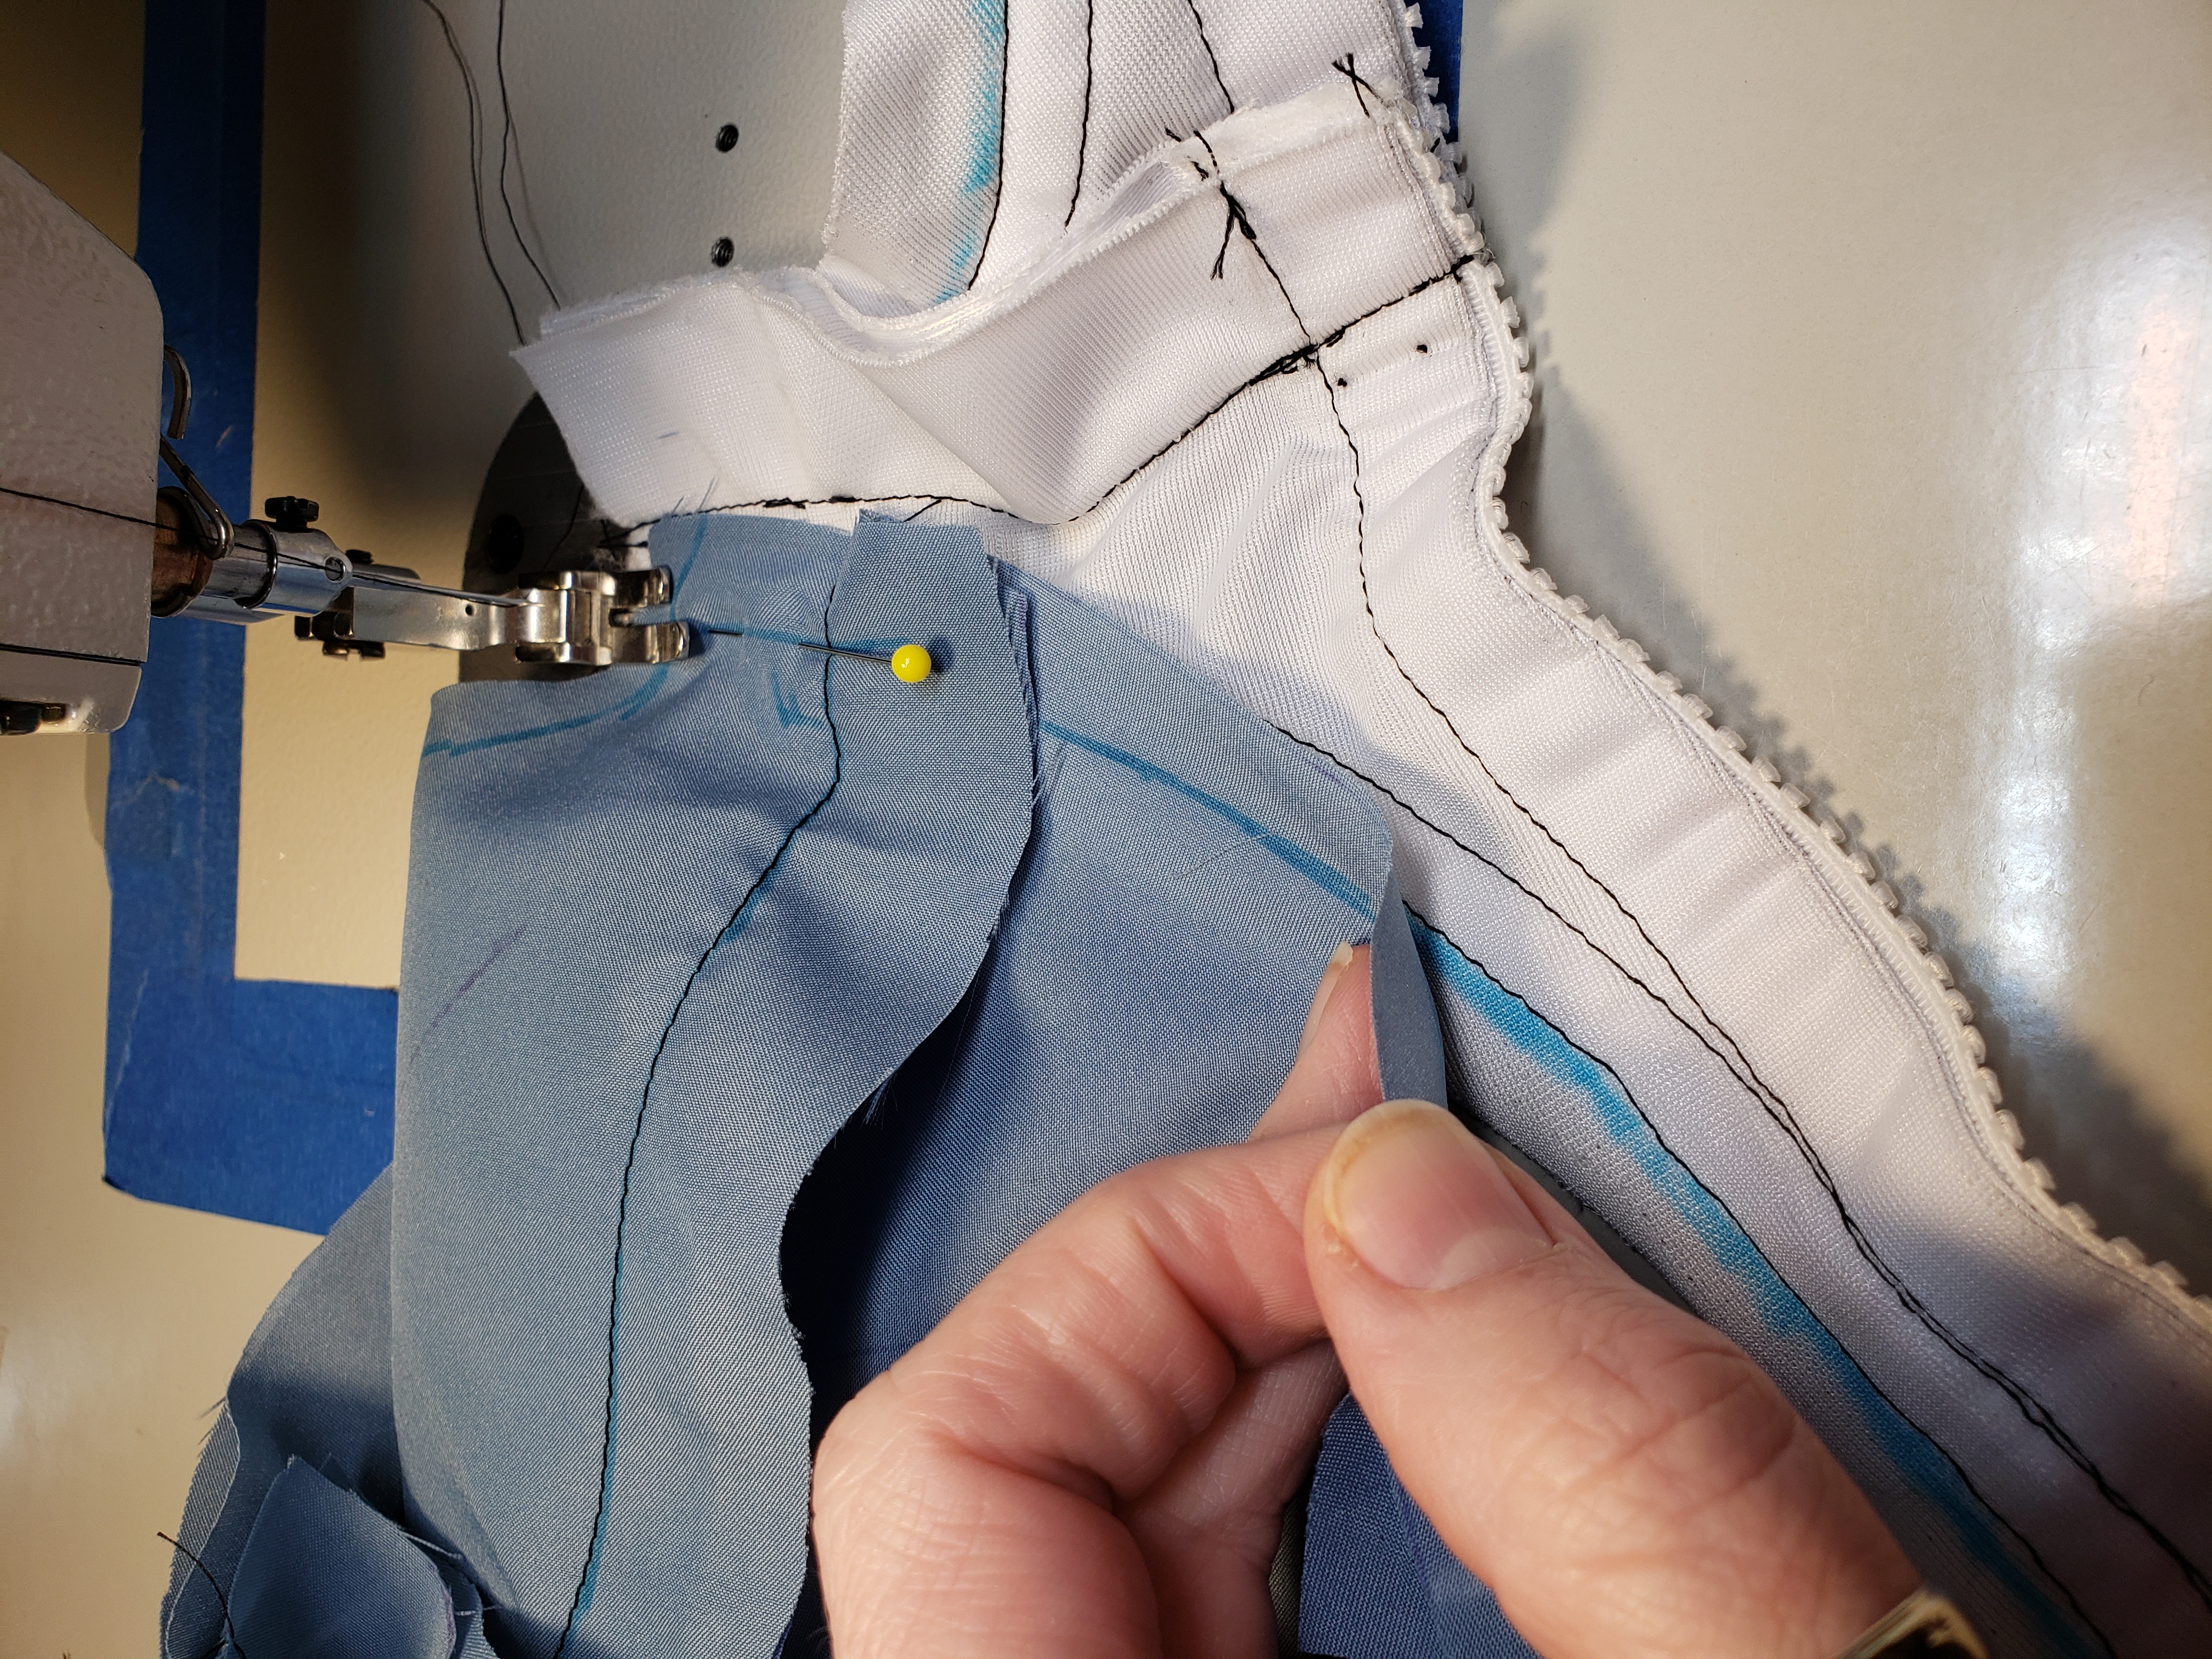
I sewed the inch or two until I reached the horizontal seam, and then I backstitched so I could start over below the cup seam WITHOUT STITCHING THE SEAM ALLOWANCE OF THE CUP DOWN!
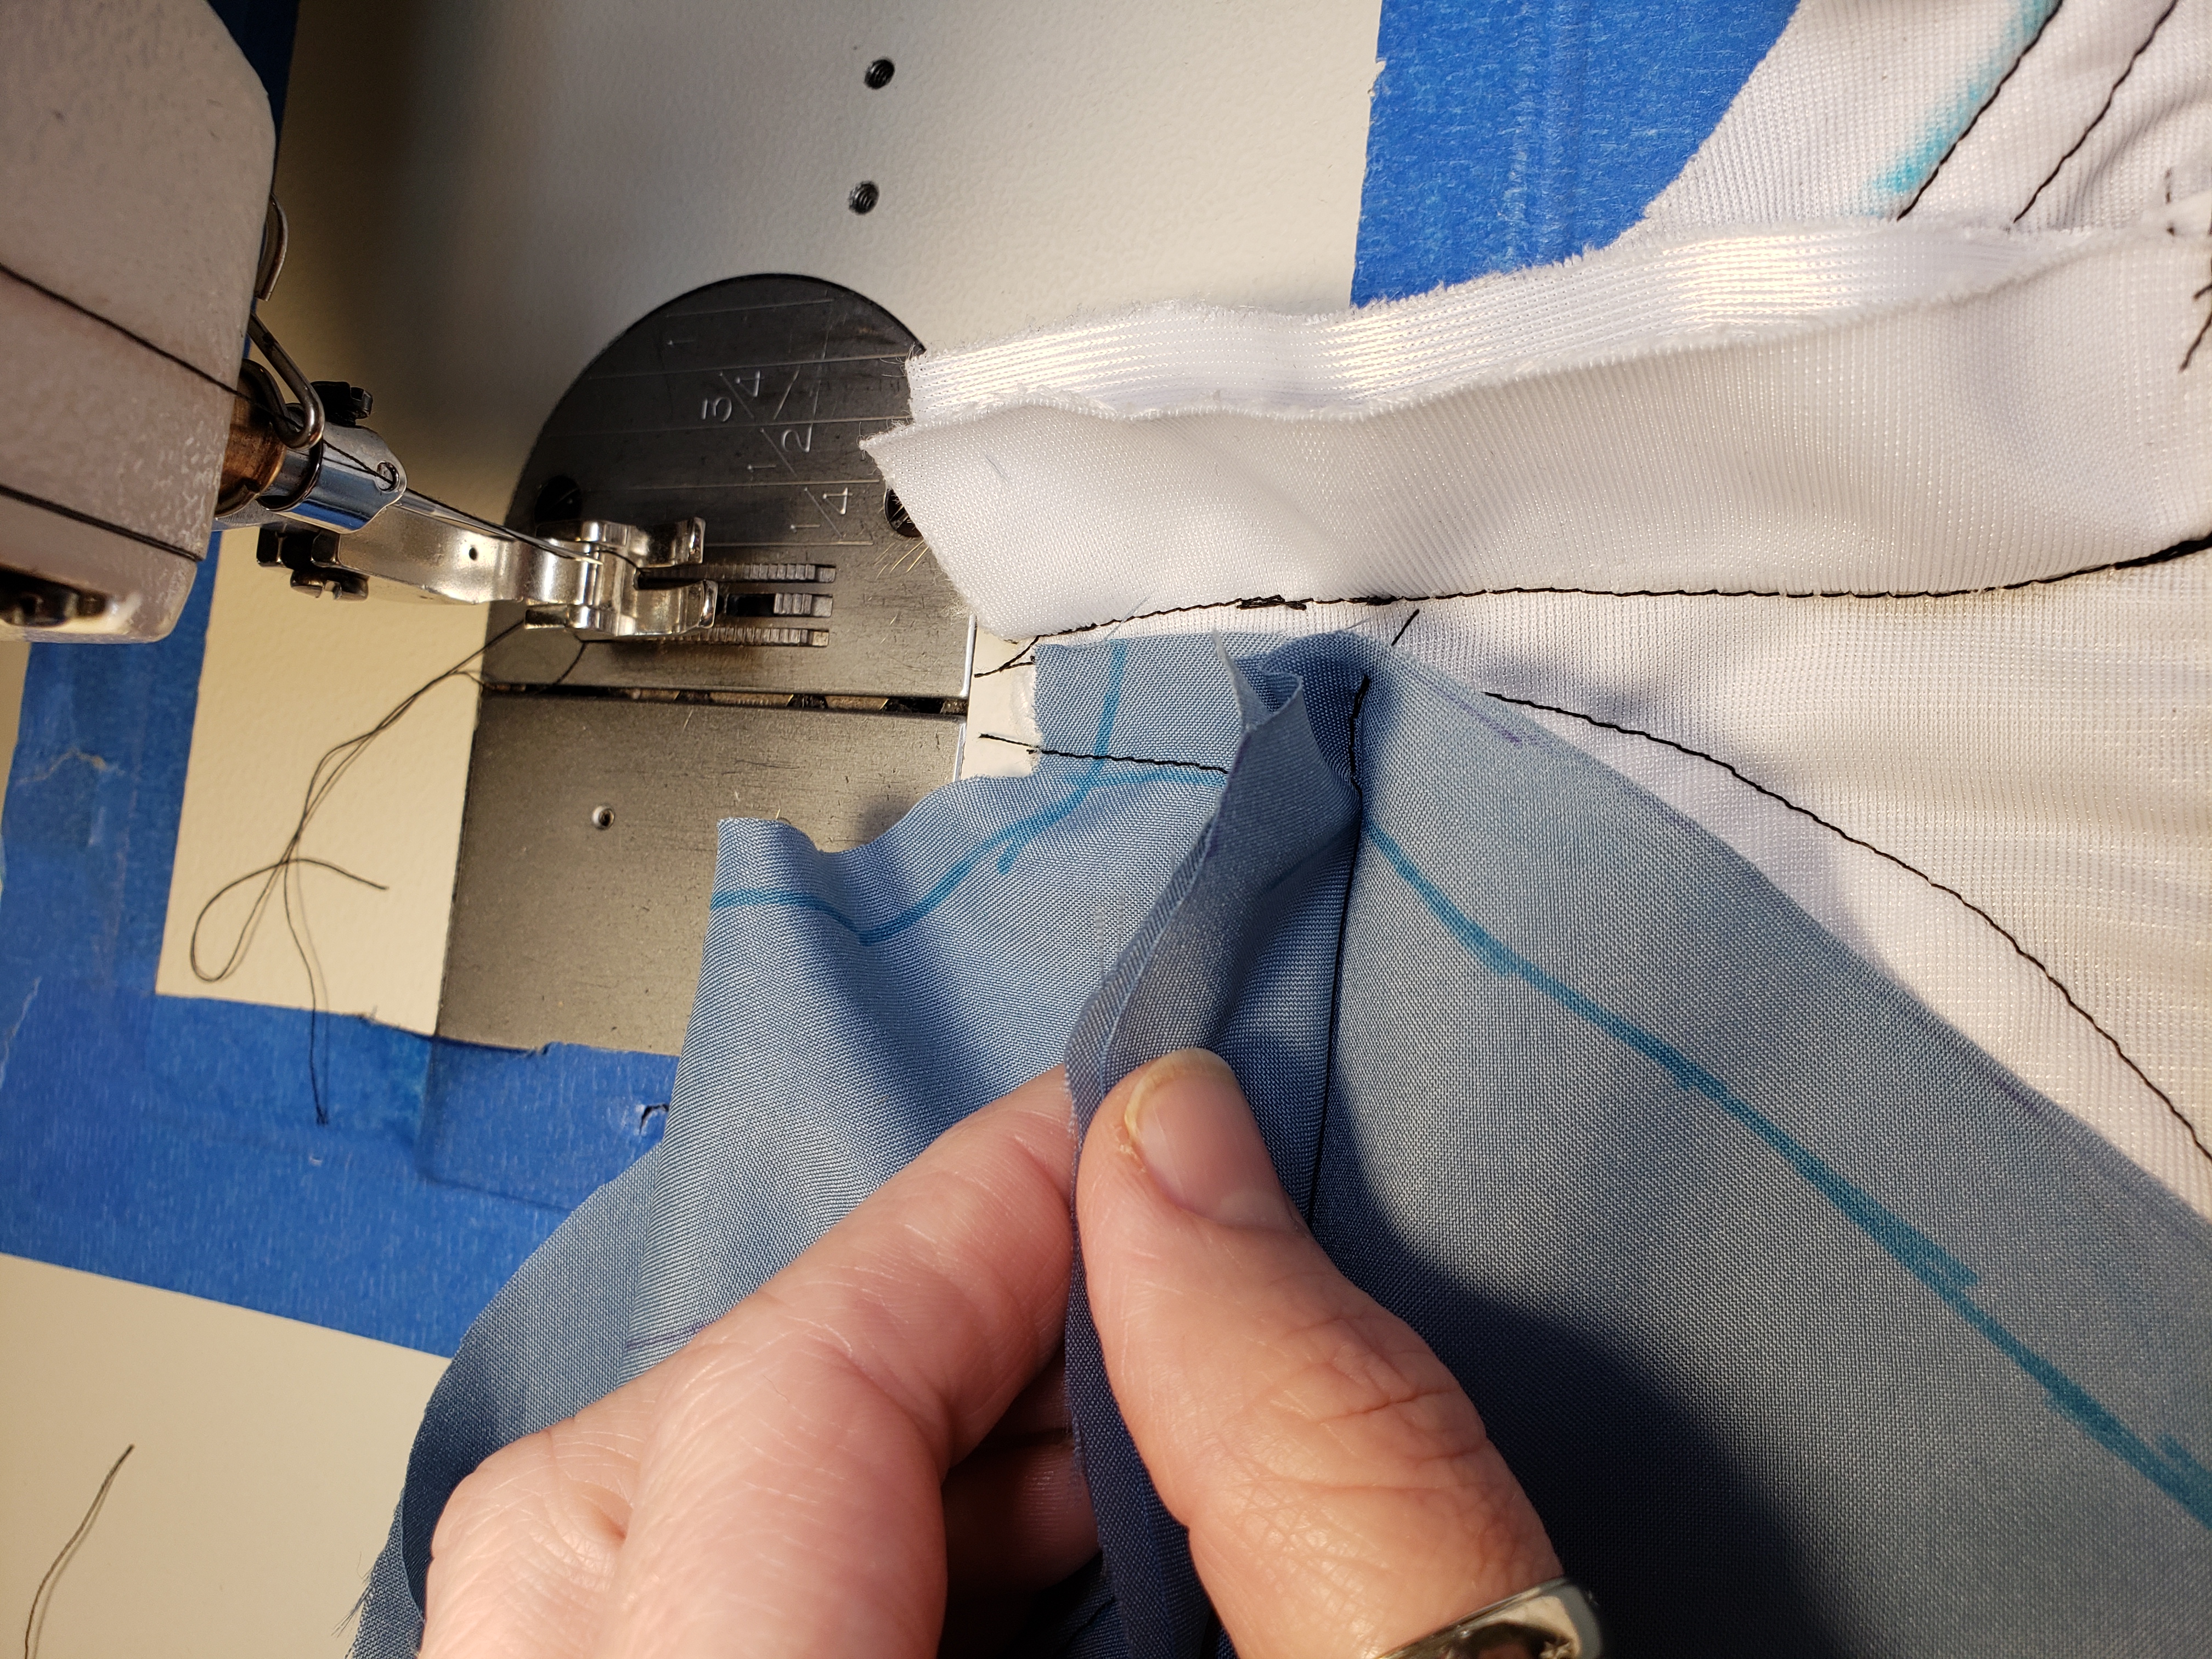
Really zoom in here and see how i’m pinching a seam allowance that is not stitched down. Stitch to the seam at the base of the cup and stop, back stitch and start over on the other side of the next seam.
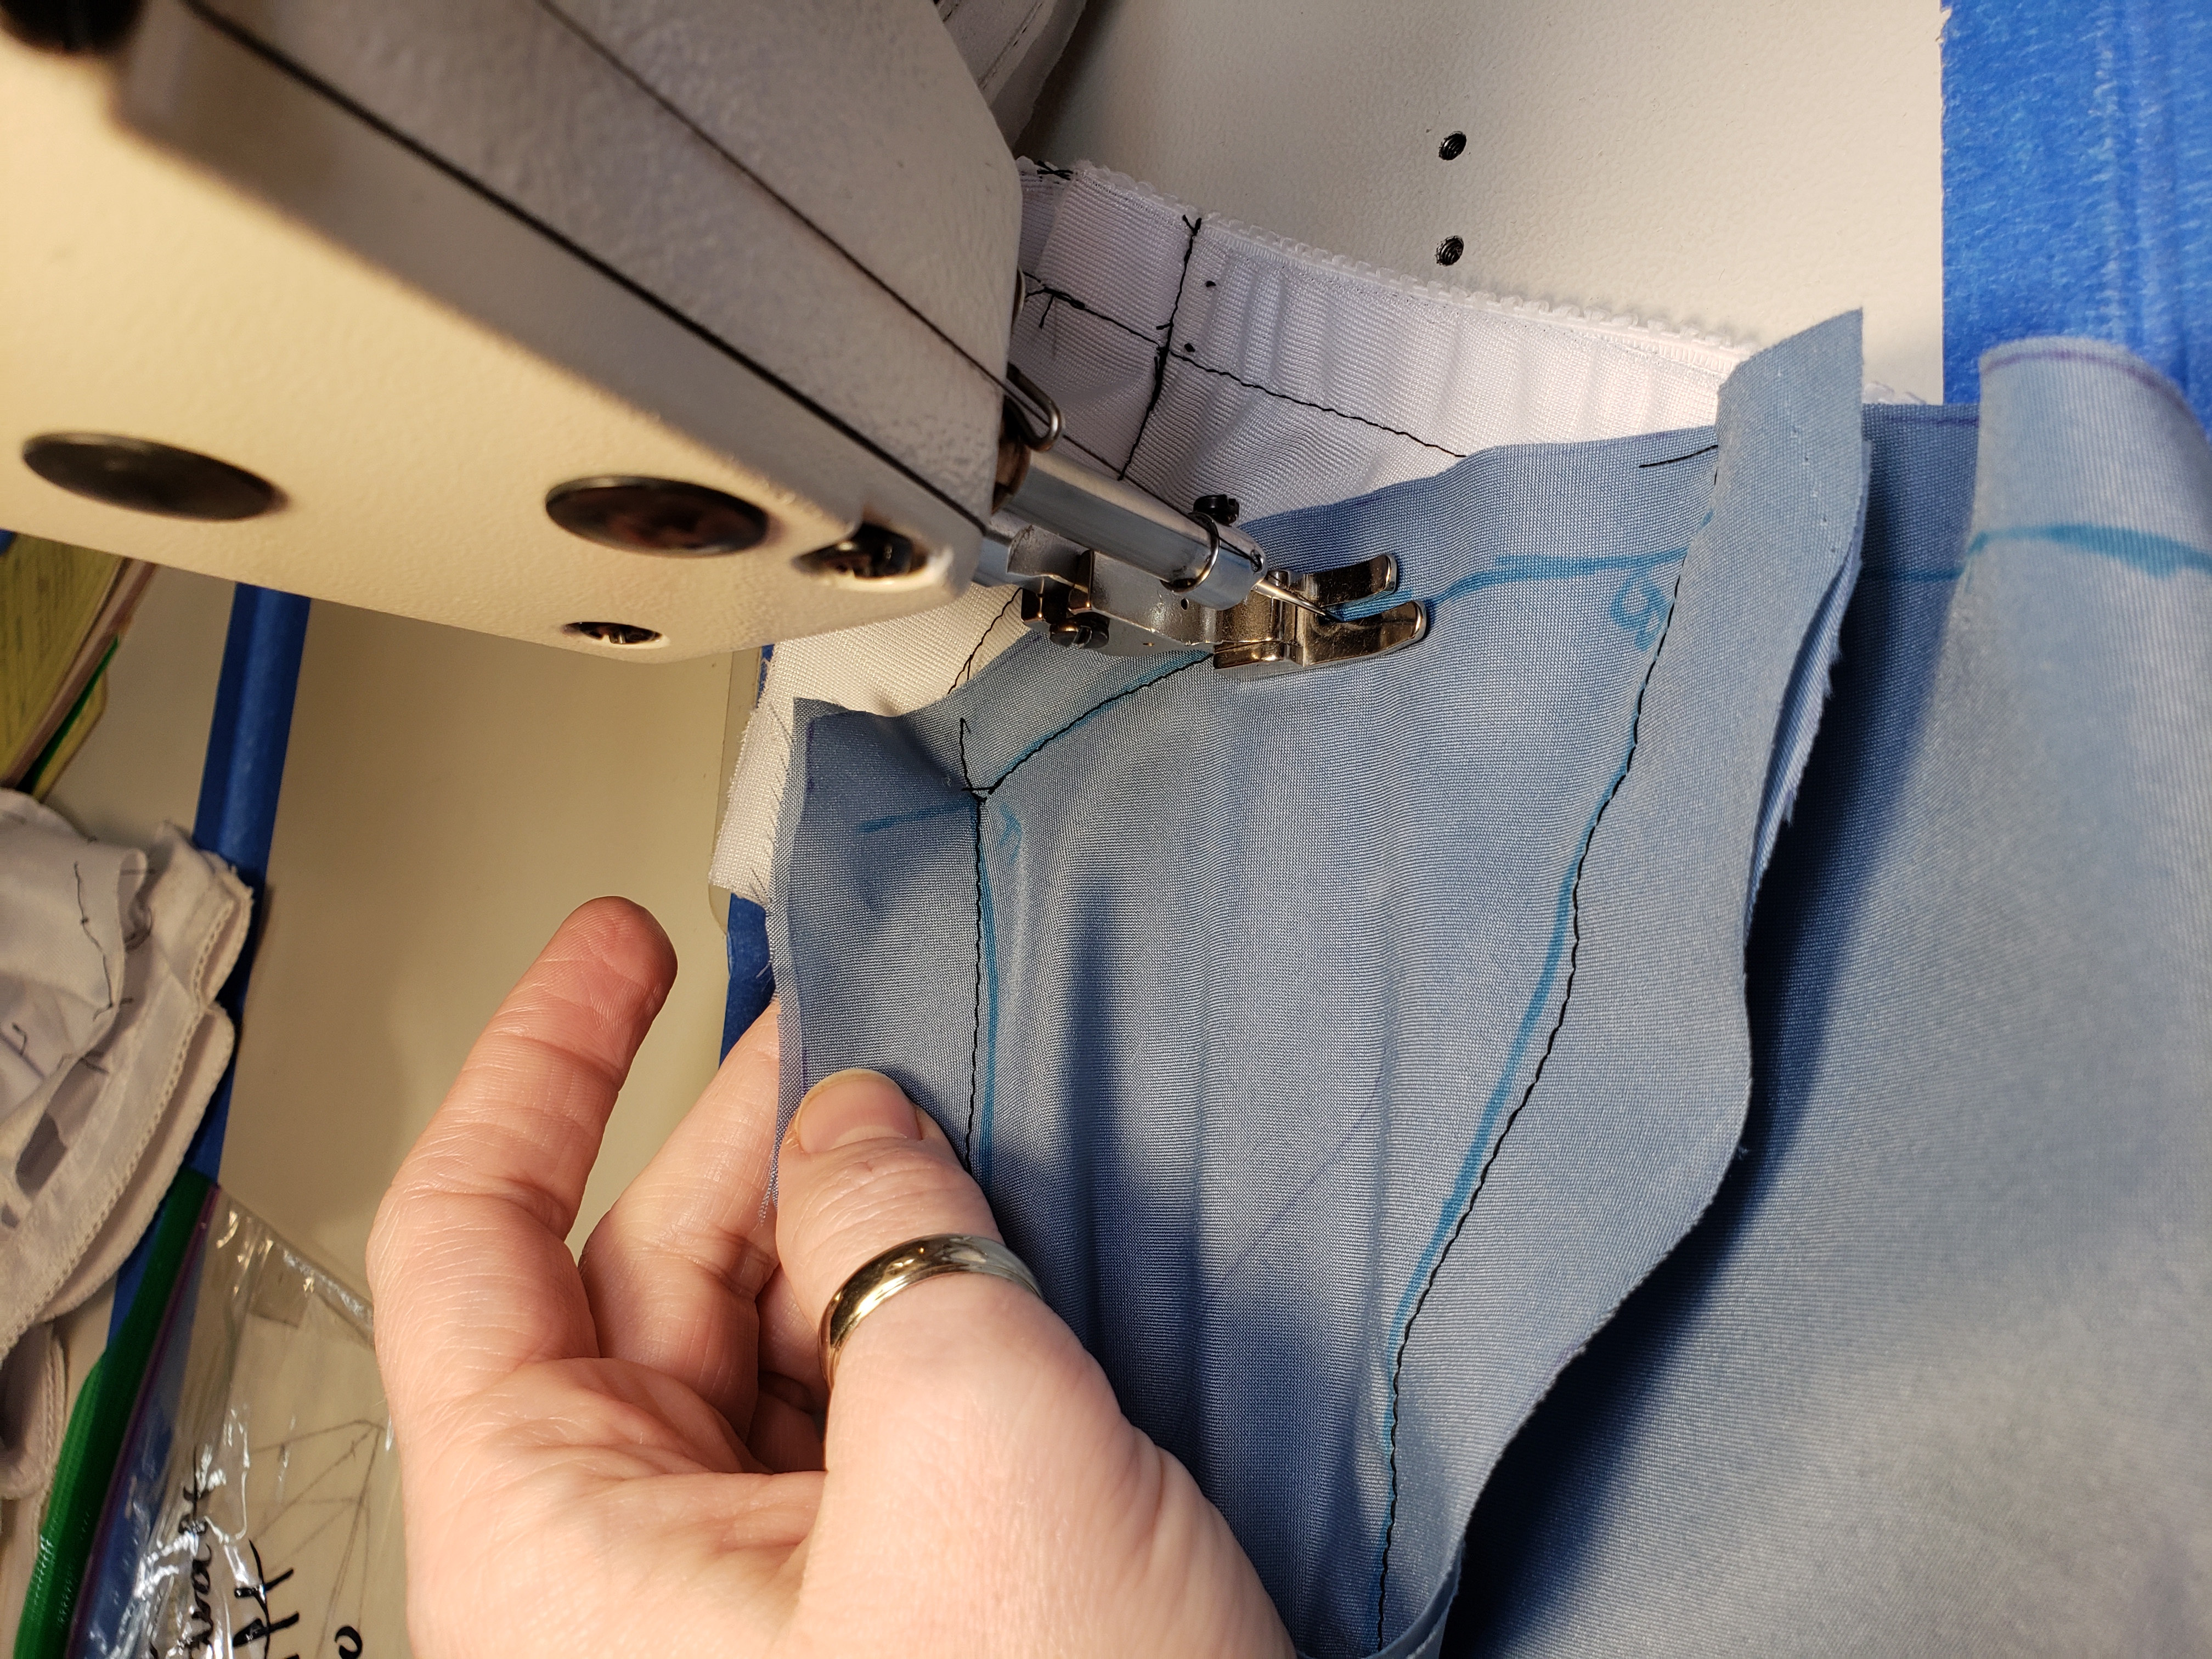
Keep stitching in the spaces between the cup seams so you can attach it to the band but for the love of all that is good, do not stitch the seam allowance down!
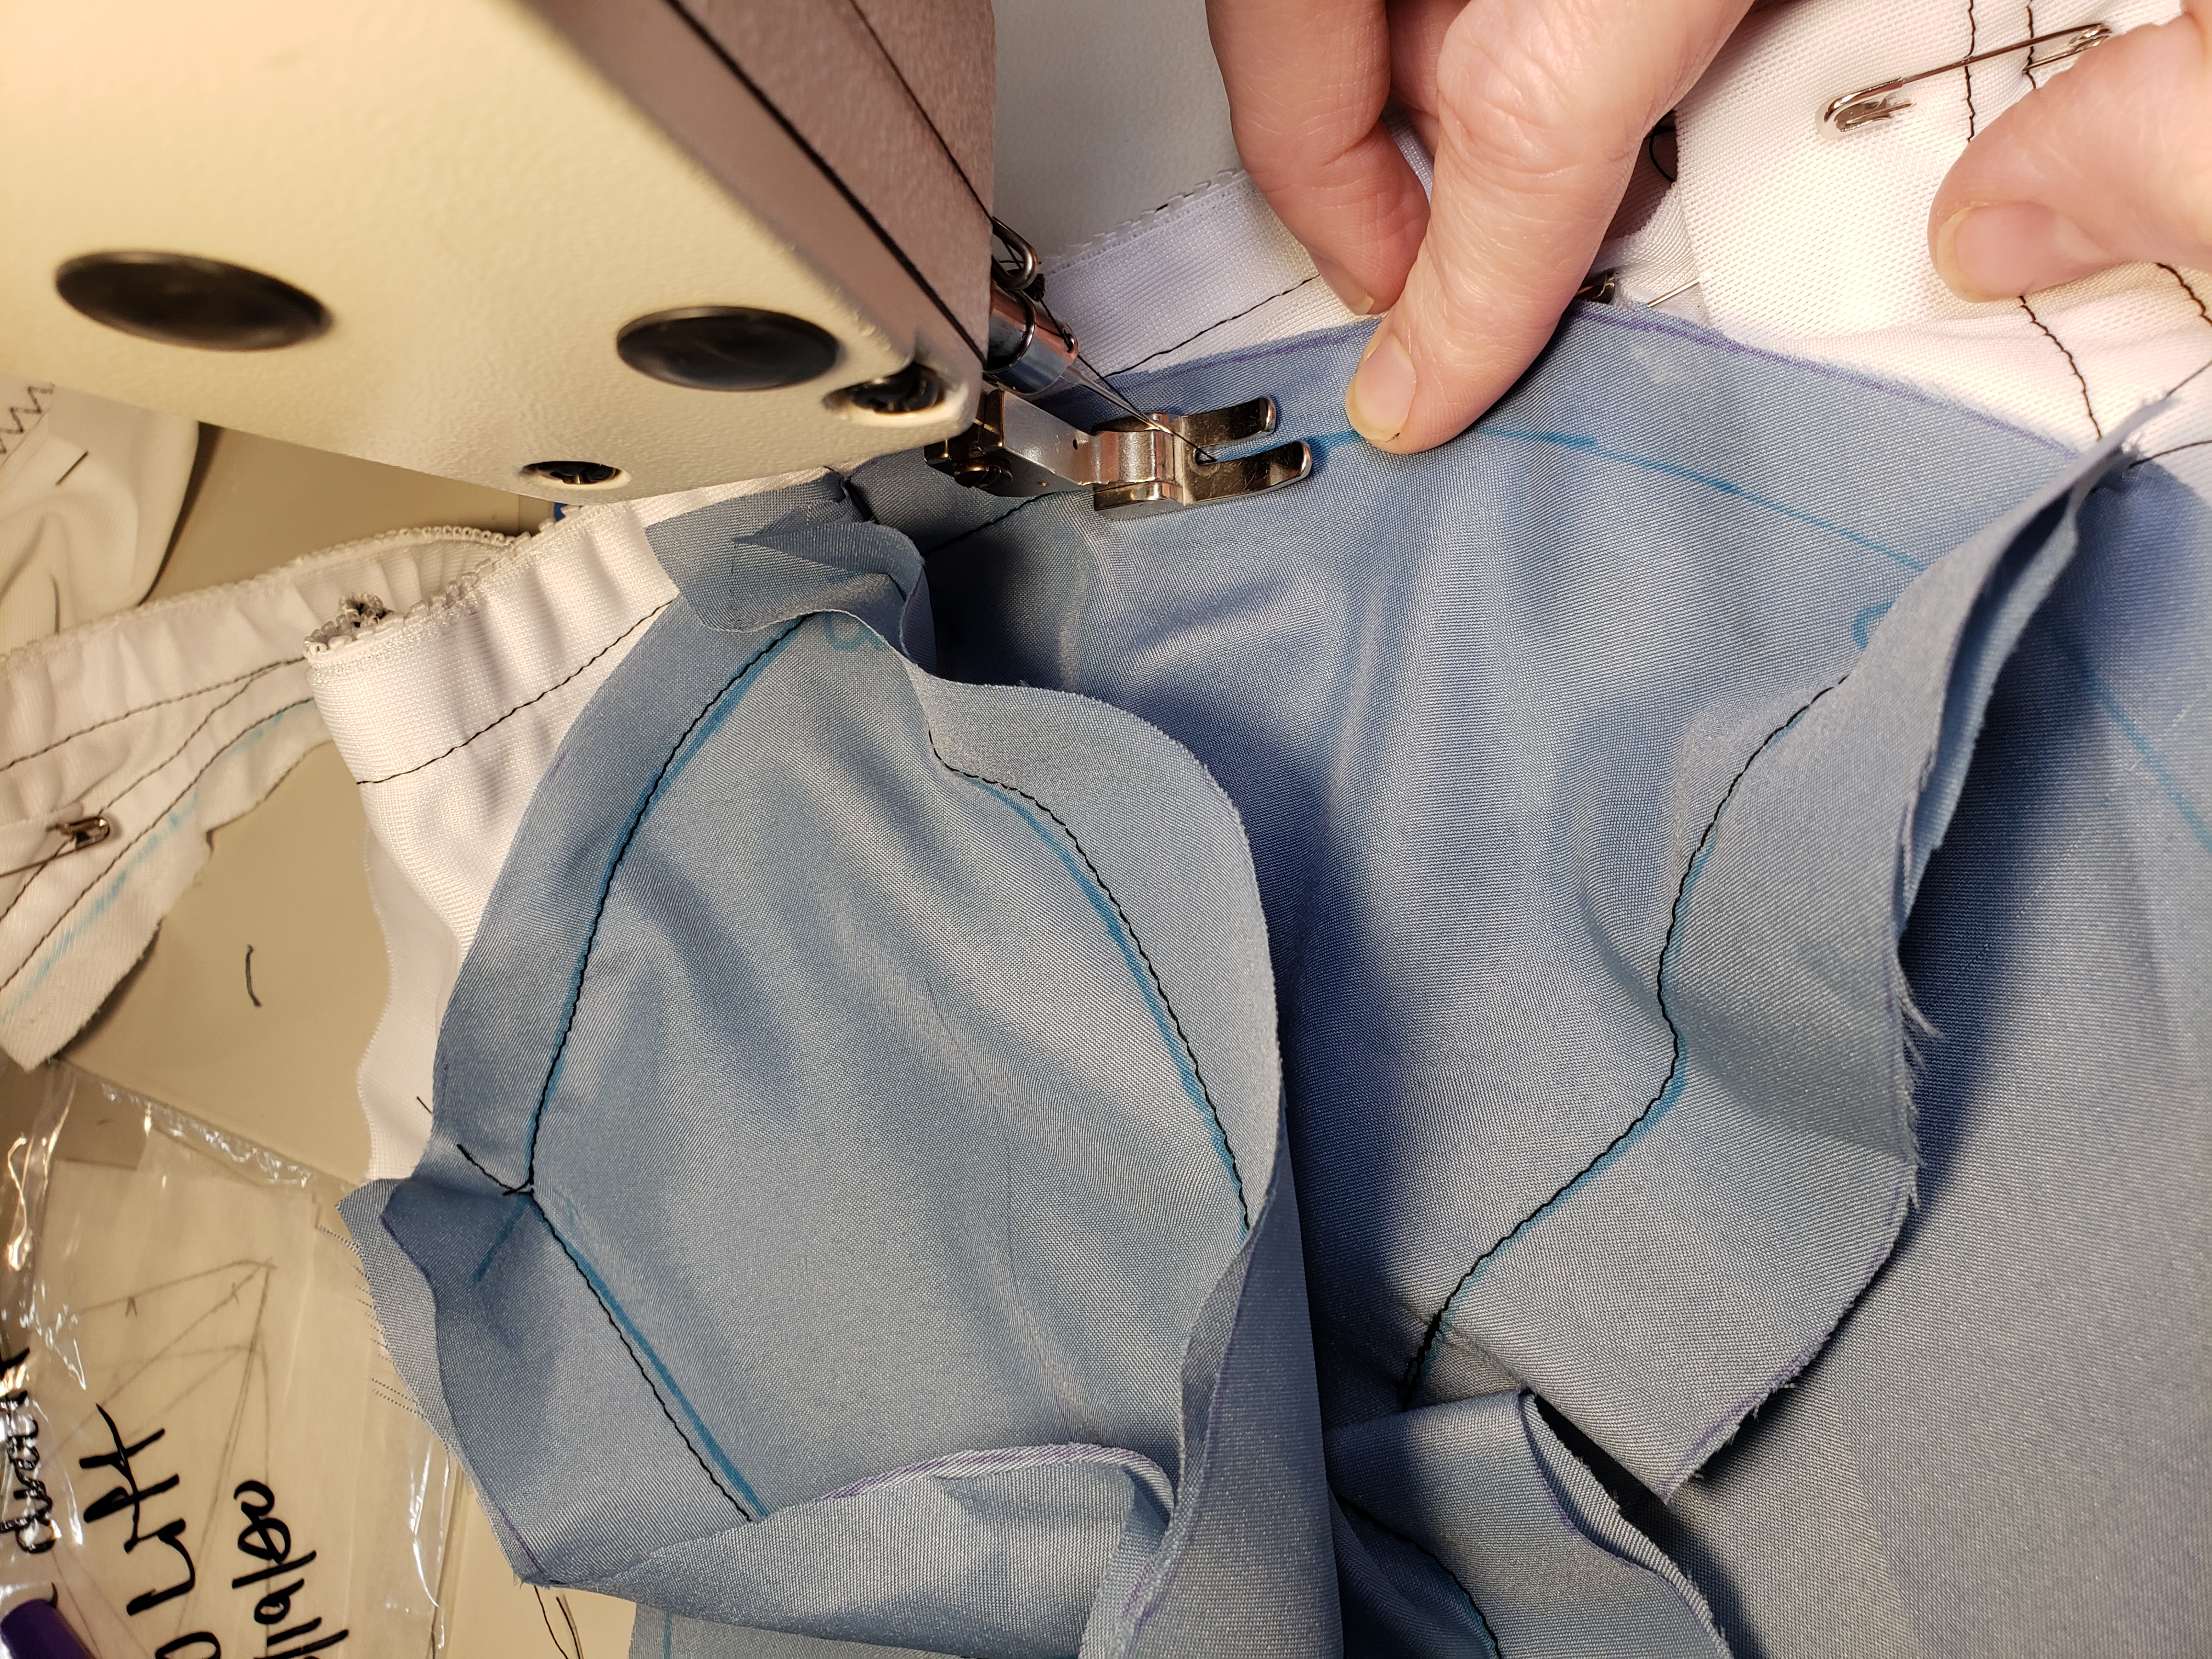
Here’s the cup, attached to the band, no seam allowances stitched down.
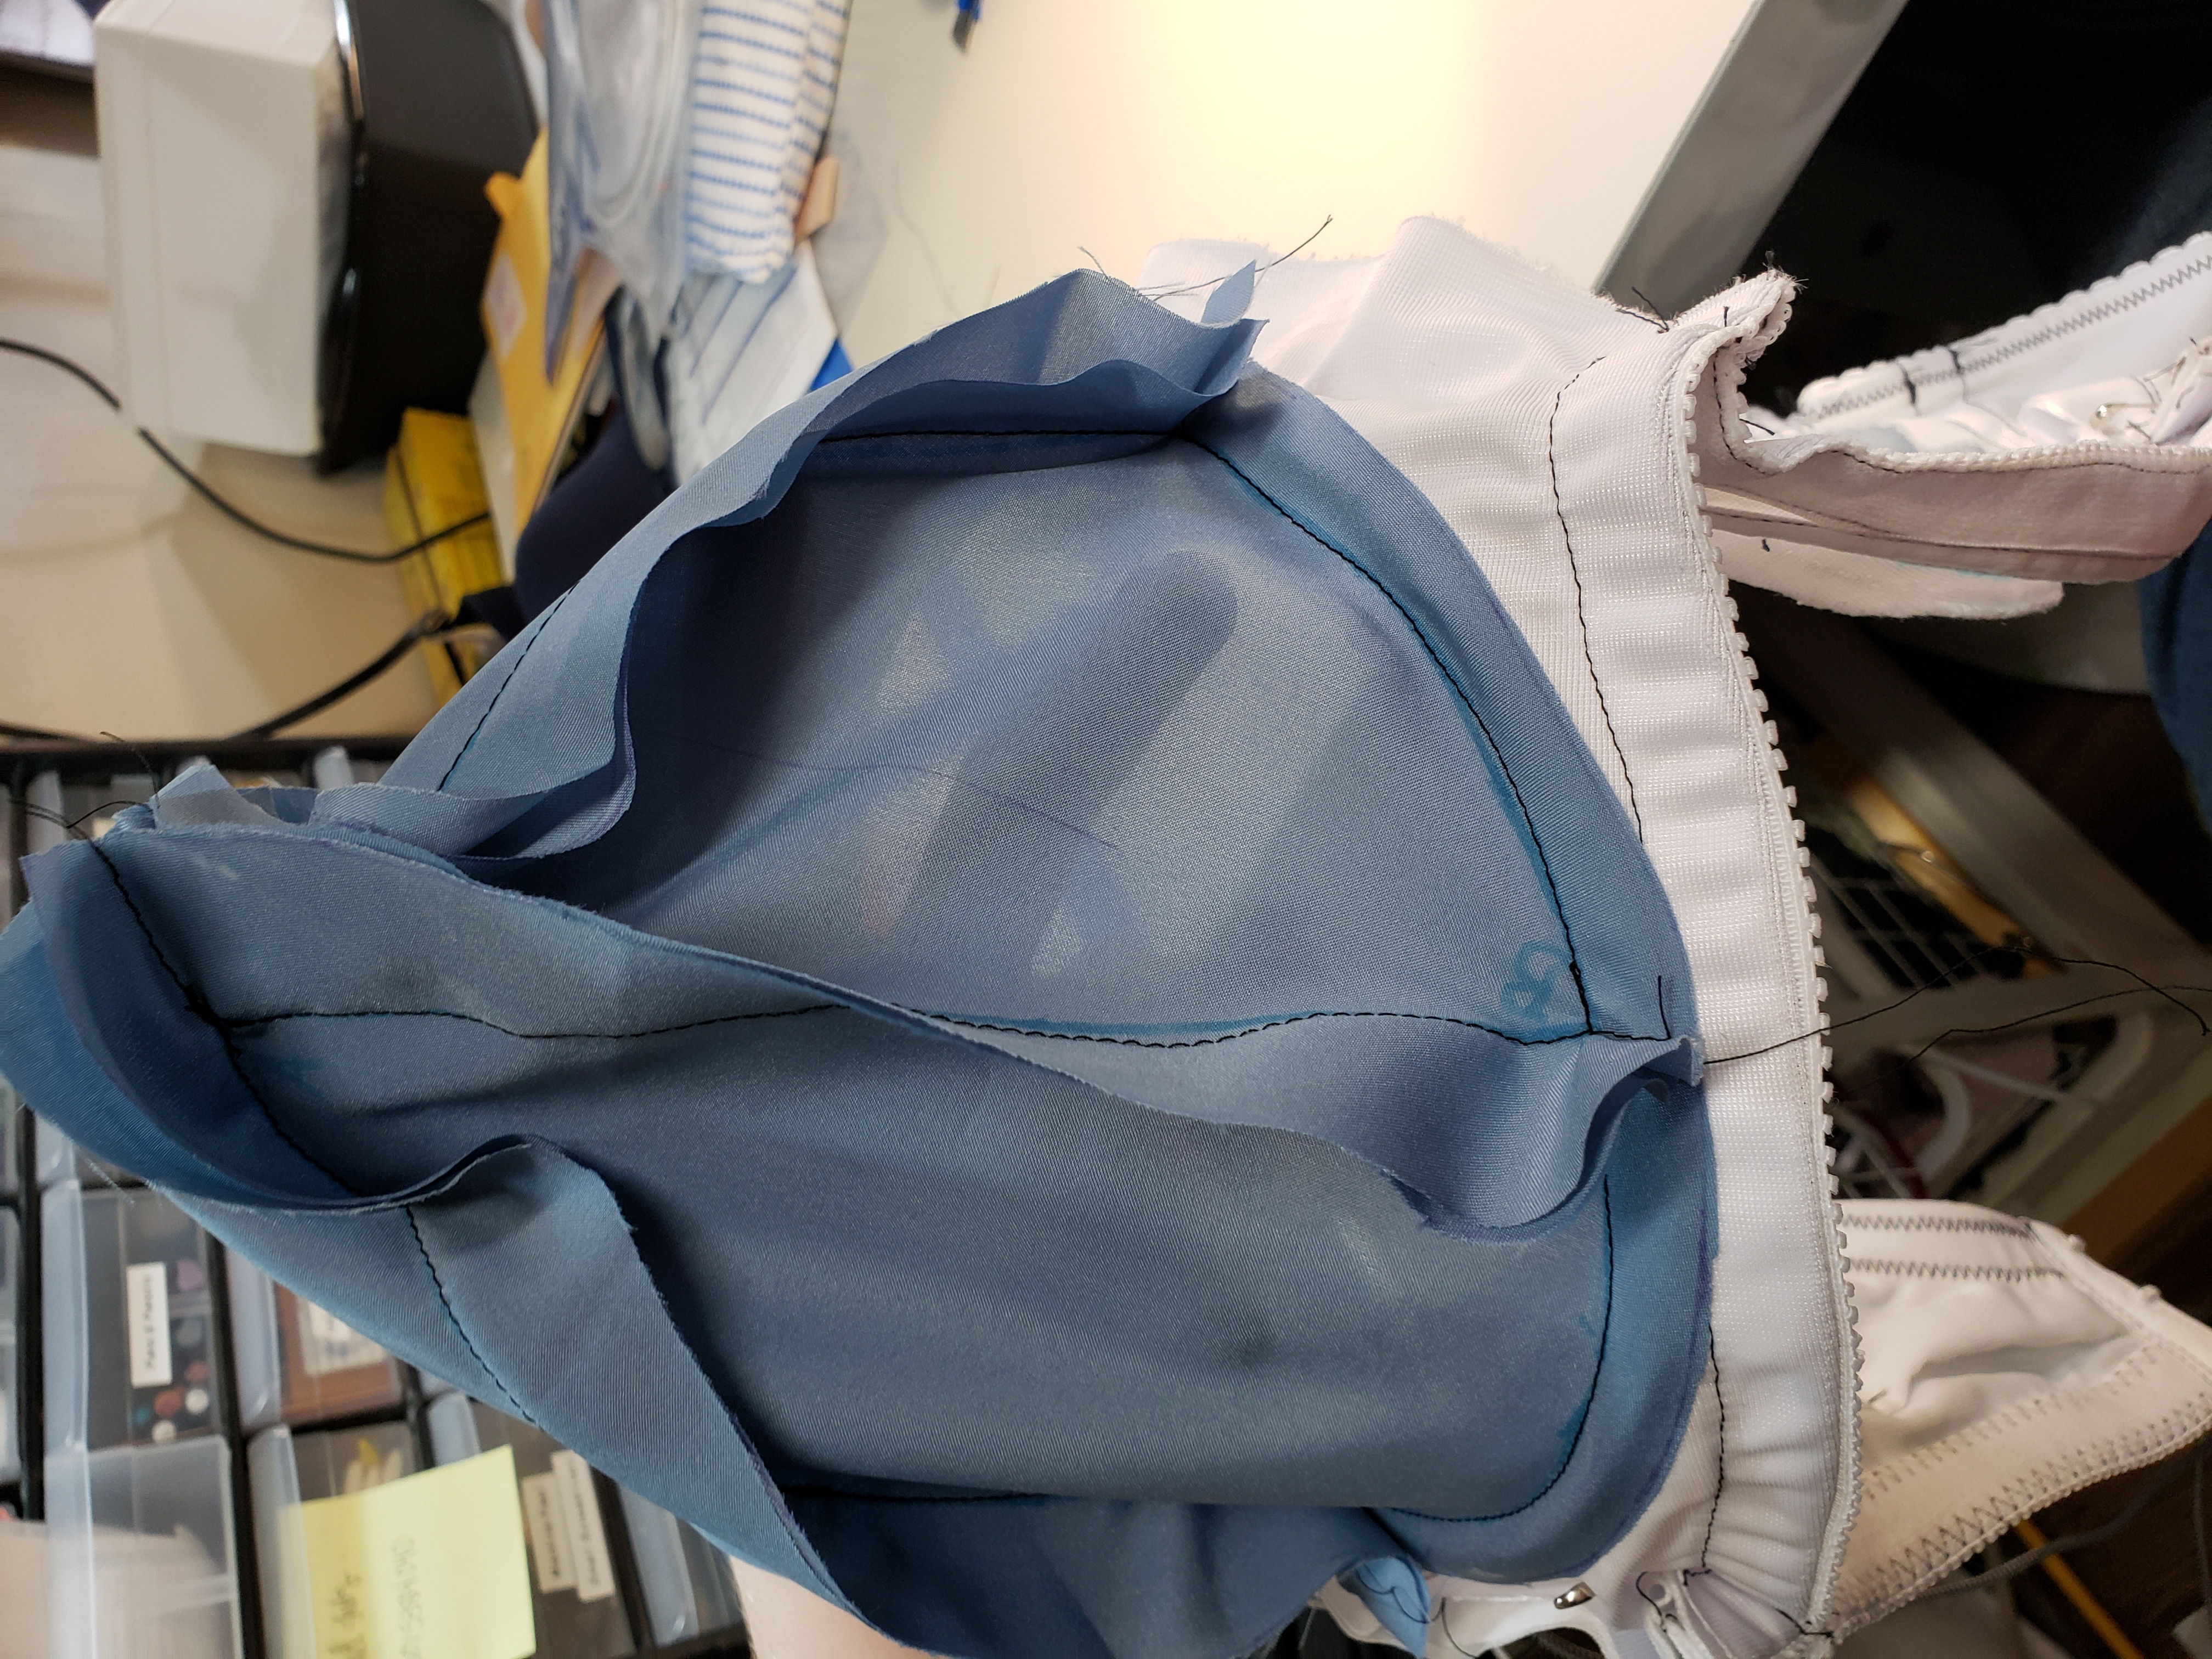
Cup Alterations
Now, slip in the underwires and try on the bra.
Cup is a bit small
Here’s where it gets really good! Let’s say that the cup you’ve made is close to fitting, but overall it seems a smidge on the small side. Remove the underwire and fold away all the pieces you don’t want to sew.
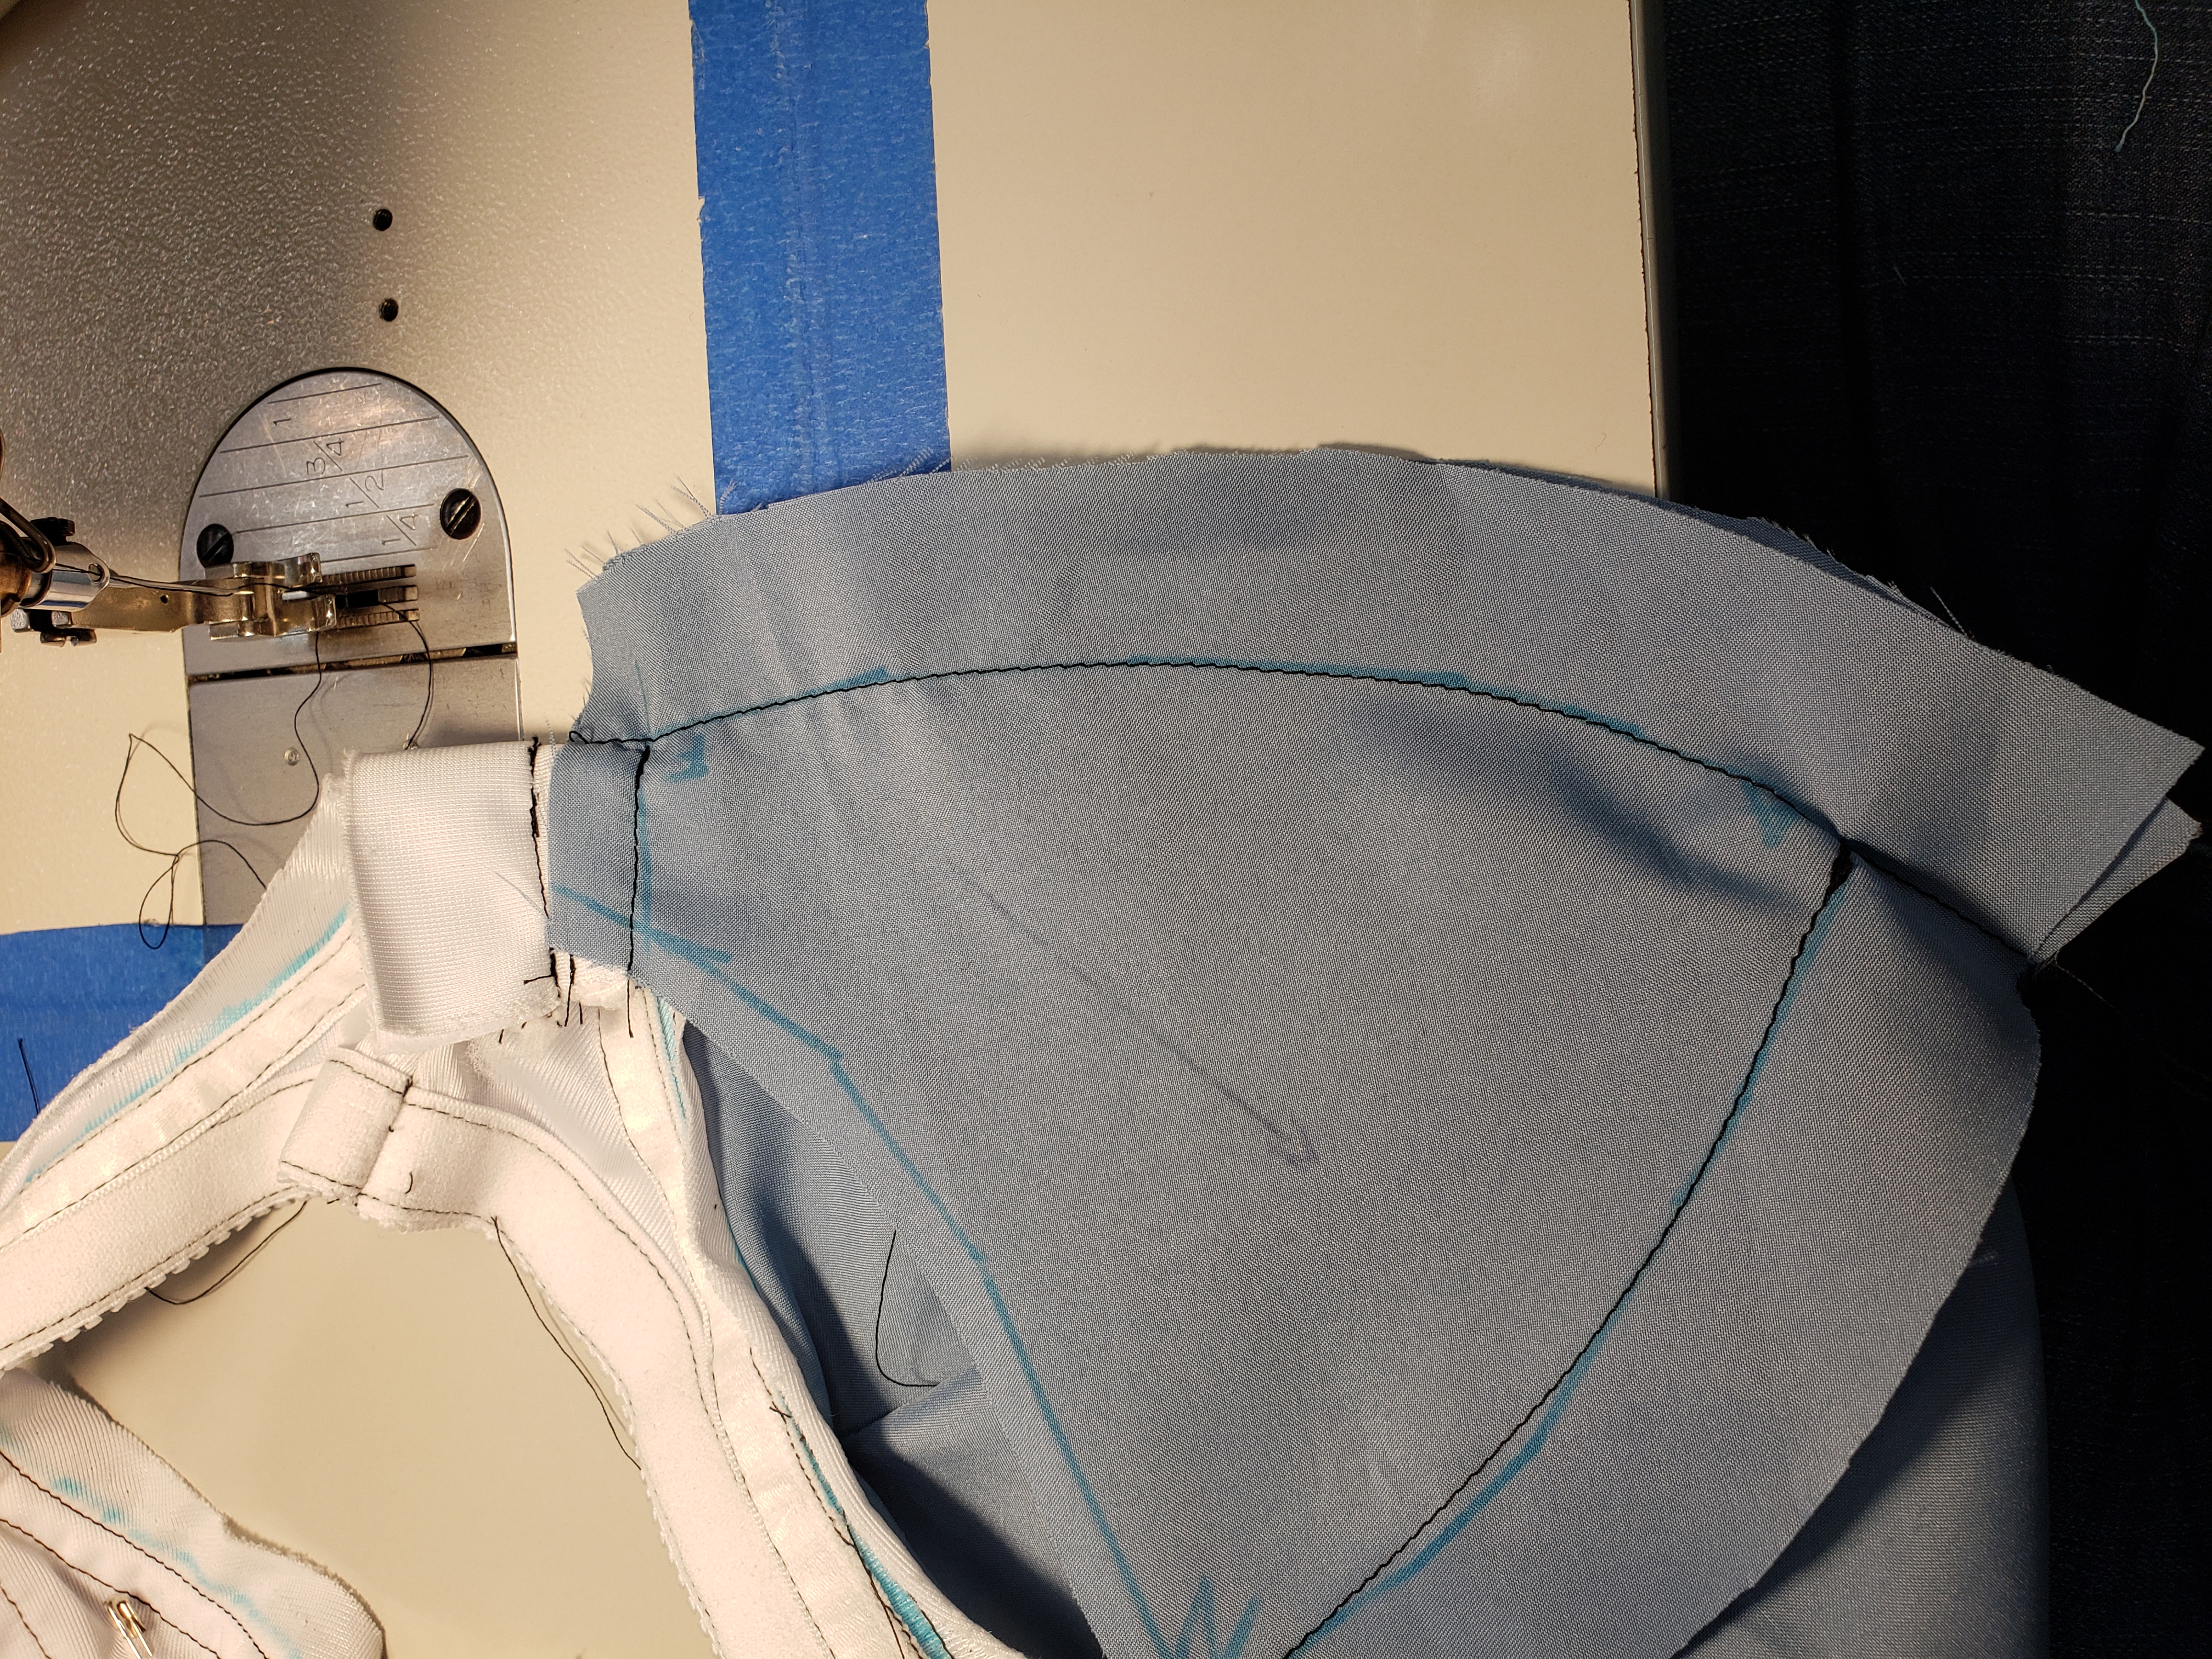
Stitch a new line of stitching a scant ¼ inch from the original seam and you have a cup that is a whole size larger!
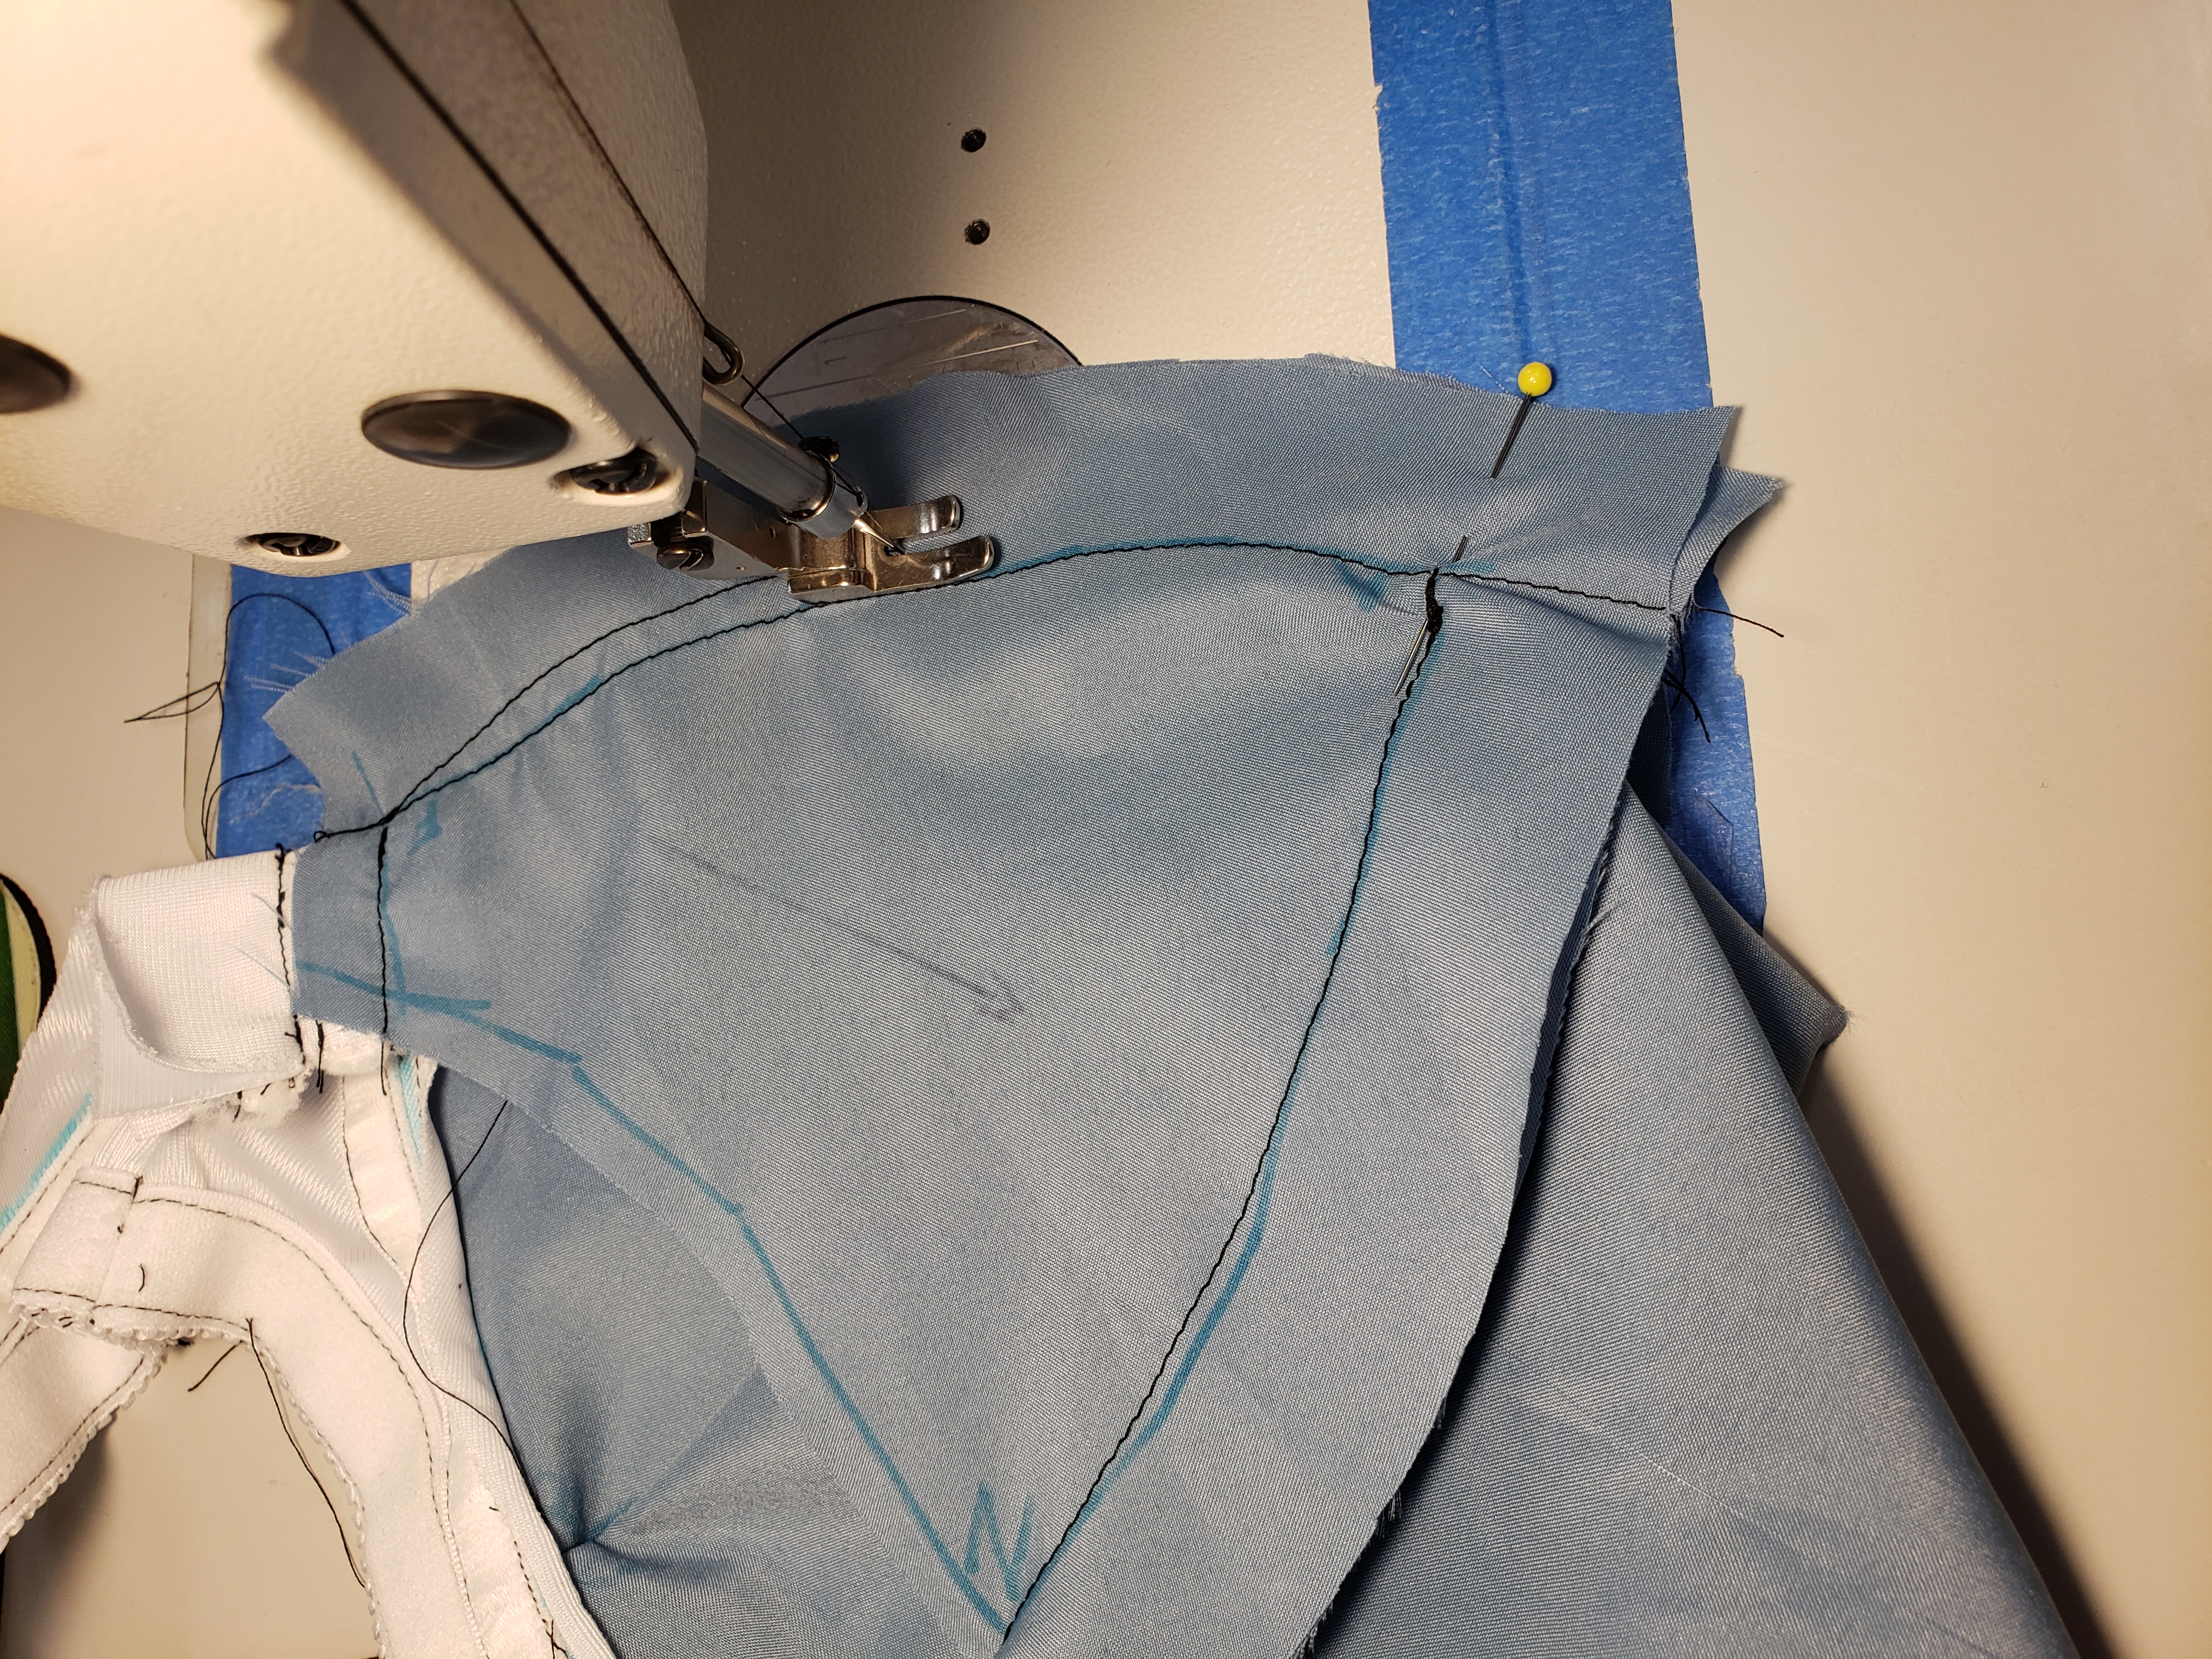
Seam rip out the old line of stitching. Notice how I stopped stitching at the apex so that I am still not stitching down my seam allowances!
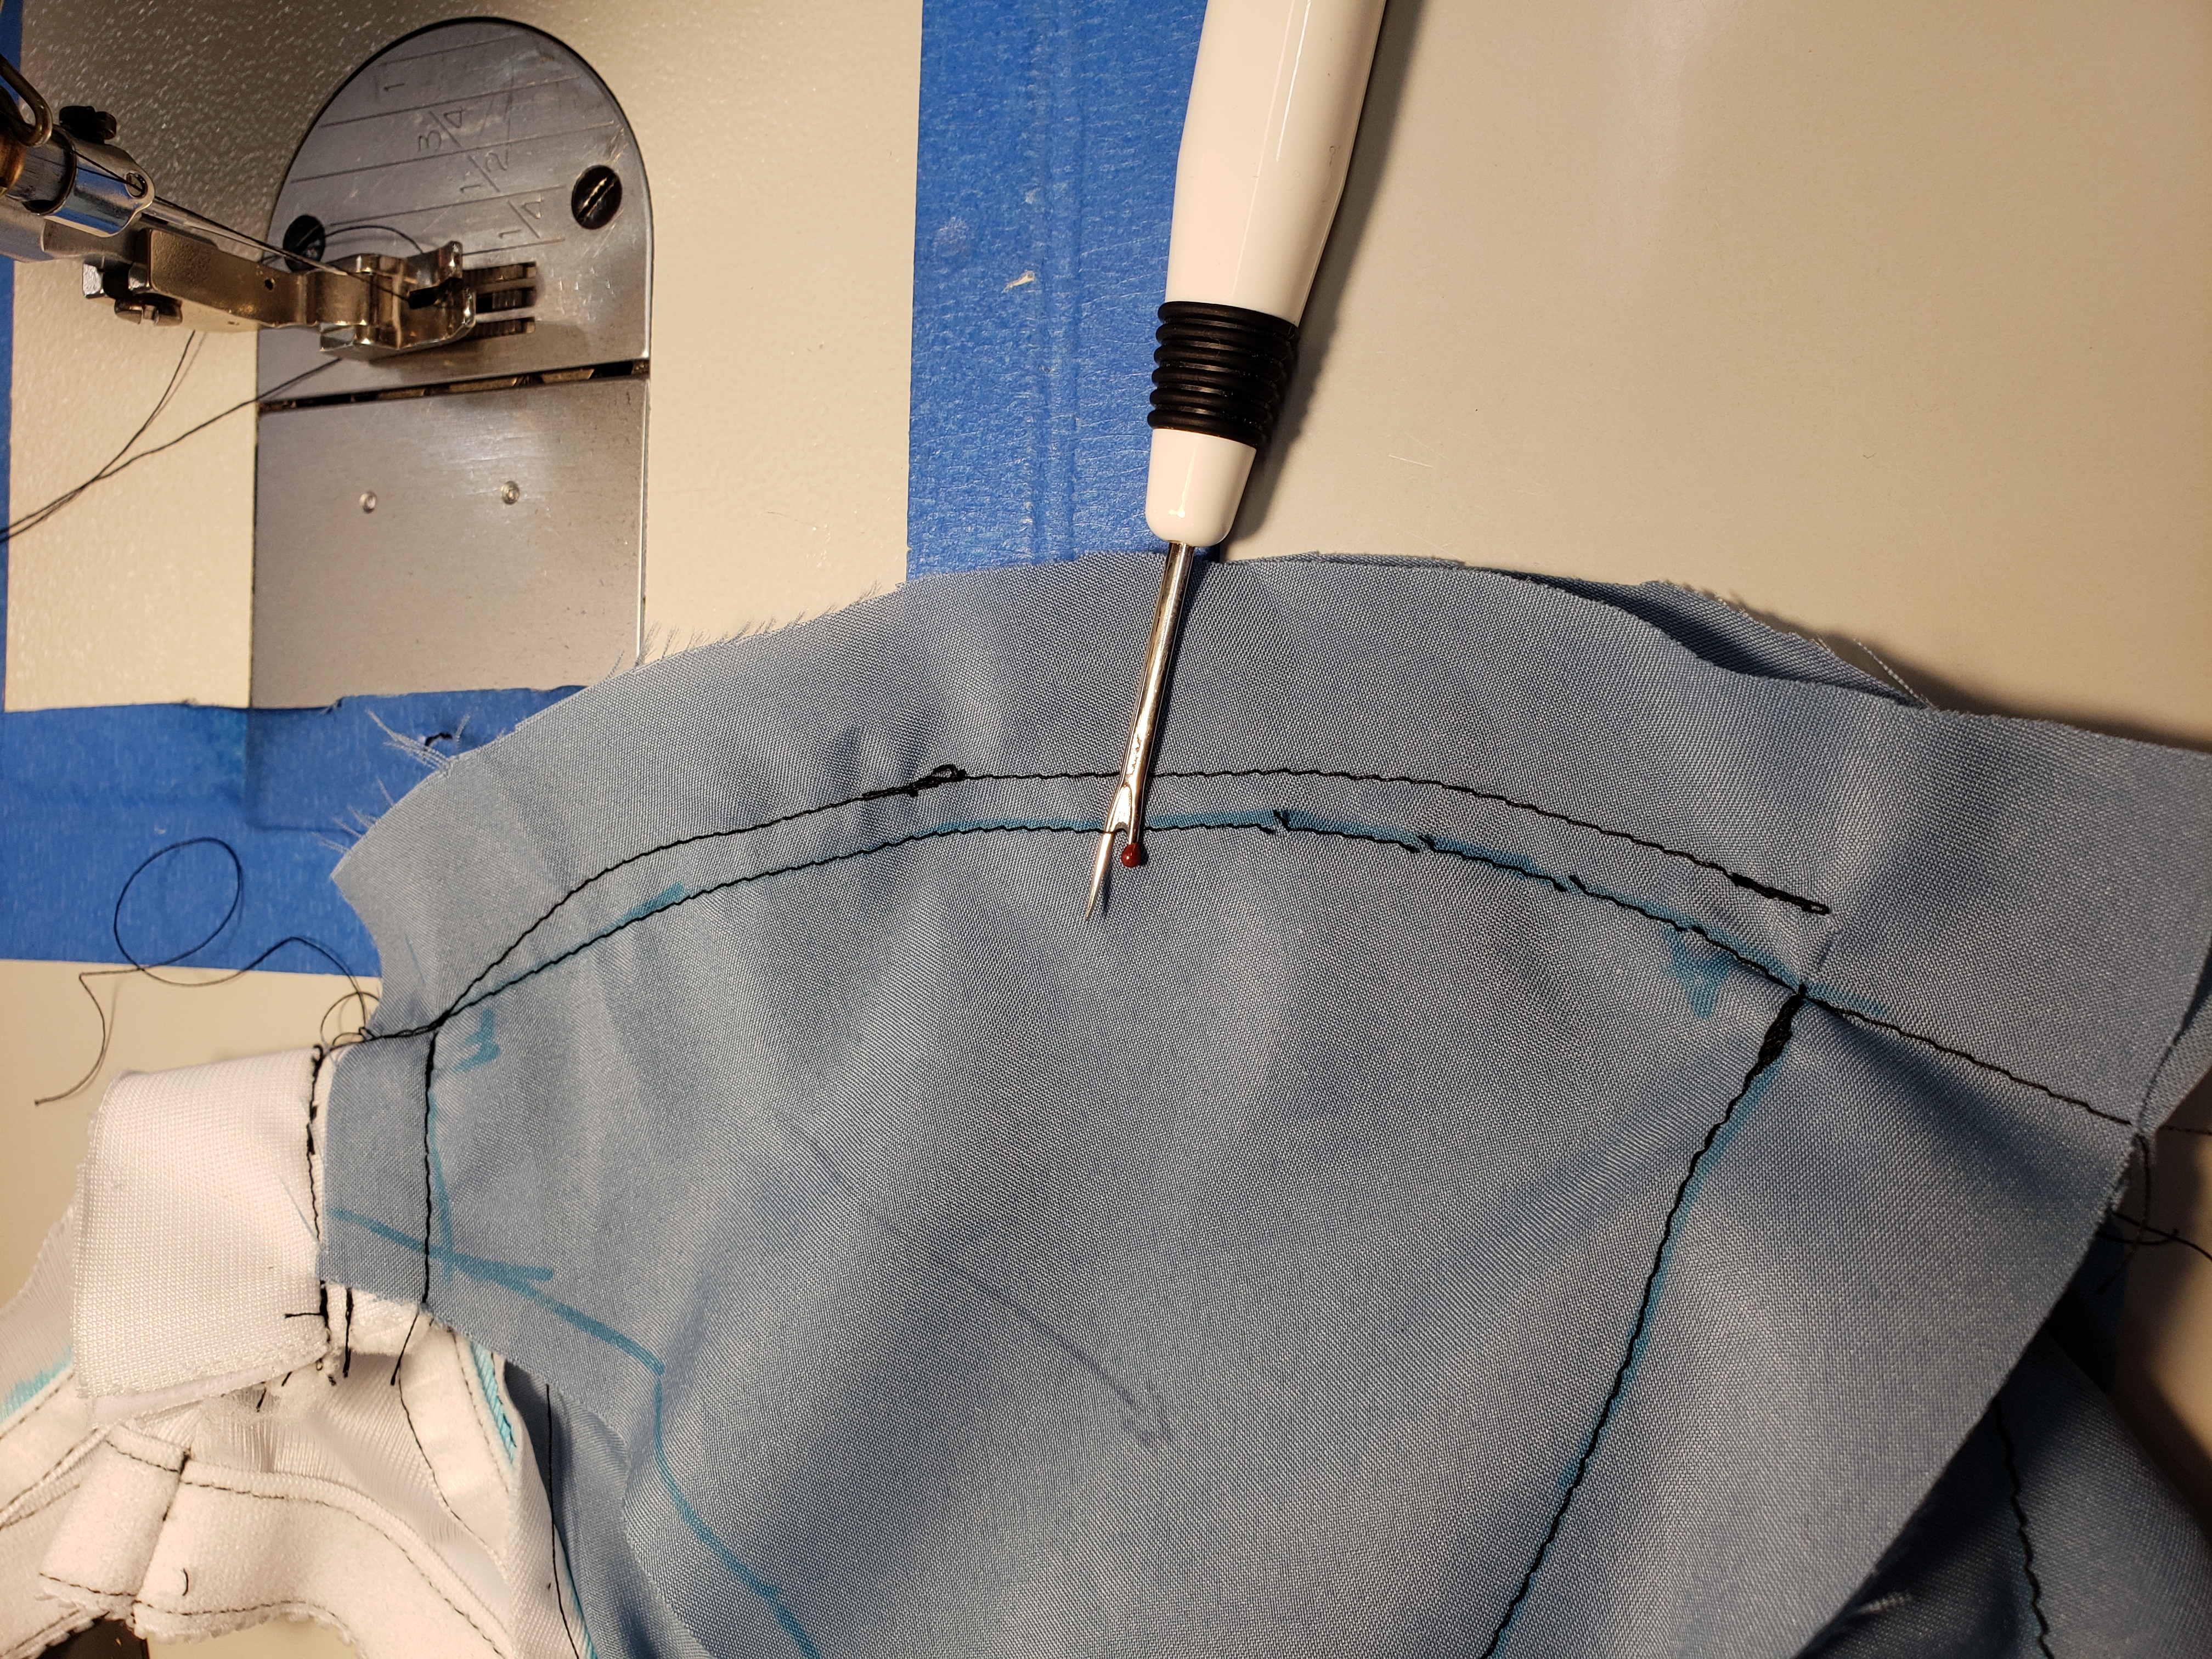
Flip the seam allowance of the seam you’re about to cross and stitch on the other side.
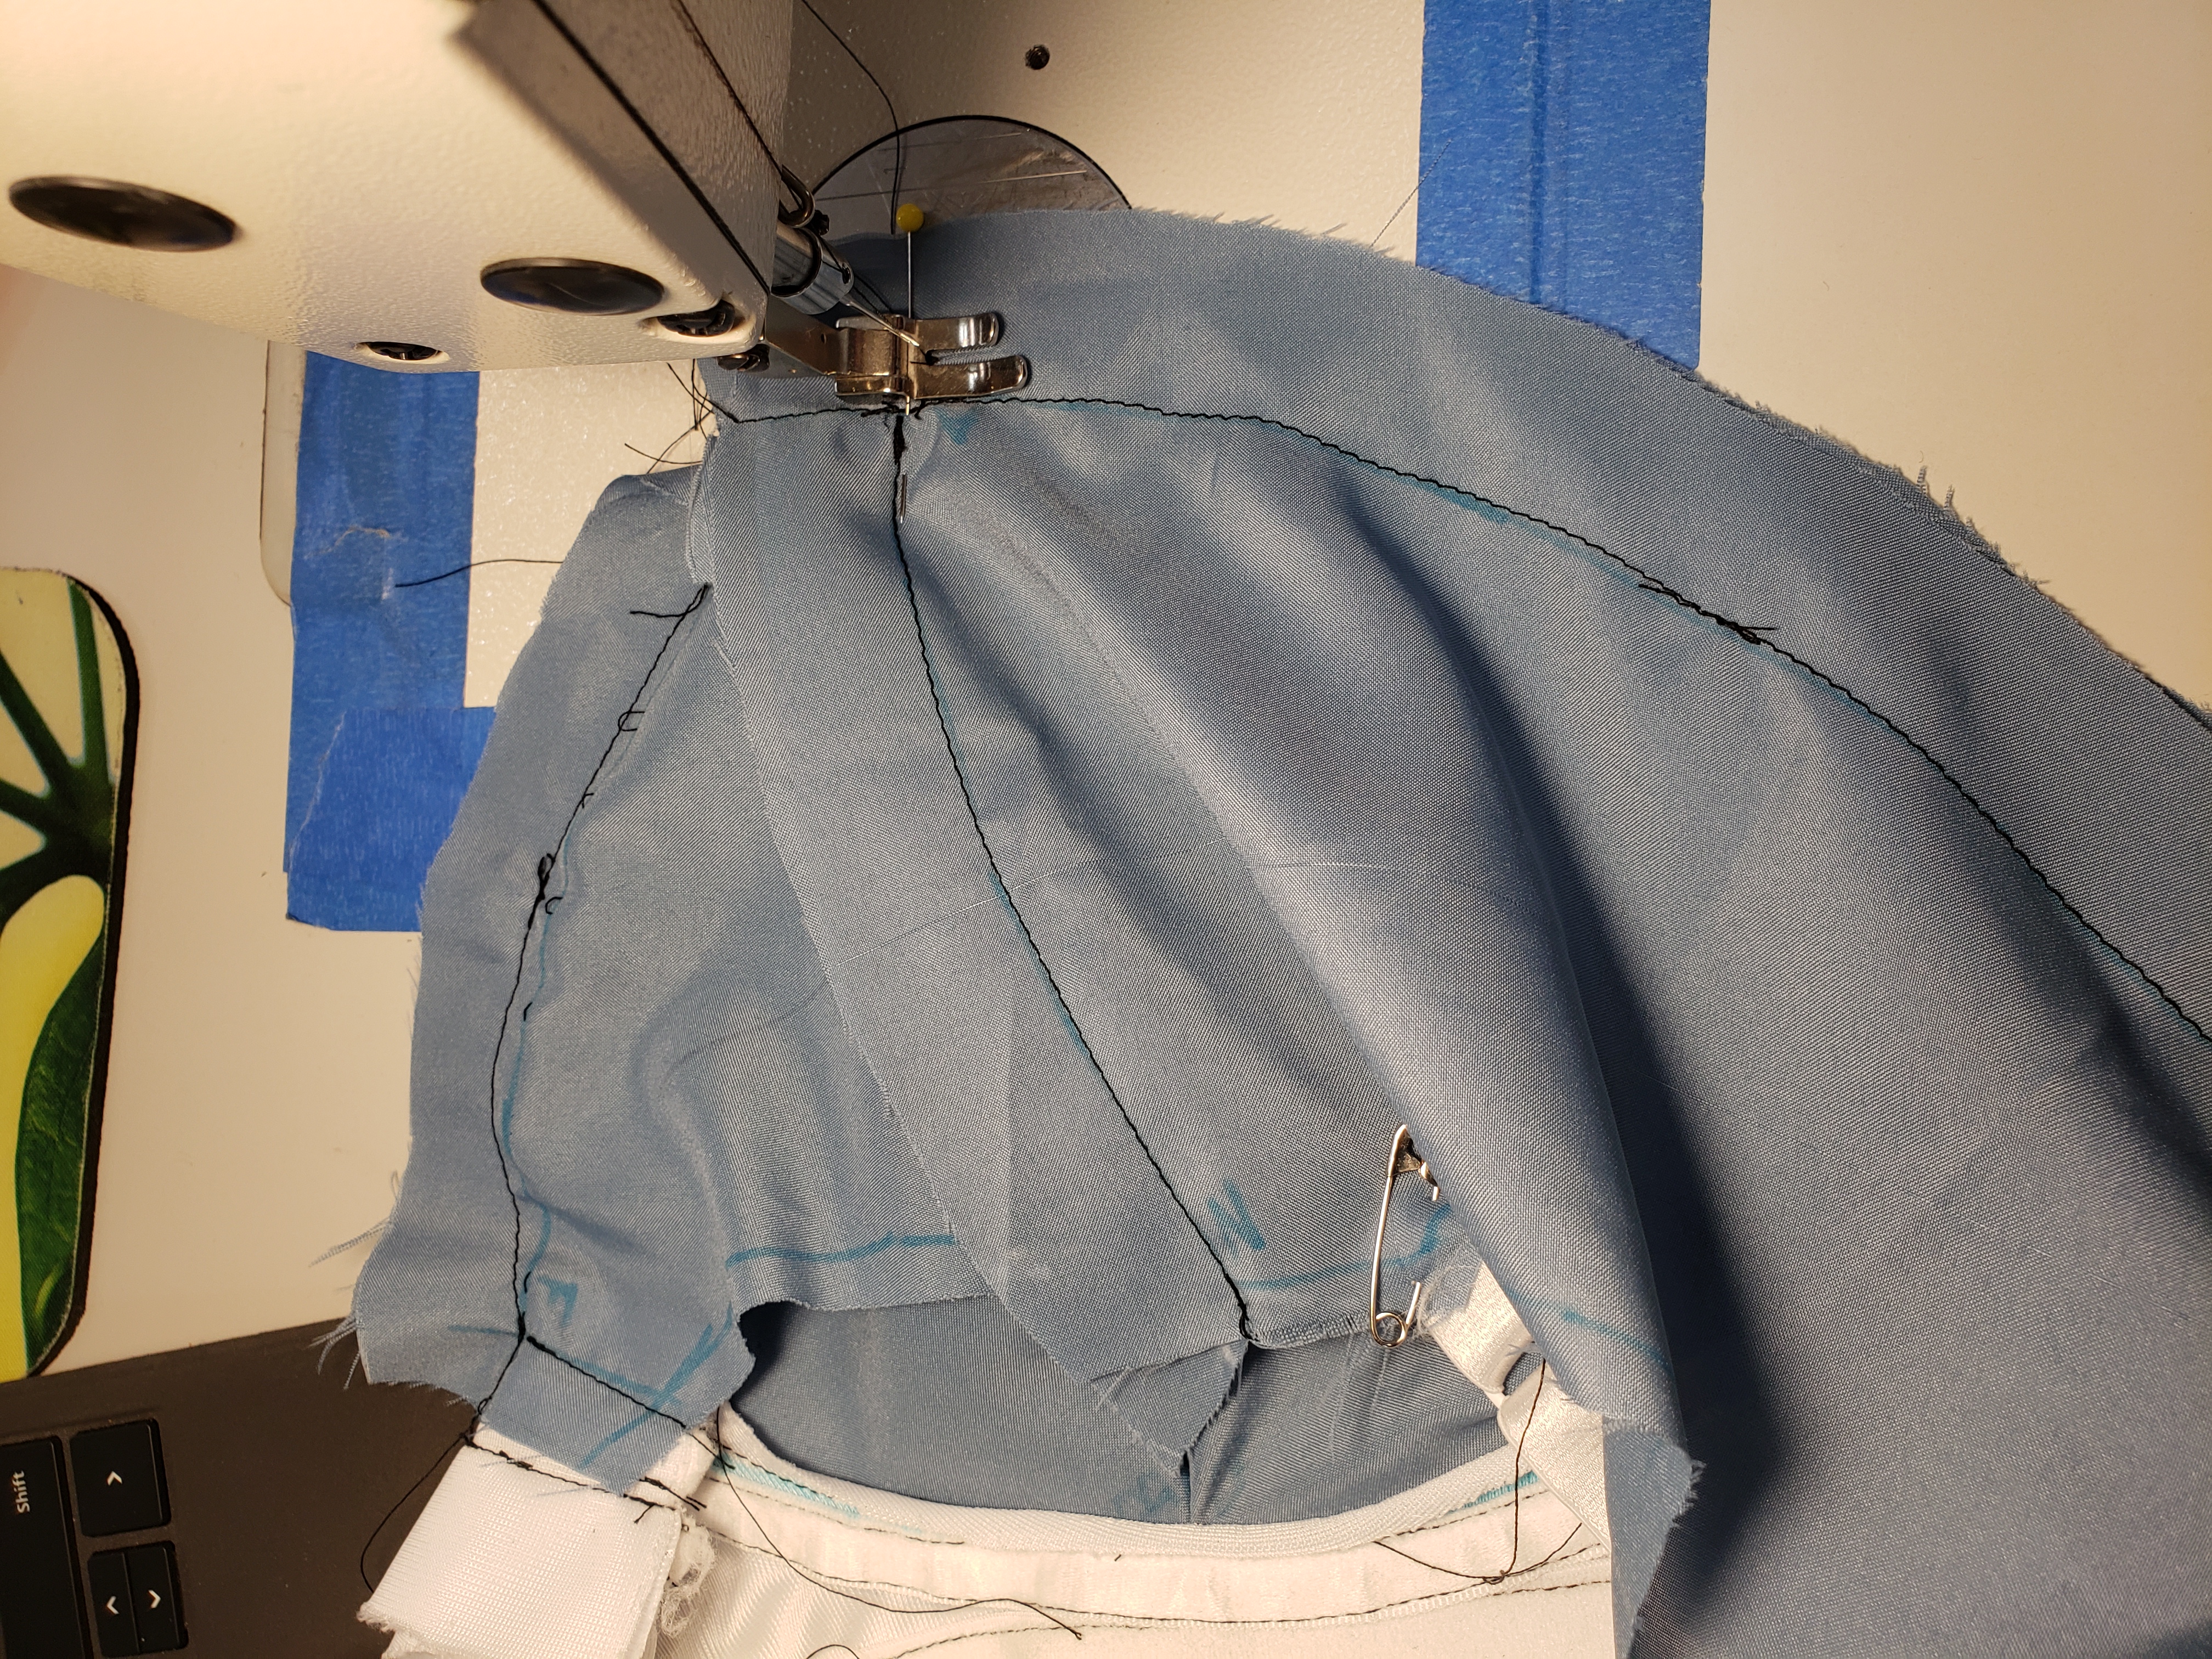
Stop before you stitch on anything you shouldn’t and seam rip out the old line.
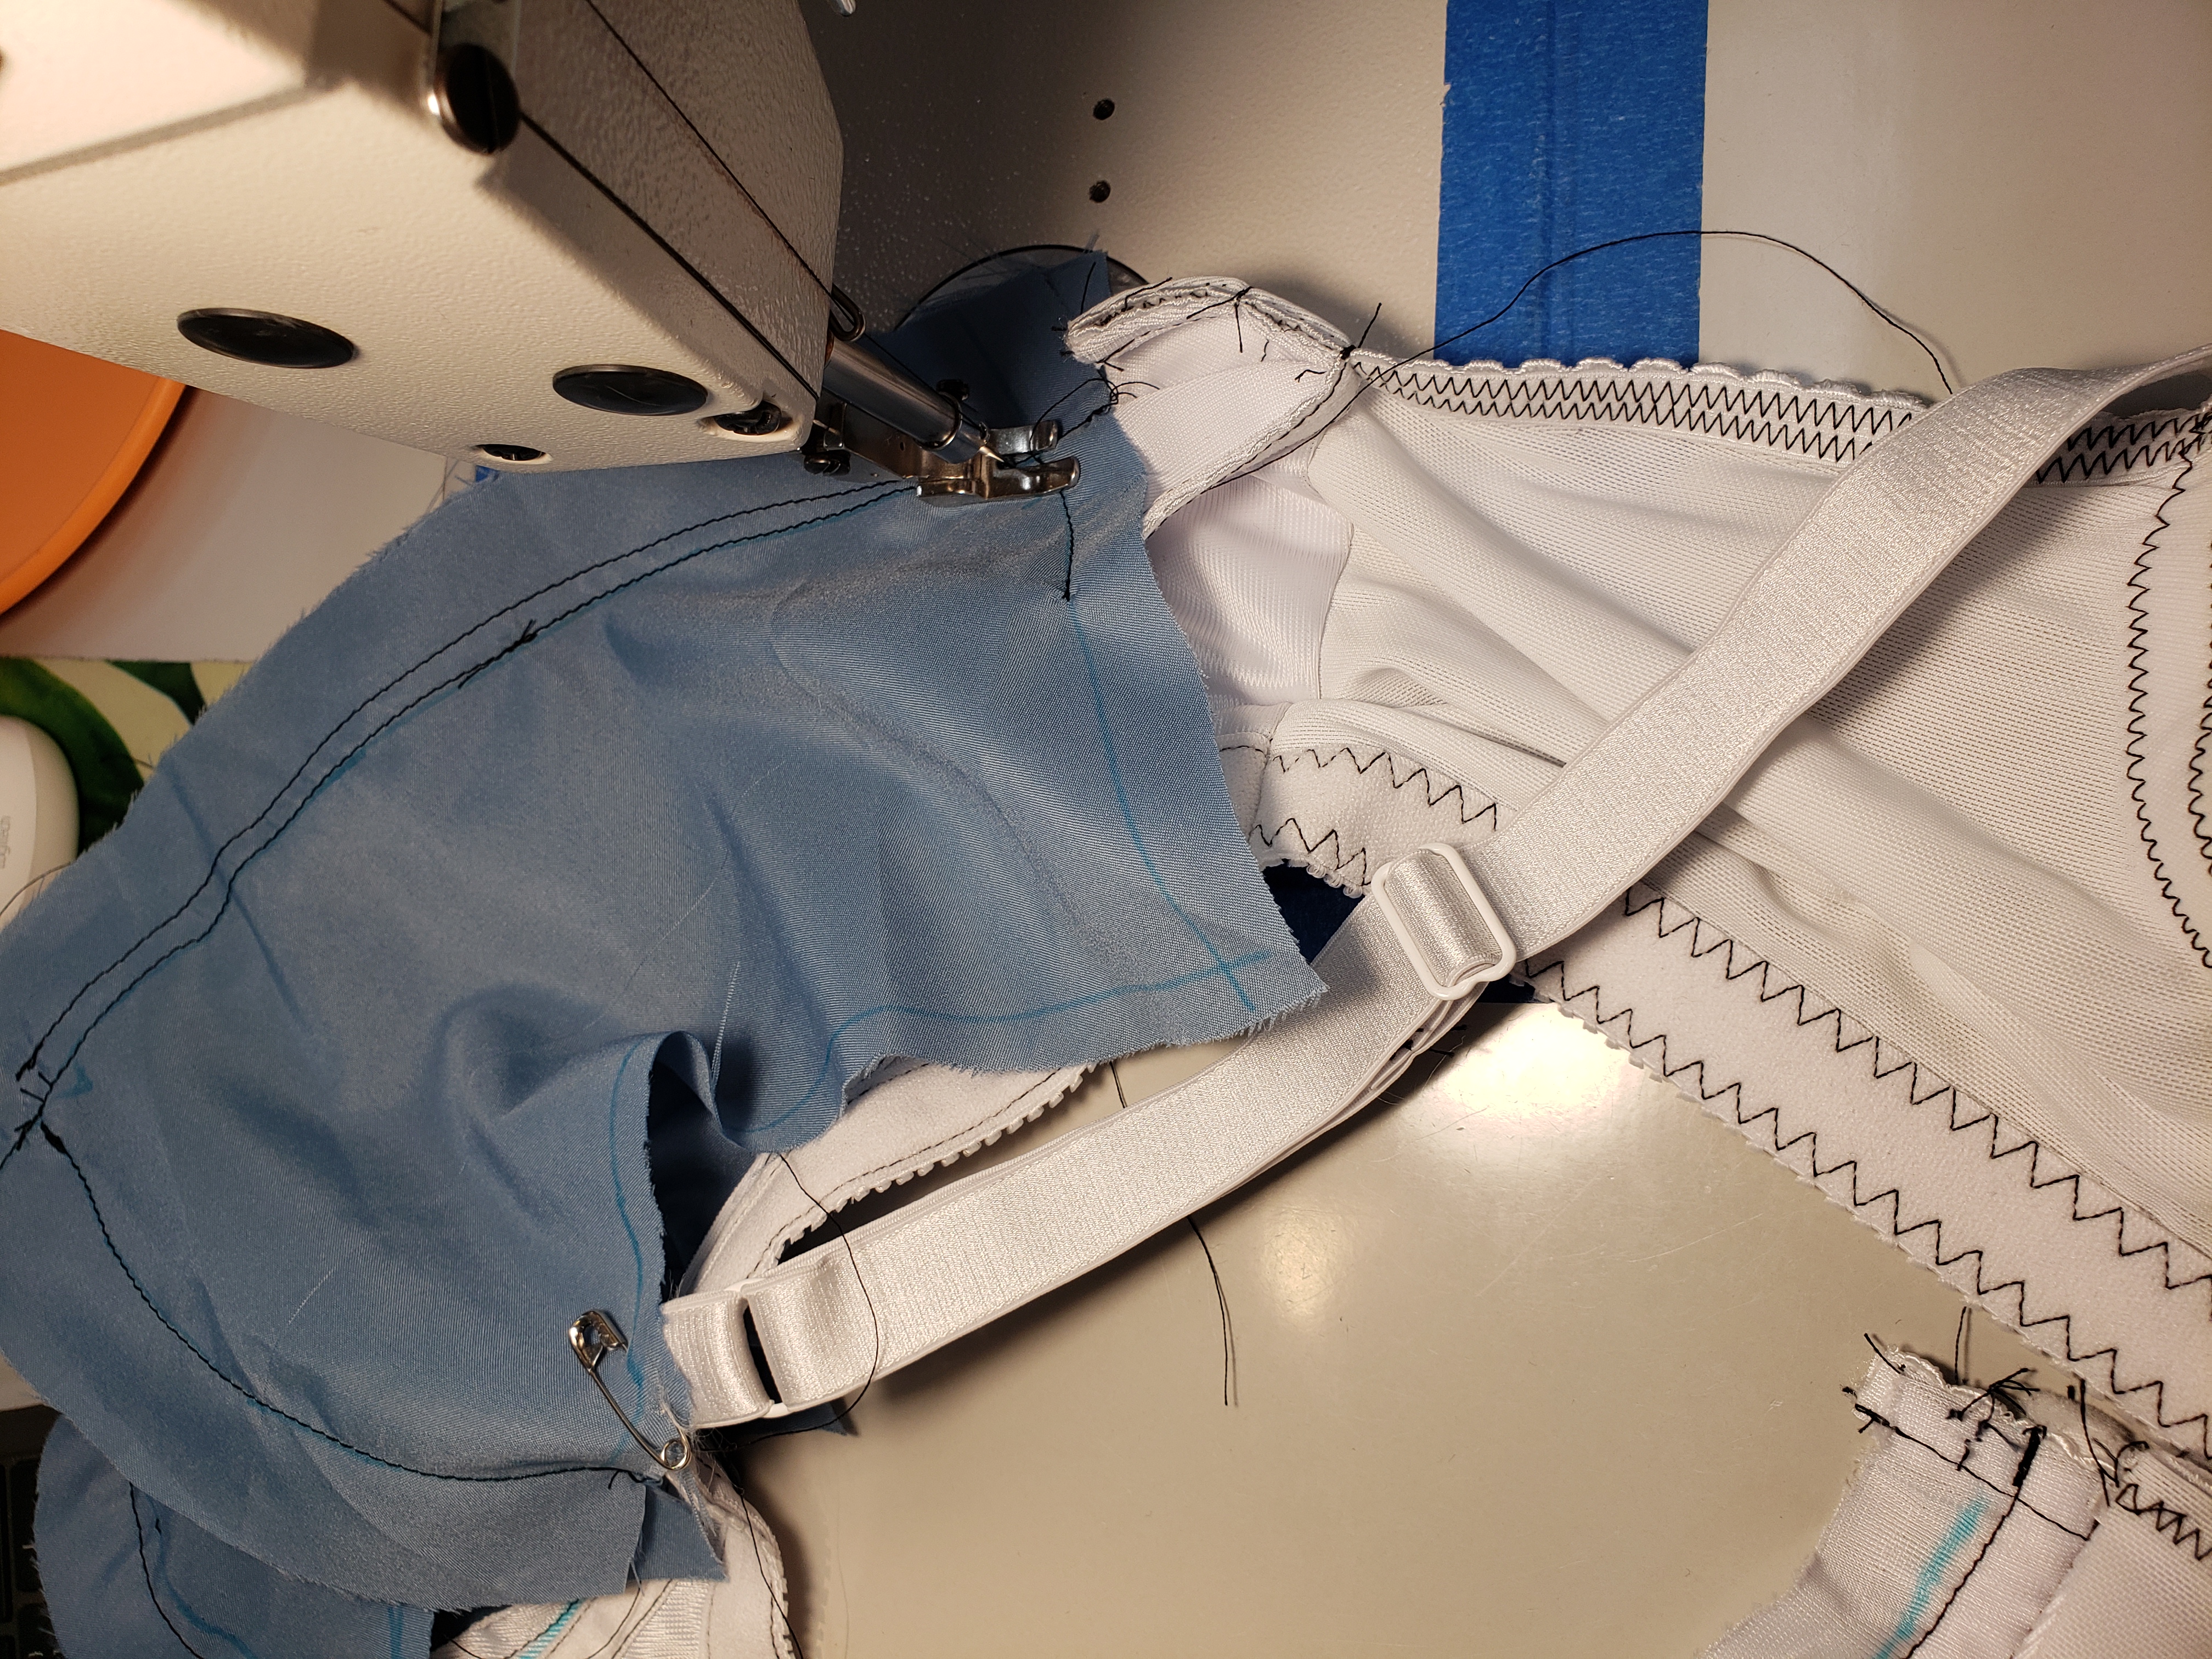
Here the cup is over a tailor’s ham and you can see that the blue lines are spread apart now from being restitched.
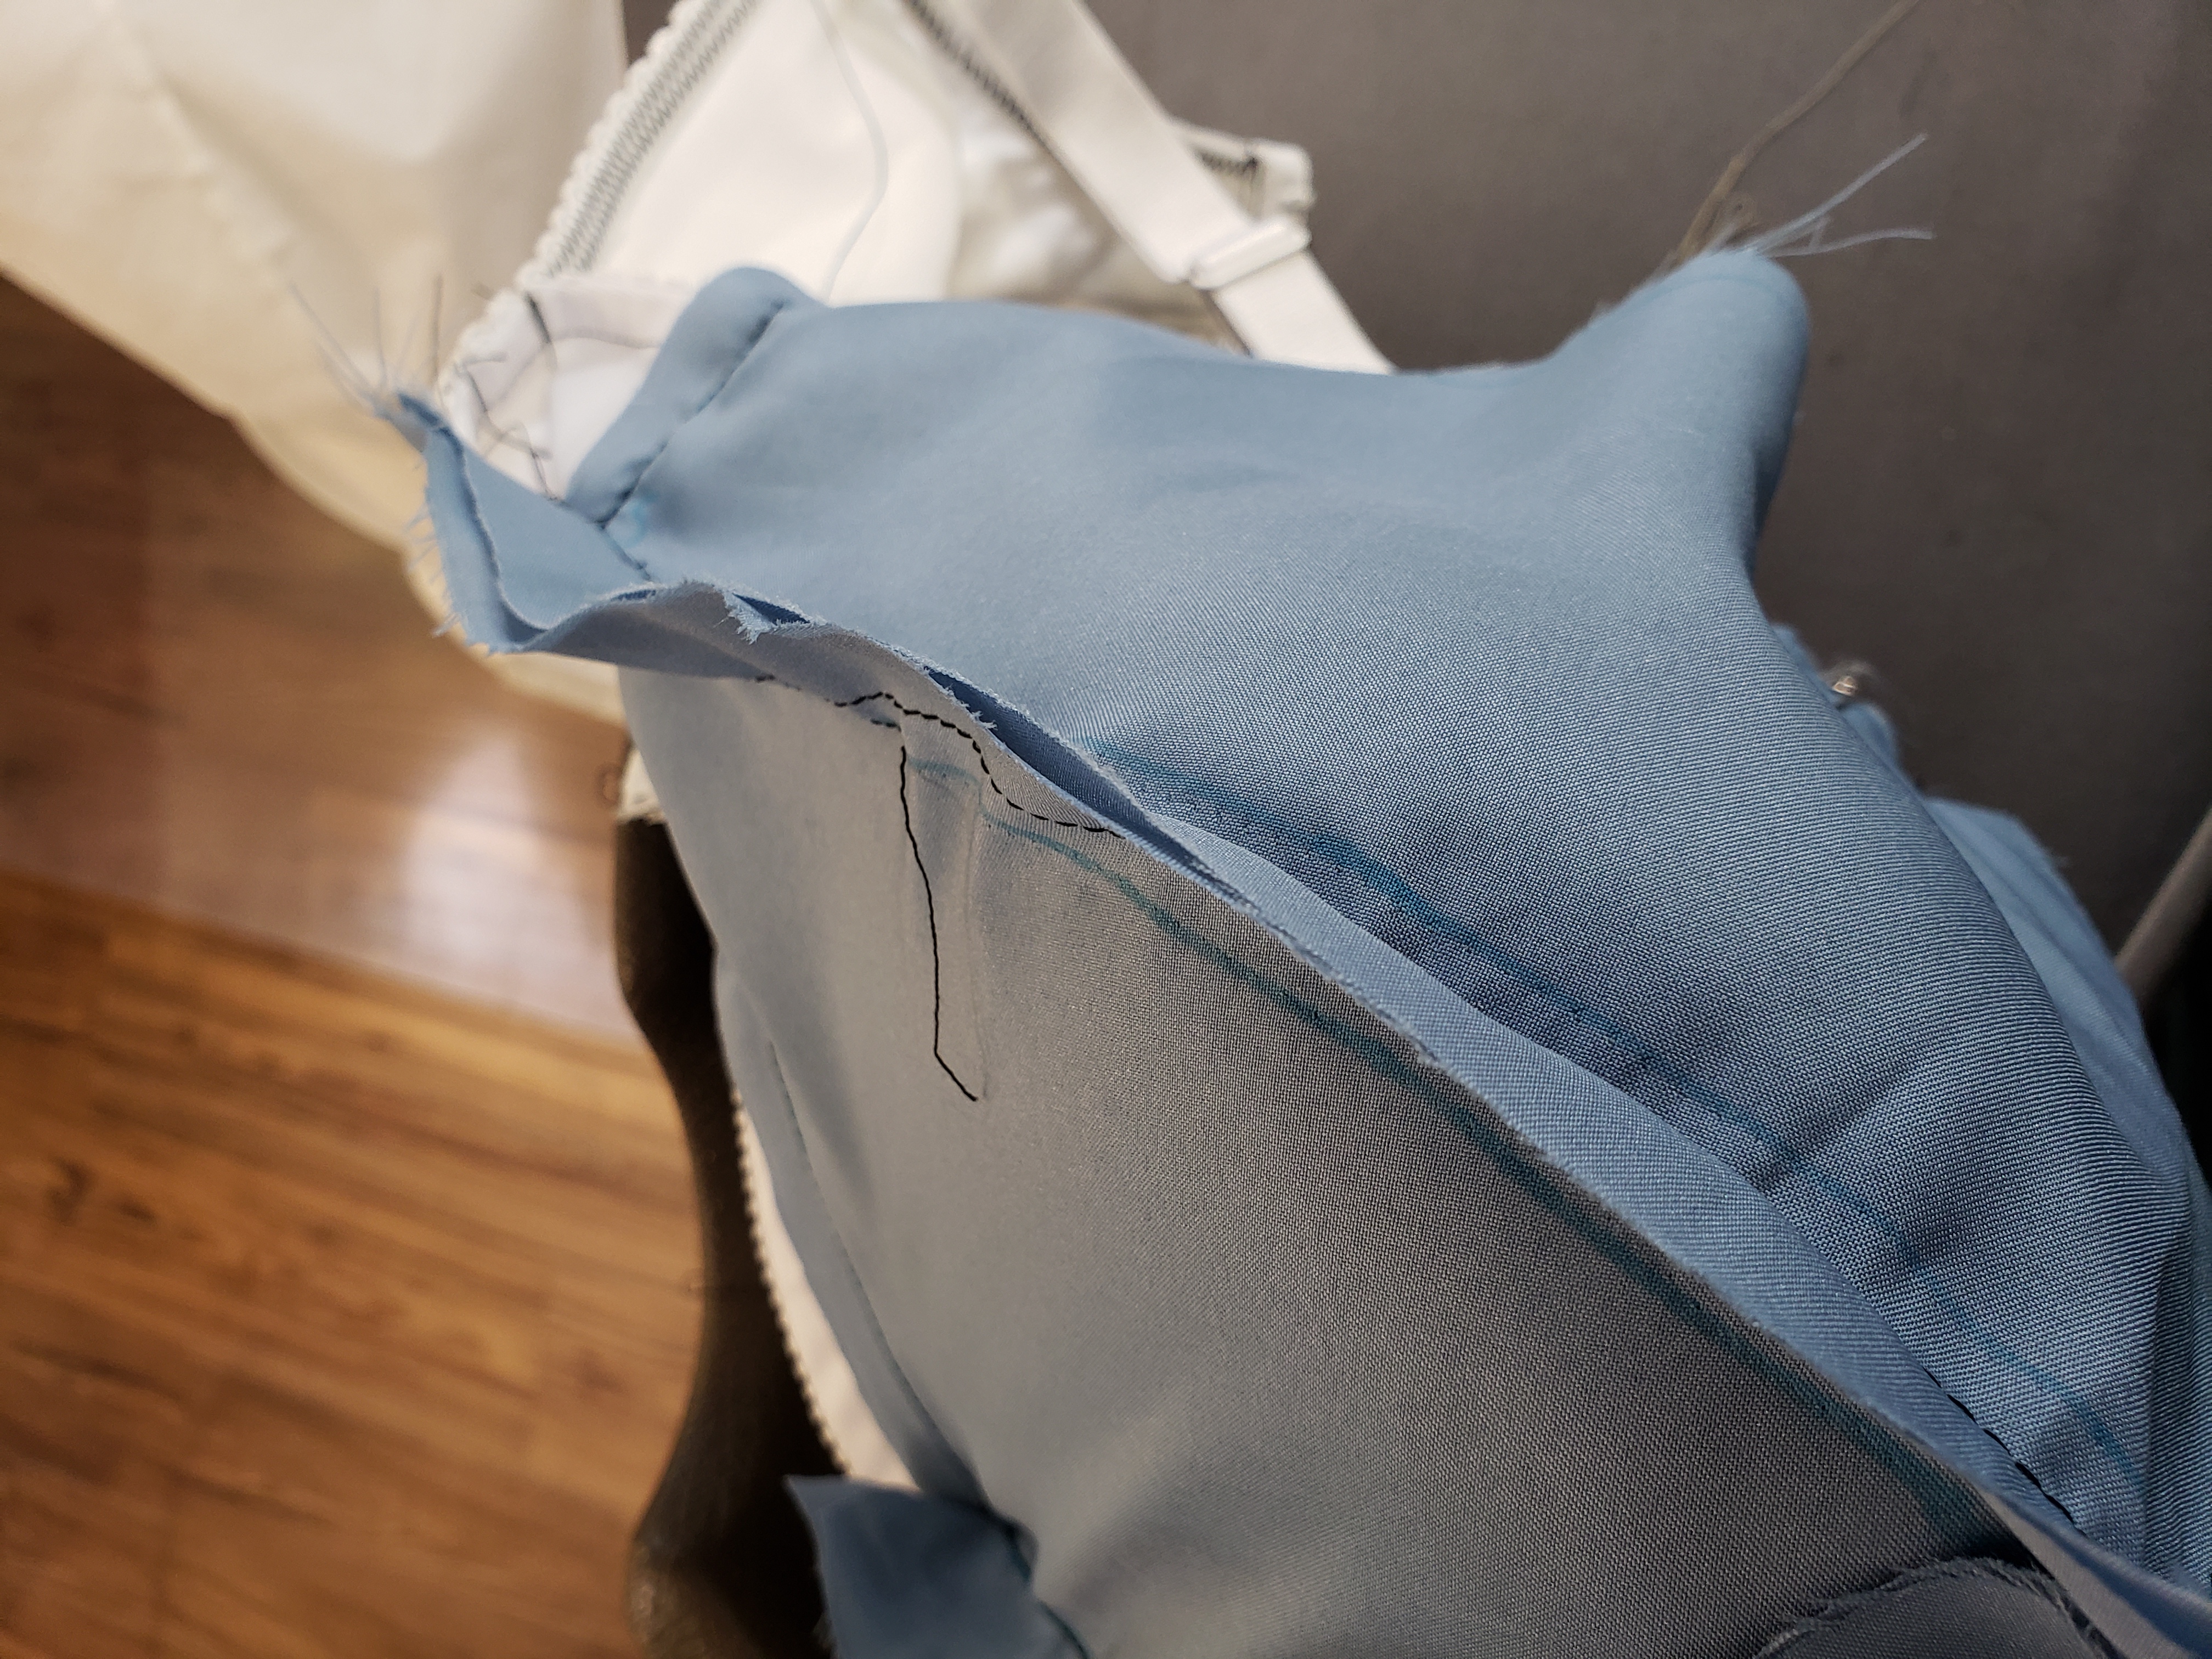
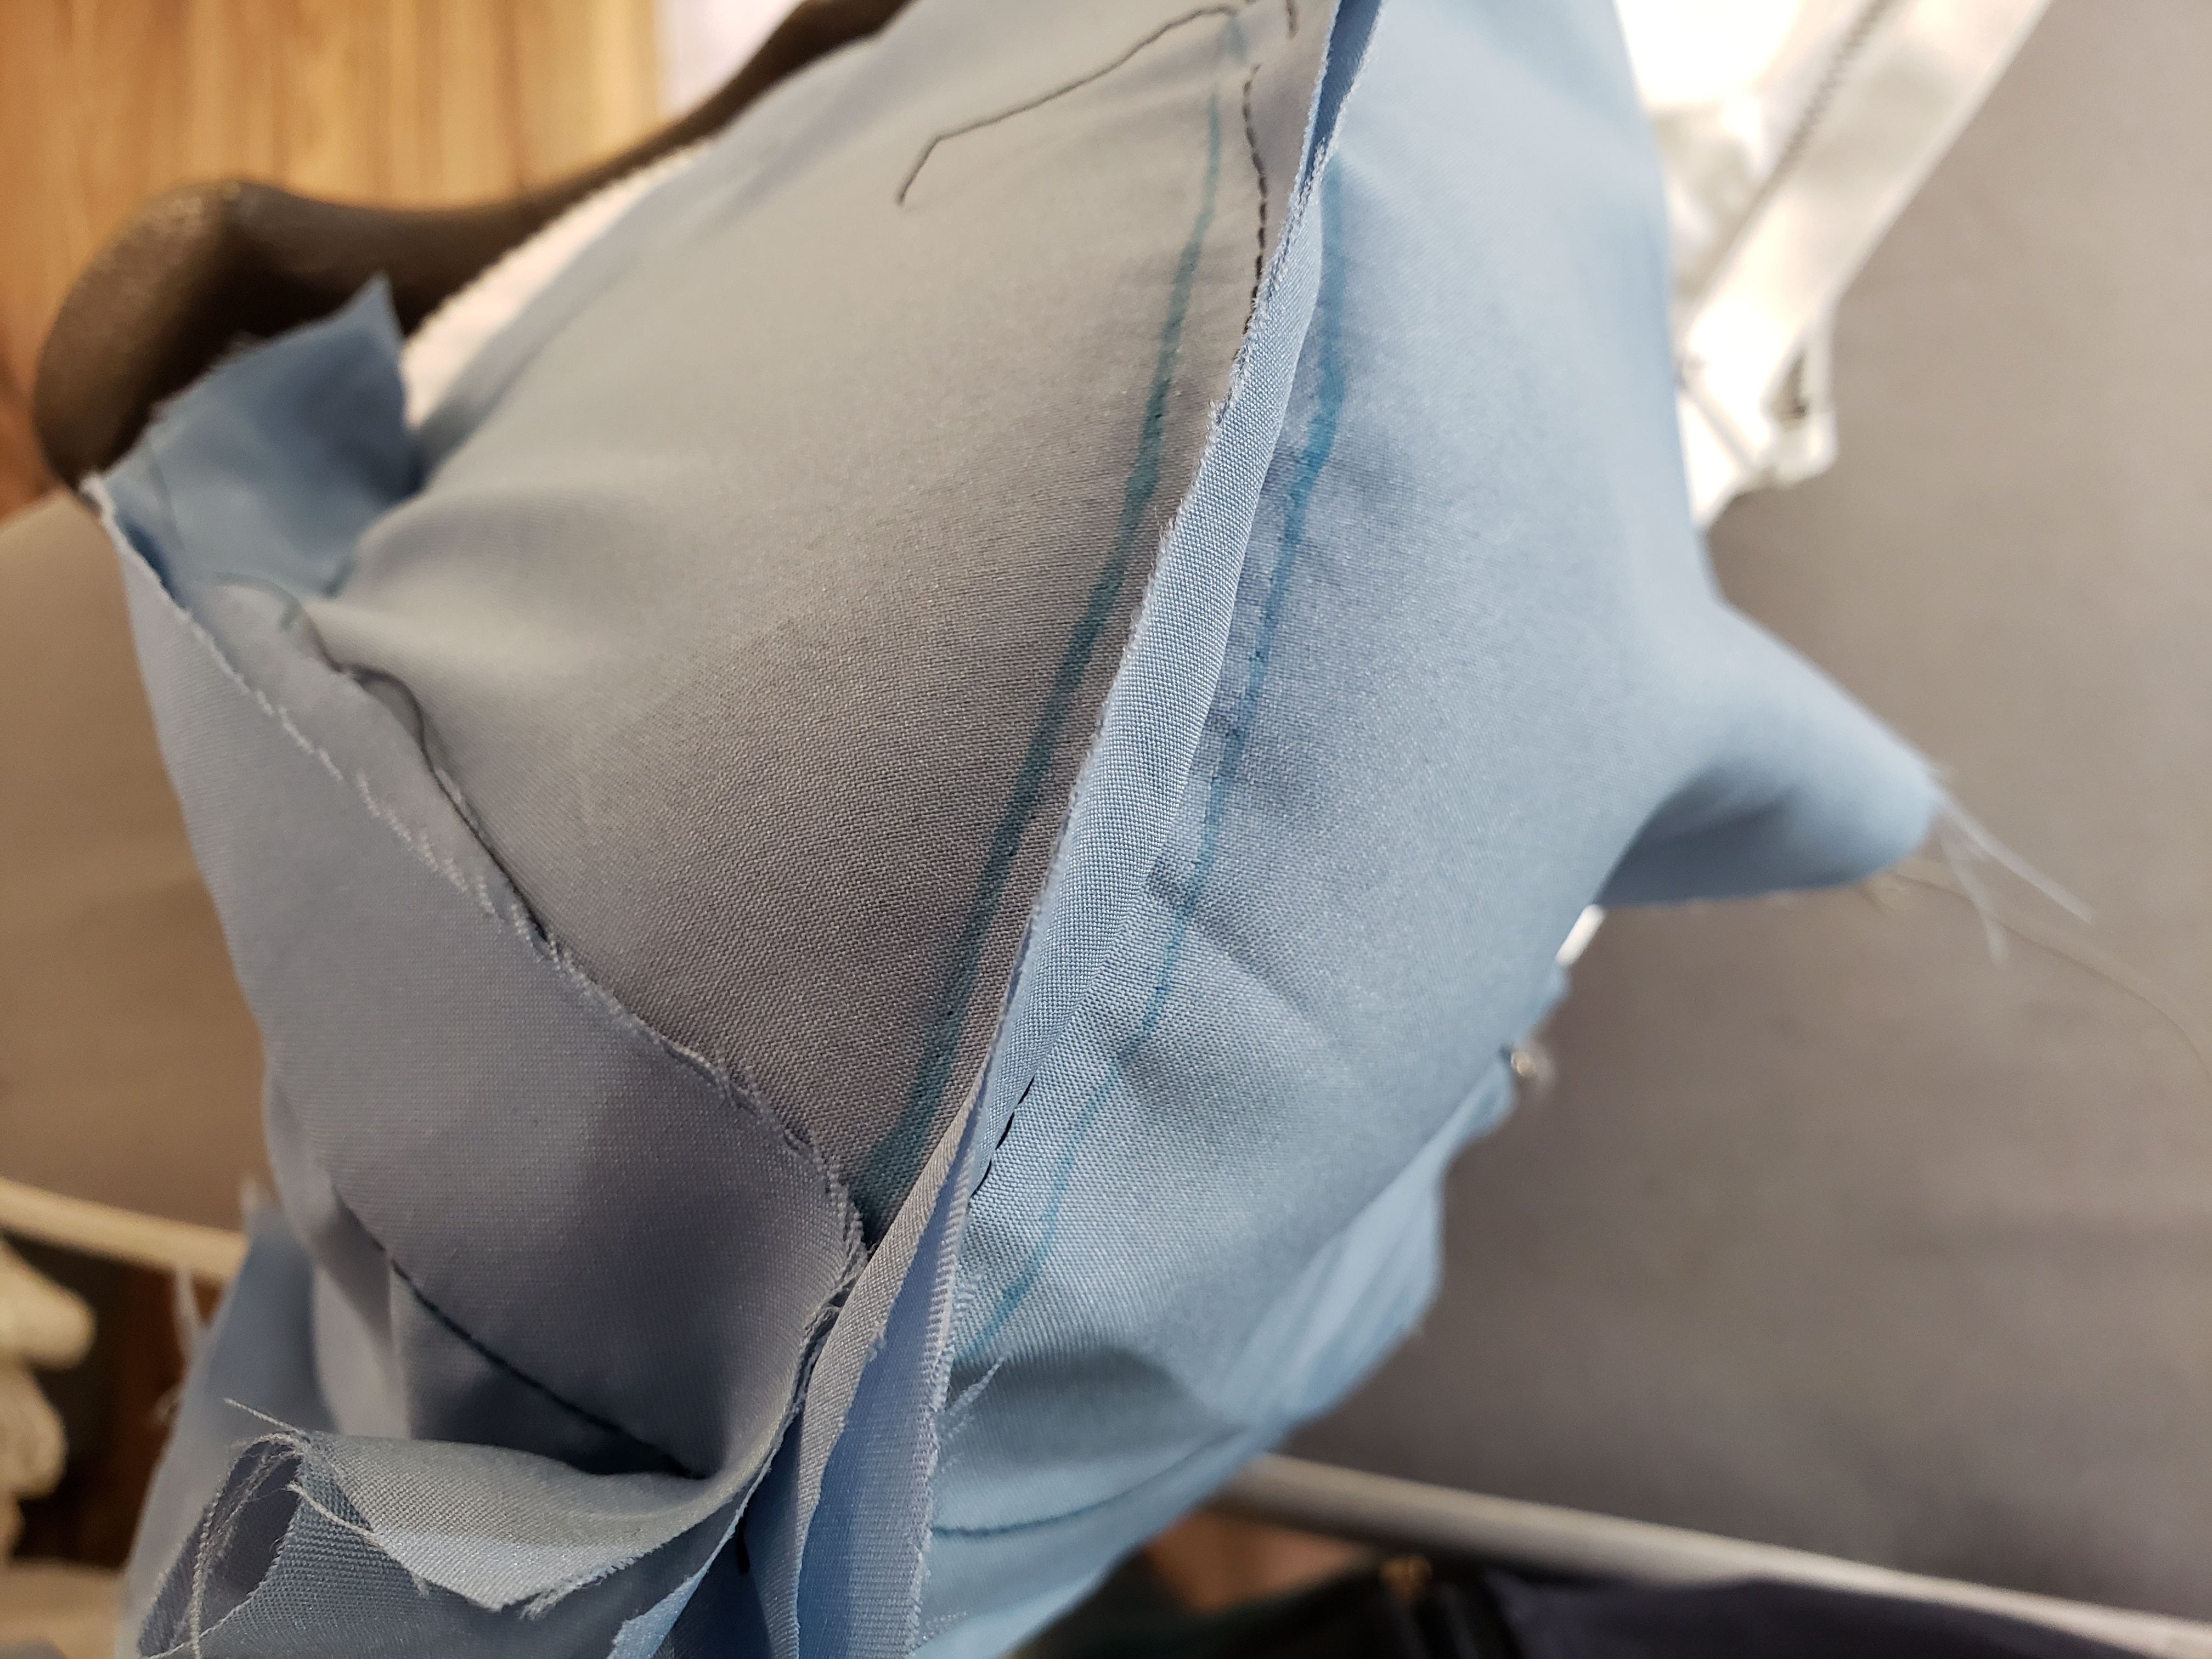
Now, you can try the bra back on, but it’s now a size larger!
Neckline pressing into skin
For another example: This is the neckline of my tester, and I happen to have a seam in this location. So if the neckline is pressing into your skin, you can stitch a new line.
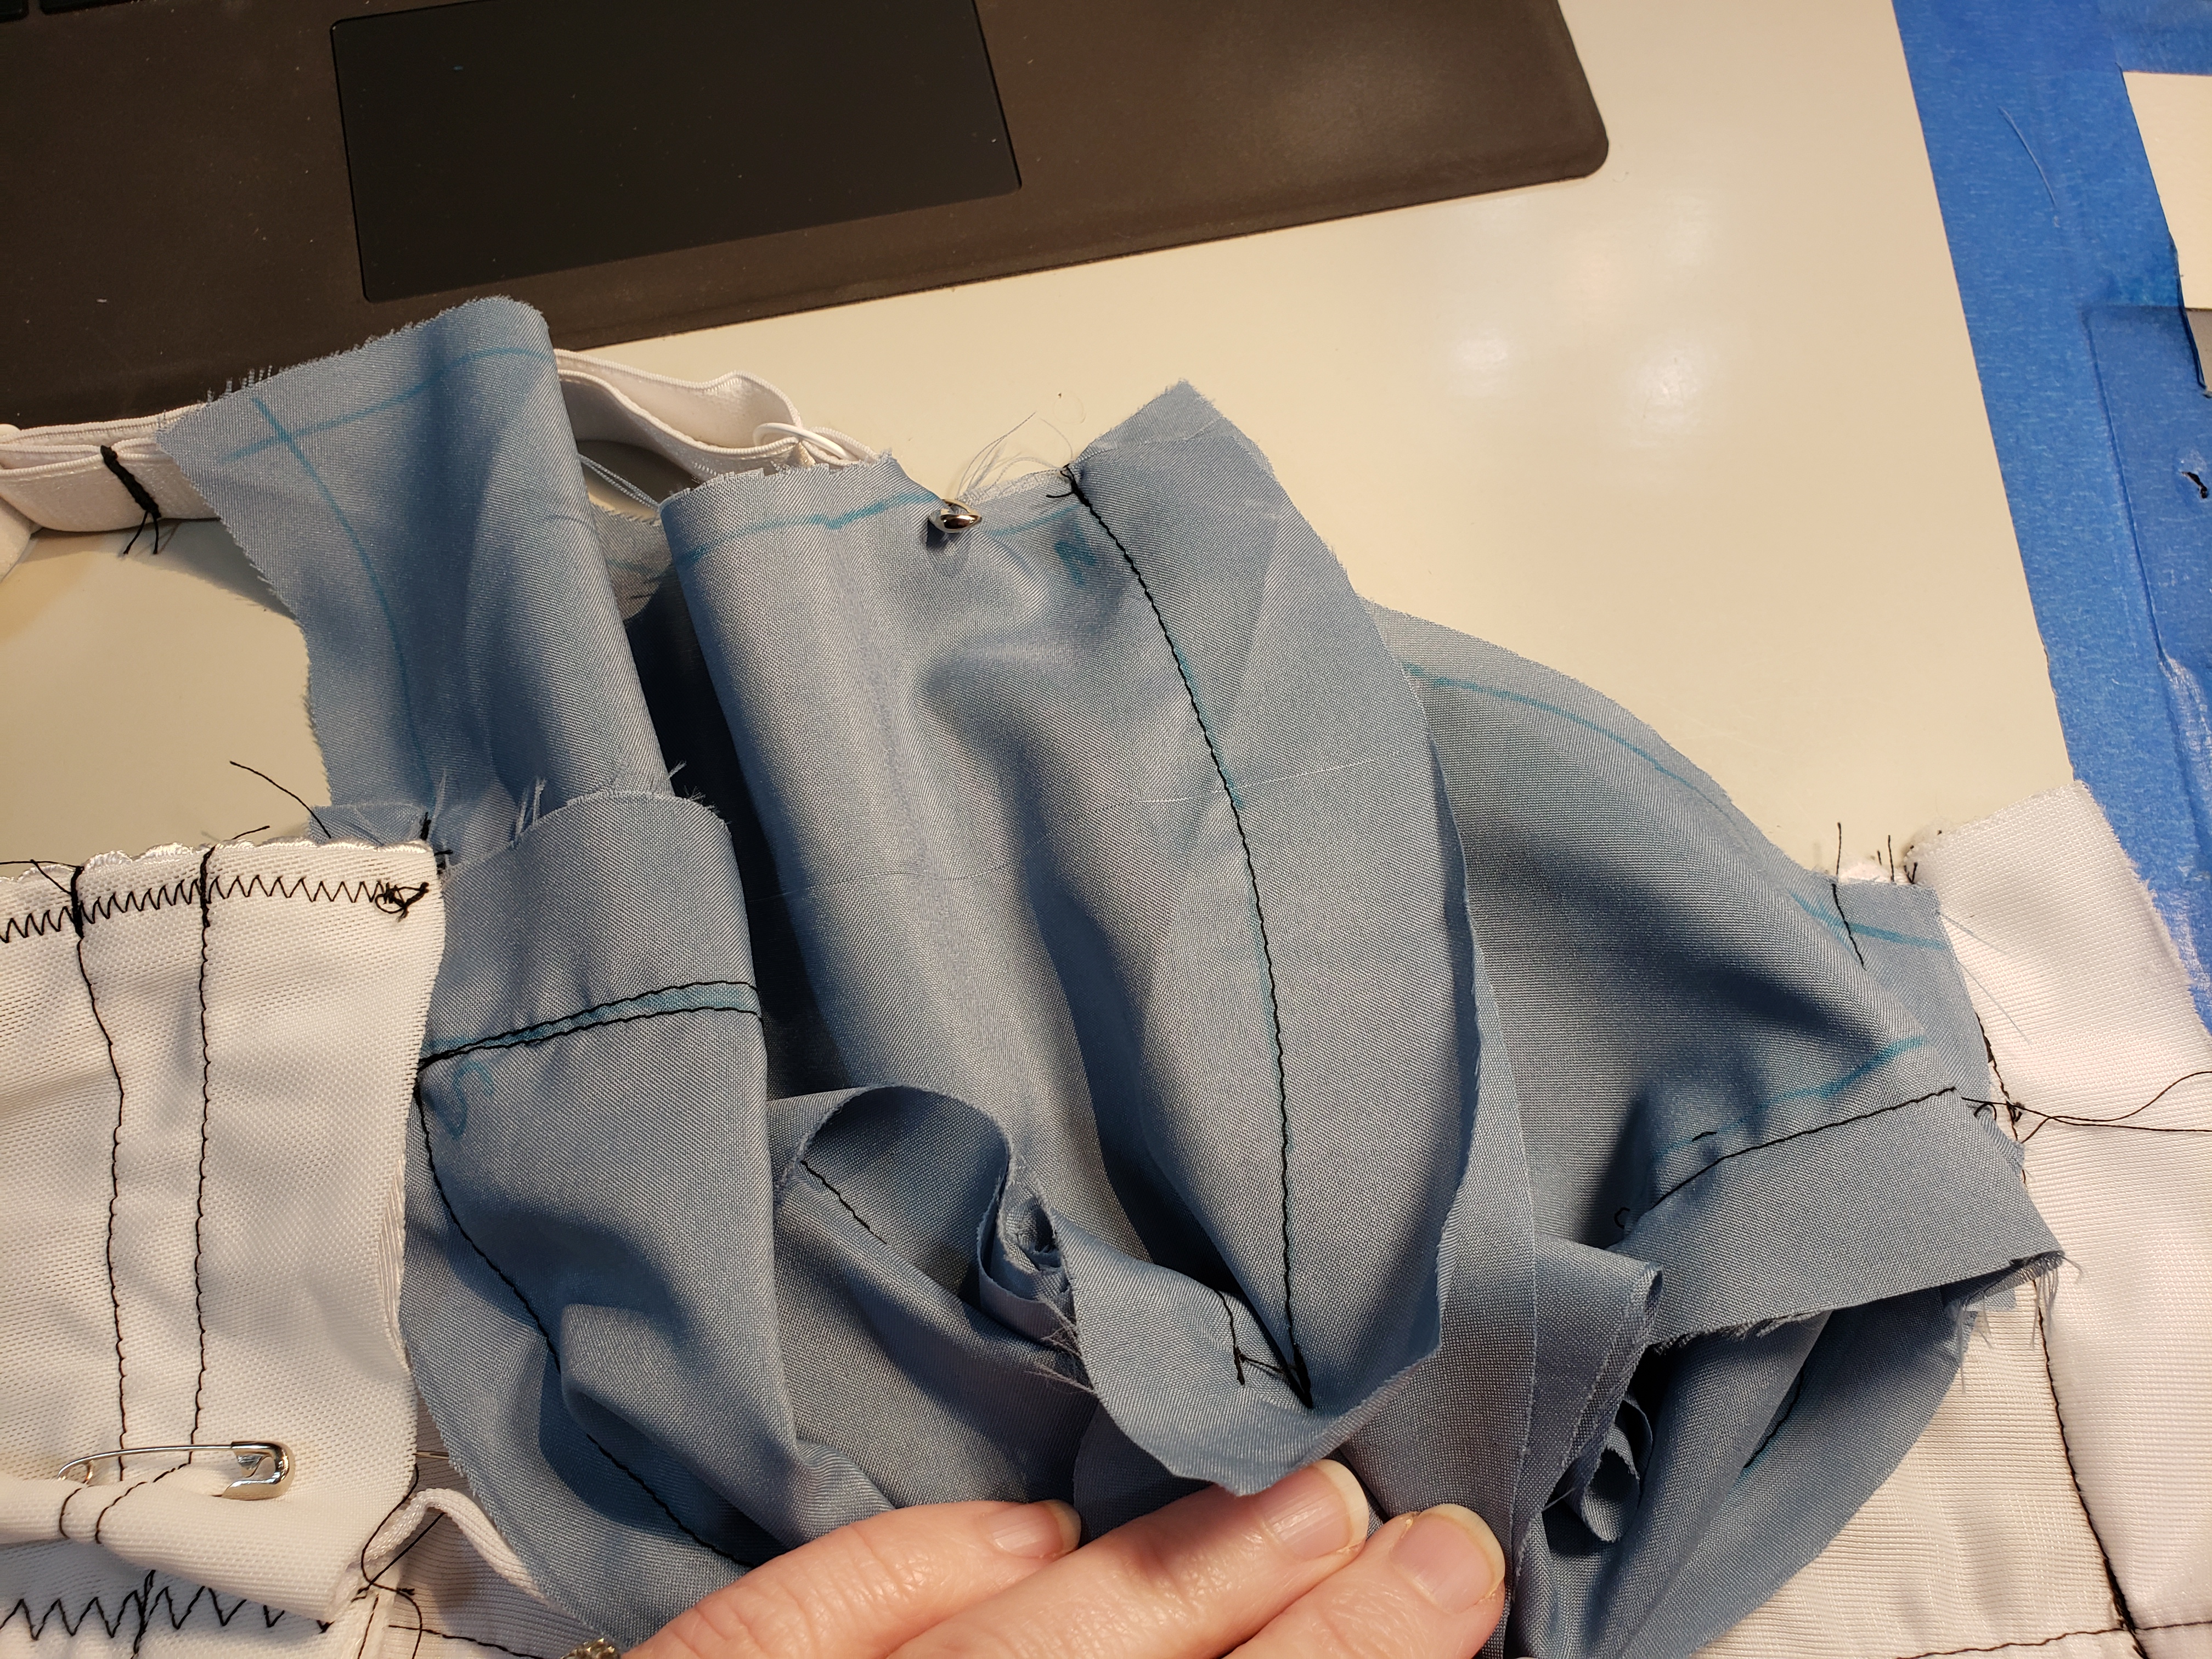
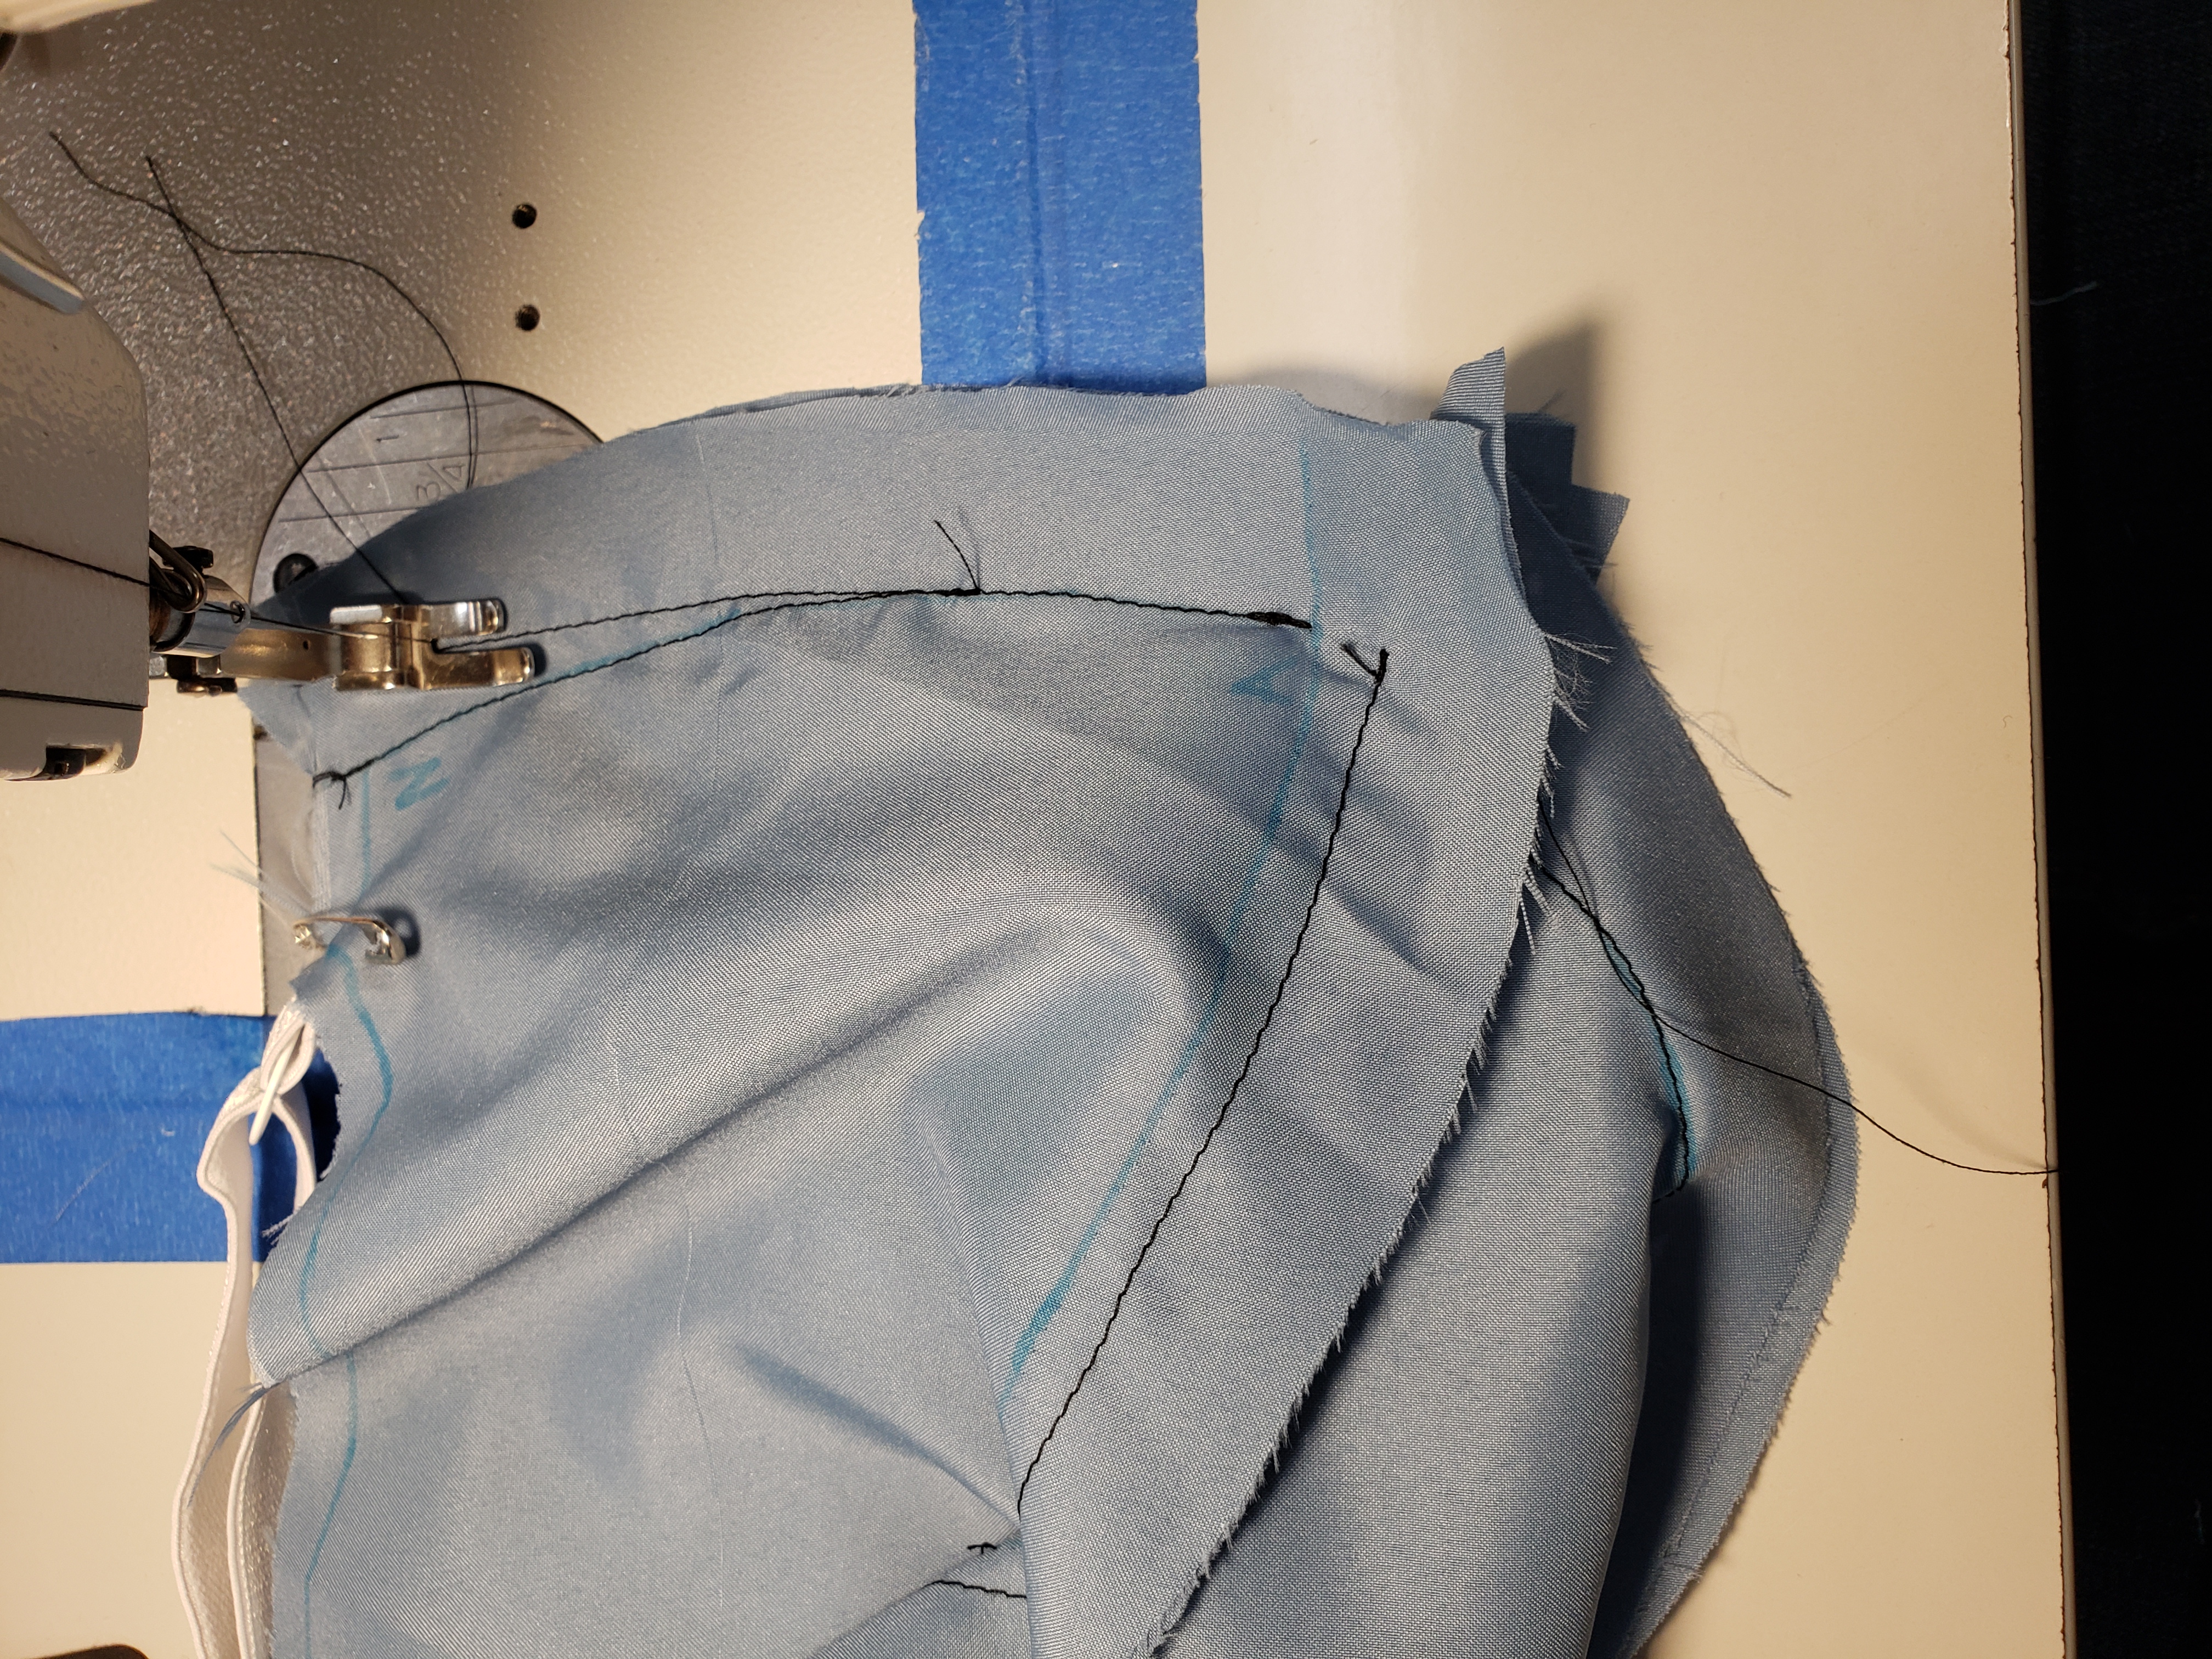
Seam rip out the old line of stitching.
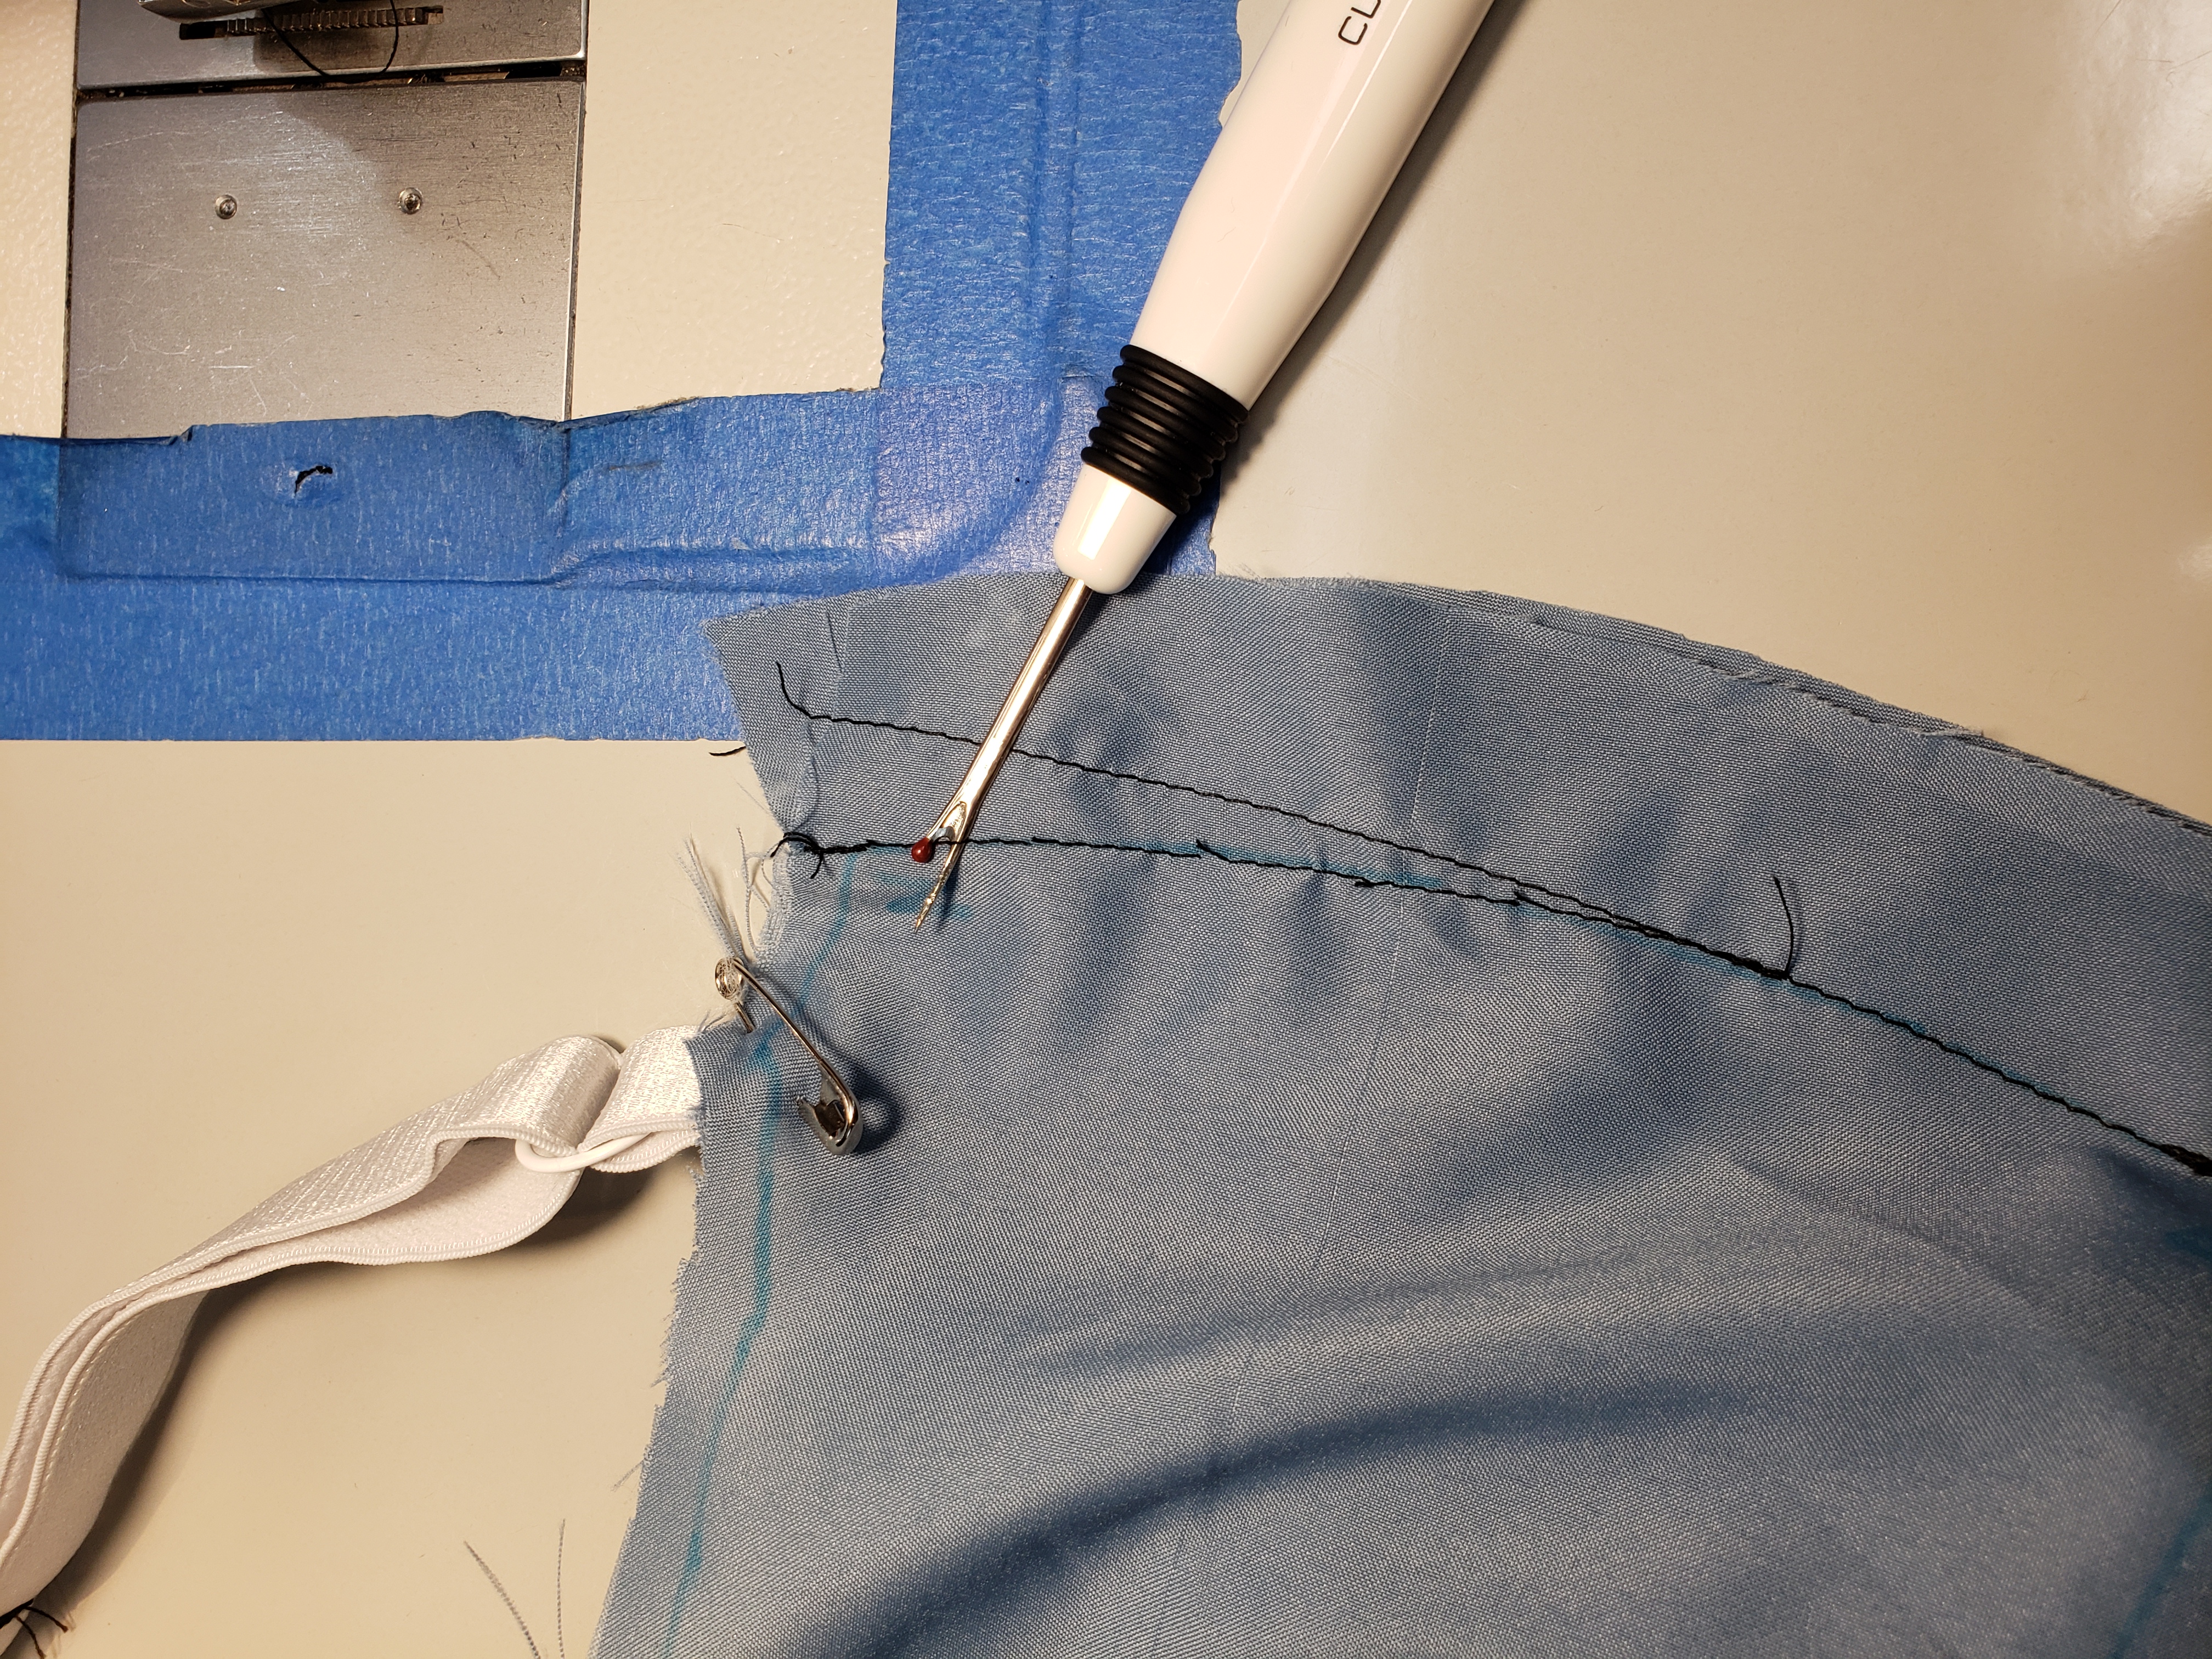
Now you can see the blue lines of extra space in the neckline between the blue marker lines.
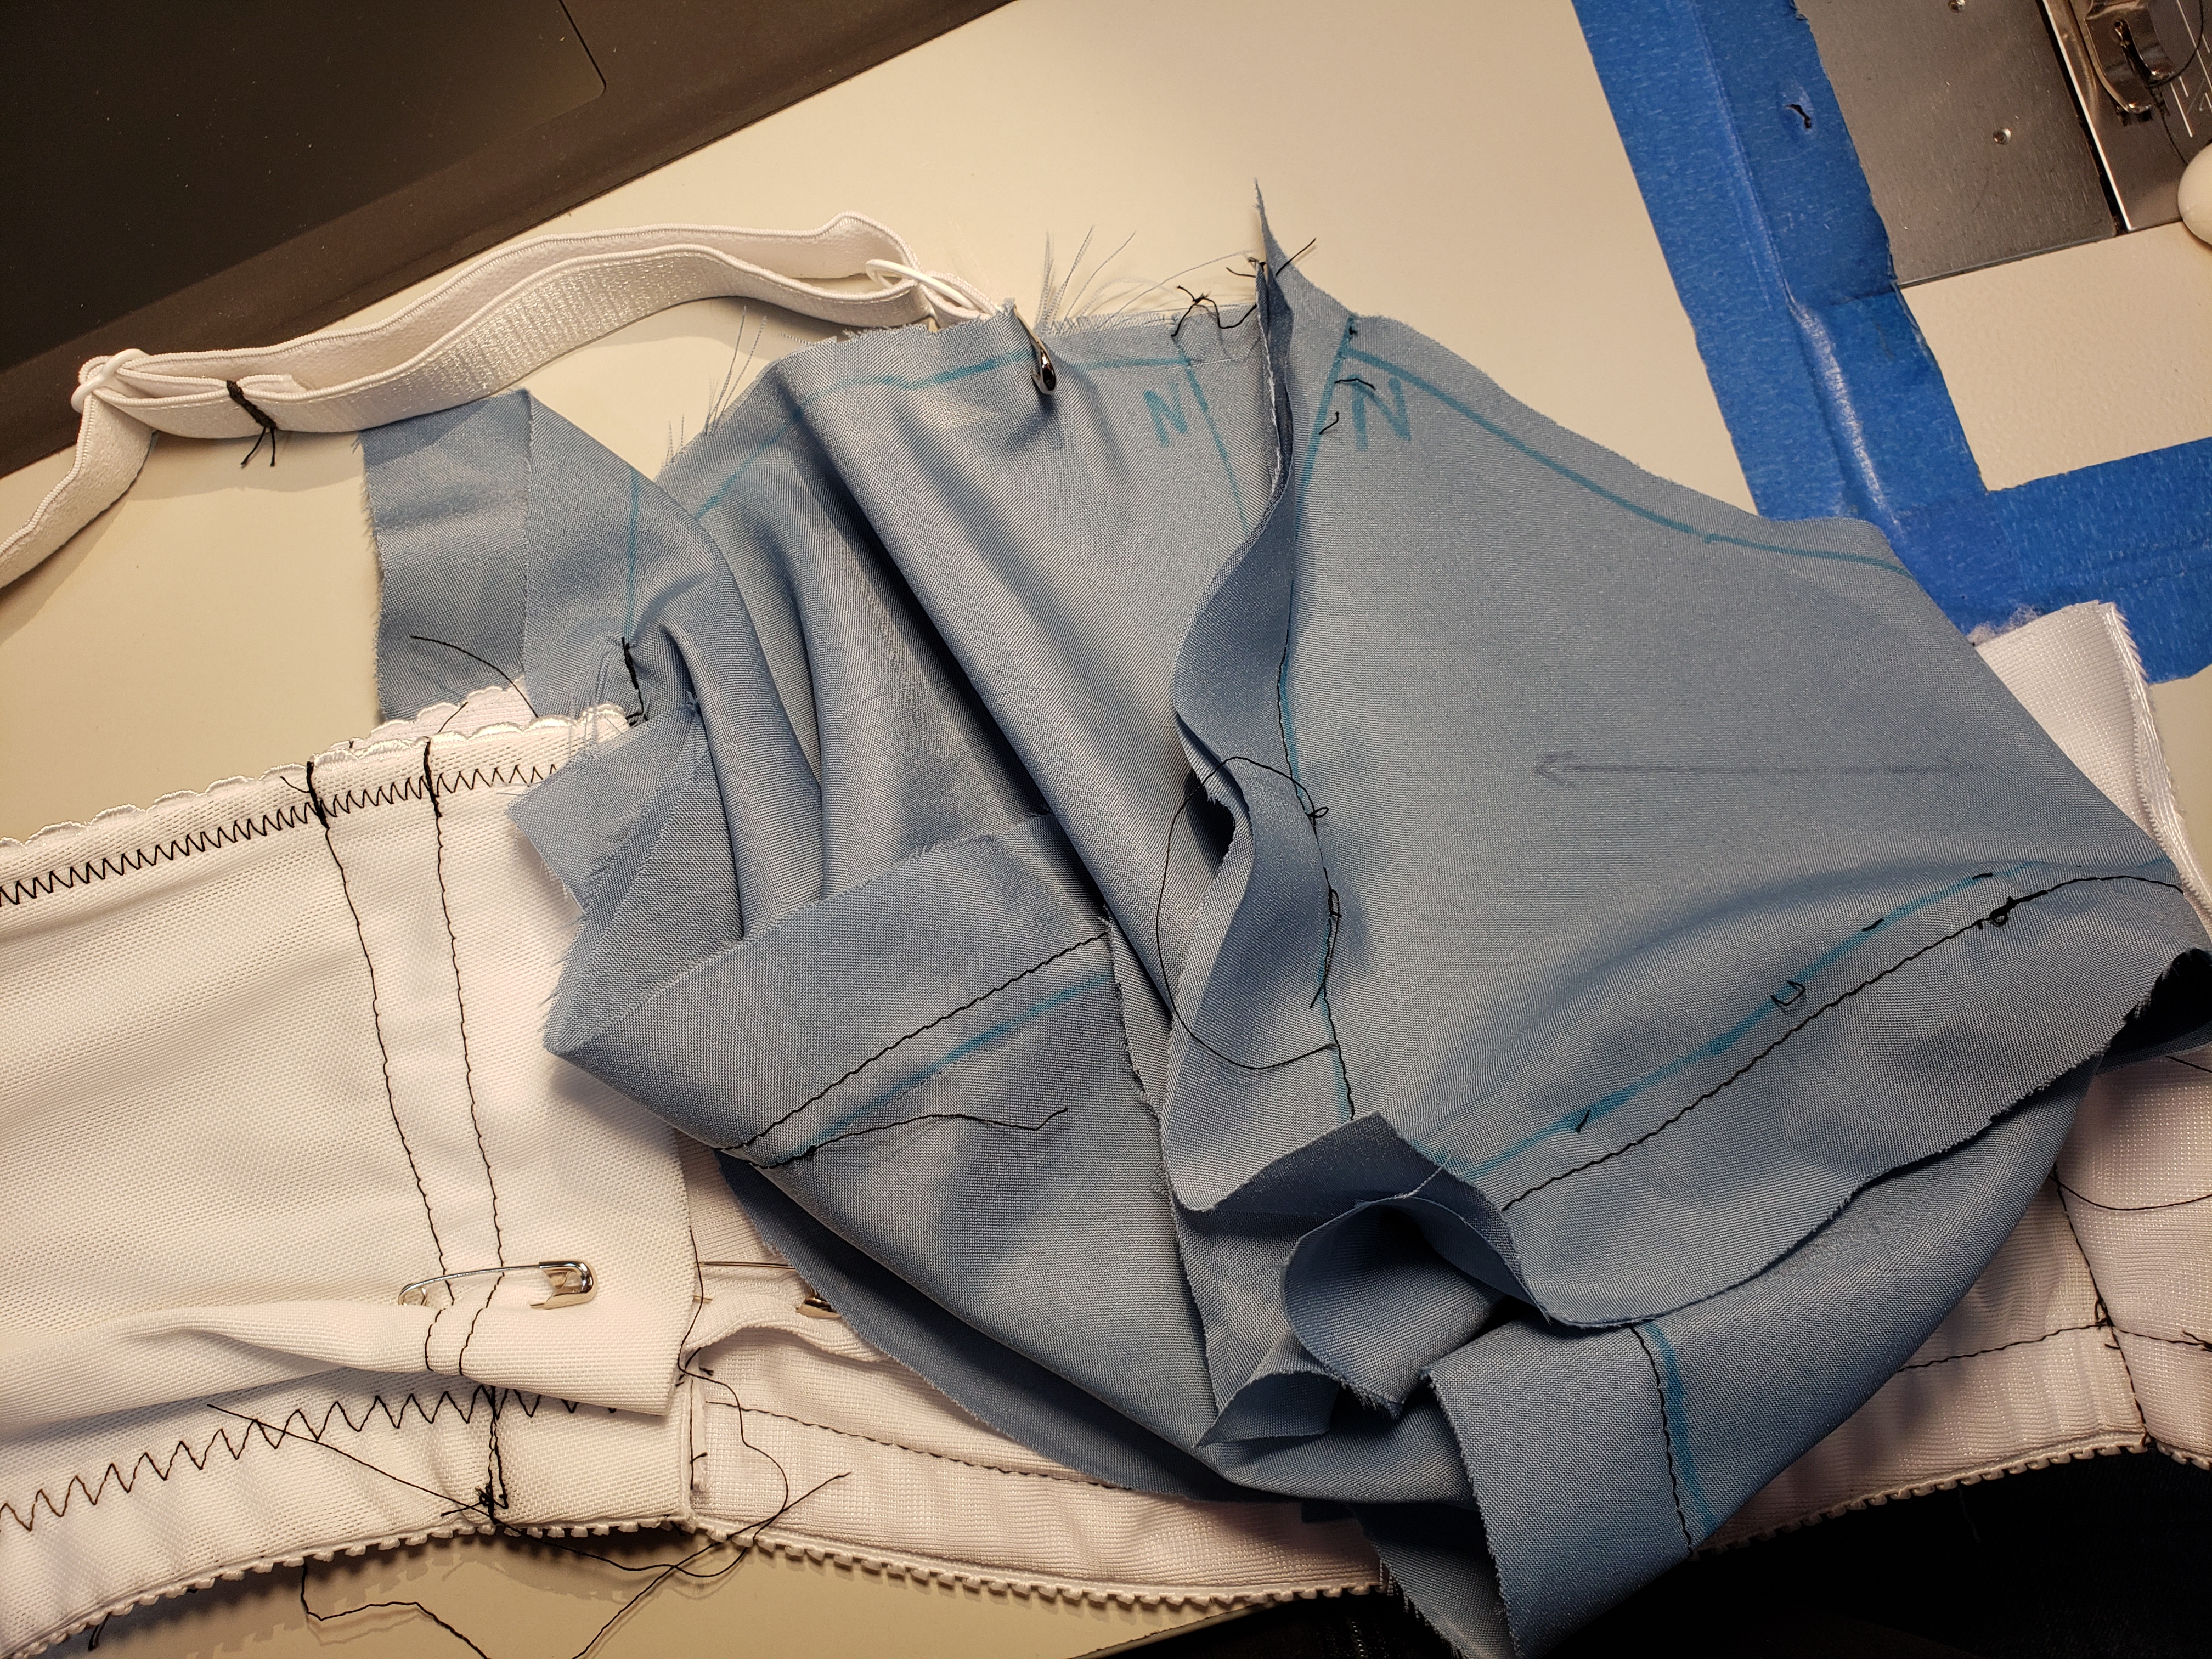
space in the upper cup and adding lift
Final change, if you notice a little space in the upper cup or you just want a bit of lift, you can take in the base of the cup to push the breast tissue upwards.
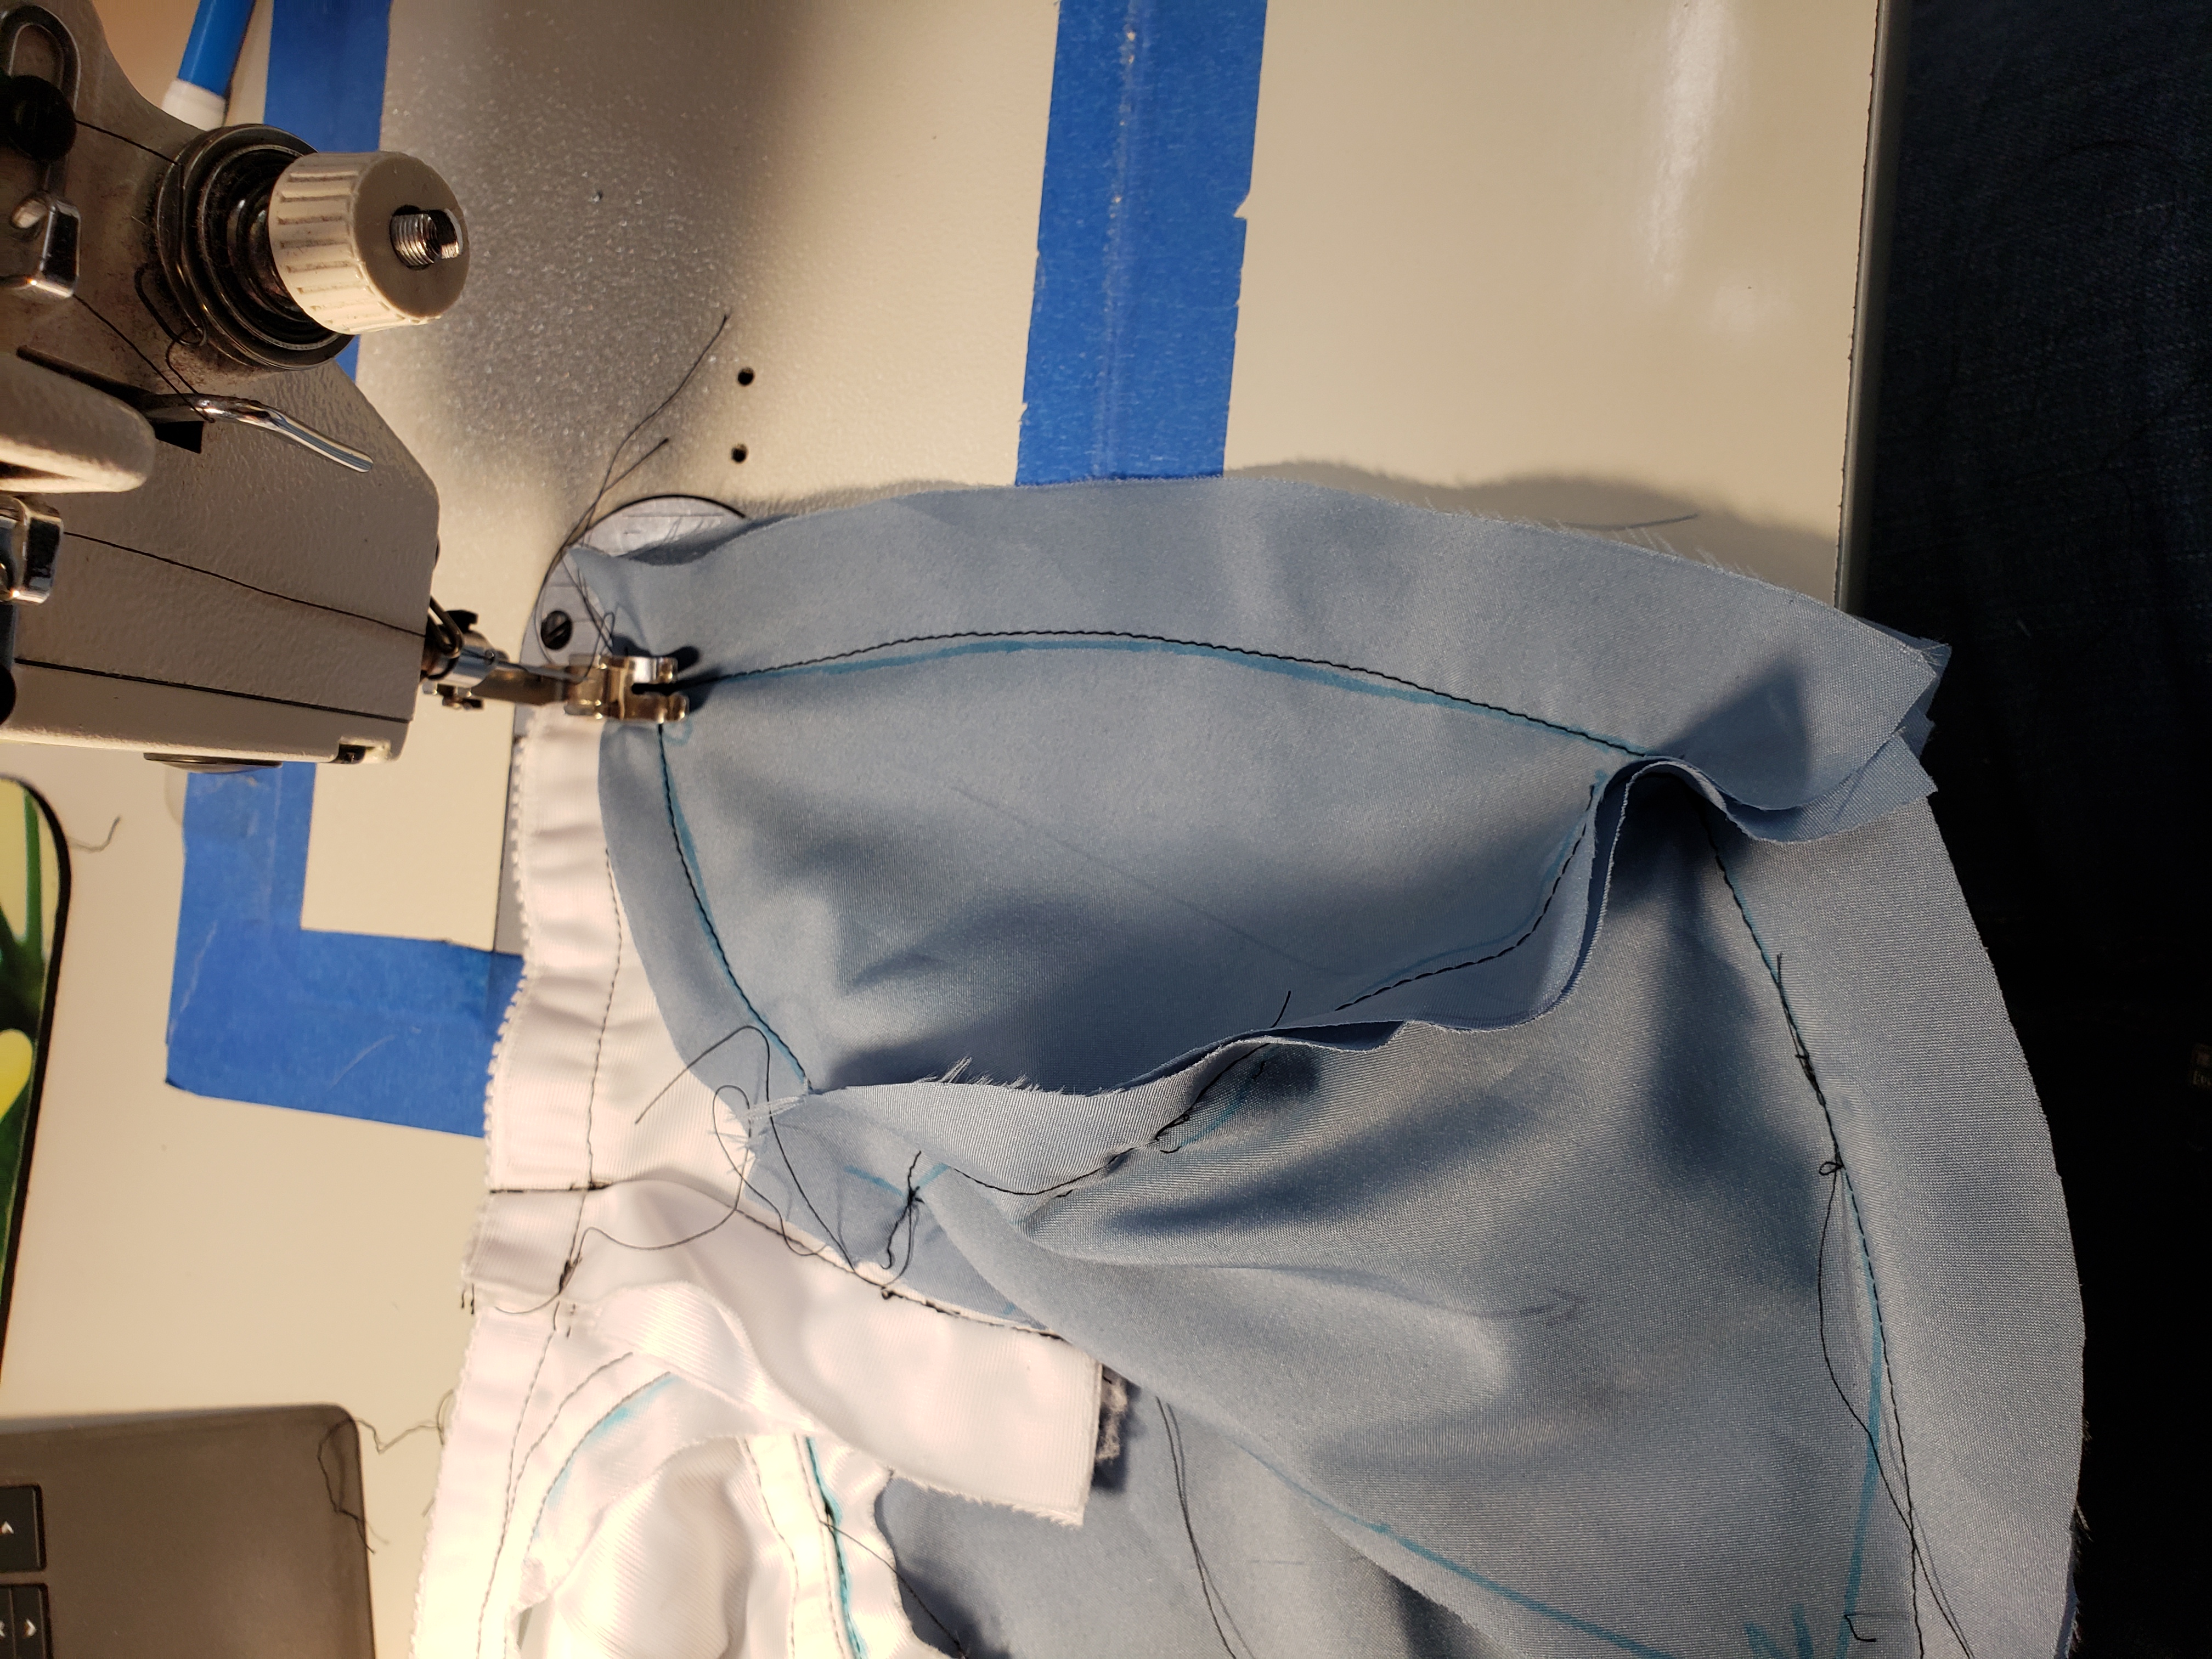
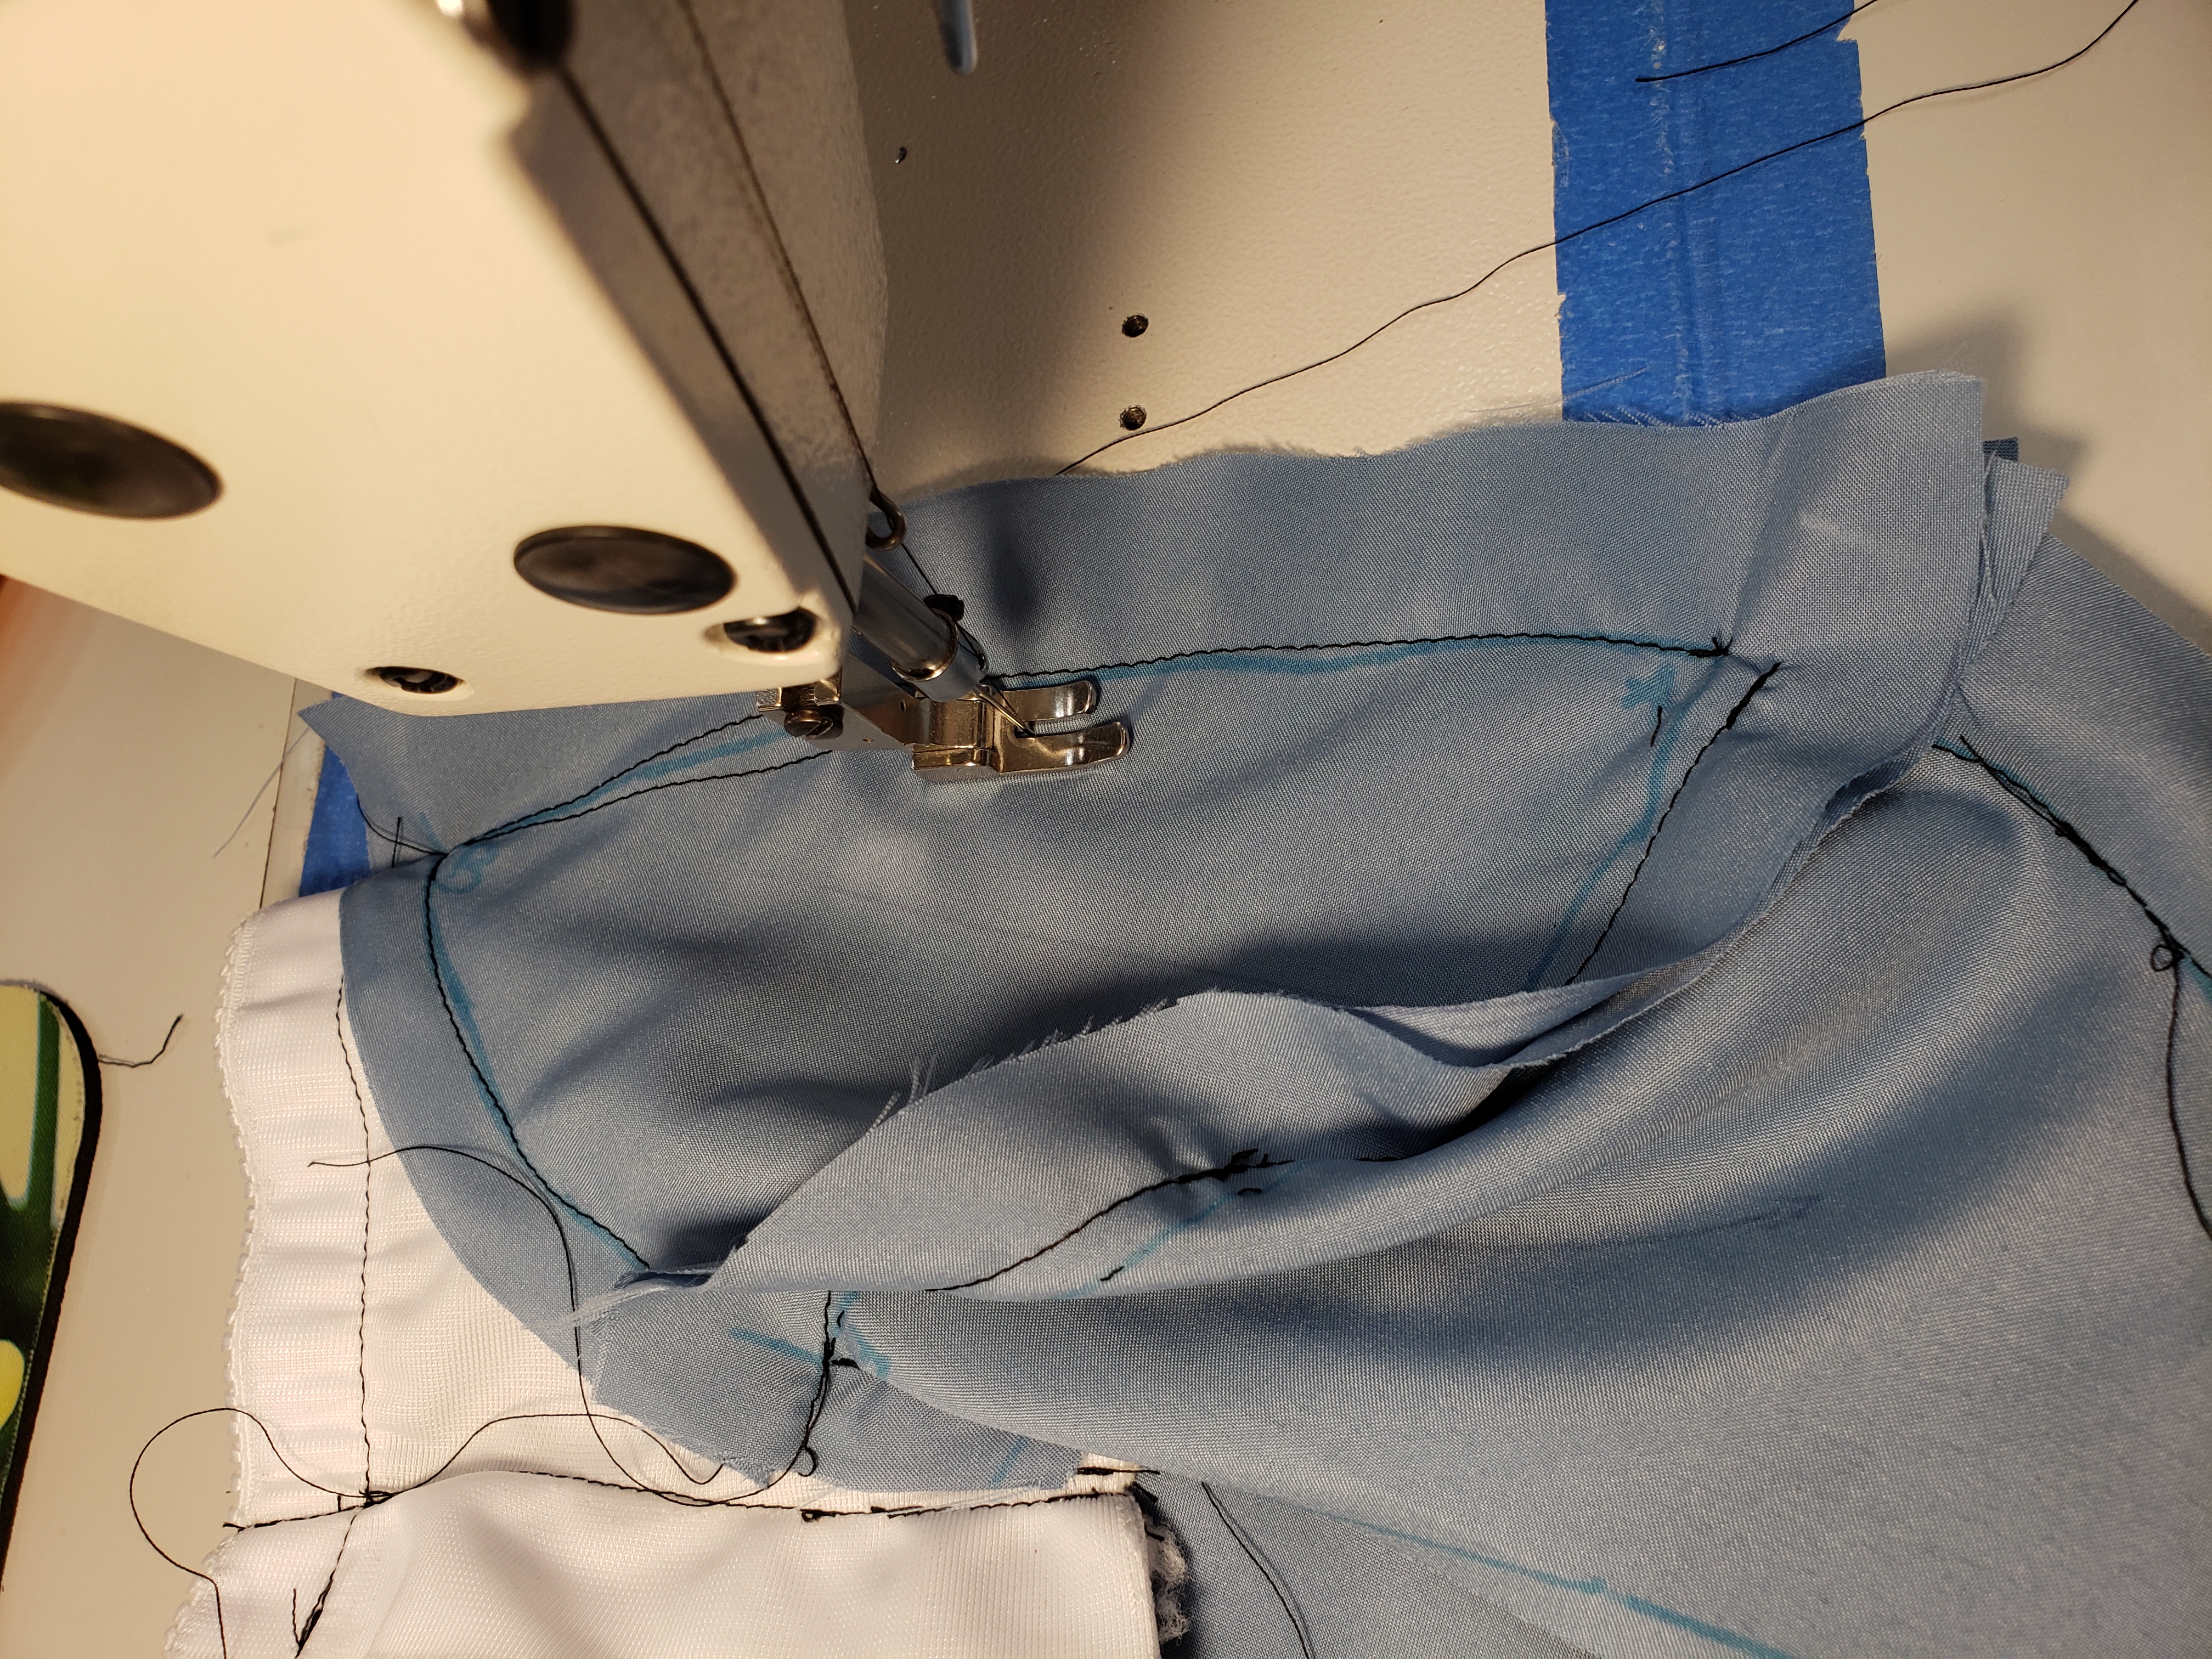
Here, I folded the tester cup and band along the vertical seam to show how I changed the shape of the vertical seam to squeeze space out of the lower cup and push it into the upper cup.
Basically you repeat all the steps above until you’re happy with the shape.
Stitching a Final Pretty Bra
I won’t go into proper sewing techniques this time around, but I will send you back to Liz Sews on YouTube for this. Liz has demonstrated many of the major bra patterns and even if she doesn’t cover your particular pattern, she’ll have something similar and it will be worth your time to learn her tricks!
Bonus: Creating Other Designs
An easy way to design different seams is to print a paper copy of your bra pattern, cut off the seam allowances, and carefully tape the pieces together. Then you can draw on the paper where you want new seam lines and cut it out and have a whole new pattern.
The other way to have a new pattern is to make a Sloper by the Bare Essentials method and use the book/online classes to make new designs. The following video demonstrates the Bare Essentials Sloper being applied to the Eve Classic bra, but honestly, you can do this to any bra pattern that fits you well and then use the Bare Essentials sloper manipulation classes to create other designs.
I would go through all the steps listed above after manipulating seams by either of these methods to give yourself the ability to properly adjust the fit before sewing a pretty version.
And that’s it! You have a bra!
Questions? Lots of people are happy to help in the Facebook Groups Sew Busty Community or Support for Bare Essentials (if you’re using the Eve Pattern from Porcelynne).


michele8243
July 13, 2021This post is going to be so helpful for explaining the fitting cups and how to sew them. Thanks for taking the time to write this.
sewbustycommunity
July 13, 2021Isn’t Kristen amazing for contributing this? Glad you’re enjoying it!