

For Community Thursday this week, I’m doing something a little different and joining in the fun of a community sewing challenge! When Jess (@SoWhatIfISew) asked me to participate in her #SewNewInJune challenge, I KNEW this meant I needed to expand my horizons. I love sticking to my comfort zones: cotton poplin, patterns with built-in cup sizes, minimal pattern adjustments …
As you probably know I’m a pretty lazy sewist. I’m more here for the creative parts of sewing, like choosing which fabric to use with which pattern, than the technical parts. I suck at spatial reasoning, geometry, and math, and therefore I’m not the biggest fan of pattern adjustments.
But I knew #SewNewInJune meant I should do an full bust adjustment. I haven’t done an FBA in … probably a year. But here I am, running a blog called Sew Busty and being challenged by Jess to try new things.
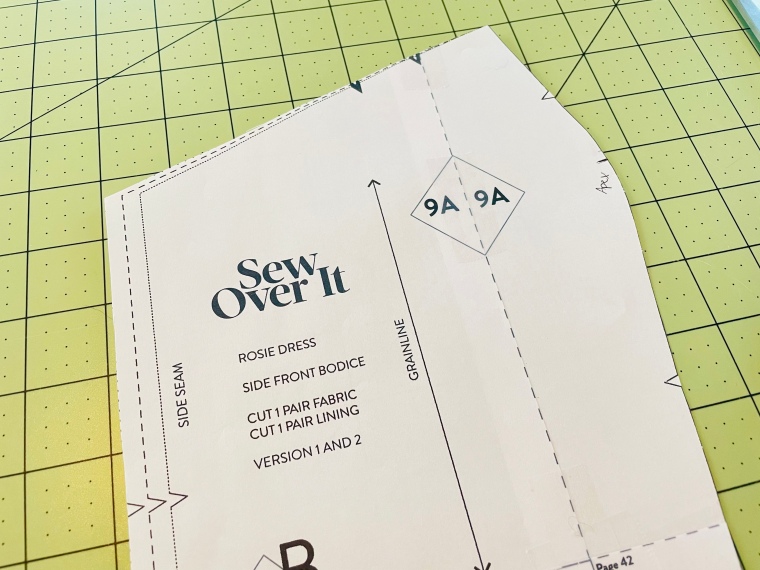
So I chose an FBA that I’ve personally seen people struggle with: the sleeveless princess seamed full bust adjustment. And Sew Over It was kind enough to gift me the Rosie dress pattern to work my magic! (While Sew Over It is drafted for a D cup at larger sizes and offers cup options at all sizes in some of their patterns, the Rosie dress is drafted for a B cup at my size.)

While doing research for this, I discovered a couple of things:
One: It’s different enough from a traditional princess seam FBA that this alteration can be intimidating.
On a traditional princess seam full bust adjustment, you use the armscye as an anchor point, like in this tutorial from the Curvy Sewing Collective. But, on a sleeveless dress with princess seams, you don’t have a traditional armscye, but are instead altering part of the neckline, so it can feel a bit tricky. It’s honestly not that much different in practice, but it definitely feels different.
Two: Most full bust adjustment tutorials assume a small (1″ or so) full bust adjustment.
My bust certainly isn’t the biggest, but I need a 3.5″ total full bust adjustment, or 1.75″ on each side. This is much bigger than the 1/2″ on each side that most tutorials expect you to be doing. For example, I tried to follow this tutorial from Closet Core Patterns that was written for a dress with very similar lines to the Rosie, but unfortunately, it wasn’t cooperating with my large bust.

Sleeveless Princess Seam FBA Tutorial
Alright, LET’S GO!
choosing a base size
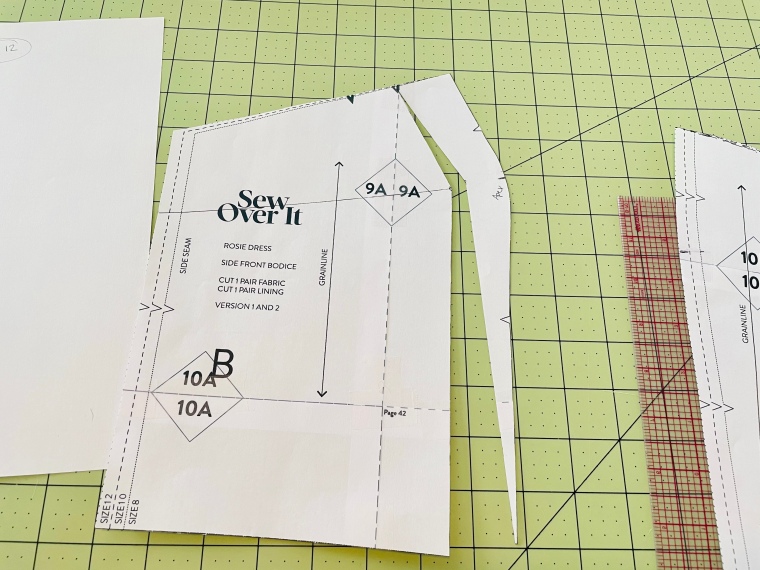
The first step is to figure out what base size you’ll be making. Choose based on your high bust + 2″ as the “bust” measurement on the chart. I’ve talked about this before, but most FBA tutorials will have you choose based on your high bust substituted for the size chart’s “bust” measurement. I’m honestly not sure why tutorials teach this way, as this instruction fails to consider that most patterns are drafted such that the high bust is 2″ smaller than the full bust.
Thus, if the high bust measurement is not offered on a pattern, you must add 2″ to your high bust measurement, and choose the size with a bust measurement that most closely corresponds to this HB+2. My high bust measurement is somewhere between 34.5 and 35 depending on the time of day/month, so I need a size with a bust measurement that is somewhere between 36.5 and 37″. On the Rosie, the size 12 has a 37″ bust, so I selected this base size. As a bonus, the size 12 also has a 30″ waist, which is very close to my 29.5″ waist.
The only place I didn’t match the size 12 (aside from my full bust, which we will get to …) is the hips, where I’m around a 37.5″. The size 12 accounts for a 40″ hip. BUT I decided not to grade the pattern down at the hip because the Rosie is designed to have a free-flowing skirt: The finished garment at size 12 has 86″ of fabric at the hips, meaning there’s 46″ of ease built in … what’s a few more inches of ease at that point?
Doing some full bust adjustment math
Now, to start our FBA, we must do a little math. As I mentioned, the Rosie is drafted for a 2″ full bust to upper bust difference. I have a 5.5″ difference. So I need to subtract 2 from 5.5, for a total of 3.5. Then, because you’re really working on half of your bodice, you need to divide this by 2. For me, 3.5/2=1.75, meaning I need to add 1.75″ on my bodice pattern.

Marking the apex and pivot points
Because the apex is not marked on the Rosie, you need to find it. On a princess seam, the apex is somewhat easy to find: It’s the place where the curve is largest. I marked this point on my side bodice:
You need to find the same point on the center front, which is a bit trickier. I did this by using my flexible ruler to measure down from the notch to the apex on my side bodice, then on my center front bodice:

Now, this point isn’t really the apex. The apex is really 5/8″ or 2 cm inward because of the seam allowance. This will mark your first pivot point. Mark this point and draw a line down, parallel to the seam line.
You can see in this picture that I drew my line parallel the grain line, not the seam line. This was a mistake. This is one of those times where you need to do as I say, not as I do. You’ll notice in later pictures that I went back and corrected myself. I just somehow forgot to go back and take a photo of the line marked correctly.

Now, you’ll want to draw a line from the apex to the first notch on the neckline. If your pattern does not have a notch here, choose a point an inch or two inward from the seam line.

You’ll also want to draw a line from the apex over to the side seam, about halfway between the notch and the armpit. Again, if you don’t have a notch, choose a point about a quarter of the way down the side seam.
Cutting your pivot lines
You’re now going to, very carefully, cut from the bottom of your bodice, up to the apex, then up to, but not through, the top notch. Leave a small bit of paper at the top notch so that your piece is still hanging together by a thread.
Similarly, cut from the side point to but not through the apex, again leaving this cut so it’s hanging together by a thread of paper.
You’ll see in this picture that I’ve corrected my line from apex to the bottom of my bodice, so it’s now following the seamline instead of the grainline. Yay!

adding width for large breasts
The next step in our princess seam large full bust adjustment is to tape the large side of your piece down to a spare piece of paper. Draw a line parallel to your cut line however many inches from your cut line that you determined you need for your full bust adjustment. In my case, this new line is 1.75″ from the cut piece:

Now, swivel your “hook” to match this line. This will open up a dart on the side seam of your piece. Don’t worry about that just yet. Tape down your “hook.”

Closing the Dart
Now, draw a line from the bottom of the dart you created to the apex point on the seam allowance (not just to the apex point where our cut marks are). On my bodice, this line is very close to the dart line – so much so that it’s hard to see. Yours may look much different, and that does not mean you’ve done anything wrong.
Tape down the bottom of your dart.

Now, cut from the curved side of your pattern piece through that line you drew, stopping at the apex point. Once again, cut to but not through this point.
Now, fold your dart closed. This will essentially move the dart from the side seam to the curved seam of your bodice.

You’ll now want to cut the “hook” piece at the lower notch, to cut the last several inches off. Move this downward to match the bottom of the larger part of your pattern piece, and fill in with scrap paper. Tape into place.

Tape this down, then draw a curve to connect the curved side of your bodice, as shown below. You can use a french curve for this or freehand. I personally freehanded this, even though I had my french curve next to me.
You also need to draw a slightly curved line to fill in the concave on your neckline/armpit area. Again, you can use a french curve to do this or you can choose to freehand it.

Dealing with the Waist
Now, obviously the problem with this full bust adjustment is that it has also added 1.75″ (or however many inches you did for your FBA) to our waistline, which I don’t personally want. The way to deal with this is to remove those same 1.75″ from the waistline.
Mark a dot however many inches inward from the side seam that you added for your FBA. If you added 3″, mark a dot 3″ in from the side seam. If you added 2.25″, mark a dot 2.25″ inward.
Using a french curve or freehanding, draw a gradual line roughly from the notch to the dot you just marked. You want this gradual line to start just below the bust line.
You’ll now cut along this line, and this will be your side seam. I know it looks weird as hell, but it’ll work out. I promise.
Now, I do want to mention that there’s some debate within the sewing community about where it’s best to take this excess. Some dressmakers suggest taking it from the princess seam rather than the side seam, and others suggest splitting this difference, taking some from the side seam and some from the princess seam. From my experiments in pattern drafting, this makes sense to me – the traditional approach in drafting is to distribute excess between multiple places, and when you add extra to one place (here, the princess seam), it also makes sense to remove it from that same place.
I’ve personally always taken the excess from the side seam, and I’ve been happy with the fit. I also note that every princess seam FBA tutorial I’ve seen (such as Curvy Sewing Collective, Megan Nielsen, Seamwork, Deer and Doe, In the Folds) does it this way. However, I’ve heard from some people with larger busts than me who have found this system to not work for them, and have found better success either removing the excess from the princess seam or half from the princess seam and half from the side seam. It’s always a good idea to try out different options and see what works best on your body! I encourage you to experiment 🙂
Altering the Center Front Pattern Piece
Since we added length to the side bodice, we also need to add length to the center front piece. To do this, you’ll first need to use a flexible ruler to measure the side front seam lines on both your side front piece and your center front piece.
Note: This is most accurately done by first removing the seam allowance, then measuring this seamline without the seam allowance. I didn’t remove the seam allowance first, because, as we’ve established, I am lazy. When I went to sew up my dress, this meant this seam didn’t quite “walk” – meaning, one piece was slightly longer than the other. I just trimmed after sewing this seam. But if you want to be super accurate, remove the seam allowance at this step, then add it back afterward.
Now, time for more math: We must figure the difference between the length of the altered side front piece and the length of the unaltered center front piece. For me, my side front seamline was 13″, while the center front was 10-7/8″, leaving me to add 2-1/8″.

You’ll add this amount by marking two lines: one at the apex, and one at the lower dart. Then, you’ll need to divide your total difference between these two spots. This shouldn’t be an even split. I added most of my extra – 1-7/8″ – at the apex, and only a little – 1/2″ – at the dart, and I actually ended up removing some at the dart in a later step.
Cut your piece on your two lines. On a scrap piece of paper, draw two parallel lines however many inches apart as you want to lengthen your center front pattern piece at the apex – in my case, 1-7/8″.

Now, align the bottom edge of the top piece of your center front pattern piece against the top line, and the top edge of your middle piece of your center front to against the bottom line. Tape down.
Repeat this with the extra you’re adding at the dart line. Re-draw the seam lines:

Walking the seams
The last thing I like to do is “walk” the seams. Basically, this means holding the two pieces together and pivoting them to make sure that you can line it up at the top, then that the notches match, then that the bottoms match. At this point, I realized I had added about 1/8″ too much at the bottom notch on my center front piece, so I amended that.
Like measuring your seamlines, this step is best done with the seam allowances removed, but it’s not the end of the world if – like me – you’re too lazy to remove them.
A final check
Okay, the real last thing I like to do is tape the pieces together and hold them up to myself. This helps me to see if the curve is reasonable.

It looked pretty good to me, so I went on my merry way sewing!
Sewing the Rosie – General Tips for Big Boobs
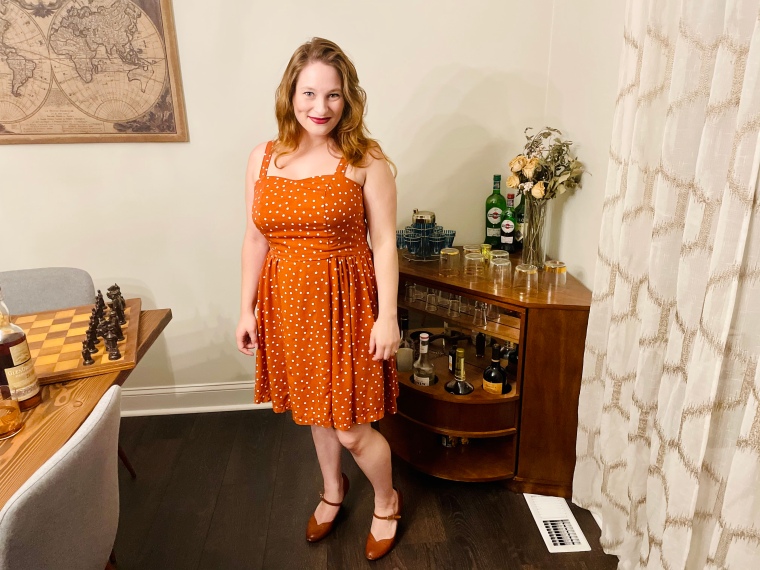
And the full bust adjustment for my big boobs worked! I’m loving the vintage vibes of this dress!

My biggest tip for sewing the Rosie is to try on your dress before you insert the lining. I highly recommend this step. You’ll want to do three things when you do this:
(1) Make sure the curve of your princess seams is correct. I had to change the curve of mine just a tad to lower the apex. This is easier to do before you’ve combined your main bodice and lining.
(2) Check the strap attachment points. The strap attachment points marked on the pattern didn’t cover my bra straps, which I didn’t realize until I’d stitched everything together and understitched. Ugh. Double seam ripping! So, try on your dress before attaching the lining and mark where, for your bra, the straps should be. Mine needed moved in about an inch in both the front and back.
(4) Figure out how long your straps should be. Again, I didn’t do this. I just sewed it up as is, not considering that the straps might not be the right length on me. They were 4.5″ too long. When I unpicked to move the straps, I also shortened them.
Another note: I did not use boning. I just skipped this step entirely. While I had boning in my stash, I felt like the boning wasn’t going to be enough to support my large breasts — I’d still need a bra — so I decided to skip this step for ease. This makes the Rosie a comfy, easy-to-wear summer frock!
Have questions about this full bust adjustment tutorial for large busts? Drop a comment below or or ask on the Sew Busty Facebook group or subreddit.

Great tutorial! Does this method also include taking extra inches from the waist after an FBA if there are no princess seams – ie gathers for a skirt or a more ‘fitted dress’. I always struggle with the extra fabric around the waist.
LikeLike
I remove the extra from the waist in much the same way for regular FBAs! We will have a tutorial at some point soon on that!
LikeLike
Thank you so much. Yes please a tutorial would be great. I always make such a hash of of the waist after a FBA!
LikeLike
So informative, thanks. Also for mentioning the potential pit falls.
LikeLike
So glad you enjoyed it! Thanks for reading 🙂
LikeLike