Bra Month | Community Blog | Bullet Bra with Cesca
A broken leg, lockdown and lecture strikes led to me putting my university course on hold; in a desperate need to fill my time (to prevent me driving my mum crazy) I returned to sewing. I’d outgrown my clothes again, my cup size growing “disproportionately” to RTW clothing. Once I had a few garments under my belt – and obsessed with period murder mysteries during third lockdown – I fell in love with vintage fashion, the sexy allure of foundational garments. I grew a burning desire to buy some, especially bullet bras (or as I prefer, torpedo titties). Sadly, my new bra size fell just outside of most vintage bra companies, and I could hardly afford a custom make.
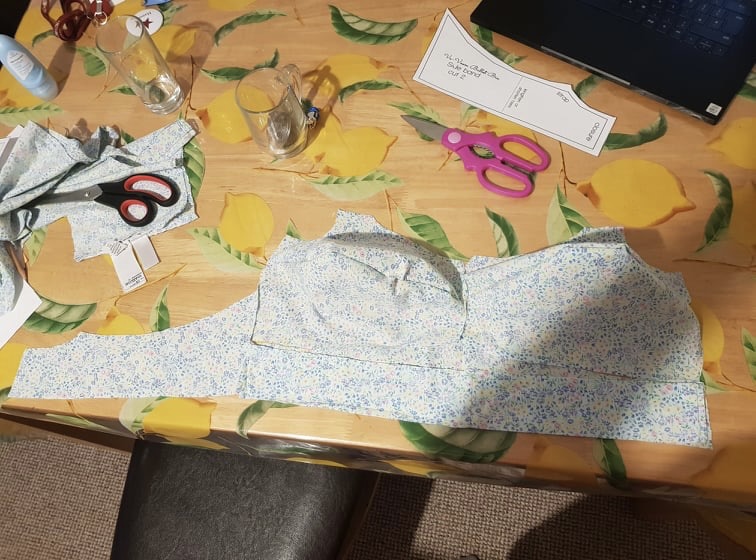
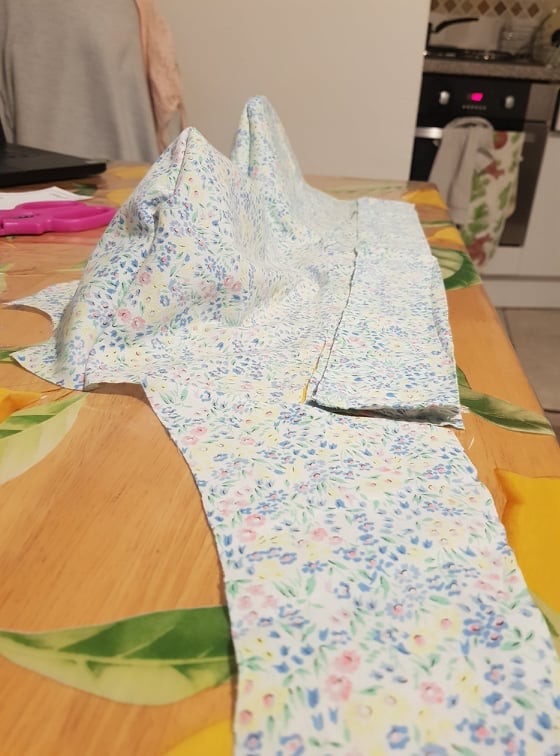
Filled with grandiose plans and optimism I scoured the internet for a cheap pattern. How hard could making a bra without wires be? Thankfully, I found a free pattern by VaVoomVintage, complete with an easy 4 day sew along. (Reader, it took me far longer due to exams and coursework.) Still on my few days off, I cut out the DD pattern, added an inch to the cups and retrieved my torn cotton pyjama trousers. I cut my pieces, basted the cups together in an attempt to check the fit (difficult because of my short roots and pendulous breasts). I forged ahead with sheer determination.
I do like a French seam (and I lack good pinking shears) so I used this in almost all seams, except when I forgot to leave enough seam or simply got confused and stitched right sides together anyway.

Spiral stitching. I procrastinated, scared of catching a finger; I watched VaVoomVintage’s video, and searched for other blogs by those who made her pattern. Luckily, as I raided my local library for sewing books, I found “Lingerie Design: A Complete Course.”
I took the plunge without marking my circles: a mistake. I recommend grabbing a compass or a circular object to mark concentric circles on the cups either separately before seaming together, or pressing down the fabric after stitching the seams, or – probably neatest – fill the cup and draw circles on the 3D shape. Then slowly stitch in separate circles/semi circles or a spiral, gently pulling the fabric away as you go. Contrasting threads and different patterns also would look wonderful as VaVoomVintage points out.

The rest of the sew along is straightforward, although before assembling everything think about the unfinished edges. I folded mine twice and stitched on the sewing machine for an untidy result. A trim added at the end might work better or a rolled hem foot.
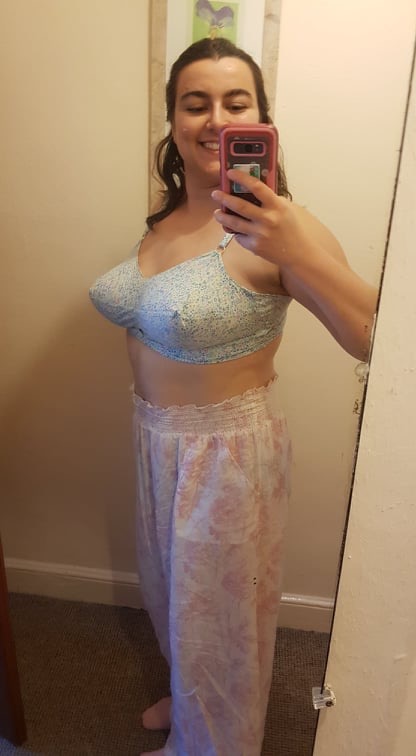
I ploughed on, making bra straps from the carefully unpicked and resewn ex-cuffs of my trousers, attaching by hand. The underband was 10cm too large on me, so I folded in the excess on each side before adding the hook and eyes by hand. For a final flourish I added buttons to the front from the original placket that I had saved.
The fit is difficult to tell without sewing the entire bra. I had to shorten my side bands again but could not lengthen the height, so I added in an extra piece between the armhole and the bra strap for more support. The band is still too big! Next time I would squash the side band and lengthen the height so that it keeps everything in when attached to the cups. Elastic straps are probably far more comfortable. The cups fit well, although I wish I had marked my circles particularly the bust apex, where the centre of the circles should be.

This pattern was easy enough to make though and a very fun foray into lingerie sewing without faffing over underwires (the enemy of my sticky-outy rib cage). I also liked how simple it was although the instructions were a little sparse. I have made up my own instructions which can be found and saved from my Instagram @lemonysews

I’m a mathematician who likes to sew vintage garments. I’m interested in the history of fashion, especially Wartime Britain, and the topology & geometry of garments. See all of Cesca’s makes on insta @lemonysews


