
Beginners’ Sewing Series Part 5 | Lago/Saybrook Tank Part B: Grading, Cheater Bust Adjustment + Cutting
Brand new to sewing? Start here. The Sew Busty Beginners’ Sewing Series will be your step-by-step guide to learning garment sewing. Each installment will build upon the last, getting progressively more advanced in skills and techniques. Catch up with the whole series here.
As part of the Beginners’ Sewing Series, we’re starting with a sew along of the Itch to Stitch Lago Tank and the Cashmerette Saybrook tank. Check out the full sew along here.
Over the past week, you should have:
- Chosen your size based on last week’s post
- Downloaded, printed, and taped together your pattern. (Haven’t done this yet? If you’re going with the Saybrook tank, make sure to use our coupon code: SEWBUSTY20 for 20% off.)
- Gathered your tools, including fabric, thread, needles, a sewing machine, and tissue paper
This week, we’re going to work on making room in the pattern for the boobies, talking about the anatomy of fabric and patterns, and cutting out your fabric.
Quick note: Throughout this post, I’m using a pink pen to make my adjustments. I’m doing this so you can clearly see where I’m marking. Please, for the love of all things good, use pencil.
Before You Start
Before you get started today, go ahead and wash your fabric. You’ll want to wash and dry it as you normally would for clothing. This will keep it from shrinking once it’s in tank form! Throw it in the washer now so it’s ready for ya when we’re done getting our patterns prepped!
Now, the “cheater” FBA that we’re going to use is appropriate for up to about a 5-6″ high bust to full bust difference. If your full bust measures more than 5-6″ larger than your high/upper bust, I’d encourage you to try following this tutorial over at Cashmerette to complete a full bust adjustment. It’s a little tougher than what we’re doing, but will result in a more accurate fit for a larger bust.
Cheater Full Bust Adjustment & Grading
Remember how I had you print two sizes last week – the size that matched your upper bust measurement, and one size bigger? Well, here’s where those two sizes come in.
Before you cut out your pattern pieces, we need to do some grading and create our “cheater” full bust adjustment, otherwise known as a boob bubble. If you have chosen the Saybrook tank, congratulations! You can skip this part of the sew-along, since the Saybrook already includes cup options. Just choose your cup size according to Cashmerette’s calculator and meet us at the section on grading the Saybrook, below.
Lago boob bubble fba step 1:
Starting on the front of the pattern, identify the armpit point of the smaller size – the size that matches your pre-FBA bust measure (upper bust + 2″, as discussed last week). On mine, I’m marking the point where the strap meets the bust at the armpit on the size 6.
Then, identify the largest part of the bust on the larger size. Here, you can see that I made a pink line on the largest part of the bust on the size 8.
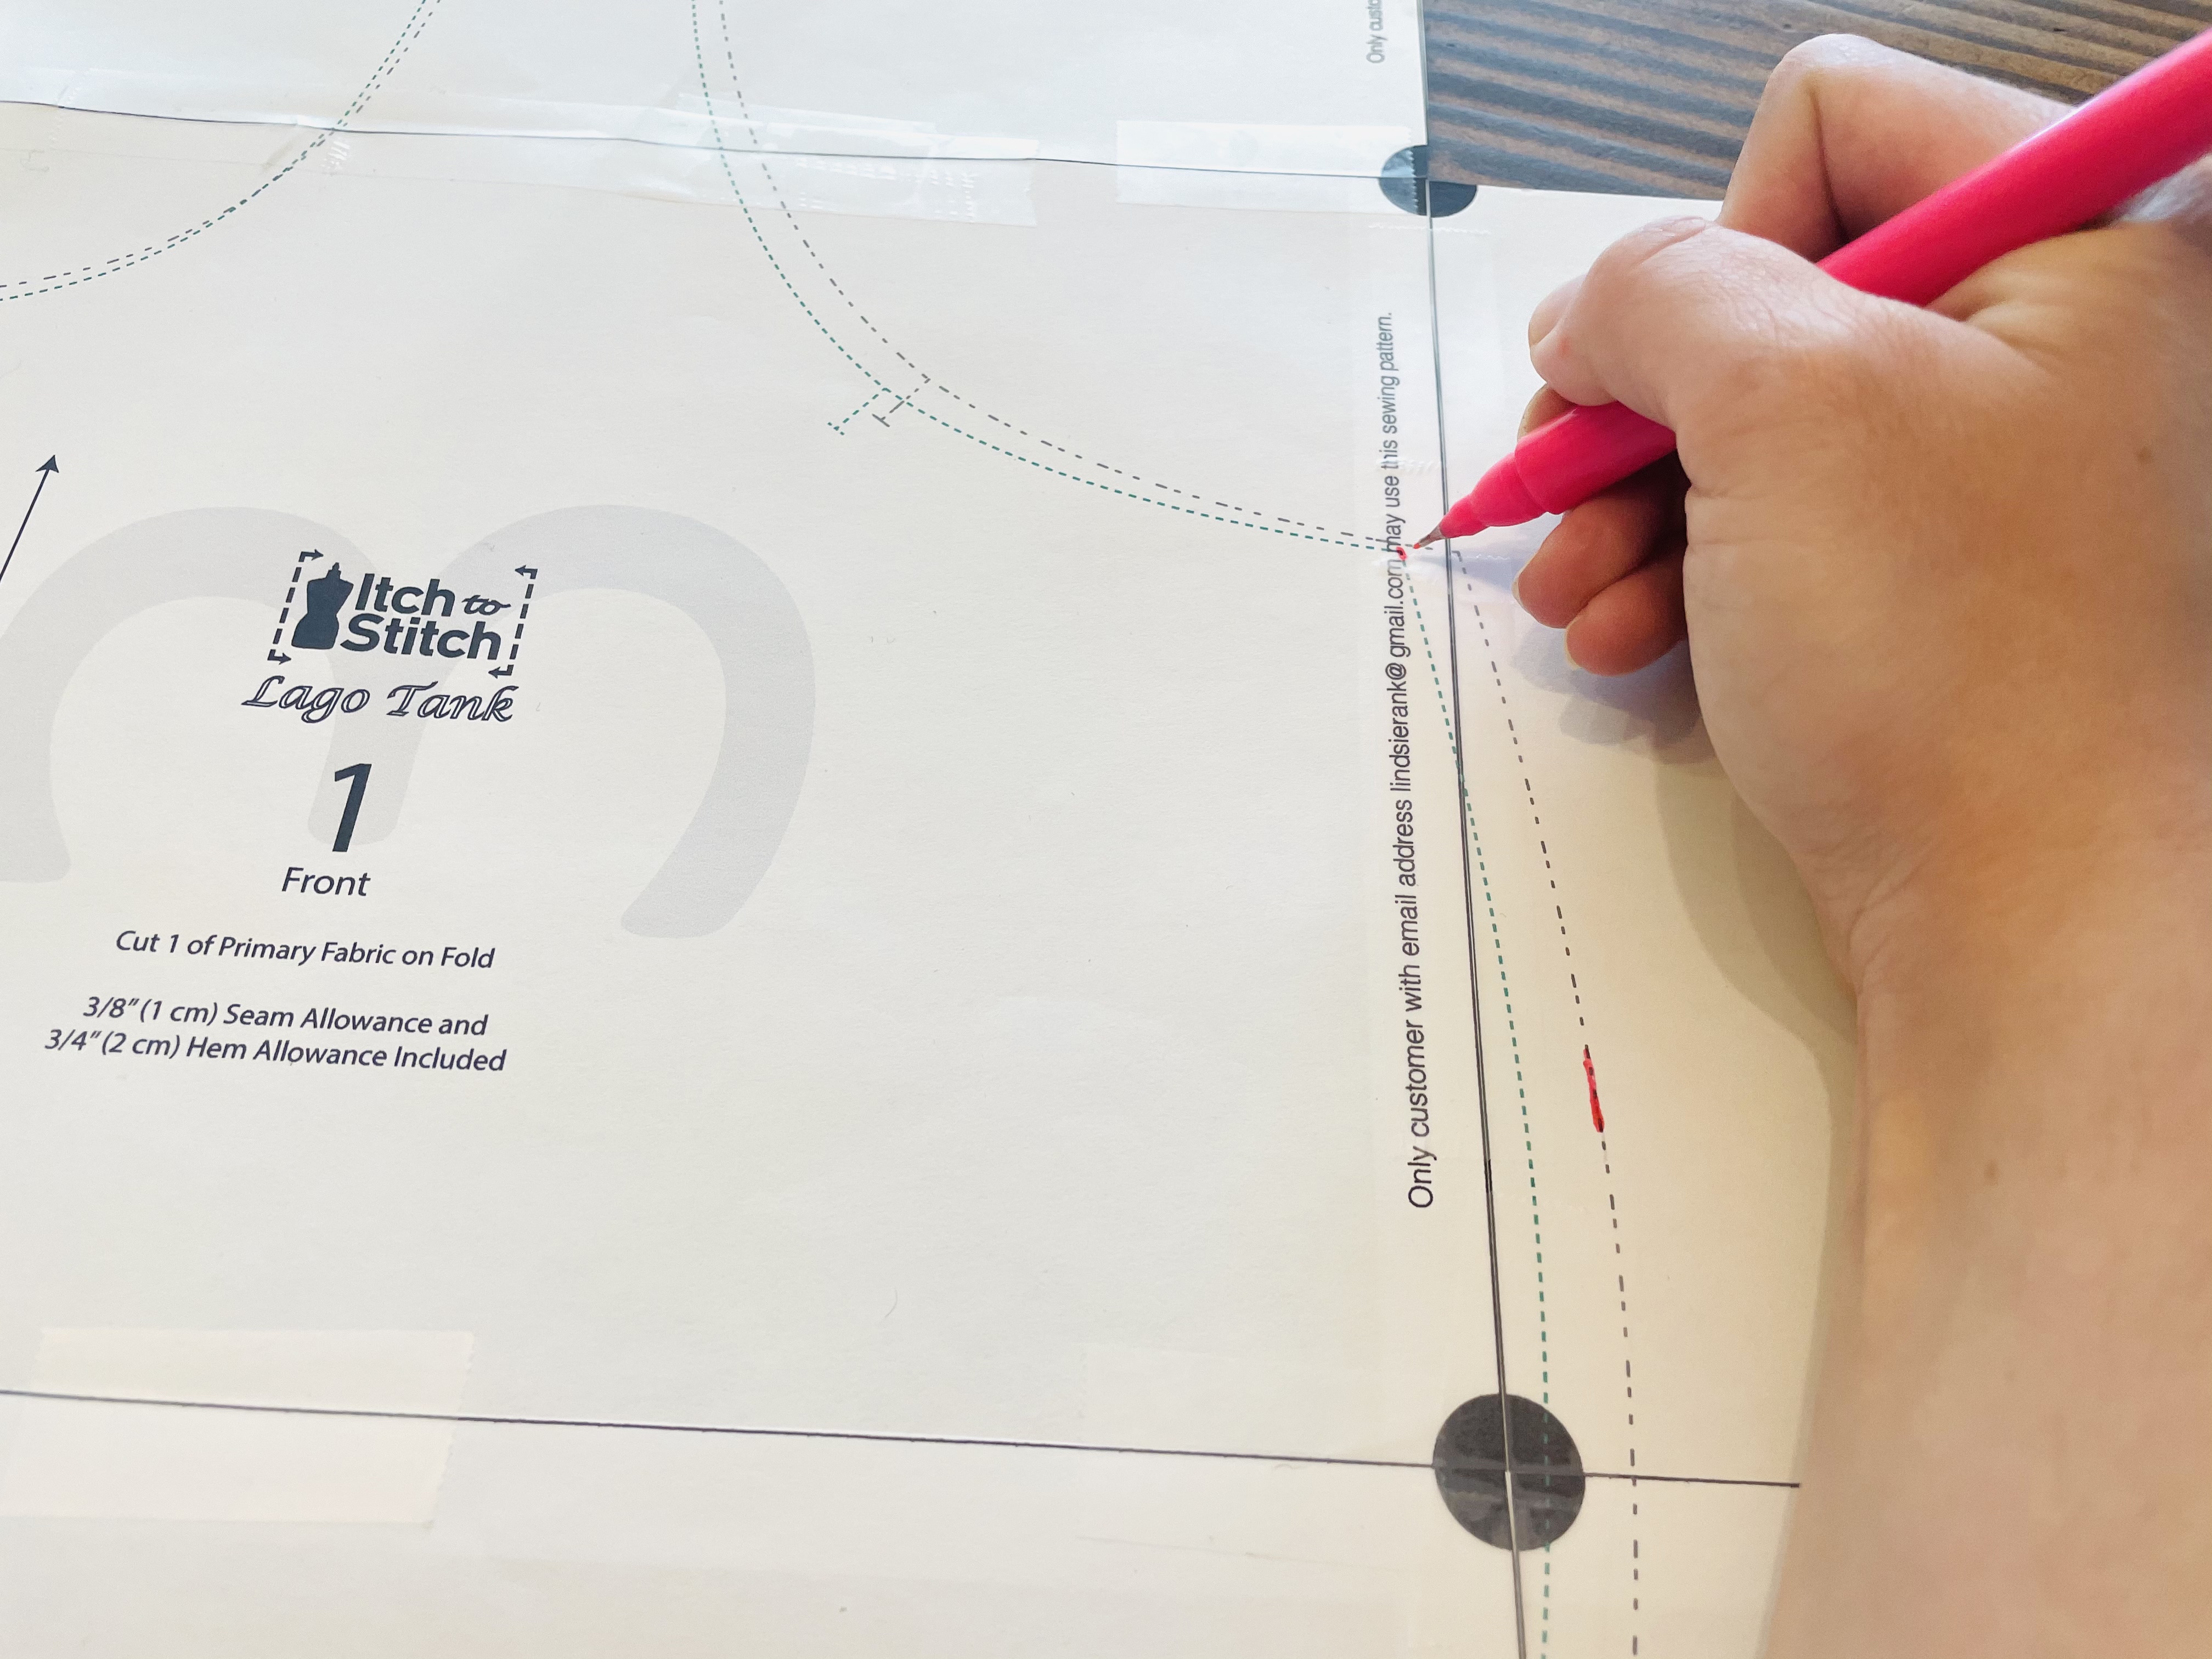
Lago boob bubble fba step 2:
Then, identify the top of the waist. This is not the smallest part of the waist, but a bit above the smallest part – where it starts really coming inward.
Remember, I went ahead with the size 6 – the same as my pre-FBA bust measure – for the waist, even though my waist measurement actually corresponds with a size 2-4. This is because I will have a more relaxed fit, as I discussed in last week’s post.
If you have a waist measurement that is the same as or smaller than the waist measurement on the size that corresponds with your upper bust measurement, I recommend you also stick with the size that corresponds with your pre-FBA bust measure for this first project.
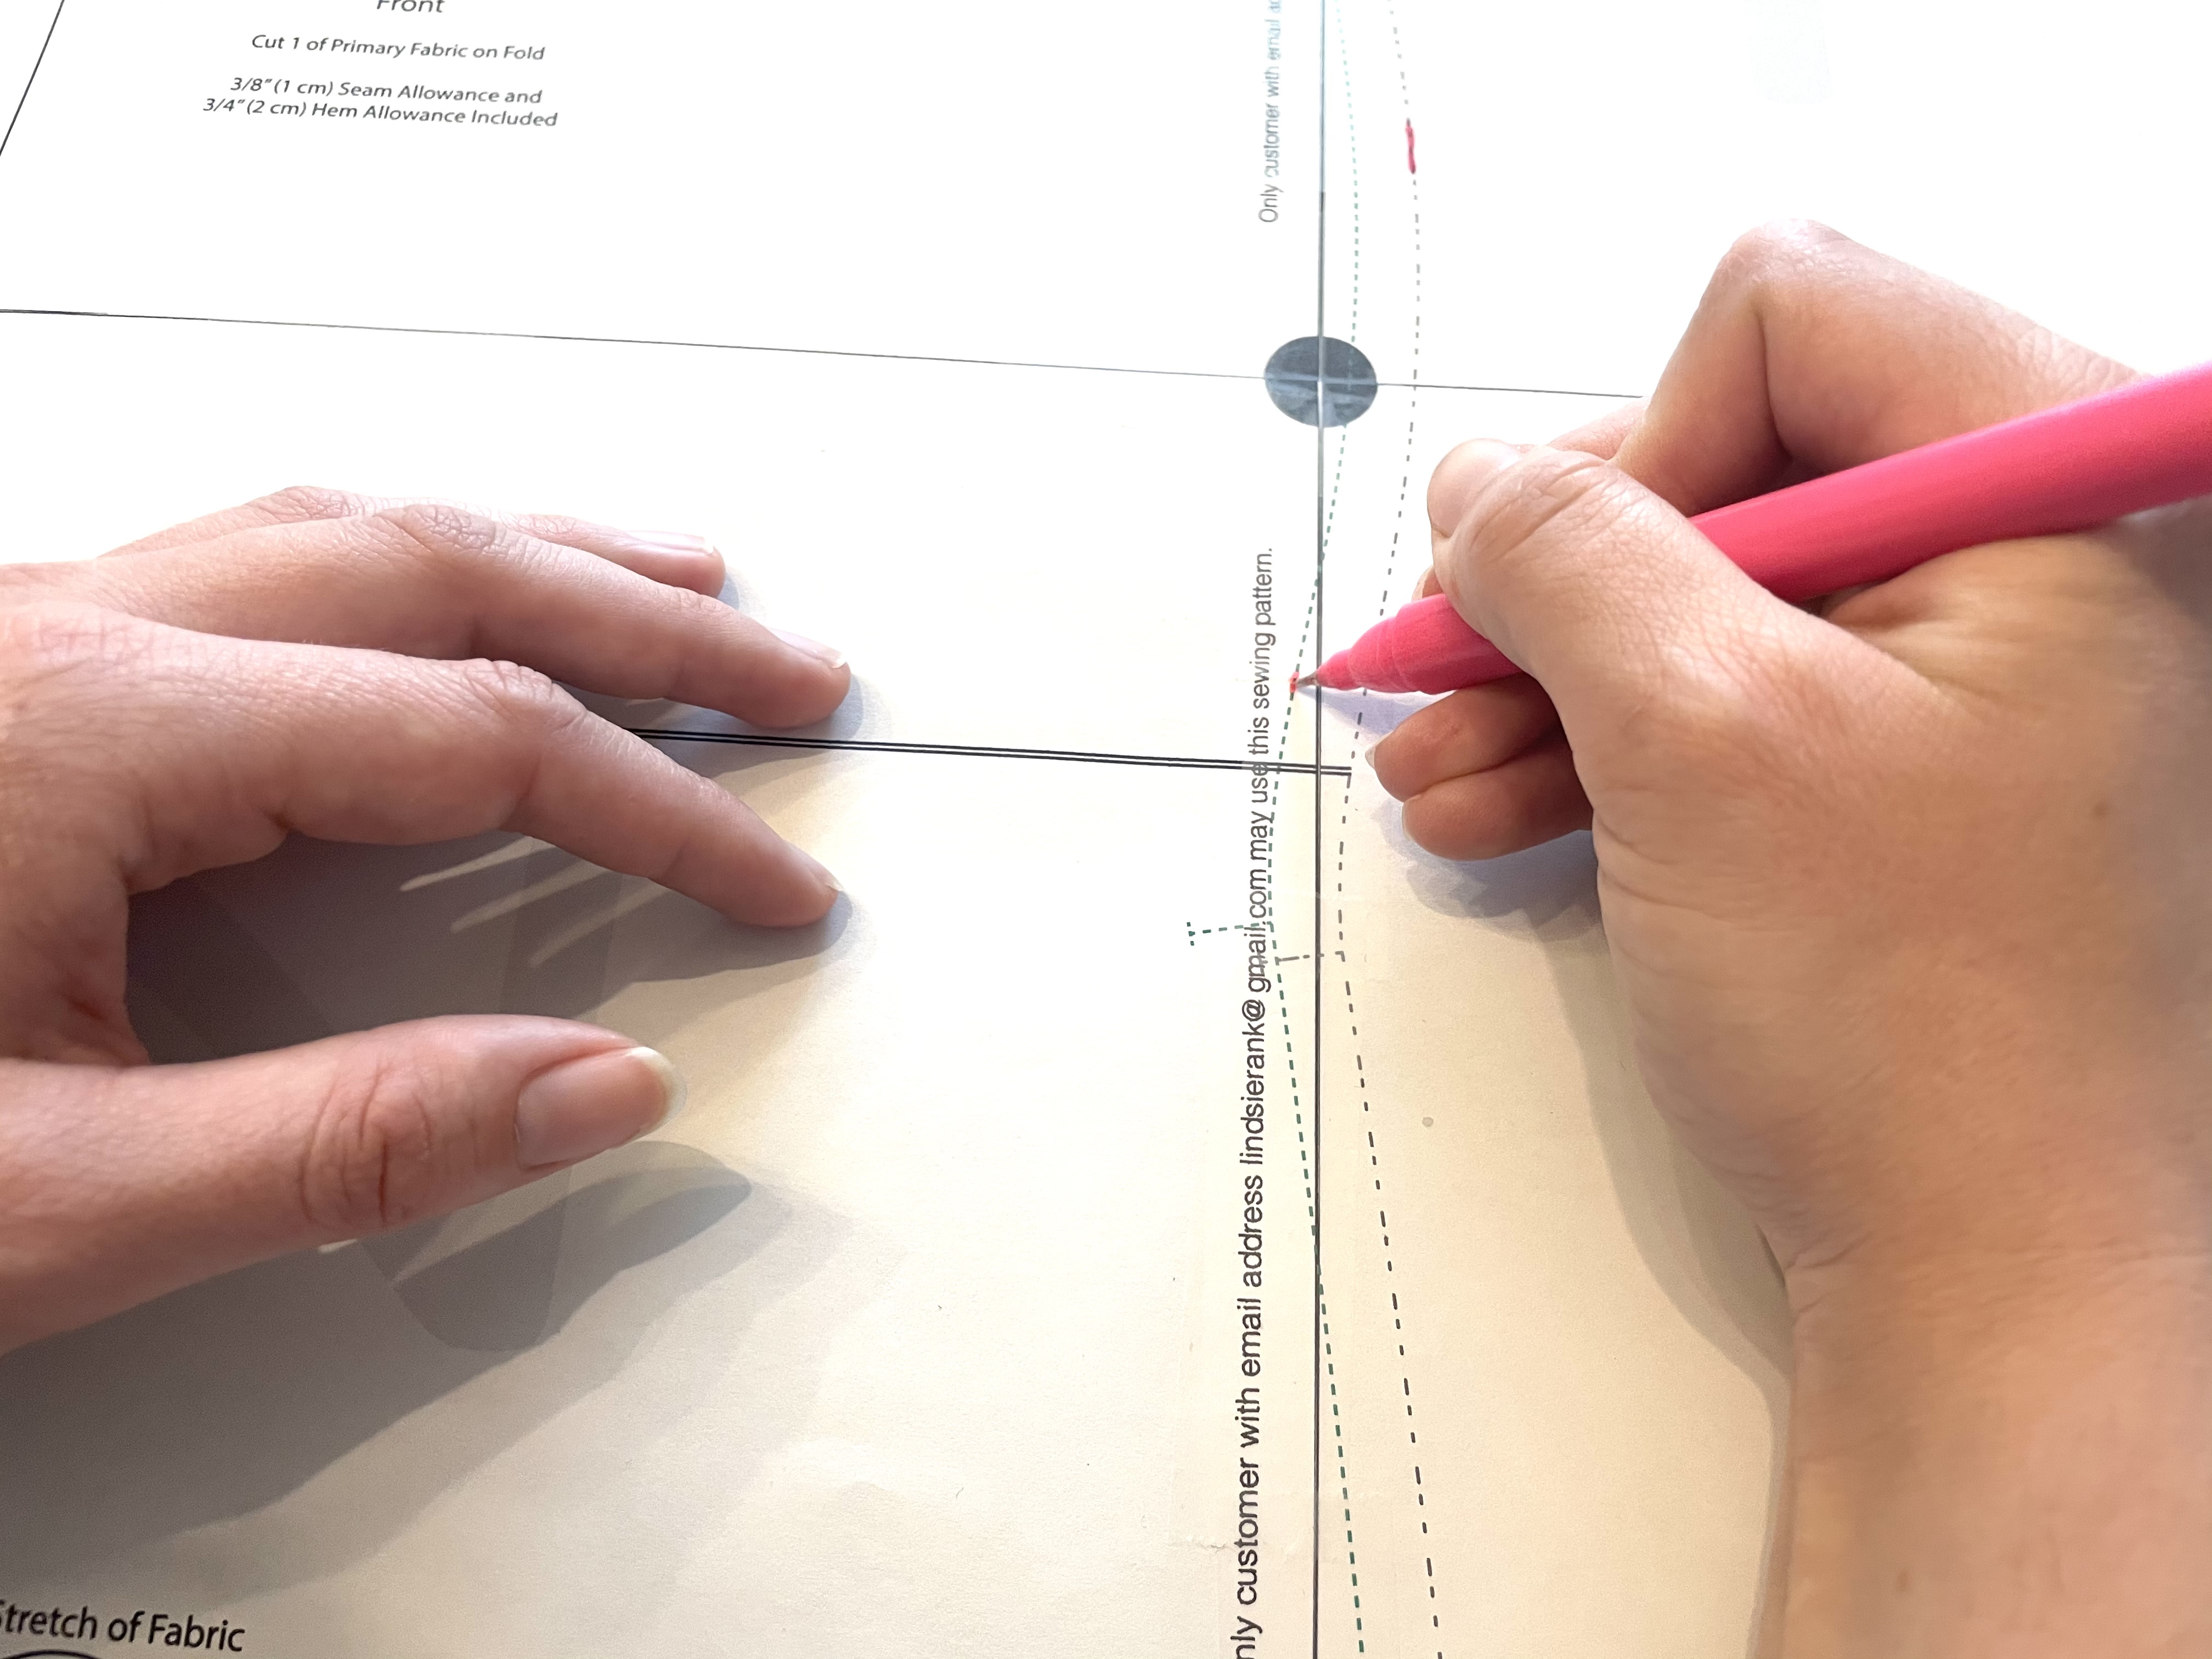
Now, if your waist is larger than the waist measurement of the size that corresponds with your upper bust size, you will need to do one of two things:
- If your waist corresponds with the waist measurement of the size larger than your upper bust size, then identify the top of the waist on that size.
- If your waist is larger than the waist measurement of the size larger than your upper bust, you’ll need to identify the top of the waist on the size that corresponds with your waist measurement. In this case, you’ll have printed three sizes: the size that corresponds with your upper bust + 2 (your pre-FBA bust measure), and the size that corresponds with your waist. At this point, identify the waist point on the size that corresponds with your waist measure, as shown in the video, below.
Lago boob bubble fba step 3:
Now, create a curved line between the three points you have identified, as shown in this video. If you have a French curve, that will make things easier. But, if not, just wing it and make the most smooth curve you can (using pencil!!!):
Lago boob bubble fba step 4:
Yay! You’ve done the front! Now we need to match the back. If you have a smaller bust (say a 3-4″ full bust to high bust difference), you likely do not need to complete this step. But for those with a 5-6″ full bust to high bust difference, we need a bit more room.
On the back pattern piece, identify the armpit point on the size that corresponds with your pre-FBA bust measure, the full bust point that corresponds with the one size larger, and the top of the waist that corresponds with the size you’ve chosen for your waist.
When identifying your top of waist point, make sure this is about the same distance from the little dotted line (we call this a notch … more on this later) as your top of waist point was on your front pattern piece, as seen in the below picture.
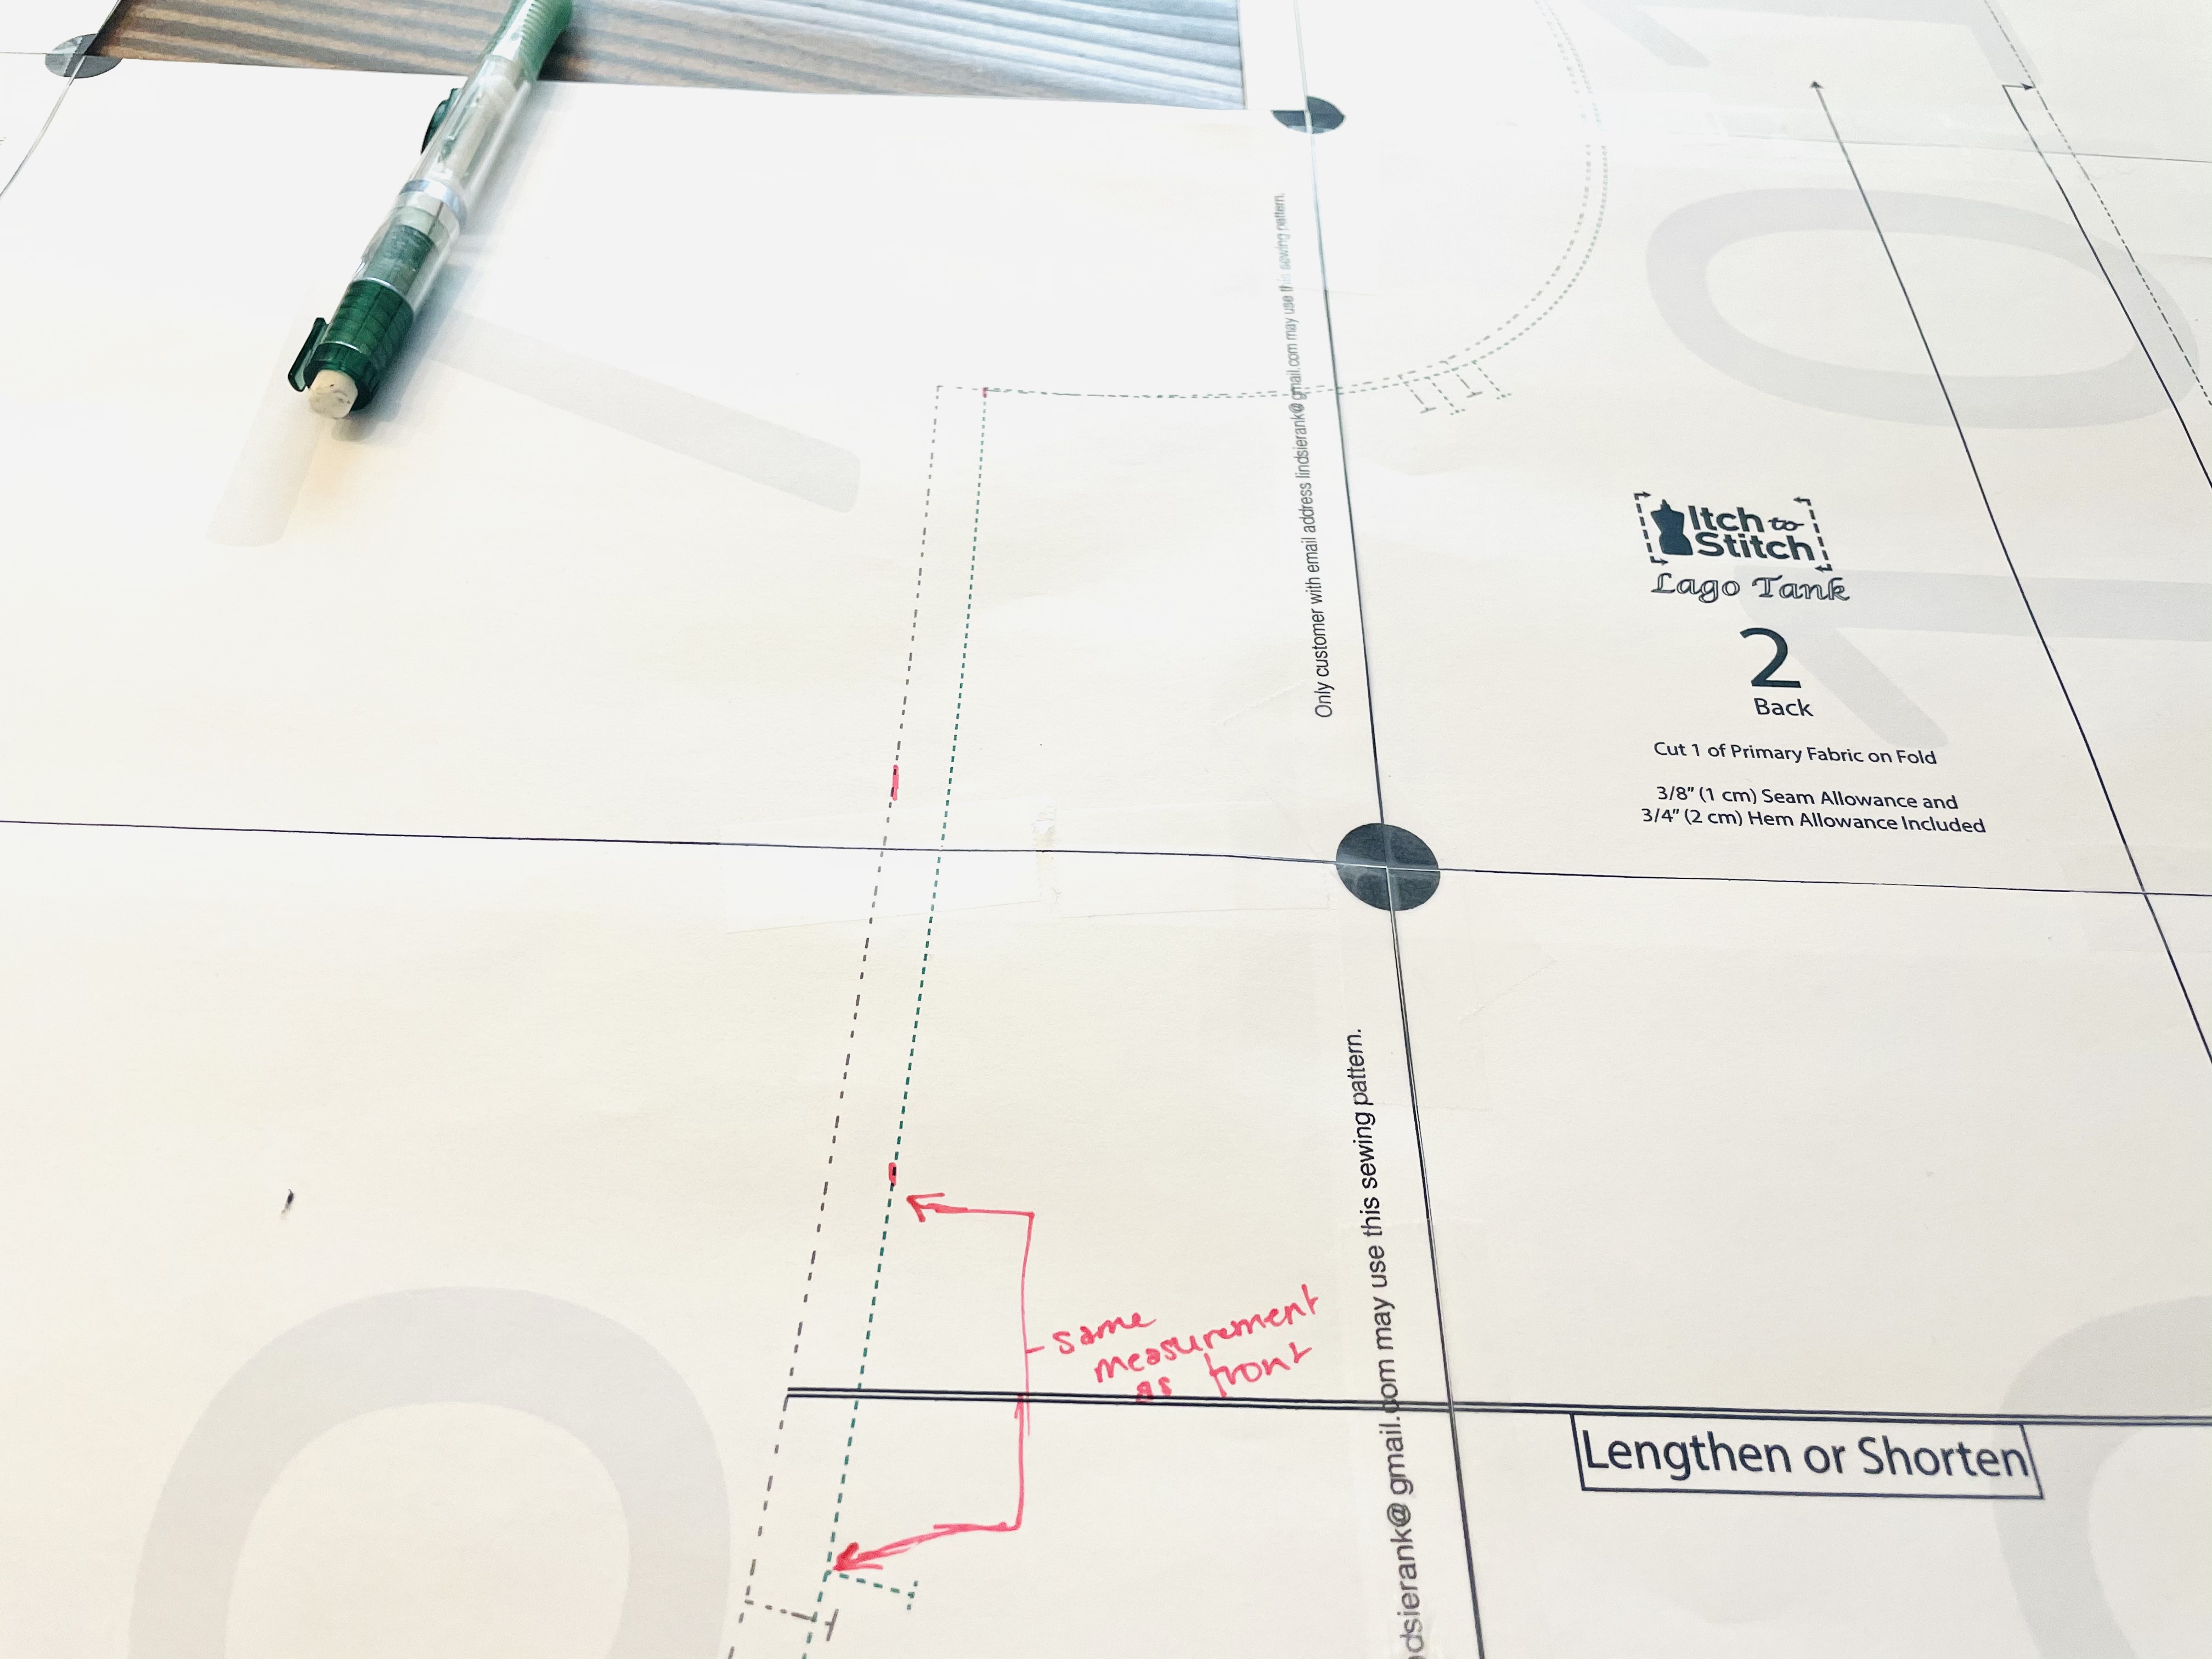
Just as you did on the front piece, draw a smooth curve between these three points.
Congratulations! You’ve completed the cheater FBA boob bubble. Feels good, yeah?
grading on the saybrook and lago:
If you find yourself needing to grade between sizes on the Saybrook tank, check out the above video for a quick and dirty on how to grade between the full bust and a larger waist. Whatever size you use for the waist, continue that size all the way down to the hem. For example, if I had stayed with the size 8 for the waist, I would continue the size 8 all the way down, not grading back in at all.
For more information on grading for a dartless top, Cashmerette has a great tutorial with a lot of detail here.
Cutting Out the Pattern Pieces
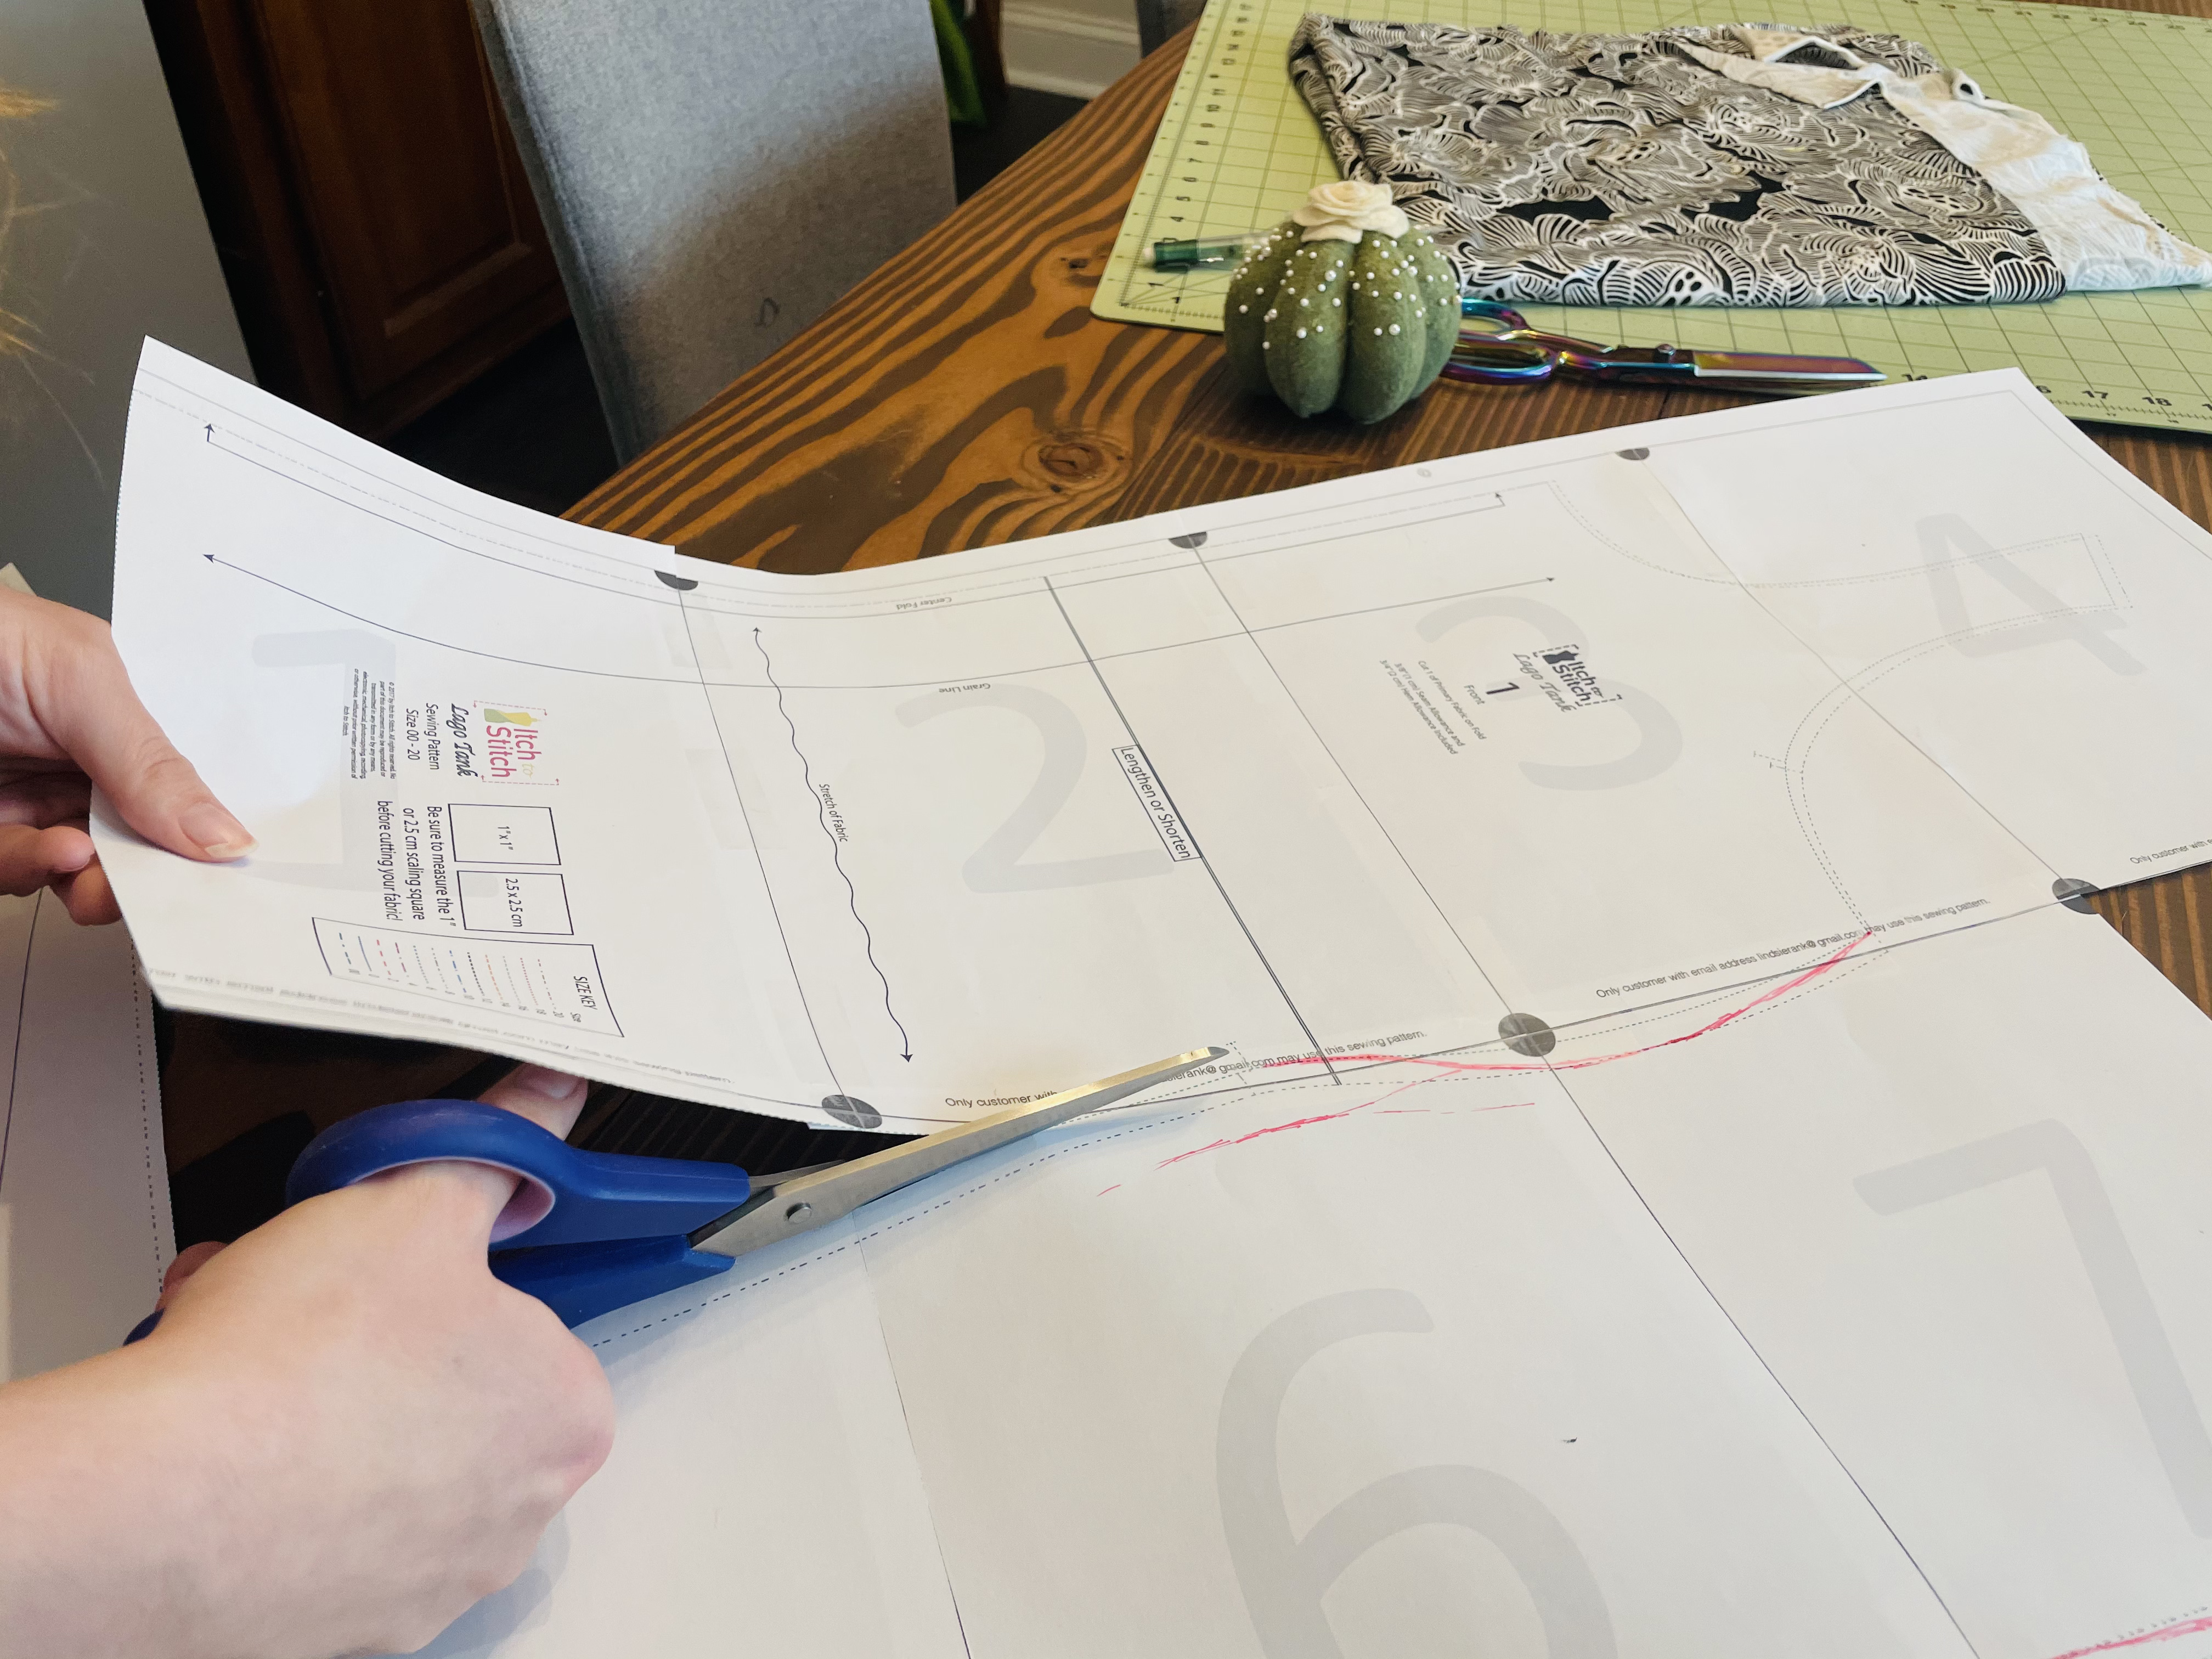
Once you have done the necessary boob bubble and FBA, cut out your pattern pieces using paper scissors. Do not use your fabric scissors for this. Fabric scissors should be for fabric, my friend.
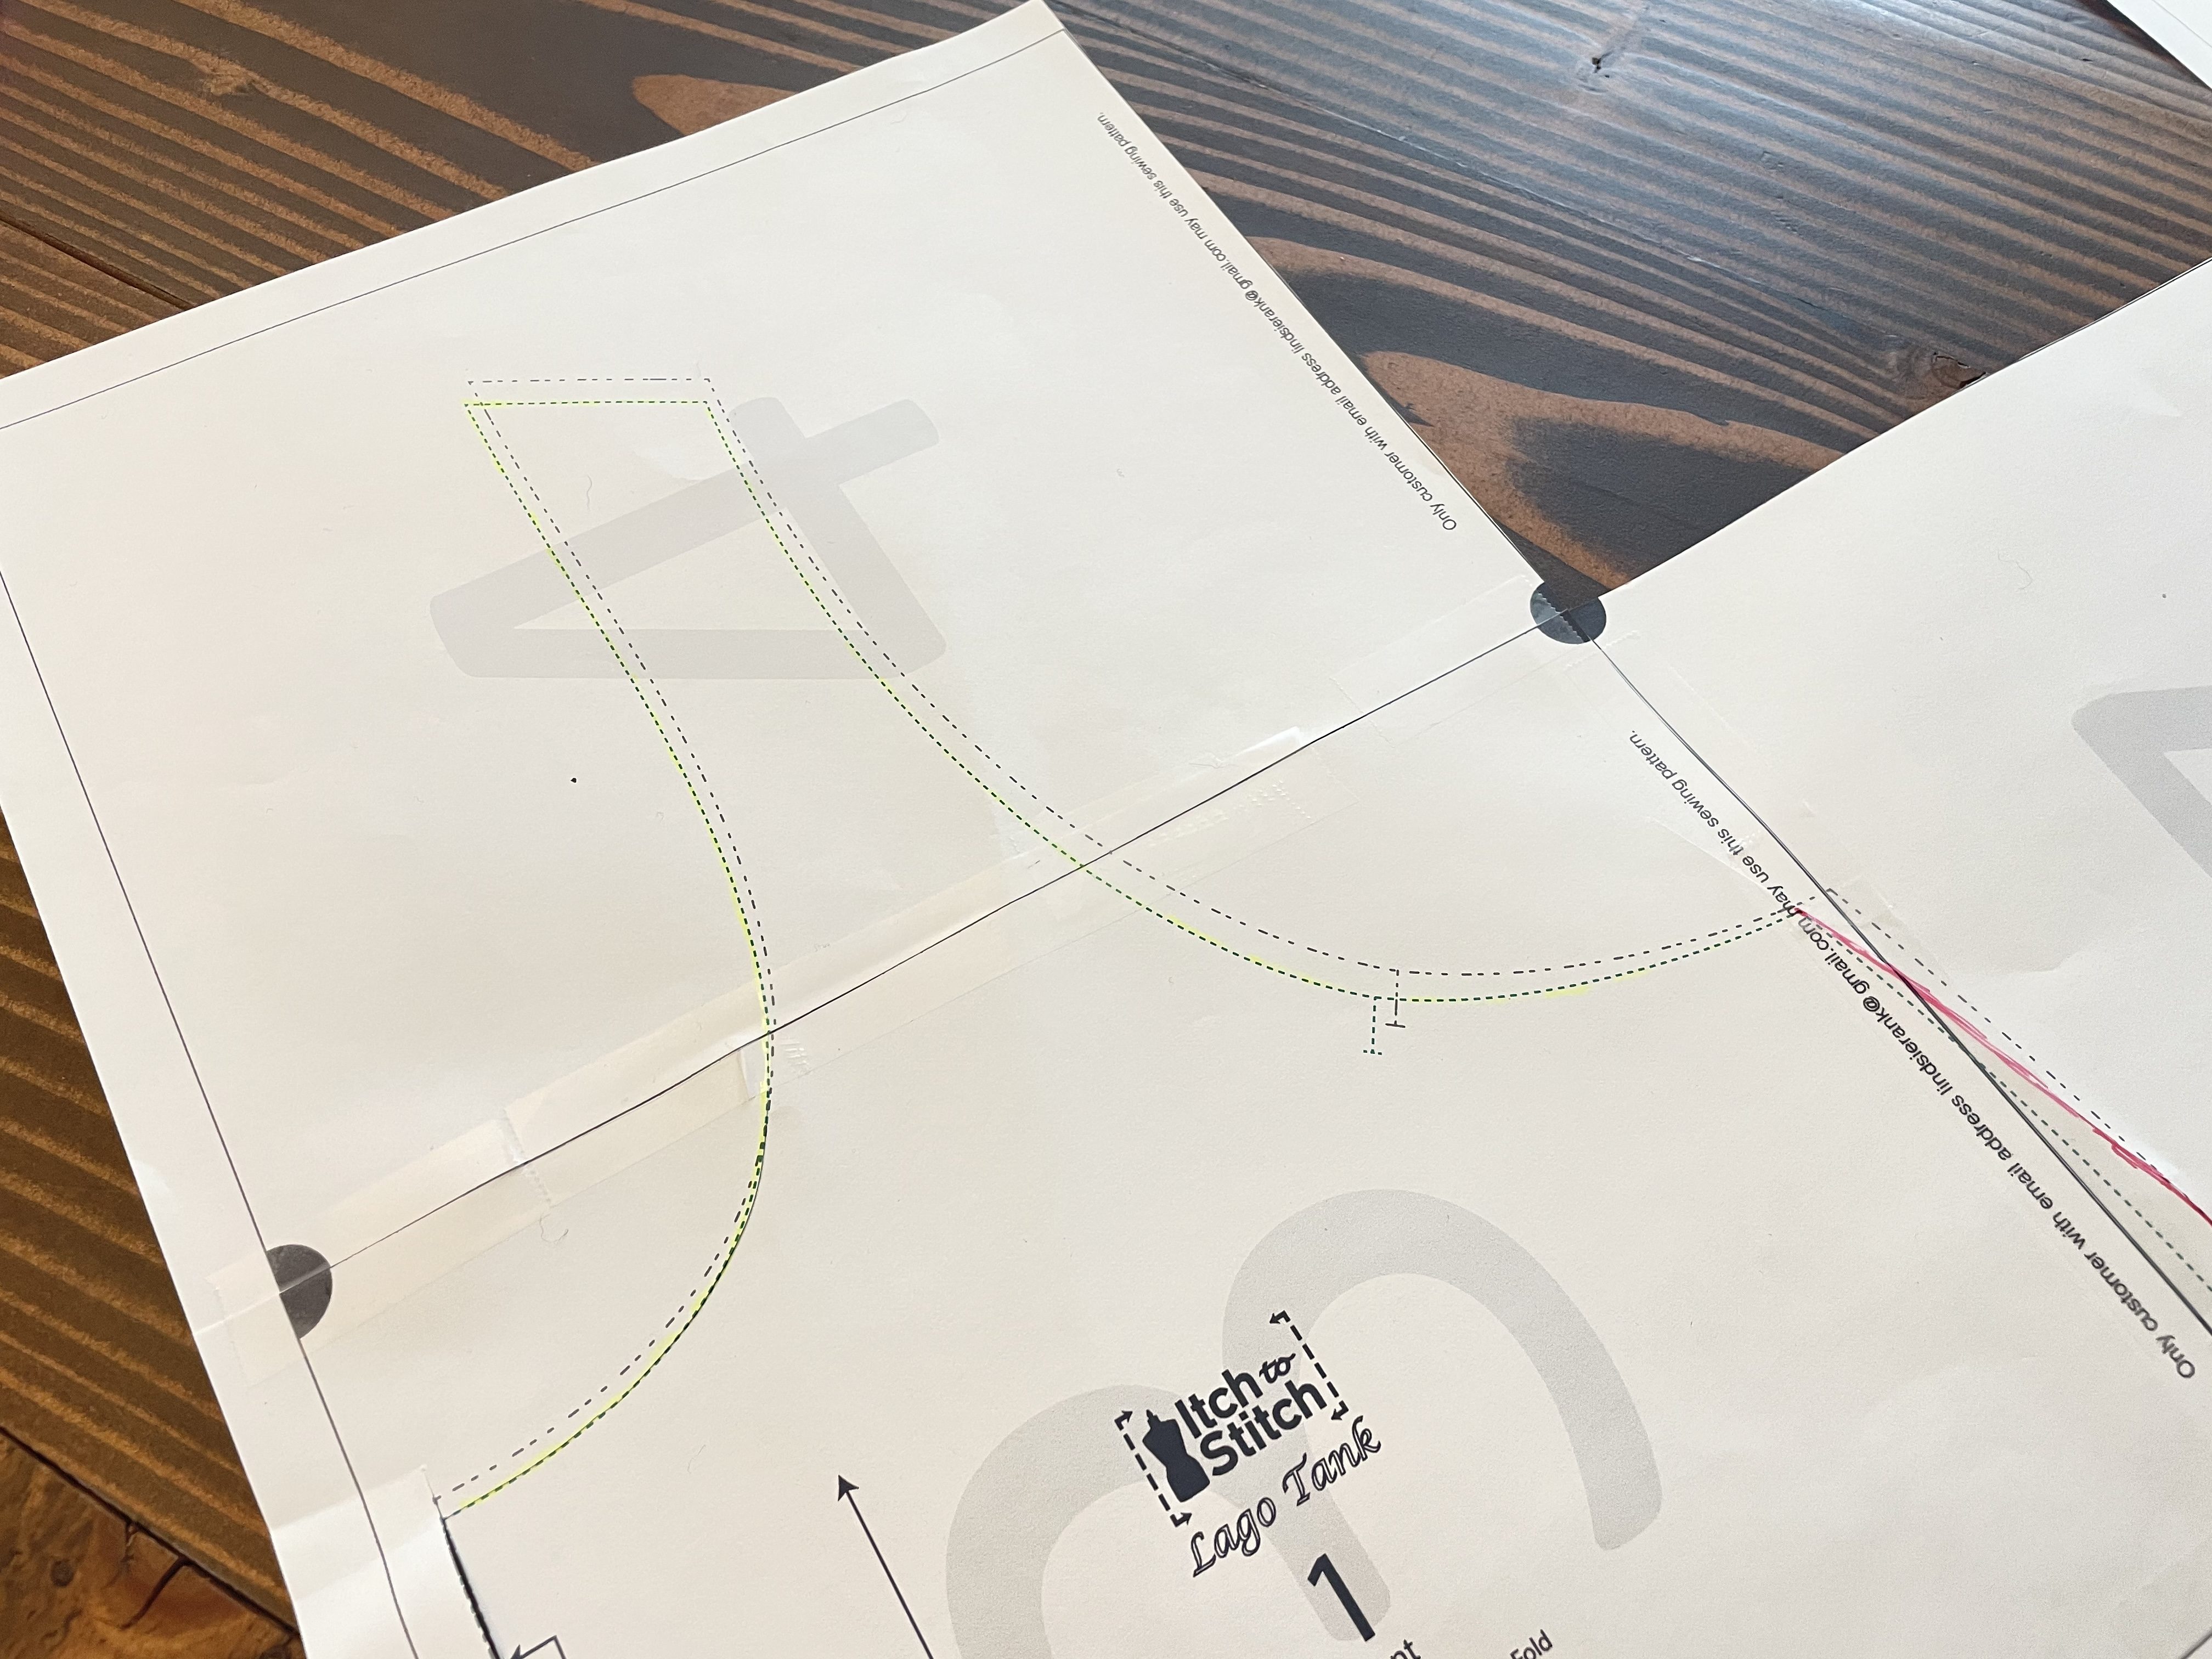
For this, you will be cutting the smaller size – the one that corresponds with your pre-FBA bust measure – except wherever you have marked during your grading or boob bubble process. In those places, cut where you’ve drawn your curves.
For tricky parts where the sizes cross over each other, like at the straps, I like to trace the size I plan to cut using a highlighter to prevent myself from getting off track:
Alright, get cutting your paper pattern!
Let’s Talk About Fabric.
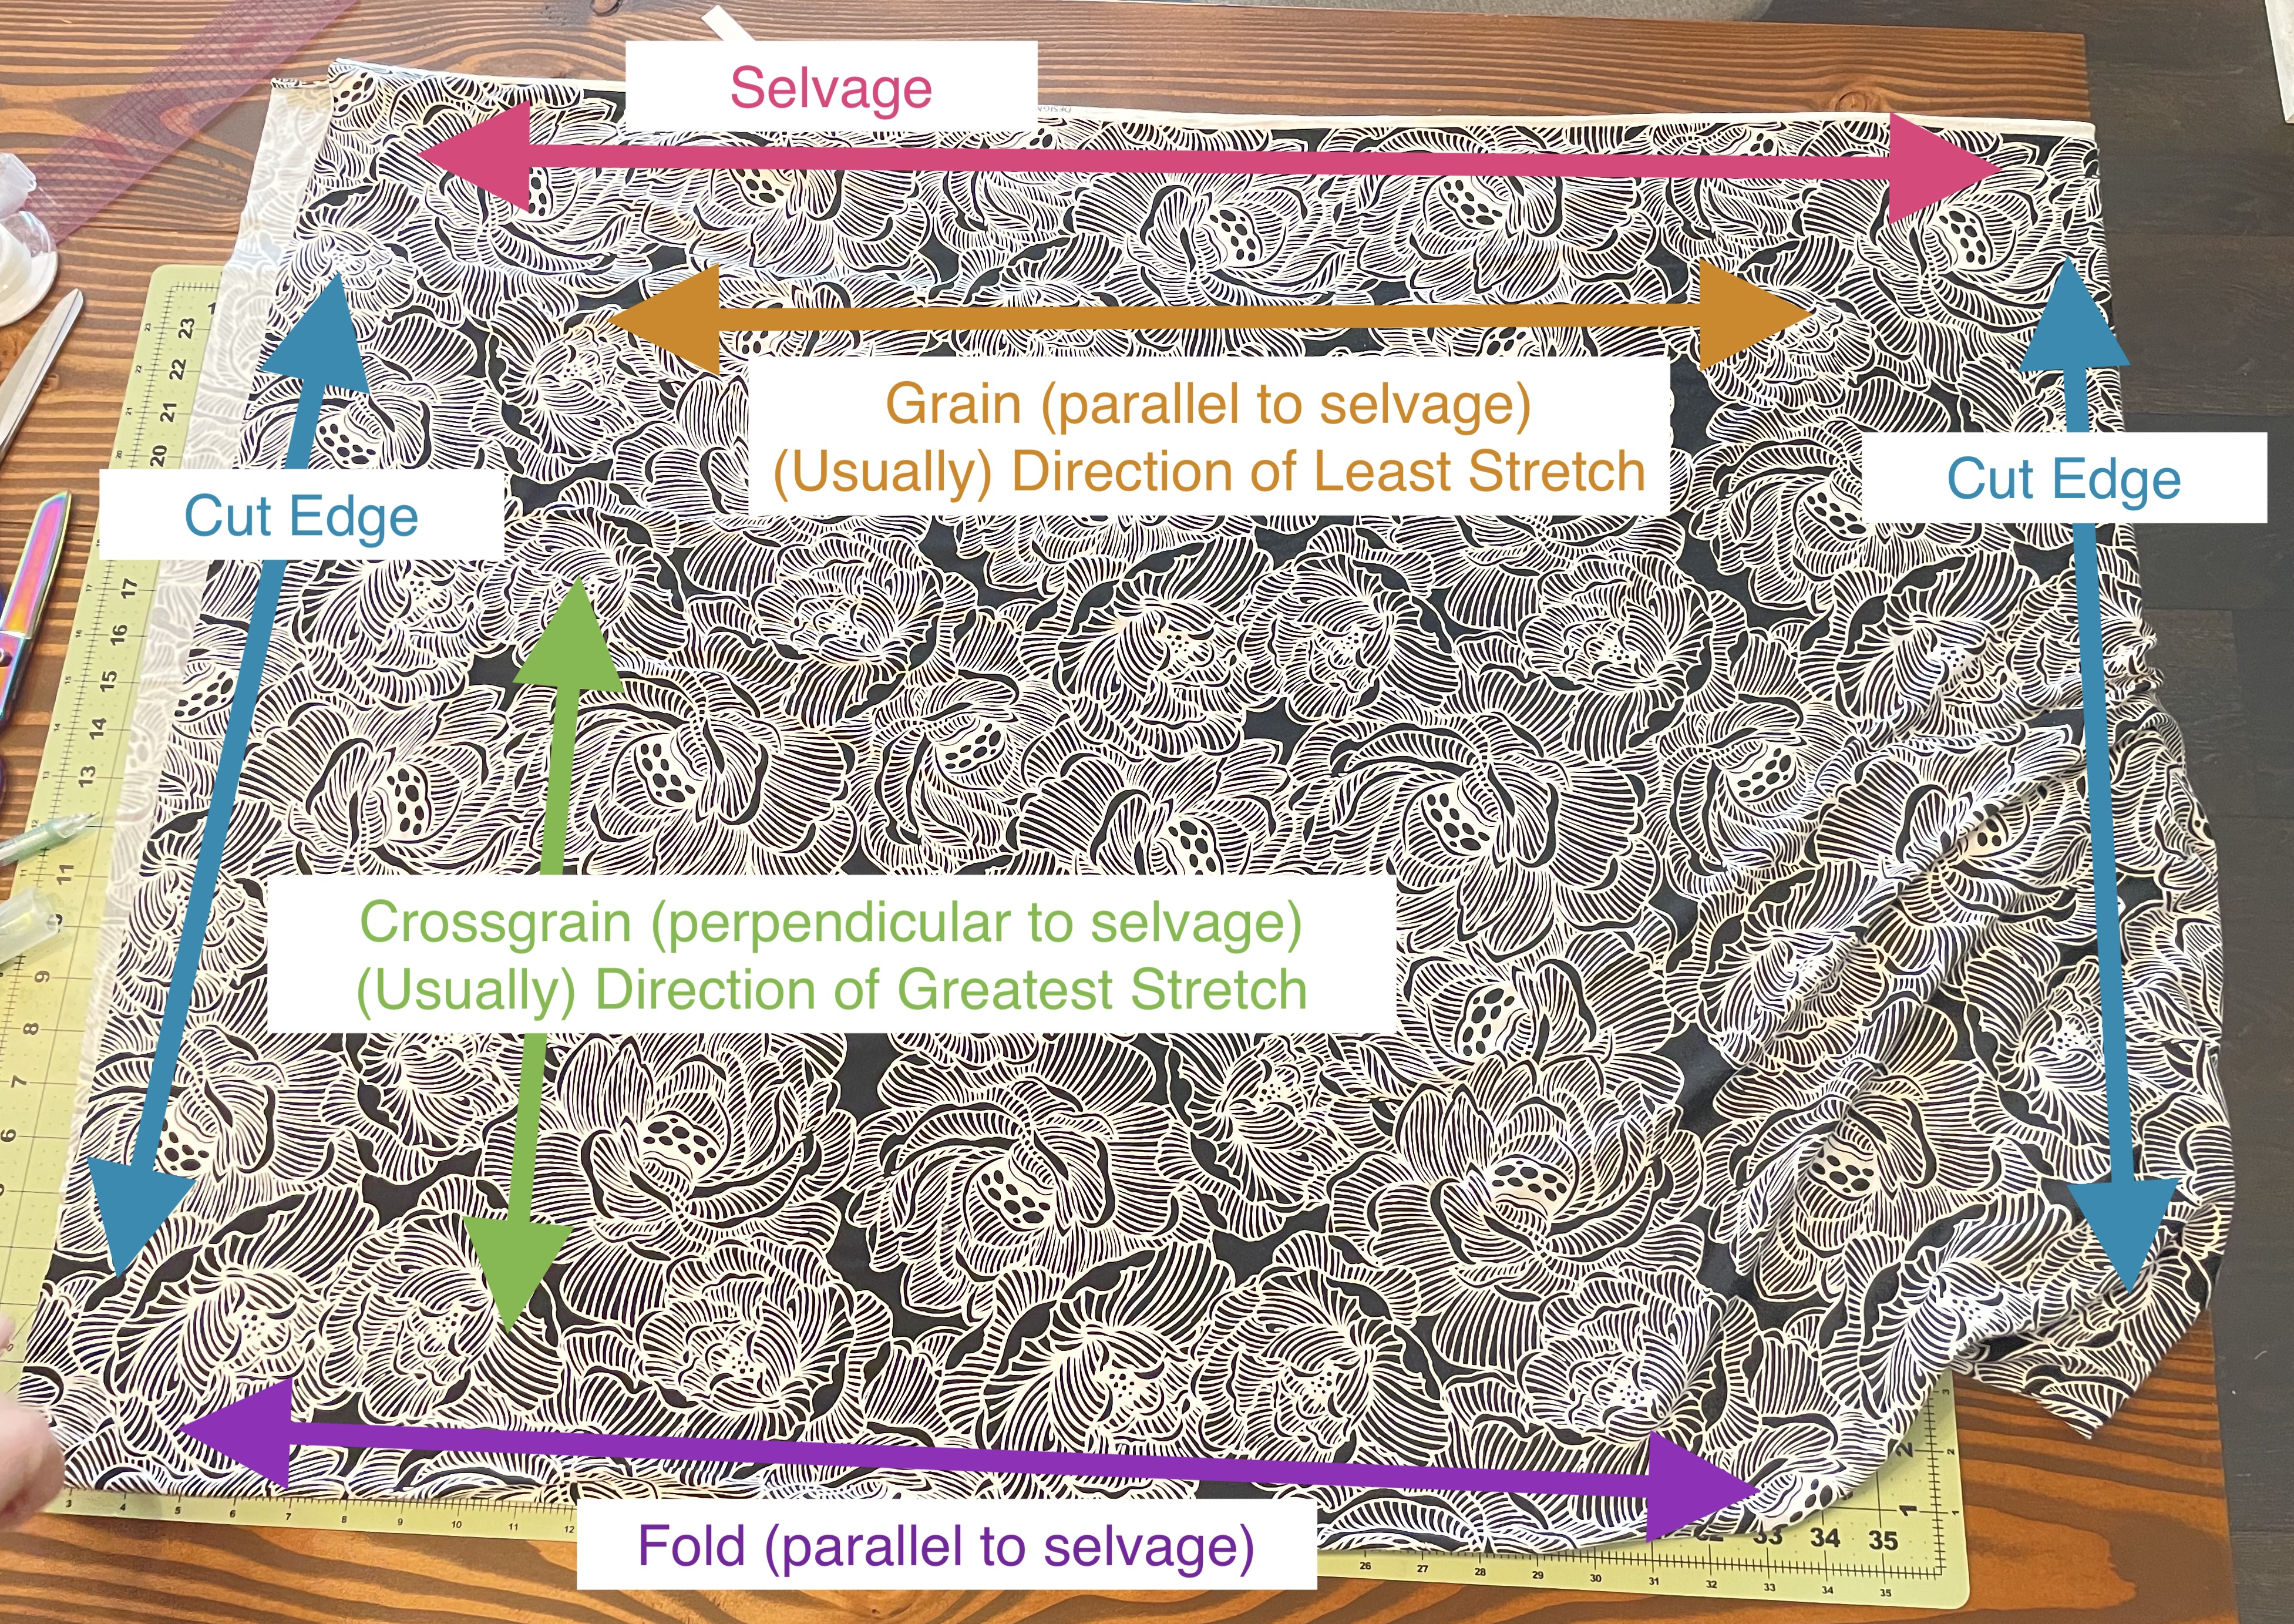
Before we cut into our fabric, let’s talk about the fabric itself. In this video, I talk you through the anatomy of the fabric. (My fabric is a lyocell spandex. Ignore my brain fart, please.)
Here’s a diagram to review:
Now, We Should Talk Patterns
In this video, I talk you through the pattern symbols. This blog gives a great run down of different pattern symbols, if you need a static visual.
Okay, Now We Talk About Cutting Fabric
Why did I talk you through the anatomy of fabric and the anatomy of a pattern before jumping into cutting?! Well, because these things are important for deciding how to cut your pattern. Let’s grab your cutting mat (no, really, grab your mat; if you don’t have a mat, choose a surface you don’t mind getting scratched) and get cutting!
Laying out your pattern
You see, you can’t just lay your pattern any which way on the fabric and cut it out. No, that won’t do. Because stretch and grainlines matter.
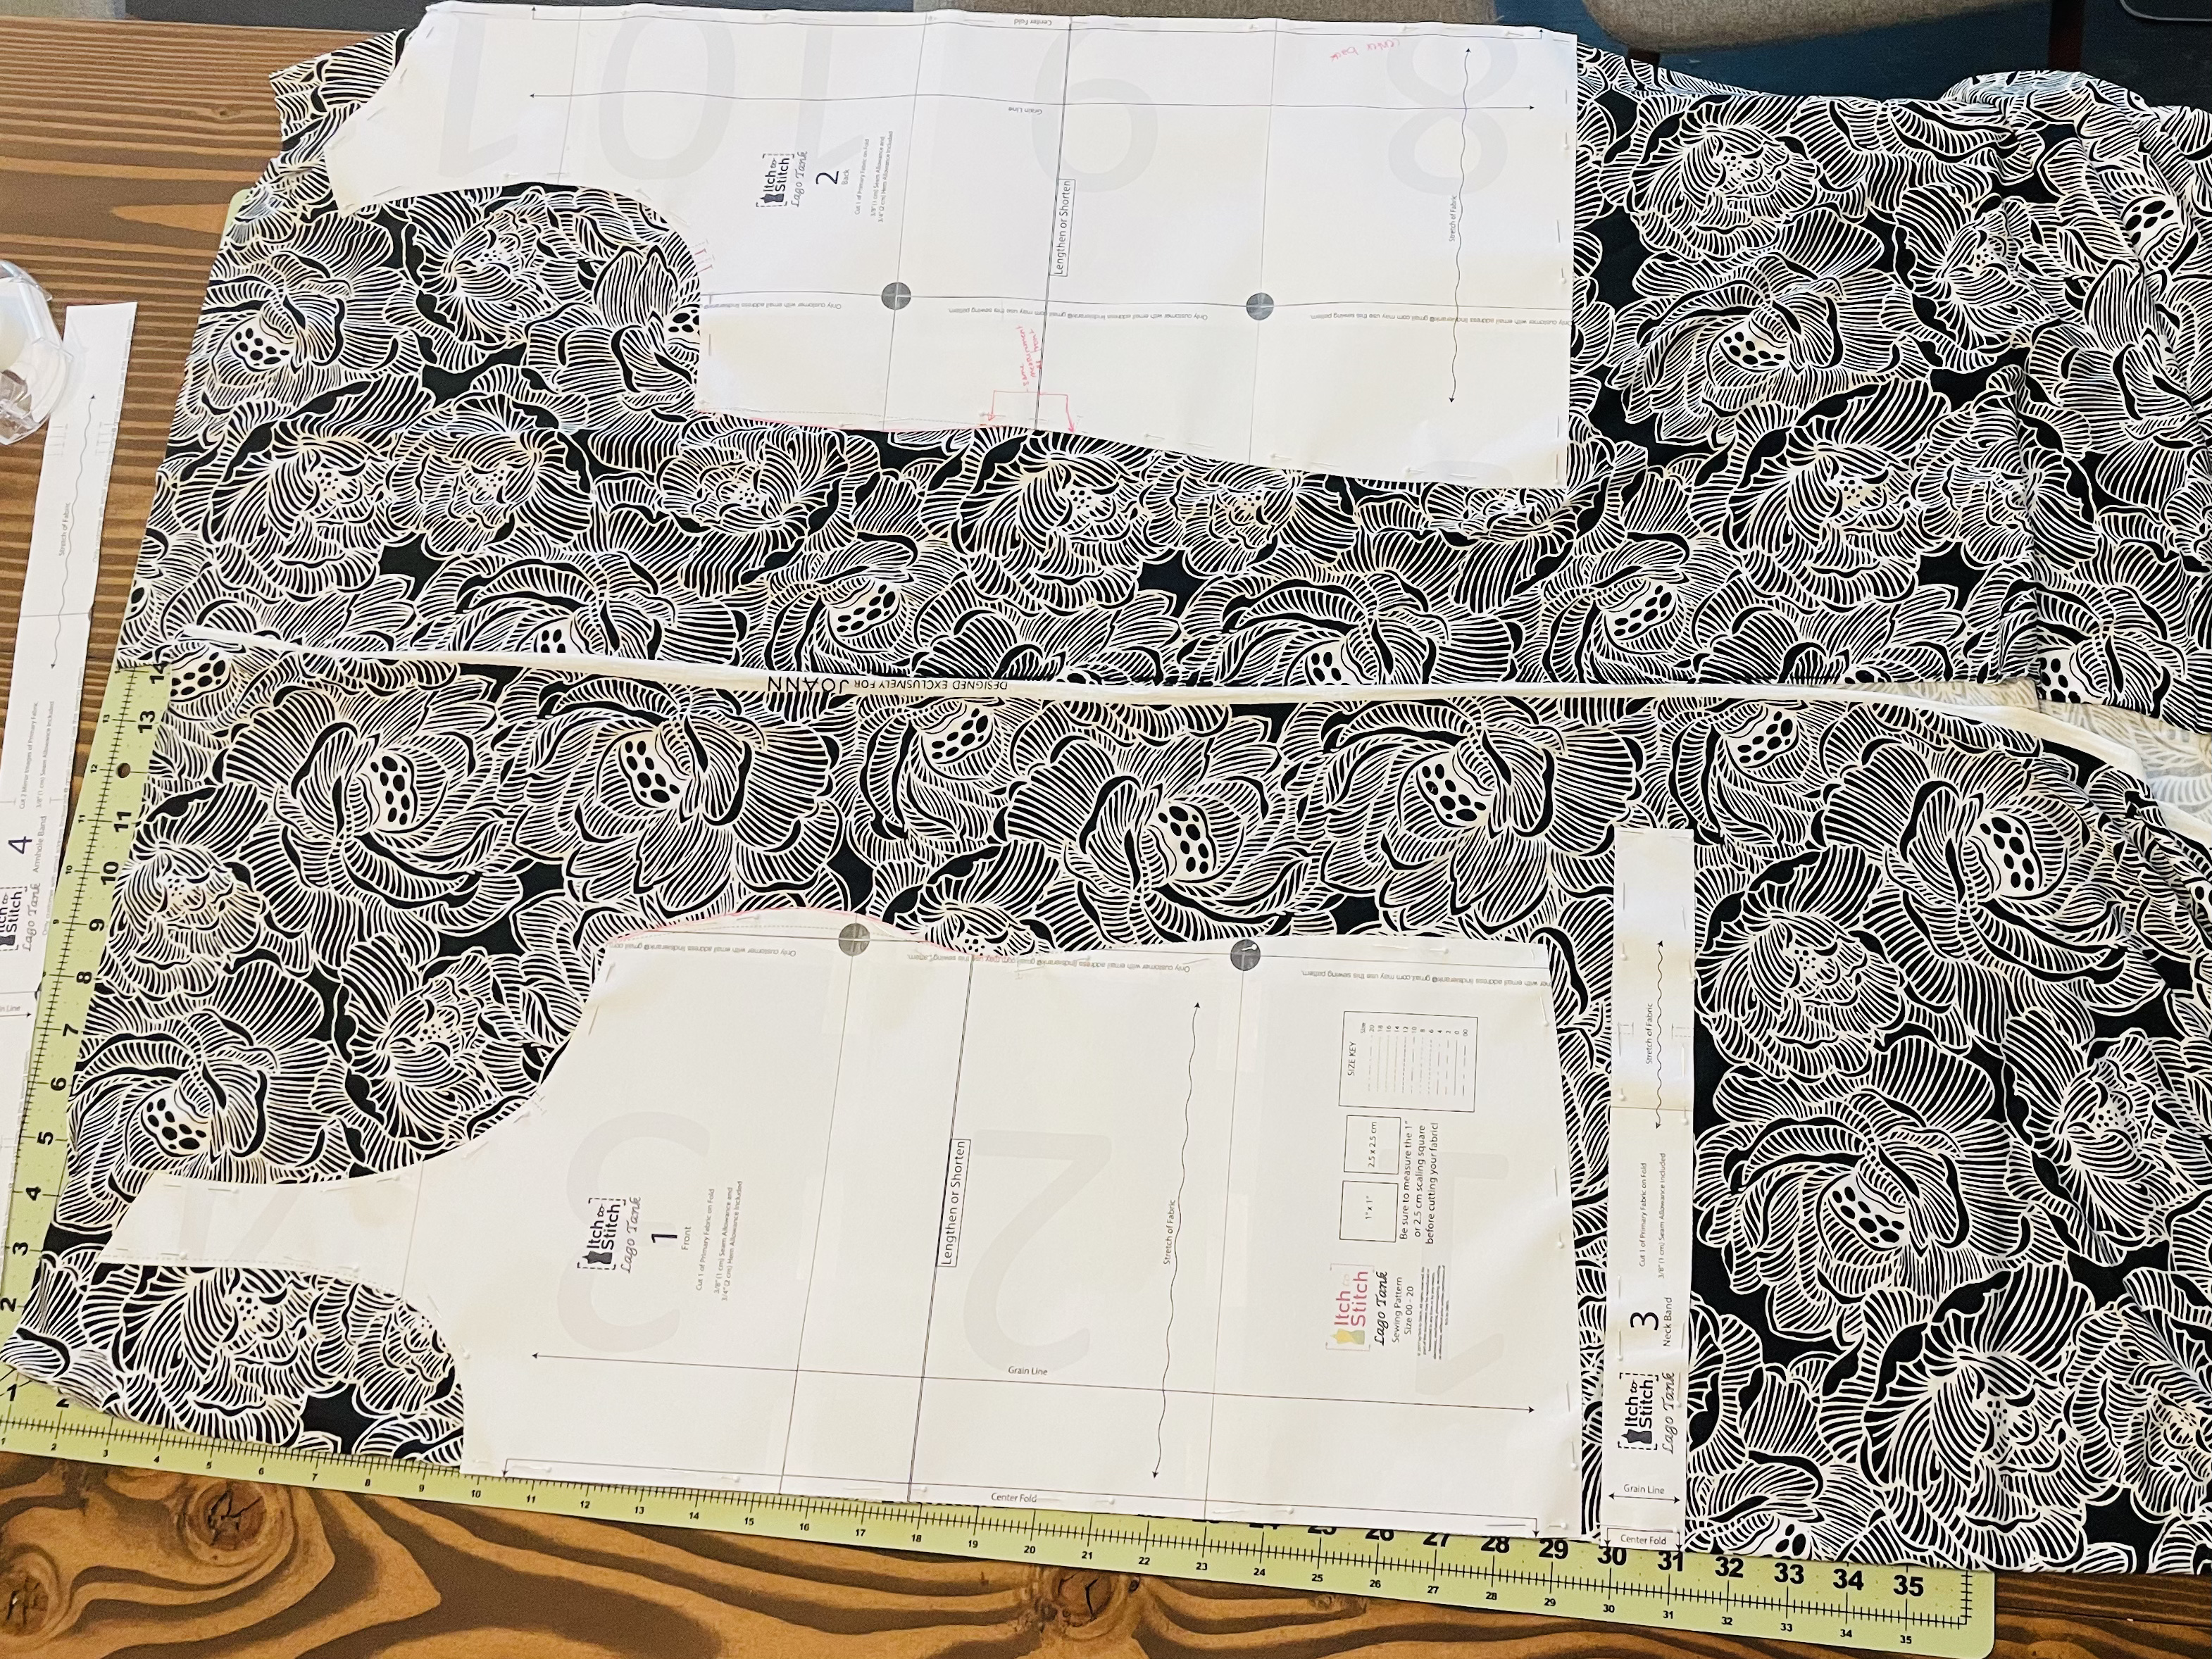
So you need to lay your pattern out in such a way that the pattern’s fold lines match the folds of your fabric. As you can see in this picture, I’ve changed the way my fabric was folded. Instead of being folded in half, I’ve folded it so that each selvage edge meets the center fold line. Then, I’ve used the resulting folds as the lines against which to place my pattern’s fold lines. As you can see, I’ve held back pattern piece 4 – the arm bands – to cut later.
This may or may not be the best way to lay out your pattern. Both the Lago and Saybrook include suggested cut layouts. My advice is to consider the layout I’ve chosen, but also check out the layouts suggested in the patterns to decide how to lay out your pattern.
A couple tips: No matter how you choose to lay out your fabric, make sure you have it folded straight – your selvage edges should match, not necessarily your cut edges (since you don’t know for sure that the fabric was cut straight). Also ensure that you smooth the fabric out. You don’t want any wrinkles under your pattern pieces.
Pin, pin, pin
Now that you’ve chosen the best layout, you’re going to pin your pattern to your fabric. I use this motion to pin:
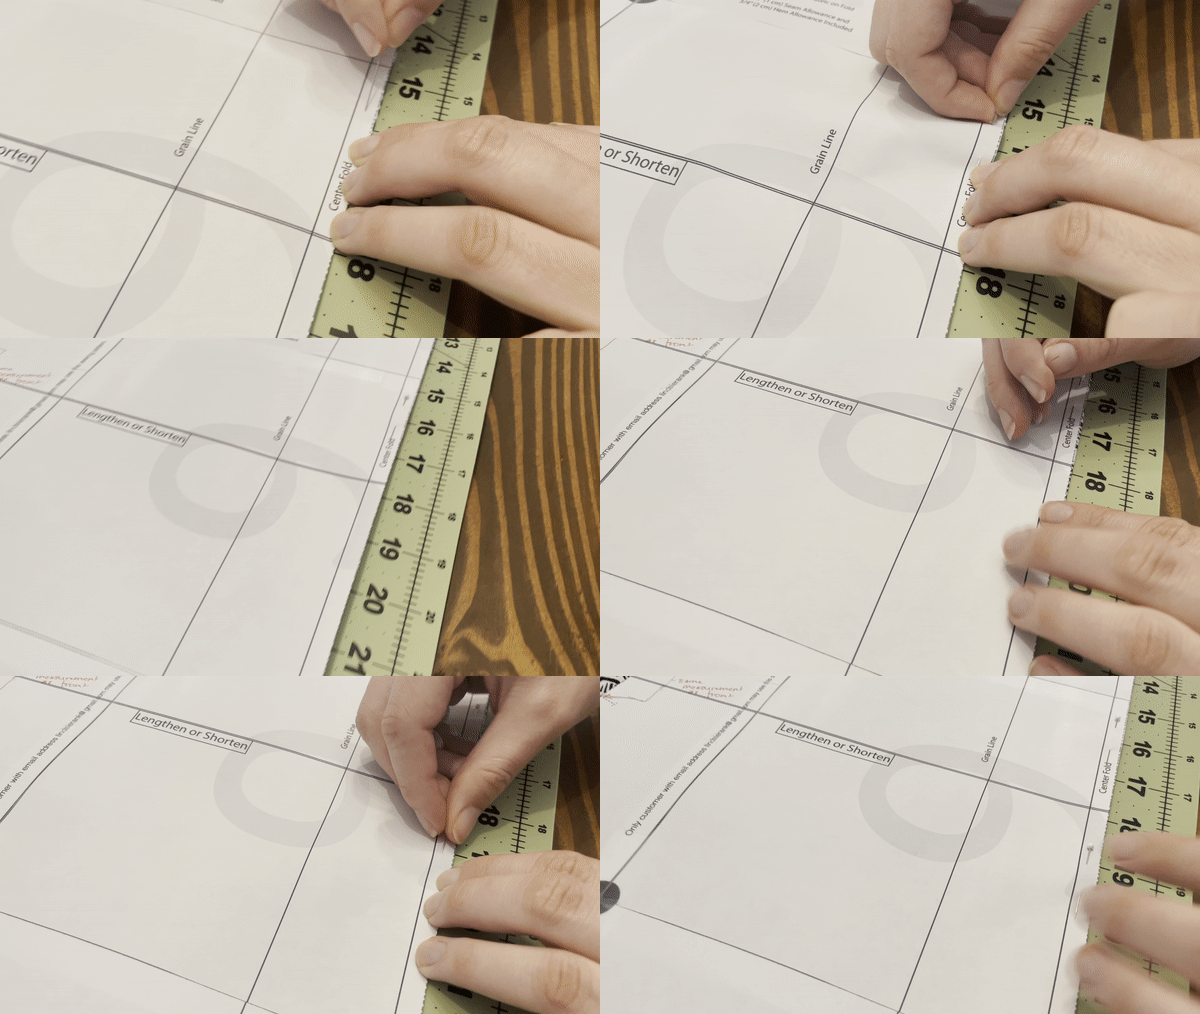
Pin all the way around your pattern pieces, about every inch and a half, with the pins closer together around curves.
time to cut
Now, you have two choices here: You can use your fabric scissors, or you can use a rotary cutter.
I suck at rotary cutters, so I’m not qualified at all to show you how to use them. I’m going to show you the scissor route. If you do choose to use a rotary cutter, you must have a cutting mat.
Now, let’s get out those fabric scissors.
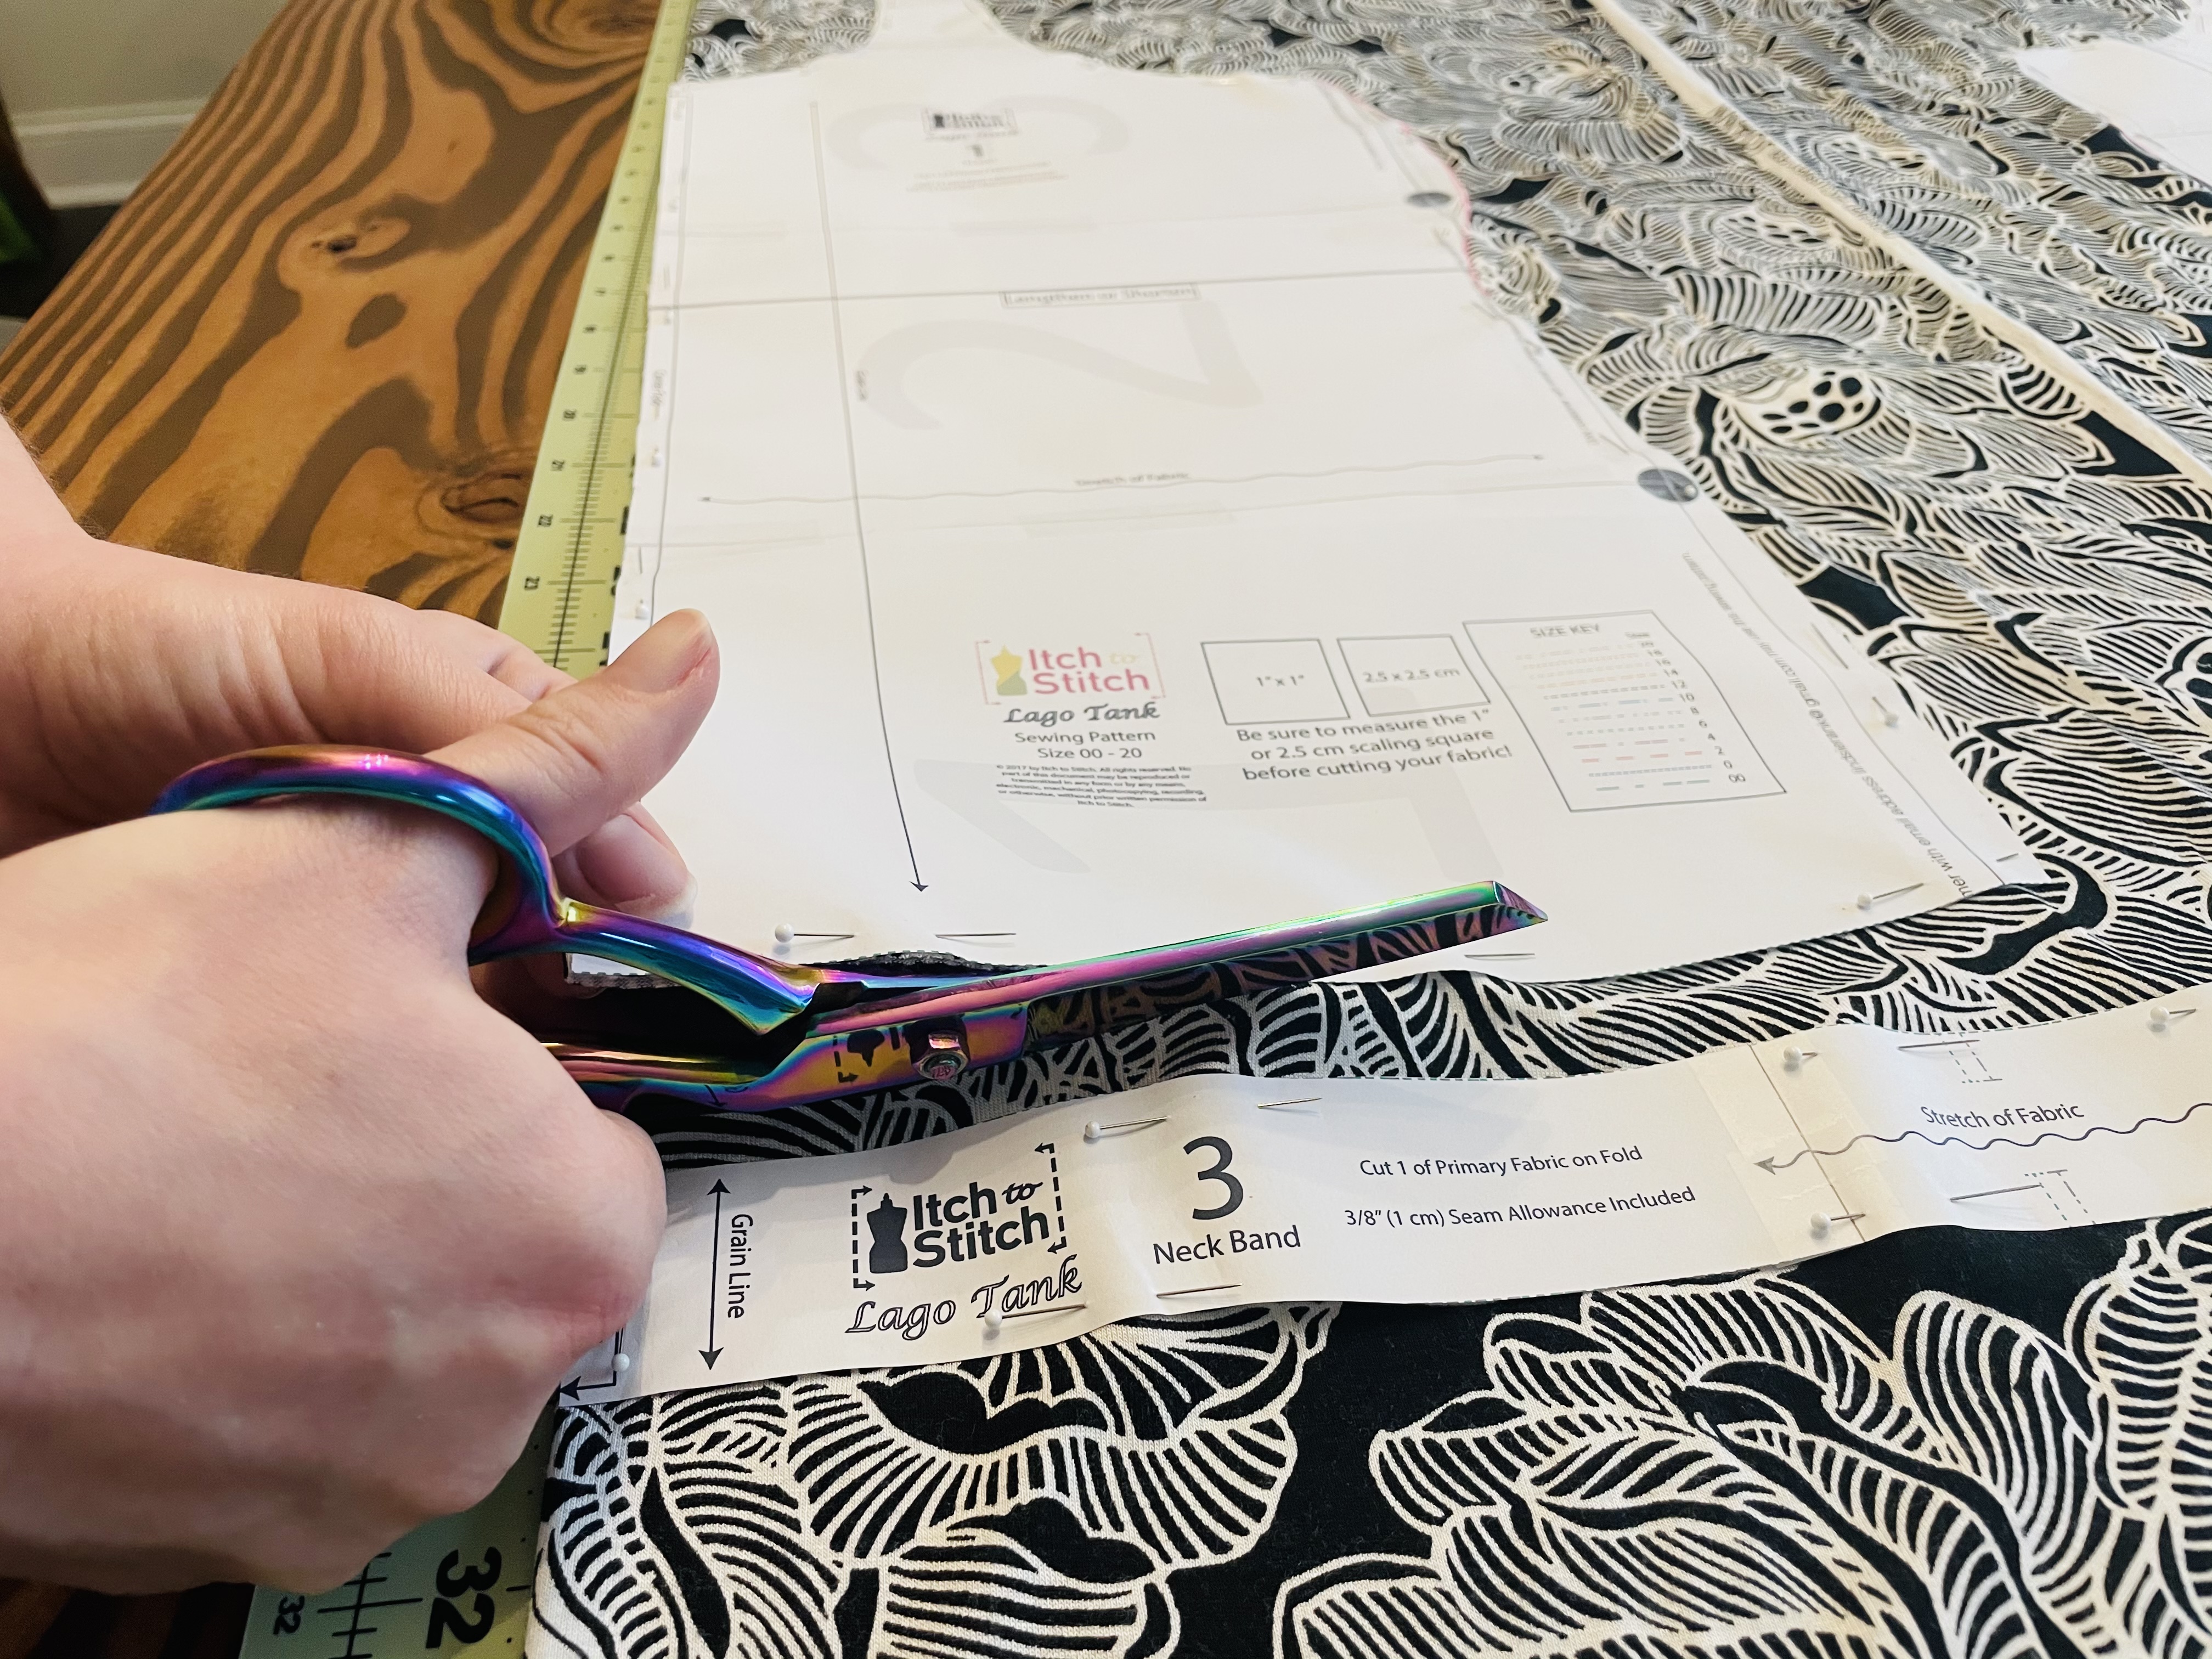
Cut all the way around your pattern pieces, keeping the pattern pieces to the left of your scissors if you are using right-handed scissors, and to the right of your scissors if you are using left-handed scissors. Positioning the scissors in this way will help you to keep your cutting line close to the edge of the pattern pieces.
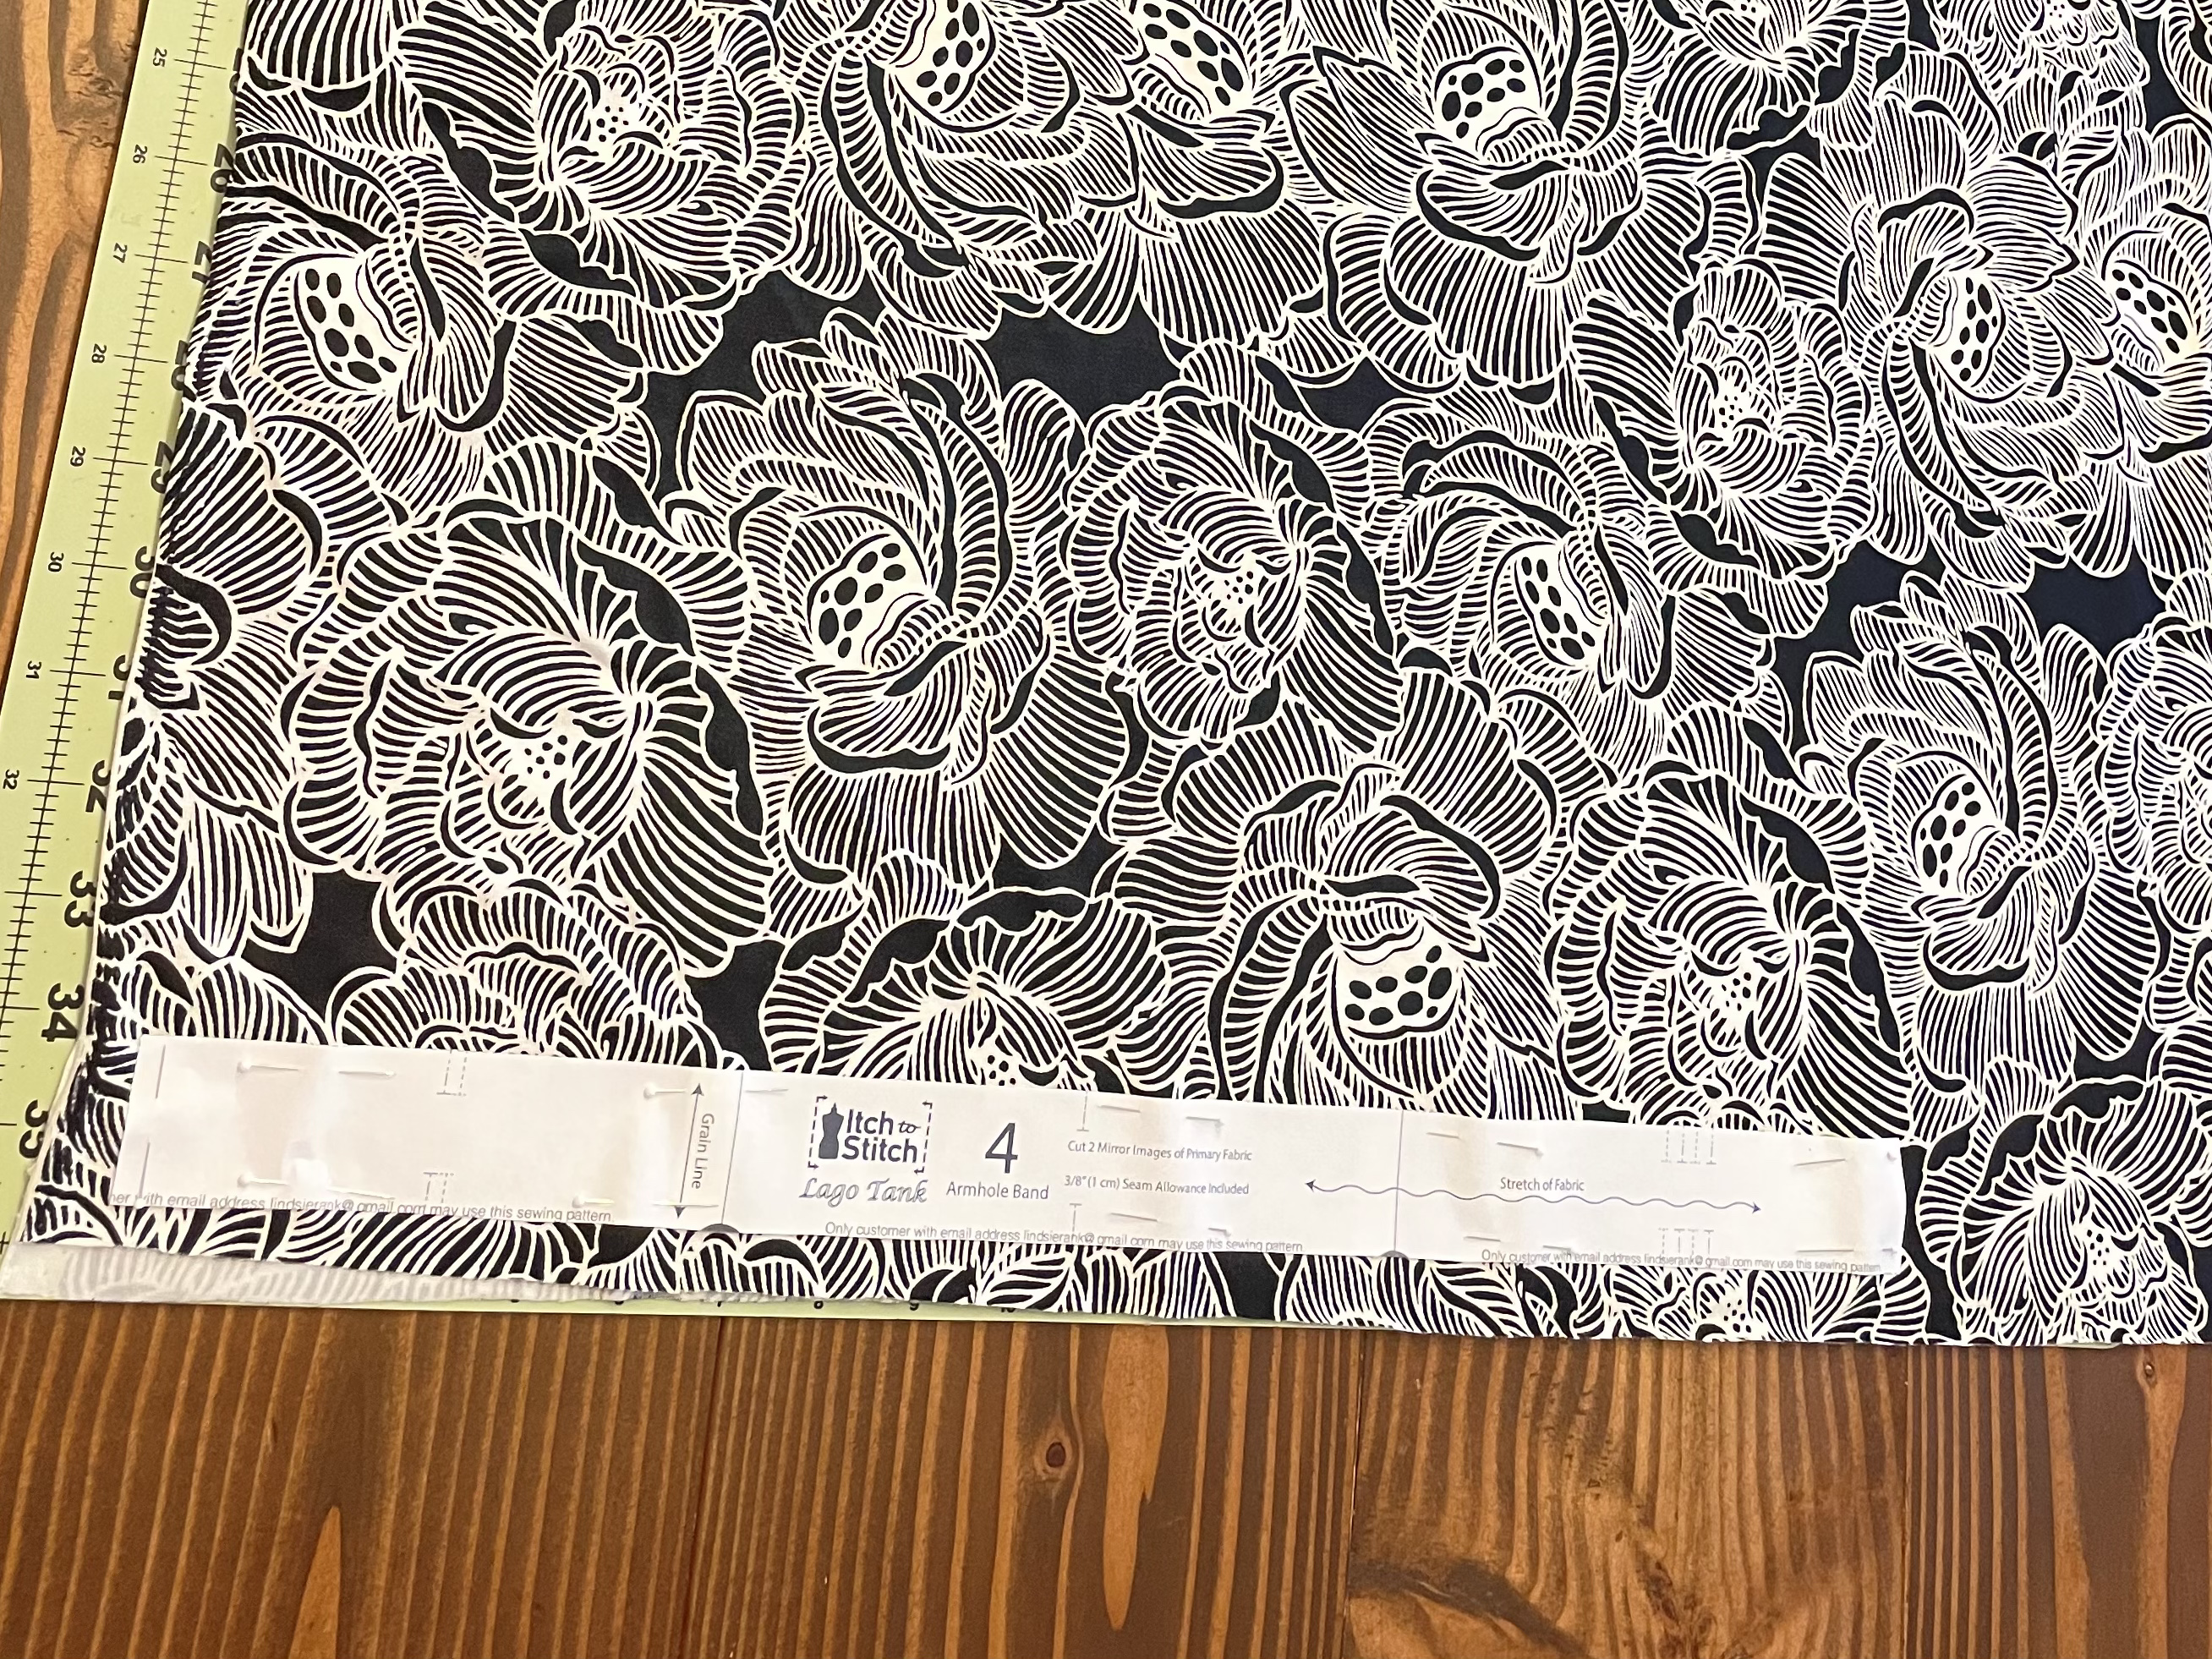
Because of my cut layout, I did this with the front, back, and neck band pattern pieces. Then I re-folded my fabric, pinned my armhole band pattern pieces, and cut around them.
Cutting the notches
The last thing to do today is to cut your notches. Notches help us to line up our pattern pieces when we start sewing.
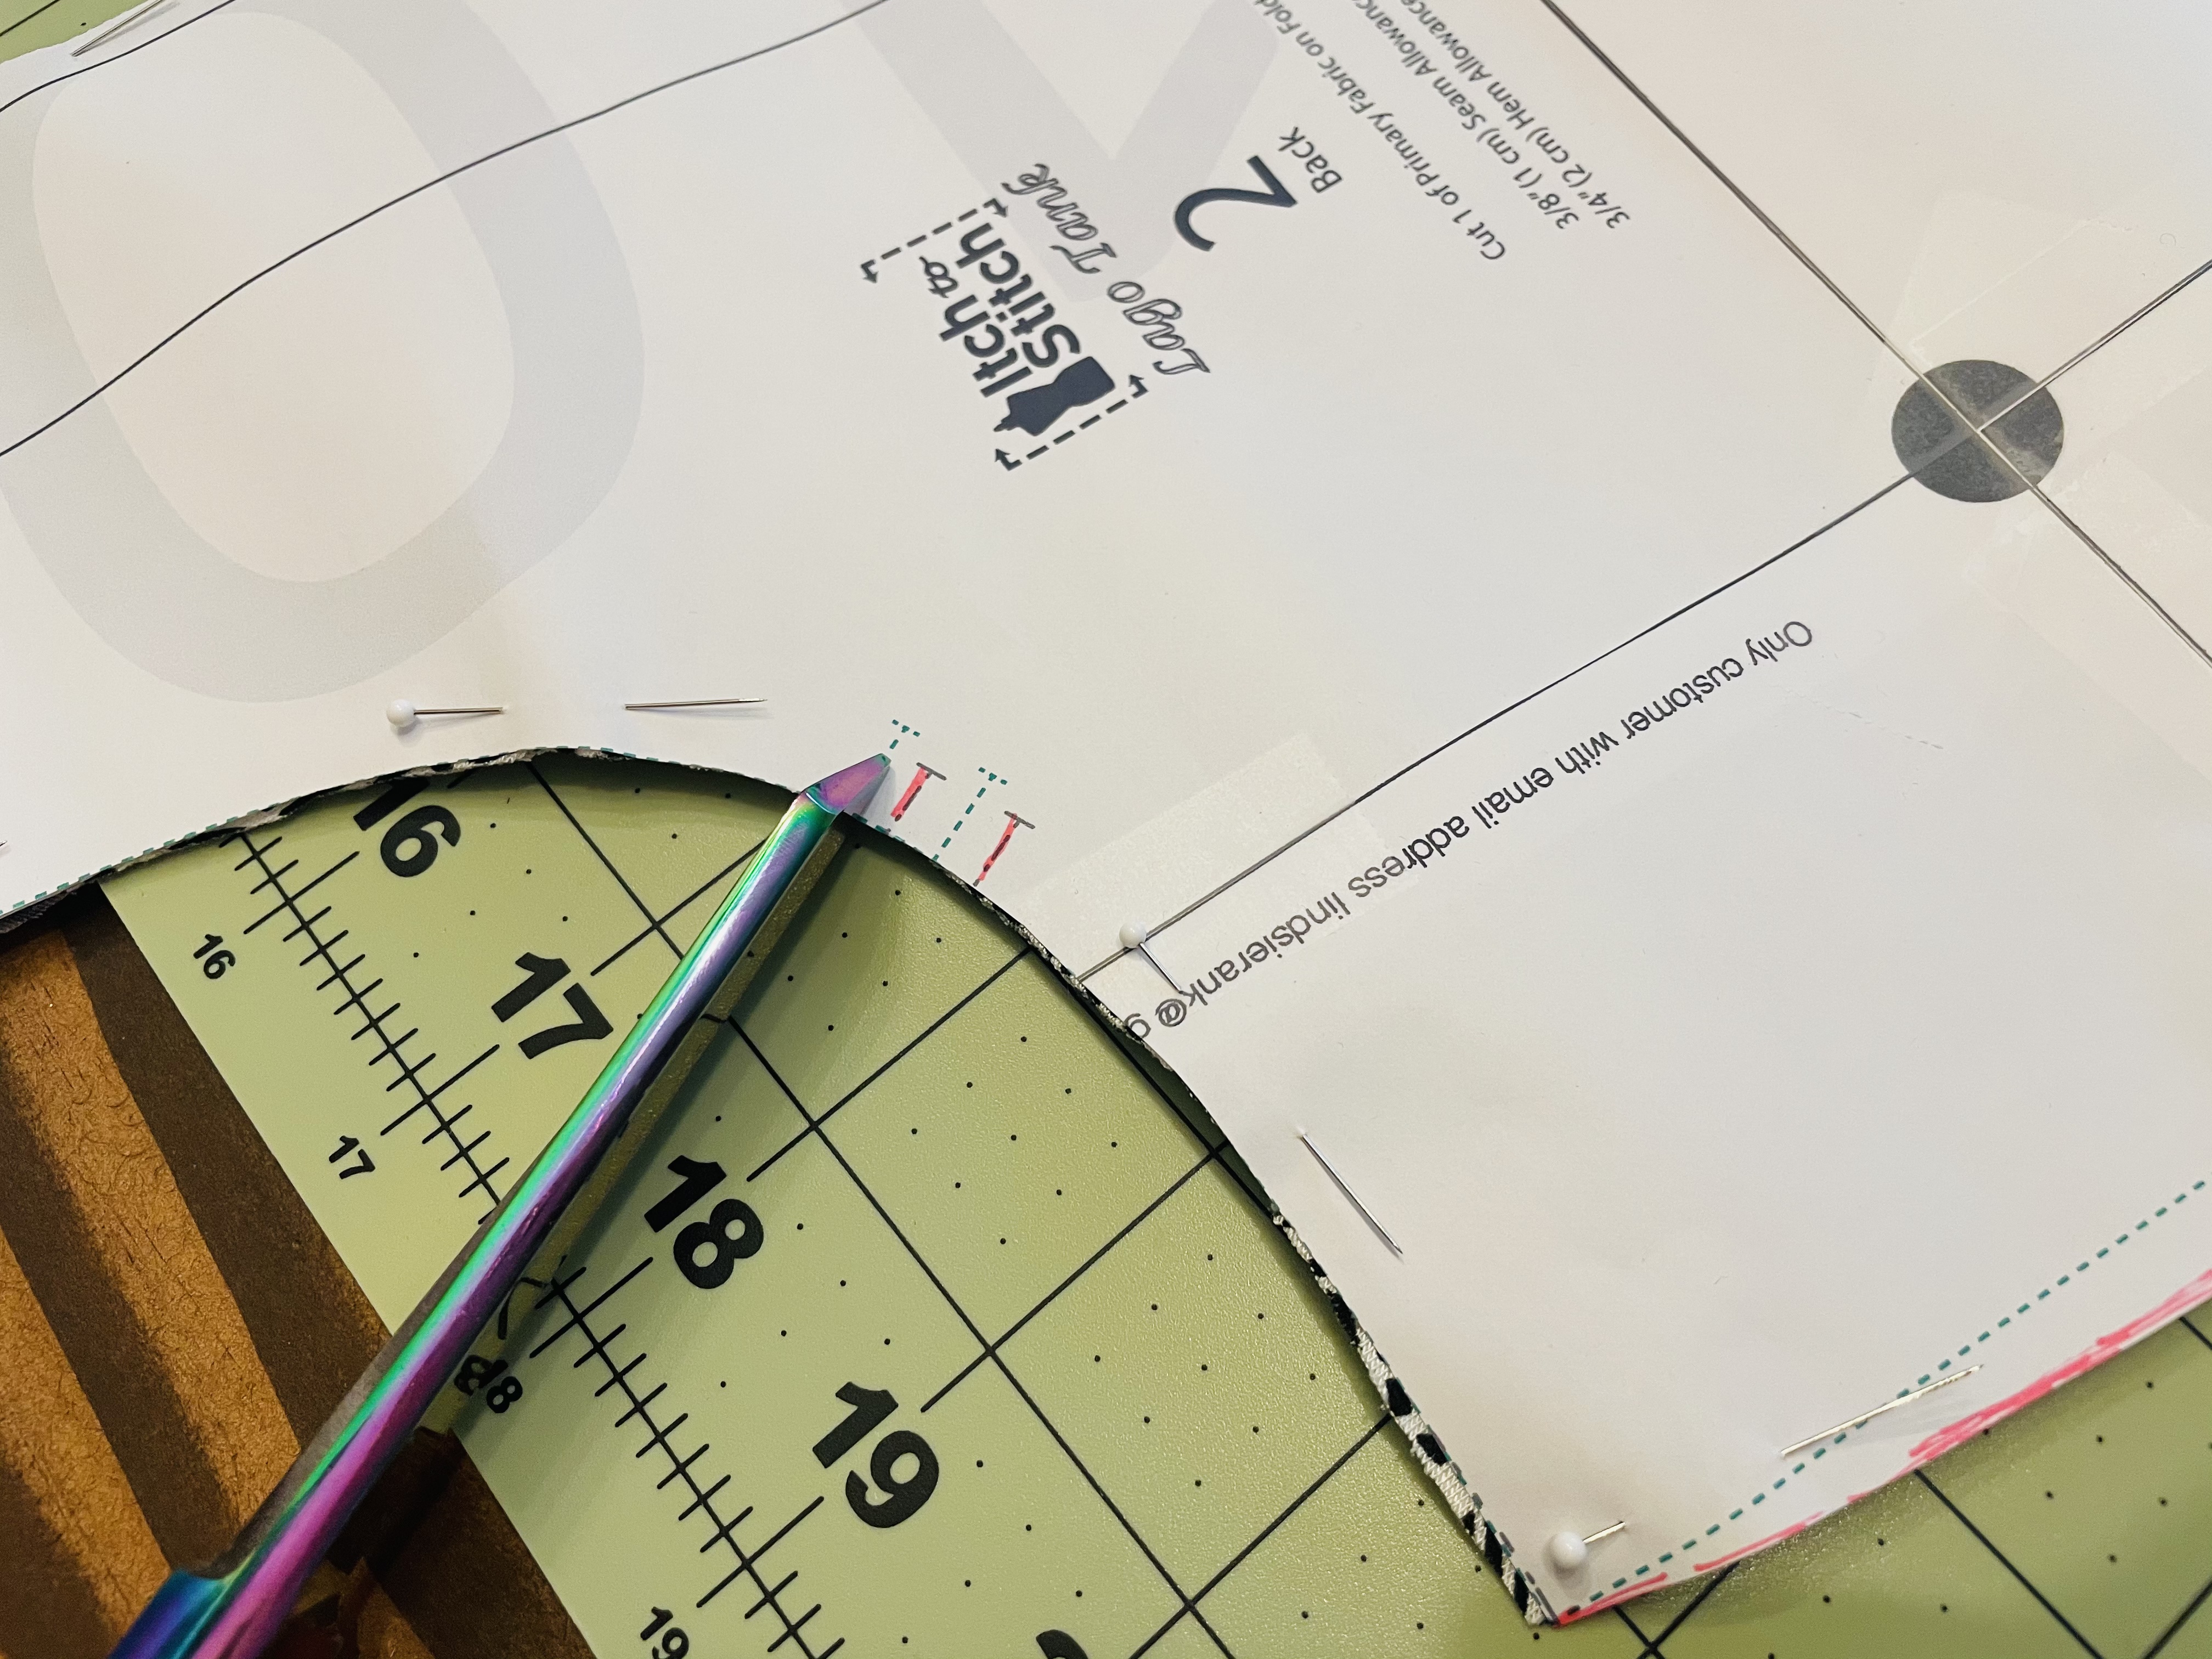
The notches on this pattern are marked with dotted lines, as seen in the picture below. At each notch, you’ll see two (or three) – one for the size that corresponds to your pre-FBA bust measure and one for the next largest size (the size we’re using for the bust). (If you graded for your waist, you may also have a third mark for the size that corresponds to your waist).
If you used the smaller size everywhere except your waist, use the notches that correspond with this size.
If you graded for your waist, use the pre-FBA measure size notches for any notches above the waist and on the armhole and neck bands, but the waist size notches for the notches near the waist.
When you cut your notches, do not cut them as deep as the pattern recommends. This gets very close to cutting into what we call your seam allowance: the line where you will sew. Instead, make them only about 1/4″ deep, as seen in the image below:
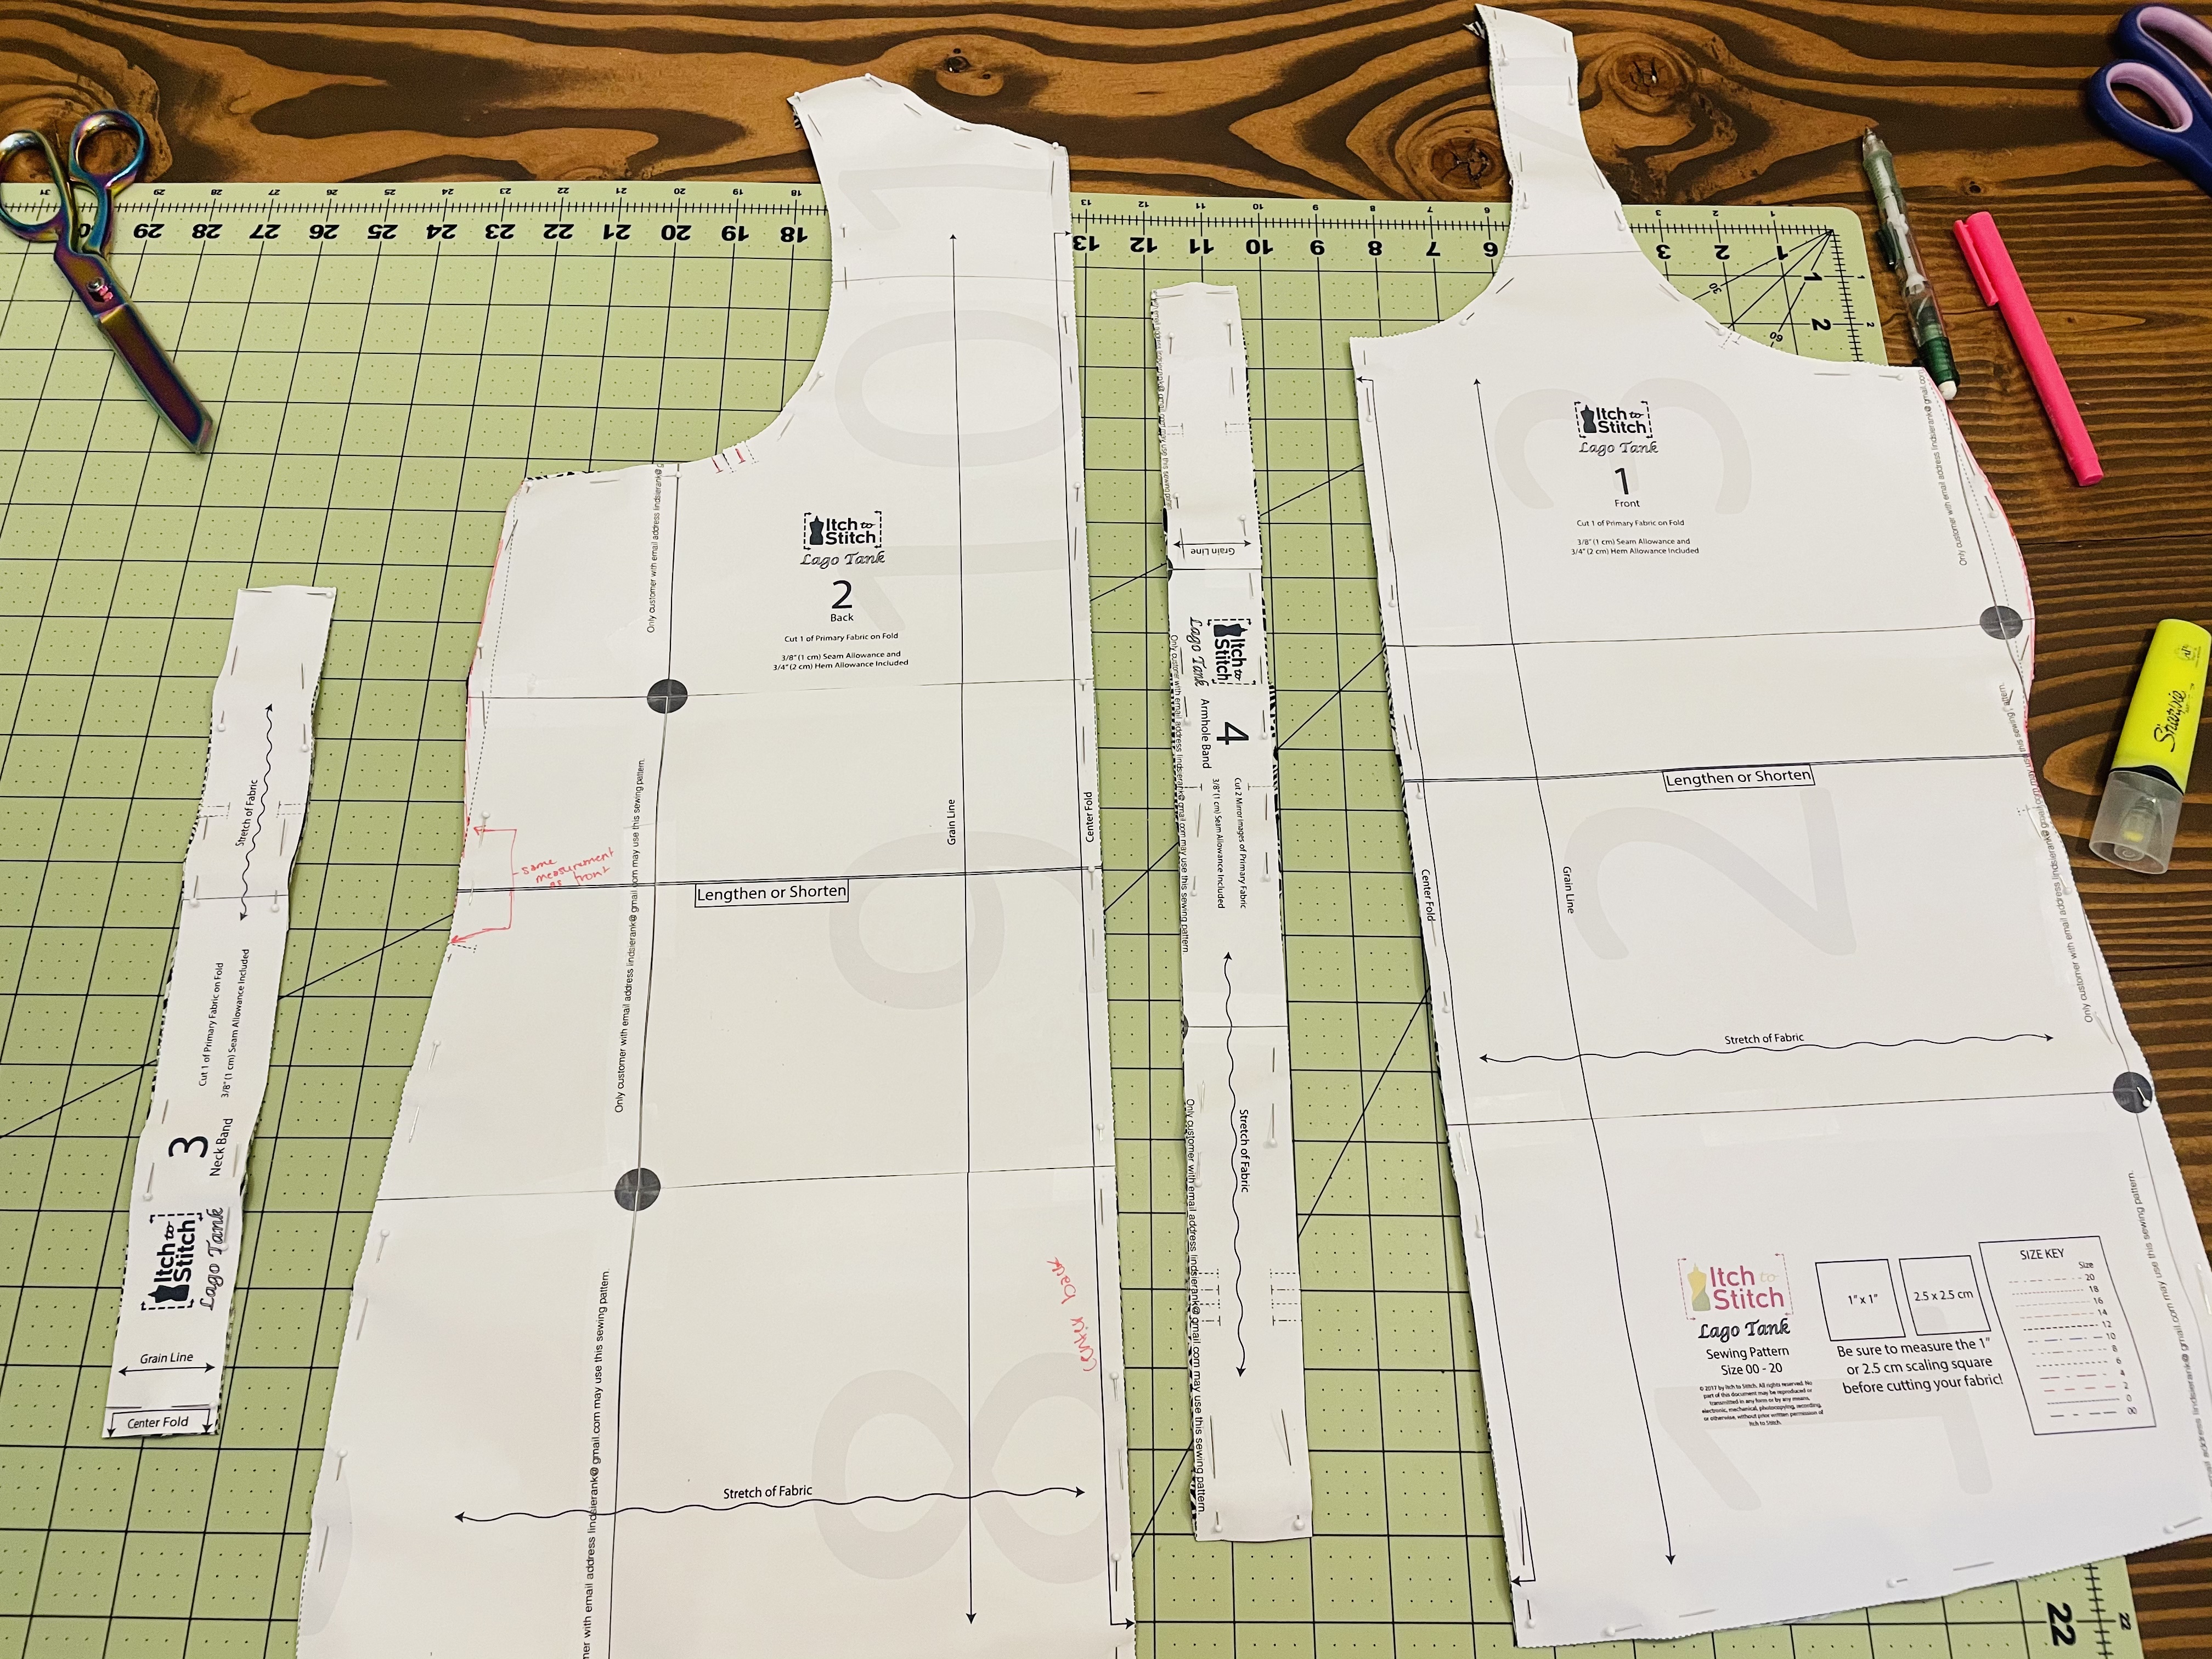
That’s it! You should now have all your pattern pieces cut! When you unpin and unfold your fabric, you will have one front, one back, one neck band, and two armhole bands.
Your Homework
This week, you should:
- If using the Lago, create your “cheater FBA” and do any necessary grading
- If using the Saybrook, do any necessary grading
- Cut out your pattern pieces, pin them to your fabric in the correct orientation, and cut out your fabric. Make sure you cut notches at 1/4″.
The next installment of the Lago/Saybrook Tank sew along will take place May 22! We’ll be talking about sewing your seams and bands.
Have a question? Feel free to drop a comment below, or ask on the Sew Busty Facebook group or subreddit.
Some of the links in this post are affiliate links. This means if you click on the link and purchase the item, I will receive an affiliate commission at no extra cost to you. All opinions remain my own.


michelle c
May 15, 2021Hello! Thanks so much for doing this. Last week you mentioned another kind of FBA if the difference between high bust & full bust is more than 6″ – I’m right at 7″ difference, so trying to decide if I should try the cheater FBA bubble or use the Cashmerette pattern. Their size guide recommends I do a 1″ FBA on their G/H patterns but I’ll probably skip that if I use their tank pattern.
Thanks!
sewbustycommunity
May 15, 2021Oh goodness! Thank you so much for reminding me of that, and sorry to have forgotten!
I probably wouldn’t do a cheater FBA on top of Cashmerette’s cup sizes. It might just get a little wild. Instead, I’d follow these instructions for a slightly tougher, but more accurate FBA: https://blog.cashmerette.com/2020/10/how-to-do-a-knit-fba.html
Updating the post now to include this note! Thank you again for the reminder!