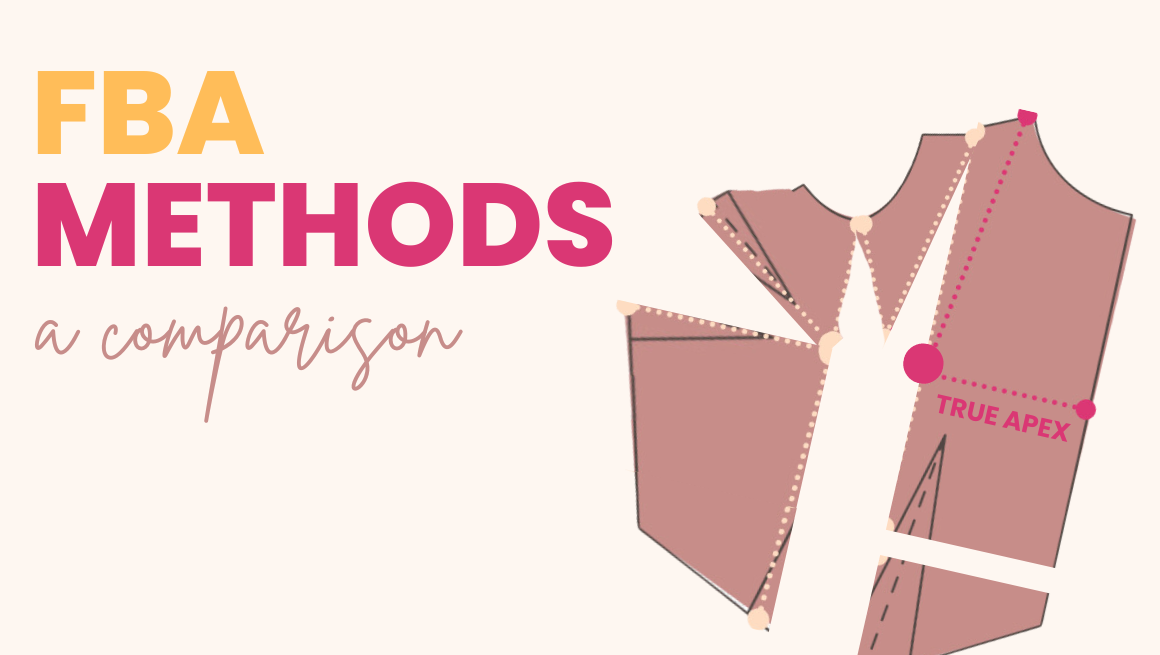
Full Bust Adjustment Guide | Comparing 5 FBA Methods (on 7 Bodies!)
Intro
If you’ve been following Sew Busty for a while, you know that my go-to full bust adjustment method is the Y-FBA. I used it for a woven dress bodice tutorial and for my Kielo jumpsuit tutorial. If I’m not using a Y-FBA, I usually opt for a traditional FBA, which is similar, but omits the slash line to the shoulder seam. I used a traditional FBA for my t-shirt tutorial and for my gathered bodice tutorial.
But Y-FBAs and traditional FBAs aren’t the only full bust adjustment methods. If you spend hours scouring Youtube, you’ll find numerous methods to add room at the bust. I also know some folks in the Sew Busty Community have preferred methods other than Y and traditional. This got me thinking, are different FBA methods better for different bodies? And an experiment was born!
I teamed up with 6 other busty sewists to try 5 different FBA methods to see which one works best for each of us. The methods we tried (with links to the tutorials we followed) were:
- Traditional FBA
- Y-FBA
- Pivot and Slide FBA (from Nancy Zieman’s book)
- Length-Only FBA
- Seam Method FBA
Huge thanks to Designer Stitch, who donated their Marit Top pattern for this experiment. Want to try it yourself? Get 20% off with code SEWBUSTYMARIT.
Jump to: Experimenters | Rules | Traditional FBA | Y-Dart FBA | Pivot and Slide FBA | Length-Only FBA | Seam Method FBA | Favorites
The Experimenters
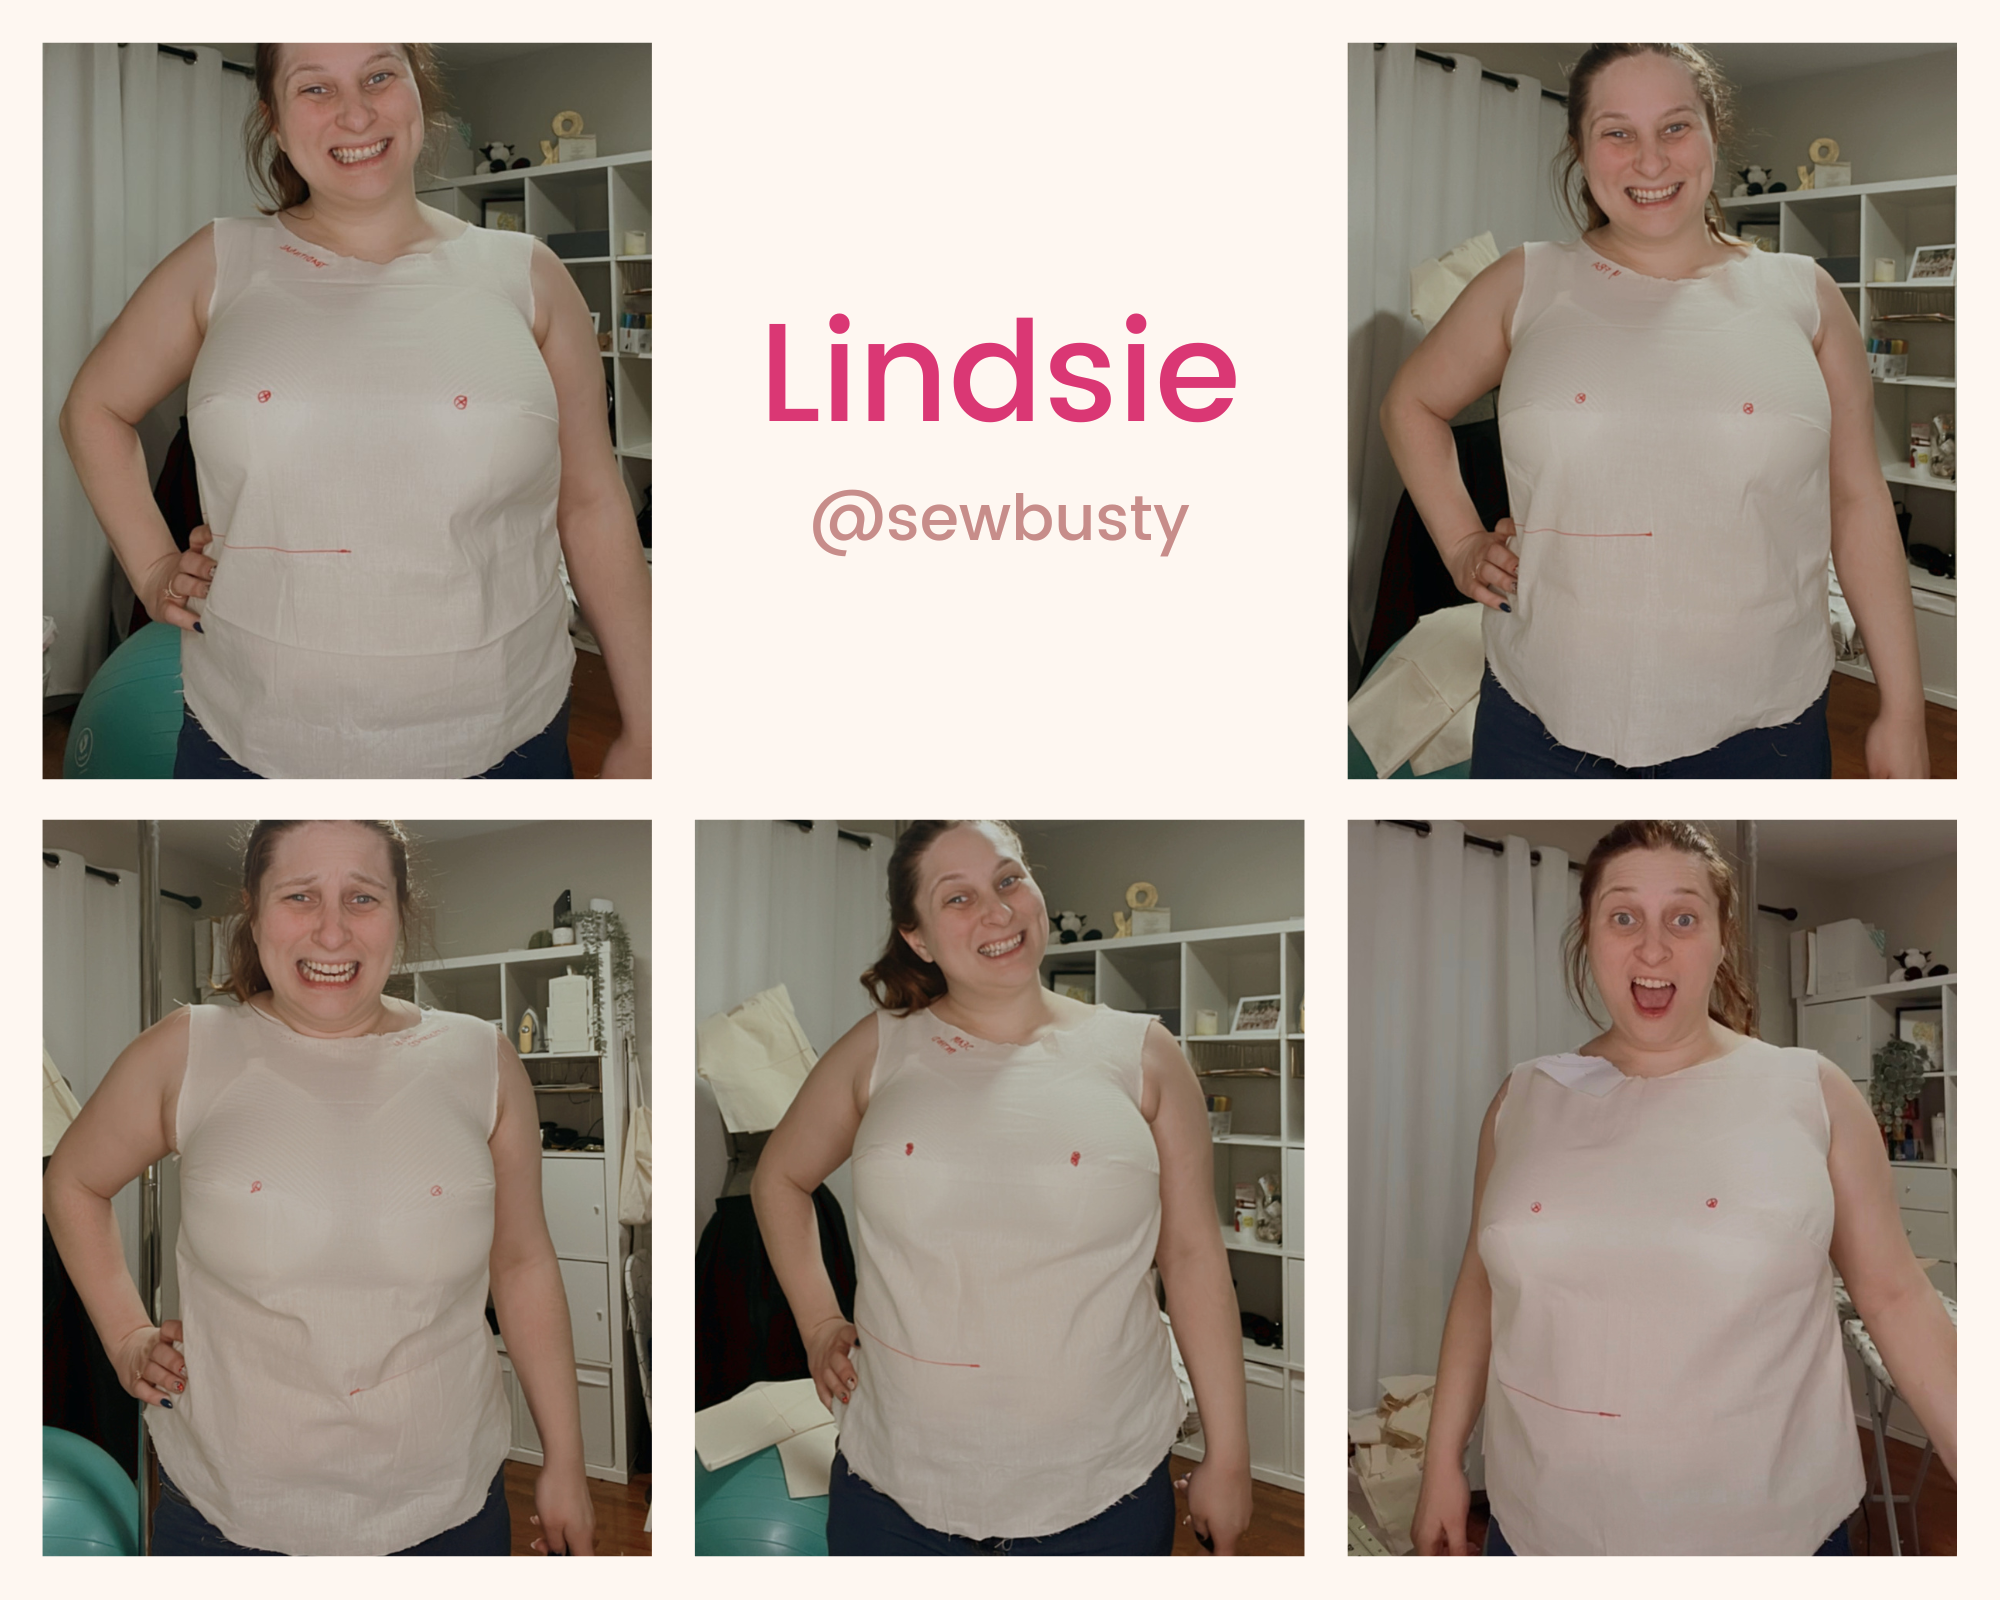
Lindsie | she/her | @sewbusty | 32 years old | 7″/17.8cm FBA (3.5″/8.9cm per side)
As a boobalicious person, I know first-hand that busty sewists have specific needs. I created the Sew Busty Community as a place for busty sewists of all sizes to come together for inspiration, resources, and support. I’d describe my bust as full on bottom, narrow and projected. My tissue is very soft and not self-supporting.
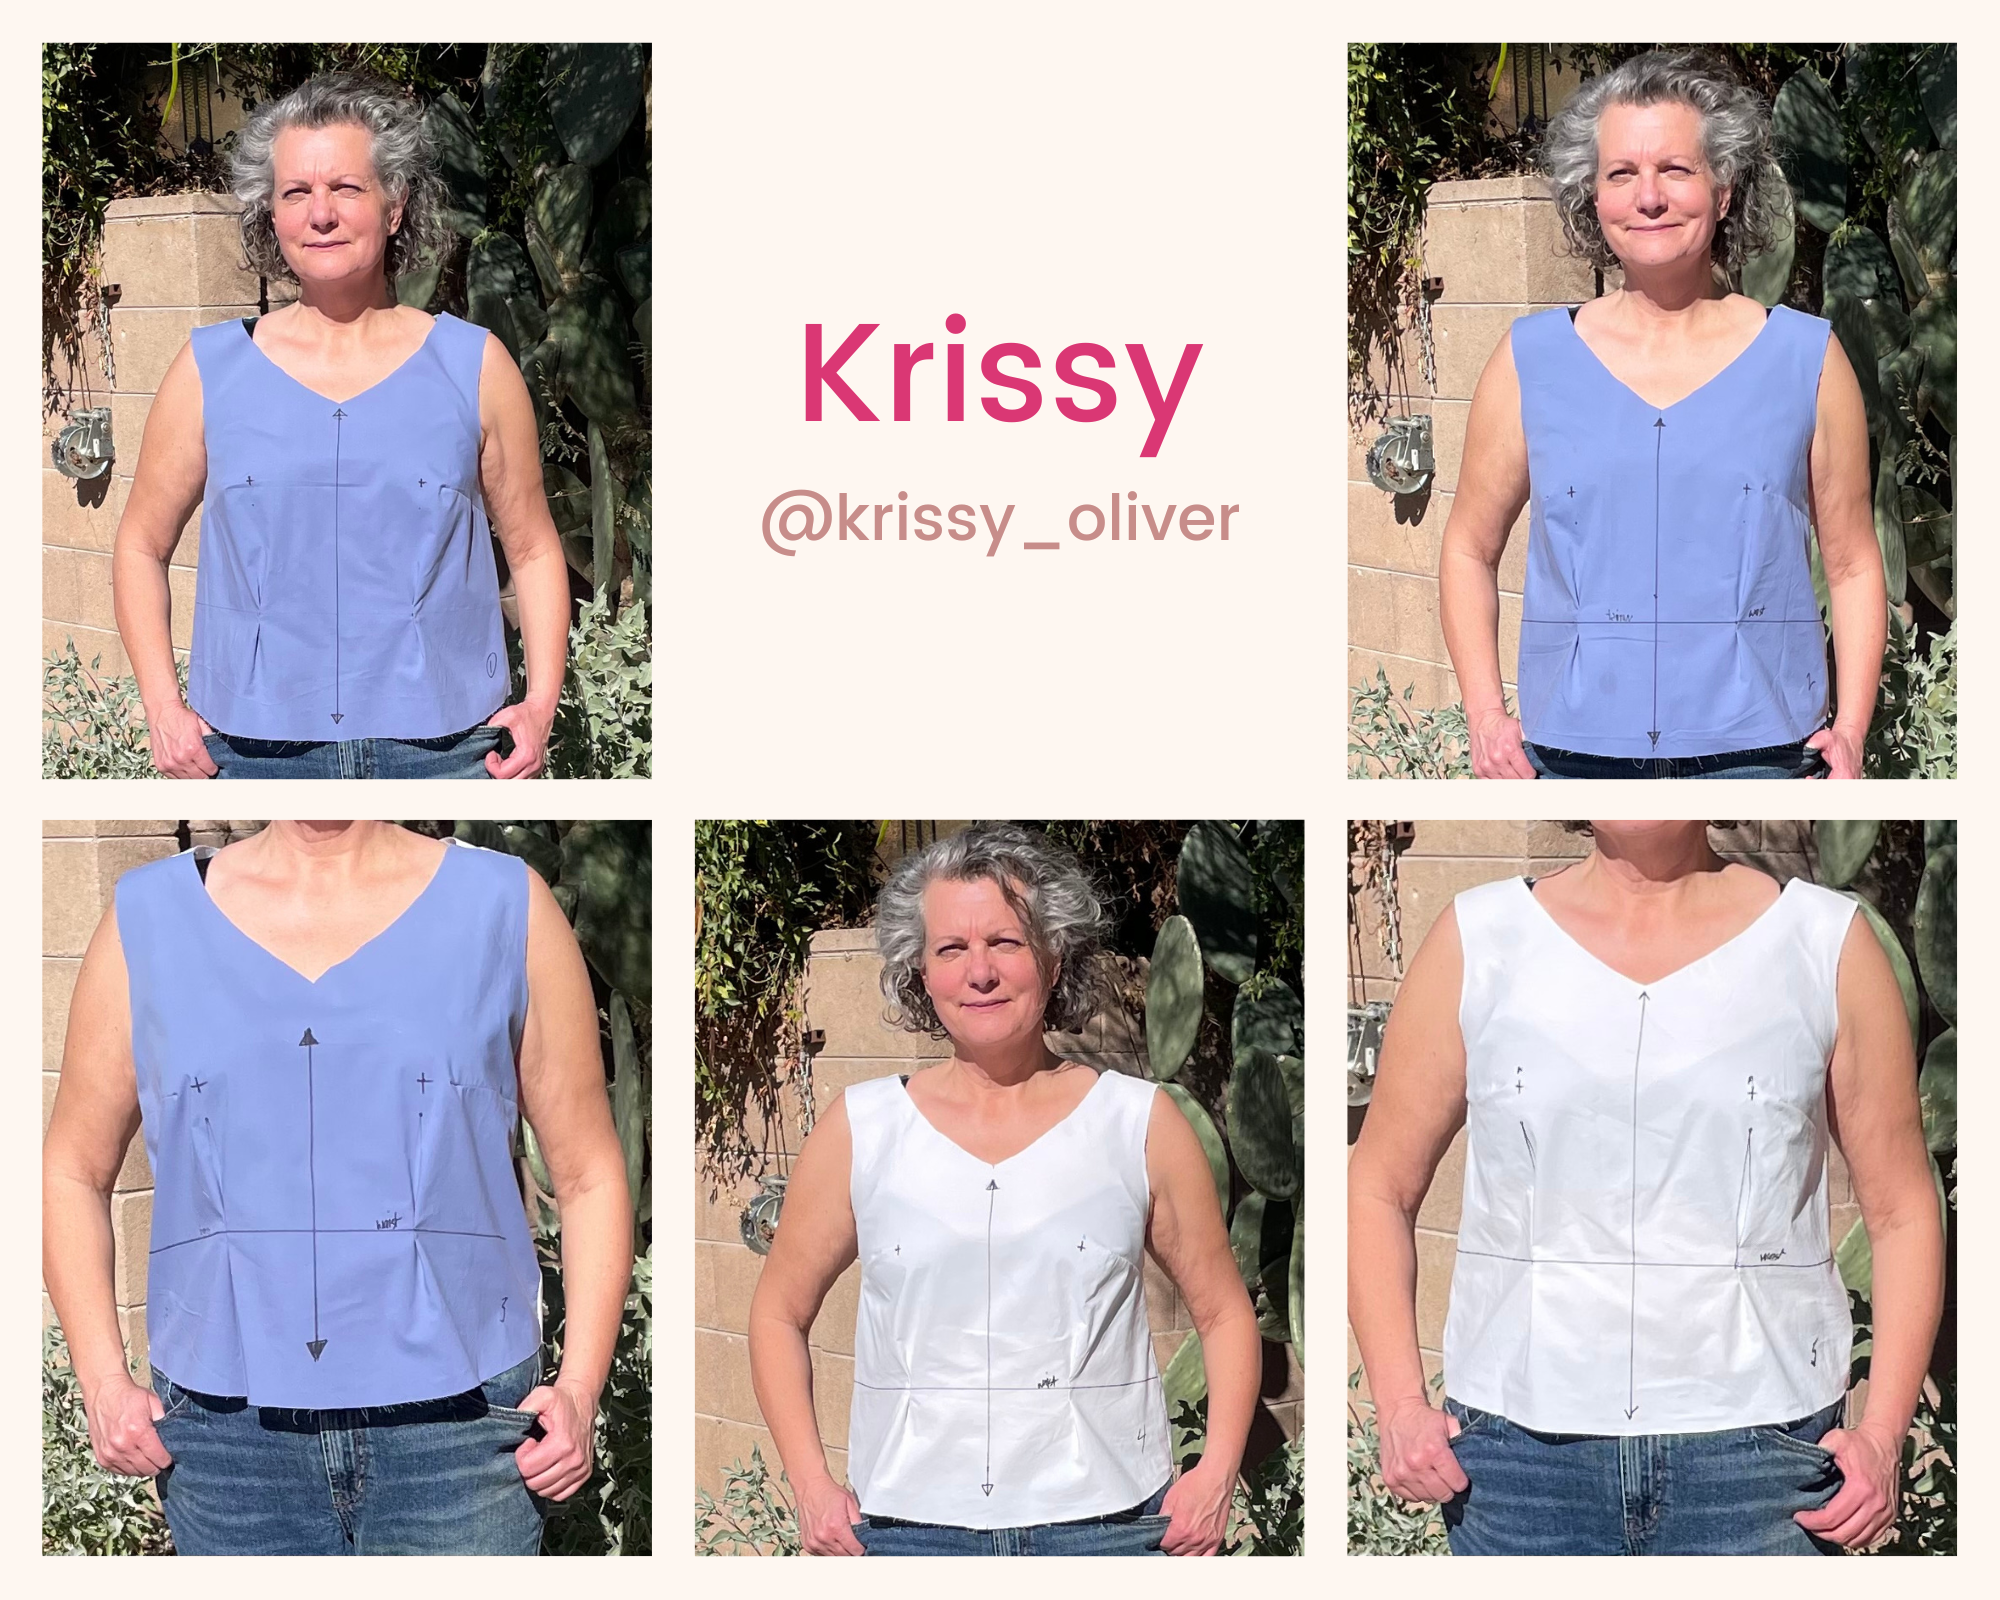
Krissy | she/her | @krissy_oliver | 56 years old | 4″/10.2cm FBA (2″/5.1cm per side)
Krissy is a sewing and patternmaking teacher, lingerie sewer, career technical designer, and clothing nerd! She describes her bust as east/west and are full and wide at bottom, flat at the top.
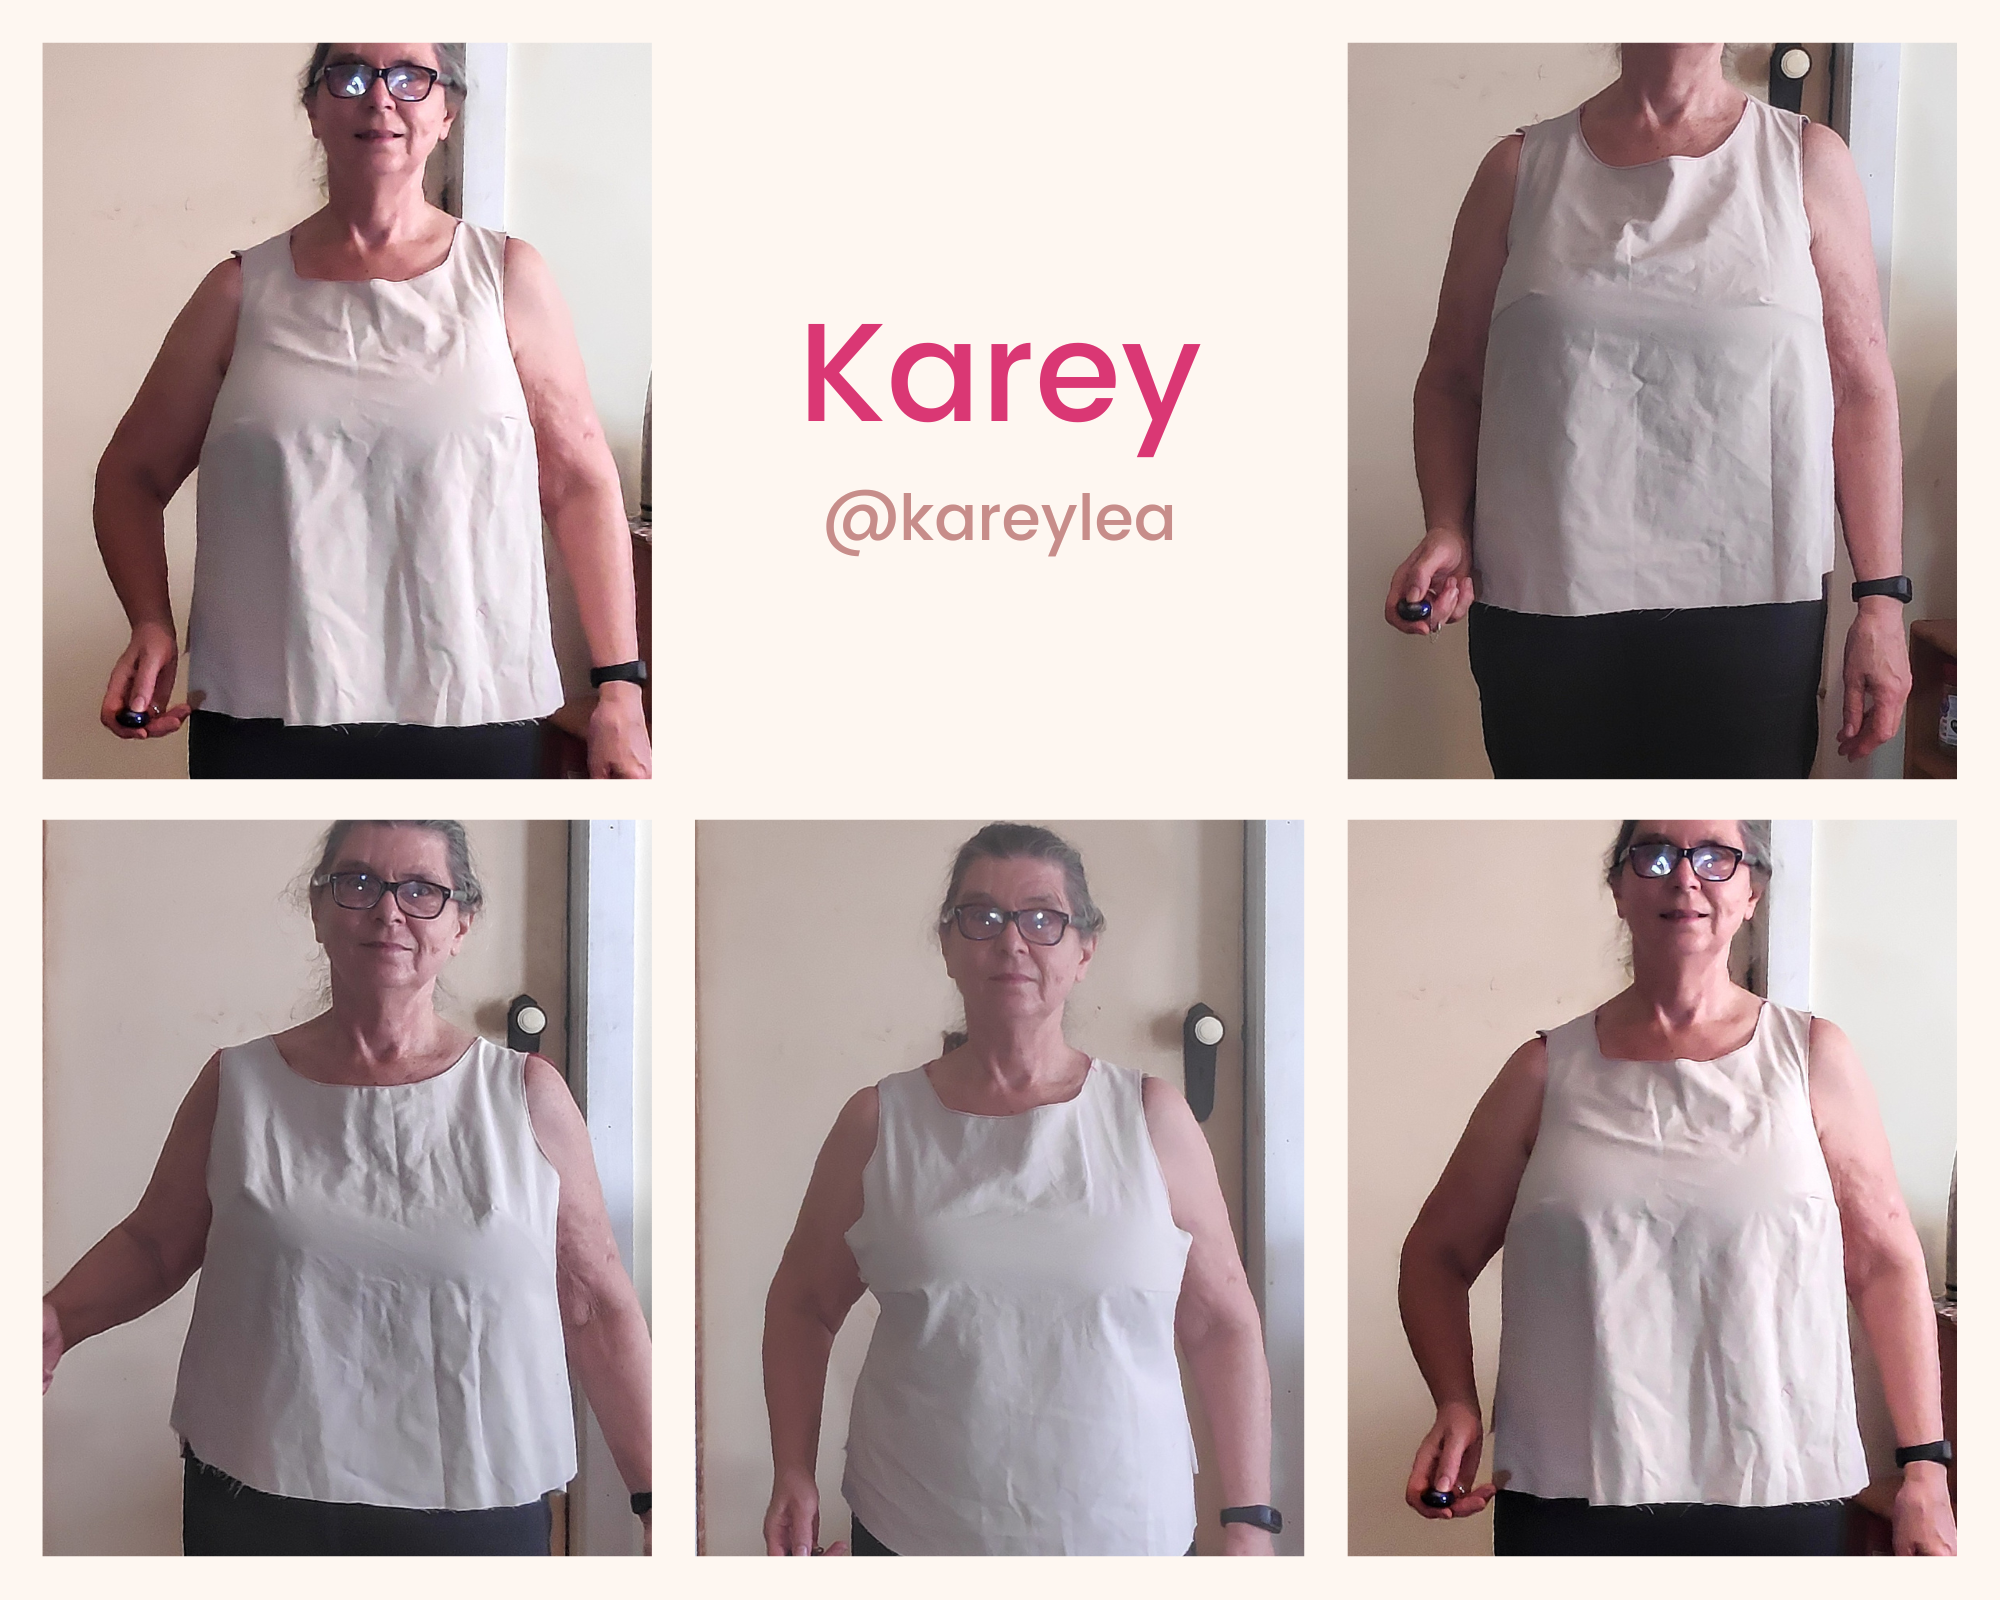
Karey | she/her | @kareylea | 67 years old | 7″/17.8cm FBA (3.5″/8.9cm per side)
Karey is a feminist, environmentalist, and retired philosophy academic who describes her bust as wide, short, and projected.
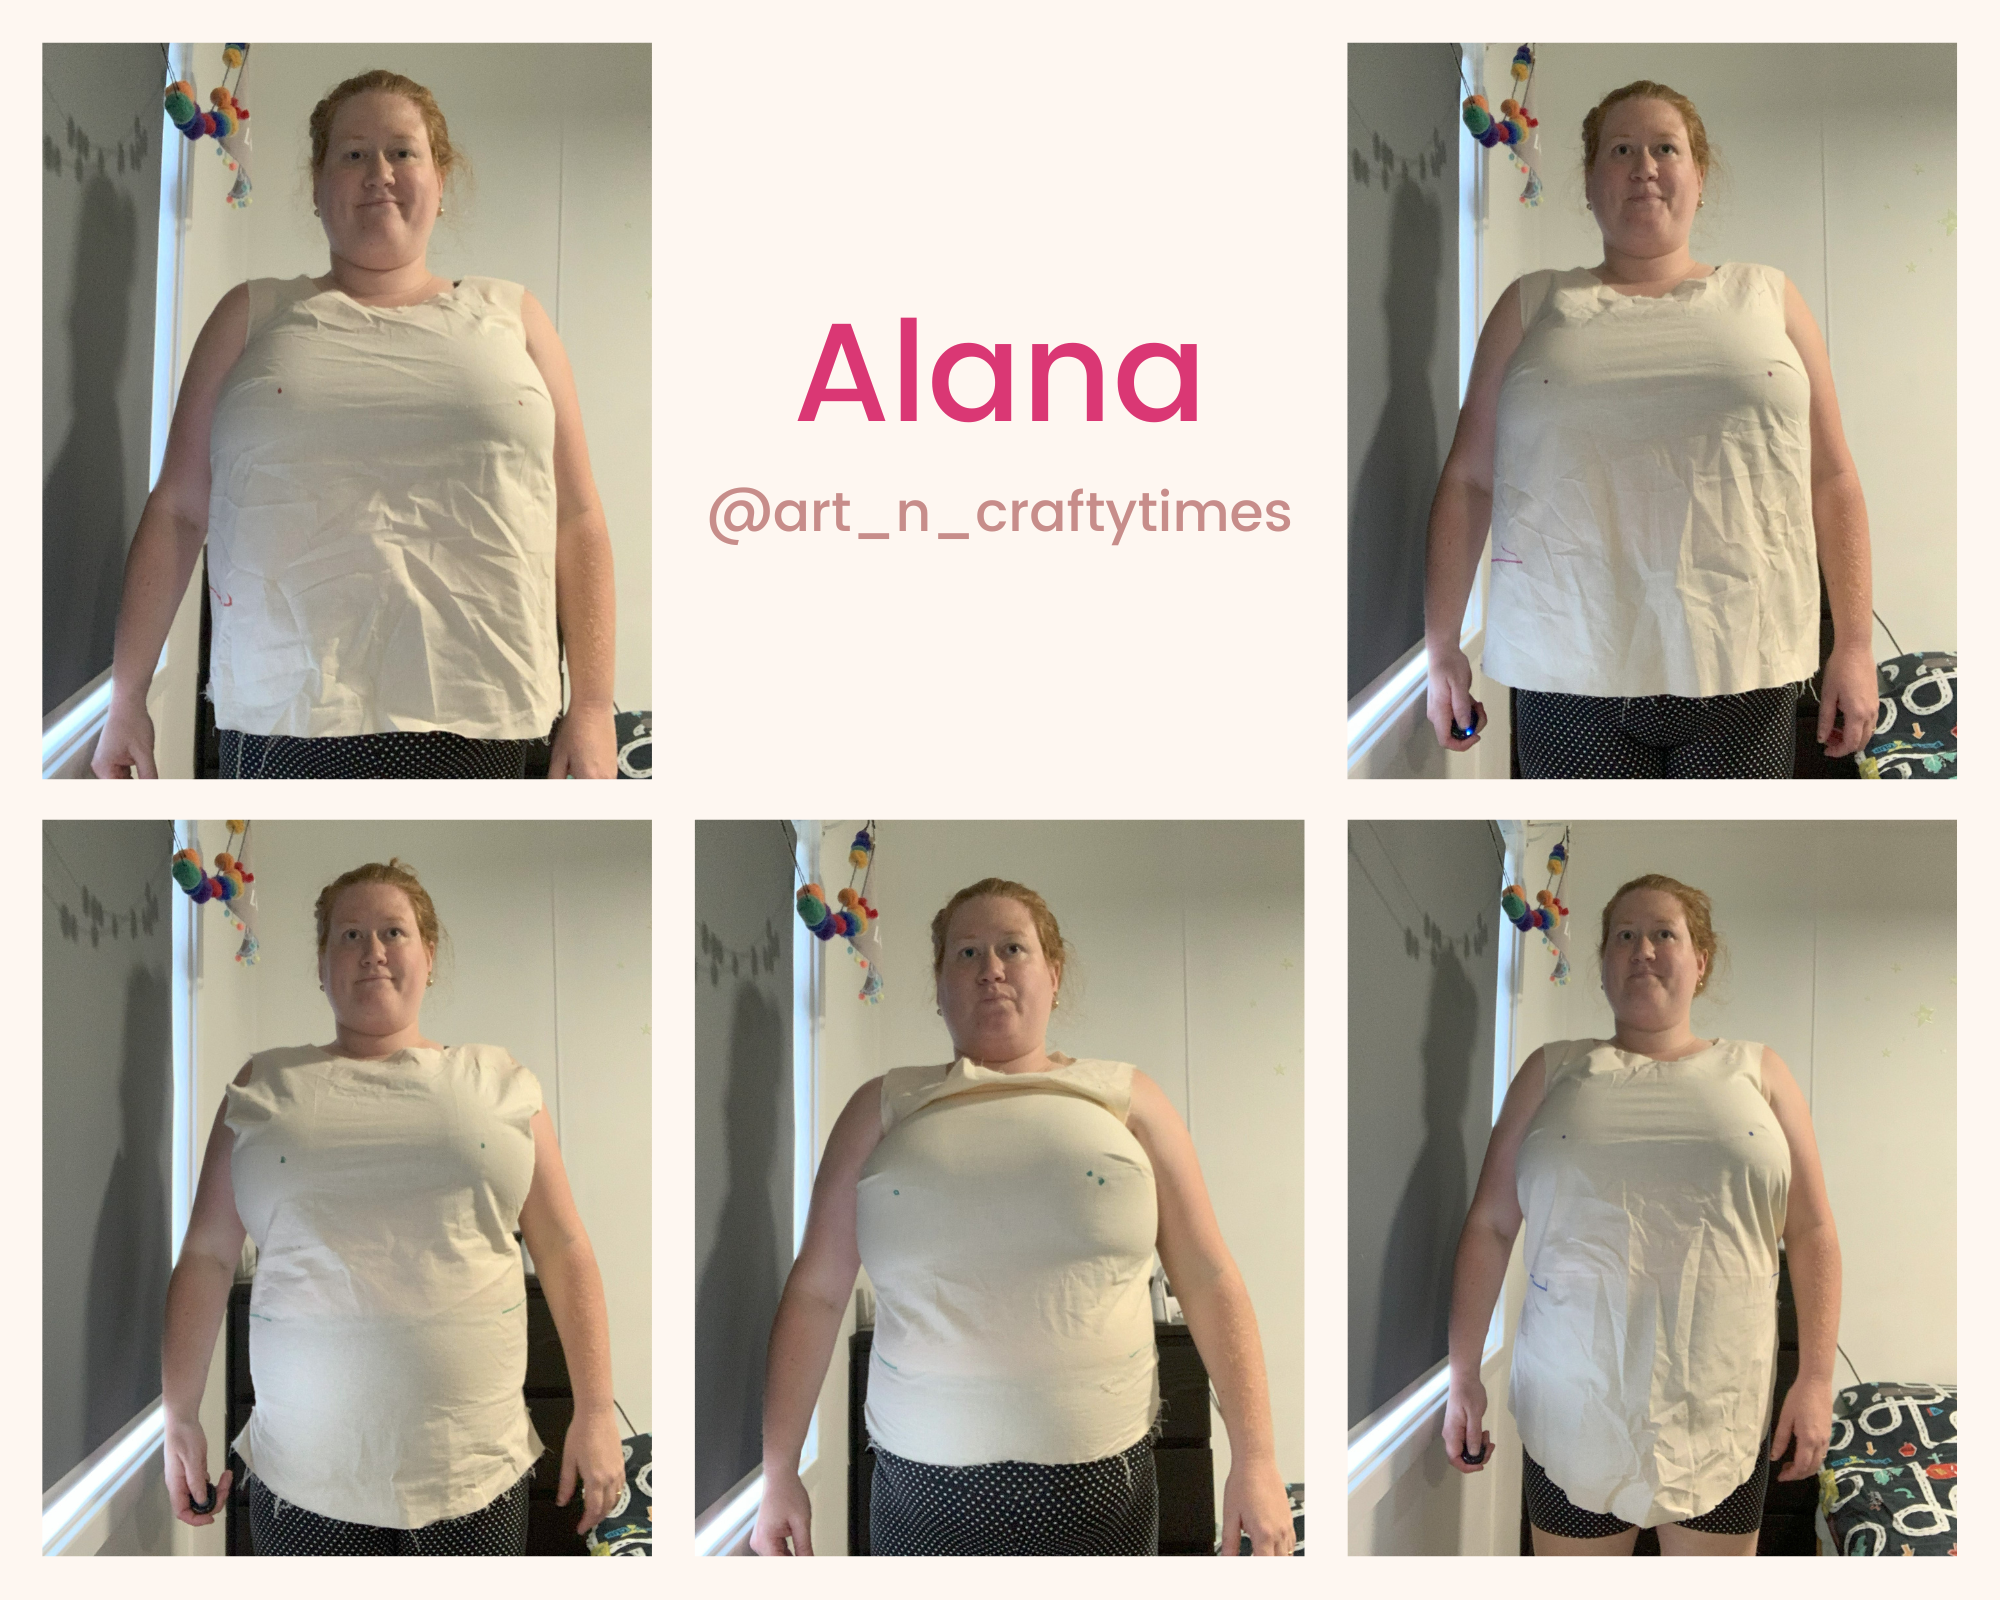
Alana | she/her | @art_n_craftytimes | 34 years old | | 10″/25.4cm FBA (5″/12.7cm per side)
Alana is from Newcastle, Australia and occasionally hosts bingo and ushers at a theatre, but most of the time she is hanging out with her 3 year old & 7 month old and escorting them around to swimming, playgroup, the library, pre-school etc. She has been sewing on and off throughout her life, but it’s been her main hobby now for 5ish years. She’s on a very slow quest to make a bra that actually fits her, and has mostly been ignoring woven tops until she has that sorted out, but says this was a great experiment to get something to fit in the meantime 🙂 Alana describes her bust shape as super massive, fairly full and round and heavy.
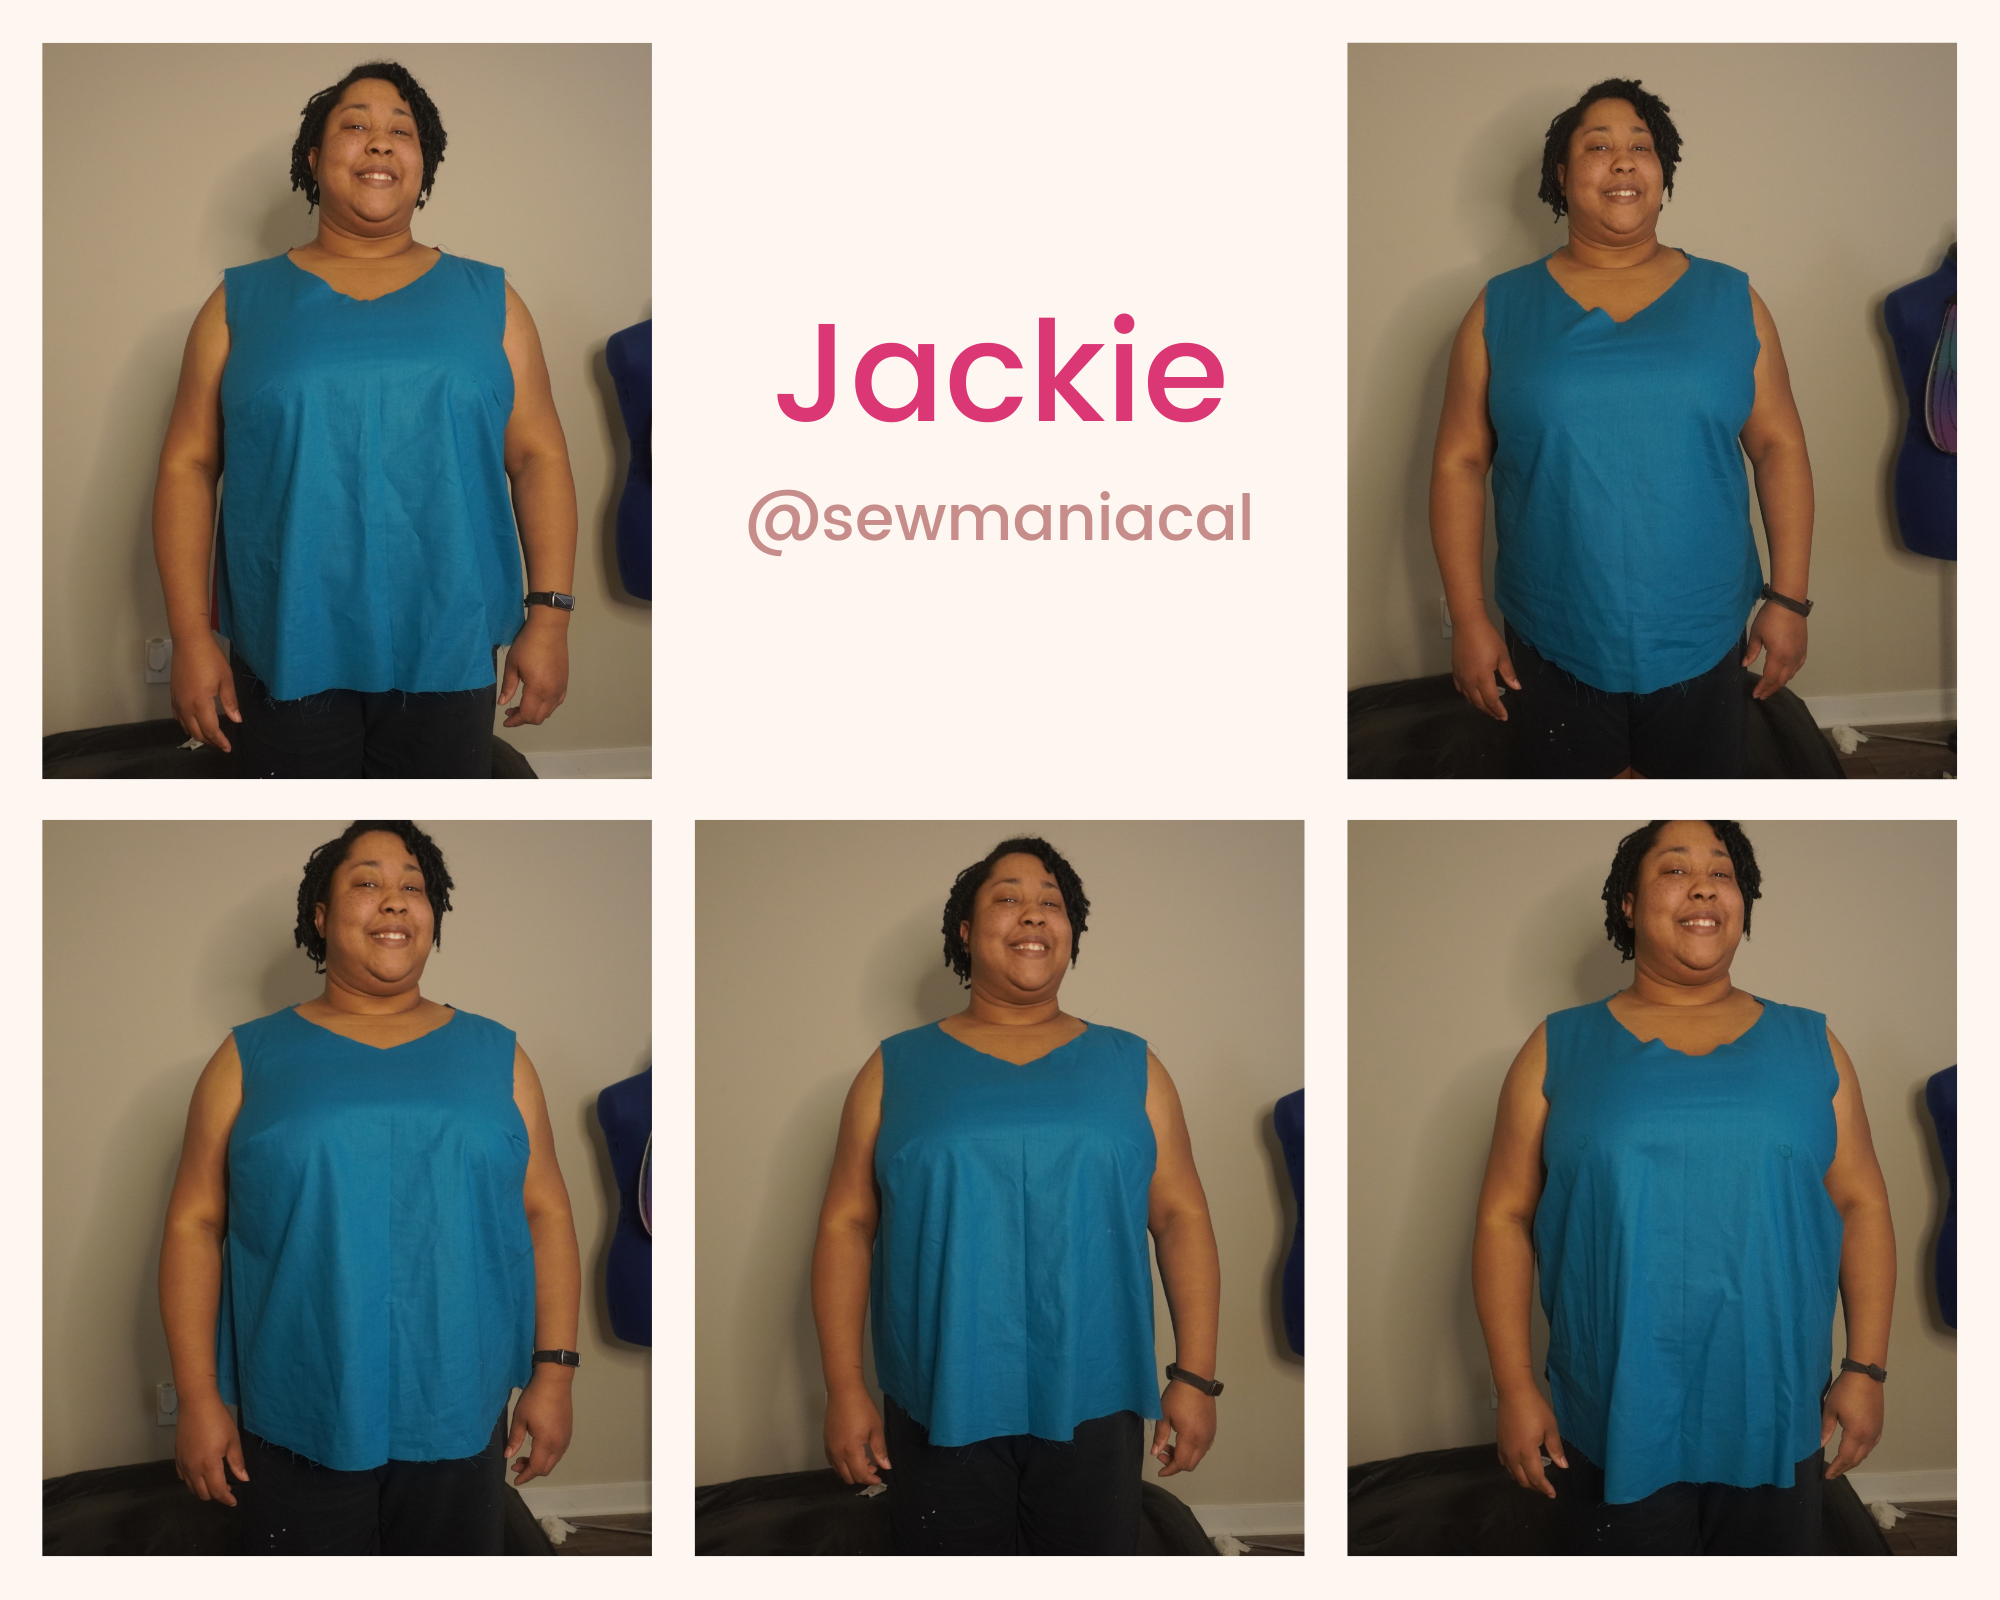
Jackie | she/her | @sewmaniacal | 32 years old | 4″/10.2cm FBA (2″/5.1cm per side)
Jackie started sewing in 2015 because she could never find her style of clothing in her size or to fit her chest. That also led her to starting a youtube channel where she records tutorials and her adventures in upsizing commercial patterns. She splits her time between sewing, cosplay and baking. She describes her bust as fleshy and pendulous.
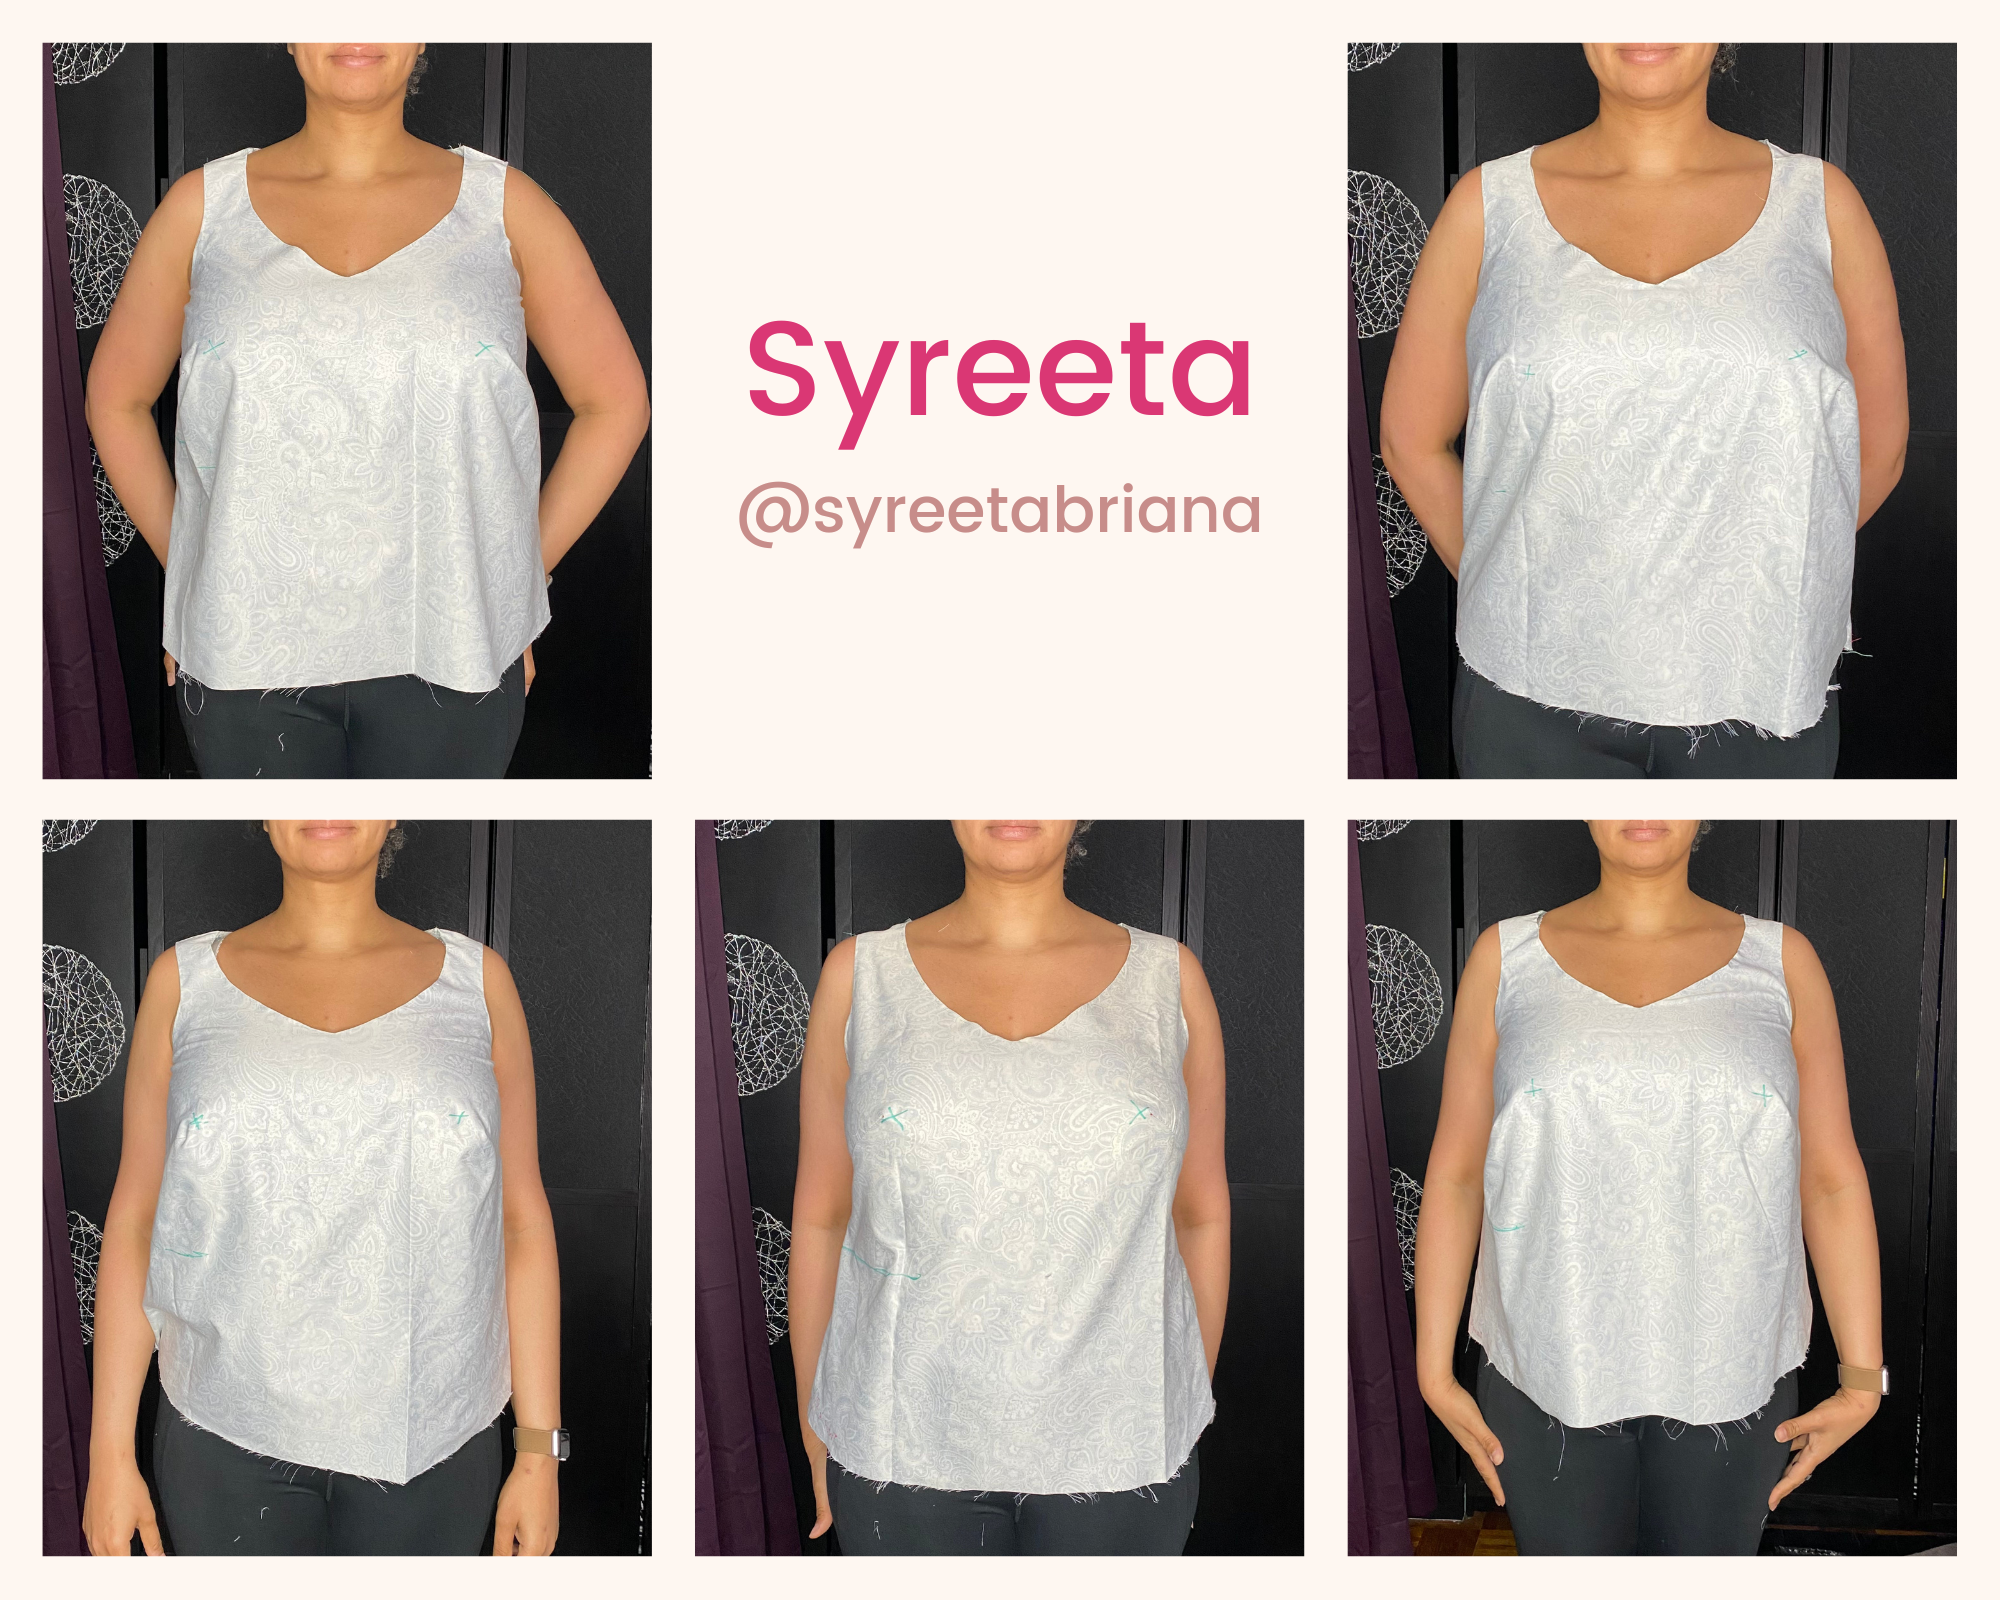
Syreeta | she/her | @syreetabriana | 41 years old | 5″/12.7cm FBA (2.5″/6.4cm per side)
Syreeta describes herself as a tall sewing nerd with bodacious bosoms, lately obsessed with sewing all the pretty underthings. She loves solving sewing puzzles when it comes to fitting patterns to her unique figure. When not sewing, find her at the gym, buried in her kindle or walking about NYC. She describes her bust as narrow-set, heavy and very full on the bottom. Her breast root is more narrow than her breast tissue and her breasts have no upper fullness unless in a supported position. Her tissue is very malleable tissue, easily taking on the shape of the cup.
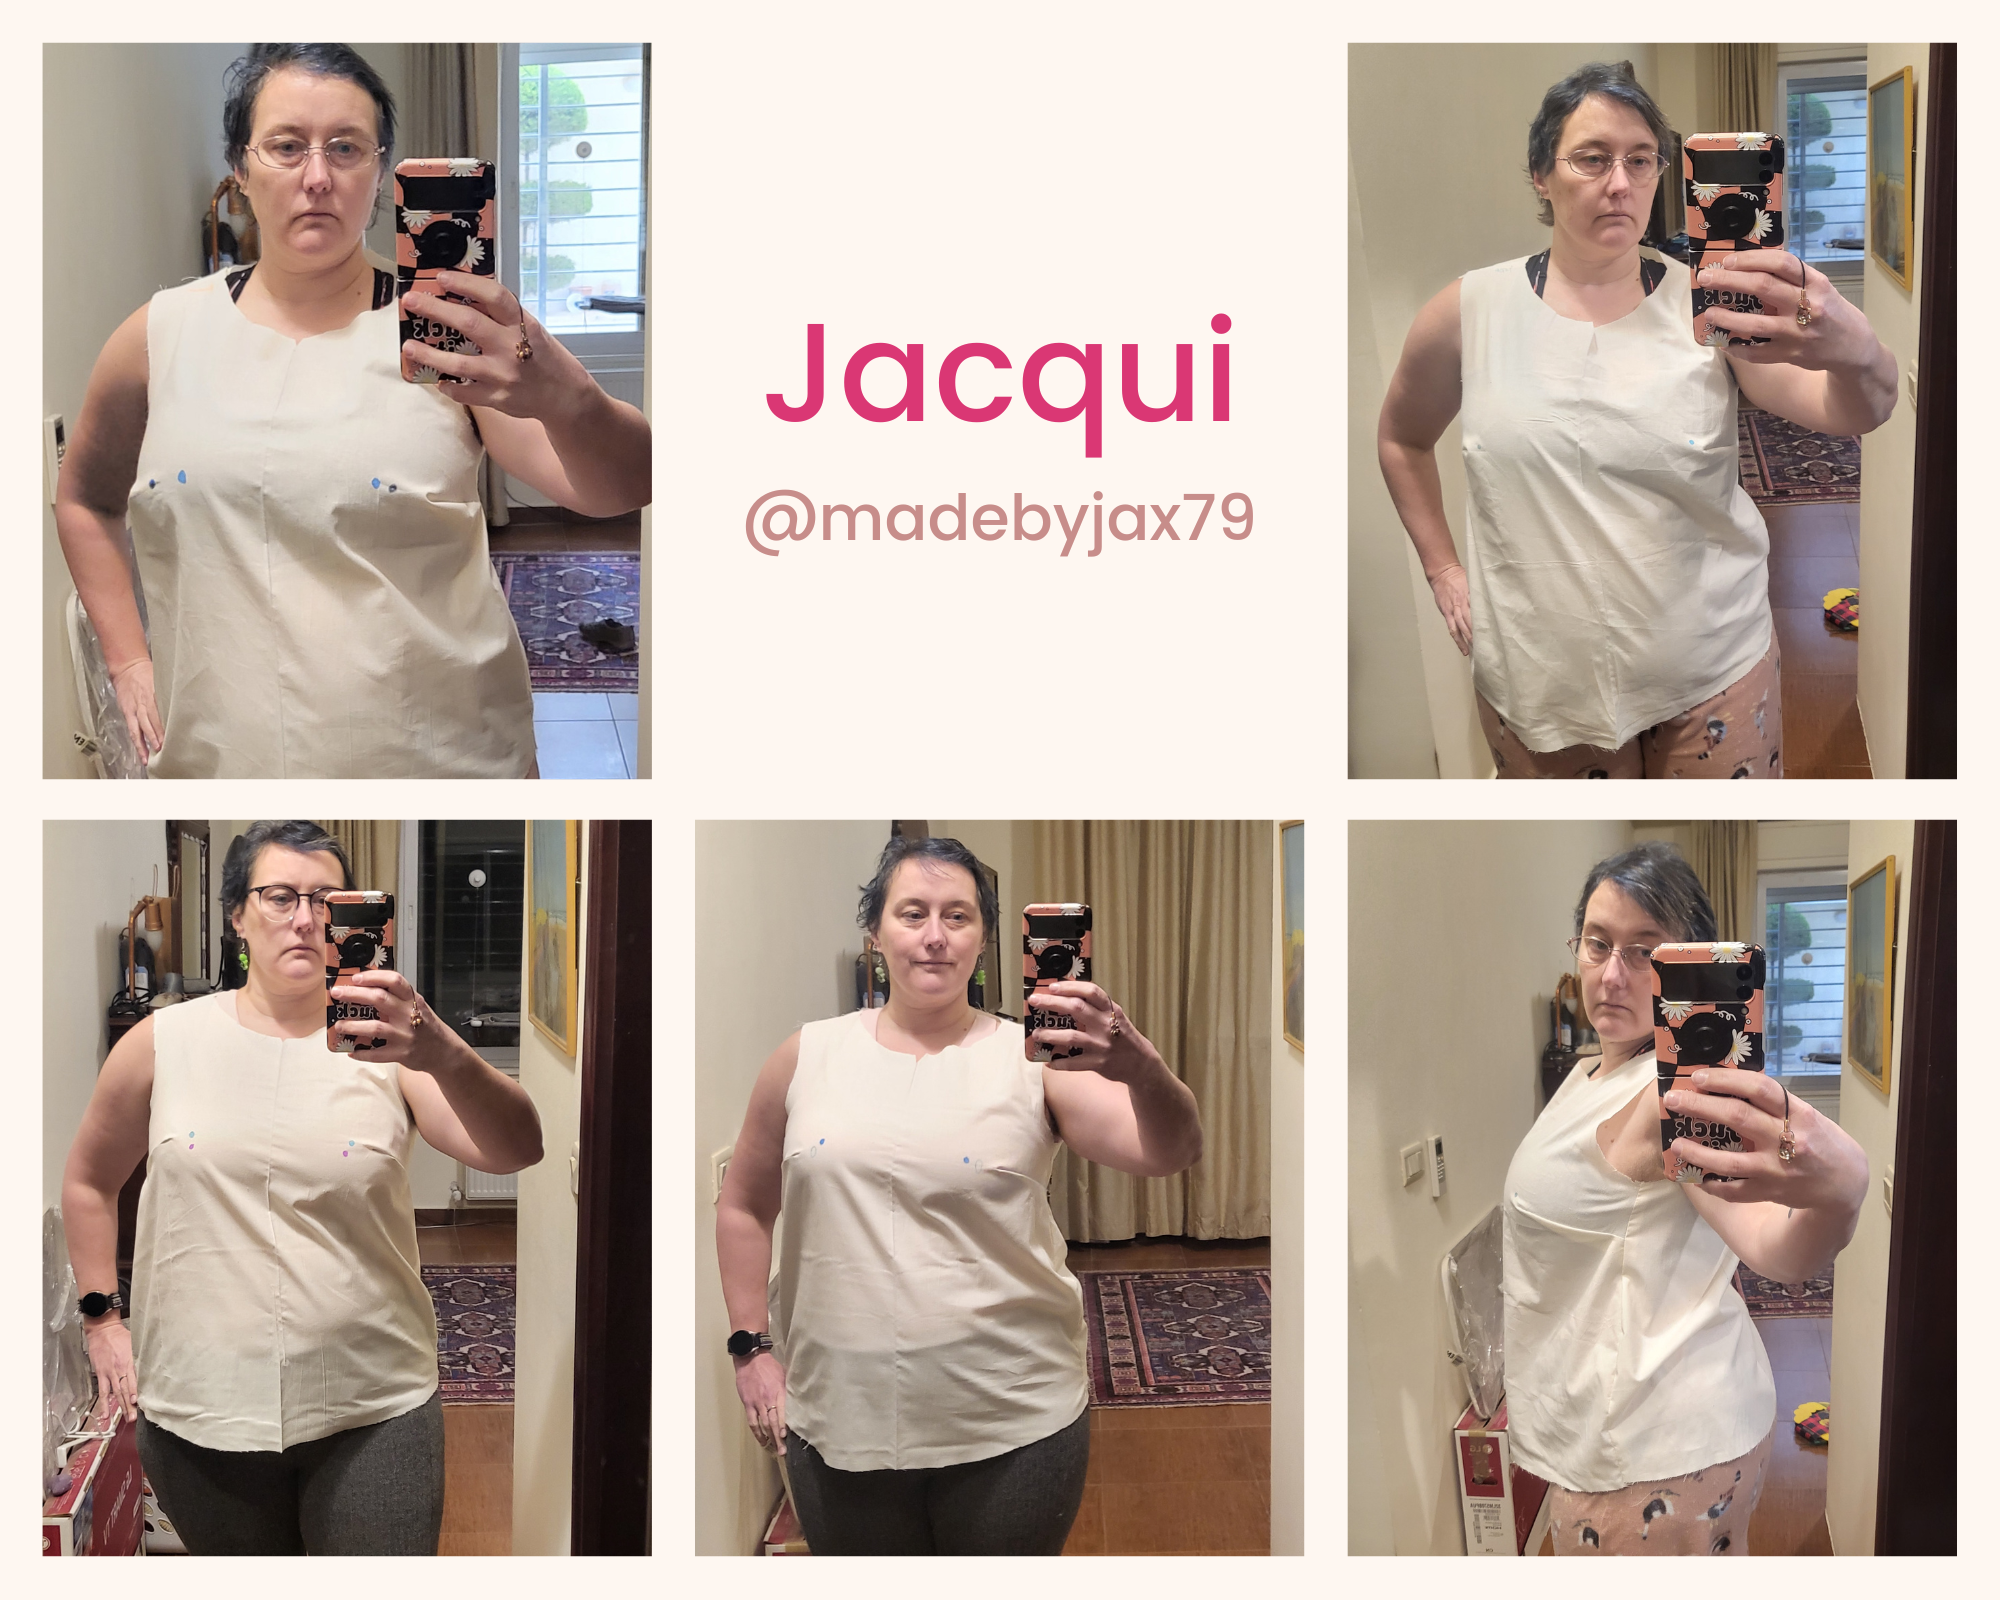
Jacqui | she/her | @madebyjax79 | 45 years old | 2″/5cm FBA (1″/2.5cm per side)
Jacqui posts on instagram about hand-made clothing, costuming, and her love of fun fabrics – all made by her! She describes her bust as high on the chest and sort of a round shape.
the rules
Our guidelines include:
- Pattern: Everyone used the Designer Stitch Marit (get it 20% off with code SEWBUSTYMARIT) as our base pattern, chosen for its simplicity (one bust dart and optional waist darts) and ease of sewing.
- Sizing: We each based our base size on our braless upper bust measurement. We all started with the B cup. Although this pattern has cup sizes up to a garment DD/E (5″ difference between upper and full bust), we know not all patterns have this option, and the purpose of this test was to see how different FBA methods work for large adjustments.
- Typical Adjustments: We made all our usual adjustments to all the muslins — things like round back, moving the apex, sloping shoulders, etc. Some participants took in the waist after the FBA, some did not based on personal preference
- Muslin Markings: On the mockup, apex and waistline points were marked for easy comparison of the impact of each method.
TRaditional fba
Tutorial from Curvy Sewing Collective
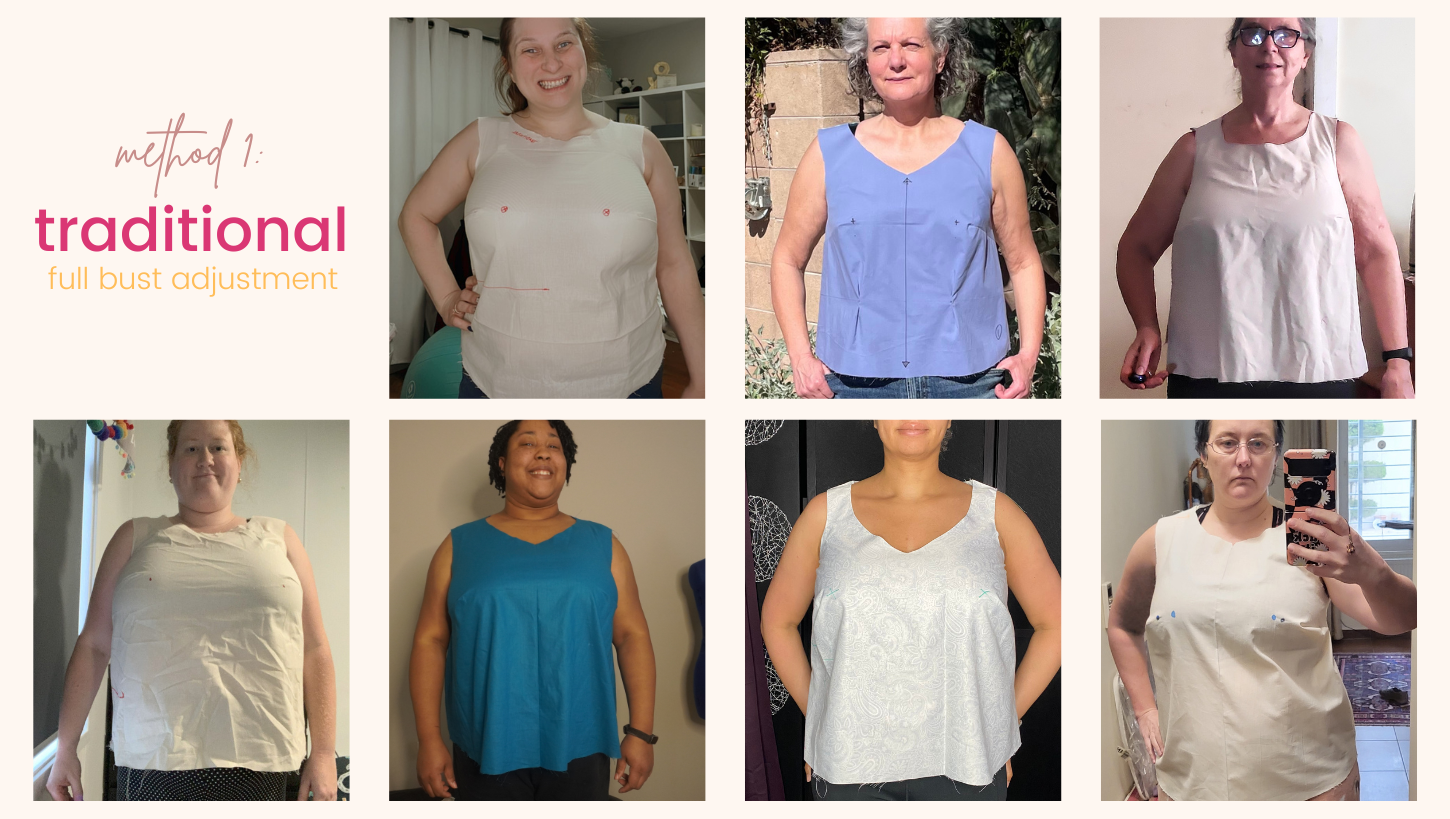
Lindsie’s thoughts: This wasn’t my absolute favorite FBA. While it produced better results than some of the others, the armscye does get a smidge of distortion because of how much width I was adding (3.5″ per side).
Krissy’s thoughts: A lot of bust room, a decent method.
Karey’s thoughts: Created too much room under bust, but excess room created across upper chest less than the other methods. So best option as starting point.
Alana’s thoughts: The best of a bad bunch. The easiest to find multiple ways to do it, which made it the simplest to draft. I really appreciated the curvy sewing blog mentioning to put the armscye pivot point higher for less armhole distortion. The only method that also walked through decent steps of checking and adjusting dart position after the FBA and truing the side seam. In terms of fit, it tents out off my boobs, which I don’t like, and adds heaps of ease around the waist and hips that is not super necessary. Looking at the pictures, it is tight around the bust still but so loose everywhere else, so doesn’t really put the fabric where needed. I added 5″ each side for a 10 inch FBA.
Jackie’s thoughts: The traditional FBA was my 2nd favorite method. Its was the easiest for me to do and looked a little more commercial and there would have been minor corrections that i would have to address. worked well for me.
Syreeta’s thoughts: This is one I’ve used often. On this pattern though, the bust fullness was a bit too low post FBA. Further adjustments needed, but it would work on this pattern.
Jacqui’s thoughts: It’s the one I know but it also puckered at the darts so I didn’t feel very happy about it.
Y-fba
Tutorial from Curvy Sewing Collective
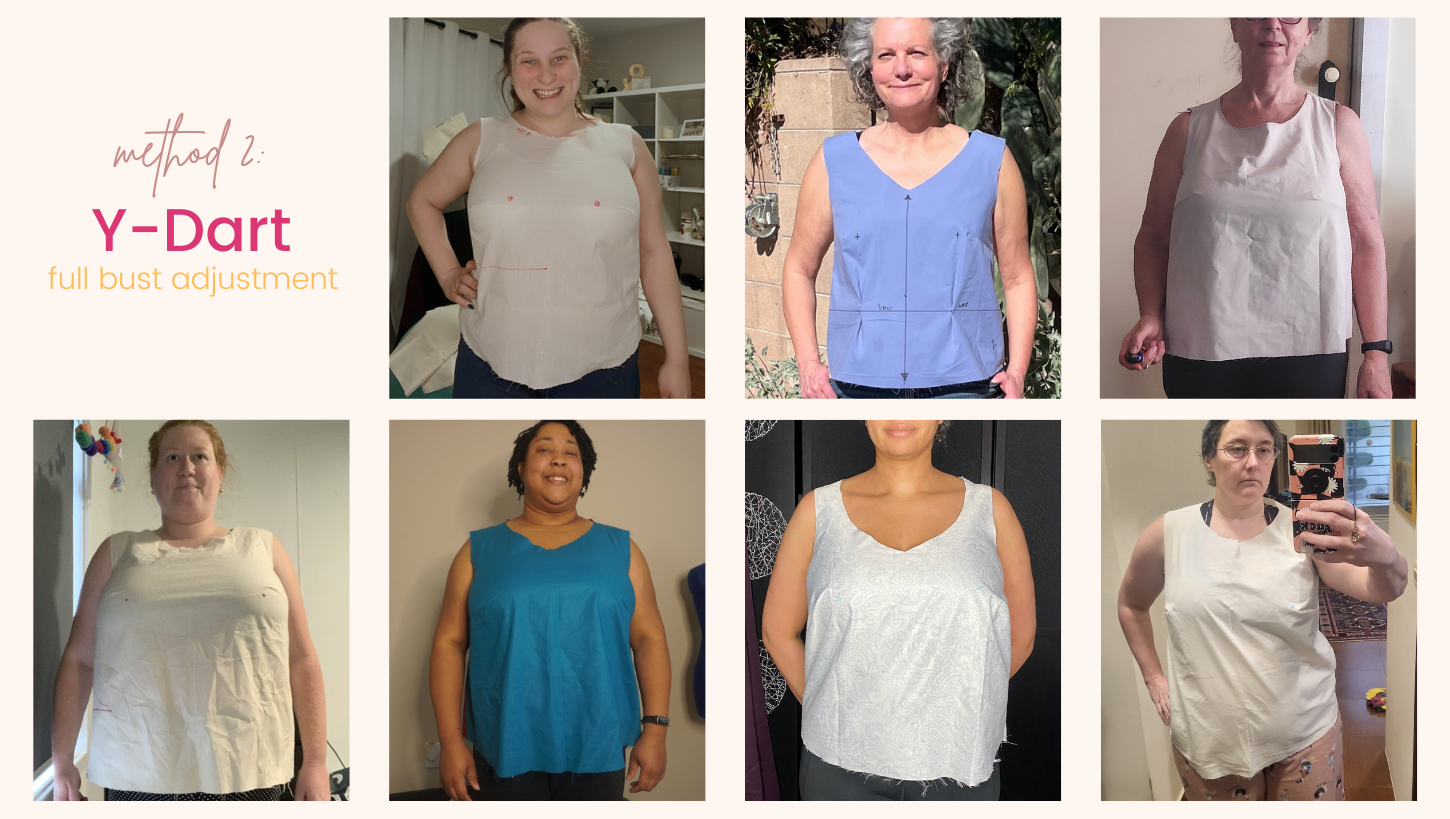
Lindsie’s thoughts: From a fit perspective, this was my second favorite. It doesn’t have the armscye issues that the traditional FBA does, and it has plenty of bust room. From a perspective of balancing ease of execution and fit, this is probably my favorite. I’ll explain more below, but my favorite method was very time intensive and the Y-FBA was much easier without sacrificing fit too much.
Krissy’s thoughts: Great, my favorite. It revises room across upper chest, and adjusts armhole, and gives enough bust width and length. Good balance at side seam, and best fit across the back.
Karey’s thoughts: Inserted the most width excess to requirements across chest. Too wide at armhole, excess width under bust. Not a preferred option.
Alana’s thoughts: One of the simpler methods to draft. Draft didn’t look that different to traditional FBA as I put the armscye dart higher on it. Wearing it, the biggest problem is that it has made the top a tent. I added 5″ each side for a 10 inch FBA.
Jackie’s thoughts: Y-FBA is my favorite! I have a lot more upper chest flesh and it opened up for my chest to breathe without needing much other alterations.
Syreeta’s thoughts: Historically used this one the most. On this pattern, bust fullness is too low as shown with drag lines. Side seam is straighter and when fullness is pulled up into place, the ease is perfect. Further adjustments needed.
Jacqui’s thoughts: I really like this one. It gave me a flatter bust dart even though the apex and my actual apex were further apart than the FBA.
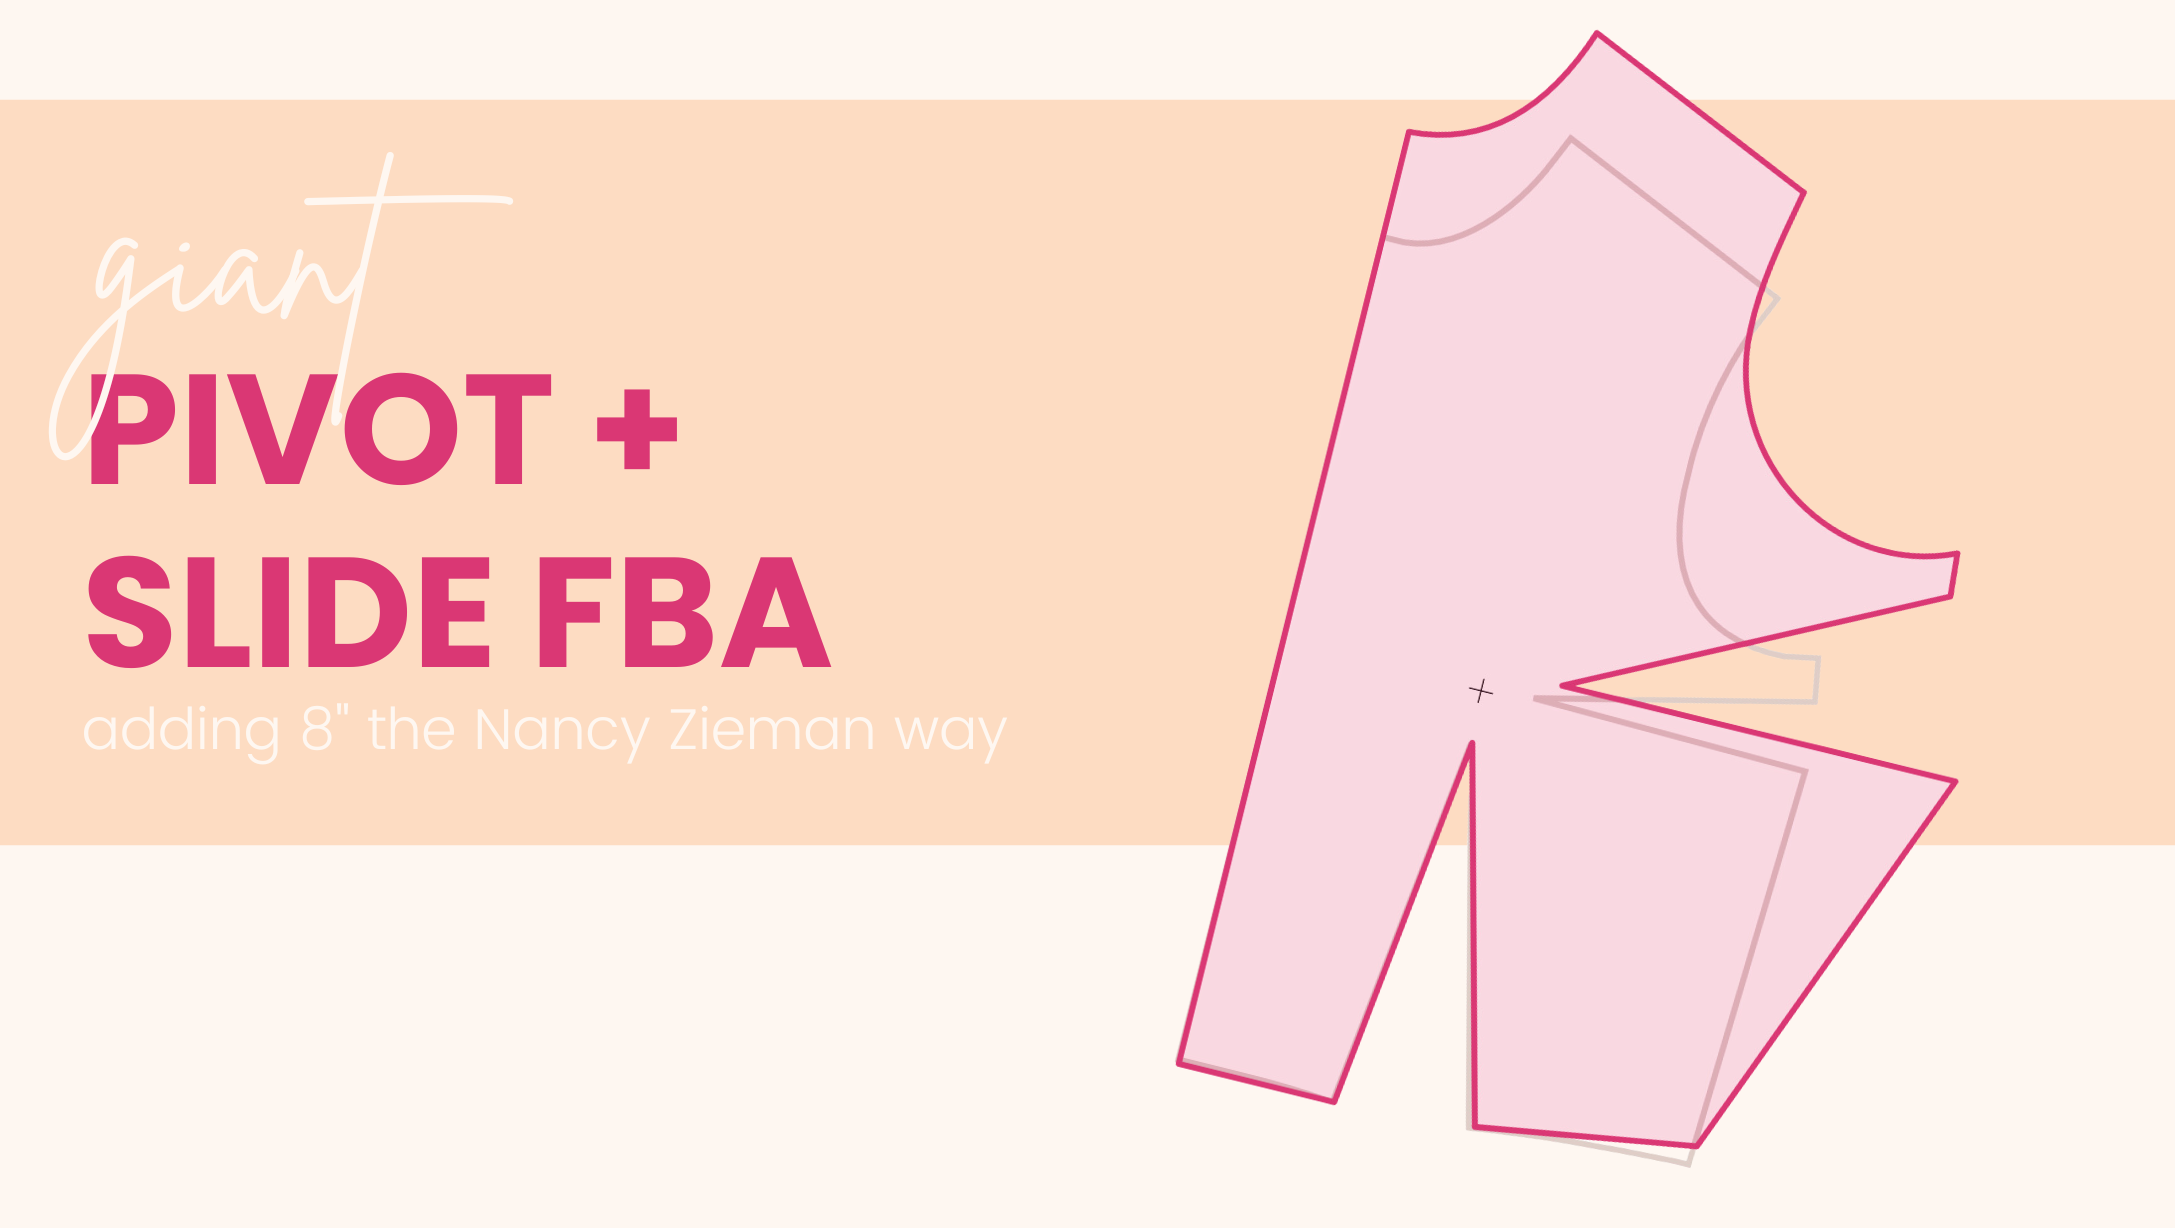
Pivot and Slide fba
Tutorial in “Pattern Fitting with Confidence” by Nancy Zieman (online tutorials unfortunately leave off steps for large FBAs)
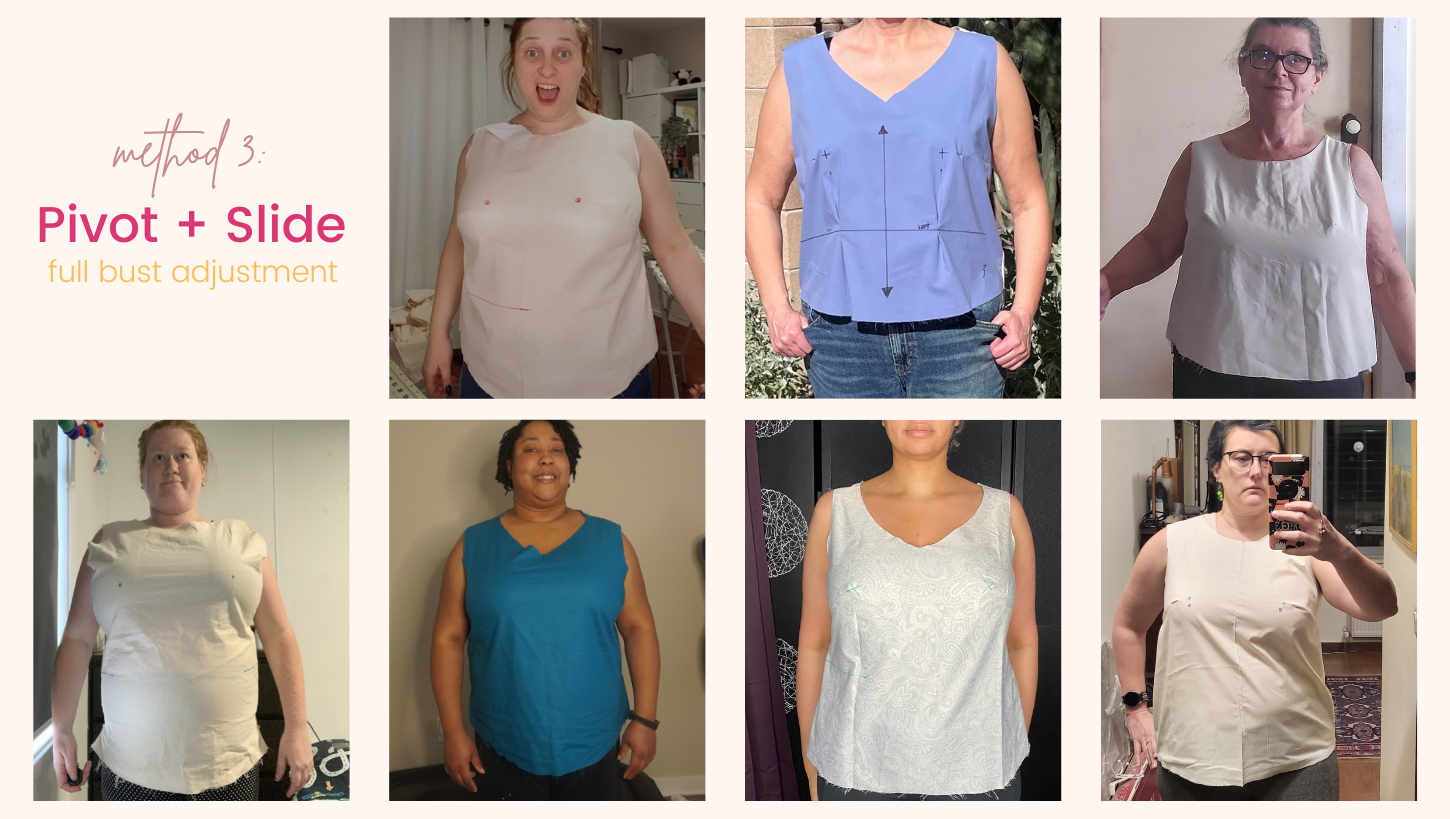
Lindsie’s thoughts: I really thought I was going to hate this method. This is the only method that changes not only the front, but also the back of the pattern, and I was sure that wasn’t going to work. For larger busts, this method involves three steps: First, you deepen the dart. Second, you pivot the pattern out by up to 1″ at the underarm then pivot back at the hip on both the front and back (this maintains the original armscye). Third, you add any additional width needed (for me, 3″ additional total) by “extensions” at the underarm, on the front and back of the pattern. It was a complicated method and took the longest. But I was super surprised that this was my favorite fit! I plan to do a blog tutorial on this method soon.
Krissy’s thoughts: Not awesome for my shape.
Karey’s thoughts: Excess width across chest, less excess below bust than other methods. I usually need massive back adjustments, but the back adjustments included in this method produce similar result with less work. A good quick and dirty method, although instructions are difficult to find and a bit sketchy. Couldn’t have done it without extra information provided to participants.
Alana’s thoughts: Very difficult (impossible?) to find info on doing that beyond a fairly small increase. The details from Nancy were difficult to follow when info is in different spots for 3 steps of dart depth – pivot – extensions. I left the dart where it was after the pivot & extensions and it was very much in the wrong spot. The extension added far too much into the armscye, especially for a sleeveless top. The drafting of the adjustment was fairly complicated, due to needing to adjust the back too (but surprise! that was actually not a bad idea!) and that it felt like a had to copy the full pattern piece a few times as you needed a ‘complete’ copy of one step in order to slide it for the next step. Fit wise my version 1 was not great, too tight all around with gaping armholes. HOWEVER I have since played around with this method for a much better result – V2. I only did the dart depth increase and pivot bits on this one from the method and also moved the dart around a few times. I’ve added length and width to the hips, and narrowed the top as well on this one (so not great to compare to the rest). With a bit more playing around, I think this is going to be my go to method! Both versions I did 5″ dart increase, V1 then had 1″ on each seam for 4″ added, then 3″ extension for 6″ total. V2 has 1″ on each side of the back and 4″ on each side at the front. **Alana’s picture shows her wearing her V2 P&S
Jackie’s thoughts: The pivot and slide method was not the worse. I did it without any other alterations besides my waist and I could tell there were other things that I was going to need to alter as well. I am a lazy sewer so im a big fan of not having to alter stuff too much so it wouldnt be my first choice of method but its definitely an option for when I want to get into in-depth altering.
Syreeta’s thoughts: This one was so annoying to do. HOWEVER, it did have the best fit overall IMHO. I had to cut the front slightly narrower because I was running out of fabric, so the final version would have better ease. Only minor changes moving forward – I completely forgot to back off the dart.
Jacqui’s thoughts: I didn’t have much trouble with the pivot and slide. It made sense to me on how to do it once I watched the video. It weirdly made the bust dart smaller though which I wasn’t expecting. It’s more fitted than the other ones but didn’t pull much.
Length Only fba
Tutorial from In House Patterns
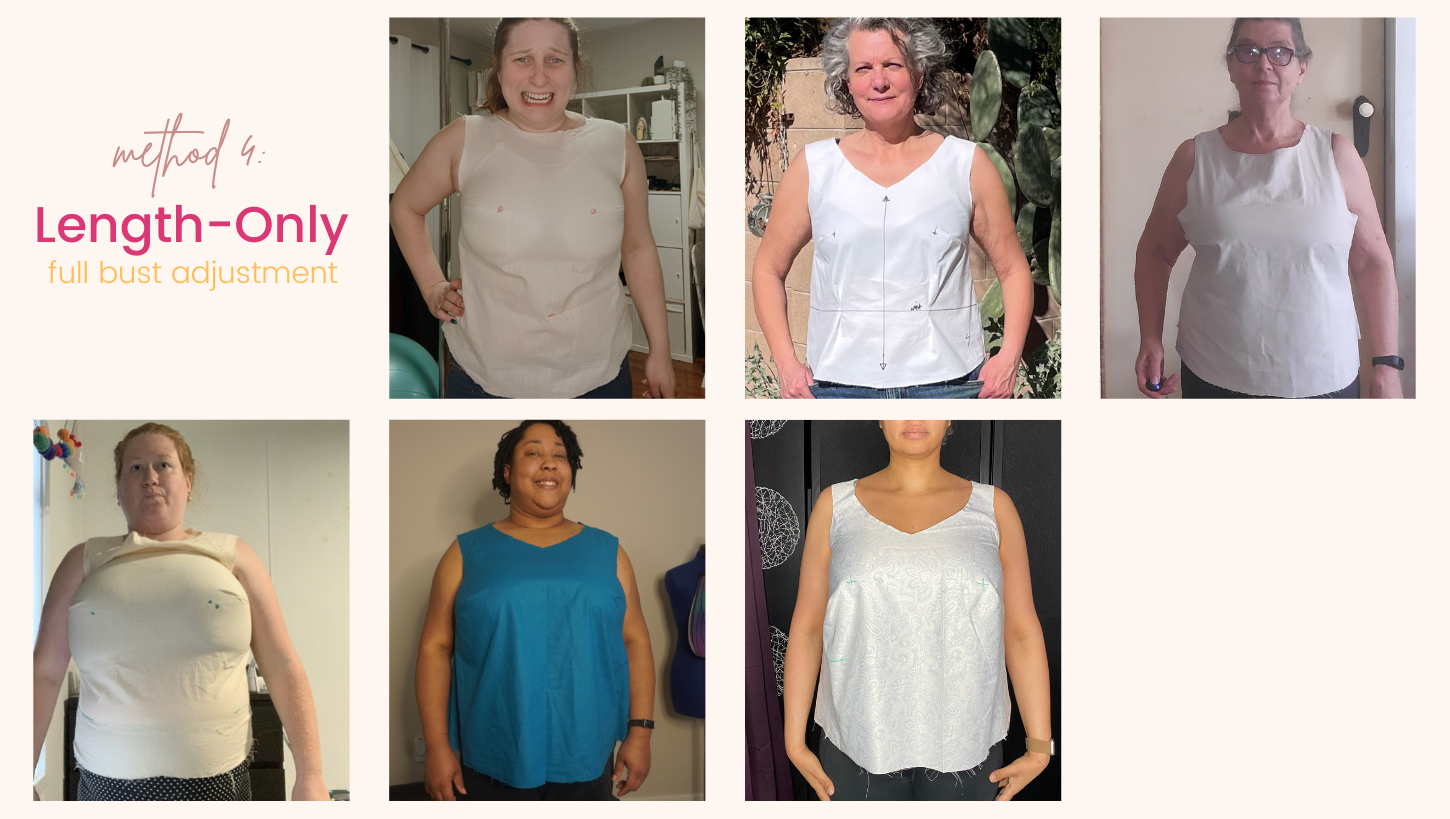
Lindsie’s thoughts: Look, I know there are folks in the Sew Busty community — super busty folks! — who swear by this method. But it just did not work for me. At all. I felt like I was being squeezed for all I was worth. It was bad.
Krissy’s thoughts: Not awesome for my shape.
Karey’s thoughts: Most excess width across chest, tight across bust, upper front side seam did not meet back side seam. Side seam misalignment. Instructions did not work well for large adjustment.
Alana’s thoughts: The video made it seem simple enough – but I would think this is best suited for only small amount of adjustment. I had 3.5″ added an bottom centre front that I then took out of the side seam. The dart ended up quite low due to adding the length above the dart. Fitting wise, I couldn’t even get it all the way on… As per suggestion in video I added 3¾”.
Jackie’s thoughts: Length only was a simple method but I did not like the way it made my chest look. It tucked in around my upper chest but it made my breasts look like a shelf, which I did not like.
Syreeta’s thoughts: Not enough ease. Very tight across the high bust area. Similar to other versions, bust fullness was too low.
Seam method fba
Tutorial from Jennifer Nielson
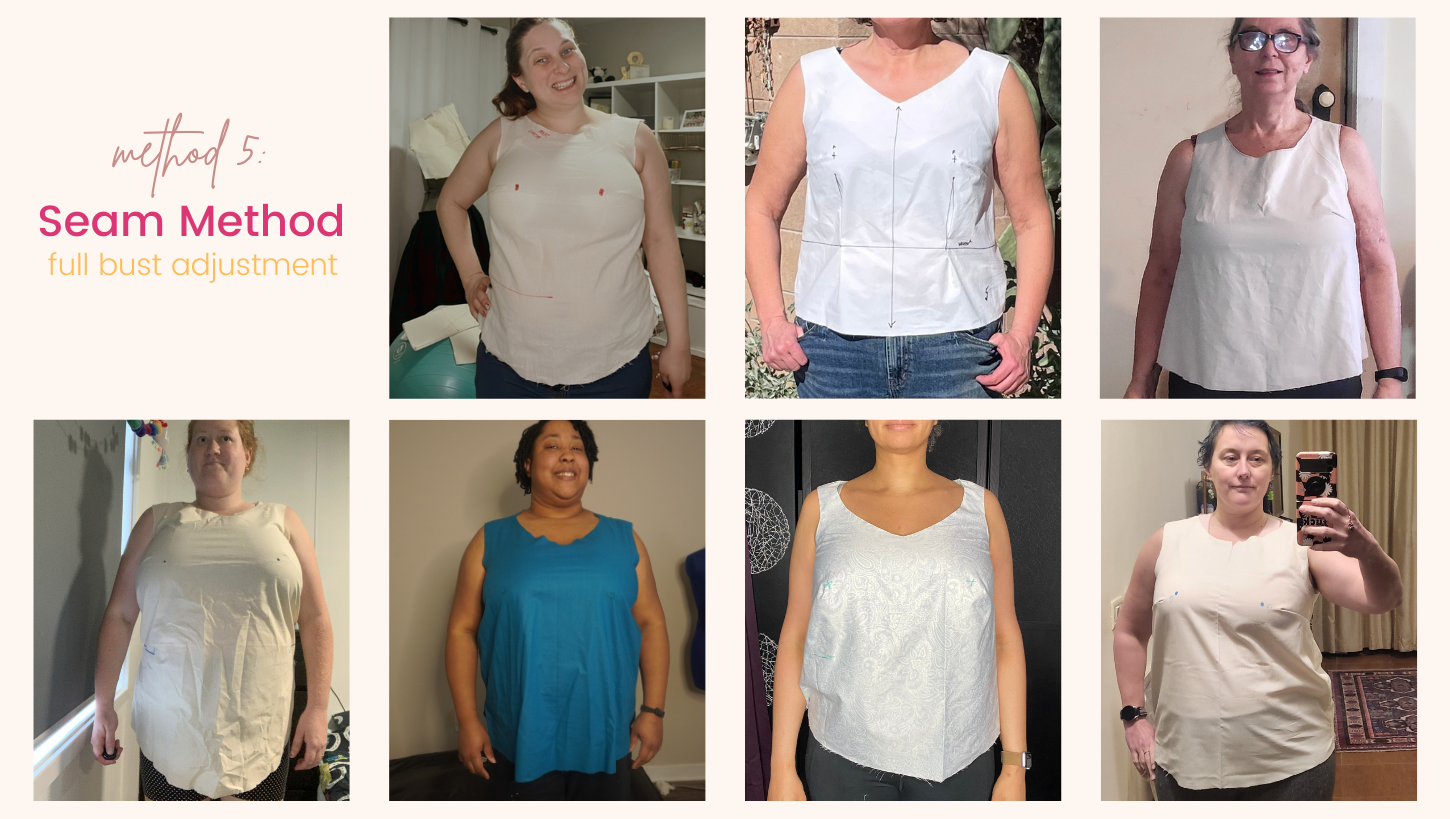
Lindsie’s thoughts: This wasn’t as bad as the length-only method, but it was still very tight at the bust. Additionally, following the method precisely would have ended up with a very narrow dart and a much longer front side seam than back side seam. I ended up deepening the dart in order to take up this extra space, which made this method more reasonable, but still a very poor fit.
Krissy’s thoughts: Again, not awesome for my shape.
Karey’s thoughts: Excess width across chest, tight on front armhole, some excess width below bust. Not a preferred option.
Alana’s thoughts: Fiddly to draft. If I left the bottom of the side seam where it landed after the adjustment I don’t think it would have even reached my waist, so the whole point of keeping the side length was lost. You can see in my side on pic that the front is significantly longer then that back. Thought it was interesting it was the only method not to alter the dart and the fit around the bust isn’t actually that terrible for it. Overall fit wise the bust is too tight and there is drag lines everywhere. I added 5″ depth and width.
Jackie’s thoughts: My least favorite method was the Seam method. I felt like there were a few things left out of the instructions. And it was not meant for larger breasts. There was a lot of hypothetical information that didn’t quite account for things like the bust dart lengthening, that only seasoned sewers would know how to account for. The finished product ended up tight around my chest and the dart was very thin. Definitely not a favorite.
Syreeta’s thoughts: Didn’t love this one, though the fit was second best after Pivot and slide. Fullness was only slightly too low.
Jacqui’s thoughts: This was fiddly and I didn’t see how this was going to work honestly. It ended up fitting tight again and the bottom seam didn’t match up. The front ended up longer than the back somehow. I’m not a fan of it.
Favorite methods

Lindsie’s fave: Overall, the pivot and slide method really surprised me. Based on the fact that it adds width the the front and back, and the fact that I only have boobs in front (lol), I really thought it was going to suck. But it was my favorite! However, because it’s so fiddly (essentially requiring you to trace the pattern three times!), I’m not sure I’ll reach for it often, and will probably still usually opt for the Y-dart method.
Krissy’s fave: My favorite is the second ~ the Y-FBA. I think it addresses all my fit needs ~ width actoss upper chest, reshapes armhole, adds bust width and adds graceful waist width needed for me ~ and the alterations create a sewable pattern at the side seam. This alteration gave the most balanced side seam on my figure and the back view/fit was also the best.
I also tried the D cup pattern from the pattern company and I still like the Y-FBA the best. That combo shoulder armhole is groovy.
Karey’s fave: None of these was entirely satisfactory. Regular dart rotated to French dart was best fitting option. Length method was least favourite. Y, pivot and seam allowance created too much width and excess fabric across chest.
Alana’s fave: Straight out of the box, the traditional is the only one that I could immediately apply and have a wearable garment, although I wouldn’t be overly happy with it. However, I think going forward I will use the basis of the pivot and slide, plus ideas from the rest of them to hack my own method.
Every method had me questioning so many things e.g. where to put the hinge point, and I feel like there is so much variation that could come out of following the same instructions. In my normal sewing that might not bother me so much, but when I was trying to do things the ‘correct’ way for this experiment, it felt really difficult. (Thanks for being so helpful in the FB group!). I did make a few choices to leave darts where they were and a couple of other bits I can’t remember in order to follow methods as is. But I was able to see that it might not be the best choice to make, and I can see people with less experience (and I think I don’t have a huge amount of experience) really struggling. I made a personal decision on mine to leave the waist be whatever came out of the adjustment and only blend back in for hips as suggested as my waist is much bigger than my other measurements. I also moved the dart down 1″ before any adjustments. My biggest issue with all the methods is there is no consideration for when the adjustment needed is so large it distorts whatever the method being shown is beyond recognition, so I am so so grateful to Sew Busty for doing this work with us, and it was a huge highlight of my sewing experience thus far to be a part of this experiment!
Jackie’s fave: Y-FBA was my favorite because it accounted for my wider upper chest and allowed my chest to breathe without much needed alteration afterwards.
I feel like every method works well and each person’s body is different so each method provided can cover everyone’s issue except the seam method. I know that’s bias but I can’t see the Seam Method as one that helps tackle the FBA problem at all.
Syreeta’s fave: Shockingly, the pivot and slide fit the best overall. Bust fullness was in the right place and had the right amount of ease overall. Considering this was the fussiest method of all five, I was surprised at how well it fit. Best part, I wouldn’t have to make any additional changes to raise/lower fullness or adjust the waist. Seems like the one-stop shop FBA. Curious to try on a sleeved garment.
Definitely a surprise for me on how this turned out! I’m very curious now to test whether pivot / slide works on other pattern shapes with similar positive results. In terms of feedback, many of these tutorials feel incomplete. I tried to go in with a beginner’s mind and just follow the instructions as written. However, essential steps are missing such as: backing off darts, moving bust fullness, find the new bust point after FBA, adjusting the waist/hip. An experienced sewist could make any of these methods work for any pattern, but a beginner could get a little lost.
Jacqui’s fave: Either the pivot and slide or the Y-FBA. They were the easiest to get my head around and had the best fit.
I really really could not figure out the length only method. I hadn’t done many of them at all and now I feel more confident in doing FBAs in general and being able to choose the right one depending on the pattern and my shape.
Thank you to Krissy, Karey, Jackie, Alana, Syreeta, and Jacqui for participating in this experiment! It was so enlightening to see how different FBA methods worked on different bodies. And thank you again to Designer Stitch for providing the Marit pattern for this experiment, and for the 20% coupon for Sew Busty readers (SEWBUSTYMARIT).
What do y’all think? Which method looks most promising to you? Have you tried any methods we didn’t try?
Some of the links in this post are affiliate links. Using the affiliate links in Sew Busty posts is a great way to support the costs of running Sew Busty, as when you click on the link and purchase the item, I will receive an affiliate commission at no extra cost to you. This helps me pay for the hosting, domain, design, and other costs associated with administering this site. All opinions remain my own.

Lydia
March 30, 2024I have always used Nancy‘s pivot and slide method for all alterations and I my garments fit me perfectly and I can do it now without any trouble. It is a bit much to understand sometimes especially if you have to adjust the bicep and the bust when you have to use the extensions plus pivot. But sometimes my tops stand out too much at the front hem and may be ever so slightly shorter. How would you fix this? I am pivoting to match my waist and hip. Thank you so much for your article because I thought if I’m using Nancy‘s method I would still need a full bust adjustment but I didn’t realize I’m already doing it I guess! This article helped in so many ways.
sewbustycommunity
June 18, 2024Sorry I missed this comment before! The P&S method is definitely great, but also a bit of a hassle. I really love the results but have to be honest that I haven’t used it again since this post just because there are SO MANY STEPS lol.
For the shortness, you can always just add a tiny bit more length at CF. For the standing out, you might consider tapering in even more for the waist and hip.